
Chances are your students have taken a picture or two. Between Instagram, Snapchat and whatever the new social media trend is, the world has increasingly turned to images as a form of mass communication. Not only that, if you ask your students how to do something, at least one of them will instantly do a Google search and share a DIY video or “instructable” (a word coined by Eric Wilhelm and Saul Griffith), full of images that help explain complex instructions or ideas in clear understandable terms. From fixing a leaky faucet to creating your own lightsaber, the images are out there, allowing us to communicate what words alone can’t.
So why not take a little time to teach students to take better pictures, and at the same time involve them in procedural writing?
Every year, the AdVENTURE team of teachers involves the students in an interdisciplinary Charity Fair project. During the three-week project, students perform different activities in each subject area class:
- In social studies, they research different charities.
- In language arts, students develop Ignite presentations to show what they learned about their charity.
- In science, students create a product to sell at our annual Charity Fair, raising funds for their charity. The science component includes not only the creation of the product, but also crafting an instructable with the procedure they followed to create their product.
- In math, they work with their charities’ statistics to support their presentations and calculate the cost/profit of the product they created in their science class.
This is the story of the instructables created for last year’s project. It all started with a challenge: Go to Instructables.com and choose one instructable that looks interesting to you. We briefly discussed the amount of text versus how the images were used by the author to provide the missing details. (As a class, we noticed how seldom the pictures were photobombed by the author or his/her friends…)
As always happens with a new project, and the possibility of using their phones in class, students took out phones to get started taking pictures. Their collective groan was heard as we stopped them, “Before you take any pictures, you need to decide which key steps will require a picture, and then learn to some composition basics!”
 In photography, framing is all about what you decide to include, or not to include, in a picture. The students experimented with framing as a way to give their images context, leading the eye towards a focal point and intriguing the viewer. Teachers’ rule of thumb while students were experimenting with framing was simple: “Does the frame clutter the image? Does it distract from what you are trying to explain?”
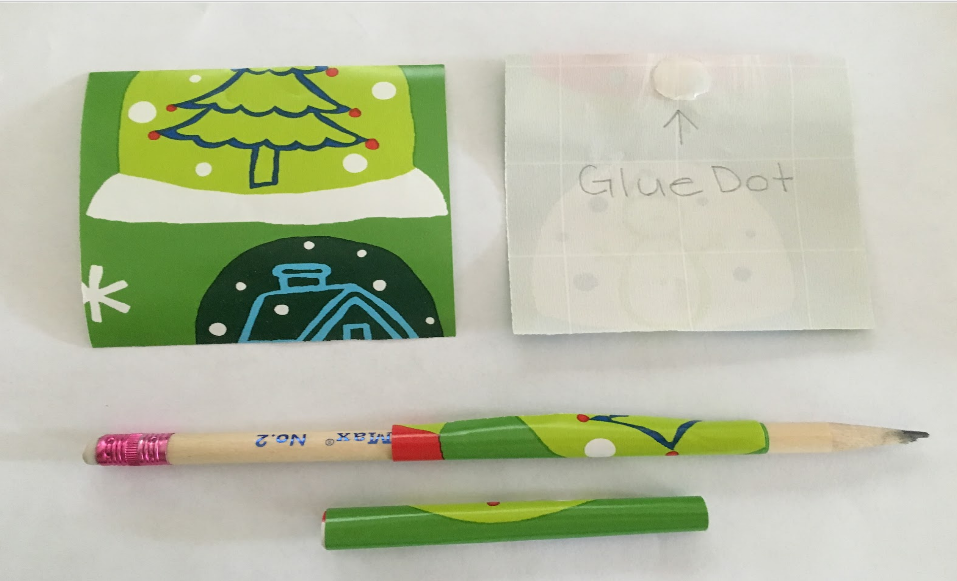
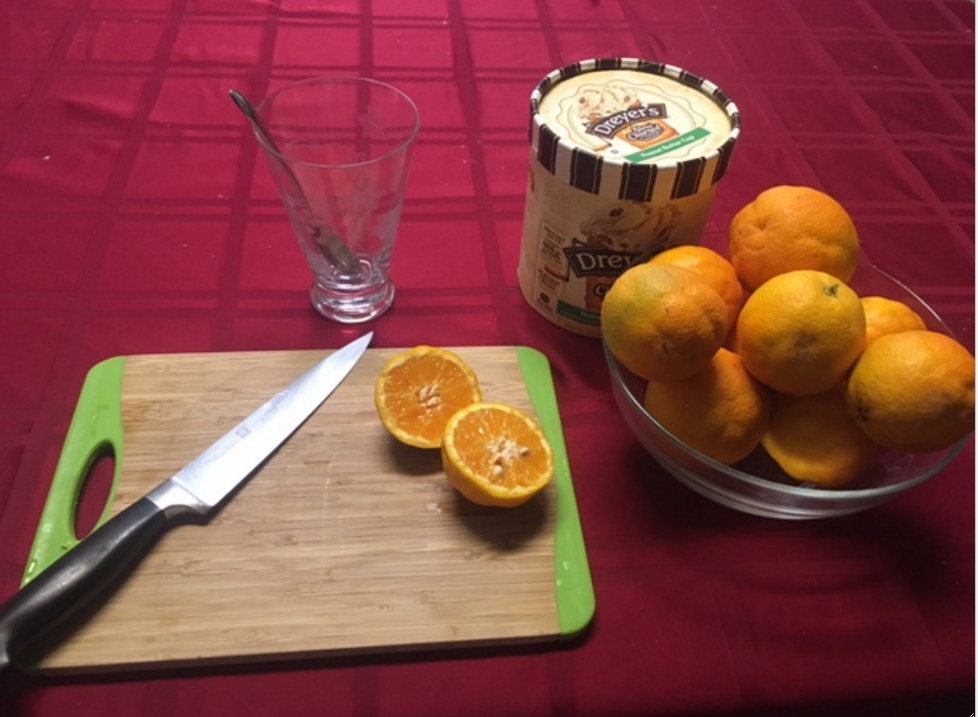 Simplicity can be thought of as the reduction of background clutter. In the instructable format, this is key, as the picture itself should be able to tell the complete story of the step. The most obvious way to achieve simplicity is to place the subject against a neutral background. After a few tries, the students also realized that this meant moving around or cropping their pictures to avoid their own shadow or feet appearing in the picture. It also meant arranging the items in a way that was aesthetically pleasing.
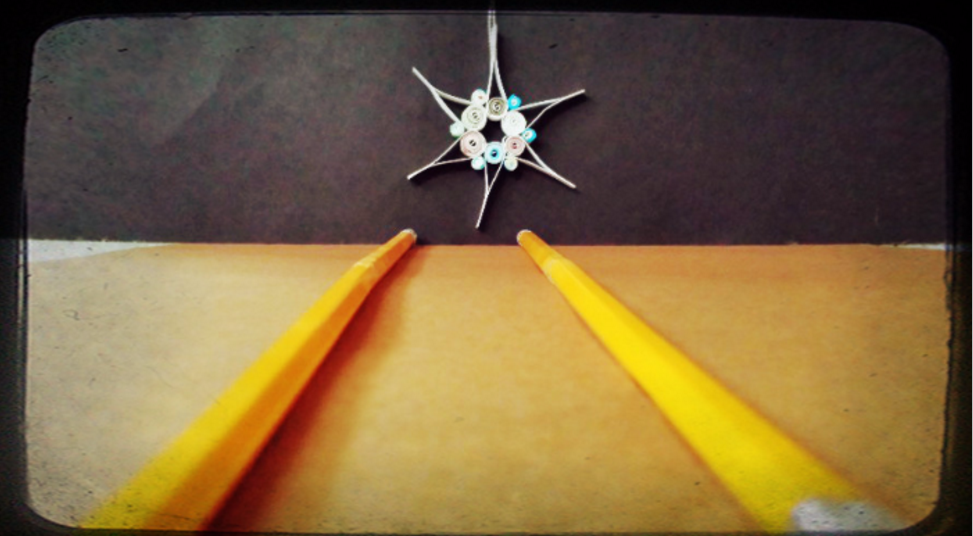 In photography, leading lines attract the viewer to a specific point in the photograph. Lines, whether natural or construed, can help create mood, or lead the viewer’s eye through the picture as it tells a story. Some of the students attempted to create lines in their instructables with the clever placement of materials. But after toying with this for a while, they realized that it wasn’t as easy as drawing lines on paper, and agreed that in an instructable, it took away from the details they wanted to show. Sometimes, less is more.
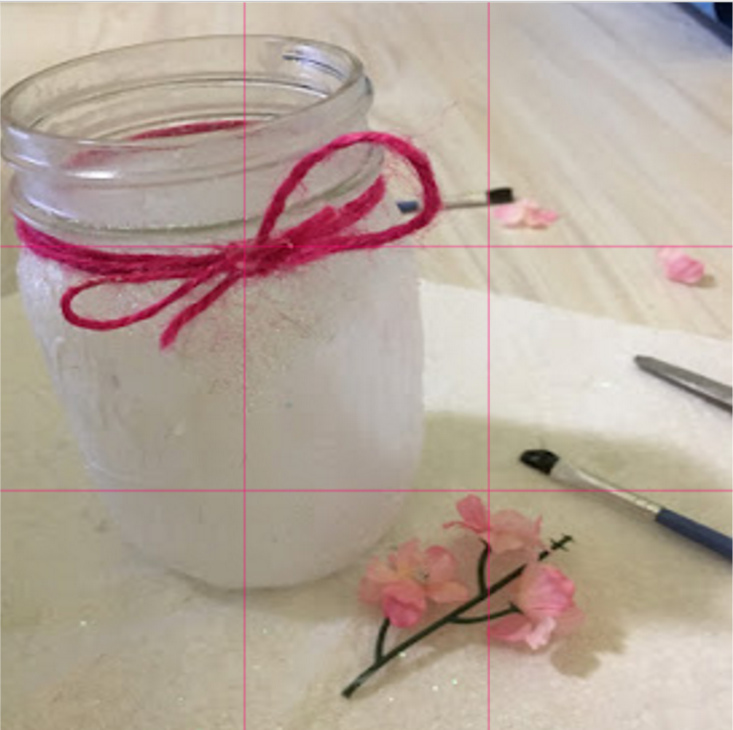 The rule of thirds helps photographers create balance in a picture. People’s eyes tend to travel through an image at specific points, which can easily be created by dividing the picture into a nine-rectangle grid. To teach the students about the rule of thirds, we discussed