upper waypoint

A Couple of Tricks for Outstanding Homemade Hummus

Save ArticleSave Article
Failed to save article

Please try again

Homemade hummus.  (Kate Williams)

Making hummus at home is not difficult; I’ve been making my own hummus since college. Most of those recipes required a can of chickpeas, some olive oil, and a drizzle of tahini from a rogue jar stuck in the back of my refrigerator. But those experiments were never really any better than what I could find at the store.

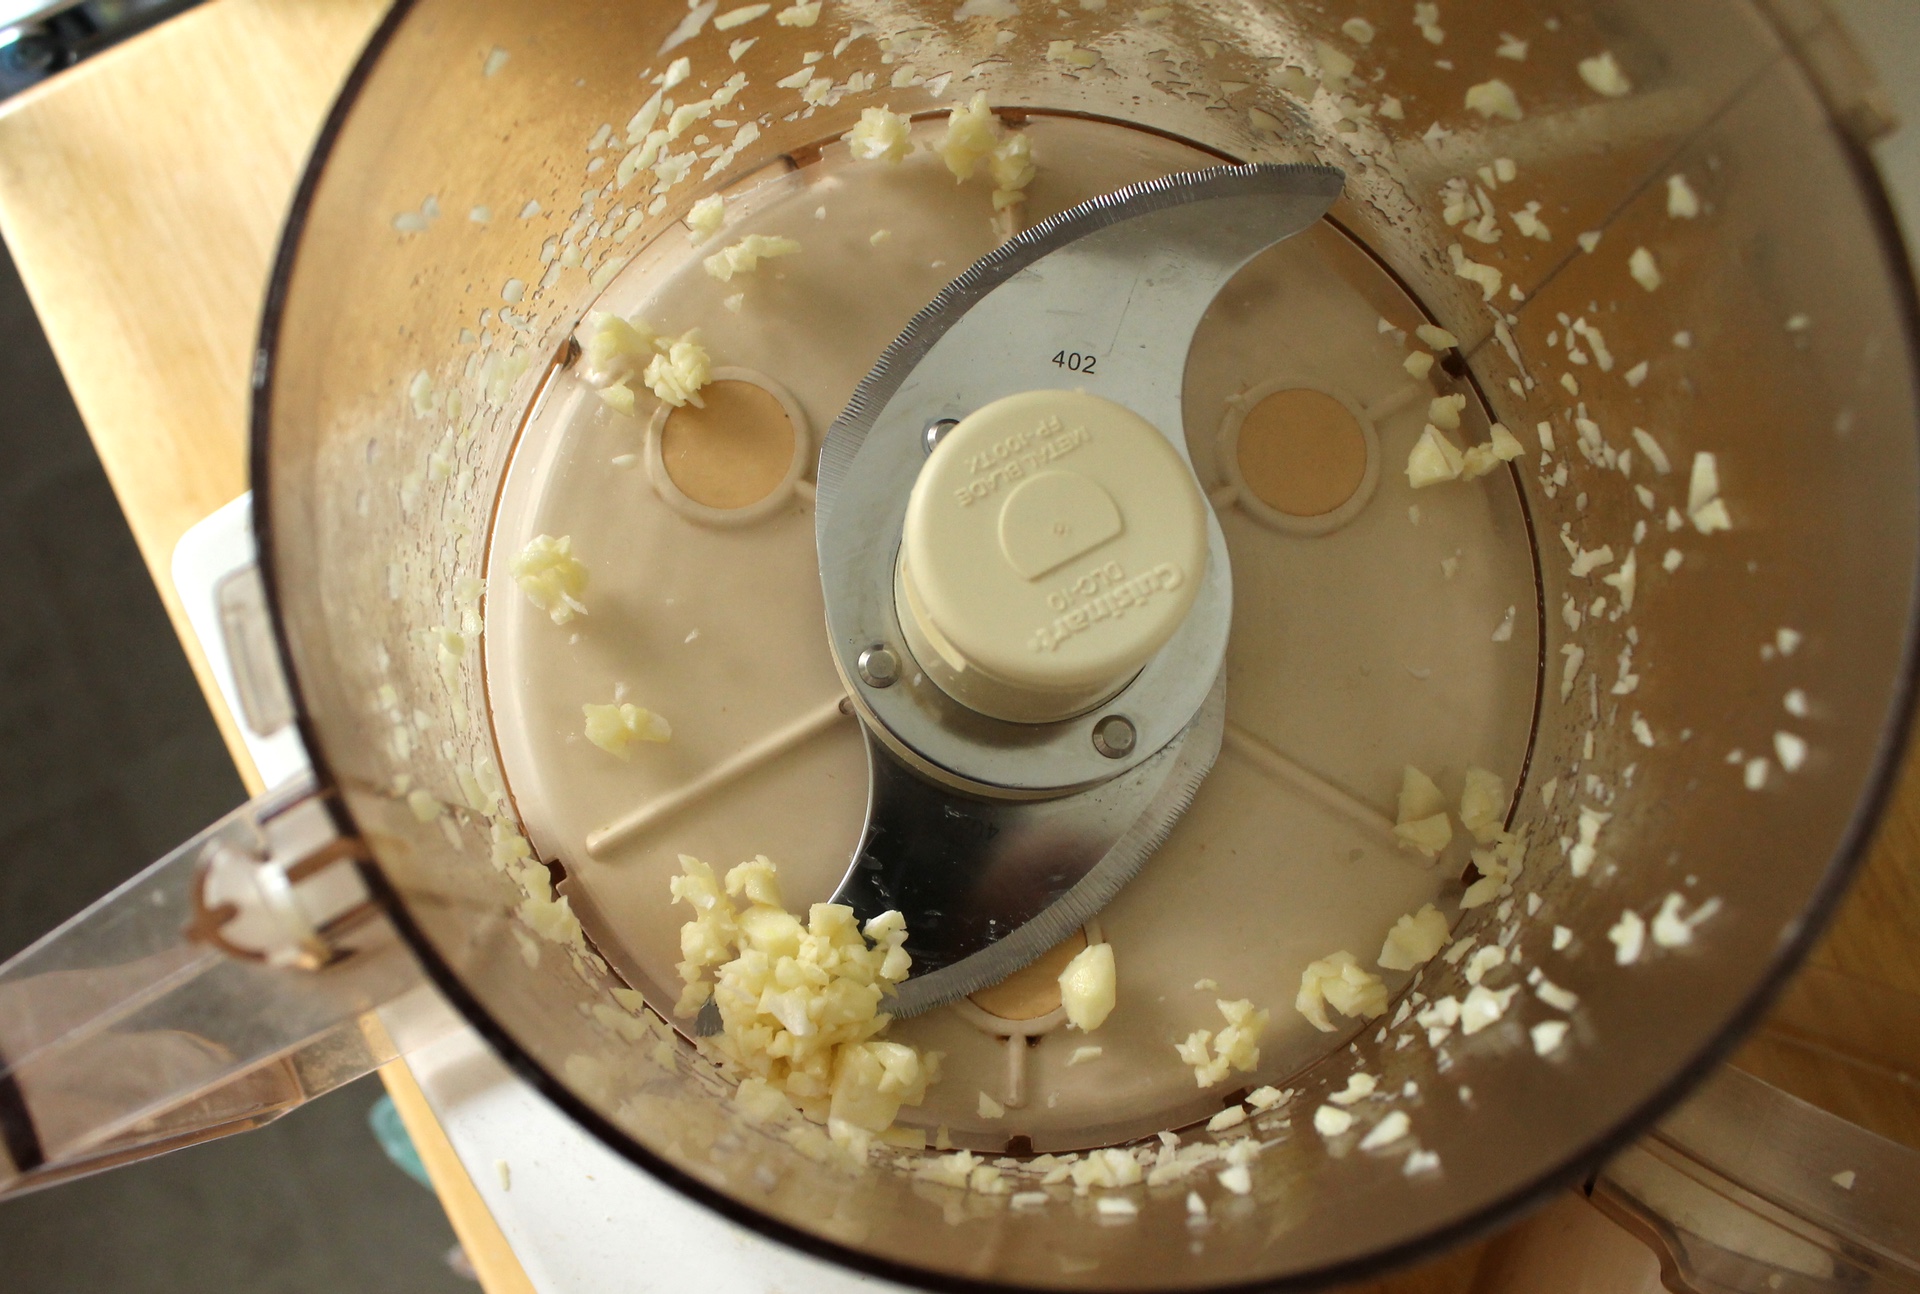
Then I discovered the silky smooth hummus in Yotam Ottolenghi and Sami Tamimi’s Jerusalem cookbook. That recipe was unlike anything I had made before. It began with dried chickpeas and included almost as much tahini as beans. The real secret was to first cook the chickpeas — dry — with a touch of baking soda. This step roughs up the exterior of the beans and encourages the skins to slip off. (The skins, hummus making veterans agree, create those small grainy lumps in the finished product.) After adding water, many of the skins float to the surface, where they can be skimmed off. Plus, the alkalizing effect of the soda makes the beans cook extra fast and (supposedly) makes them more digestible.

Cooking the chickpeas dry with a little baking soda speeds up cooking and helps remove pesky chickpea skins.
Cooking the chickpeas dry with a little baking soda speeds up cooking and helps remove pesky chickpea skins. (Kate Williams)

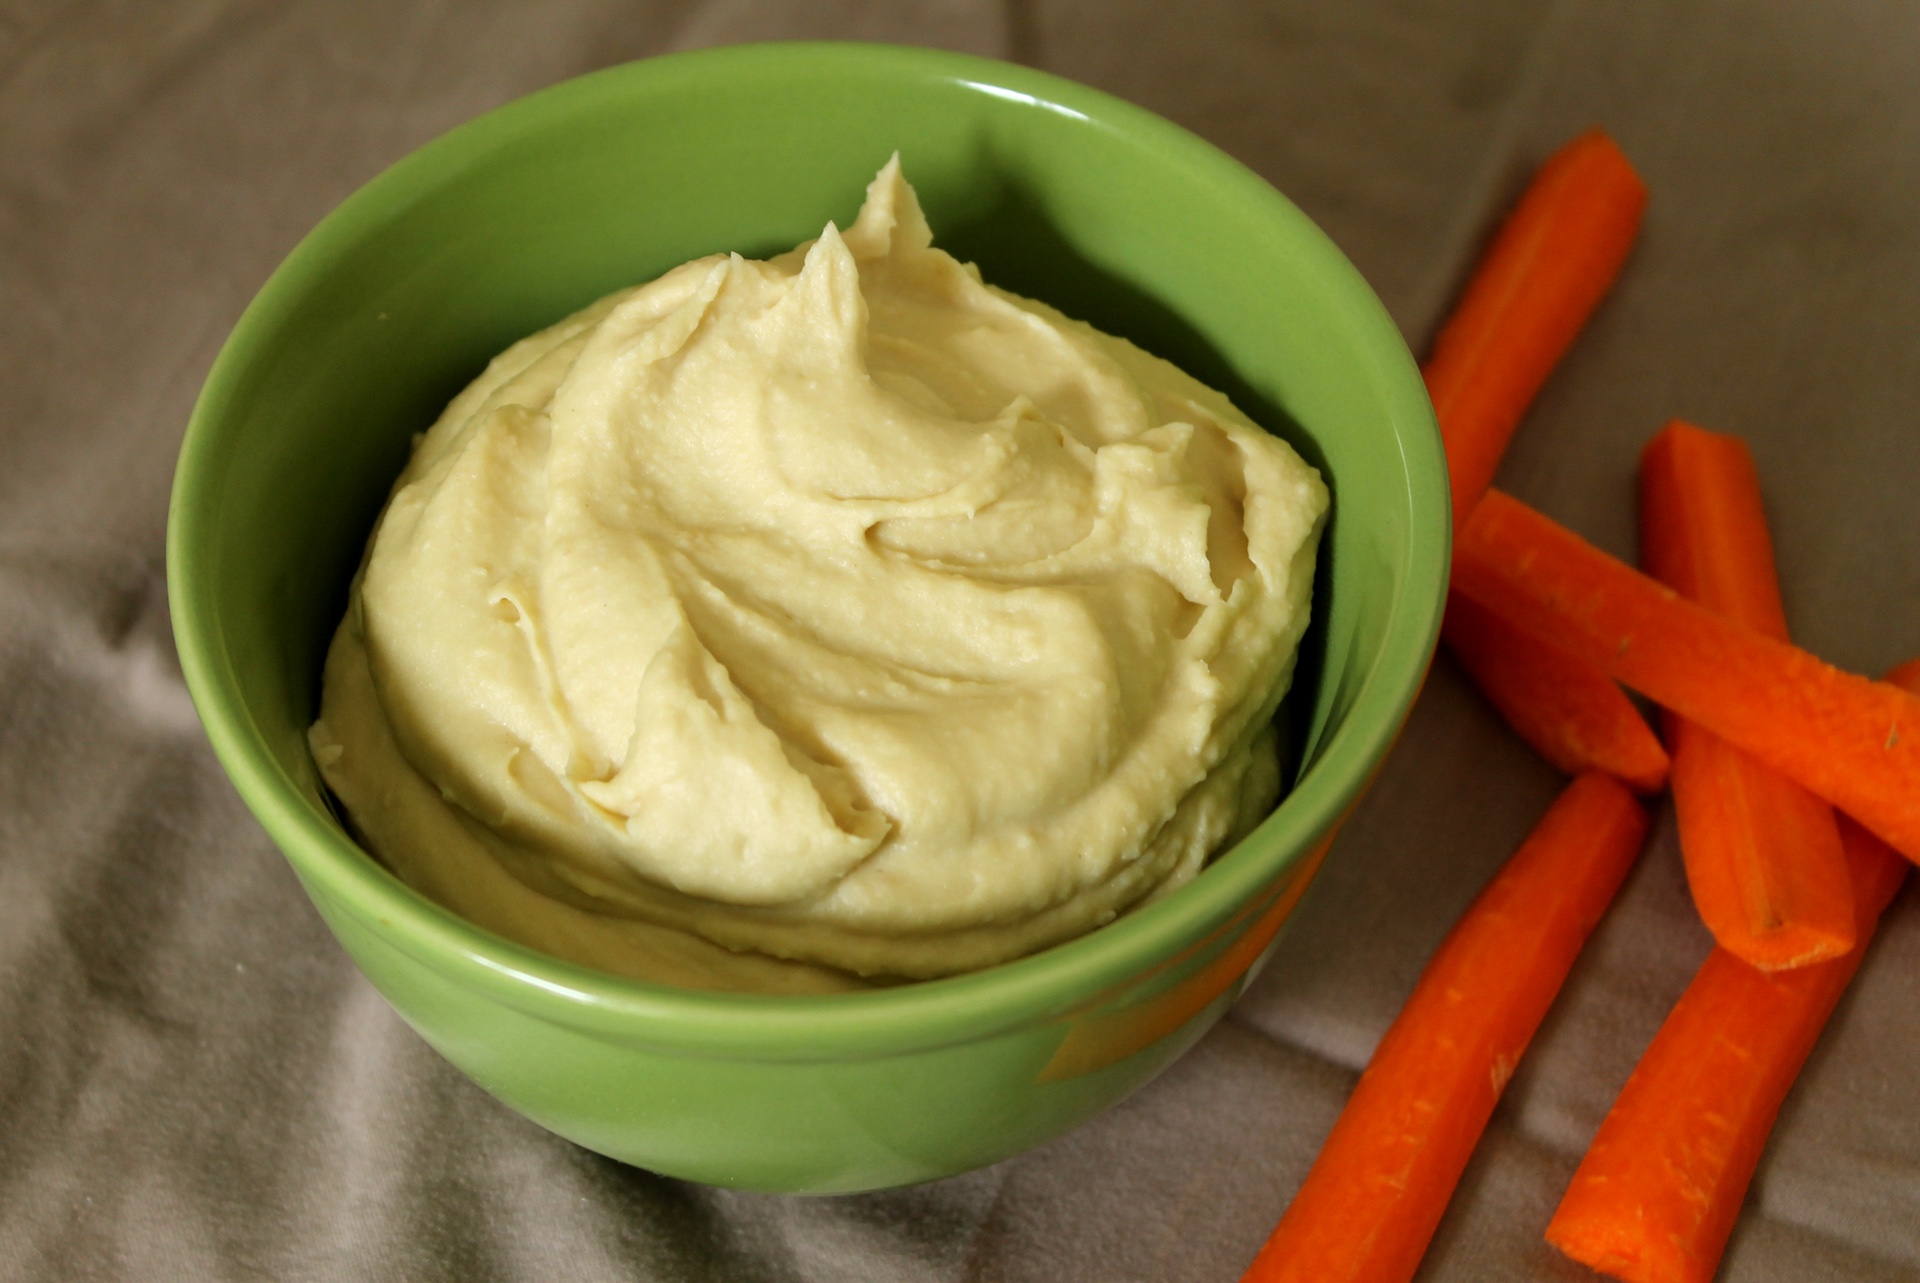
Over time, I have modified the Jerusalem recipe. I prefer my hummus with less tahini and the addition of high-quality olive oil. You can taste the chickpeas better this way, but you’ll still get the awesome texture of the original.

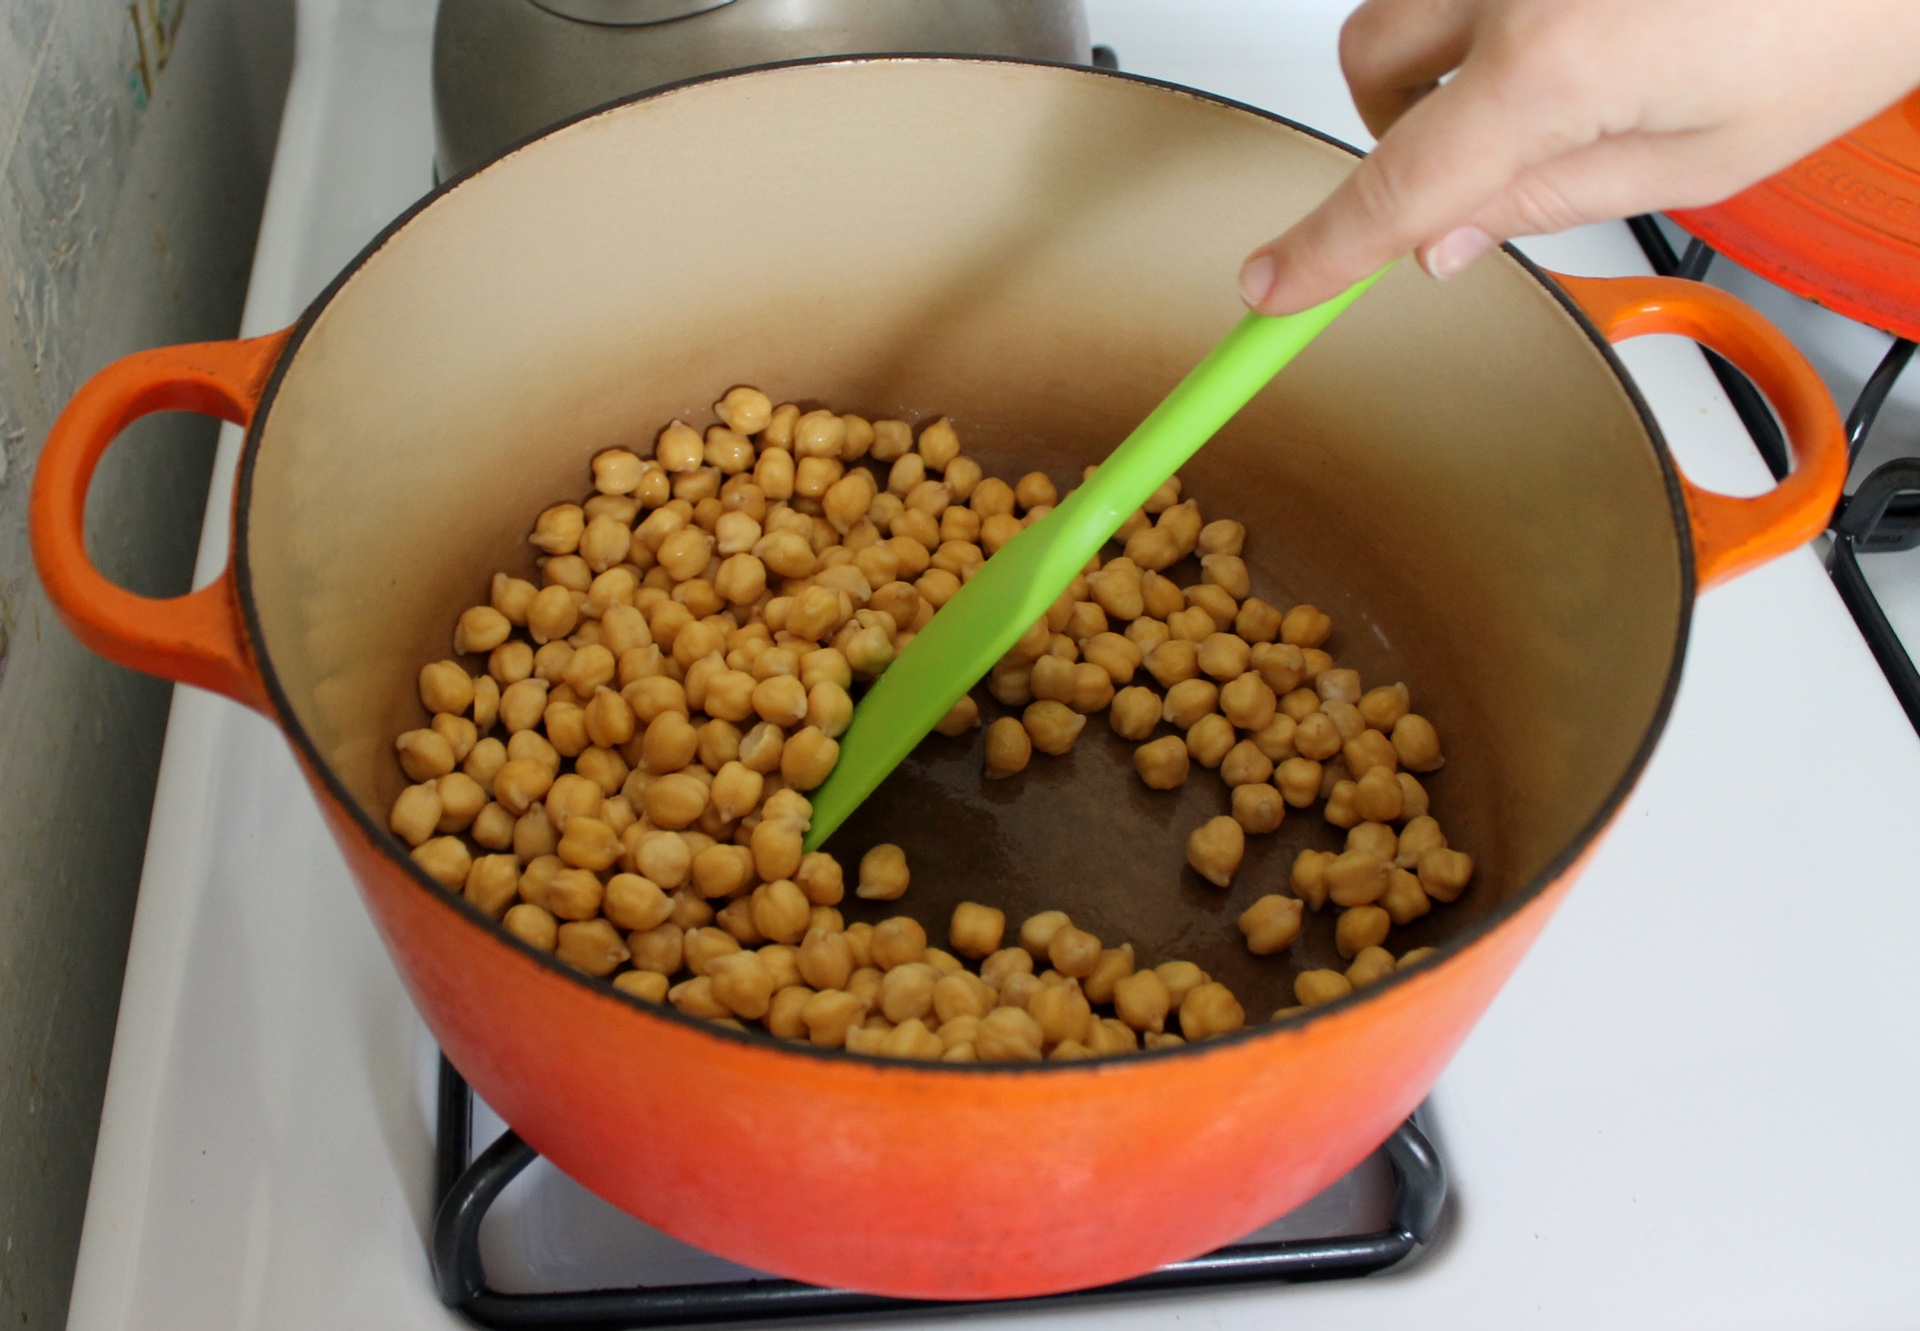
To start, you’ll want to soak a cup of dried chickpeas in cool water overnight. I have made the hummus using “quick-soaked” beans, which are made by bringing the dried beans and water to a boil, removing them from the heat, and letting them sit until cool. However, I think the texture of the hummus is better when made with chickpeas soaked overnight.

The next day, drain the chickpeas and pour them into a pot. I like to use a deep Dutch oven because the water will foam up dramatically as the beans boil; spillovers are not fun. Add baking soda and give the chickpeas a good stir. Then place the pot over medium-high heat and cook, stirring constantly, for a few minutes. This step will help to loosen the skin and jump-start the cooking.

Skim off all of the foam and skins that float to the surface as the chickpeas cook.
Skim off all of the foam and skins that float to the surface as the chickpeas cook. (Kate Williams)

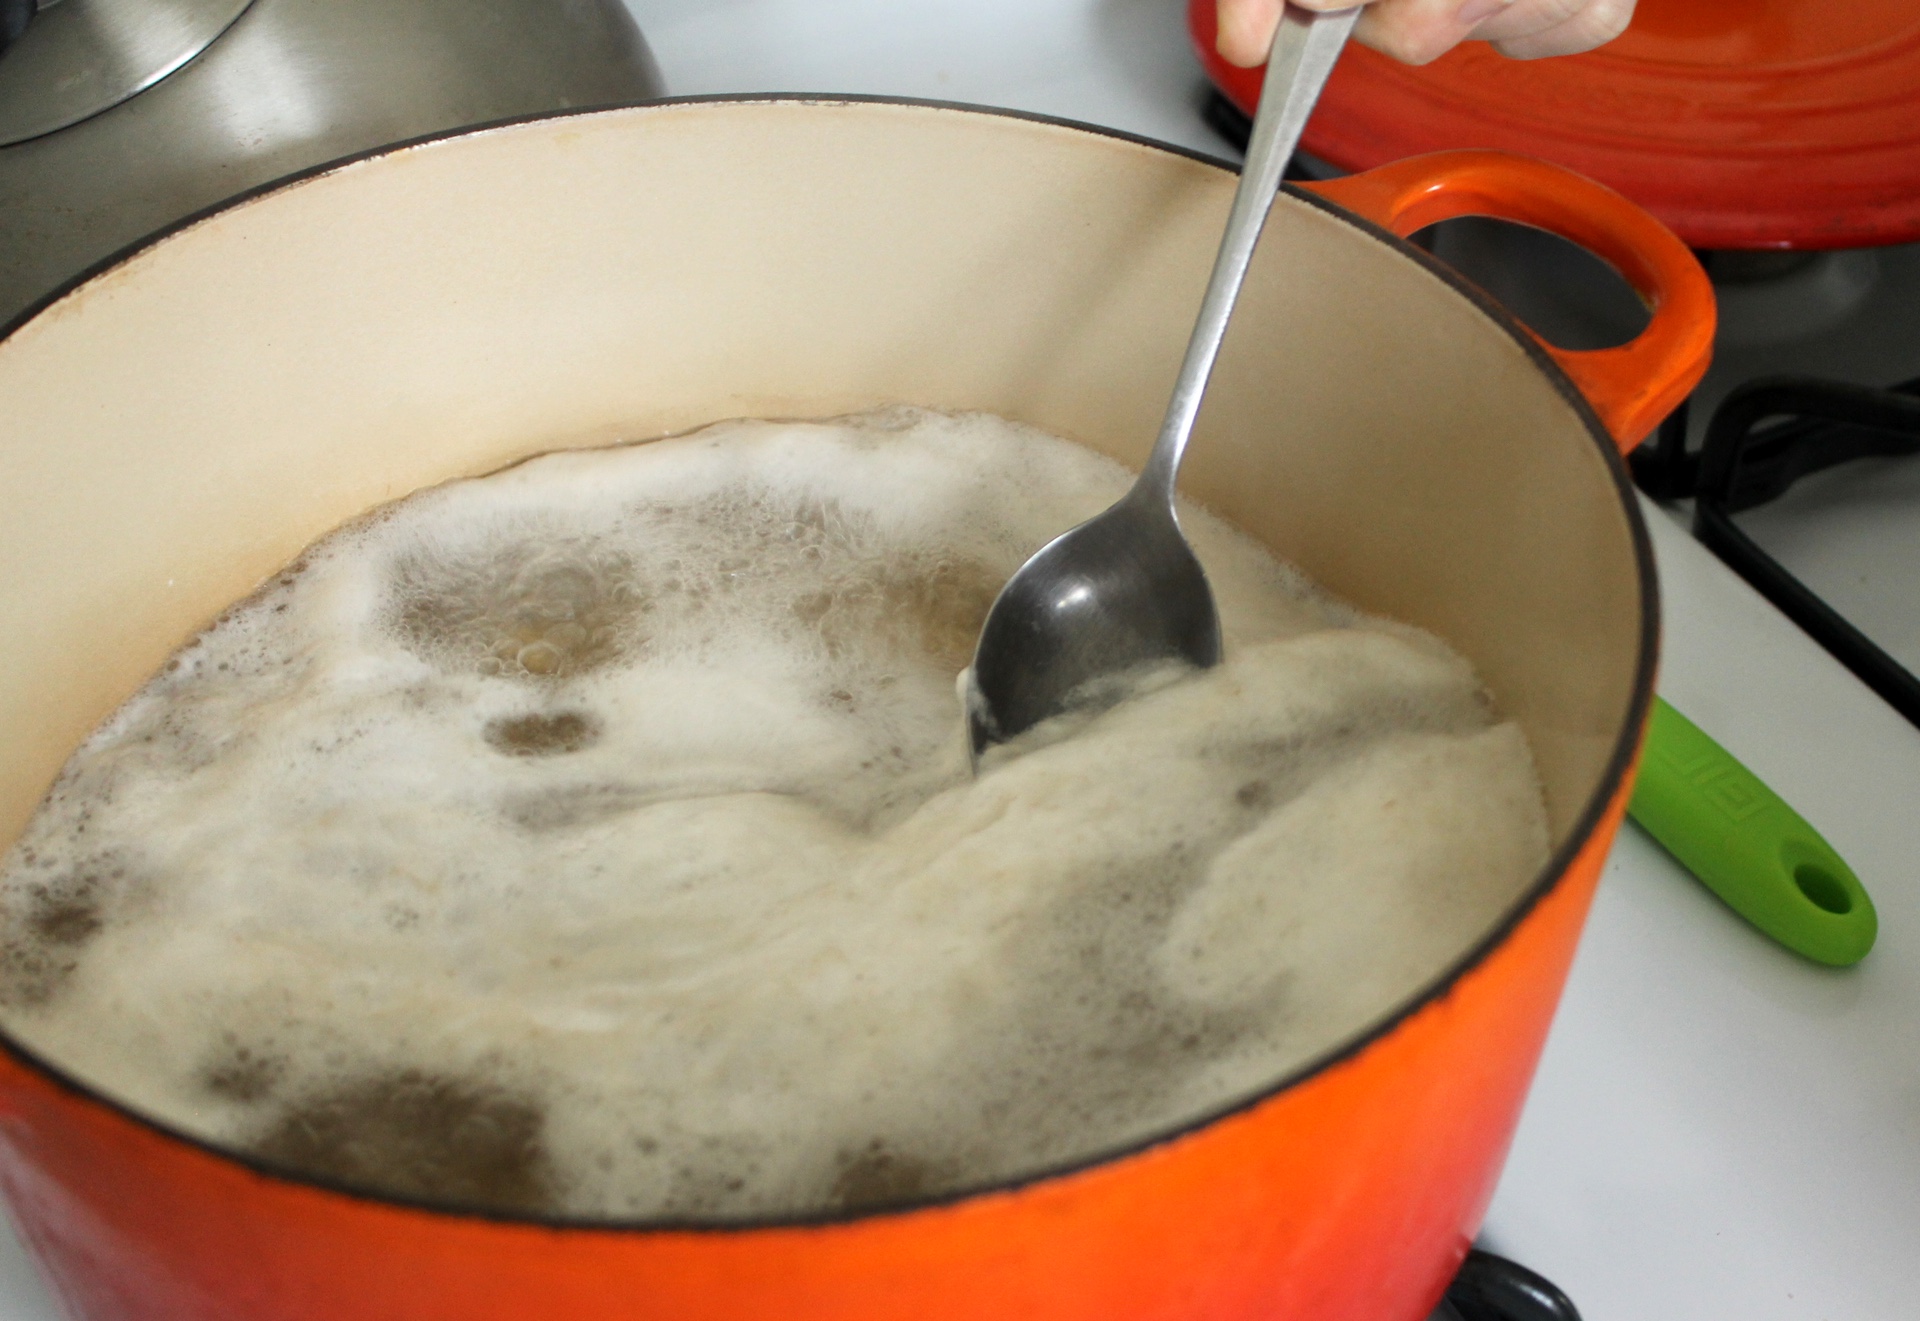
Add about 6 cups of water and bring the whole thing to a boil over high heat. Once it reaches boiling, keep it there. Don’t reduce the heat to a simmer as instructed in just about every other dried bean recipe. You want that rapid boil to knock off those skins.

Sponsored

Watch the pot carefully and get ready for foam. Skim off the white sea foam-like sludge as it forms. Bonus points for chickpea skins.

Keep boiling the chickpeas until they are super tender. It may take only 20 minutes, or it could take up to 45 minutes if the beans are old. Once tender, drain the chickpeas well and set aside.

Keep things simple by mincing the garlic in the food processor.
Keep things simple by mincing the garlic in the food processor. (Kate Williams)

Now begins the blending. I like to mince the garlic in the food processor first, mostly because I am lazy and don’t want to pull out a knife or garlic press. Mincing the garlic in the food processor also has the added benefit of keeping all of the tasty garlic oils in the processor bowl and off of a cutting board. Once the garlic is minced, add the chickpeas and process until they form a thick paste.

Keep the food processor running and pour the tahini, olive oil, lemon juice, and salt through the feed tube. It will sputter a bit and then start turning smooth. Now add some water. I like to add about 5 tablespoons of water to start, and then add more if I want a more drizzle-able result. Experiment and figure out what you like. No matter how much water you use, you’ll want to keep the food processor running for at least another minute or two to smooth out any additional lumps. It will seem like a long time, but it’s totally worth it.

I especially like this hummus served warm, right out of the food processor, but you can let it cool and refrigerate for up to a week. Dip away.

Homemade hummus.
Homemade hummus. (Kate Williams)

Recipe: Homemade Hummus

Makes about 3 cups
Note: Hummus consistency is a personal preference. If you like your hummus on the thin and drizzly side, add up to 8 tablespoons (½ cup) water at the end of blending. If you prefer a thicker dip, use the lower amount (5 tablespoons).

    Ingredients:
  • 1 cup dried chickpeas
  • 1 teaspoon baking soda
  • 3 cloves garlic, peeled
  • ½ cup tahini
  • ⅓ cup extra virgin olive oil
  • 3 tablespoons freshly squeezed lemon juice
  • 1 teaspoon kosher salt
  • 5-8 tablespoons ice water (see note)

Sponsored

Instructions:

  1. The night before making the hummus, soak the chickpeas in a large bowl of cold water.
  2. The next day, drain the chickpeas and transfer to a large pot or Dutch oven.
  3. Add the baking soda and turn the heat to medium-high. Cook the chickpeas, stirring constantly, for 3 minutes.
  4. Add about 6 cups water and increase the heat to high. Bring the water to a rapid boil. It will foam up dramatically. Use a spoon to skim off all of the white foam as it forms. Continue to boil until the chickpeas are very tender, 20 to 30 (or up to 45) minutes. Drain and set aside.
  5. Pulse the garlic in a food processor until minced, 5 to 8 pulses. Add the drained chickpeas and process until they turn into a paste, about 10 seconds. Scrape down the sides of the food processor.
  6. With the food processor running, pour in the tahini, olive oil, lemon juice, and kosher salt. Continue to process until smooth, about 30 seconds.
  7. Add 5 tablespoons water and process until very smooth, 1 to 2 more minutes. Add additional water if desired.
  8. Serve warm or let cool to room temperature before refrigerating. The hummus will keep for about 1 week in the refrigerator.

lower waypoint
next waypoint
Samosas aren’t from India…Wait, what?Food Labeling: How to Identify Conventional, Organic and GMO ProduceSpringtime Delight: Rhubarb Puff-Tart PocketsCheck, Please: How to Pay without looking like a fool or making everyone uncomfortable.Bored of Apples and Walnuts? Try Adding Date Charoset to Your Passover Table This YearDIY Bone Broth - You Really Should be Making It at HomeBay Area Bites Guide to 8 Great Places to Buy Fresh FishJosey Baker Bread: Baking for Bros, with Gluten-Free Adventure Bread RecipeEnding It All: How to Finish Your DinnerFromage de Chat (aka Cat Milk Cheese)