upper waypoint

A Favorite Family Treat: English Toffee

Save ArticleSave Article
Failed to save article

Please try again

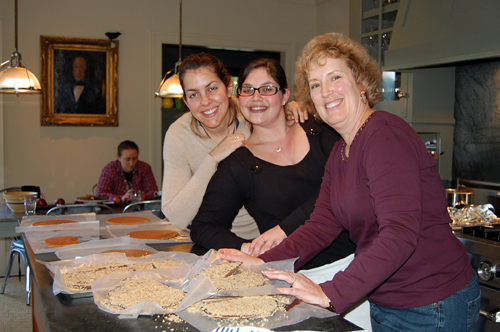
Denise, Rachael, and Megan showing off our successful batch
Denise, Rachael, and Megan showing off successful batch of English Toffee

I'd been waiting for this day for a few months. I always anticipate Thanksgiving for quite some time, but this year it was the day after Thanksgiving that I was looking forward to the most. Denise, a family friend, was driving up to Marin to teach my sisters and I how to make her infamous toffee, Denise's Pieces. Ever since I can remember, we've received a small box right around the holidays--it's better than any tin of cookies. In fact, it's better than fifty tins of cookies. I'm not sure about my sisters, but I definitely took to hiding and hoarding a few pieces in random spots around the kitchen last year. I chose the broken dishwasher that no one ever uses: it proved to be an excellent hiding spot.

Now every year around the holidays, we have Cookie Night at my Dad's, where we choose a few recipes, bake them off, and make tins for family and friends. Last year, we got the coveted recipe for Denise's Pieces and set out to make our own. Faulty candy thermometers, burnt fingers, and a whole heaping serving of confusion later, we had weird crumbly masses of wet sugar. Not quite right. Definitely not hide-in-the-dishwasher-worthy. Although disappointed, we knew that at the very least, our tin straight from Denise's kitchen was probably on its way.

So you can imagine how delighted I was to hear that this year, Denise was going to make an in-person appearance and teach us the insider secrets. She has holiday celebrity status in our household; I couldn't quite believe my ears: In person? Really? It was like someone had told me Ruth Reichl or Meryl Streep was coming for dinner. She arrived prepared with all of the ingredients--and a caveat. The room grew quiet. My Dad seemed to know what she was going to say already as his eyes darted back and forth from Denise to each of us. Denise paused and turned toward my sister Rachael and I.

"So girls, you know that once I show you the secrets, you no longer receive your own tin? You now must go out and carry on the tradition yourselves. It's yours now," she said with a big, proud smile. Behind my polite nod was a sinking feeling that Christmas would never be the same. What?! I wanted to send her packing right back where she came from so everything would remain just as it was. No yearly tin? But we had no choice: she was before us and had so generously driven two hours to teach us the recipe. We set forth, with no other option but to succeed. We would make these happen. I looked at Rachael and nodded assuredly. She nodded back. It was on.

Sponsored

Dad displaying the goods

Denise's Aunt Betty taught her the toffee recipe, and she’s been making it ever since for the past twenty-five years. She now does fifty pounds of her Pieces each holiday season, sending them out to her staff and friends and family, starting in November to give herself plenty of time for packing and shipping. I kid you not when I say that people from near and far clamor to get on her yearly list--she has to do frequent editing to keep it manageable. While I was sad we wouldn't be on the list this year, I was pleasantly surprised to learn how easy the recipe is--and I'm excited to share it here with you today (don't worry, I have Denise's permission).

If you've never made toffee or candy before, it is helpful to watch someone do it first, or to simply know that inevitably you’ll probably have to do a round of failed candy before you get it just right. You'll need patience and a few extra sticks of butter. It helps a lot to know what the "hard crack" stage looks like (Denise can even smell it and seems to know when it’s ready--I told you, she's a toffee rock star), but with a good candy thermometer and a quick glance at my photos, you’ll be just fine.

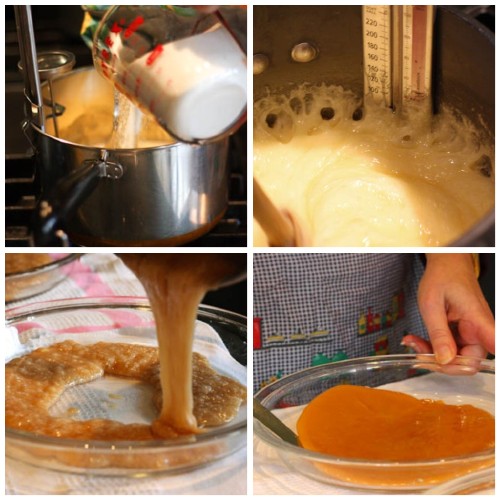
Cooking the butter and sugar to hard crack stage and pouring it to set
Cooking the butter and sugar to "hard crack" stage and pouring it to set (steps 1-7 in recipe below)

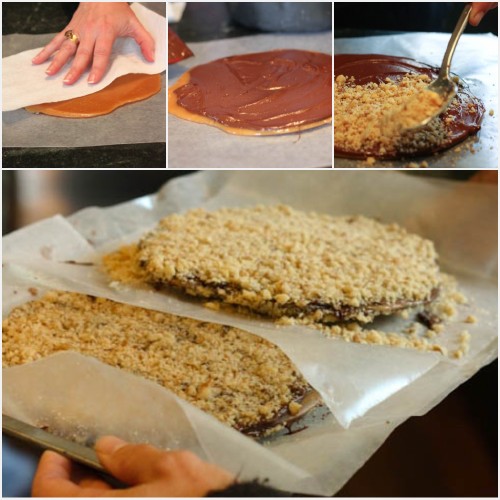
Adding the chocolate and nuts
Adding the chocolate and nuts (Steps 8-10 in recipe below)

Denise's Pieces (or English Toffee)

Equipment:
5 glass Pyrex round pie pans *
Candy Thermometer (stay away from the glass ones as they get quite hot)
2 Copper-bottom saucepans or (or similar quality)
Wax Paper
Wooden Spoon, Spatula

Ingredients:
2 ¼ cups sugar
5-6 cups Chocolate Chips (not exact--may need a little more or a little less)
½ cup water
4 sticks high quality sweet cream butter
2-3 16 oz. bag walnuts (or your preference of nuts), crushed

Quick note on ingredients: You're using the chocolate and nuts to cover the toffee at the end, so the exact amount varies depending on how much you like to add on. This is roughly what we used. Play around and see what works for you.

Preparation:

1. Butter your Pyrex pans using one of the sticks of butter and set aside (don't worry, you’ll have a little less than 4 sticks for the recipe after this step, but that’s o.k). Denise works the butter into the pan with her hands for uniform coverage.

2. Put the chocolate chips in one of your pans and heat on very low heat to get them melting. Once melted, turn heat off and allow them to hang out--when ready to use, if they've firmed up, just give them a quick reheat. You want it to be creamy, malleable chocolate.

3. Place sticks of butter in saucepan with candy thermometer fitted on side. Heat on low-medium heat and stir constantly until you reach 170 degrees. The goal is to really let the butter heat slowly.

4. Slowly dribble the water into the butter, stirring as you go and then bring the temperature back up to 170.

5. Add the sugar very slowly, stirring in between each addition. Then, simply continue stirring until the mixture reaches a "hard crack" stage of 300 degrees. This should take roughly twenty minutes depending on your stove and cookware. Make sure, when stirring, to get the edges frequently so the mixture doesn’t burn in any one spot.

6. When you reach about 275 degrees, the heat will stay right there for quite sometime. Don't worry. Keep stirring. If things are going well the mixture should be increasing in volume, about 2x what it looked like originally. Look for the color to be changing to a nice, caramelly brown.

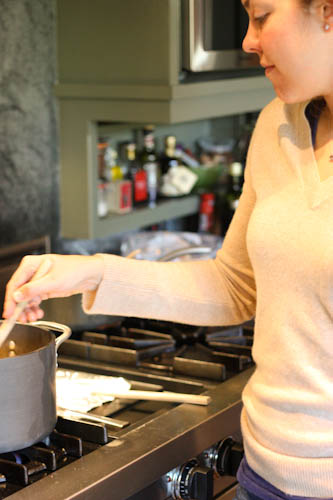
Megan finding some Zen in the constant stirring process

7. When you reach "hard crack" pull the pan off and pour into the Pyrex in a circular motion, hitting the center last (this will prevent you from pouring it all into the center of the pan and having it sit in a clump there--you're going for a nice even layer).

8. Wait about 5 minutes for toffee to cool (you don't want to melt the wax paper) and then loosen the candy from the Pyrex gently with a knife using a circular motion.

9. Set on wax paper and blot with a napkin to get rid of any extra butter (which would make it difficult for the chocolate layer to stick).

10. Spread melted chocolate on the surface with a spoon or spatula and sprinkle nuts generously. Gently press nuts into the chocolate so they'll stick and flip toffee over. Repeat on other side. Then layer toffee onto a cookie sheet and put in fridge to cool and set completely--24 hrs is ideal. After completely set, break up into pieces and arrange in tins or plates.

Makes roughly 2 pounds Toffee (Denise does such big batches, she doesn't usually portion it out this way, so this is an estimate...but a pretty good one, I think).

*Denise said you may certainly use a larger 9 x 13 pan, but she had a difficult time flipping the toffee when she did so. I opted to stick with what works for her...that being said, any pie plates you have will probably work just fine. The round shape is just really nice because it’s so easy to work with.

Sponsored

We finished. It's delicious. I have so much of it there's no need for hoarding--yet. I haven't made it completely on my own, but I'm confident it’ll be fine. It has to be. There is simply no other option this year.

lower waypoint
next waypoint
Samosas aren’t from India…Wait, what?Food Labeling: How to Identify Conventional, Organic and GMO ProduceSpringtime Delight: Rhubarb Puff-Tart PocketsCheck, Please: How to Pay without looking like a fool or making everyone uncomfortable.Josey Baker Bread: Baking for Bros, with Gluten-Free Adventure Bread RecipeBored of Apples and Walnuts? Try Adding Date Charoset to Your Passover Table This YearDIY Bone Broth - You Really Should be Making It at HomeBay Area Bites Guide to 8 Great Places to Buy Fresh FishFromage de Chat (aka Cat Milk Cheese)Taste Test: Store-bought Raw Sauerkrauts are Surprisingly Distinctive