First up, the dry ingredients. Flour, a little salt, a little sugar, stirred together in the pot. A glass of ice water, set aside. He's bought fancy butter, a good thing, in this case the high-butterfat, European-style butter from Straus Creamery, Marin's organic dairy. I tell him I've met the Straus family and their happy grass-roaming cows, and we rub up a little locavore glow, helped along by the tequila. Then the butter is cubed and tossed into the flour so that each cube is coated.

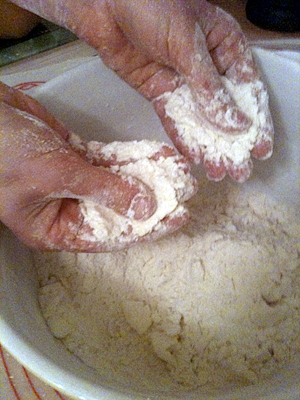
"Now, hold your hands out in front of you, palms up, like a statue of Jesus," I tell him, and we scoop our fingers, palms up, down and up through the butter-chunked flour. "Now, pick up a butter cube between your thumb and fingertips. Flatten it out to a little butter nickel, and drop it back into the bowl."
Keep scooping, aerating the flour as you go, and flattening out your butter nickels. The trick is to keep everything light and airy--no squeezing, no mashing. You don't want paste, you want a crumbly mixture of flour layered with shards of cold fat. As long as you keep your palms facing up and only your thumb and fingertips working the dough, all is well. Stop when it looks somewhere between peas and rolled oatmeal, chunkier than you might imagine, and definitely before it gets to to the dry-cornmeal stage most cookbooks recommend.
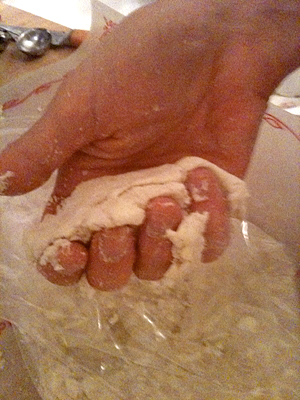
So far, so good. Now, the water to make the dough: four or five tablespoons, mixed in lightly with a fork. Then sprinkled in, a tablespoon at a time, maybe 8 to 10 tablespoons in all. Pick up a handful of dough, and squeeze gently. It should come together in a ball that holds together but isn't wet or gluey. Err on the side of slight crumbliness, if you must.

Once the dough holds together, it goes into the pie-baker's friend, the gallon-size resealable bag. Dough firmly pushed down into a round, air pressed out from the bag and sealed, then into the freezer for 20 minutes, or the fridge for an hour (or overnight). While not absolutely necessary, it relaxes the dough and firms up the butter, increasingly flakiness and making it less likely to stick while rolling or shrink during baking.
The dough comes out and is divided in half, with the second half going back in the fridge. Onto a lightly floured board, we press our dough-lump into a roughly round patty. "A rolling pin makes life easier," I tell Kevin as I pick up my wooden pin. "But then again, I've also rolled out a lot of pie crusts with a wine bottle."
I hand him the pin and tell him to think of the dough as a sun, with rays radiating out from the center. "Don't roll back and forth like you're paving a highway. Roll from the center to the edge, around and around so you make an even circle. And after every few rolls, loosen the dough with a spatula, so it doesn't get in the habit of sticking."
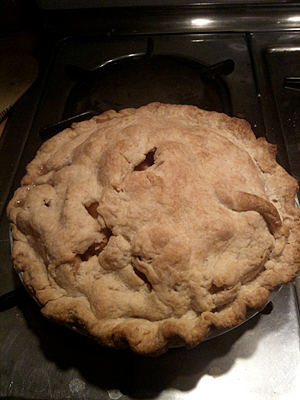
He rolls and rolls, and soon we've got a circle a couple of inches bigger than our pan. We loosen the dough, fold in half and in half again, and transfer it into the pan, since it's much easier to move a thick folded triangle of dough than a thin floppy circle. Unfold, press lightly, put in the fridge and repeat with the other half of the dough. The filling goes in--in this case, blueberries, mixed with sugar and a little cornstarch--the top is draped on and crimped, and it goes into the oven. An hour later, his partner is home, and they are two men with a hot pie.
Kevin is happy and amazed that it could be so easy. Scones, he wants to make next, and I tell him it's the same technique: mix the dry ingredients, cut in the butter, add liquid, then roll out and cut.
The next patient is Leslie, a great cook and a longtime cookbook editor and author. What could I possibly teach her? But baking, it turns out, is where she feels out of control. "Bread, cake, pie," is how she describes her hierarchy of baking fears. We decide to start at the bottom, with pie. In this case, she has bowls galore, but no pie pan, since she never makes pies. "I'm a crisp person," she admits. We go through the same steps, and I show her the fluff-it-up, palms-up technique. "Bring it up to God!" she laughs, and we agree. Surely there is pie in heaven, good pie.

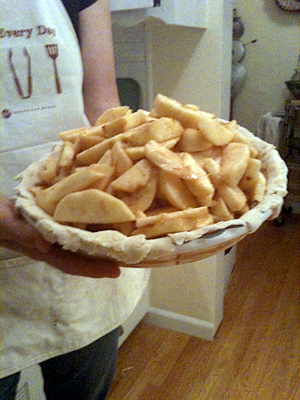
It's apple this time, and we slice and mound the apples high while the crust chills. This crust is a little crumbly, and wants to crack and stick as we roll. I grab the baker's friend, plastic wrap (waxed paper works well too), and we slap a sheet of plastic between the rolling pin and the dough. Suddenly, everything's easy: the dough stops sticking and the cracks seal up. We fold and drape and crimp, and the pie goes into the oven. Leslie is ecstatic: she has conquered pie! An hour later, her family sits down to steaming slices. Her nieces battle forks for the last piece of crust on the plate. And the Pie Therapist packs up her rolling pin and slips out into the night, another job done.
All Butter Pie Crust
Yes, shortening is easier to work with. But honestly, it's not that hard to use butter, and the taste is so wonderful, there's no reason to bother with anything else. Anyway, if you're going to eat fat, eat honest tasty fat that tastes good.
As for baking times, it depends on the type of filling. Most double-crusted fruit pies can be baked at 375F for about 45 to 55 minutes, until crust in golden brown and filling is just bubbling up. For a single-crust pie, like pumpkin or pecan, bake at 350F for 30-40 minutes, until filling is just set but still a slightly jiggly, since filling will continue to set as it cools.
Equipment:
a large bowl
measuring cups and spoons
a large spoon for mixing
a pie pan (metal, glass, or ceramic)
a rolling pin
resealable plastic bag or plastic wrap
Ingredients:
Makes: Enough for a 9-inch 2-crust pie
2 1/4 cups flour
1/2 tsp salt
1 1/2 tablespoons sugar
2 sticks (8 oz, 1 cup) butter, chilled
8 to 10 tablespoons ice water
extra flour for dusting
Preparation:
1. In a large bowl, sift or whisk together flour, salt, and sugar.
2. Cut butter into 1/2-inch cubes. Toss butter cubes into flour mixture. Rub butter cubes between your thumb and fingertips, palms up, until butter flattens into little flour-covered nickels. Keep scooping up flour and butter cubes and flattening into nickels until all butter is flattened into shards.
3. Lightly stir in half the water. Add the rest in drizzles, stirring and scooping dough until it just holds together; you may not use all the water. Squeeze a handful of dough together; it should hold together without crumbling.
4. Scoop dough into a gallon-size resealable bag. Flatten dough into a thick patty, press air from bag and seal. Chill for at least an hour in the refrigerator, or 20 minutes in the freezer. You can make your dough up to 2 days in advance, keeping it in the refrigerator, or store for up to a month in the freezer.
5. To roll out dough, sprinkle a wide work surface with flour. Divide dough in half and shape into a round. Rub rolling pin with flour and roll out into a thin, even circle, loosening dough frequently with a spatula. If dough is hard to roll or cracks, it may be too cold. Let it warm up for a couple of minutes, then try again. Put a sheet of waxed paper or plastic wrap between your rolling pin and the dough if dough is very sticky.
6. Loosen dough with a spatula. Fold in half, and then in half again. Transfer to pie pan and press lightly into the pan. Trim so dough is nearly flush with edges of pan. Put in the fridge and roll out second half of dough.
7. Put filling into pie pan, top with top crust, and seal edges together, crimping in whatever decorative fashion you like.
 Run through your Thanksgiving menu in your head, right now. Something in there is making you nervous. Very nervous. What it is? You can admit it. It's not a phobia, more like an...inadequacy, a fear of never being as good as grandma, a lingering humiliation from that one year you tried and the knife wouldn't even cut through the bottom crust, so rock-like it was. Or when the dough glued itself to the counter in a rebellious mound, refusing to roll and instead sticking to every surface save the pie pan. But yes, it's real. We call it Fear of Pie-ing. And that's why I'm here, your Pie Therapist on call.

