KQED Food is your home for stories about all of the Bay Area’s vibrant food cultures: the taco truck, omakase counter, grocery co-op and driveway pupusa stand. Our news stories, essays, shows and features document the food scene’s latest trends and changemakers—and help guide you to your next delicious meal.
Latest Stories
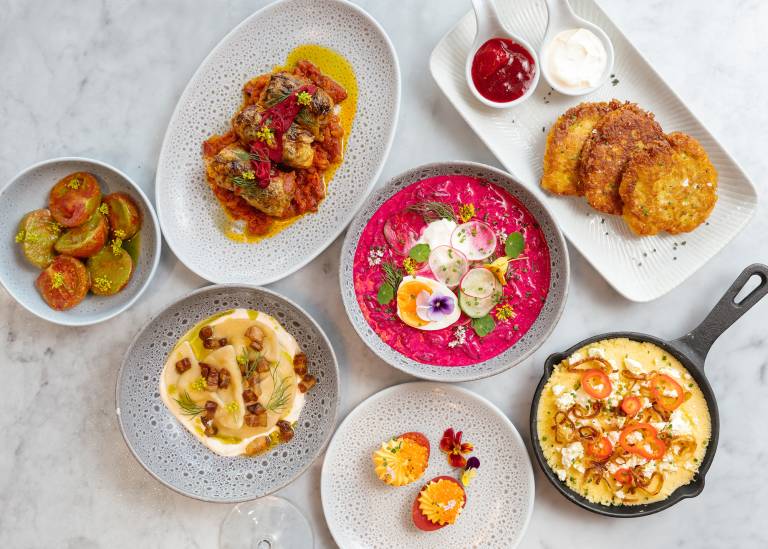
The Only Ukrainian Restaurant in Wine Country Pops Open for One Month This Summer
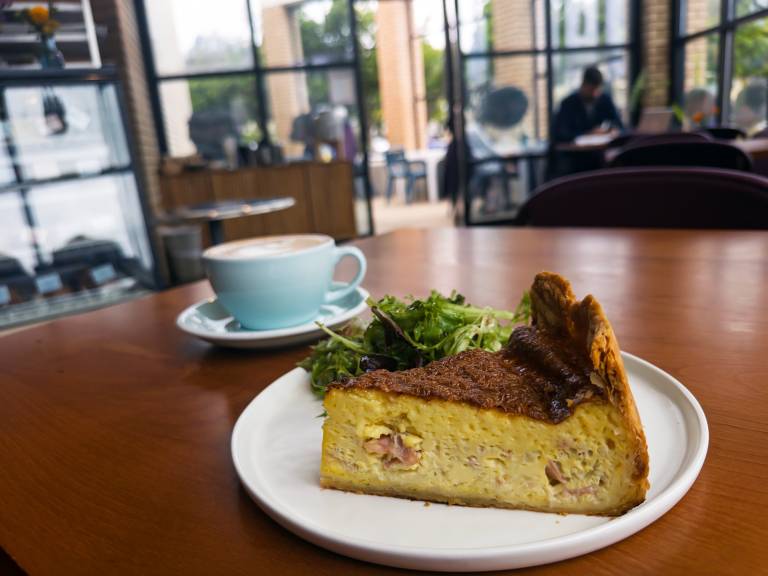
The East Bay’s Most Enticing New Cafe? It’s at the Library
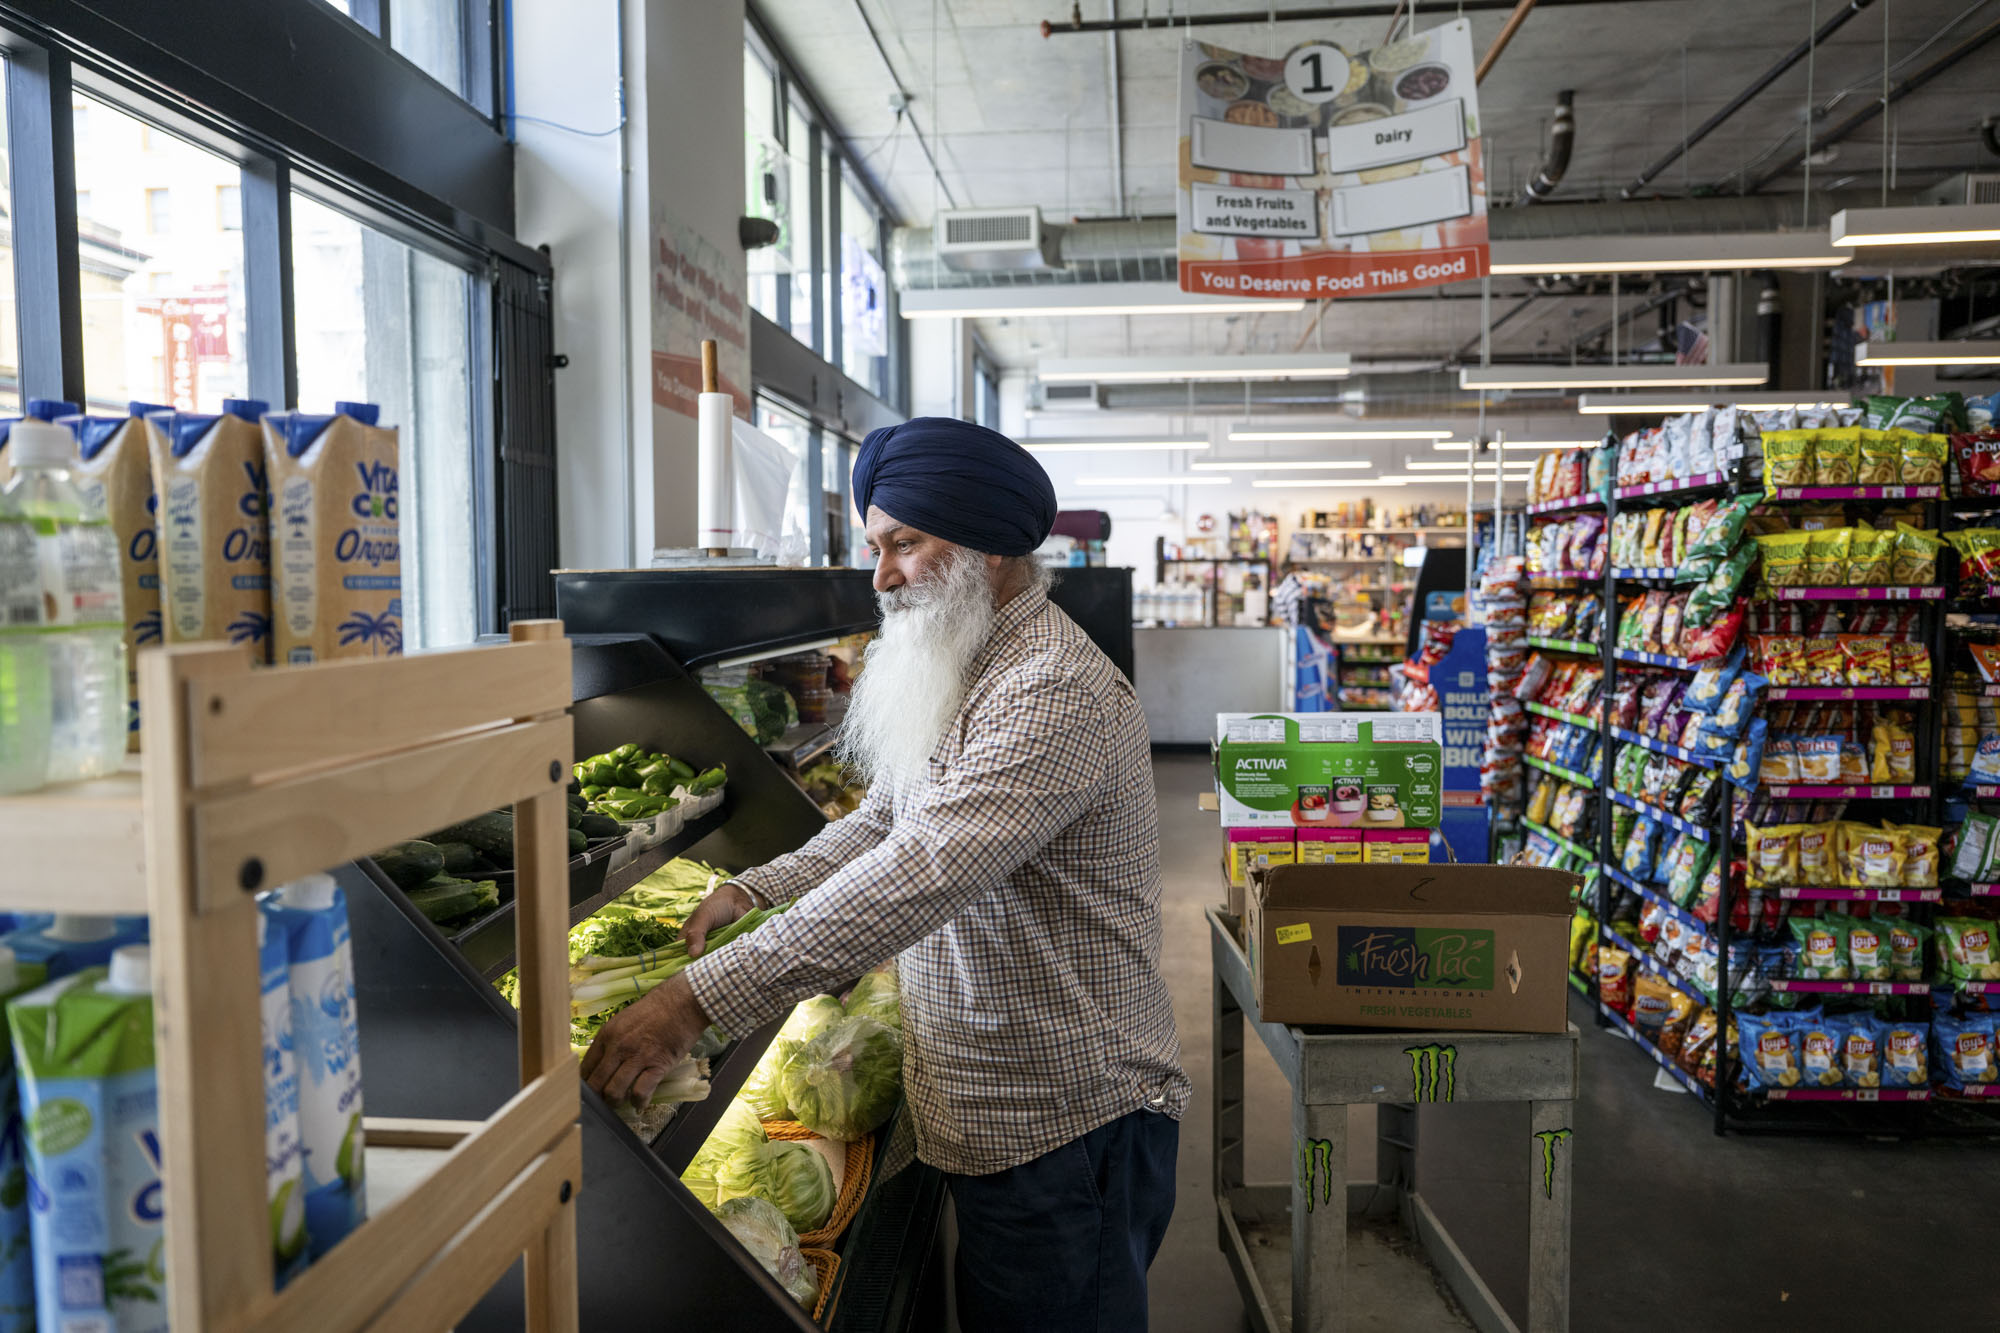
To Fund Affordable Food, San Francisco Looks to Tax Vacant Grocery Stores, Pharmacies
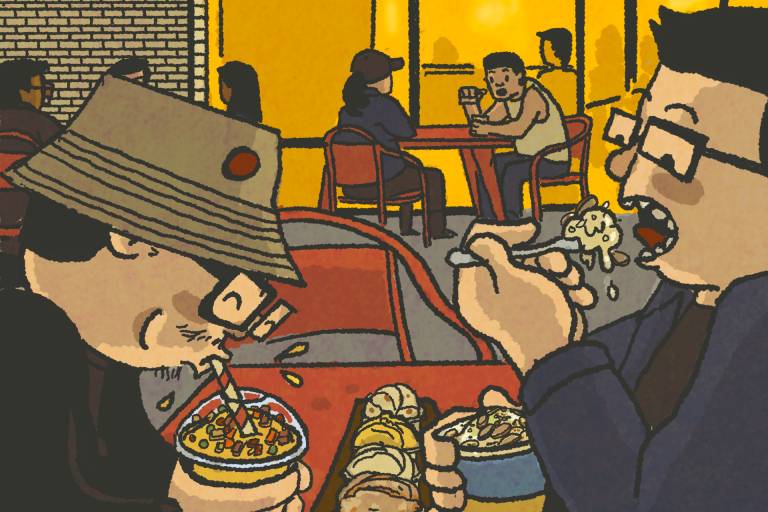
The Exuberant Joy of an Indian Ice Cream Shop at 11 PM
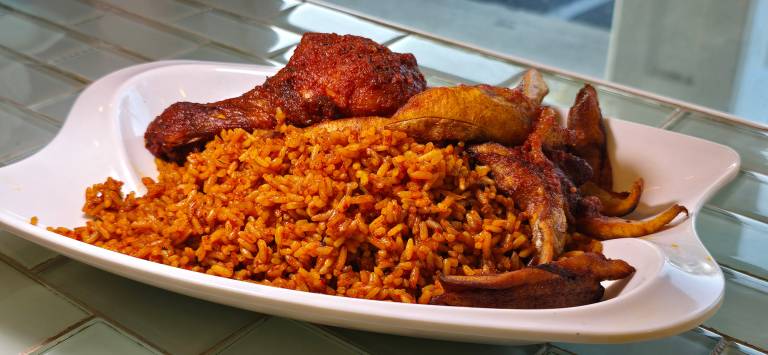
The South Bay’s First Nigerian Restaurant Takes Off in San José
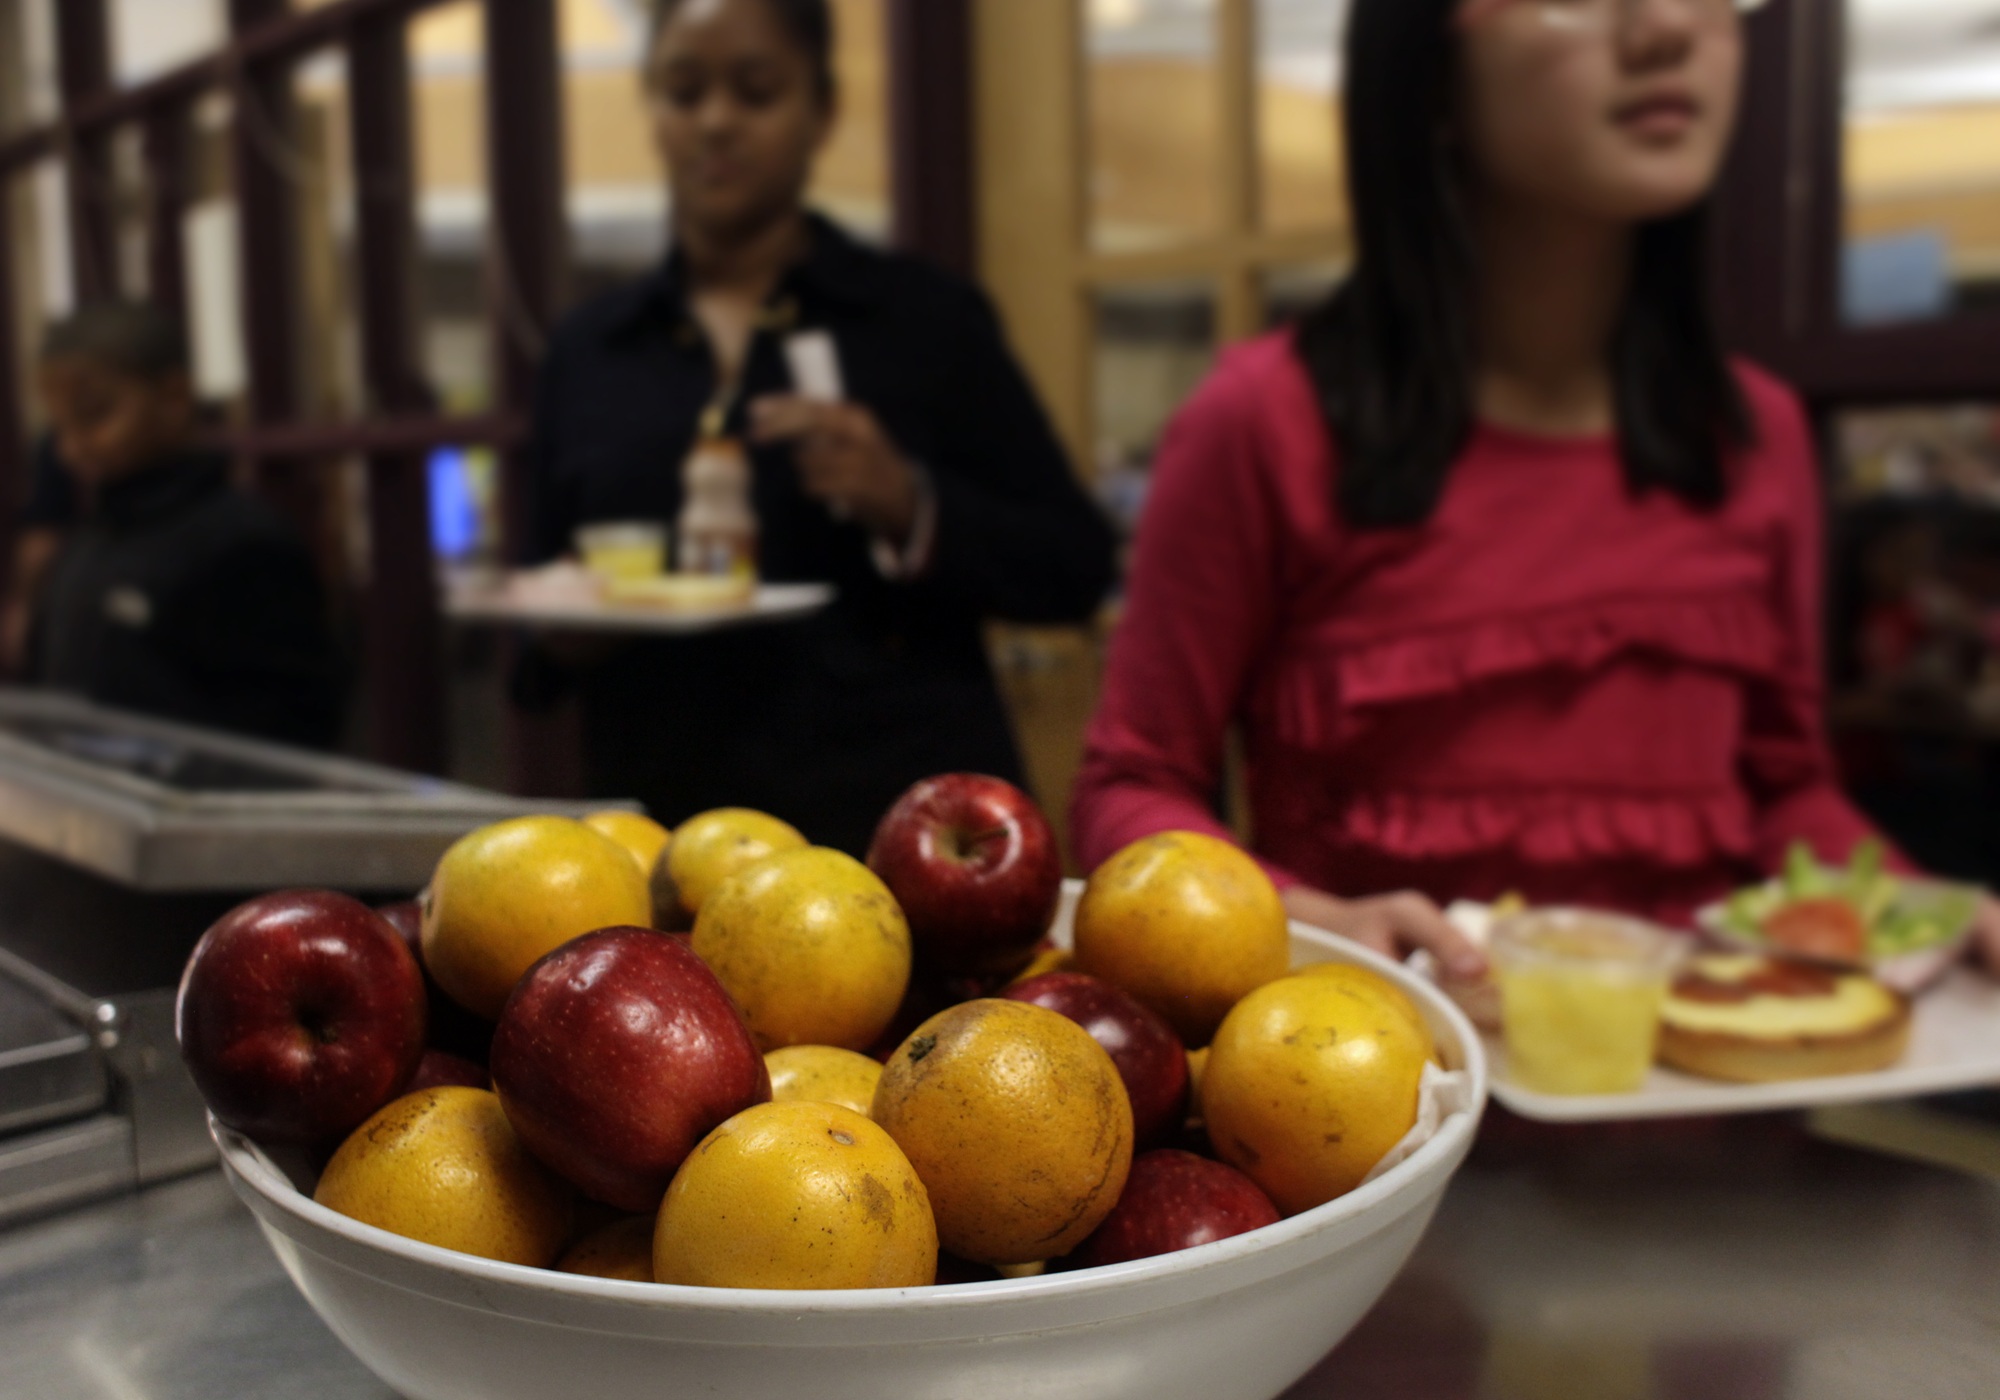
As CalFresh Guidelines Expand, Where Can Students Who Rely on School Meals Go?
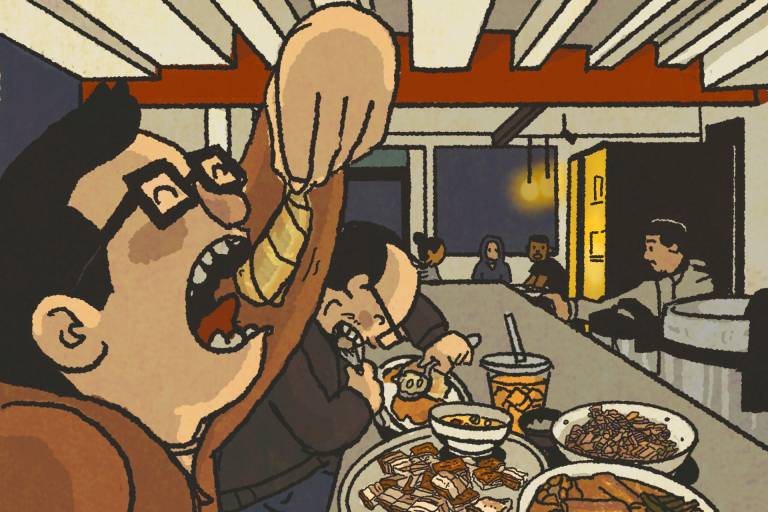
This Late-Night Filipino Diner in Downtown Oakland Is Hidden in Plain Sight
Indian Mangoes Are the ‘Fruit of the Gods.’ Now, in San Francisco, They Have Their Own Party
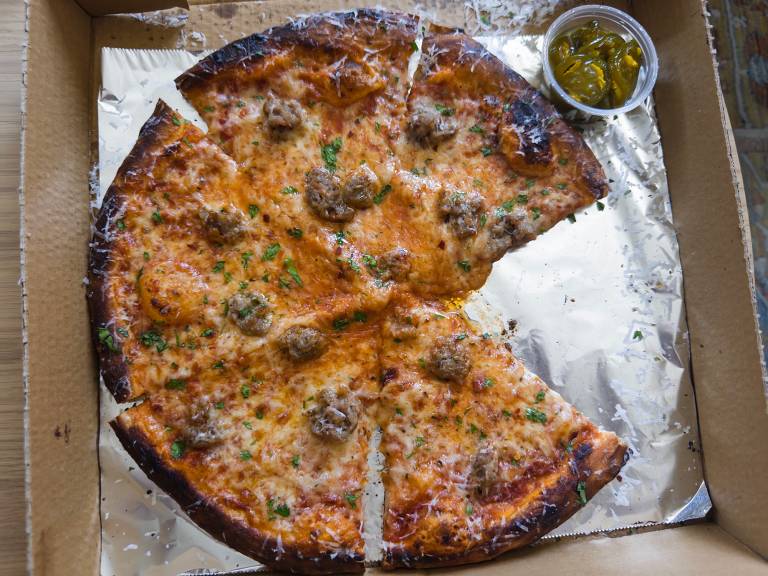
The East Bay’s Most Exciting New Pizza Pop-up Is at a Richmond Weed Dispensary
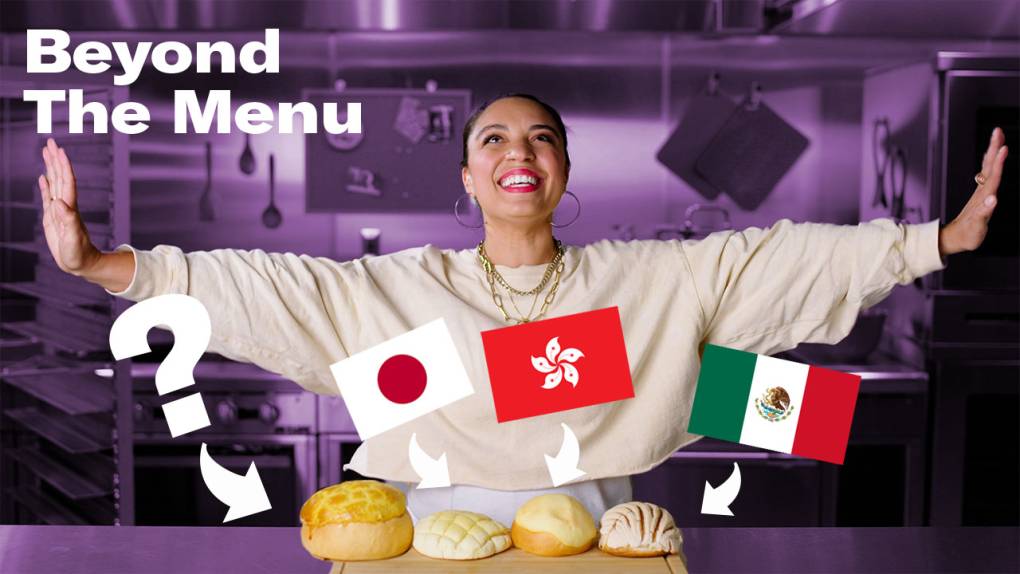
Beyond The Menu
How Pretzels Went From Human Sacrifice To Beer Gardens
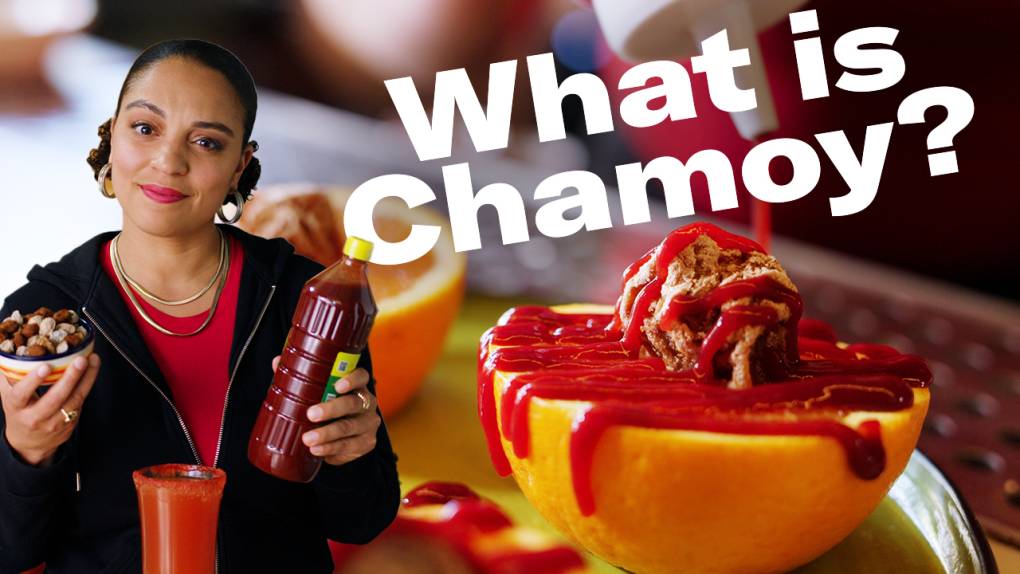
It’s Mexican, Asian, a Candy, a Sauce…It’s Chamoy
This Fiery Hot Sauce Uses a Pepper Lost To History
Chicken and Waffles: from Amish Country to Harlem
The Chilling History of Ice Cream
Your Corn Tortilla Sucks…Science Can Fix It
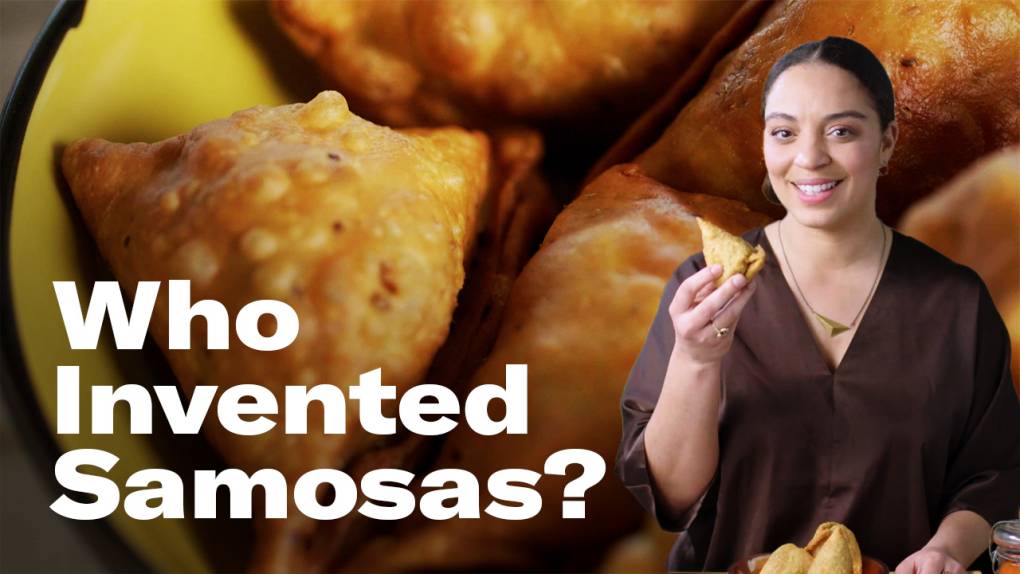
Samosas aren’t from India…Wait, what?
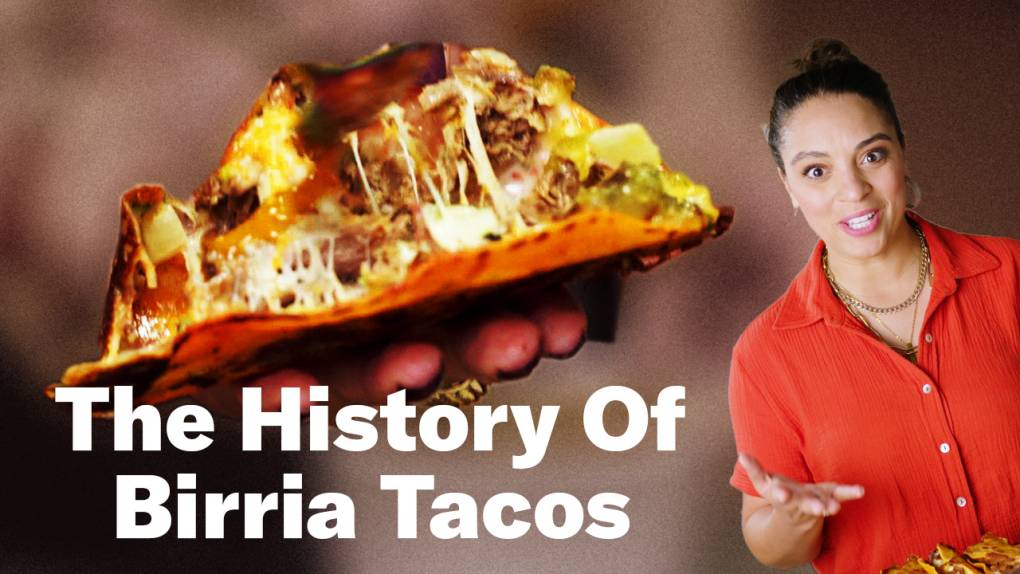
Your Birria Taco Is Ancient History—Here’s Why
Hong Kong’s Most Popular Treat Has A Surprising Backstory
Check, Please! Bay Area
Check, Please! Bay Area reviews: Ole's Waffle Shop, Korean Superette, Pazzo
Check, Please! Bay Area reviews: Merchant Roots, T’Chaka, Creekside Bakery
Check, Please! Bay Area reviews: Funky Elephant, Y’s Choice, Jim’s by MLVS
Check, Please! Bay Area reviews: Fox Tale Fermentation Project, The Bywater, Pyeong Chang Tofu House
Check, Please! Bay Area Begins Its Third Decade With Four New Episodes
Check, Please! Bay Area reviews: Smokin' D's BBQ, Rosalind Bakery, Taishoken Ramen
Check, Please! Bay Area reviews: Sideboard, Tacos Oscar, New Eritrea
Check, Please! Bay Area reviews: Mykonos Meze, Trifecta, Montesacro
Check, Please! Bay Area reviews: Stateline Road Smokehouse, Stockhome, Bar Sprezzatura
Recipes
We Take on Rancho Gordo's Fussiest Heirloom Bean (with Apologies to Kelly Clarkson)
We Recreate Maya Angelou's Magic Lemon Meringue Pie
Creep Out Your Halloween Party Guests With These "Horrors d'oeuvres"
Hong Kong’s Most Popular Treat Has A Surprising Backstory
Get Cozy with Jacques Pépin's Pea Pod Soup Recipe
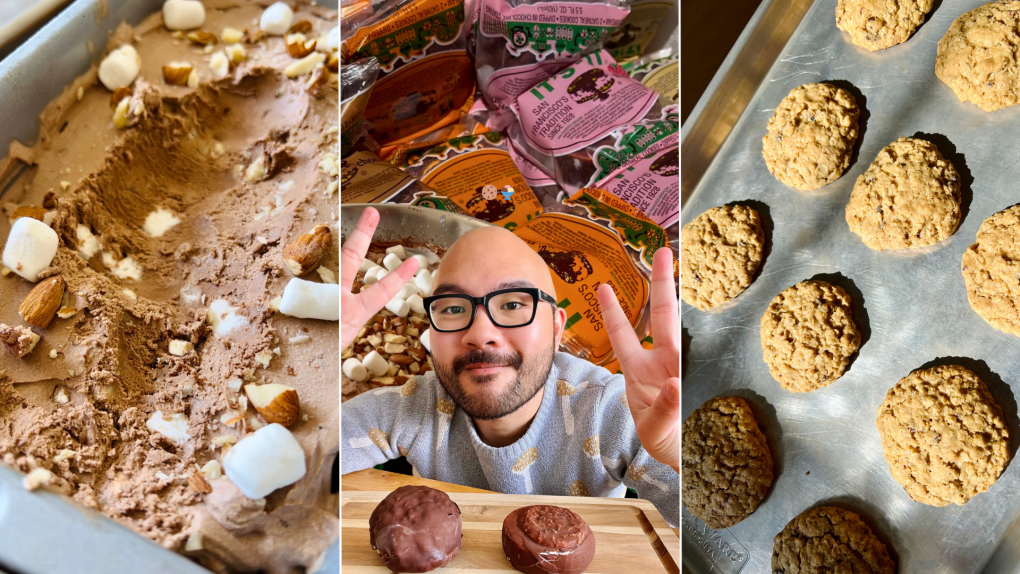
We Recreated an It's-It Ice Cream Sandwich at Home — With an Oakland Twist.
Jacques Pépin's Tips for Perfectly Cooked Eggs
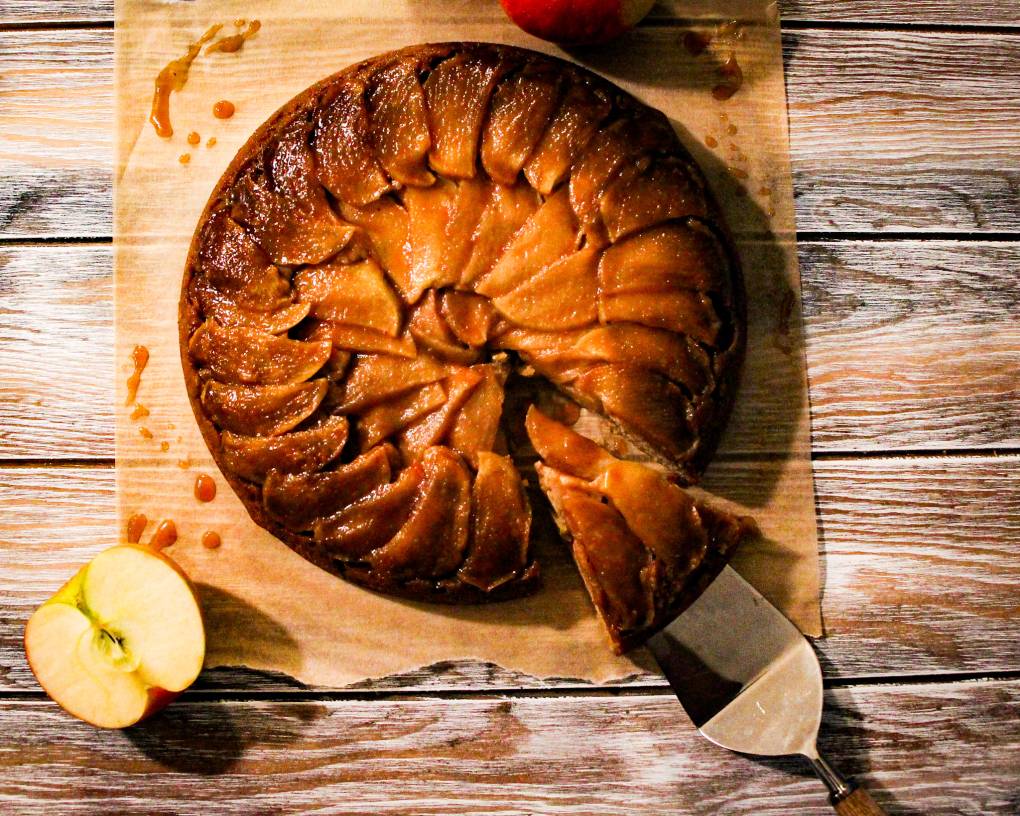
Spiced Apple Upside Down Cake is a Gorgeous and Delicious Holiday Recipe
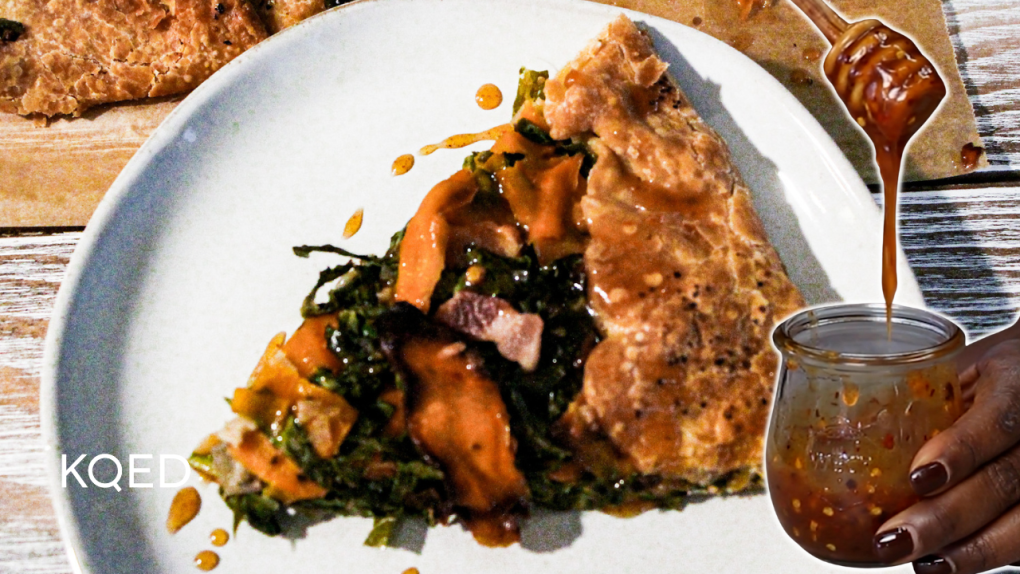
This Sweet Potato Galette with Hot Honey is a Cozy Fall Treat
Golden State Plate
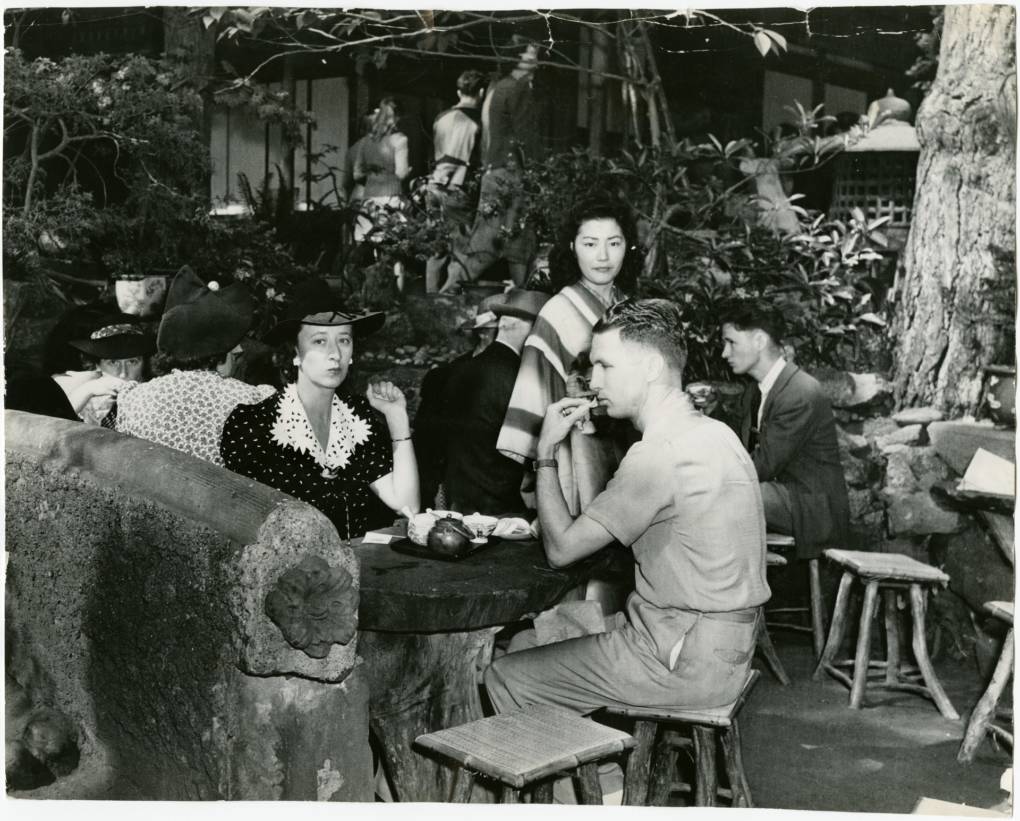
Bay Area Foodie Culture Goes Way Further Back Than California Cuisine
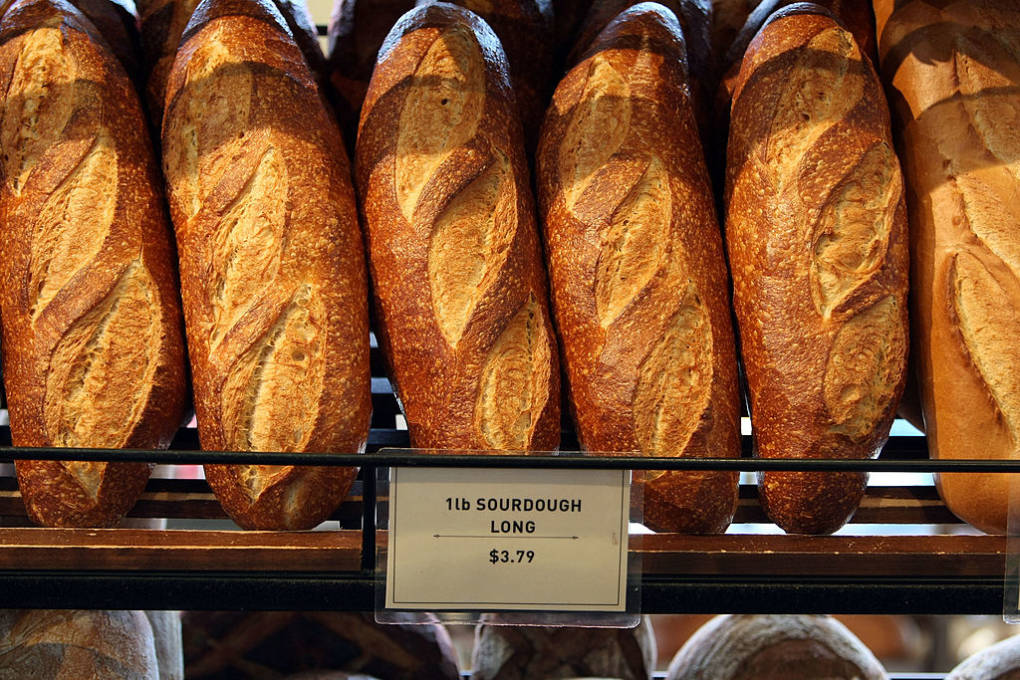
How Rice-A-Roni Became The San Francisco Treat
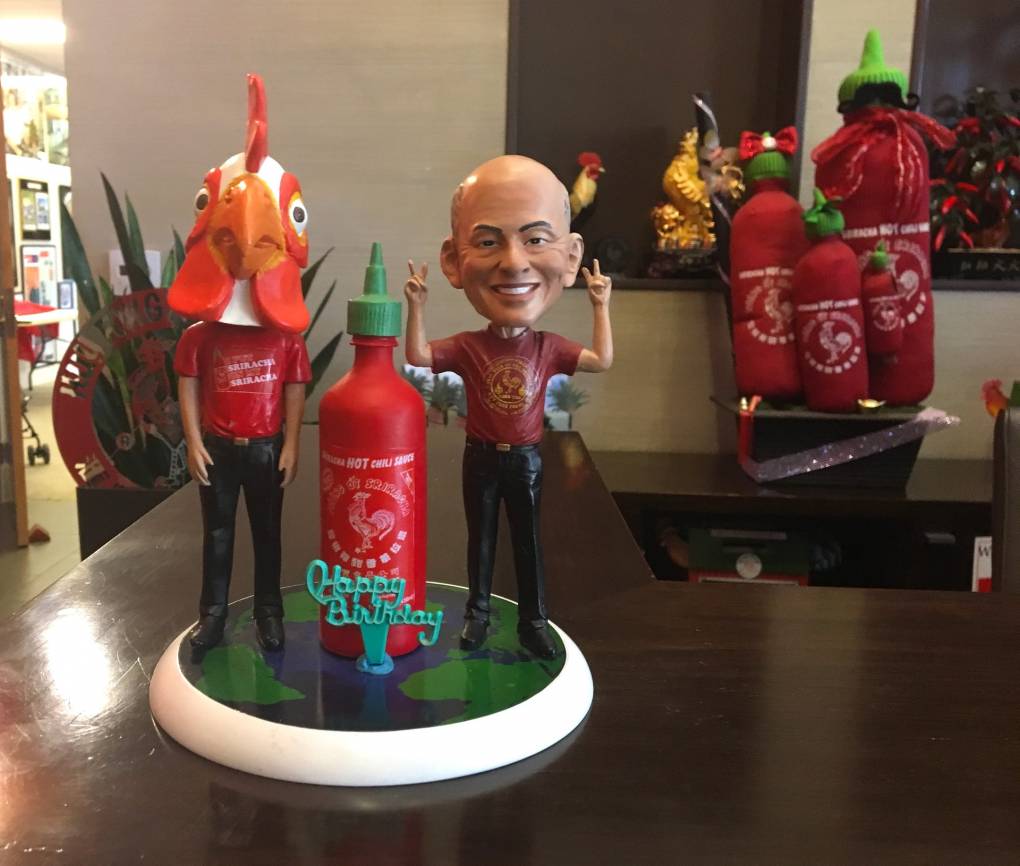
Golden State Plate: Sriracha’s Journey From Southeast Asia to Southern California
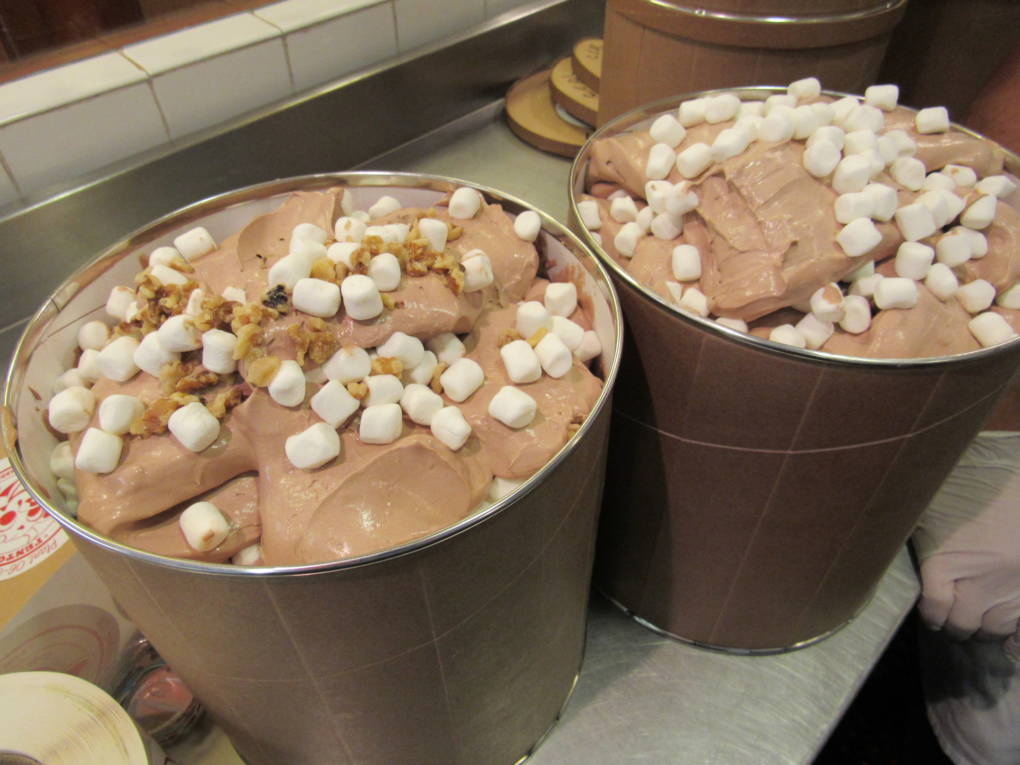
Golden State Plate: Rocky Road Ice Cream's Bumpy History
Golden State Plate – The Backstory Behind California-Born Food and Drinks
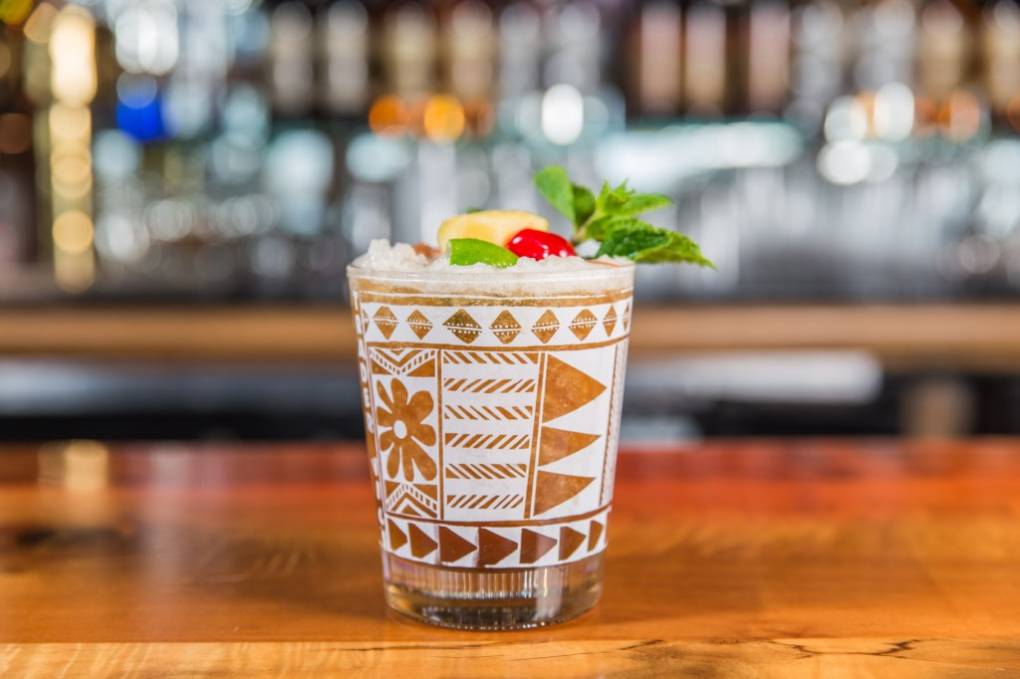
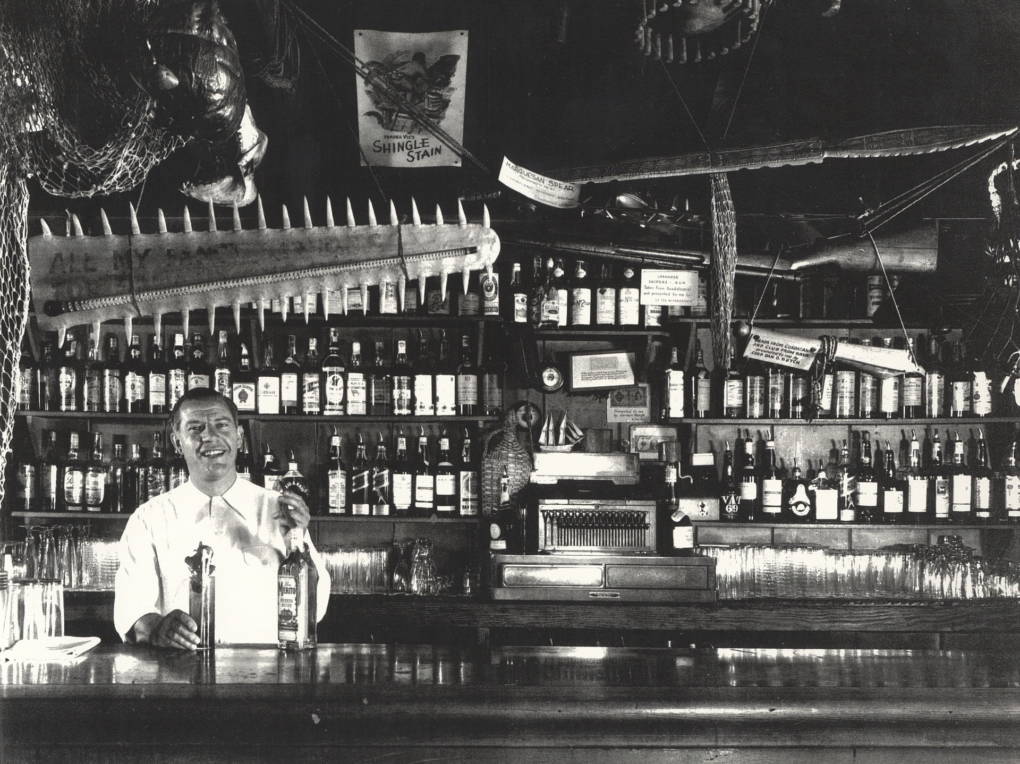
Yes, Your 'Tropical' Mai Tai Was Invented Here in Oakland
An Island Drink With California Roots: The Mai Tai Turns 75
Unwrapping the California Origins of the Fortune Cookie
Golden State Plate: Santa Maria Barbecue, It's Not Just Tri-Tip
Player sponsored by
window.__IS_SSR__=true
window.__INITIAL_STATE__={
"attachmentsReducer": {
"audio_0": {
"type": "attachments",
"id": "audio_0",
"imgSizes": {
"kqedFullSize": {
"file": "https://ww2.kqed.org/news/wp-content/themes/KQED-unified/img/audio_bgs/background0.jpg"
}
}
},
"audio_1": {
"type": "attachments",
"id": "audio_1",
"imgSizes": {
"kqedFullSize": {
"file": "https://ww2.kqed.org/news/wp-content/themes/KQED-unified/img/audio_bgs/background1.jpg"
}
}
},
"audio_2": {
"type": "attachments",
"id": "audio_2",
"imgSizes": {
"kqedFullSize": {
"file": "https://ww2.kqed.org/news/wp-content/themes/KQED-unified/img/audio_bgs/background2.jpg"
}
}
},
"audio_3": {
"type": "attachments",
"id": "audio_3",
"imgSizes": {
"kqedFullSize": {
"file": "https://ww2.kqed.org/news/wp-content/themes/KQED-unified/img/audio_bgs/background3.jpg"
}
}
},
"audio_4": {
"type": "attachments",
"id": "audio_4",
"imgSizes": {
"kqedFullSize": {
"file": "https://ww2.kqed.org/news/wp-content/themes/KQED-unified/img/audio_bgs/background4.jpg"
}
}
},
"placeholder": {
"type": "attachments",
"id": "placeholder",
"imgSizes": {
"thumbnail": {
"file": "https://cdn.kqed.org/wp-content/uploads/2024/12/KQED-Default-Image-816638274-2000x1333-1-160x107.jpg",
"width": 160,
"height": 107,
"mimeType": "image/jpeg"
},
"medium": {
"file": "https://cdn.kqed.org/wp-content/uploads/2024/12/KQED-Default-Image-816638274-2000x1333-1-800x533.jpg",
"width": 800,
"height": 533,
"mimeType": "image/jpeg"
},
"medium_large": {
"file": "https://cdn.kqed.org/wp-content/uploads/2024/12/KQED-Default-Image-816638274-2000x1333-1-768x512.jpg",
"width": 768,
"height": 512,
"mimeType": "image/jpeg"
},
"large": {
"file": "https://cdn.kqed.org/wp-content/uploads/2024/12/KQED-Default-Image-816638274-2000x1333-1-1020x680.jpg",
"width": 1020,
"height": 680,
"mimeType": "image/jpeg"
},
"1536x1536": {
"file": "https://cdn.kqed.org/wp-content/uploads/2024/12/KQED-Default-Image-816638274-2000x1333-1-1536x1024.jpg",
"width": 1536,
"height": 1024,
"mimeType": "image/jpeg"
},
"fd-lrg": {
"file": "https://cdn.kqed.org/wp-content/uploads/2024/12/KQED-Default-Image-816638274-2000x1333-1-1536x1024.jpg",
"width": 1536,
"height": 1024,
"mimeType": "image/jpeg"
},
"fd-med": {
"file": "https://cdn.kqed.org/wp-content/uploads/2024/12/KQED-Default-Image-816638274-2000x1333-1-1020x680.jpg",
"width": 1020,
"height": 680,
"mimeType": "image/jpeg"
},
"fd-sm": {
"file": "https://cdn.kqed.org/wp-content/uploads/2024/12/KQED-Default-Image-816638274-2000x1333-1-800x533.jpg",
"width": 800,
"height": 533,
"mimeType": "image/jpeg"
},
"post-thumbnail": {
"file": "https://cdn.kqed.org/wp-content/uploads/2024/12/KQED-Default-Image-816638274-2000x1333-1-672x372.jpg",
"width": 672,
"height": 372,
"mimeType": "image/jpeg"
},
"twentyfourteen-full-width": {
"file": "https://cdn.kqed.org/wp-content/uploads/2024/12/KQED-Default-Image-816638274-2000x1333-1-1038x576.jpg",
"width": 1038,
"height": 576,
"mimeType": "image/jpeg"
},
"xxsmall": {
"file": "https://cdn.kqed.org/wp-content/uploads/2024/12/KQED-Default-Image-816638274-2000x1333-1-160x107.jpg",
"width": 160,
"height": 107,
"mimeType": "image/jpeg"
},
"xsmall": {
"file": "https://cdn.kqed.org/wp-content/uploads/2024/12/KQED-Default-Image-816638274-2000x1333-1-672x372.jpg",
"width": 672,
"height": 372,
"mimeType": "image/jpeg"
},
"small": {
"file": "https://cdn.kqed.org/wp-content/uploads/2024/12/KQED-Default-Image-816638274-2000x1333-1-672x372.jpg",
"width": 672,
"height": 372,
"mimeType": "image/jpeg"
},
"xlarge": {
"file": "https://cdn.kqed.org/wp-content/uploads/2024/12/KQED-Default-Image-816638274-2000x1333-1-1020x680.jpg",
"width": 1020,
"height": 680,
"mimeType": "image/jpeg"
},
"full-width": {
"file": "https://cdn.kqed.org/wp-content/uploads/2024/12/KQED-Default-Image-816638274-2000x1333-1-1920x1280.jpg",
"width": 1920,
"height": 1280,
"mimeType": "image/jpeg"
},
"guest-author-32": {
"file": "https://cdn.kqed.org/wp-content/uploads/2025/01/KQED-Default-Image-816638274-1333x1333-1-160x160.jpg",
"width": 32,
"height": 32,
"mimeType": "image/jpeg"
},
"guest-author-50": {
"file": "https://cdn.kqed.org/wp-content/uploads/2025/01/KQED-Default-Image-816638274-1333x1333-1-160x160.jpg",
"width": 50,
"height": 50,
"mimeType": "image/jpeg"
},
"guest-author-64": {
"file": "https://cdn.kqed.org/wp-content/uploads/2025/01/KQED-Default-Image-816638274-1333x1333-1-160x160.jpg",
"width": 64,
"height": 64,
"mimeType": "image/jpeg"
},
"guest-author-96": {
"file": "https://cdn.kqed.org/wp-content/uploads/2025/01/KQED-Default-Image-816638274-1333x1333-1-160x160.jpg",
"width": 96,
"height": 96,
"mimeType": "image/jpeg"
},
"guest-author-128": {
"file": "https://cdn.kqed.org/wp-content/uploads/2025/01/KQED-Default-Image-816638274-1333x1333-1-160x160.jpg",
"width": 128,
"height": 128,
"mimeType": "image/jpeg"
},
"detail": {
"file": "https://cdn.kqed.org/wp-content/uploads/2025/01/KQED-Default-Image-816638274-1333x1333-1-160x160.jpg",
"width": 160,
"height": 160,
"mimeType": "image/jpeg"
},
"kqedFullSize": {
"file": "https://cdn.kqed.org/wp-content/uploads/2024/12/KQED-Default-Image-816638274-2000x1333-1.jpg",
"width": 2000,
"height": 1333
}
}
},
"root-site_24654": {
"type": "attachments",
"id": "root-site_24654",
"meta": {
"index": "attachments_1716263798",
"site": "root-site",
"id": "24654",
"found": true
},
"parent": 0,
"imgSizes": {
"twentyfourteen-full-width": {
"file": "https://cdn.kqed.org/wp-content/uploads/2024/03/KC-W1_Lechon-Kawali-Tacos_Mestiza_credit-Albert-Law-1020x681-1-1020x576.jpeg",
"width": 1020,
"mimeType": "image/jpeg",
"height": 576
},
"thumbnail": {
"file": "https://cdn.kqed.org/wp-content/uploads/2024/03/KC-W1_Lechon-Kawali-Tacos_Mestiza_credit-Albert-Law-1020x681-1-160x107.jpeg",
"width": 160,
"mimeType": "image/jpeg",
"height": 107
},
"post-thumbnail": {
"file": "https://cdn.kqed.org/wp-content/uploads/2024/03/KC-W1_Lechon-Kawali-Tacos_Mestiza_credit-Albert-Law-1020x681-1-672x372.jpeg",
"width": 672,
"mimeType": "image/jpeg",
"height": 372
},
"kqedFullSize": {
"file": "https://cdn.kqed.org/wp-content/uploads/2024/03/KC-W1_Lechon-Kawali-Tacos_Mestiza_credit-Albert-Law-1020x681-1.jpeg",
"width": 1020,
"height": 681
},
"medium": {
"file": "https://cdn.kqed.org/wp-content/uploads/2024/03/KC-W1_Lechon-Kawali-Tacos_Mestiza_credit-Albert-Law-1020x681-1-800x534.jpeg",
"width": 800,
"mimeType": "image/jpeg",
"height": 534
},
"medium_large": {
"file": "https://cdn.kqed.org/wp-content/uploads/2024/03/KC-W1_Lechon-Kawali-Tacos_Mestiza_credit-Albert-Law-1020x681-1-768x513.jpeg",
"width": 768,
"mimeType": "image/jpeg",
"height": 513
}
},
"publishDate": 1711753666,
"modified": 1711753666,
"caption": null,
"description": null,
"title": "KC-W1_Lechon-Kawali-Tacos_Mestiza_credit-Albert-Law-1020x681",
"credit": null,
"status": "inherit",
"altTag": null,
"isLoading": false,
"fetchFailed": false
},
"arts_13991041": {
"type": "attachments",
"id": "arts_13991041",
"meta": {
"index": "attachments_1716263798",
"site": "arts",
"id": "13991041",
"found": true
},
"title": "spread rotated_jason perry",
"publishDate": 1782275132,
"status": "inherit",
"parent": 13990975,
"modified": 1782275475,
"caption": "A spread of hearty Ukrainian courtesy of cookbook author Anna Voloshyna, whose residency at Napa's Oxbow Market will run through the end of July 2026.",
"credit": "Jason Perry",
"altTag": "Overhead view of a spread of colorful Ukrainian dishes, including a bowl of bright pink borscht in the center.",
"description": null,
"imgSizes": {
"thumbnail": {
"file": "https://cdn.kqed.org/wp-content/uploads/sites/2/2026/06/spread-rotated_jason-perry-160x114.jpg",
"width": 160,
"height": 114,
"mimeType": "image/jpeg"
},
"medium_large": {
"file": "https://cdn.kqed.org/wp-content/uploads/sites/2/2026/06/spread-rotated_jason-perry-768x549.jpg",
"width": 768,
"height": 549,
"mimeType": "image/jpeg"
},
"1536x1536": {
"file": "https://cdn.kqed.org/wp-content/uploads/sites/2/2026/06/spread-rotated_jason-perry-1536x1097.jpg",
"width": 1536,
"height": 1097,
"mimeType": "image/jpeg"
},
"post-thumbnail": {
"file": "https://cdn.kqed.org/wp-content/uploads/sites/2/2026/06/spread-rotated_jason-perry-672x372.jpg",
"width": 672,
"height": 372,
"mimeType": "image/jpeg"
},
"twentyfourteen-full-width": {
"file": "https://cdn.kqed.org/wp-content/uploads/sites/2/2026/06/spread-rotated_jason-perry-1038x576.jpg",
"width": 1038,
"height": 576,
"mimeType": "image/jpeg"
},
"npr-cds-wide": {
"file": "https://cdn.kqed.org/wp-content/uploads/sites/2/2026/06/spread-rotated_jason-perry-1200x675.jpg",
"width": 1200,
"height": 675,
"mimeType": "image/jpeg"
},
"npr-cds-square": {
"file": "https://cdn.kqed.org/wp-content/uploads/sites/2/2026/06/spread-rotated_jason-perry-600x600.jpg",
"width": 600,
"height": 600,
"mimeType": "image/jpeg"
},
"kqedFullSize": {
"file": "https://cdn.kqed.org/wp-content/uploads/sites/2/2026/06/spread-rotated_jason-perry.jpg",
"width": 2000,
"height": 1429
}
},
"isLoading": false,
"fetchFailed": false
},
"arts_13990910": {
"type": "attachments",
"id": "arts_13990910",
"meta": {
"index": "attachments_1716263798",
"site": "arts",
"id": "13990910",
"found": true
},
"title": "as kneaded quiche lead",
"publishDate": 1781823760,
"status": "inherit",
"parent": 13990903,
"modified": 1781823879,
"caption": "Located inside the main branch of the San Leandro library, As Kneaded Cafe serves a stellar quiche Lorraine.",
"credit": "Luke Tsai/KQED",
"altTag": "Thick slice of quiche and a cup of coffee on a table inside a sunny cafe.",
"description": null,
"imgSizes": {
"thumbnail": {
"file": "https://cdn.kqed.org/wp-content/uploads/sites/2/2026/06/as-kneaded-quiche-lead-160x120.jpg",
"width": 160,
"height": 120,
"mimeType": "image/jpeg"
},
"medium_large": {
"file": "https://cdn.kqed.org/wp-content/uploads/sites/2/2026/06/as-kneaded-quiche-lead-768x576.jpg",
"width": 768,
"height": 576,
"mimeType": "image/jpeg"
},
"1536x1536": {
"file": "https://cdn.kqed.org/wp-content/uploads/sites/2/2026/06/as-kneaded-quiche-lead-1536x1152.jpg",
"width": 1536,
"height": 1152,
"mimeType": "image/jpeg"
},
"post-thumbnail": {
"file": "https://cdn.kqed.org/wp-content/uploads/sites/2/2026/06/as-kneaded-quiche-lead-672x372.jpg",
"width": 672,
"height": 372,
"mimeType": "image/jpeg"
},
"twentyfourteen-full-width": {
"file": "https://cdn.kqed.org/wp-content/uploads/sites/2/2026/06/as-kneaded-quiche-lead-1038x576.jpg",
"width": 1038,
"height": 576,
"mimeType": "image/jpeg"
},
"npr-cds-wide": {
"file": "https://cdn.kqed.org/wp-content/uploads/sites/2/2026/06/as-kneaded-quiche-lead-1200x675.jpg",
"width": 1200,
"height": 675,
"mimeType": "image/jpeg"
},
"npr-cds-square": {
"file": "https://cdn.kqed.org/wp-content/uploads/sites/2/2026/06/as-kneaded-quiche-lead-600x600.jpg",
"width": 600,
"height": 600,
"mimeType": "image/jpeg"
},
"kqedFullSize": {
"file": "https://cdn.kqed.org/wp-content/uploads/sites/2/2026/06/as-kneaded-quiche-lead.jpg",
"width": 2000,
"height": 1500
}
},
"isLoading": false,
"fetchFailed": false
},
"news_12087846": {
"type": "attachments",
"id": "news_12087846",
"meta": {
"index": "attachments_1716263798",
"site": "news",
"id": "12087846",
"found": true
},
"title": "260616-SFAffordableGroceries-04-BL-KQED",
"publishDate": 1781643271,
"status": "inherit",
"parent": 0,
"modified": 1781643342,
"caption": "Store owner Satwinder Multani stocks produce at Dalda’s Community Market in San Francisco’s Tenderloin neighborhood on June 16, 2026. The market offers fresh produce and other healthy food options in a neighborhood with limited grocery access.",
"credit": "Beth LaBerge/KQED",
"altTag": null,
"description": null,
"imgSizes": {
"thumbnail": {
"file": "https://cdn.kqed.org/wp-content/uploads/sites/10/2026/06/260616-SFAffordableGroceries-04-BL-KQED-160x107.jpg",
"width": 160,
"height": 107,
"mimeType": "image/jpeg"
},
"1536x1536": {
"file": "https://cdn.kqed.org/wp-content/uploads/sites/10/2026/06/260616-SFAffordableGroceries-04-BL-KQED-1536x1024.jpg",
"width": 1536,
"height": 1024,
"mimeType": "image/jpeg"
},
"post-thumbnail": {
"file": "https://cdn.kqed.org/wp-content/uploads/sites/10/2026/06/260616-SFAffordableGroceries-04-BL-KQED-672x372.jpg",
"width": 672,
"height": 372,
"mimeType": "image/jpeg"
},
"twentyfourteen-full-width": {
"file": "https://cdn.kqed.org/wp-content/uploads/sites/10/2026/06/260616-SFAffordableGroceries-04-BL-KQED-1038x576.jpg",
"width": 1038,
"height": 576,
"mimeType": "image/jpeg"
},
"npr-cds-wide": {
"file": "https://cdn.kqed.org/wp-content/uploads/sites/10/2026/06/260616-SFAffordableGroceries-04-BL-KQED-1200x675.jpg",
"width": 1200,
"height": 675,
"mimeType": "image/jpeg"
},
"npr-cds-square": {
"file": "https://cdn.kqed.org/wp-content/uploads/sites/10/2026/06/260616-SFAffordableGroceries-04-BL-KQED-600x600.jpg",
"width": 600,
"height": 600,
"mimeType": "image/jpeg"
},
"kqedFullSize": {
"file": "https://cdn.kqed.org/wp-content/uploads/sites/10/2026/06/260616-SFAffordableGroceries-04-BL-KQED.jpg",
"width": 2000,
"height": 1333
}
},
"isLoading": false,
"fetchFailed": false
},
"arts_13990721": {
"type": "attachments",
"id": "arts_13990721",
"meta": {
"index": "attachments_1716263798",
"site": "arts",
"id": "13990721",
"found": true
},
"title": "PintsOfLove2-crop",
"publishDate": 1781220670,
"status": "inherit",
"parent": 13990715,
"modified": 1781220815,
"caption": "Pints of Joy is known for its wide selection of Indian-inspired ice cream flavors. The original Sunnyvale location stays open until 11 p.m. on weekends.",
"credit": "Thien Pham",
"altTag": "Illustration: Two men eagerly eating many varieties of ice cream.",
"description": null,
"imgSizes": {
"thumbnail": {
"file": "https://cdn.kqed.org/wp-content/uploads/sites/2/2026/06/PintsOfLove2-crop-160x107.jpg",
"width": 160,
"height": 107,
"mimeType": "image/jpeg"
},
"medium_large": {
"file": "https://cdn.kqed.org/wp-content/uploads/sites/2/2026/06/PintsOfLove2-crop-768x512.jpg",
"width": 768,
"height": 512,
"mimeType": "image/jpeg"
},
"1536x1536": {
"file": "https://cdn.kqed.org/wp-content/uploads/sites/2/2026/06/PintsOfLove2-crop-1536x1024.jpg",
"width": 1536,
"height": 1024,
"mimeType": "image/jpeg"
},
"post-thumbnail": {
"file": "https://cdn.kqed.org/wp-content/uploads/sites/2/2026/06/PintsOfLove2-crop-672x372.jpg",
"width": 672,
"height": 372,
"mimeType": "image/jpeg"
},
"twentyfourteen-full-width": {
"file": "https://cdn.kqed.org/wp-content/uploads/sites/2/2026/06/PintsOfLove2-crop-1038x576.jpg",
"width": 1038,
"height": 576,
"mimeType": "image/jpeg"
},
"npr-cds-wide": {
"file": "https://cdn.kqed.org/wp-content/uploads/sites/2/2026/06/PintsOfLove2-crop-1200x675.jpg",
"width": 1200,
"height": 675,
"mimeType": "image/jpeg"
},
"npr-cds-square": {
"file": "https://cdn.kqed.org/wp-content/uploads/sites/2/2026/06/PintsOfLove2-crop-600x600.jpg",
"width": 600,
"height": 600,
"mimeType": "image/jpeg"
},
"kqedFullSize": {
"file": "https://cdn.kqed.org/wp-content/uploads/sites/2/2026/06/PintsOfLove2-crop.jpg",
"width": 1920,
"height": 1280
}
},
"isLoading": false,
"fetchFailed": false
},
"arts_13990675": {
"type": "attachments",
"id": "arts_13990675",
"meta": {
"index": "attachments_1716263798",
"site": "arts",
"id": "13990675",
"found": true
},
"title": "Jollof Rice",
"publishDate": 1781049907,
"status": "inherit",
"parent": 13990663,
"modified": 1781050265,
"caption": "One of FolaFela's best dishes is its bold, smoky jollof rice. The San José newcomer is the South Bay's first Nigerian restaurant.",
"credit": "Octavio Peña",
"altTag": "Reddish-orange jollof rice and a chicken leg served on a white plate.",
"description": null,
"imgSizes": {
"thumbnail": {
"file": "https://cdn.kqed.org/wp-content/uploads/sites/2/2026/06/Jollof-Rice-160x74.jpg",
"width": 160,
"height": 74,
"mimeType": "image/jpeg"
},
"medium_large": {
"file": "https://cdn.kqed.org/wp-content/uploads/sites/2/2026/06/Jollof-Rice-768x355.jpg",
"width": 768,
"height": 355,
"mimeType": "image/jpeg"
},
"1536x1536": {
"file": "https://cdn.kqed.org/wp-content/uploads/sites/2/2026/06/Jollof-Rice-1536x710.jpg",
"width": 1536,
"height": 710,
"mimeType": "image/jpeg"
},
"post-thumbnail": {
"file": "https://cdn.kqed.org/wp-content/uploads/sites/2/2026/06/Jollof-Rice-672x372.jpg",
"width": 672,
"height": 372,
"mimeType": "image/jpeg"
},
"twentyfourteen-full-width": {
"file": "https://cdn.kqed.org/wp-content/uploads/sites/2/2026/06/Jollof-Rice-1038x576.jpg",
"width": 1038,
"height": 576,
"mimeType": "image/jpeg"
},
"npr-cds-wide": {
"file": "https://cdn.kqed.org/wp-content/uploads/sites/2/2026/06/Jollof-Rice-1200x675.jpg",
"width": 1200,
"height": 675,
"mimeType": "image/jpeg"
},
"npr-cds-square": {
"file": "https://cdn.kqed.org/wp-content/uploads/sites/2/2026/06/Jollof-Rice-600x600.jpg",
"width": 600,
"height": 600,
"mimeType": "image/jpeg"
},
"kqedFullSize": {
"file": "https://cdn.kqed.org/wp-content/uploads/sites/2/2026/06/Jollof-Rice.jpg",
"width": 2000,
"height": 924
}
},
"isLoading": false,
"fetchFailed": false
},
"news_12086641": {
"type": "attachments",
"id": "news_12086641",
"meta": {
"index": "attachments_1716263798",
"site": "news",
"id": "12086641",
"found": true
},
"title": "Takoma Park Middle school students eating cafeteria lunch.",
"publishDate": 1780960751,
"status": "inherit",
"parent": 12086417,
"modified": 1780964693,
"caption": "Takoma Park Middle School students have the option of eating a regular hot lunch or buying chips or other snacks on the side. Students eating cafeteria lunch at Takoma Park Middle School in Takoma Park, Maryland, on Jan. 31, 2013. Schools in Montgomery County still serve snack foods to students during lunch.",
"credit": "Juana Arias for the Washington Post via Getty Images",
"altTag": null,
"description": null,
"imgSizes": {
"thumbnail": {
"file": "https://cdn.kqed.org/wp-content/uploads/sites/10/2026/06/SummerMealsGetty-160x112.jpg",
"width": 160,
"height": 112,
"mimeType": "image/jpeg"
},
"1536x1536": {
"file": "https://cdn.kqed.org/wp-content/uploads/sites/10/2026/06/SummerMealsGetty-1536x1075.jpg",
"width": 1536,
"height": 1075,
"mimeType": "image/jpeg"
},
"post-thumbnail": {
"file": "https://cdn.kqed.org/wp-content/uploads/sites/10/2026/06/SummerMealsGetty-672x372.jpg",
"width": 672,
"height": 372,
"mimeType": "image/jpeg"
},
"twentyfourteen-full-width": {
"file": "https://cdn.kqed.org/wp-content/uploads/sites/10/2026/06/SummerMealsGetty-1038x576.jpg",
"width": 1038,
"height": 576,
"mimeType": "image/jpeg"
},
"npr-cds-wide": {
"file": "https://cdn.kqed.org/wp-content/uploads/sites/10/2026/06/SummerMealsGetty-1200x675.jpg",
"width": 1200,
"height": 675,
"mimeType": "image/jpeg"
},
"npr-cds-square": {
"file": "https://cdn.kqed.org/wp-content/uploads/sites/10/2026/06/SummerMealsGetty-600x600.jpg",
"width": 600,
"height": 600,
"mimeType": "image/jpeg"
},
"kqedFullSize": {
"file": "https://cdn.kqed.org/wp-content/uploads/sites/10/2026/06/SummerMealsGetty.jpg",
"width": 2000,
"height": 1400
}
},
"isLoading": false,
"fetchFailed": false
},
"arts_13990277": {
"type": "attachments",
"id": "arts_13990277",
"meta": {
"index": "attachments_1716263798",
"site": "arts",
"id": "13990277",
"found": true
},
"title": "TitaBeccas2-crop",
"publishDate": 1780019661,
"status": "inherit",
"parent": 13990274,
"modified": 1780020087,
"caption": "In downtown Oakland, Tita Becca's serves some of the tastiest homestyle Filipino food in the Bay Area — until as late as 2 a.m. on weekends.",
"credit": "Thien Pham",
"altTag": "Illustration: Man devouring a shrimp lumpia while seating a diner counter.",
"description": null,
"imgSizes": {
"thumbnail": {
"file": "https://cdn.kqed.org/wp-content/uploads/sites/2/2026/05/TitaBeccas2-crop-160x107.jpg",
"width": 160,
"height": 107,
"mimeType": "image/jpeg"
},
"medium_large": {
"file": "https://cdn.kqed.org/wp-content/uploads/sites/2/2026/05/TitaBeccas2-crop-768x512.jpg",
"width": 768,
"height": 512,
"mimeType": "image/jpeg"
},
"1536x1536": {
"file": "https://cdn.kqed.org/wp-content/uploads/sites/2/2026/05/TitaBeccas2-crop-1536x1024.jpg",
"width": 1536,
"height": 1024,
"mimeType": "image/jpeg"
},
"post-thumbnail": {
"file": "https://cdn.kqed.org/wp-content/uploads/sites/2/2026/05/TitaBeccas2-crop-672x372.jpg",
"width": 672,
"height": 372,
"mimeType": "image/jpeg"
},
"twentyfourteen-full-width": {
"file": "https://cdn.kqed.org/wp-content/uploads/sites/2/2026/05/TitaBeccas2-crop-1038x576.jpg",
"width": 1038,
"height": 576,
"mimeType": "image/jpeg"
},
"npr-cds-wide": {
"file": "https://cdn.kqed.org/wp-content/uploads/sites/2/2026/05/TitaBeccas2-crop-1200x675.jpg",
"width": 1200,
"height": 675,
"mimeType": "image/jpeg"
},
"npr-cds-square": {
"file": "https://cdn.kqed.org/wp-content/uploads/sites/2/2026/05/TitaBeccas2-crop-600x600.jpg",
"width": 600,
"height": 600,
"mimeType": "image/jpeg"
},
"kqedFullSize": {
"file": "https://cdn.kqed.org/wp-content/uploads/sites/2/2026/05/TitaBeccas2-crop.jpg",
"width": 1920,
"height": 1280
}
},
"isLoading": false,
"fetchFailed": false
},
"arts_13990237": {
"type": "attachments",
"id": "arts_13990237",
"meta": {
"index": "attachments_1716263798",
"site": "arts",
"id": "13990237",
"found": true
},
"title": "mango happiness",
"publishDate": 1779990999,
"status": "inherit",
"parent": 13990218,
"modified": 1780156996,
"caption": "Partygoers eating mangoes at the 2025 edition of an annual mango party in San Francisco's Mission District. This year's party will take place on May 31, 2026. Pictured from left: Aadil Ali, Tanay Desai and Meeki Lad",
"credit": "Courtesy of Deep Mehta",
"altTag": "Large group of people eating mangoes in a park.",
"description": null,
"imgSizes": {
"thumbnail": {
"file": "https://cdn.kqed.org/wp-content/uploads/sites/2/2026/05/mango-happiness-160x106.jpg",
"width": 160,
"height": 106,
"mimeType": "image/jpeg"
},
"medium_large": {
"file": "https://cdn.kqed.org/wp-content/uploads/sites/2/2026/05/mango-happiness-768x509.jpg",
"width": 768,
"height": 509,
"mimeType": "image/jpeg"
},
"1536x1536": {
"file": "https://cdn.kqed.org/wp-content/uploads/sites/2/2026/05/mango-happiness-1536x1018.jpg",
"width": 1536,
"height": 1018,
"mimeType": "image/jpeg"
},
"post-thumbnail": {
"file": "https://cdn.kqed.org/wp-content/uploads/sites/2/2026/05/mango-happiness-672x372.jpg",
"width": 672,
"height": 372,
"mimeType": "image/jpeg"
},
"twentyfourteen-full-width": {
"file": "https://cdn.kqed.org/wp-content/uploads/sites/2/2026/05/mango-happiness-1038x576.jpg",
"width": 1038,
"height": 576,
"mimeType": "image/jpeg"
},
"npr-cds-wide": {
"file": "https://cdn.kqed.org/wp-content/uploads/sites/2/2026/05/mango-happiness-1200x675.jpg",
"width": 1200,
"height": 675,
"mimeType": "image/jpeg"
},
"npr-cds-square": {
"file": "https://cdn.kqed.org/wp-content/uploads/sites/2/2026/05/mango-happiness-600x600.jpg",
"width": 600,
"height": 600,
"mimeType": "image/jpeg"
},
"kqedFullSize": {
"file": "https://cdn.kqed.org/wp-content/uploads/sites/2/2026/05/mango-happiness.jpg",
"width": 2000,
"height": 1326
}
},
"isLoading": false,
"fetchFailed": false
},
"arts_13990181": {
"type": "attachments",
"id": "arts_13990181",
"meta": {
"index": "attachments_1716263798",
"site": "arts",
"id": "13990181",
"found": true
},
"title": "goldpie sausage",
"publishDate": 1779831831,
"status": "inherit",
"parent": 13990167,
"modified": 1779831947,
"caption": "Goldpie's sausage pie is a classic East Coast–style pizza. The pop-up is located at the 7 Stars Holistic Healing Center weed dispensary in Richmond on Sundays and Mondays.",
"credit": "Luke Tsai/KQED",
"altTag": "Overhead view of a sausage pizza with one slice missing.",
"description": null,
"imgSizes": {
"thumbnail": {
"file": "https://cdn.kqed.org/wp-content/uploads/sites/2/2026/05/goldpie-sausage-160x120.jpg",
"width": 160,
"height": 120,
"mimeType": "image/jpeg"
},
"medium_large": {
"file": "https://cdn.kqed.org/wp-content/uploads/sites/2/2026/05/goldpie-sausage-768x576.jpg",
"width": 768,
"height": 576,
"mimeType": "image/jpeg"
},
"1536x1536": {
"file": "https://cdn.kqed.org/wp-content/uploads/sites/2/2026/05/goldpie-sausage-1536x1152.jpg",
"width": 1536,
"height": 1152,
"mimeType": "image/jpeg"
},
"post-thumbnail": {
"file": "https://cdn.kqed.org/wp-content/uploads/sites/2/2026/05/goldpie-sausage-672x372.jpg",
"width": 672,
"height": 372,
"mimeType": "image/jpeg"
},
"twentyfourteen-full-width": {
"file": "https://cdn.kqed.org/wp-content/uploads/sites/2/2026/05/goldpie-sausage-1038x576.jpg",
"width": 1038,
"height": 576,
"mimeType": "image/jpeg"
},
"npr-cds-wide": {
"file": "https://cdn.kqed.org/wp-content/uploads/sites/2/2026/05/goldpie-sausage-1200x675.jpg",
"width": 1200,
"height": 675,
"mimeType": "image/jpeg"
},
"npr-cds-square": {
"file": "https://cdn.kqed.org/wp-content/uploads/sites/2/2026/05/goldpie-sausage-600x600.jpg",
"width": 600,
"height": 600,
"mimeType": "image/jpeg"
},
"kqedFullSize": {
"file": "https://cdn.kqed.org/wp-content/uploads/sites/2/2026/05/goldpie-sausage.jpg",
"width": 2000,
"height": 1500
}
},
"isLoading": false,
"fetchFailed": false
},
"food_1337833": {
"type": "attachments",
"id": "food_1337833",
"meta": {
"index": "attachments_1716263798",
"site": "food",
"id": "1337833",
"found": true
},
"title": "Pretzels 2_2",
"publishDate": 1733179370,
"status": "inherit",
"parent": 1337824,
"modified": 1733179404,
"caption": "Host of Beyond the Menu Cecilia Philips holds up a giant paper mache pretzel and pretends to eat it. ",
"credit": null,
"altTag": "Host of Beyond the Menu, Cecilia Philips is holding a giant paper mache pretzel pretending to eat it. The text on the image reads 'Who Invented Pretzels?'",
"description": "Host of Beyond the Menu Cecilia Philips holds up a giant pretzel and pretends to eat it. ",
"imgSizes": {
"medium": {
"file": "https://cdn.kqed.org/wp-content/uploads/sites/41/2024/12/Pretzels-2_2-800x450.png",
"width": 800,
"height": 450,
"mimeType": "image/png"
},
"large": {
"file": "https://cdn.kqed.org/wp-content/uploads/sites/41/2024/12/Pretzels-2_2-1020x574.png",
"width": 1020,
"height": 574,
"mimeType": "image/png"
},
"thumbnail": {
"file": "https://cdn.kqed.org/wp-content/uploads/sites/41/2024/12/Pretzels-2_2-160x90.png",
"width": 160,
"height": 90,
"mimeType": "image/png"
},
"medium_large": {
"file": "https://cdn.kqed.org/wp-content/uploads/sites/41/2024/12/Pretzels-2_2-768x432.png",
"width": 768,
"height": 432,
"mimeType": "image/png"
},
"post-thumbnail": {
"file": "https://cdn.kqed.org/wp-content/uploads/sites/41/2024/12/Pretzels-2_2-672x372.png",
"width": 672,
"height": 372,
"mimeType": "image/png"
},
"twentyfourteen-full-width": {
"file": "https://cdn.kqed.org/wp-content/uploads/sites/41/2024/12/Pretzels-2_2-1038x576.png",
"width": 1038,
"height": 576,
"mimeType": "image/png"
},
"kqedFullSize": {
"file": "https://cdn.kqed.org/wp-content/uploads/sites/41/2024/12/Pretzels-2_2.png",
"width": 1280,
"height": 720
}
},
"isLoading": false,
"fetchFailed": false
},
"food_1337651": {
"type": "attachments",
"id": "food_1337651",
"meta": {
"index": "attachments_1716263798",
"site": "food",
"id": "1337651",
"found": true
},
"title": "History of Chamoy",
"publishDate": 1718990545,
"status": "inherit",
"parent": 1337646,
"modified": 1718990594,
"caption": "The Asian origins of chamoy, one of Mexico's most beloved condiments",
"credit": "Matt Piniol",
"altTag": "A young light-skinned black woman stands in the foreground holding a bottle of chamoy. In the background, a large bottle of chamoy sauce is squeezed onto half an orange.",
"description": null,
"imgSizes": {
"medium": {
"file": "https://cdn.kqed.org/wp-content/uploads/sites/41/2024/06/Chamoy_thumbnail_text2-800x450.jpg",
"width": 800,
"height": 450,
"mimeType": "image/jpeg"
},
"large": {
"file": "https://cdn.kqed.org/wp-content/uploads/sites/41/2024/06/Chamoy_thumbnail_text2-1020x574.jpg",
"width": 1020,
"height": 574,
"mimeType": "image/jpeg"
},
"thumbnail": {
"file": "https://cdn.kqed.org/wp-content/uploads/sites/41/2024/06/Chamoy_thumbnail_text2-160x90.jpg",
"width": 160,
"height": 90,
"mimeType": "image/jpeg"
},
"medium_large": {
"file": "https://cdn.kqed.org/wp-content/uploads/sites/41/2024/06/Chamoy_thumbnail_text2-768x432.jpg",
"width": 768,
"height": 432,
"mimeType": "image/jpeg"
},
"post-thumbnail": {
"file": "https://cdn.kqed.org/wp-content/uploads/sites/41/2024/06/Chamoy_thumbnail_text2-672x372.jpg",
"width": 672,
"height": 372,
"mimeType": "image/jpeg"
},
"twentyfourteen-full-width": {
"file": "https://cdn.kqed.org/wp-content/uploads/sites/41/2024/06/Chamoy_thumbnail_text2-1038x576.jpg",
"width": 1038,
"height": 576,
"mimeType": "image/jpeg"
},
"kqedFullSize": {
"file": "https://cdn.kqed.org/wp-content/uploads/sites/41/2024/06/Chamoy_thumbnail_text2.jpg",
"width": 1280,
"height": 720
}
},
"isLoading": false,
"fetchFailed": false
},
"food_1337641": {
"type": "attachments",
"id": "food_1337641",
"meta": {
"index": "attachments_1716263798",
"site": "food",
"id": "1337641",
"found": true
},
"title": "Sambal",
"publishDate": 1717789888,
"status": "inherit",
"parent": 1337639,
"modified": 1717790318,
"caption": "Cecilia Phillips explores the roots sambal, a fiery Indonesian hot sauce similar to sriracha.",
"credit": "Matt Piniol",
"altTag": "A young light-skinned black woman with long hair holds chile peppers in two outstretched hands. There is a bowl of spicy chile paste behind her.",
"description": "Cecilia Phillips explores the roots sambal, a fiery Indonesian hot sauce similar to sriracha.",
"imgSizes": {
"medium": {
"file": "https://cdn.kqed.org/wp-content/uploads/sites/41/2024/06/Sambal_Host-800x450.jpg",
"width": 800,
"height": 450,
"mimeType": "image/jpeg"
},
"large": {
"file": "https://cdn.kqed.org/wp-content/uploads/sites/41/2024/06/Sambal_Host-1020x574.jpg",
"width": 1020,
"height": 574,
"mimeType": "image/jpeg"
},
"thumbnail": {
"file": "https://cdn.kqed.org/wp-content/uploads/sites/41/2024/06/Sambal_Host-160x90.jpg",
"width": 160,
"height": 90,
"mimeType": "image/jpeg"
},
"medium_large": {
"file": "https://cdn.kqed.org/wp-content/uploads/sites/41/2024/06/Sambal_Host-768x432.jpg",
"width": 768,
"height": 432,
"mimeType": "image/jpeg"
},
"post-thumbnail": {
"file": "https://cdn.kqed.org/wp-content/uploads/sites/41/2024/06/Sambal_Host-672x372.jpg",
"width": 672,
"height": 372,
"mimeType": "image/jpeg"
},
"twentyfourteen-full-width": {
"file": "https://cdn.kqed.org/wp-content/uploads/sites/41/2024/06/Sambal_Host-1038x576.jpg",
"width": 1038,
"height": 576,
"mimeType": "image/jpeg"
},
"kqedFullSize": {
"file": "https://cdn.kqed.org/wp-content/uploads/sites/41/2024/06/Sambal_Host.jpg",
"width": 1280,
"height": 720
}
},
"isLoading": false,
"fetchFailed": false
},
"food_1337636": {
"type": "attachments",
"id": "food_1337636",
"meta": {
"index": "attachments_1716263798",
"site": "food",
"id": "1337636",
"found": true
},
"title": "CW_ThumbsArtboard 4",
"publishDate": 1716592753,
"status": "inherit",
"parent": 1337630,
"modified": 1716593030,
"caption": "Cecilia Phillips is excited to uncover the savory saga of chicken and waffles",
"credit": "Matt Piniol",
"altTag": "A plate with a piece of fried chicken sitting on top of a waffle next to the show's host, Cecilia Phillips",
"description": "Cecilia Phillips is excited to uncover the savory saga of chicken and waffles",
"imgSizes": {
"medium": {
"file": "https://cdn.kqed.org/wp-content/uploads/sites/41/2024/05/CW_ThumbsArtboard-4-800x450.jpg",
"width": 800,
"height": 450,
"mimeType": "image/jpeg"
},
"large": {
"file": "https://cdn.kqed.org/wp-content/uploads/sites/41/2024/05/CW_ThumbsArtboard-4-1020x574.jpg",
"width": 1020,
"height": 574,
"mimeType": "image/jpeg"
},
"thumbnail": {
"file": "https://cdn.kqed.org/wp-content/uploads/sites/41/2024/05/CW_ThumbsArtboard-4-160x90.jpg",
"width": 160,
"height": 90,
"mimeType": "image/jpeg"
},
"medium_large": {
"file": "https://cdn.kqed.org/wp-content/uploads/sites/41/2024/05/CW_ThumbsArtboard-4-768x432.jpg",
"width": 768,
"height": 432,
"mimeType": "image/jpeg"
},
"post-thumbnail": {
"file": "https://cdn.kqed.org/wp-content/uploads/sites/41/2024/05/CW_ThumbsArtboard-4-672x372.jpg",
"width": 672,
"height": 372,
"mimeType": "image/jpeg"
},
"twentyfourteen-full-width": {
"file": "https://cdn.kqed.org/wp-content/uploads/sites/41/2024/05/CW_ThumbsArtboard-4-1038x576.jpg",
"width": 1038,
"height": 576,
"mimeType": "image/jpeg"
},
"kqedFullSize": {
"file": "https://cdn.kqed.org/wp-content/uploads/sites/41/2024/05/CW_ThumbsArtboard-4.jpg",
"width": 1280,
"height": 720
}
},
"isLoading": false,
"fetchFailed": false
},
"food_1337603": {
"type": "attachments",
"id": "food_1337603",
"meta": {
"index": "attachments_1716263798",
"site": "food",
"id": "1337603",
"found": true
},
"parent": 1337599,
"imgSizes": {
"twentyfourteen-full-width": {
"file": "https://cdn.kqed.org/wp-content/uploads/sites/41/2024/05/Rocky_Road_Thumbs_4-1038x576.jpg",
"width": 1038,
"mimeType": "image/jpeg",
"height": 576
},
"thumbnail": {
"file": "https://cdn.kqed.org/wp-content/uploads/sites/41/2024/05/Rocky_Road_Thumbs_4-160x90.jpg",
"width": 160,
"mimeType": "image/jpeg",
"height": 90
},
"post-thumbnail": {
"file": "https://cdn.kqed.org/wp-content/uploads/sites/41/2024/05/Rocky_Road_Thumbs_4-672x372.jpg",
"width": 672,
"mimeType": "image/jpeg",
"height": 372
},
"kqedFullSize": {
"file": "https://cdn.kqed.org/wp-content/uploads/sites/41/2024/05/Rocky_Road_Thumbs_4.jpg",
"width": 1280,
"height": 720
},
"large": {
"file": "https://cdn.kqed.org/wp-content/uploads/sites/41/2024/05/Rocky_Road_Thumbs_4-1020x574.jpg",
"width": 1020,
"mimeType": "image/jpeg",
"height": 574
},
"medium": {
"file": "https://cdn.kqed.org/wp-content/uploads/sites/41/2024/05/Rocky_Road_Thumbs_4-800x450.jpg",
"width": 800,
"mimeType": "image/jpeg",
"height": 450
},
"medium_large": {
"file": "https://cdn.kqed.org/wp-content/uploads/sites/41/2024/05/Rocky_Road_Thumbs_4-768x432.jpg",
"width": 768,
"mimeType": "image/jpeg",
"height": 432
}
},
"publishDate": 1715643148,
"modified": 1715643458,
"caption": "Cecilia Phillips dives into ice cream's rocky history in the rocky road episode of Beyond The Menu.",
"description": "Cecilia Phillips dives into ice cream's rocky history in the rocky road episode of Beyond The Menu.",
"title": "Rocky_Road_Thumbs_4",
"credit": "Matt Piniol",
"status": "inherit",
"altTag": "A close-up of a metal serving dish with rocky road ice cream scoops topped with marshmallow fluff next to a woman holding a jar of mini marshmallows and almonds in each hand.",
"isLoading": false,
"fetchFailed": false
},
"food_1337594": {
"type": "attachments",
"id": "food_1337594",
"meta": {
"index": "attachments_1716263798",
"site": "food",
"id": "1337594",
"found": true
},
"parent": 1337589,
"imgSizes": {
"twentyfourteen-full-width": {
"file": "https://cdn.kqed.org/wp-content/uploads/sites/41/2024/04/Nixtal_ThumbsArtboard_9-1038x576.jpg",
"width": 1038,
"mimeType": "image/jpeg",
"height": 576
},
"thumbnail": {
"file": "https://cdn.kqed.org/wp-content/uploads/sites/41/2024/04/Nixtal_ThumbsArtboard_9-160x90.jpg",
"width": 160,
"mimeType": "image/jpeg",
"height": 90
},
"post-thumbnail": {
"file": "https://cdn.kqed.org/wp-content/uploads/sites/41/2024/04/Nixtal_ThumbsArtboard_9-672x372.jpg",
"width": 672,
"mimeType": "image/jpeg",
"height": 372
},
"kqedFullSize": {
"file": "https://cdn.kqed.org/wp-content/uploads/sites/41/2024/04/Nixtal_ThumbsArtboard_9.jpg",
"width": 1280,
"height": 720
},
"large": {
"file": "https://cdn.kqed.org/wp-content/uploads/sites/41/2024/04/Nixtal_ThumbsArtboard_9-1020x574.jpg",
"width": 1020,
"mimeType": "image/jpeg",
"height": 574
},
"medium": {
"file": "https://cdn.kqed.org/wp-content/uploads/sites/41/2024/04/Nixtal_ThumbsArtboard_9-800x450.jpg",
"width": 800,
"mimeType": "image/jpeg",
"height": 450
},
"medium_large": {
"file": "https://cdn.kqed.org/wp-content/uploads/sites/41/2024/04/Nixtal_ThumbsArtboard_9-768x432.jpg",
"width": 768,
"mimeType": "image/jpeg",
"height": 432
}
},
"publishDate": 1714176764,
"modified": 1714177065,
"caption": "Cecilia Phillips is excited to tell you about nixtamalization—the ancient science that unlocks the corn tortilla.",
"description": "Cecilia Phillips is excited to tell you about nixtamalization—the ancient science that unlocks the corn tortilla.",
"title": "Nixtal_ThumbsArtboard_9",
"credit": "Matt Piniol",
"status": "inherit",
"altTag": "A close-up of a bag with store-bought corn tortillas next to a woman tearing up a tortilla with her hands.",
"isLoading": false,
"fetchFailed": false
},
"food_1337580": {
"type": "attachments",
"id": "food_1337580",
"meta": {
"index": "attachments_1716263798",
"site": "food",
"id": "1337580",
"found": true
},
"parent": 1337576,
"imgSizes": {
"twentyfourteen-full-width": {
"file": "https://cdn.kqed.org/wp-content/uploads/sites/41/2024/04/Samosas_Thumb_3-1038x576.jpg",
"width": 1038,
"mimeType": "image/jpeg",
"height": 576
},
"thumbnail": {
"file": "https://cdn.kqed.org/wp-content/uploads/sites/41/2024/04/Samosas_Thumb_3-160x90.jpg",
"width": 160,
"mimeType": "image/jpeg",
"height": 90
},
"post-thumbnail": {
"file": "https://cdn.kqed.org/wp-content/uploads/sites/41/2024/04/Samosas_Thumb_3-672x372.jpg",
"width": 672,
"mimeType": "image/jpeg",
"height": 372
},
"kqedFullSize": {
"file": "https://cdn.kqed.org/wp-content/uploads/sites/41/2024/04/Samosas_Thumb_3.jpg",
"width": 1280,
"height": 720
},
"large": {
"file": "https://cdn.kqed.org/wp-content/uploads/sites/41/2024/04/Samosas_Thumb_3-1020x574.jpg",
"width": 1020,
"mimeType": "image/jpeg",
"height": 574
},
"medium": {
"file": "https://cdn.kqed.org/wp-content/uploads/sites/41/2024/04/Samosas_Thumb_3-800x450.jpg",
"width": 800,
"mimeType": "image/jpeg",
"height": 450
},
"medium_large": {
"file": "https://cdn.kqed.org/wp-content/uploads/sites/41/2024/04/Samosas_Thumb_3-768x432.jpg",
"width": 768,
"mimeType": "image/jpeg",
"height": 432
}
},
"publishDate": 1713200418,
"modified": 1713200664,
"caption": "Cecilia Phillips holding a bite-size Indian street food that is the samosa.",
"description": "a bite-size Indian street food that is the samosa.",
"title": "Samosas_Thumb_3",
"credit": "Matt Piniol",
"status": "inherit",
"altTag": "A smiling woman holding a samosa is positioned against a backdrop that is a closeup of a bowl filled with crispy triangular samosas",
"isLoading": false,
"fetchFailed": false
},
"food_1337543": {
"type": "attachments",
"id": "food_1337543",
"meta": {
"index": "attachments_1716263798",
"site": "food",
"id": "1337543",
"found": true
},
"parent": 1337534,
"imgSizes": {
"twentyfourteen-full-width": {
"file": "https://cdn.kqed.org/wp-content/uploads/sites/41/2024/04/Birria_1_v7-1038x576.jpg",
"width": 1038,
"mimeType": "image/jpeg",
"height": 576
},
"thumbnail": {
"file": "https://cdn.kqed.org/wp-content/uploads/sites/41/2024/04/Birria_1_v7-160x90.jpg",
"width": 160,
"mimeType": "image/jpeg",
"height": 90
},
"post-thumbnail": {
"file": "https://cdn.kqed.org/wp-content/uploads/sites/41/2024/04/Birria_1_v7-672x372.jpg",
"width": 672,
"mimeType": "image/jpeg",
"height": 372
},
"kqedFullSize": {
"file": "https://cdn.kqed.org/wp-content/uploads/sites/41/2024/04/Birria_1_v7.jpg",
"width": 1280,
"height": 720
},
"large": {
"file": "https://cdn.kqed.org/wp-content/uploads/sites/41/2024/04/Birria_1_v7-1020x574.jpg",
"width": 1020,
"mimeType": "image/jpeg",
"height": 574
},
"medium": {
"file": "https://cdn.kqed.org/wp-content/uploads/sites/41/2024/04/Birria_1_v7-800x450.jpg",
"width": 800,
"mimeType": "image/jpeg",
"height": 450
},
"medium_large": {
"file": "https://cdn.kqed.org/wp-content/uploads/sites/41/2024/04/Birria_1_v7-768x432.jpg",
"width": 768,
"mimeType": "image/jpeg",
"height": 432
}
},
"publishDate": 1712594317,
"modified": 1712594368,
"caption": "Cecilia Phillips, the host of Beyond The Menu, can't wait to tell you all about the history of the birria taco.",
"description": "Cecilia Phillips, the host of Beyond The Menu, can't wait to tell you all about the history of the birria taco.",
"title": "Birria_1_v7",
"credit": "Matt Piniol",
"status": "inherit",
"altTag": "A close-up of a birria taco with cheese next to the show's host, Cecilia Phillips.",
"isLoading": false,
"fetchFailed": false
},
"food_1337521": {
"type": "attachments",
"id": "food_1337521",
"meta": {
"index": "attachments_1716263798",
"site": "food",
"id": "1337521",
"found": true
},
"parent": 1337517,
"imgSizes": {
"twentyfourteen-full-width": {
"file": "https://cdn.kqed.org/wp-content/uploads/sites/41/2024/03/BTM102_Pineapple_Buns_Thumb_Alt1-1-1038x576.jpg",
"width": 1038,
"mimeType": "image/jpeg",
"height": 576
},
"thumbnail": {
"file": "https://cdn.kqed.org/wp-content/uploads/sites/41/2024/03/BTM102_Pineapple_Buns_Thumb_Alt1-1-160x90.jpg",
"width": 160,
"mimeType": "image/jpeg",
"height": 90
},
"post-thumbnail": {
"file": "https://cdn.kqed.org/wp-content/uploads/sites/41/2024/03/BTM102_Pineapple_Buns_Thumb_Alt1-1-672x372.jpg",
"width": 672,
"mimeType": "image/jpeg",
"height": 372
},
"kqedFullSize": {
"file": "https://cdn.kqed.org/wp-content/uploads/sites/41/2024/03/BTM102_Pineapple_Buns_Thumb_Alt1-1.jpg",
"width": 1280,
"height": 720
},
"large": {
"file": "https://cdn.kqed.org/wp-content/uploads/sites/41/2024/03/BTM102_Pineapple_Buns_Thumb_Alt1-1-1020x574.jpg",
"width": 1020,
"mimeType": "image/jpeg",
"height": 574
},
"medium": {
"file": "https://cdn.kqed.org/wp-content/uploads/sites/41/2024/03/BTM102_Pineapple_Buns_Thumb_Alt1-1-800x450.jpg",
"width": 800,
"mimeType": "image/jpeg",
"height": 450
},
"medium_large": {
"file": "https://cdn.kqed.org/wp-content/uploads/sites/41/2024/03/BTM102_Pineapple_Buns_Thumb_Alt1-1-768x432.jpg",
"width": 768,
"mimeType": "image/jpeg",
"height": 432
}
},
"publishDate": 1711131292,
"modified": 1711131707,
"caption": "Beyond The Menu's host Cecilia Phillips and a collection of sweet buns that resemble each other (from left to right): pineapple bun, melonpan, Mexico bun, and concha.",
"description": "Beyond The Menu's host Cecilia Phillips and a collection of sweet buns that resemble each other (from left to right): pineapple bun, melonpan, Mexico bun, and concha.",
"title": "BTM102_Pineapple_Buns_Thumb_Alt1 (1)",
"credit": "Matt Piniol",
"status": "inherit",
"altTag": "A smiling woman is standing in the kitchen in front of four different sweet buns that each have a flag from their country of origin next to them.",
"isLoading": false,
"fetchFailed": false
},
"checkplease_23814": {
"type": "attachments",
"id": "checkplease_23814",
"meta": {
"index": "attachments_1716263798",
"site": "checkplease",
"id": "23814",
"found": true
},
"title": "CPBA_2104_PBS",
"publishDate": 1778801800,
"status": "inherit",
"parent": 23756,
"modified": 1778801800,
"caption": null,
"credit": null,
"altTag": null,
"description": null,
"imgSizes": {
"thumbnail": {
"file": "https://cdn.kqed.org/wp-content/uploads/sites/40/2026/04/CPBA_2104_PBS-160x90.png",
"width": 160,
"height": 90,
"mimeType": "image/png"
},
"medium_large": {
"file": "https://cdn.kqed.org/wp-content/uploads/sites/40/2026/04/CPBA_2104_PBS-768x432.png",
"width": 768,
"height": 432,
"mimeType": "image/png"
},
"post-thumbnail": {
"file": "https://cdn.kqed.org/wp-content/uploads/sites/40/2026/04/CPBA_2104_PBS-672x372.png",
"width": 672,
"height": 372,
"mimeType": "image/png"
},
"twentyfourteen-full-width": {
"file": "https://cdn.kqed.org/wp-content/uploads/sites/40/2026/04/CPBA_2104_PBS-1038x576.png",
"width": 1038,
"height": 576,
"mimeType": "image/png"
},
"kqedFullSize": {
"file": "https://cdn.kqed.org/wp-content/uploads/sites/40/2026/04/CPBA_2104_PBS.png",
"width": 1280,
"height": 720
}
},
"isLoading": false,
"fetchFailed": false
},
"checkplease_23802": {
"type": "attachments",
"id": "checkplease_23802",
"meta": {
"index": "attachments_1716263798",
"site": "checkplease",
"id": "23802",
"found": true
},
"title": "CPBA_2103_PBS",
"publishDate": 1778192378,
"status": "inherit",
"parent": 23755,
"modified": 1778192378,
"caption": null,
"credit": null,
"altTag": null,
"description": null,
"imgSizes": {
"thumbnail": {
"file": "https://cdn.kqed.org/wp-content/uploads/sites/40/2026/03/CPBA_2103_PBS-160x90.png",
"width": 160,
"height": 90,
"mimeType": "image/png"
},
"medium_large": {
"file": "https://cdn.kqed.org/wp-content/uploads/sites/40/2026/03/CPBA_2103_PBS-768x432.png",
"width": 768,
"height": 432,
"mimeType": "image/png"
},
"post-thumbnail": {
"file": "https://cdn.kqed.org/wp-content/uploads/sites/40/2026/03/CPBA_2103_PBS-672x372.png",
"width": 672,
"height": 372,
"mimeType": "image/png"
},
"twentyfourteen-full-width": {
"file": "https://cdn.kqed.org/wp-content/uploads/sites/40/2026/03/CPBA_2103_PBS-1038x576.png",
"width": 1038,
"height": 576,
"mimeType": "image/png"
},
"kqedFullSize": {
"file": "https://cdn.kqed.org/wp-content/uploads/sites/40/2026/03/CPBA_2103_PBS.png",
"width": 1280,
"height": 720
}
},
"isLoading": false,
"fetchFailed": false
},
"checkplease_23795": {
"type": "attachments",
"id": "checkplease_23795",
"meta": {
"index": "attachments_1716263798",
"site": "checkplease",
"id": "23795",
"found": true
},
"title": "CPBA_2102_PBS",
"publishDate": 1777603844,
"status": "inherit",
"parent": 23754,
"modified": 1777603844,
"caption": null,
"credit": null,
"altTag": null,
"description": null,
"imgSizes": {
"thumbnail": {
"file": "https://cdn.kqed.org/wp-content/uploads/sites/40/2026/03/CPBA_2102_PBS-160x90.png",
"width": 160,
"height": 90,
"mimeType": "image/png"
},
"medium_large": {
"file": "https://cdn.kqed.org/wp-content/uploads/sites/40/2026/03/CPBA_2102_PBS-768x432.png",
"width": 768,
"height": 432,
"mimeType": "image/png"
},
"post-thumbnail": {
"file": "https://cdn.kqed.org/wp-content/uploads/sites/40/2026/03/CPBA_2102_PBS-672x372.png",
"width": 672,
"height": 372,
"mimeType": "image/png"
},
"twentyfourteen-full-width": {
"file": "https://cdn.kqed.org/wp-content/uploads/sites/40/2026/03/CPBA_2102_PBS-1038x576.png",
"width": 1038,
"height": 576,
"mimeType": "image/png"
},
"kqedFullSize": {
"file": "https://cdn.kqed.org/wp-content/uploads/sites/40/2026/03/CPBA_2102_PBS.png",
"width": 1280,
"height": 720
}
},
"isLoading": false,
"fetchFailed": false
},
"checkplease_23779": {
"type": "attachments",
"id": "checkplease_23779",
"meta": {
"index": "attachments_1716263798",
"site": "checkplease",
"id": "23779",
"found": true
},
"title": "CPBA_2101_PBS",
"publishDate": 1775601185,
"status": "inherit",
"parent": 23753,
"modified": 1775601185,
"caption": null,
"credit": null,
"altTag": null,
"description": null,
"imgSizes": {
"thumbnail": {
"file": "https://cdn.kqed.org/wp-content/uploads/sites/40/2026/03/CPBA_2101_PBS-160x90.png",
"width": 160,
"height": 90,
"mimeType": "image/png"
},
"medium_large": {
"file": "https://cdn.kqed.org/wp-content/uploads/sites/40/2026/03/CPBA_2101_PBS-768x432.png",
"width": 768,
"height": 432,
"mimeType": "image/png"
},
"post-thumbnail": {
"file": "https://cdn.kqed.org/wp-content/uploads/sites/40/2026/03/CPBA_2101_PBS-672x372.png",
"width": 672,
"height": 372,
"mimeType": "image/png"
},
"twentyfourteen-full-width": {
"file": "https://cdn.kqed.org/wp-content/uploads/sites/40/2026/03/CPBA_2101_PBS-1038x576.png",
"width": 1038,
"height": 576,
"mimeType": "image/png"
},
"kqedFullSize": {
"file": "https://cdn.kqed.org/wp-content/uploads/sites/40/2026/03/CPBA_2101_PBS.png",
"width": 1280,
"height": 720
}
},
"isLoading": false,
"fetchFailed": false
},
"checkplease_23772": {
"type": "attachments",
"id": "checkplease_23772",
"meta": {
"index": "attachments_1716263798",
"site": "checkplease",
"id": "23772",
"found": true
},
"title": "2103_f",
"publishDate": 1774557586,
"status": "inherit",
"parent": 23771,
"modified": 1774557586,
"caption": null,
"credit": null,
"altTag": null,
"description": null,
"imgSizes": {
"thumbnail": {
"file": "https://cdn.kqed.org/wp-content/uploads/sites/40/2026/03/2103_f-160x90.png",
"width": 160,
"height": 90,
"mimeType": "image/png"
},
"medium_large": {
"file": "https://cdn.kqed.org/wp-content/uploads/sites/40/2026/03/2103_f-768x432.png",
"width": 768,
"height": 432,
"mimeType": "image/png"
},
"1536x1536": {
"file": "https://cdn.kqed.org/wp-content/uploads/sites/40/2026/03/2103_f-1536x864.png",
"width": 1536,
"height": 864,
"mimeType": "image/png"
},
"post-thumbnail": {
"file": "https://cdn.kqed.org/wp-content/uploads/sites/40/2026/03/2103_f-672x372.png",
"width": 672,
"height": 372,
"mimeType": "image/png"
},
"twentyfourteen-full-width": {
"file": "https://cdn.kqed.org/wp-content/uploads/sites/40/2026/03/2103_f-1038x576.png",
"width": 1038,
"height": 576,
"mimeType": "image/png"
},
"kqedFullSize": {
"file": "https://cdn.kqed.org/wp-content/uploads/sites/40/2026/03/2103_f.png",
"width": 1920,
"height": 1080
}
},
"isLoading": false,
"fetchFailed": false
},
"checkplease_23747": {
"type": "attachments",
"id": "checkplease_23747",
"meta": {
"index": "attachments_1716263798",
"site": "checkplease",
"id": "23747",
"found": true
},
"title": "TaishokenRamen_Cover_PBS",
"publishDate": 1772161084,
"status": "inherit",
"parent": 23742,
"modified": 1772161084,
"caption": null,
"credit": null,
"altTag": null,
"description": null,
"imgSizes": {
"thumbnail": {
"file": "https://cdn.kqed.org/wp-content/uploads/sites/40/2026/02/TaishokenRamen_Cover_PBS-160x90.png",
"width": 160,
"height": 90,
"mimeType": "image/png"
},
"medium_large": {
"file": "https://cdn.kqed.org/wp-content/uploads/sites/40/2026/02/TaishokenRamen_Cover_PBS-768x432.png",
"width": 768,
"height": 432,
"mimeType": "image/png"
},
"post-thumbnail": {
"file": "https://cdn.kqed.org/wp-content/uploads/sites/40/2026/02/TaishokenRamen_Cover_PBS-672x372.png",
"width": 672,
"height": 372,
"mimeType": "image/png"
},
"twentyfourteen-full-width": {
"file": "https://cdn.kqed.org/wp-content/uploads/sites/40/2026/02/TaishokenRamen_Cover_PBS-1038x576.png",
"width": 1038,
"height": 576,
"mimeType": "image/png"
},
"kqedFullSize": {
"file": "https://cdn.kqed.org/wp-content/uploads/sites/40/2026/02/TaishokenRamen_Cover_PBS.png",
"width": 1280,
"height": 720
}
},
"isLoading": false,
"fetchFailed": false
},
"checkplease_23734": {
"type": "attachments",
"id": "checkplease_23734",
"meta": {
"index": "attachments_1716263798",
"site": "checkplease",
"id": "23734",
"found": true
},
"title": "TacosOscar_Cover_PBS",
"publishDate": 1771539556,
"status": "inherit",
"parent": 23729,
"modified": 1771539556,
"caption": null,
"credit": null,
"altTag": null,
"description": null,
"imgSizes": {
"thumbnail": {
"file": "https://cdn.kqed.org/wp-content/uploads/sites/40/2026/02/TacosOscar_Cover_PBS-160x90.png",
"width": 160,
"height": 90,
"mimeType": "image/png"
},
"medium_large": {
"file": "https://cdn.kqed.org/wp-content/uploads/sites/40/2026/02/TacosOscar_Cover_PBS-768x432.png",
"width": 768,
"height": 432,
"mimeType": "image/png"
},
"post-thumbnail": {
"file": "https://cdn.kqed.org/wp-content/uploads/sites/40/2026/02/TacosOscar_Cover_PBS-672x372.png",
"width": 672,
"height": 372,
"mimeType": "image/png"
},
"twentyfourteen-full-width": {
"file": "https://cdn.kqed.org/wp-content/uploads/sites/40/2026/02/TacosOscar_Cover_PBS-1038x576.png",
"width": 1038,
"height": 576,
"mimeType": "image/png"
},
"kqedFullSize": {
"file": "https://cdn.kqed.org/wp-content/uploads/sites/40/2026/02/TacosOscar_Cover_PBS.png",
"width": 1280,
"height": 720
}
},
"isLoading": false,
"fetchFailed": false
},
"checkplease_23724": {
"type": "attachments",
"id": "checkplease_23724",
"meta": {
"index": "attachments_1716263798",
"site": "checkplease",
"id": "23724",
"found": true
},
"title": "Trifecta_Cover_PBS",
"publishDate": 1770953084,
"status": "inherit",
"parent": 23721,
"modified": 1770953084,
"caption": null,
"credit": null,
"altTag": null,
"description": null,
"imgSizes": {
"thumbnail": {
"file": "https://cdn.kqed.org/wp-content/uploads/sites/40/2026/02/Trifecta_Cover_PBS-160x90.png",
"width": 160,
"height": 90,
"mimeType": "image/png"
},
"medium_large": {
"file": "https://cdn.kqed.org/wp-content/uploads/sites/40/2026/02/Trifecta_Cover_PBS-768x432.png",
"width": 768,
"height": 432,
"mimeType": "image/png"
},
"post-thumbnail": {
"file": "https://cdn.kqed.org/wp-content/uploads/sites/40/2026/02/Trifecta_Cover_PBS-672x372.png",
"width": 672,
"height": 372,
"mimeType": "image/png"
},
"twentyfourteen-full-width": {
"file": "https://cdn.kqed.org/wp-content/uploads/sites/40/2026/02/Trifecta_Cover_PBS-1038x576.png",
"width": 1038,
"height": 576,
"mimeType": "image/png"
},
"kqedFullSize": {
"file": "https://cdn.kqed.org/wp-content/uploads/sites/40/2026/02/Trifecta_Cover_PBS.png",
"width": 1280,
"height": 720
}
},
"isLoading": false,
"fetchFailed": false
},
"checkplease_23711": {
"type": "attachments",
"id": "checkplease_23711",
"meta": {
"index": "attachments_1716263798",
"site": "checkplease",
"id": "23711",
"found": true
},
"title": "StatelineRoadSmokehouse_Cover_PBS",
"publishDate": 1770343446,
"status": "inherit",
"parent": 23706,
"modified": 1770343446,
"caption": null,
"credit": null,
"altTag": null,
"description": null,
"imgSizes": {
"thumbnail": {
"file": "https://cdn.kqed.org/wp-content/uploads/sites/40/2026/02/StatelineRoadSmokehouse_Cover_PBS-160x90.png",
"width": 160,
"height": 90,
"mimeType": "image/png"
},
"medium_large": {
"file": "https://cdn.kqed.org/wp-content/uploads/sites/40/2026/02/StatelineRoadSmokehouse_Cover_PBS-768x432.png",
"width": 768,
"height": 432,
"mimeType": "image/png"
},
"post-thumbnail": {
"file": "https://cdn.kqed.org/wp-content/uploads/sites/40/2026/02/StatelineRoadSmokehouse_Cover_PBS-672x372.png",
"width": 672,
"height": 372,
"mimeType": "image/png"
},
"twentyfourteen-full-width": {
"file": "https://cdn.kqed.org/wp-content/uploads/sites/40/2026/02/StatelineRoadSmokehouse_Cover_PBS-1038x576.png",
"width": 1038,
"height": 576,
"mimeType": "image/png"
},
"kqedFullSize": {
"file": "https://cdn.kqed.org/wp-content/uploads/sites/40/2026/02/StatelineRoadSmokehouse_Cover_PBS.png",
"width": 1280,
"height": 720
}
},
"isLoading": false,
"fetchFailed": false
},
"food_1337956": {
"type": "attachments",
"id": "food_1337956",
"meta": {
"index": "attachments_1716263798",
"site": "food",
"id": "1337956",
"found": true
},
"title": "Shrimp U Bean Gone",
"publishDate": 1741307875,
"status": "inherit",
"parent": 1337955,
"modified": 1741309075,
"caption": "We Face-Off with the Queen Bee of Beans",
"credit": "Josh Decolongon",
"altTag": "An array of Rancho Gordo's bagged dry white beans line the background. A silver bowl with cooked shrimp and beans with parsley are in the foreground next to Josh Decolongon, a young bald Filipino man with facial hair and glasses",
"description": null,
"imgSizes": {
"medium": {
"file": "https://cdn.kqed.org/wp-content/uploads/sites/41/2025/03/NoCrumbs_RanchoGordo-800x450.png",
"width": 800,
"height": 450,
"mimeType": "image/png"
},
"large": {
"file": "https://cdn.kqed.org/wp-content/uploads/sites/41/2025/03/NoCrumbs_RanchoGordo-1020x574.png",
"width": 1020,
"height": 574,
"mimeType": "image/png"
},
"thumbnail": {
"file": "https://cdn.kqed.org/wp-content/uploads/sites/41/2025/03/NoCrumbs_RanchoGordo-160x90.png",
"width": 160,
"height": 90,
"mimeType": "image/png"
},
"medium_large": {
"file": "https://cdn.kqed.org/wp-content/uploads/sites/41/2025/03/NoCrumbs_RanchoGordo-768x432.png",
"width": 768,
"height": 432,
"mimeType": "image/png"
},
"1536x1536": {
"file": "https://cdn.kqed.org/wp-content/uploads/sites/41/2025/03/NoCrumbs_RanchoGordo-1536x864.png",
"width": 1536,
"height": 864,
"mimeType": "image/png"
},
"post-thumbnail": {
"file": "https://cdn.kqed.org/wp-content/uploads/sites/41/2025/03/NoCrumbs_RanchoGordo-672x372.png",
"width": 672,
"height": 372,
"mimeType": "image/png"
},
"twentyfourteen-full-width": {
"file": "https://cdn.kqed.org/wp-content/uploads/sites/41/2025/03/NoCrumbs_RanchoGordo-1038x576.png",
"width": 1038,
"height": 576,
"mimeType": "image/png"
},
"kqedFullSize": {
"file": "https://cdn.kqed.org/wp-content/uploads/sites/41/2025/03/NoCrumbs_RanchoGordo.png",
"width": 1920,
"height": 1080
}
},
"isLoading": false,
"fetchFailed": false
},
"food_1337944": {
"type": "attachments",
"id": "food_1337944",
"meta": {
"index": "attachments_1716263798",
"site": "food",
"id": "1337944",
"found": true
},
"title": "NoCrumbs_mayaangelou_pie",
"publishDate": 1740693107,
"status": "inherit",
"parent": 1337943,
"modified": 1740693222,
"caption": "No Crumbs' Josh Decolongon tries his hand at Maya Angelou's lemon meringue pie.",
"credit": "Josh Decolongon",
"altTag": "A variety of lemon meringue pies are collaged alongside images of Josh Decolongon, a young bald Filipino man with glasses. Maya Angelou's cookbook is in the lower right corner of the image.",
"description": null,
"imgSizes": {
"medium": {
"file": "https://cdn.kqed.org/wp-content/uploads/sites/41/2025/02/NoCrumbs_mayaangelou_pie-800x450.png",
"width": 800,
"height": 450,
"mimeType": "image/png"
},
"large": {
"file": "https://cdn.kqed.org/wp-content/uploads/sites/41/2025/02/NoCrumbs_mayaangelou_pie-1020x574.png",
"width": 1020,
"height": 574,
"mimeType": "image/png"
},
"thumbnail": {
"file": "https://cdn.kqed.org/wp-content/uploads/sites/41/2025/02/NoCrumbs_mayaangelou_pie-160x90.png",
"width": 160,
"height": 90,
"mimeType": "image/png"
},
"medium_large": {
"file": "https://cdn.kqed.org/wp-content/uploads/sites/41/2025/02/NoCrumbs_mayaangelou_pie-768x432.png",
"width": 768,
"height": 432,
"mimeType": "image/png"
},
"1536x1536": {
"file": "https://cdn.kqed.org/wp-content/uploads/sites/41/2025/02/NoCrumbs_mayaangelou_pie-1536x864.png",
"width": 1536,
"height": 864,
"mimeType": "image/png"
},
"post-thumbnail": {
"file": "https://cdn.kqed.org/wp-content/uploads/sites/41/2025/02/NoCrumbs_mayaangelou_pie-672x372.png",
"width": 672,
"height": 372,
"mimeType": "image/png"
},
"twentyfourteen-full-width": {
"file": "https://cdn.kqed.org/wp-content/uploads/sites/41/2025/02/NoCrumbs_mayaangelou_pie-1038x576.png",
"width": 1038,
"height": 576,
"mimeType": "image/png"
},
"kqedFullSize": {
"file": "https://cdn.kqed.org/wp-content/uploads/sites/41/2025/02/NoCrumbs_mayaangelou_pie.png",
"width": 1920,
"height": 1080
}
},
"isLoading": false,
"fetchFailed": false
},
"food_1337763": {
"type": "attachments",
"id": "food_1337763",
"meta": {
"index": "attachments_1716263798",
"site": "food",
"id": "1337763",
"found": true
},
"title": "No Crumbs Halloween Appetizer",
"publishDate": 1727895377,
"status": "inherit",
"parent": 1337762,
"modified": 1727895540,
"caption": "Josh shows off his deliciously disgusting Halloween party appetizer.",
"credit": "Josh Decolongon",
"altTag": "Young bearded Filipino man wears a green Super Mario Brothers hat. On the left is a plastic skull covered in deli meat slices. Molinari Delicatessen sign in the background.",
"description": null,
"imgSizes": {
"medium": {
"file": "https://cdn.kqed.org/wp-content/uploads/sites/41/2024/10/NoCrumbs_Halloween_horsdouevres-800x450.png",
"width": 800,
"height": 450,
"mimeType": "image/png"
},
"large": {
"file": "https://cdn.kqed.org/wp-content/uploads/sites/41/2024/10/NoCrumbs_Halloween_horsdouevres-1020x574.png",
"width": 1020,
"height": 574,
"mimeType": "image/png"
},
"thumbnail": {
"file": "https://cdn.kqed.org/wp-content/uploads/sites/41/2024/10/NoCrumbs_Halloween_horsdouevres-160x90.png",
"width": 160,
"height": 90,
"mimeType": "image/png"
},
"medium_large": {
"file": "https://cdn.kqed.org/wp-content/uploads/sites/41/2024/10/NoCrumbs_Halloween_horsdouevres-768x432.png",
"width": 768,
"height": 432,
"mimeType": "image/png"
},
"1536x1536": {
"file": "https://cdn.kqed.org/wp-content/uploads/sites/41/2024/10/NoCrumbs_Halloween_horsdouevres-1536x864.png",
"width": 1536,
"height": 864,
"mimeType": "image/png"
},
"post-thumbnail": {
"file": "https://cdn.kqed.org/wp-content/uploads/sites/41/2024/10/NoCrumbs_Halloween_horsdouevres-672x372.png",
"width": 672,
"height": 372,
"mimeType": "image/png"
},
"twentyfourteen-full-width": {
"file": "https://cdn.kqed.org/wp-content/uploads/sites/41/2024/10/NoCrumbs_Halloween_horsdouevres-1038x576.png",
"width": 1038,
"height": 576,
"mimeType": "image/png"
},
"kqedFullSize": {
"file": "https://cdn.kqed.org/wp-content/uploads/sites/41/2024/10/NoCrumbs_Halloween_horsdouevres.png",
"width": 1920,
"height": 1080
}
},
"isLoading": false,
"fetchFailed": false
},
"food_1337485": {
"type": "attachments",
"id": "food_1337485",
"meta": {
"index": "attachments_1716263798",
"site": "food",
"id": "1337485",
"found": true
},
"parent": 1337484,
"imgSizes": {
"twentyfourteen-full-width": {
"file": "https://ww2.kqed.org/app/uploads/sites/41/2023/10/jpcah229_jacquespepin_peapodsoup-1038x576.png",
"width": 1038,
"mimeType": "image/png",
"height": 576
},
"thumbnail": {
"file": "https://ww2.kqed.org/app/uploads/sites/41/2023/10/jpcah229_jacquespepin_peapodsoup-160x90.png",
"width": 160,
"mimeType": "image/png",
"height": 90
},
"post-thumbnail": {
"file": "https://ww2.kqed.org/app/uploads/sites/41/2023/10/jpcah229_jacquespepin_peapodsoup-672x372.png",
"width": 672,
"mimeType": "image/png",
"height": 372
},
"kqedFullSize": {
"file": "https://ww2.kqed.org/app/uploads/sites/41/2023/10/jpcah229_jacquespepin_peapodsoup.png",
"width": 1280,
"height": 720
},
"large": {
"file": "https://ww2.kqed.org/app/uploads/sites/41/2023/10/jpcah229_jacquespepin_peapodsoup-1020x574.png",
"width": 1020,
"mimeType": "image/png",
"height": 574
},
"medium": {
"file": "https://ww2.kqed.org/app/uploads/sites/41/2023/10/jpcah229_jacquespepin_peapodsoup-800x450.png",
"width": 800,
"mimeType": "image/png",
"height": 450
},
"medium_large": {
"file": "https://ww2.kqed.org/app/uploads/sites/41/2023/10/jpcah229_jacquespepin_peapodsoup-768x432.png",
"width": 768,
"mimeType": "image/png",
"height": 432
}
},
"publishDate": 1696611600,
"modified": 1696611691,
"caption": "Jacques Pepin's Pea Pod Soup",
"description": null,
"title": "Jacques Pepin's Pea Soup",
"credit": "Jacques Pepin Foundation",
"status": "inherit",
"altTag": "A big bowl of green pea soup with chives in the background. Jacques pepin stands in the foreground in a blue plaid shirt",
"isLoading": false,
"fetchFailed": false
},
"food_1337459": {
"type": "attachments",
"id": "food_1337459",
"meta": {
"index": "attachments_1716263798",
"site": "food",
"id": "1337459",
"found": true
},
"parent": 1337457,
"imgSizes": {
"twentyfourteen-full-width": {
"file": "https://ww2.kqed.org/app/uploads/sites/41/2023/08/NoCrumbs_ItsIt_01-1038x576.png",
"width": 1038,
"mimeType": "image/png",
"height": 576
},
"thumbnail": {
"file": "https://ww2.kqed.org/app/uploads/sites/41/2023/08/NoCrumbs_ItsIt_01-160x90.png",
"width": 160,
"mimeType": "image/png",
"height": 90
},
"post-thumbnail": {
"file": "https://ww2.kqed.org/app/uploads/sites/41/2023/08/NoCrumbs_ItsIt_01-672x372.png",
"width": 672,
"mimeType": "image/png",
"height": 372
},
"kqedFullSize": {
"file": "https://ww2.kqed.org/app/uploads/sites/41/2023/08/NoCrumbs_ItsIt_01.png",
"width": 1920,
"height": 1080
},
"large": {
"file": "https://ww2.kqed.org/app/uploads/sites/41/2023/08/NoCrumbs_ItsIt_01-1020x574.png",
"width": 1020,
"mimeType": "image/png",
"height": 574
},
"1536x1536": {
"file": "https://ww2.kqed.org/app/uploads/sites/41/2023/08/NoCrumbs_ItsIt_01-1536x864.png",
"width": 1536,
"mimeType": "image/png",
"height": 864
},
"medium": {
"file": "https://ww2.kqed.org/app/uploads/sites/41/2023/08/NoCrumbs_ItsIt_01-800x450.png",
"width": 800,
"mimeType": "image/png",
"height": 450
},
"medium_large": {
"file": "https://ww2.kqed.org/app/uploads/sites/41/2023/08/NoCrumbs_ItsIt_01-768x432.png",
"width": 768,
"mimeType": "image/png",
"height": 432
}
},
"publishDate": 1691018088,
"modified": 1691018240,
"caption": "Josh Decolongon recreates the famous San Francisco It’s-It using homemade rocky road ice cream, a flavor that was invented in Oakland.",
"description": null,
"title": "No Crumbs - It's-It",
"credit": "Josh Decolongon",
"status": "inherit",
"altTag": "A triptych image with a close up of rocky road ice cream on the left, a tray of oatmeal cookies on the right, and a young bald Filipino man with glasses standing over a chocolate ice cream sandwich in the middle",
"isLoading": false,
"fetchFailed": false
},
"food_1337404": {
"type": "attachments",
"id": "food_1337404",
"meta": {
"index": "attachments_1716263798",
"site": "food",
"id": "1337404",
"found": true
},
"parent": 1337402,
"imgSizes": {
"twentyfourteen-full-width": {
"file": "https://ww2.kqed.org/app/uploads/sites/41/2023/04/jacquespepin_eggs_notxt-1038x576.png",
"width": 1038,
"mimeType": "image/png",
"height": 576
},
"thumbnail": {
"file": "https://ww2.kqed.org/app/uploads/sites/41/2023/04/jacquespepin_eggs_notxt-160x90.png",
"width": 160,
"mimeType": "image/png",
"height": 90
},
"post-thumbnail": {
"file": "https://ww2.kqed.org/app/uploads/sites/41/2023/04/jacquespepin_eggs_notxt-672x372.png",
"width": 672,
"mimeType": "image/png",
"height": 372
},
"kqedFullSize": {
"file": "https://ww2.kqed.org/app/uploads/sites/41/2023/04/jacquespepin_eggs_notxt.png",
"width": 1280,
"height": 720
},
"large": {
"file": "https://ww2.kqed.org/app/uploads/sites/41/2023/04/jacquespepin_eggs_notxt-1020x574.png",
"width": 1020,
"mimeType": "image/png",
"height": 574
},
"medium": {
"file": "https://ww2.kqed.org/app/uploads/sites/41/2023/04/jacquespepin_eggs_notxt-800x450.png",
"width": 800,
"mimeType": "image/png",
"height": 450
},
"medium_large": {
"file": "https://ww2.kqed.org/app/uploads/sites/41/2023/04/jacquespepin_eggs_notxt-768x432.png",
"width": 768,
"mimeType": "image/png",
"height": 432
}
},
"publishDate": 1680886769,
"modified": 1680886943,
"caption": "Jacques' poached, hard boiled, and ouef mollet style eggs.",
"description": null,
"title": "Jacques Pepin's Egg Techniques",
"credit": "JP Foundation",
"status": "inherit",
"altTag": "One poached egg, one hard boiled egg, one oueff mollet with brilliant yellow yolks on a plate. Jacques Pepin in foreground looking at the camera.",
"isLoading": false,
"fetchFailed": false
},
"food_1337388": {
"type": "attachments",
"id": "food_1337388",
"meta": {
"index": "attachments_1716263798",
"site": "food",
"id": "1337388",
"found": true
},
"parent": 1337385,
"imgSizes": {
"twentyfourteen-full-width": {
"file": "https://ww2.kqed.org/app/uploads/sites/41/2022/10/Spice-Apple-Cake-H-3-1038x576.jpg",
"width": 1038,
"mimeType": "image/jpeg",
"height": 576
},
"thumbnail": {
"file": "https://ww2.kqed.org/app/uploads/sites/41/2022/10/Spice-Apple-Cake-H-3-160x128.jpg",
"width": 160,
"mimeType": "image/jpeg",
"height": 128
},
"post-thumbnail": {
"file": "https://ww2.kqed.org/app/uploads/sites/41/2022/10/Spice-Apple-Cake-H-3-672x372.jpg",
"width": 672,
"mimeType": "image/jpeg",
"height": 372
},
"kqedFullSize": {
"file": "https://ww2.kqed.org/app/uploads/sites/41/2022/10/Spice-Apple-Cake-H-3.jpg",
"width": 2048,
"height": 1639
},
"large": {
"file": "https://ww2.kqed.org/app/uploads/sites/41/2022/10/Spice-Apple-Cake-H-3-1020x816.jpg",
"width": 1020,
"mimeType": "image/jpeg",
"height": 816
},
"1536x1536": {
"file": "https://ww2.kqed.org/app/uploads/sites/41/2022/10/Spice-Apple-Cake-H-3-1536x1229.jpg",
"width": 1536,
"mimeType": "image/jpeg",
"height": 1229
},
"full-width": {
"file": "https://ww2.kqed.org/app/uploads/sites/41/2022/10/Spice-Apple-Cake-H-3-1920x1537.jpg",
"width": 1920,
"mimeType": "image/jpeg",
"height": 1537
},
"medium": {
"file": "https://ww2.kqed.org/app/uploads/sites/41/2022/10/Spice-Apple-Cake-H-3-800x640.jpg",
"width": 800,
"mimeType": "image/jpeg",
"height": 640
},
"medium_large": {
"file": "https://ww2.kqed.org/app/uploads/sites/41/2022/10/Spice-Apple-Cake-H-3-768x615.jpg",
"width": 768,
"mimeType": "image/jpeg",
"height": 615
}
},
"publishDate": 1666047343,
"modified": 1666047458,
"caption": "Spiced Apple Upside Down Cake is your new Fall tradition.",
"description": null,
"title": "Spiced Apple Upside Down Cake",
"credit": "Stefani Renée",
"status": "inherit",
"altTag": "A baked apple cake with spatula removing a slice",
"isLoading": false,
"fetchFailed": false
},
"food_1337372": {
"type": "attachments",
"id": "food_1337372",
"meta": {
"index": "attachments_1716263798",
"site": "food",
"id": "1337372",
"found": true
},
"parent": 1337370,
"imgSizes": {
"twentyfourteen-full-width": {
"file": "https://ww2.kqed.org/app/uploads/sites/41/2022/10/sr04_fall_galette_honey-1038x576.png",
"width": 1038,
"mimeType": "image/png",
"height": 576
},
"thumbnail": {
"file": "https://ww2.kqed.org/app/uploads/sites/41/2022/10/sr04_fall_galette_honey-160x90.png",
"width": 160,
"mimeType": "image/png",
"height": 90
},
"post-thumbnail": {
"file": "https://ww2.kqed.org/app/uploads/sites/41/2022/10/sr04_fall_galette_honey-672x372.png",
"width": 672,
"mimeType": "image/png",
"height": 372
},
"kqedFullSize": {
"file": "https://ww2.kqed.org/app/uploads/sites/41/2022/10/sr04_fall_galette_honey.png",
"width": 1280,
"height": 720
},
"large": {
"file": "https://ww2.kqed.org/app/uploads/sites/41/2022/10/sr04_fall_galette_honey-1020x574.png",
"width": 1020,
"mimeType": "image/png",
"height": 574
},
"medium": {
"file": "https://ww2.kqed.org/app/uploads/sites/41/2022/10/sr04_fall_galette_honey-800x450.png",
"width": 800,
"mimeType": "image/png",
"height": 450
},
"medium_large": {
"file": "https://ww2.kqed.org/app/uploads/sites/41/2022/10/sr04_fall_galette_honey-768x432.png",
"width": 768,
"mimeType": "image/png",
"height": 432
}
},
"publishDate": 1665428431,
"modified": 1665432650,
"caption": "Get cozy with a savory fall galette with hot honey.",
"description": null,
"title": "Fall Galette with Hot Honey",
"credit": "Stefani Renée",
"status": "inherit",
"altTag": "Slice of savory tart with sweet potato, chard, and a jar of hot honey",
"isLoading": false,
"fetchFailed": false
},
"news_11431556": {
"type": "attachments",
"id": "news_11431556",
"meta": {
"index": "attachments_1716263798",
"site": "news",
"id": "11431556",
"found": true
},
"parent": 11401794,
"imgSizes": {
"small": {
"file": "https://ww2.kqed.org/app/uploads/sites/10/2017/04/GettyImages-80811914-520x347.jpg",
"width": 520,
"mimeType": "image/jpeg",
"height": 347
},
"twentyfourteen-full-width": {
"file": "https://ww2.kqed.org/app/uploads/sites/10/2017/04/GettyImages-80811914-1024x576.jpg",
"width": 1024,
"mimeType": "image/jpeg",
"height": 576
},
"thumbnail": {
"file": "https://ww2.kqed.org/app/uploads/sites/10/2017/04/GettyImages-80811914-160x107.jpg",
"width": 160,
"mimeType": "image/jpeg",
"height": 107
},
"fd-sm": {
"file": "https://ww2.kqed.org/app/uploads/sites/10/2017/04/GettyImages-80811914-960x640.jpg",
"width": 960,
"mimeType": "image/jpeg",
"height": 640
},
"post-thumbnail": {
"file": "https://ww2.kqed.org/app/uploads/sites/10/2017/04/GettyImages-80811914-672x372.jpg",
"width": 672,
"mimeType": "image/jpeg",
"height": 372
},
"xsmall": {
"file": "https://ww2.kqed.org/app/uploads/sites/10/2017/04/GettyImages-80811914-375x250.jpg",
"width": 375,
"mimeType": "image/jpeg",
"height": 250
},
"kqedFullSize": {
"file": "https://ww2.kqed.org/app/uploads/sites/10/2017/04/GettyImages-80811914.jpg",
"width": 1024,
"height": 683
},
"large": {
"file": "https://ww2.kqed.org/app/uploads/sites/10/2017/04/GettyImages-80811914-1020x680.jpg",
"width": 1020,
"mimeType": "image/jpeg",
"height": 680
},
"guest-author-50": {
"file": "https://ww2.kqed.org/app/uploads/sites/10/2017/04/GettyImages-80811914-50x50.jpg",
"width": 50,
"mimeType": "image/jpeg",
"height": 50
},
"guest-author-96": {
"file": "https://ww2.kqed.org/app/uploads/sites/10/2017/04/GettyImages-80811914-96x96.jpg",
"width": 96,
"mimeType": "image/jpeg",
"height": 96
},
"medium": {
"file": "https://ww2.kqed.org/app/uploads/sites/10/2017/04/GettyImages-80811914-800x534.jpg",
"width": 800,
"mimeType": "image/jpeg",
"height": 534
},
"guest-author-64": {
"file": "https://ww2.kqed.org/app/uploads/sites/10/2017/04/GettyImages-80811914-64x64.jpg",
"width": 64,
"mimeType": "image/jpeg",
"height": 64
},
"guest-author-32": {
"file": "https://ww2.kqed.org/app/uploads/sites/10/2017/04/GettyImages-80811914-32x32.jpg",
"width": 32,
"mimeType": "image/jpeg",
"height": 32
},
"detail": {
"file": "https://ww2.kqed.org/app/uploads/sites/10/2017/04/GettyImages-80811914-150x150.jpg",
"width": 150,
"mimeType": "image/jpeg",
"height": 150
},
"guest-author-128": {
"file": "https://ww2.kqed.org/app/uploads/sites/10/2017/04/GettyImages-80811914-128x128.jpg",
"width": 128,
"mimeType": "image/jpeg",
"height": 128
},
"xxsmall": {
"file": "https://ww2.kqed.org/app/uploads/sites/10/2017/04/GettyImages-80811914-240x160.jpg",
"width": 240,
"mimeType": "image/jpeg",
"height": 160
}
},
"publishDate": 1493406908,
"modified": 1493406928,
"caption": "Freshly baked loaves of sourdough bread are displayed at Boudin Bakery.",
"description": "Freshly baked loaves of sourdough bread are displayed at Boudin Bakery.",
"title": "Flour Scarcity Affects San Francisco Sourdough Bread Bakers",
"credit": "Justin Sullivan/Getty Images",
"status": "inherit",
"isLoading": false,
"fetchFailed": false
},
"news_11817540": {
"type": "attachments",
"id": "news_11817540",
"meta": {
"index": "attachments_1716263798",
"site": "news",
"id": "11817540",
"found": true
},
"parent": 11819923,
"imgSizes": {
"apple_news_ca_square_4_0": {
"file": "https://ww2.kqed.org/app/uploads/sites/10/2020/05/Rice-A-Roni-470x470.jpg",
"width": 470,
"mimeType": "image/jpeg",
"height": 470
},
"twentyfourteen-full-width": {
"file": "https://ww2.kqed.org/app/uploads/sites/10/2020/05/Rice-A-Roni-774x576.jpg",
"width": 774,
"mimeType": "image/jpeg",
"height": 576
},
"thumbnail": {
"file": "https://ww2.kqed.org/app/uploads/sites/10/2020/05/Rice-A-Roni-160x126.jpg",
"width": 160,
"mimeType": "image/jpeg",
"height": 126
},
"post-thumbnail": {
"file": "https://ww2.kqed.org/app/uploads/sites/10/2020/05/Rice-A-Roni-672x372.jpg",
"width": 672,
"mimeType": "image/jpeg",
"height": 372
},
"kqedFullSize": {
"file": "https://ww2.kqed.org/app/uploads/sites/10/2020/05/Rice-A-Roni.jpg",
"width": 774,
"height": 608
},
"apple_news_ca_landscape_4_7": {
"file": "https://ww2.kqed.org/app/uploads/sites/10/2020/05/Rice-A-Roni-632x474.jpg",
"width": 632,
"mimeType": "image/jpeg",
"height": 474
},
"apple_news_ca_portrait_4_7": {
"file": "https://ww2.kqed.org/app/uploads/sites/10/2020/05/Rice-A-Roni-414x552.jpg",
"width": 414,
"mimeType": "image/jpeg",
"height": 552
},
"apple_news_ca_portrait_5_5": {
"file": "https://ww2.kqed.org/app/uploads/sites/10/2020/05/Rice-A-Roni-687x608.jpg",
"width": 687,
"mimeType": "image/jpeg",
"height": 608
},
"apple_news_ca_square_4_7": {
"file": "https://ww2.kqed.org/app/uploads/sites/10/2020/05/Rice-A-Roni-550x550.jpg",
"width": 550,
"mimeType": "image/jpeg",
"height": 550
},
"apple_news_ca_landscape_4_0": {
"file": "https://ww2.kqed.org/app/uploads/sites/10/2020/05/Rice-A-Roni-536x402.jpg",
"width": 536,
"mimeType": "image/jpeg",
"height": 402
},
"apple_news_ca_portrait_4_0": {
"file": "https://ww2.kqed.org/app/uploads/sites/10/2020/05/Rice-A-Roni-354x472.jpg",
"width": 354,
"mimeType": "image/jpeg",
"height": 472
}
},
"publishDate": 1589226869,
"modified": 1590086560,
"caption": "Rice-A-Roni is a common household item with a surprising San Francisco origin story.",
"description": null,
"title": "Rice-A-Roni",
"credit": "Boereck 13:27, 25 September 2006 (UTC) / CC BY-SA ",
"status": "inherit",
"isLoading": false,
"fetchFailed": false
},
"news_11796240": {
"type": "attachments",
"id": "news_11796240",
"meta": {
"index": "attachments_1716263798",
"site": "news",
"id": "11796240",
"found": true
},
"parent": 11796231,
"imgSizes": {
"apple_news_ca_landscape_5_5": {
"file": "https://ww2.kqed.org/app/uploads/sites/10/2020/01/RS40736_IMG_8237-qut-1044x783.jpg",
"width": 1044,
"mimeType": "image/jpeg",
"height": 783
},
"apple_news_ca_square_4_0": {
"file": "https://ww2.kqed.org/app/uploads/sites/10/2020/01/RS40736_IMG_8237-qut-470x470.jpg",
"width": 470,
"mimeType": "image/jpeg",
"height": 470
},
"twentyfourteen-full-width": {
"file": "https://ww2.kqed.org/app/uploads/sites/10/2020/01/RS40736_IMG_8237-qut-1038x576.jpg",
"width": 1038,
"mimeType": "image/jpeg",
"height": 576
},
"thumbnail": {
"file": "https://ww2.kqed.org/app/uploads/sites/10/2020/01/RS40736_IMG_8237-qut-160x136.jpg",
"width": 160,
"mimeType": "image/jpeg",
"height": 136
},
"post-thumbnail": {
"file": "https://ww2.kqed.org/app/uploads/sites/10/2020/01/RS40736_IMG_8237-qut-672x372.jpg",
"width": 672,
"mimeType": "image/jpeg",
"height": 372
},
"kqedFullSize": {
"file": "https://ww2.kqed.org/app/uploads/sites/10/2020/01/RS40736_IMG_8237-qut.jpg",
"width": 1920,
"height": 1630
},
"apple_news_ca_landscape_4_7": {
"file": "https://ww2.kqed.org/app/uploads/sites/10/2020/01/RS40736_IMG_8237-qut-632x474.jpg",
"width": 632,
"mimeType": "image/jpeg",
"height": 474
},
"large": {
"file": "https://ww2.kqed.org/app/uploads/sites/10/2020/01/RS40736_IMG_8237-qut-1020x866.jpg",
"width": 1020,
"mimeType": "image/jpeg",
"height": 866
},
"complete_open_graph": {
"file": "https://ww2.kqed.org/app/uploads/sites/10/2020/01/RS40736_IMG_8237-qut-1200x1019.jpg",
"width": 1200,
"mimeType": "image/jpeg",
"height": 1019
},
"apple_news_ca_landscape_4_0": {
"file": "https://ww2.kqed.org/app/uploads/sites/10/2020/01/RS40736_IMG_8237-qut-536x402.jpg",
"width": 536,
"mimeType": "image/jpeg",
"height": 402
},
"apple_news_ca_portrait_12_9": {
"file": "https://ww2.kqed.org/app/uploads/sites/10/2020/01/RS40736_IMG_8237-qut-1122x1496.jpg",
"width": 1122,
"mimeType": "image/jpeg",
"height": 1496
},
"medium": {
"file": "https://ww2.kqed.org/app/uploads/sites/10/2020/01/RS40736_IMG_8237-qut-800x679.jpg",
"width": 800,
"mimeType": "image/jpeg",
"height": 679
},
"apple_news_ca_portrait_4_0": {
"file": "https://ww2.kqed.org/app/uploads/sites/10/2020/01/RS40736_IMG_8237-qut-354x472.jpg",
"width": 354,
"mimeType": "image/jpeg",
"height": 472
},
"apple_news_ca_portrait_9_7": {
"file": "https://ww2.kqed.org/app/uploads/sites/10/2020/01/RS40736_IMG_8237-qut-840x1120.jpg",
"width": 840,
"mimeType": "image/jpeg",
"height": 1120
},
"apple_news_ca_landscape_12_9": {
"file": "https://ww2.kqed.org/app/uploads/sites/10/2020/01/RS40736_IMG_8237-qut-1832x1374.jpg",
"width": 1832,
"mimeType": "image/jpeg",
"height": 1374
},
"apple_news_ca_square_9_7": {
"file": "https://ww2.kqed.org/app/uploads/sites/10/2020/01/RS40736_IMG_8237-qut-1104x1104.jpg",
"width": 1104,
"mimeType": "image/jpeg",
"height": 1104
},
"apple_news_ca_portrait_4_7": {
"file": "https://ww2.kqed.org/app/uploads/sites/10/2020/01/RS40736_IMG_8237-qut-414x552.jpg",
"width": 414,
"mimeType": "image/jpeg",
"height": 552
},
"apple_news_ca_square_12_9": {
"file": "https://ww2.kqed.org/app/uploads/sites/10/2020/01/RS40736_IMG_8237-qut-1472x1472.jpg",
"width": 1472,
"mimeType": "image/jpeg",
"height": 1472
},
"apple_news_ca_portrait_5_5": {
"file": "https://ww2.kqed.org/app/uploads/sites/10/2020/01/RS40736_IMG_8237-qut-687x916.jpg",
"width": 687,
"mimeType": "image/jpeg",
"height": 916
},
"full-width": {
"file": "https://ww2.kqed.org/app/uploads/sites/10/2020/01/RS40736_IMG_8237-qut-1920x1630.jpg",
"width": 1920,
"mimeType": "image/jpeg",
"height": 1630
},
"apple_news_ca_square_4_7": {
"file": "https://ww2.kqed.org/app/uploads/sites/10/2020/01/RS40736_IMG_8237-qut-550x550.jpg",
"width": 550,
"mimeType": "image/jpeg",
"height": 550
},
"apple_news_ca_landscape_9_7": {
"file": "https://ww2.kqed.org/app/uploads/sites/10/2020/01/RS40736_IMG_8237-qut-1376x1032.jpg",
"width": 1376,
"mimeType": "image/jpeg",
"height": 1032
},
"apple_news_ca_square_5_5": {
"file": "https://ww2.kqed.org/app/uploads/sites/10/2020/01/RS40736_IMG_8237-qut-912x912.jpg",
"width": 912,
"mimeType": "image/jpeg",
"height": 912
}
},
"publishDate": 1579129236,
"modified": 1579296879,
"caption": "The Huy Fong factory waiting room includes unique items, like a David Tran bobblehead. ",
"description": null,
"title": "RS40736_IMG_8237-qut",
"credit": "Avishay Artsy/KQED News",
"status": "inherit",
"isLoading": false,
"fetchFailed": false
},
"news_11775051": {
"type": "attachments",
"id": "news_11775051",
"meta": {
"index": "attachments_1716263798",
"site": "news",
"id": "11775051",
"found": true
},
"parent": 11774993,
"imgSizes": {
"apple_news_ca_landscape_5_5": {
"file": "https://ww2.kqed.org/app/uploads/sites/10/2019/09/RS39125_fresh-rocky-road-at-Fentons-2-qut-1044x783.jpg",
"width": 1044,
"mimeType": "image/jpeg",
"height": 783
},
"apple_news_ca_square_4_0": {
"file": "https://ww2.kqed.org/app/uploads/sites/10/2019/09/RS39125_fresh-rocky-road-at-Fentons-2-qut-470x470.jpg",
"width": 470,
"mimeType": "image/jpeg",
"height": 470
},
"twentyfourteen-full-width": {
"file": "https://ww2.kqed.org/app/uploads/sites/10/2019/09/RS39125_fresh-rocky-road-at-Fentons-2-qut-1038x576.jpg",
"width": 1038,
"mimeType": "image/jpeg",
"height": 576
},
"thumbnail": {
"file": "https://ww2.kqed.org/app/uploads/sites/10/2019/09/RS39125_fresh-rocky-road-at-Fentons-2-qut-160x120.jpg",
"width": 160,
"mimeType": "image/jpeg",
"height": 120
},
"post-thumbnail": {
"file": "https://ww2.kqed.org/app/uploads/sites/10/2019/09/RS39125_fresh-rocky-road-at-Fentons-2-qut-672x372.jpg",
"width": 672,
"mimeType": "image/jpeg",
"height": 372
},
"kqedFullSize": {
"file": "https://ww2.kqed.org/app/uploads/sites/10/2019/09/RS39125_fresh-rocky-road-at-Fentons-2-qut.jpg",
"width": 1920,
"height": 1440
},
"apple_news_ca_landscape_4_7": {
"file": "https://ww2.kqed.org/app/uploads/sites/10/2019/09/RS39125_fresh-rocky-road-at-Fentons-2-qut-632x474.jpg",
"width": 632,
"mimeType": "image/jpeg",
"height": 474
},
"large": {
"file": "https://ww2.kqed.org/app/uploads/sites/10/2019/09/RS39125_fresh-rocky-road-at-Fentons-2-qut-1020x765.jpg",
"width": 1020,
"mimeType": "image/jpeg",
"height": 765
},
"complete_open_graph": {
"file": "https://ww2.kqed.org/app/uploads/sites/10/2019/09/RS39125_fresh-rocky-road-at-Fentons-2-qut-1200x900.jpg",
"width": 1200,
"mimeType": "image/jpeg",
"height": 900
},
"apple_news_ca_landscape_4_0": {
"file": "https://ww2.kqed.org/app/uploads/sites/10/2019/09/RS39125_fresh-rocky-road-at-Fentons-2-qut-536x402.jpg",
"width": 536,
"mimeType": "image/jpeg",
"height": 402
},
"apple_news_ca_portrait_12_9": {
"file": "https://ww2.kqed.org/app/uploads/sites/10/2019/09/RS39125_fresh-rocky-road-at-Fentons-2-qut-1122x1440.jpg",
"width": 1122,
"mimeType": "image/jpeg",
"height": 1440
},
"medium": {
"file": "https://ww2.kqed.org/app/uploads/sites/10/2019/09/RS39125_fresh-rocky-road-at-Fentons-2-qut-800x600.jpg",
"width": 800,
"mimeType": "image/jpeg",
"height": 600
},
"apple_news_ca_portrait_4_0": {
"file": "https://ww2.kqed.org/app/uploads/sites/10/2019/09/RS39125_fresh-rocky-road-at-Fentons-2-qut-354x472.jpg",
"width": 354,
"mimeType": "image/jpeg",
"height": 472
},
"apple_news_ca_portrait_9_7": {
"file": "https://ww2.kqed.org/app/uploads/sites/10/2019/09/RS39125_fresh-rocky-road-at-Fentons-2-qut-840x1120.jpg",
"width": 840,
"mimeType": "image/jpeg",
"height": 1120
},
"apple_news_ca_landscape_12_9": {
"file": "https://ww2.kqed.org/app/uploads/sites/10/2019/09/RS39125_fresh-rocky-road-at-Fentons-2-qut-1832x1374.jpg",
"width": 1832,
"mimeType": "image/jpeg",
"height": 1374
},
"apple_news_ca_square_9_7": {
"file": "https://ww2.kqed.org/app/uploads/sites/10/2019/09/RS39125_fresh-rocky-road-at-Fentons-2-qut-1104x1104.jpg",
"width": 1104,
"mimeType": "image/jpeg",
"height": 1104
},
"apple_news_ca_portrait_4_7": {
"file": "https://ww2.kqed.org/app/uploads/sites/10/2019/09/RS39125_fresh-rocky-road-at-Fentons-2-qut-414x552.jpg",
"width": 414,
"mimeType": "image/jpeg",
"height": 552
},
"apple_news_ca_square_12_9": {
"file": "https://ww2.kqed.org/app/uploads/sites/10/2019/09/RS39125_fresh-rocky-road-at-Fentons-2-qut-1472x1440.jpg",
"width": 1472,
"mimeType": "image/jpeg",
"height": 1440
},
"apple_news_ca_portrait_5_5": {
"file": "https://ww2.kqed.org/app/uploads/sites/10/2019/09/RS39125_fresh-rocky-road-at-Fentons-2-qut-687x916.jpg",
"width": 687,
"mimeType": "image/jpeg",
"height": 916
},
"full-width": {
"file": "https://ww2.kqed.org/app/uploads/sites/10/2019/09/RS39125_fresh-rocky-road-at-Fentons-2-qut-1920x1440.jpg",
"width": 1920,
"mimeType": "image/jpeg",
"height": 1440
},
"apple_news_ca_square_4_7": {
"file": "https://ww2.kqed.org/app/uploads/sites/10/2019/09/RS39125_fresh-rocky-road-at-Fentons-2-qut-550x550.jpg",
"width": 550,
"mimeType": "image/jpeg",
"height": 550
},
"apple_news_ca_landscape_9_7": {
"file": "https://ww2.kqed.org/app/uploads/sites/10/2019/09/RS39125_fresh-rocky-road-at-Fentons-2-qut-1376x1032.jpg",
"width": 1376,
"mimeType": "image/jpeg",
"height": 1032
},
"apple_news_ca_square_5_5": {
"file": "https://ww2.kqed.org/app/uploads/sites/10/2019/09/RS39125_fresh-rocky-road-at-Fentons-2-qut-912x912.jpg",
"width": 912,
"mimeType": "image/jpeg",
"height": 912
}
},
"publishDate": 1568839292,
"modified": 1569092998,
"caption": "Fenton's Creamery still makes its ice cream in small batches, by hand. The creamery claims to have invented Rocky Road in 1929. So does Dryer's, which was headquartered just down the road in Oakland. ",
"description": "Two small batches of rocky road ice cream, with marshmallows and walnuts",
"title": "RS39125_fresh rocky road at Fenton's 2-qut",
"credit": "Sasha Khokha/KQED",
"status": "inherit",
"isLoading": false,
"fetchFailed": false
},
"news_11729451": {
"type": "attachments",
"id": "news_11729451",
"meta": {
"index": "attachments_1716263798",
"site": "news",
"id": "11729451",
"found": true
},
"parent": 11729394,
"imgSizes": {
"twentyfourteen-full-width": {
"file": "https://ww2.kqed.org/app/uploads/sites/10/2019/02/RS34810_DSC_1228-qut-1920x1280-1038x576.jpg",
"width": 1038,
"mimeType": "image/jpeg",
"height": 576
},
"thumbnail": {
"file": "https://ww2.kqed.org/app/uploads/sites/10/2019/02/RS34810_DSC_1228-qut-1920x1280-160x107.jpg",
"width": 160,
"mimeType": "image/jpeg",
"height": 107
},
"post-thumbnail": {
"file": "https://ww2.kqed.org/app/uploads/sites/10/2019/02/RS34810_DSC_1228-qut-1920x1280-672x372.jpg",
"width": 672,
"mimeType": "image/jpeg",
"height": 372
},
"kqedFullSize": {
"file": "https://ww2.kqed.org/app/uploads/sites/10/2019/02/RS34810_DSC_1228-qut-1920x1280.jpg",
"width": 1920,
"height": 1280
},
"large": {
"file": "https://ww2.kqed.org/app/uploads/sites/10/2019/02/RS34810_DSC_1228-qut-1920x1280-1020x680.jpg",
"width": 1020,
"mimeType": "image/jpeg",
"height": 680
},
"complete_open_graph": {
"file": "https://ww2.kqed.org/app/uploads/sites/10/2019/02/RS34810_DSC_1228-qut-1920x1280-1200x800.jpg",
"width": 1200,
"mimeType": "image/jpeg",
"height": 800
},
"guest-author-50": {
"file": "https://ww2.kqed.org/app/uploads/sites/10/2019/02/RS34810_DSC_1228-qut-1920x1280-50x50.jpg",
"width": 50,
"mimeType": "image/jpeg",
"height": 50
},
"guest-author-96": {
"file": "https://ww2.kqed.org/app/uploads/sites/10/2019/02/RS34810_DSC_1228-qut-1920x1280-96x96.jpg",
"width": 96,
"mimeType": "image/jpeg",
"height": 96
},
"medium": {
"file": "https://ww2.kqed.org/app/uploads/sites/10/2019/02/RS34810_DSC_1228-qut-1920x1280-800x533.jpg",
"width": 800,
"mimeType": "image/jpeg",
"height": 533
},
"guest-author-64": {
"file": "https://ww2.kqed.org/app/uploads/sites/10/2019/02/RS34810_DSC_1228-qut-1920x1280-64x64.jpg",
"width": 64,
"mimeType": "image/jpeg",
"height": 64
},
"guest-author-32": {
"file": "https://ww2.kqed.org/app/uploads/sites/10/2019/02/RS34810_DSC_1228-qut-1920x1280-32x32.jpg",
"width": 32,
"mimeType": "image/jpeg",
"height": 32
},
"full-width": {
"file": "https://ww2.kqed.org/app/uploads/sites/10/2019/02/RS34810_DSC_1228-qut-1920x1280-1920x1280.jpg",
"width": 1920,
"mimeType": "image/jpeg",
"height": 1280
},
"guest-author-128": {
"file": "https://ww2.kqed.org/app/uploads/sites/10/2019/02/RS34810_DSC_1228-qut-1920x1280-128x128.jpg",
"width": 128,
"mimeType": "image/jpeg",
"height": 128
}
},
"publishDate": 1551298872,
"modified": 1551298919,
"caption": "In the late 1800s, Pisco Punch wasn’t just a drink. Ordering a glass was a status symbol.",
"description": "In the late 1800s, Pisco Punch wasn’t just a drink. Ordering a glass was a status symbol.",
"title": "RS34810_DSC_1228-qut-1920x1280",
"credit": "Carly Severn/KQED",
"status": "inherit",
"isLoading": false,
"fetchFailed": false
},
"news_11759000": {
"type": "attachments",
"id": "news_11759000",
"meta": {
"index": "attachments_1716263798",
"site": "news",
"id": "11759000",
"found": true
},
"parent": 11758996,
"imgSizes": {
"apple_news_ca_square_4_0": {
"file": "https://ww2.kqed.org/app/uploads/sites/10/2019/07/Trader-Vics-Mai-Tai-470x470.jpg",
"width": 470,
"mimeType": "image/jpeg",
"height": 470
},
"twentyfourteen-full-width": {
"file": "https://ww2.kqed.org/app/uploads/sites/10/2019/07/Trader-Vics-Mai-Tai-1024x576.jpg",
"width": 1024,
"mimeType": "image/jpeg",
"height": 576
},
"thumbnail": {
"file": "https://ww2.kqed.org/app/uploads/sites/10/2019/07/Trader-Vics-Mai-Tai-160x107.jpg",
"width": 160,
"mimeType": "image/jpeg",
"height": 107
},
"post-thumbnail": {
"file": "https://ww2.kqed.org/app/uploads/sites/10/2019/07/Trader-Vics-Mai-Tai-672x372.jpg",
"width": 672,
"mimeType": "image/jpeg",
"height": 372
},
"kqedFullSize": {
"file": "https://ww2.kqed.org/app/uploads/sites/10/2019/07/Trader-Vics-Mai-Tai.jpg",
"width": 1024,
"height": 682
},
"apple_news_ca_landscape_4_7": {
"file": "https://ww2.kqed.org/app/uploads/sites/10/2019/07/Trader-Vics-Mai-Tai-632x474.jpg",
"width": 632,
"mimeType": "image/jpeg",
"height": 474
},
"large": {
"file": "https://ww2.kqed.org/app/uploads/sites/10/2019/07/Trader-Vics-Mai-Tai-1020x679.jpg",
"width": 1020,
"mimeType": "image/jpeg",
"height": 679
},
"apple_news_ca_landscape_4_0": {
"file": "https://ww2.kqed.org/app/uploads/sites/10/2019/07/Trader-Vics-Mai-Tai-536x402.jpg",
"width": 536,
"mimeType": "image/jpeg",
"height": 402
},
"medium": {
"file": "https://ww2.kqed.org/app/uploads/sites/10/2019/07/Trader-Vics-Mai-Tai-800x533.jpg",
"width": 800,
"mimeType": "image/jpeg",
"height": 533
},
"apple_news_ca_portrait_4_0": {
"file": "https://ww2.kqed.org/app/uploads/sites/10/2019/07/Trader-Vics-Mai-Tai-354x472.jpg",
"width": 354,
"mimeType": "image/jpeg",
"height": 472
},
"apple_news_ca_portrait_9_7": {
"file": "https://ww2.kqed.org/app/uploads/sites/10/2019/07/Trader-Vics-Mai-Tai-840x682.jpg",
"width": 840,
"mimeType": "image/jpeg",
"height": 682
},
"apple_news_ca_portrait_4_7": {
"file": "https://ww2.kqed.org/app/uploads/sites/10/2019/07/Trader-Vics-Mai-Tai-414x552.jpg",
"width": 414,
"mimeType": "image/jpeg",
"height": 552
},
"apple_news_ca_portrait_5_5": {
"file": "https://ww2.kqed.org/app/uploads/sites/10/2019/07/Trader-Vics-Mai-Tai-687x682.jpg",
"width": 687,
"mimeType": "image/jpeg",
"height": 682
},
"apple_news_ca_square_4_7": {
"file": "https://ww2.kqed.org/app/uploads/sites/10/2019/07/Trader-Vics-Mai-Tai-550x550.jpg",
"width": 550,
"mimeType": "image/jpeg",
"height": 550
},
"apple_news_ca_square_5_5": {
"file": "https://ww2.kqed.org/app/uploads/sites/10/2019/07/Trader-Vics-Mai-Tai-912x682.jpg",
"width": 912,
"mimeType": "image/jpeg",
"height": 682
}
},
"publishDate": 1562196386,
"modified": 1562196420,
"caption": "The Mai Tai may have a tropical sounding name, but it's origins are right here in the Bay Area. ",
"description": "The Mai Tai may have a tropical sounding name, but it's origins are right here in the Bay Area. ",
"title": "Trader-Vics-Mai-Tai",
"credit": "Courtesy of Trader Vics.",
"status": "inherit",
"isLoading": false,
"fetchFailed": false
},
"news_11756259": {
"type": "attachments",
"id": "news_11756259",
"meta": {
"index": "attachments_1716263798",
"site": "news",
"id": "11756259",
"found": true
},
"parent": 11755932,
"imgSizes": {
"apple_news_ca_landscape_5_5": {
"file": "https://ww2.kqed.org/app/uploads/sites/10/2019/06/RS37844_VIC_OAK_BAR-qut-1044x783.jpg",
"width": 1044,
"mimeType": "image/jpeg",
"height": 783
},
"apple_news_ca_square_4_0": {
"file": "https://ww2.kqed.org/app/uploads/sites/10/2019/06/RS37844_VIC_OAK_BAR-qut-470x470.jpg",
"width": 470,
"mimeType": "image/jpeg",
"height": 470
},
"twentyfourteen-full-width": {
"file": "https://ww2.kqed.org/app/uploads/sites/10/2019/06/RS37844_VIC_OAK_BAR-qut-1038x576.jpg",
"width": 1038,
"mimeType": "image/jpeg",
"height": 576
},
"thumbnail": {
"file": "https://ww2.kqed.org/app/uploads/sites/10/2019/06/RS37844_VIC_OAK_BAR-qut-160x120.jpg",
"width": 160,
"mimeType": "image/jpeg",
"height": 120
},
"post-thumbnail": {
"file": "https://ww2.kqed.org/app/uploads/sites/10/2019/06/RS37844_VIC_OAK_BAR-qut-672x372.jpg",
"width": 672,
"mimeType": "image/jpeg",
"height": 372
},
"kqedFullSize": {
"file": "https://ww2.kqed.org/app/uploads/sites/10/2019/06/RS37844_VIC_OAK_BAR-qut.jpg",
"width": 1920,
"height": 1438
},
"apple_news_ca_landscape_4_7": {
"file": "https://ww2.kqed.org/app/uploads/sites/10/2019/06/RS37844_VIC_OAK_BAR-qut-632x474.jpg",
"width": 632,
"mimeType": "image/jpeg",
"height": 474
},
"large": {
"file": "https://ww2.kqed.org/app/uploads/sites/10/2019/06/RS37844_VIC_OAK_BAR-qut-1020x764.jpg",
"width": 1020,
"mimeType": "image/jpeg",
"height": 764
},
"complete_open_graph": {
"file": "https://ww2.kqed.org/app/uploads/sites/10/2019/06/RS37844_VIC_OAK_BAR-qut-1200x899.jpg",
"width": 1200,
"mimeType": "image/jpeg",
"height": 899
},
"apple_news_ca_landscape_4_0": {
"file": "https://ww2.kqed.org/app/uploads/sites/10/2019/06/RS37844_VIC_OAK_BAR-qut-536x402.jpg",
"width": 536,
"mimeType": "image/jpeg",
"height": 402
},
"apple_news_ca_portrait_12_9": {
"file": "https://ww2.kqed.org/app/uploads/sites/10/2019/06/RS37844_VIC_OAK_BAR-qut-1122x1438.jpg",
"width": 1122,
"mimeType": "image/jpeg",
"height": 1438
},
"medium": {
"file": "https://ww2.kqed.org/app/uploads/sites/10/2019/06/RS37844_VIC_OAK_BAR-qut-800x599.jpg",
"width": 800,
"mimeType": "image/jpeg",
"height": 599
},
"apple_news_ca_portrait_4_0": {
"file": "https://ww2.kqed.org/app/uploads/sites/10/2019/06/RS37844_VIC_OAK_BAR-qut-354x472.jpg",
"width": 354,
"mimeType": "image/jpeg",
"height": 472
},
"apple_news_ca_portrait_9_7": {
"file": "https://ww2.kqed.org/app/uploads/sites/10/2019/06/RS37844_VIC_OAK_BAR-qut-840x1120.jpg",
"width": 840,
"mimeType": "image/jpeg",
"height": 1120
},
"apple_news_ca_landscape_12_9": {
"file": "https://ww2.kqed.org/app/uploads/sites/10/2019/06/RS37844_VIC_OAK_BAR-qut-1832x1374.jpg",
"width": 1832,
"mimeType": "image/jpeg",
"height": 1374
},
"apple_news_ca_square_9_7": {
"file": "https://ww2.kqed.org/app/uploads/sites/10/2019/06/RS37844_VIC_OAK_BAR-qut-1104x1104.jpg",
"width": 1104,
"mimeType": "image/jpeg",
"height": 1104
},
"apple_news_ca_portrait_4_7": {
"file": "https://ww2.kqed.org/app/uploads/sites/10/2019/06/RS37844_VIC_OAK_BAR-qut-414x552.jpg",
"width": 414,
"mimeType": "image/jpeg",
"height": 552
},
"apple_news_ca_square_12_9": {
"file": "https://ww2.kqed.org/app/uploads/sites/10/2019/06/RS37844_VIC_OAK_BAR-qut-1472x1438.jpg",
"width": 1472,
"mimeType": "image/jpeg",
"height": 1438
},
"apple_news_ca_portrait_5_5": {
"file": "https://ww2.kqed.org/app/uploads/sites/10/2019/06/RS37844_VIC_OAK_BAR-qut-687x916.jpg",
"width": 687,
"mimeType": "image/jpeg",
"height": 916
},
"full-width": {
"file": "https://ww2.kqed.org/app/uploads/sites/10/2019/06/RS37844_VIC_OAK_BAR-qut-1920x1438.jpg",
"width": 1920,
"mimeType": "image/jpeg",
"height": 1438
},
"apple_news_ca_square_4_7": {
"file": "https://ww2.kqed.org/app/uploads/sites/10/2019/06/RS37844_VIC_OAK_BAR-qut-550x550.jpg",
"width": 550,
"mimeType": "image/jpeg",
"height": 550
},
"apple_news_ca_landscape_9_7": {
"file": "https://ww2.kqed.org/app/uploads/sites/10/2019/06/RS37844_VIC_OAK_BAR-qut-1376x1032.jpg",
"width": 1376,
"mimeType": "image/jpeg",
"height": 1032
},
"apple_news_ca_square_5_5": {
"file": "https://ww2.kqed.org/app/uploads/sites/10/2019/06/RS37844_VIC_OAK_BAR-qut-912x912.jpg",
"width": 912,
"mimeType": "image/jpeg",
"height": 912
}
},
"publishDate": 1561077585,
"modified": 1561158328,
"caption": "Victor Bergeron behind the bar at Trader Vic's. ",
"description": "Victor Bergeron behind the bar at Trader Vic's. ",
"title": "Trader Vics Victor Bergeron",
"credit": "Courtesy of Eve Bergeron",
"status": "inherit",
"isLoading": false,
"fetchFailed": false
},
"news_11743018": {
"type": "attachments",
"id": "news_11743018",
"meta": {
"index": "attachments_1716263798",
"site": "news",
"id": "11743018",
"found": true
},
"parent": 11742748,
"imgSizes": {
"twentyfourteen-full-width": {
"file": "https://ww2.kqed.org/app/uploads/sites/10/2019/04/RS36761_AAA-7879_600dpiJPG-qut-1038x576.jpg",
"width": 1038,
"mimeType": "image/jpeg",
"height": 576
},
"thumbnail": {
"file": "https://ww2.kqed.org/app/uploads/sites/10/2019/04/RS36761_AAA-7879_600dpiJPG-qut-160x129.jpg",
"width": 160,
"mimeType": "image/jpeg",
"height": 129
},
"post-thumbnail": {
"file": "https://ww2.kqed.org/app/uploads/sites/10/2019/04/RS36761_AAA-7879_600dpiJPG-qut-672x372.jpg",
"width": 672,
"mimeType": "image/jpeg",
"height": 372
},
"kqedFullSize": {
"file": "https://ww2.kqed.org/app/uploads/sites/10/2019/04/RS36761_AAA-7879_600dpiJPG-qut.jpg",
"width": 1920,
"height": 1546
},
"large": {
"file": "https://ww2.kqed.org/app/uploads/sites/10/2019/04/RS36761_AAA-7879_600dpiJPG-qut-1020x821.jpg",
"width": 1020,
"mimeType": "image/jpeg",
"height": 821
},
"complete_open_graph": {
"file": "https://ww2.kqed.org/app/uploads/sites/10/2019/04/RS36761_AAA-7879_600dpiJPG-qut-1200x966.jpg",
"width": 1200,
"mimeType": "image/jpeg",
"height": 966
},
"full-width": {
"file": "https://ww2.kqed.org/app/uploads/sites/10/2019/04/RS36761_AAA-7879_600dpiJPG-qut-1920x1546.jpg",
"width": 1920,
"mimeType": "image/jpeg",
"height": 1546
},
"medium": {
"file": "https://ww2.kqed.org/app/uploads/sites/10/2019/04/RS36761_AAA-7879_600dpiJPG-qut-800x644.jpg",
"width": 800,
"mimeType": "image/jpeg",
"height": 644
}
},
"publishDate": 1556238903,
"modified": 1556317015,
"caption": "A couple enjoying fortune cookies and tea at the Japanese Tea Garden in 1941, just one year before the internment of citizens of Japanese descent in the United States.",
"description": "A couple enjoying fortune cookies and tea at the Japanese Tea Garden in 1941, just one year before the internment of citizens of Japanese descent in the United States.",
"title": "RS36761_AAA-7879_600dpiJPG-qut",
"credit": "San Francisco History Center, San Francisco Public Library",
"status": "inherit",
"isLoading": false,
"fetchFailed": false
},
"news_11734735": {
"type": "attachments",
"id": "news_11734735",
"meta": {
"index": "attachments_1716263798",
"site": "news",
"id": "11734735",
"found": true
},
"parent": 11734682,
"imgSizes": {
"post-thumbnail": {
"file": "https://ww2.kqed.org/app/uploads/sites/10/2019/03/RS36082_IMG_7606-qut-672x372.jpg",
"width": 672,
"mimeType": "image/jpeg",
"height": 372
},
"kqedFullSize": {
"file": "https://ww2.kqed.org/app/uploads/sites/10/2019/03/RS36082_IMG_7606-qut.jpg",
"width": 1920,
"height": 1440
},
"guest-author-50": {
"file": "https://ww2.kqed.org/app/uploads/sites/10/2019/03/RS36082_IMG_7606-qut-50x50.jpg",
"width": 50,
"mimeType": "image/jpeg",
"height": 50
},
"guest-author-96": {
"file": "https://ww2.kqed.org/app/uploads/sites/10/2019/03/RS36082_IMG_7606-qut-96x96.jpg",
"width": 96,
"mimeType": "image/jpeg",
"height": 96
},
"apple_news_ca_portrait_12_9": {
"file": "https://ww2.kqed.org/app/uploads/sites/10/2019/03/RS36082_IMG_7606-qut-1122x1440.jpg",
"width": 1122,
"mimeType": "image/jpeg",
"height": 1440
},
"medium": {
"file": "https://ww2.kqed.org/app/uploads/sites/10/2019/03/RS36082_IMG_7606-qut-800x600.jpg",
"width": 800,
"mimeType": "image/jpeg",
"height": 600
},
"guest-author-32": {
"file": "https://ww2.kqed.org/app/uploads/sites/10/2019/03/RS36082_IMG_7606-qut-32x32.jpg",
"width": 32,
"mimeType": "image/jpeg",
"height": 32
},
"apple_news_ca_portrait_9_7": {
"file": "https://ww2.kqed.org/app/uploads/sites/10/2019/03/RS36082_IMG_7606-qut-840x1120.jpg",
"width": 840,
"mimeType": "image/jpeg",
"height": 1120
},
"apple_news_ca_square_9_7": {
"file": "https://ww2.kqed.org/app/uploads/sites/10/2019/03/RS36082_IMG_7606-qut-1104x1104.jpg",
"width": 1104,
"mimeType": "image/jpeg",
"height": 1104
},
"apple_news_ca_portrait_4_7": {
"file": "https://ww2.kqed.org/app/uploads/sites/10/2019/03/RS36082_IMG_7606-qut-414x552.jpg",
"width": 414,
"mimeType": "image/jpeg",
"height": 552
},
"apple_news_ca_square_12_9": {
"file": "https://ww2.kqed.org/app/uploads/sites/10/2019/03/RS36082_IMG_7606-qut-1472x1440.jpg",
"width": 1472,
"mimeType": "image/jpeg",
"height": 1440
},
"apple_news_ca_portrait_5_5": {
"file": "https://ww2.kqed.org/app/uploads/sites/10/2019/03/RS36082_IMG_7606-qut-687x916.jpg",
"width": 687,
"mimeType": "image/jpeg",
"height": 916
},
"apple_news_ca_square_4_7": {
"file": "https://ww2.kqed.org/app/uploads/sites/10/2019/03/RS36082_IMG_7606-qut-550x550.jpg",
"width": 550,
"mimeType": "image/jpeg",
"height": 550
},
"apple_news_ca_square_5_5": {
"file": "https://ww2.kqed.org/app/uploads/sites/10/2019/03/RS36082_IMG_7606-qut-912x912.jpg",
"width": 912,
"mimeType": "image/jpeg",
"height": 912
},
"apple_news_ca_landscape_5_5": {
"file": "https://ww2.kqed.org/app/uploads/sites/10/2019/03/RS36082_IMG_7606-qut-1044x783.jpg",
"width": 1044,
"mimeType": "image/jpeg",
"height": 783
},
"apple_news_ca_square_4_0": {
"file": "https://ww2.kqed.org/app/uploads/sites/10/2019/03/RS36082_IMG_7606-qut-470x470.jpg",
"width": 470,
"mimeType": "image/jpeg",
"height": 470
},
"twentyfourteen-full-width": {
"file": "https://ww2.kqed.org/app/uploads/sites/10/2019/03/RS36082_IMG_7606-qut-1038x576.jpg",
"width": 1038,
"mimeType": "image/jpeg",
"height": 576
},
"thumbnail": {
"file": "https://ww2.kqed.org/app/uploads/sites/10/2019/03/RS36082_IMG_7606-qut-160x120.jpg",
"width": 160,
"mimeType": "image/jpeg",
"height": 120
},
"apple_news_ca_landscape_4_7": {
"file": "https://ww2.kqed.org/app/uploads/sites/10/2019/03/RS36082_IMG_7606-qut-632x474.jpg",
"width": 632,
"mimeType": "image/jpeg",
"height": 474
},
"large": {
"file": "https://ww2.kqed.org/app/uploads/sites/10/2019/03/RS36082_IMG_7606-qut-1020x765.jpg",
"width": 1020,
"mimeType": "image/jpeg",
"height": 765
},
"complete_open_graph": {
"file": "https://ww2.kqed.org/app/uploads/sites/10/2019/03/RS36082_IMG_7606-qut-1200x900.jpg",
"width": 1200,
"mimeType": "image/jpeg",
"height": 900
},
"apple_news_ca_landscape_4_0": {
"file": "https://ww2.kqed.org/app/uploads/sites/10/2019/03/RS36082_IMG_7606-qut-536x402.jpg",
"width": 536,
"mimeType": "image/jpeg",
"height": 402
},
"guest-author-64": {
"file": "https://ww2.kqed.org/app/uploads/sites/10/2019/03/RS36082_IMG_7606-qut-64x64.jpg",
"width": 64,
"mimeType": "image/jpeg",
"height": 64
},
"apple_news_ca_portrait_4_0": {
"file": "https://ww2.kqed.org/app/uploads/sites/10/2019/03/RS36082_IMG_7606-qut-354x472.jpg",
"width": 354,
"mimeType": "image/jpeg",
"height": 472
},
"apple_news_ca_landscape_12_9": {
"file": "https://ww2.kqed.org/app/uploads/sites/10/2019/03/RS36082_IMG_7606-qut-1832x1374.jpg",
"width": 1832,
"mimeType": "image/jpeg",
"height": 1374
},
"full-width": {
"file": "https://ww2.kqed.org/app/uploads/sites/10/2019/03/RS36082_IMG_7606-qut-1920x1440.jpg",
"width": 1920,
"mimeType": "image/jpeg",
"height": 1440
},
"guest-author-128": {
"file": "https://ww2.kqed.org/app/uploads/sites/10/2019/03/RS36082_IMG_7606-qut-128x128.jpg",
"width": 128,
"mimeType": "image/jpeg",
"height": 128
},
"apple_news_ca_landscape_9_7": {
"file": "https://ww2.kqed.org/app/uploads/sites/10/2019/03/RS36082_IMG_7606-qut-1376x1032.jpg",
"width": 1376,
"mimeType": "image/jpeg",
"height": 1032
}
},
"publishDate": 1553289192,
"modified": 1553289388,
"caption": "Members of the Santa Maria Elks Lodge tend to their steaks during their weekly “Cook Your Own” night.",
"description": null,
"title": "RS36082_IMG_7606-qut",
"credit": "Diane Bock",
"status": "inherit",
"isLoading": false,
"fetchFailed": false
}
},
"audioPlayerReducer": {
"postId": "stream_live",
"isPaused": true,
"isPlaying": false,
"pfsActive": false,
"pledgeModalIsOpen": true,
"playerDrawerIsOpen": false,
"liveAudioPlayStartedAt": 0,
"liveAudioPlayContext": ""
},
"authorsReducer": {
"byline_arts_13990218": {
"type": "authors",
"id": "byline_arts_13990218",
"meta": {
"override": true
},
"slug": "byline_arts_13990218",
"name": "Kajsa Kedefors",
"isLoading": false
},
"ltsai": {
"type": "authors",
"id": "11743",
"meta": {
"index": "authors_1716337520",
"id": "11743",
"found": true
},
"name": "Luke Tsai",
"firstName": "Luke",
"lastName": "Tsai",
"slug": "ltsai",
"email": "ltsai@kqed.org",
"display_author_email": true,
"staff_mastheads": [
"arts"
],
"title": "Food Editor",
"bio": "Luke Tsai is KQED's food editor and resident stinky tofu connoisseur. Prior to KQED, he was an editor at Eater SF, \u003cem>San Francisco \u003c/em>magazine, and the \u003cem>East Bay Express\u003c/em>, and his work has also appeared in TASTE, the \u003cem>San Francisco Chronicle\u003c/em>, and the \u003cem>Best Food Writing\u003c/em> anthology. When he isn't writing or editing, you'll find him eating most everything he can get his hands on.",
"avatar": "https://secure.gravatar.com/avatar/1e59b45bf191526e7339d6ba46e33a57b2030d25c27660ecc64ea3cb863e34f7?s=600&d=blank&r=g",
"twitter": "theluketsai",
"bluesky": null,
"facebook": null,
"instagram": null,
"linkedin": null,
"sites": [
{
"site": "",
"roles": [
"editor"
]
},
{
"site": "arts",
"roles": [
"administrator"
]
},
{
"site": "news",
"roles": [
"editor",
"contributor"
]
},
{
"site": "bayareabites",
"roles": [
"editor"
]
},
{
"site": "food",
"roles": [
"editor"
]
}
],
"headData": {
"title": "Luke Tsai | KQED",
"description": "Food Editor",
"ogImgSrc": "https://secure.gravatar.com/avatar/1e59b45bf191526e7339d6ba46e33a57b2030d25c27660ecc64ea3cb863e34f7?s=600&d=blank&r=g",
"twImgSrc": "https://secure.gravatar.com/avatar/1e59b45bf191526e7339d6ba46e33a57b2030d25c27660ecc64ea3cb863e34f7?s=600&d=blank&r=g"
},
"isLoading": false,
"link": "/author/ltsai"
},
"tpham": {
"type": "authors",
"id": "11753",
"meta": {
"index": "authors_1716337520",
"id": "11753",
"found": true
},
"name": "Thien Pham",
"firstName": "Thien",
"lastName": "Pham",
"slug": "tpham",
"email": "thiendog@gmail.com",
"display_author_email": false,
"staff_mastheads": [],
"title": "KQED Contributor",
"bio": null,
"avatar": "https://secure.gravatar.com/avatar/fa68ed7d6a785e5294a7bb79a3f409c3?s=600&d=blank&r=g",
"twitter": null,
"facebook": null,
"instagram": null,
"linkedin": null,
"sites": [
{
"site": "arts",
"roles": [
"contributor"
]
}
],
"headData": {
"title": "Thien Pham | KQED",
"description": "KQED Contributor",
"ogImgSrc": "https://secure.gravatar.com/avatar/fa68ed7d6a785e5294a7bb79a3f409c3?s=600&d=blank&r=g",
"twImgSrc": "https://secure.gravatar.com/avatar/fa68ed7d6a785e5294a7bb79a3f409c3?s=600&d=blank&r=g"
},
"isLoading": false,
"link": "/author/tpham"
},
"sjohnson": {
"type": "authors",
"id": "11840",
"meta": {
"index": "authors_1716337520",
"id": "11840",
"found": true
},
"name": "Sydney Johnson",
"firstName": "Sydney",
"lastName": "Johnson",
"slug": "sjohnson",
"email": "sjohnson@kqed.org",
"display_author_email": false,
"staff_mastheads": [
"news"
],
"title": "KQED Reporter",
"bio": "Sydney Johnson is a general assignment reporter at KQED. She previously reported on public health and city government at the San Francisco Examiner, and before that, she covered statewide education policy for EdSource. Her reporting has won multiple local, state and national awards. Sydney is a graduate of the University of California, Berkeley and lives in San Francisco.",
"avatar": "https://secure.gravatar.com/avatar/97855f2719b72ad6190b7c535fe642c8?s=600&d=blank&r=g",
"twitter": "sydneyfjohnson",
"facebook": null,
"instagram": null,
"linkedin": null,
"sites": [
{
"site": "news",
"roles": [
"editor"
]
}
],
"headData": {
"title": "Sydney Johnson | KQED",
"description": "KQED Reporter",
"ogImgSrc": "https://secure.gravatar.com/avatar/97855f2719b72ad6190b7c535fe642c8?s=600&d=blank&r=g",
"twImgSrc": "https://secure.gravatar.com/avatar/97855f2719b72ad6190b7c535fe642c8?s=600&d=blank&r=g"
},
"isLoading": false,
"link": "/author/sjohnson"
},
"nkhan": {
"type": "authors",
"id": "11867",
"meta": {
"index": "authors_1716337520",
"id": "11867",
"found": true
},
"name": "Nisa Khan",
"firstName": "Nisa",
"lastName": "Khan",
"slug": "nkhan",
"email": "nkhan@kqed.org",
"display_author_email": false,
"staff_mastheads": [],
"title": "KQED Contributor",
"bio": "Nisa Khan is a reporter for KQED's Audience News Desk. She was formerly a data reporter at Michigan Radio. She earned a Bachelor of Science in Information from the University of Michigan and a Master of Arts in Communication from Stanford University.",
"avatar": "https://secure.gravatar.com/avatar/a3bf1efcfbe7658d13a434cc54d0b2e3?s=600&d=blank&r=g",
"twitter": "mnisakhan",
"bluesky": null,
"facebook": null,
"instagram": null,
"linkedin": null,
"sites": [
{
"site": "arts",
"roles": [
"editor"
]
},
{
"site": "news",
"roles": [
"editor"
]
},
{
"site": "science",
"roles": [
"editor",
"author"
]
},
{
"site": "forum",
"roles": [
"editor"
]
},
{
"site": "liveblog",
"roles": [
"contributor"
]
}
],
"headData": {
"title": "Nisa Khan | KQED",
"description": "KQED Contributor",
"ogImgSrc": "https://secure.gravatar.com/avatar/a3bf1efcfbe7658d13a434cc54d0b2e3?s=600&d=blank&r=g",
"twImgSrc": "https://secure.gravatar.com/avatar/a3bf1efcfbe7658d13a434cc54d0b2e3?s=600&d=blank&r=g"
},
"isLoading": false,
"link": "/author/nkhan"
},
"bduffett": {
"type": "authors",
"id": "11902",
"meta": {
"index": "authors_1716337520",
"id": "11902",
"found": true
},
"name": "Becky Duffett",
"firstName": "Becky",
"lastName": "Duffett",
"slug": "bduffett",
"email": "duffettr@gmail.com",
"display_author_email": false,
"staff_mastheads": [],
"title": "KQED Contributor",
"bio": null,
"avatar": "https://secure.gravatar.com/avatar/e5baf1733e81ecc5f55104a3c095028c?s=600&d=blank&r=g",
"twitter": null,
"facebook": null,
"instagram": null,
"linkedin": null,
"sites": [
{
"site": "arts",
"roles": [
"contributor"
]
}
],
"headData": {
"title": "Becky Duffett | KQED",
"description": "KQED Contributor",
"ogImgSrc": "https://secure.gravatar.com/avatar/e5baf1733e81ecc5f55104a3c095028c?s=600&d=blank&r=g",
"twImgSrc": "https://secure.gravatar.com/avatar/e5baf1733e81ecc5f55104a3c095028c?s=600&d=blank&r=g"
},
"isLoading": false,
"link": "/author/bduffett"
},
"opena": {
"type": "authors",
"id": "11903",
"meta": {
"index": "authors_1716337520",
"id": "11903",
"found": true
},
"name": "Octavio Peña",
"firstName": "Octavio",
"lastName": "Peña",
"slug": "opena",
"email": "octaviopenagutierrez@gmail.com",
"display_author_email": false,
"staff_mastheads": [],
"title": "KQED Contributor",
"bio": null,
"avatar": "https://secure.gravatar.com/avatar/8fb464e0c705ab58fc9d18e06211557c?s=600&d=blank&r=g",
"twitter": null,
"facebook": null,
"instagram": null,
"linkedin": null,
"sites": [
{
"site": "arts",
"roles": [
"contributor"
]
}
],
"headData": {
"title": "Octavio Peña | KQED",
"description": "KQED Contributor",
"ogImgSrc": "https://secure.gravatar.com/avatar/8fb464e0c705ab58fc9d18e06211557c?s=600&d=blank&r=g",
"twImgSrc": "https://secure.gravatar.com/avatar/8fb464e0c705ab58fc9d18e06211557c?s=600&d=blank&r=g"
},
"isLoading": false,
"link": "/author/opena"
},
"byline_food_1337824": {
"type": "authors",
"id": "byline_food_1337824",
"meta": {
"override": true
},
"slug": "byline_food_1337824",
"name": "Manjula Varghese",
"isLoading": false
},
"byline_food_1337646": {
"type": "authors",
"id": "byline_food_1337646",
"meta": {
"override": true
},
"slug": "byline_food_1337646",
"name": "Manjula Varghese",
"isLoading": false
},
"byline_food_1337630": {
"type": "authors",
"id": "byline_food_1337630",
"meta": {
"override": true
},
"slug": "byline_food_1337630",
"name": "Manjula Varghese",
"isLoading": false
},
"byline_food_1337599": {
"type": "authors",
"id": "byline_food_1337599",
"meta": {
"override": true
},
"slug": "byline_food_1337599",
"name": "Myles Bess",
"isLoading": false
},
"byline_food_1337576": {
"type": "authors",
"id": "byline_food_1337576",
"meta": {
"override": true
},
"slug": "byline_food_1337576",
"name": "Manjula Varghese",
"isLoading": false
},
"byline_food_1337534": {
"type": "authors",
"id": "byline_food_1337534",
"meta": {
"override": true
},
"slug": "byline_food_1337534",
"name": "Matt Morales",
"isLoading": false
},
"dlartaud": {
"type": "authors",
"id": "10621",
"meta": {
"index": "authors_1716337520",
"id": "10621",
"found": true
},
"name": "Derek Lartaud",
"firstName": "Derek",
"lastName": "Lartaud",
"slug": "dlartaud",
"email": "dlartaud@kqed.org",
"display_author_email": true,
"staff_mastheads": [],
"title": "KQED Contributor",
"bio": "Derek Lartaud came to the Bay Area after nearly five years of researching schizophrenia and diabetes at Yale University. Determined to tell visual stories, he’s worked for the BBC, Al Jazeera America, TIME, PBS, and the Center for Investigative Reporting. He has a bachelor’s degree in neuroscience and a master’s degree in journalism. When not holding a camera or editing a story, he’s trying to rebuild his 1969 Honda CL350.",
"avatar": "https://secure.gravatar.com/avatar/e03912790b9252d0f67d68120966e449?s=600&d=mm&r=g",
"twitter": null,
"facebook": null,
"instagram": null,
"linkedin": null,
"sites": [
{
"site": "education",
"roles": [
"contributor"
]
},
{
"site": "quest",
"roles": [
"contributor"
]
},
{
"site": "food",
"roles": [
"editor"
]
}
],
"headData": {
"title": "Derek Lartaud | KQED",
"description": "KQED Contributor",
"ogImgSrc": "https://secure.gravatar.com/avatar/e03912790b9252d0f67d68120966e449?s=600&d=mm&r=g",
"twImgSrc": "https://secure.gravatar.com/avatar/e03912790b9252d0f67d68120966e449?s=600&d=mm&r=g"
},
"isLoading": false,
"link": "/author/dlartaud"
},
"checkplease": {
"type": "authors",
"id": "11084",
"meta": {
"index": "authors_1716337520",
"id": "11084",
"found": true
},
"name": "Check, Please! Bay Area",
"firstName": "Check, Please! Bay Area",
"lastName": null,
"slug": "checkplease",
"email": "checkplease@kqed.org",
"display_author_email": false,
"staff_mastheads": [],
"title": null,
"bio": null,
"avatar": "https://secure.gravatar.com/avatar/787e1f7f2e1ac24c9d71bc7e2951e0e4?s=600&d=blank&r=g",
"twitter": null,
"facebook": null,
"instagram": null,
"linkedin": null,
"sites": [
{
"site": "checkplease",
"roles": [
"editor"
]
},
{
"site": "food",
"roles": [
"author"
]
}
],
"headData": {
"title": "Check, Please! Bay Area | KQED",
"description": null,
"ogImgSrc": "https://secure.gravatar.com/avatar/787e1f7f2e1ac24c9d71bc7e2951e0e4?s=600&d=blank&r=g",
"twImgSrc": "https://secure.gravatar.com/avatar/787e1f7f2e1ac24c9d71bc7e2951e0e4?s=600&d=blank&r=g"
},
"isLoading": false,
"link": "/author/checkplease"
},
"byline_food_1337955": {
"type": "authors",
"id": "byline_food_1337955",
"meta": {
"override": true
},
"slug": "byline_food_1337955",
"name": "KQED Food Staff",
"isLoading": false
},
"byline_food_1337943": {
"type": "authors",
"id": "byline_food_1337943",
"meta": {
"override": true
},
"slug": "byline_food_1337943",
"name": "KQED Food Staff",
"isLoading": false
},
"byline_food_1337762": {
"type": "authors",
"id": "byline_food_1337762",
"meta": {
"override": true
},
"slug": "byline_food_1337762",
"name": "KQED Food Staff",
"isLoading": false
},
"bayareabites": {
"type": "authors",
"id": "5083",
"meta": {
"index": "authors_1716337520",
"id": "5083",
"found": true
},
"name": "KQED Food Staff",
"firstName": null,
"lastName": null,
"slug": "bayareabites",
"email": "bayareabites@kqed.org",
"display_author_email": false,
"staff_mastheads": [],
"title": "KQED Contributor",
"bio": "Bay Area Bites (BAB), KQED's public media food blog, feeds you visually compelling food-related stories, news, recipes and reviews from the San Francisco Bay Area and beyond.",
"avatar": "https://secure.gravatar.com/avatar/7113fdeeace4c1251f9bbe4b2fab415a?s=600&d=blank&r=g",
"twitter": "bayareabites",
"facebook": "bayareabites",
"instagram": null,
"linkedin": null,
"sites": [
{
"site": "arts",
"roles": [
"contributor"
]
},
{
"site": "bayareabites",
"roles": [
"administrator"
]
},
{
"site": "food",
"roles": [
"author"
]
}
],
"headData": {
"title": "KQED Food Staff | KQED",
"description": "KQED Contributor",
"ogImgSrc": "https://secure.gravatar.com/avatar/7113fdeeace4c1251f9bbe4b2fab415a?s=600&d=blank&r=g",
"twImgSrc": "https://secure.gravatar.com/avatar/7113fdeeace4c1251f9bbe4b2fab415a?s=600&d=blank&r=g"
},
"isLoading": false,
"link": "/author/bayareabites"
},
"jdecolongon": {
"type": "authors",
"id": "11828",
"meta": {
"index": "authors_1716337520",
"id": "11828",
"found": true
},
"name": "Josh Decolongon",
"firstName": "Josh",
"lastName": "Decolongon",
"slug": "jdecolongon",
"email": "jdecolongon@kqed.org",
"display_author_email": true,
"staff_mastheads": [
"arts"
],
"title": "Audience Engagement Producer, KQED Food",
"bio": "Josh Decolongon is the audience engagement producer for KQED Food and \u003ci>Check, Please! Bay Area\u003c/i> as well as the host and producer of \u003ci>No Crumbs\u003c/i>, KQED's first vertical video Food series. His flavorful adventures have been featured in \u003ci>The Wall Street Journal\u003c/i>, \u003ci>Vice News\u003c/i>, \u003ci>SFGate\u003c/i> and \u003ci>Thrillist\u003c/i>. On his spare time, Josh enjoys experimenting with flavors for a new cocktail or finding the next exciting wine pairing.",
"avatar": "https://secure.gravatar.com/avatar/4fa7cfd9beceb2866723b319d5b427fe?s=600&d=blank&r=g",
"twitter": null,
"facebook": null,
"instagram": "sommeligay",
"linkedin": null,
"sites": [
{
"site": "",
"roles": [
"editor"
]
},
{
"site": "arts",
"roles": [
"editor"
]
},
{
"site": "bayareabites",
"roles": [
"editor"
]
},
{
"site": "checkplease",
"roles": [
"editor"
]
},
{
"site": "food",
"roles": [
"editor"
]
}
],
"headData": {
"title": "Josh Decolongon | KQED",
"description": "Audience Engagement Producer, KQED Food",
"ogImgSrc": "https://secure.gravatar.com/avatar/4fa7cfd9beceb2866723b319d5b427fe?s=600&d=blank&r=g",
"twImgSrc": "https://secure.gravatar.com/avatar/4fa7cfd9beceb2866723b319d5b427fe?s=600&d=blank&r=g"
},
"isLoading": false,
"link": "/author/jdecolongon"
},
"byline_news_11816328": {
"type": "authors",
"id": "byline_news_11816328",
"meta": {
"override": true
},
"slug": "byline_news_11816328",
"name": "The Kitchen Sisters, Asal Ehsanipour",
"isLoading": false
},
"byline_news_11796231": {
"type": "authors",
"id": "byline_news_11796231",
"meta": {
"override": true
},
"slug": "byline_news_11796231",
"name": "Avishay Artsy",
"isLoading": false
},
"byline_news_11734682": {
"type": "authors",
"id": "byline_news_11734682",
"meta": {
"override": true
},
"slug": "byline_news_11734682",
"name": "Diane Bock",
"isLoading": false
},
"sracho": {
"type": "authors",
"id": "107",
"meta": {
"index": "authors_1716337520",
"id": "107",
"found": true
},
"name": "Suzie Racho",
"firstName": "Suzie",
"lastName": "Racho",
"slug": "sracho",
"email": "SRacho@KQED.org",
"display_author_email": false,
"staff_mastheads": [
"news"
],
"title": "KQED Contributor",
"bio": "Suzie Racho is a correspondent-producer with \u003cem>The California Report Magazine\u003c/em>\u003cem>. S\u003c/em>he has also worked with several other KQED productions, including Bay Curious, Truth Be Told, The Do List and KQED News.\r\n\r\nSuzie came to KQED in 1996 after receiving a BA in journalism from San Francisco State University and spending several years working in the music industry. As part of \u003cem>The California Report\u003c/em> team, her work has been recognized by the Society for Professional Journalists, National Federation of Community Broadcasters and Public Radio News Directors Incorporated, among others. She was recognized with a national Gracie Award in 2019. She spends her free time baking, listening to K-pop and rooting for the Giants and Valkyries.",
"avatar": "https://secure.gravatar.com/avatar/cc04f18ecb8bbc759f5fc14667dd6ac4?s=600&d=blank&r=g",
"twitter": null,
"bluesky": null,
"facebook": null,
"instagram": null,
"linkedin": null,
"sites": [
{
"site": "arts",
"roles": [
"editor"
]
},
{
"site": "news",
"roles": [
"editor"
]
}
],
"headData": {
"title": "Suzie Racho | KQED",
"description": "KQED Contributor",
"ogImgSrc": "https://secure.gravatar.com/avatar/cc04f18ecb8bbc759f5fc14667dd6ac4?s=600&d=blank&r=g",
"twImgSrc": "https://secure.gravatar.com/avatar/cc04f18ecb8bbc759f5fc14667dd6ac4?s=600&d=blank&r=g"
},
"isLoading": false,
"link": "/author/sracho"
},
"kqed": {
"type": "authors",
"id": "236",
"meta": {
"index": "authors_1716337520",
"id": "236",
"found": true
},
"name": "KQED News Staff",
"firstName": "KQED News Staff",
"lastName": null,
"slug": "kqed",
"email": "faq@kqed.org",
"display_author_email": false,
"staff_mastheads": [],
"title": null,
"bio": null,
"avatar": "https://secure.gravatar.com/avatar/ef0e801a68c4c54afa9180db14084167?s=600&d=blank&r=g",
"twitter": null,
"facebook": null,
"instagram": null,
"linkedin": null,
"sites": [
{
"site": "arts",
"roles": [
"contributor"
]
},
{
"site": "news",
"roles": [
"editor"
]
},
{
"site": "futureofyou",
"roles": [
"author"
]
}
],
"headData": {
"title": "KQED News Staff | KQED",
"description": null,
"ogImgSrc": "https://secure.gravatar.com/avatar/ef0e801a68c4c54afa9180db14084167?s=600&d=blank&r=g",
"twImgSrc": "https://secure.gravatar.com/avatar/ef0e801a68c4c54afa9180db14084167?s=600&d=blank&r=g"
},
"isLoading": false,
"link": "/author/kqed"
},
"sasha-khokha": {
"type": "authors",
"id": "254",
"meta": {
"index": "authors_1716337520",
"id": "254",
"found": true
},
"name": "Sasha Khokha",
"firstName": "Sasha",
"lastName": "Khokha",
"slug": "sasha-khokha",
"email": "skhokha@kqed.org",
"display_author_email": true,
"staff_mastheads": [
"news"
],
"title": "Host, The California Report Magazine",
"bio": "Sasha Khokha is the host of \u003cem>The California Report's \u003c/em> weekly magazine program, which takes listeners on sound-rich excursions to meet the people that make the Golden State unique -- through audio documentaries and long-form stories. As \u003cem>The California Report's\u003c/em> Central Valley Bureau Chief based in Fresno for nearly a dozen years, Sasha brought the lives and concerns of rural Californians to listeners around the state. Her reporting helped expose the hidden price immigrant women janitors and farmworkers may pay to keep their jobs: sexual assault at work. It inspired two new California laws to protect them from sexual harassment. She was a key member of the reporting team for the Frontline film \u003cem>Rape on the Night Shift, \u003c/em>which was nominated for two national Emmys. Sasha has also won a national Edward R. Murrow and a national PRNDI award for investigative reporting, as well as multiple prizes from the Society for Professional Journalists. Sasha is a proud alum of the UC Berkeley Graduate School of Journalism and Brown University and a member of the South Asian Journalists Association.",
"avatar": "https://secure.gravatar.com/avatar/e4b5e1541aaeea2aa356aa1fb2a68950?s=600&d=blank&r=g",
"twitter": "KQEDSashaKhokha",
"facebook": null,
"instagram": null,
"linkedin": null,
"sites": [
{
"site": "news",
"roles": [
"editor"
]
},
{
"site": "stateofhealth",
"roles": [
"author"
]
},
{
"site": "science",
"roles": [
"author"
]
},
{
"site": "quest",
"roles": [
"subscriber"
]
}
],
"headData": {
"title": "Sasha Khokha | KQED",
"description": "Host, The California Report Magazine",
"ogImgSrc": "https://secure.gravatar.com/avatar/e4b5e1541aaeea2aa356aa1fb2a68950?s=600&d=blank&r=g",
"twImgSrc": "https://secure.gravatar.com/avatar/e4b5e1541aaeea2aa356aa1fb2a68950?s=600&d=blank&r=g"
},
"isLoading": false,
"link": "/author/sasha-khokha"
},
"aehsanipour": {
"type": "authors",
"id": "11580",
"meta": {
"index": "authors_1716337520",
"id": "11580",
"found": true
},
"name": "Asal Ehsanipour",
"firstName": "Asal",
"lastName": "Ehsanipour",
"slug": "aehsanipour",
"email": "aehsanipour@kqed.org",
"display_author_email": false,
"staff_mastheads": [],
"title": "Reporter and Producer",
"bio": "Asal Ehsanipour is a producer and reporter for Rightnowish, Bay Curious and The California Report Magazine. She is also a producer for \u003ca href=\"https://www.thedoubleshift.com/\">The Double Shift\u003c/a>, a podcast about a new generation of working mothers. In 2018, Asal was named an Emerging Journalist Fellow by the Journalism and Women’s Symposium. Her work has appeared on KQED, KALW, PRI’s The World, and in several food and travel publications.",
"avatar": "https://secure.gravatar.com/avatar/c0e210438f5dca1b76921ff9f0eada52?s=600&d=blank&r=g",
"twitter": null,
"facebook": null,
"instagram": null,
"linkedin": null,
"sites": [
{
"site": "arts",
"roles": []
},
{
"site": "news",
"roles": [
"author",
"edit_others_posts"
]
}
],
"headData": {
"title": "Asal Ehsanipour | KQED",
"description": "Reporter and Producer",
"ogImgSrc": "https://secure.gravatar.com/avatar/c0e210438f5dca1b76921ff9f0eada52?s=600&d=blank&r=g",
"twImgSrc": "https://secure.gravatar.com/avatar/c0e210438f5dca1b76921ff9f0eada52?s=600&d=blank&r=g"
},
"isLoading": false,
"link": "/author/aehsanipour"
}
},
"pagesReducer": {
"root-site_kqedfood": {
"type": "pages",
"id": "root-site_24656",
"meta": {
"index": "pages_1716337520",
"site": "root-site",
"id": "24656",
"score": 0
},
"slug": "kqedfood",
"title": "Food",
"headTitle": "Food | KQED",
"pagePath": "kqedfood",
"pageMeta": {
"sticky": false,
"WpPageTemplate": "page-topic-editorial",
"adSlotOverride": "300x250_food",
"excludeFromSiteSearch": "Include"
},
"headData": {
"title": "Food | KQED",
"description": "There is no place like the Bay Area for food in all its forms, and KQED tells culinary stories of culture, family, cooking, restaurants and more. From the long-running favorite TV series Check, Please! Bay Area to a smattering of food news, features, recipes, guides and essays, we’ve got your plate covered.",
"ogTitle": "",
"ogDescription": "There is no place like the Bay Area for food in all its forms, and KQED tells culinary stories of culture, family, cooking, restaurants and more. From the long-running favorite TV series Check, Please! Bay Area to a smattering of food news, features, recipes, guides and essays, we’ve got your plate covered.",
"ogImgId": "root-site_24654",
"twTitle": "",
"twDescription": "There is no place like the Bay Area for food in all its forms, and KQED tells culinary stories of culture, family, cooking, restaurants and more. From the long-running favorite TV series Check, Please! Bay Area to a smattering of food news, features, recipes, guides and essays, we’ve got your plate covered.",
"twImgId": "root-site_24654",
"socialDescription": "There is no place like the Bay Area for food in all its forms, and KQED tells culinary stories of culture, family, cooking, restaurants and more. From the long-running favorite TV series Check, Please! Bay Area to a smattering of food news, features, recipes, guides and essays, we’ve got your plate covered.",
"canonicalUrl": "https://www.kqed.org/food"
},
"labelTerm": {
"site": ""
},
"publishDate": 1711757547,
"content": "\u003cp>KQED Food is your home for stories about all of the Bay Area’s vibrant food cultures: the taco truck, omakase counter, grocery co-op and driveway pupusa stand. Our news stories, essays, shows and features document the food scene’s latest trends and changemakers—and help guide you to your next delicious meal.\u003c/p>\n\n\n\n\n\n\n\n\n\n\n\n\n\u003cp>[ad fullwidth]\u003c/p>\u003cp>\u003c/p>\n",
"blocks": [
{
"blockName": "core/paragraph",
"attrs": [],
"innerBlocks": [],
"innerHTML": "\n\u003cp>KQED Food is your home for stories about all of the Bay Area’s vibrant food cultures: the taco truck, omakase counter, grocery co-op and driveway pupusa stand. Our news stories, essays, shows and features document the food scene’s latest trends and changemakers—and help guide you to your next delicious meal.\u003c/p>\n",
"innerContent": [
"\n\u003cp>KQED Food is your home for stories about all of the Bay Area’s vibrant food cultures: the taco truck, omakase counter, grocery co-op and driveway pupusa stand. Our news stories, essays, shows and features document the food scene’s latest trends and changemakers—and help guide you to your next delicious meal.\u003c/p>\n"
]
},
{
"blockName": "kqed/post-list",
"attrs": {
"layout": "cardArticle2",
"query": "posts/bayareabites,arts,news?category=food&queryId=13c78a7bb6e",
"title": "Latest Stories",
"seeMore": true,
"sizeBase": 9
},
"innerBlocks": [],
"innerHTML": "",
"innerContent": []
},
{
"blockName": "kqed/post-list",
"attrs": {
"layout": "cardArticle2",
"query": "posts/?tag=beyond-the-menu&queryId=7d419e5806",
"title": "Beyond The Menu",
"seeMore": true,
"sizeBase": 6
},
"innerBlocks": [],
"innerHTML": "",
"innerContent": []
},
{
"blockName": "kqed/post-list",
"attrs": {
"layout": "cardArticle2",
"query": "posts/checkplease?&queryId=158a28fc4bb",
"title": "Check, Please! Bay Area",
"seeMore": true,
"sizeBase": 6
},
"innerBlocks": [],
"innerHTML": "",
"innerContent": []
},
{
"blockName": "kqed/post-list",
"attrs": {
"layout": "cardArticle2",
"query": "posts/food,bayareabites?tag=recipe,recipes&queryId=1279f4cb899",
"title": "Recipes",
"seeMore": true,
"sizeBase": 6
},
"innerBlocks": [],
"innerHTML": "",
"innerContent": []
},
{
"blockName": "kqed/post-list",
"attrs": {
"layout": "cardArticle2",
"query": "posts/news?tag=golden-state-plate&queryId=914c85b379",
"title": "Golden State Plate",
"seeMore": true,
"sizeBase": 6
},
"innerBlocks": [],
"innerHTML": "",
"innerContent": []
},
{
"blockName": "kqed/ad",
"attrs": [],
"innerBlocks": [],
"innerHTML": "",
"innerContent": []
}
],
"status": "publish",
"parent": 0,
"modified": 1717179766,
"format": "standard",
"path": "/food",
"redirect": {
"type": "internal",
"url": "/food"
},
"audioTrackLength": null,
"parsedContent": [
{
"type": "contentString",
"content": "\u003cdiv class=\"post-body\">\u003cp>\u003cp>KQED Food is your home for stories about all of the Bay Area’s vibrant food cultures: the taco truck, omakase counter, grocery co-op and driveway pupusa stand. Our news stories, essays, shows and features document the food scene’s latest trends and changemakers—and help guide you to your next delicious meal.\u003c/p>\n\n\n\n\n\n\n\n\n\n\n\n\n\u003cp>\u003c/p>\u003c/div>",
"attributes": {
"named": {},
"numeric": []
}
},
{
"type": "component",
"content": "",
"name": "ad",
"attributes": {
"named": {
"label": "fullwidth"
},
"numeric": [
"fullwidth"
]
}
},
{
"type": "contentString",
"content": "\u003cdiv class=\"post-body\">\u003cp>\u003c/p>\u003cp>\u003c/p>\n\u003c/div>\u003c/p>",
"attributes": {
"named": {},
"numeric": []
}
}
],
"label": "root-site",
"isLoading": false
}
},
"pfsSessionReducer": {},
"postsReducer": {
"stream_live": {
"type": "live",
"id": "stream_live",
"audioUrl": "https://streams.kqed.org/kqedradio",
"title": "Live Stream",
"excerpt": "Live Stream information currently unavailable.",
"link": "/radio",
"featImg": "",
"label": {
"name": "KQED Live",
"link": "/"
}
},
"stream_kqedNewscast": {
"type": "posts",
"id": "stream_kqedNewscast",
"audioUrl": "https://www.kqed.org/.stream/anon/radio/RDnews/newscast.mp3?_=1",
"title": "KQED Newscast",
"featImg": "",
"label": {
"name": "88.5 FM",
"link": "/"
}
},
"arts_13990975": {
"type": "posts",
"id": "arts_13990975",
"meta": {
"index": "posts_1716263798",
"site": "arts",
"id": "13990975",
"score": null,
"sort": [
1782320400000
]
},
"guestAuthors": [],
"slug": "ukrainian-restaurant-napa-anna-voloshyna-oxbow-public-market-pop-up",
"title": "The Only Ukrainian Restaurant in Wine Country Pops Open for One Month This Summer",
"publishDate": 1782320400,
"format": "standard",
"headTitle": "The Only Ukrainian Restaurant in Wine Country Pops Open for One Month This Summer | KQED",
"labelTerm": {},
"content": "\u003cp>\u003ca href=\"https://www.annavoloshyna.com\">Anna Voloshyna\u003c/a> never dreamed of opening a restaurant. The chef and author has been busy planning a tour for her second cookbook, hosting events \u003ca href=\"https://www.kqed.org/news/11908537/ukrainian-chef-in-sf-finds-comfort-cooking-traditional-food-and-raises-thousands-in-relief-aid\">and fundraisers\u003c/a>, and running her IACP award-winning \u003ca href=\"https://www.instagram.com/annavoloshynacooks/\">Instagram\u003c/a> account, all celebrating the cooking of her native Ukraine. But she got talked into a residency at \u003ca href=\"https://rotationnapa.com\">Rotation by Feast It Forward\u003c/a> at Oxbow Public Market in Napa, which means she’s effectively opening the only Ukrainian restaurant in wine country — if only for the month of July. \u003c/p>\n\n\n\n\u003cp>“People have been bugging me forever,” Voloshyna says. “Like, ‘Where can we try your food?’” Or any Ukrainian food, anywhere across the Bay Area, for that matter? \u003c/p>\n\n\n\n\u003cp>Northern California is home to a few small food businesses that proudly rep Ukraine, including \u003ca href=\"https://lelekasf.com\">Leleka\u003c/a> focusing on dumpling delivery in SF, San Mateo and Sunnyvale; \u003ca href=\"https://nataliasdacha.com\">Natalia’s Dacha\u003c/a> serving honey cakes at Napa County farmers markets; and the \u003ca href=\"https://borschmobile.com\">Borsch Mobile\u003c/a> truck bringing beet soup to the people across the Bay Area. And plenty of restaurants serve more broadly Eastern European–inspired menus with similar dishes. But given the context of the ongoing Russian war against Ukraine, Voloshyna has doubled down on specifically showcasing the hearty dishes and fermented flavors of her home country, and can’t wait to serve a sit-down dinner experience. \u003c/p>\n\n\n\n\u003cp>“This is the place where Ukrainian cuisine and culture will be celebrated, and I will shout about it nonstop for the whole month,” she says. \u003c/p>\n\n\n\n\u003cfigure class=\"wp-block-image size-full\">\u003cimg loading=\"lazy\" decoding=\"async\" width=\"2000\" height=\"1333\" src=\"https://cdn.kqed.org/wp-content/uploads/sites/2/2026/06/anna-voloshyna_jason-perry.jpg\" alt=\"Portrait of a smiling chef holding a glass of white wine inside her restaurant.\" class=\"wp-image-13991033\" srcset=\"https://cdn.kqed.org/wp-content/uploads/sites/2/2026/06/anna-voloshyna_jason-perry.jpg 2000w, https://cdn.kqed.org/wp-content/uploads/sites/2/2026/06/anna-voloshyna_jason-perry-160x107.jpg 160w, https://cdn.kqed.org/wp-content/uploads/sites/2/2026/06/anna-voloshyna_jason-perry-768x512.jpg 768w, https://cdn.kqed.org/wp-content/uploads/sites/2/2026/06/anna-voloshyna_jason-perry-1536x1024.jpg 1536w\" sizes=\"auto, (max-width: 2000px) 100vw, 2000px\">\u003cfigcaption class=\"wp-element-caption\">Voloshyna will be the guest chef at Rotation by Feast It Forward, a new restaurant that hosts star chefs from around the country. Her second cookbook, ‘Ukraine,’ comes out in October 2026. (Jason Perry)\u003c/figcaption>\u003c/figure>\n\n\n\n\u003cp>Rotation is a new project from Katie Hamilton Shaffer of Feast It Forward, the events space and media network across the street from Oxbow. She took over a restaurant in a corner of the market, welcoming star guest chefs from across the country. The month-long chef residencies kicked off in February with Martin Yan from SF, followed by Tristen Epps from Houston and Lee Anne Wong from Honolulu, showcasing Chinese, Trinidadian, and Hawaiian flavors, respectively. None of these chefs phoned it in — Voloshyna’s staying in a cottage in Napa for the month, along with her husband and little wolf of a dog. She’ll be shopping the farmers market and working closely in the kitchen with Rotation executive chef Jeff Mosher and his team. \u003c/p>\n\n\n\n\u003cp>[ad fullwidth]\u003c/p>\n\u003cp>They’re throwing down a full menu, focusing on classics presented in a modern and refined way, Voloshyna says. A meal might start with beet-pickled deviled eggs with smoked trout roe, varenyky (dumplings) stuffed with farmer cheese and confit pork belly, and kholodnyk (chilled borsch) with refreshing raw veggies. Diners won’t want to miss the quintessential chicken Kyiv — “with a crispy crust and inside garlic butter — what’s not to love?” Voloshyna says. She’s already fermenting beet kvass to season the shpundra (braised short ribs), best served over banosh (polenta) with brynza sheep cheese and crispy onions. The grilled squash with preserved lemons comes from her first cookbook; the roasted eggplant with herbed yogurt will be in her second. And sour cream, pickles and fresh dill scatter across everything. \u003c/p>\n\n\n\n\u003cfigure class=\"wp-block-gallery has-nested-images columns-default is-cropped wp-block-gallery-1 is-layout-flex wp-block-gallery-is-layout-flex\">\n\u003cfigure class=\"wp-block-image size-large\">\u003cimg loading=\"lazy\" decoding=\"async\" width=\"1429\" height=\"2000\" data-id=\"13991038\" src=\"https://cdn.kqed.org/wp-content/uploads/sites/2/2026/06/deviled-eggs_jason-perry.jpg\" alt=\"Bright purple deviled eggs topped with orange fish roe.\" class=\"wp-image-13991038\" srcset=\"https://cdn.kqed.org/wp-content/uploads/sites/2/2026/06/deviled-eggs_jason-perry.jpg 1429w, https://cdn.kqed.org/wp-content/uploads/sites/2/2026/06/deviled-eggs_jason-perry-160x224.jpg 160w, https://cdn.kqed.org/wp-content/uploads/sites/2/2026/06/deviled-eggs_jason-perry-768x1075.jpg 768w, https://cdn.kqed.org/wp-content/uploads/sites/2/2026/06/deviled-eggs_jason-perry-1097x1536.jpg 1097w\" sizes=\"auto, (max-width: 1429px) 100vw, 1429px\">\u003cfigcaption class=\"wp-element-caption\">Beet-pickled deviled eggs topped with trout roe. (Jason Perry)\u003c/figcaption>\u003c/figure>\n\n\n\n\u003cfigure class=\"wp-block-image size-large\">\u003cimg loading=\"lazy\" decoding=\"async\" width=\"1429\" height=\"2000\" data-id=\"13991035\" src=\"https://cdn.kqed.org/wp-content/uploads/sites/2/2026/06/short-rib_jason-perry.jpg\" alt=\"Purple braised short rib over a bed of polenta with sliced radishes sprinkled on top.\" class=\"wp-image-13991035\" srcset=\"https://cdn.kqed.org/wp-content/uploads/sites/2/2026/06/short-rib_jason-perry.jpg 1429w, https://cdn.kqed.org/wp-content/uploads/sites/2/2026/06/short-rib_jason-perry-160x224.jpg 160w, https://cdn.kqed.org/wp-content/uploads/sites/2/2026/06/short-rib_jason-perry-768x1075.jpg 768w, https://cdn.kqed.org/wp-content/uploads/sites/2/2026/06/short-rib_jason-perry-1097x1536.jpg 1097w\" sizes=\"auto, (max-width: 1429px) 100vw, 1429px\">\u003cfigcaption class=\"wp-element-caption\">Braised short ribs seasoned with fermented beets. (Jason Perry)\u003c/figcaption>\u003c/figure>\n\u003c/figure>\n\n\n\n\u003cp>Desserts include a sunflower semifreddo inspired by childhood snacks of sunflower halva: “That flavor is carved into my brain,” Voloshyna says. She grew up in a small town named Snihurivka in the south, a couple of hours from Odesa, surrounded by “fields and fields” of sunflowers. Despite the war, Ukraine remains a leading exporter of sunflower oil, so those cooking and finishing oils are foundational flavors, and the flowers shine as a national symbol of resilience. \u003c/p>\n\n\n\n\u003cp>Rotation serves its own menu at lunch, although Voloshyna will slide in at least one special — khachapuri. The Georgian cheese boats are now wildly popular across Ukraine. Shaffer, the owner, curates the wine list, focusing on locals from Napa and Sonoma, and cocktails include a signature old fashioned with bourbon washed in duck fat. \u003c/p>\n\n\n\n\u003cp>Rotation is located toward the back of Oxbow, across from Hog Island Oyster Co. It’s not simply a market stall; it’s a generous restaurant with 5,000 square feet and 125 seats, centered on an open kitchen with a wood-fired oven. Voloshyna plans to set up a cookbook display for anyone who wants to buy a signed copy of her first cookbook, \u003ca href=\"https://omnivorebooks.myshopify.com/products/pre-order-ukrainian-anna-voloshyna-budmo-recipes-from-a-ukrainian-kitchen\">\u003cem>Budmo!\u003c/em>\u003c/a> (“cheers!” in Ukrainian), or preorder her second. \u003c/p>\n\n\n\n\n\n\u003cp>When Voloshyna published \u003ca href=\"https://omnivorebooks.myshopify.com/products/pre-order-ukrainian-anna-voloshyna-budmo-recipes-from-a-ukrainian-kitchen\">\u003cem>Budmo!\u003c/em>\u003c/a> in the fall of 2022, Russia had already been occupying Ukraine since 2014. It launched the full-scale invasion in February 2022, bringing even more bittersweet meaning to this collection of recipes celebrating the foods Voloshyna grew up with. Since then, she spent three years researching her second book \u003ca href=\"https://www.barnesandnoble.com/w/ukraine-anna-voloshyna/1149390099?utm_source=ig&utm_medium=social&utm_content=link_in_bio&fbclid=PAZXh0bgNhZW0CMTEAc3J0YwZhcHBfaWQPOTM2NjE5NzQzMzkyNDU5AAGnwGp82l-bSB-MR4FT3SOHQn3QaGD0Q4D_H-jUHLVsdBStaUfpj3osn0YufHI_aem_1dx-xXKjUhwTLE2P_AaQxw\">\u003cem>Ukraïne\u003c/em>\u003c/a>, which comes out this October, traveling to many regions and near the frontline, gathering recipes, essays and photos. At a time when her country is fighting for its existence, she believes in the importance of calling even the most humble bowl of borsch Ukrainian. “We need to remember the roots and honor the culture,” she says. \u003c/p>\n\n\n\n\u003cp>Whether folks are tasting her food at the restaurant or trying one of her recipes at home, Voloshyna hopes to help them understand and appreciate Ukrainian cooking. “Because of this war, we remembered who we are as a nation,” she says. “Food is one way to showcase, ‘This is who we are.’ We want to show that to the world. We are not Russia. We are Ukraine.” \u003c/p>\n\n\n\n\u003chr class=\"wp-block-separator has-alpha-channel-opacity\">\n\n\n\n\u003cp>\u003ca href=\"https://rotationnapa.com\">\u003cem>Rotation by Feast It Forward\u003c/em>\u003c/a>\u003cem> is open Monday and Tuesday noon–3 p.m.; Wednesday, Thursday and Sunday noon–8 p.m.; and Friday and Saturday noon–9 p.m. \u003c/em>\u003ca href=\"https://rotationnapa.com/chef/chef-anna-voloshyna\">\u003cem>Anna Voloshyna\u003c/em>\u003c/a>\u003cem> will be in residency for the month of July, and \u003c/em>\u003ca href=\"https://www.opentable.com/r/rotation-by-feast-it-forward-napa\">\u003cem>reservations\u003c/em>\u003c/a>\u003cem> are live.\u003c/em>\u003c/p>\n\n\n\n\u003cp>\u003c/p>\n\u003cp>\u003c/p>\n\n",
"blocks": [
{
"blockName": "core/paragraph",
"attrs": [],
"innerHTML": "\n\u003cp>\u003ca href=\"https://www.annavoloshyna.com\">Anna Voloshyna\u003c/a> never dreamed of opening a restaurant. The chef and author has been busy planning a tour for her second cookbook, hosting events \u003ca href=\"https://www.kqed.org/news/11908537/ukrainian-chef-in-sf-finds-comfort-cooking-traditional-food-and-raises-thousands-in-relief-aid\">and fundraisers\u003c/a>, and running her IACP award-winning \u003ca href=\"https://www.instagram.com/annavoloshynacooks/\">Instagram\u003c/a> account, all celebrating the cooking of her native Ukraine. But she got talked into a residency at \u003ca href=\"https://rotationnapa.com\">Rotation by Feast It Forward\u003c/a> at Oxbow Public Market in Napa, which means she’s effectively opening the only Ukrainian restaurant in wine country — if only for the month of July. \u003c/p>\n",
"innerContent": [
"\n\u003cp>\u003ca href=\"https://www.annavoloshyna.com\">Anna Voloshyna\u003c/a> never dreamed of opening a restaurant. The chef and author has been busy planning a tour for her second cookbook, hosting events \u003ca href=\"https://www.kqed.org/news/11908537/ukrainian-chef-in-sf-finds-comfort-cooking-traditional-food-and-raises-thousands-in-relief-aid\">and fundraisers\u003c/a>, and running her IACP award-winning \u003ca href=\"https://www.instagram.com/annavoloshynacooks/\">Instagram\u003c/a> account, all celebrating the cooking of her native Ukraine. But she got talked into a residency at \u003ca href=\"https://rotationnapa.com\">Rotation by Feast It Forward\u003c/a> at Oxbow Public Market in Napa, which means she’s effectively opening the only Ukrainian restaurant in wine country — if only for the month of July. \u003c/p>\n"
],
"innerBlocks": []
},
{
"blockName": "core/paragraph",
"attrs": [],
"innerHTML": "\n\u003cp>“People have been bugging me forever,” Voloshyna says. “Like, ‘Where can we try your food?’” Or any Ukrainian food, anywhere across the Bay Area, for that matter? \u003c/p>\n",
"innerContent": [
"\n\u003cp>“People have been bugging me forever,” Voloshyna says. “Like, ‘Where can we try your food?’” Or any Ukrainian food, anywhere across the Bay Area, for that matter? \u003c/p>\n"
],
"innerBlocks": []
},
{
"blockName": "core/paragraph",
"attrs": [],
"innerHTML": "\n\u003cp>Northern California is home to a few small food businesses that proudly rep Ukraine, including \u003ca href=\"https://lelekasf.com\">Leleka\u003c/a> focusing on dumpling delivery in SF, San Mateo and Sunnyvale; \u003ca href=\"https://nataliasdacha.com\">Natalia’s Dacha\u003c/a> serving honey cakes at Napa County farmers markets; and the \u003ca href=\"https://borschmobile.com\">Borsch Mobile\u003c/a> truck bringing beet soup to the people across the Bay Area. And plenty of restaurants serve more broadly Eastern European–inspired menus with similar dishes. But given the context of the ongoing Russian war against Ukraine, Voloshyna has doubled down on specifically showcasing the hearty dishes and fermented flavors of her home country, and can’t wait to serve a sit-down dinner experience. \u003c/p>\n",
"innerContent": [
"\n\u003cp>Northern California is home to a few small food businesses that proudly rep Ukraine, including \u003ca href=\"https://lelekasf.com\">Leleka\u003c/a> focusing on dumpling delivery in SF, San Mateo and Sunnyvale; \u003ca href=\"https://nataliasdacha.com\">Natalia’s Dacha\u003c/a> serving honey cakes at Napa County farmers markets; and the \u003ca href=\"https://borschmobile.com\">Borsch Mobile\u003c/a> truck bringing beet soup to the people across the Bay Area. And plenty of restaurants serve more broadly Eastern European–inspired menus with similar dishes. But given the context of the ongoing Russian war against Ukraine, Voloshyna has doubled down on specifically showcasing the hearty dishes and fermented flavors of her home country, and can’t wait to serve a sit-down dinner experience. \u003c/p>\n"
],
"innerBlocks": []
},
{
"blockName": "core/paragraph",
"attrs": [],
"innerHTML": "\n\u003cp>“This is the place where Ukrainian cuisine and culture will be celebrated, and I will shout about it nonstop for the whole month,” she says. \u003c/p>\n",
"innerContent": [
"\n\u003cp>“This is the place where Ukrainian cuisine and culture will be celebrated, and I will shout about it nonstop for the whole month,” she says. \u003c/p>\n"
],
"innerBlocks": []
},
{
"blockName": "core/image",
"attrs": {
"id": 13991033,
"sizeSlug": "full",
"linkDestination": "none",
"imageCredit": "Jason Perry",
"srcset": "https://cdn.kqed.org/wp-content/uploads/sites/2/2026/06/anna-voloshyna_jason-perry.jpg 2000w, https://cdn.kqed.org/wp-content/uploads/sites/2/2026/06/anna-voloshyna_jason-perry-160x107.jpg 160w, https://cdn.kqed.org/wp-content/uploads/sites/2/2026/06/anna-voloshyna_jason-perry-768x512.jpg 768w, https://cdn.kqed.org/wp-content/uploads/sites/2/2026/06/anna-voloshyna_jason-perry-1536x1024.jpg 1536w",
"sizes": "(min-width: 992px) min(100vw, 1536px), (min-width: 768px) min(100vw, 1280px), min(100vw, 1020px)"
},
"innerHTML": "\n\u003cfigure class=\"wp-block-image size-full\">\u003cimg src=\"https://cdn.kqed.org/wp-content/uploads/sites/2/2026/06/anna-voloshyna_jason-perry.jpg\" alt=\"Portrait of a smiling chef holding a glass of white wine inside her restaurant.\" class=\"wp-image-13991033\" srcset=\"https://cdn.kqed.org/wp-content/uploads/sites/2/2026/06/anna-voloshyna_jason-perry.jpg 2000w, https://cdn.kqed.org/wp-content/uploads/sites/2/2026/06/anna-voloshyna_jason-perry-160x107.jpg 160w, https://cdn.kqed.org/wp-content/uploads/sites/2/2026/06/anna-voloshyna_jason-perry-768x512.jpg 768w, https://cdn.kqed.org/wp-content/uploads/sites/2/2026/06/anna-voloshyna_jason-perry-1536x1024.jpg 1536w\" sizes=\"(min-width: 992px) min(100vw, 1536px), (min-width: 768px) min(100vw, 1280px), min(100vw, 1020px)\" />\u003cfigcaption class=\"wp-element-caption\">Voloshyna will be the guest chef at Rotation by Feast It Forward, a new restaurant that hosts star chefs from around the country. Her second cookbook, ‘Ukraine,’ comes out in October 2026.\u003c/figcaption>\u003c/figure>\n",
"innerContent": [
"\n\u003cfigure class=\"wp-block-image size-full\">\u003cimg src=\"https://cdn.kqed.org/wp-content/uploads/sites/2/2026/06/anna-voloshyna_jason-perry.jpg\" alt=\"Portrait of a smiling chef holding a glass of white wine inside her restaurant.\" class=\"wp-image-13991033\" />\u003cfigcaption class=\"wp-element-caption\">Voloshyna will be the guest chef at Rotation by Feast It Forward, a new restaurant that hosts star chefs from around the country. Her second cookbook, ‘Ukraine,’ comes out in October 2026.\u003c/figcaption>\u003c/figure>\n"
],
"innerBlocks": []
},
{
"blockName": "core/paragraph",
"attrs": [],
"innerHTML": "\n\u003cp>Rotation is a new project from Katie Hamilton Shaffer of Feast It Forward, the events space and media network across the street from Oxbow. She took over a restaurant in a corner of the market, welcoming star guest chefs from across the country. The month-long chef residencies kicked off in February with Martin Yan from SF, followed by Tristen Epps from Houston and Lee Anne Wong from Honolulu, showcasing Chinese, Trinidadian, and Hawaiian flavors, respectively. None of these chefs phoned it in — Voloshyna’s staying in a cottage in Napa for the month, along with her husband and little wolf of a dog. She’ll be shopping the farmers market and working closely in the kitchen with Rotation executive chef Jeff Mosher and his team. \u003c/p>\n",
"innerContent": [
"\n\u003cp>Rotation is a new project from Katie Hamilton Shaffer of Feast It Forward, the events space and media network across the street from Oxbow. She took over a restaurant in a corner of the market, welcoming star guest chefs from across the country. The month-long chef residencies kicked off in February with Martin Yan from SF, followed by Tristen Epps from Houston and Lee Anne Wong from Honolulu, showcasing Chinese, Trinidadian, and Hawaiian flavors, respectively. None of these chefs phoned it in — Voloshyna’s staying in a cottage in Napa for the month, along with her husband and little wolf of a dog. She’ll be shopping the farmers market and working closely in the kitchen with Rotation executive chef Jeff Mosher and his team. \u003c/p>\n"
],
"innerBlocks": []
},
{
"blockName": "kqed/ad",
"attrs": {
"format": "fullwidth"
},
"innerBlocks": [],
"innerHTML": "",
"innerContent": []
},
{
"blockName": "core/paragraph",
"attrs": [],
"innerHTML": "\n\u003cp>They’re throwing down a full menu, focusing on classics presented in a modern and refined way, Voloshyna says. A meal might start with beet-pickled deviled eggs with smoked trout roe, varenyky (dumplings) stuffed with farmer cheese and confit pork belly, and kholodnyk (chilled borsch) with refreshing raw veggies. Diners won’t want to miss the quintessential chicken Kyiv — “with a crispy crust and inside garlic butter — what’s not to love?” Voloshyna says. She’s already fermenting beet kvass to season the shpundra (braised short ribs), best served over banosh (polenta) with brynza sheep cheese and crispy onions. The grilled squash with preserved lemons comes from her first cookbook; the roasted eggplant with herbed yogurt will be in her second. And sour cream, pickles and fresh dill scatter across everything. \u003c/p>\n",
"innerContent": [
"\n\u003cp>They’re throwing down a full menu, focusing on classics presented in a modern and refined way, Voloshyna says. A meal might start with beet-pickled deviled eggs with smoked trout roe, varenyky (dumplings) stuffed with farmer cheese and confit pork belly, and kholodnyk (chilled borsch) with refreshing raw veggies. Diners won’t want to miss the quintessential chicken Kyiv — “with a crispy crust and inside garlic butter — what’s not to love?” Voloshyna says. She’s already fermenting beet kvass to season the shpundra (braised short ribs), best served over banosh (polenta) with brynza sheep cheese and crispy onions. The grilled squash with preserved lemons comes from her first cookbook; the roasted eggplant with herbed yogurt will be in her second. And sour cream, pickles and fresh dill scatter across everything. \u003c/p>\n"
],
"innerBlocks": []
},
{
"blockName": "core/gallery",
"attrs": {
"linkTo": "none"
},
"innerHTML": "\n\u003cfigure class=\"wp-block-gallery has-nested-images columns-default is-cropped\">\n\n\u003c/figure>\n",
"innerContent": [
"\n\u003cfigure class=\"wp-block-gallery has-nested-images columns-default is-cropped\">",
null,
"\n\n",
null,
"\u003c/figure>\n"
],
"innerBlocks": [
{
"blockName": "core/image",
"attrs": {
"id": 13991038,
"sizeSlug": "large",
"linkDestination": "none"
},
"innerBlocks": [],
"innerHTML": "\n\u003cfigure class=\"wp-block-image size-large\">\u003cimg src=\"https://cdn.kqed.org/wp-content/uploads/sites/2/2026/06/deviled-eggs_jason-perry.jpg\" alt=\"Bright purple deviled eggs topped with orange fish roe.\" class=\"wp-image-13991038\" />\u003cfigcaption class=\"wp-element-caption\">Beet-pickled deviled eggs topped with trout roe.\u003c/figcaption>\u003c/figure>\n",
"innerContent": [
"\n\u003cfigure class=\"wp-block-image size-large\">\u003cimg src=\"https://cdn.kqed.org/wp-content/uploads/sites/2/2026/06/deviled-eggs_jason-perry.jpg\" alt=\"Bright purple deviled eggs topped with orange fish roe.\" class=\"wp-image-13991038\" />\u003cfigcaption class=\"wp-element-caption\">Beet-pickled deviled eggs topped with trout roe.\u003c/figcaption>\u003c/figure>\n"
]
},
{
"blockName": "core/image",
"attrs": {
"id": 13991035,
"sizeSlug": "large",
"linkDestination": "none"
},
"innerBlocks": [],
"innerHTML": "\n\u003cfigure class=\"wp-block-image size-large\">\u003cimg src=\"https://cdn.kqed.org/wp-content/uploads/sites/2/2026/06/short-rib_jason-perry.jpg\" alt=\"Purple braised short rib over a bed of polenta with sliced radishes sprinkled on top.\" class=\"wp-image-13991035\" />\u003cfigcaption class=\"wp-element-caption\">Braised short ribs seasoned with fermented beets.\u003c/figcaption>\u003c/figure>\n",
"innerContent": [
"\n\u003cfigure class=\"wp-block-image size-large\">\u003cimg src=\"https://cdn.kqed.org/wp-content/uploads/sites/2/2026/06/short-rib_jason-perry.jpg\" alt=\"Purple braised short rib over a bed of polenta with sliced radishes sprinkled on top.\" class=\"wp-image-13991035\" />\u003cfigcaption class=\"wp-element-caption\">Braised short ribs seasoned with fermented beets.\u003c/figcaption>\u003c/figure>\n"
]
}
]
},
{
"blockName": "core/paragraph",
"attrs": [],
"innerHTML": "\n\u003cp>Desserts include a sunflower semifreddo inspired by childhood snacks of sunflower halva: “That flavor is carved into my brain,” Voloshyna says. She grew up in a small town named Snihurivka in the south, a couple of hours from Odesa, surrounded by “fields and fields” of sunflowers. Despite the war, Ukraine remains a leading exporter of sunflower oil, so those cooking and finishing oils are foundational flavors, and the flowers shine as a national symbol of resilience. \u003c/p>\n",
"innerContent": [
"\n\u003cp>Desserts include a sunflower semifreddo inspired by childhood snacks of sunflower halva: “That flavor is carved into my brain,” Voloshyna says. She grew up in a small town named Snihurivka in the south, a couple of hours from Odesa, surrounded by “fields and fields” of sunflowers. Despite the war, Ukraine remains a leading exporter of sunflower oil, so those cooking and finishing oils are foundational flavors, and the flowers shine as a national symbol of resilience. \u003c/p>\n"
],
"innerBlocks": []
},
{
"blockName": "core/paragraph",
"attrs": [],
"innerHTML": "\n\u003cp>Rotation serves its own menu at lunch, although Voloshyna will slide in at least one special — khachapuri. The Georgian cheese boats are now wildly popular across Ukraine. Shaffer, the owner, curates the wine list, focusing on locals from Napa and Sonoma, and cocktails include a signature old fashioned with bourbon washed in duck fat. \u003c/p>\n",
"innerContent": [
"\n\u003cp>Rotation serves its own menu at lunch, although Voloshyna will slide in at least one special — khachapuri. The Georgian cheese boats are now wildly popular across Ukraine. Shaffer, the owner, curates the wine list, focusing on locals from Napa and Sonoma, and cocktails include a signature old fashioned with bourbon washed in duck fat. \u003c/p>\n"
],
"innerBlocks": []
},
{
"blockName": "core/paragraph",
"attrs": [],
"innerHTML": "\n\u003cp>Rotation is located toward the back of Oxbow, across from Hog Island Oyster Co. It’s not simply a market stall; it’s a generous restaurant with 5,000 square feet and 125 seats, centered on an open kitchen with a wood-fired oven. Voloshyna plans to set up a cookbook display for anyone who wants to buy a signed copy of her first cookbook, \u003ca href=\"https://omnivorebooks.myshopify.com/products/pre-order-ukrainian-anna-voloshyna-budmo-recipes-from-a-ukrainian-kitchen\">\u003cem>Budmo!\u003c/em>\u003c/a> (“cheers!” in Ukrainian), or preorder her second. \u003c/p>\n",
"innerContent": [
"\n\u003cp>Rotation is located toward the back of Oxbow, across from Hog Island Oyster Co. It’s not simply a market stall; it’s a generous restaurant with 5,000 square feet and 125 seats, centered on an open kitchen with a wood-fired oven. Voloshyna plans to set up a cookbook display for anyone who wants to buy a signed copy of her first cookbook, \u003ca href=\"https://omnivorebooks.myshopify.com/products/pre-order-ukrainian-anna-voloshyna-budmo-recipes-from-a-ukrainian-kitchen\">\u003cem>Budmo!\u003c/em>\u003c/a> (“cheers!” in Ukrainian), or preorder her second. \u003c/p>\n"
],
"innerBlocks": []
},
{
"blockName": "kqed-v2/related-articles",
"attrs": {
"postIds": [
"arts_13985042",
"news_11908537"
],
"labelWasCleared": true
},
"innerHTML": "",
"innerContent": [],
"innerBlocks": []
},
{
"blockName": "core/paragraph",
"attrs": [],
"innerHTML": "\n\u003cp>When Voloshyna published \u003ca href=\"https://omnivorebooks.myshopify.com/products/pre-order-ukrainian-anna-voloshyna-budmo-recipes-from-a-ukrainian-kitchen\">\u003cem>Budmo!\u003c/em>\u003c/a> in the fall of 2022, Russia had already been occupying Ukraine since 2014. It launched the full-scale invasion in February 2022, bringing even more bittersweet meaning to this collection of recipes celebrating the foods Voloshyna grew up with. Since then, she spent three years researching her second book \u003ca href=\"https://www.barnesandnoble.com/w/ukraine-anna-voloshyna/1149390099?utm_source=ig&utm_medium=social&utm_content=link_in_bio&fbclid=PAZXh0bgNhZW0CMTEAc3J0YwZhcHBfaWQPOTM2NjE5NzQzMzkyNDU5AAGnwGp82l-bSB-MR4FT3SOHQn3QaGD0Q4D_H-jUHLVsdBStaUfpj3osn0YufHI_aem_1dx-xXKjUhwTLE2P_AaQxw\">\u003cem>Ukraïne\u003c/em>\u003c/a>, which comes out this October, traveling to many regions and near the frontline, gathering recipes, essays and photos. At a time when her country is fighting for its existence, she believes in the importance of calling even the most humble bowl of borsch Ukrainian. “We need to remember the roots and honor the culture,” she says. \u003c/p>\n",
"innerContent": [
"\n\u003cp>When Voloshyna published \u003ca href=\"https://omnivorebooks.myshopify.com/products/pre-order-ukrainian-anna-voloshyna-budmo-recipes-from-a-ukrainian-kitchen\">\u003cem>Budmo!\u003c/em>\u003c/a> in the fall of 2022, Russia had already been occupying Ukraine since 2014. It launched the full-scale invasion in February 2022, bringing even more bittersweet meaning to this collection of recipes celebrating the foods Voloshyna grew up with. Since then, she spent three years researching her second book \u003ca href=\"https://www.barnesandnoble.com/w/ukraine-anna-voloshyna/1149390099?utm_source=ig&utm_medium=social&utm_content=link_in_bio&fbclid=PAZXh0bgNhZW0CMTEAc3J0YwZhcHBfaWQPOTM2NjE5NzQzMzkyNDU5AAGnwGp82l-bSB-MR4FT3SOHQn3QaGD0Q4D_H-jUHLVsdBStaUfpj3osn0YufHI_aem_1dx-xXKjUhwTLE2P_AaQxw\">\u003cem>Ukraïne\u003c/em>\u003c/a>, which comes out this October, traveling to many regions and near the frontline, gathering recipes, essays and photos. At a time when her country is fighting for its existence, she believes in the importance of calling even the most humble bowl of borsch Ukrainian. “We need to remember the roots and honor the culture,” she says. \u003c/p>\n"
],
"innerBlocks": []
},
{
"blockName": "core/paragraph",
"attrs": [],
"innerHTML": "\n\u003cp>Whether folks are tasting her food at the restaurant or trying one of her recipes at home, Voloshyna hopes to help them understand and appreciate Ukrainian cooking. “Because of this war, we remembered who we are as a nation,” she says. “Food is one way to showcase, ‘This is who we are.’ We want to show that to the world. We are not Russia. We are Ukraine.” \u003c/p>\n",
"innerContent": [
"\n\u003cp>Whether folks are tasting her food at the restaurant or trying one of her recipes at home, Voloshyna hopes to help them understand and appreciate Ukrainian cooking. “Because of this war, we remembered who we are as a nation,” she says. “Food is one way to showcase, ‘This is who we are.’ We want to show that to the world. We are not Russia. We are Ukraine.” \u003c/p>\n"
],
"innerBlocks": []
},
{
"blockName": "core/separator",
"attrs": [],
"innerHTML": "\n\u003chr class=\"wp-block-separator has-alpha-channel-opacity\" />\n",
"innerContent": [
"\n\u003chr class=\"wp-block-separator has-alpha-channel-opacity\" />\n"
],
"innerBlocks": []
},
{
"blockName": "core/paragraph",
"attrs": [],
"innerHTML": "\n\u003cp>\u003ca href=\"https://rotationnapa.com\">\u003cem>Rotation by Feast It Forward\u003c/em>\u003c/a>\u003cem> is open Monday and Tuesday noon–3 p.m.; Wednesday, Thursday and Sunday noon–8 p.m.; and Friday and Saturday noon–9 p.m. \u003c/em>\u003ca href=\"https://rotationnapa.com/chef/chef-anna-voloshyna\">\u003cem>Anna Voloshyna\u003c/em>\u003c/a>\u003cem> will be in residency for the month of July, and \u003c/em>\u003ca href=\"https://www.opentable.com/r/rotation-by-feast-it-forward-napa\">\u003cem>reservations\u003c/em>\u003c/a>\u003cem> are live.\u003c/em>\u003c/p>\n",
"innerContent": [
"\n\u003cp>\u003ca href=\"https://rotationnapa.com\">\u003cem>Rotation by Feast It Forward\u003c/em>\u003c/a>\u003cem> is open Monday and Tuesday noon–3 p.m.; Wednesday, Thursday and Sunday noon–8 p.m.; and Friday and Saturday noon–9 p.m. \u003c/em>\u003ca href=\"https://rotationnapa.com/chef/chef-anna-voloshyna\">\u003cem>Anna Voloshyna\u003c/em>\u003c/a>\u003cem> will be in residency for the month of July, and \u003c/em>\u003ca href=\"https://www.opentable.com/r/rotation-by-feast-it-forward-napa\">\u003cem>reservations\u003c/em>\u003c/a>\u003cem> are live.\u003c/em>\u003c/p>\n"
],
"innerBlocks": []
},
{
"blockName": "kqed/ad",
"attrs": {
"format": "floatright"
},
"innerBlocks": [],
"innerHTML": "",
"innerContent": []
},
{
"blockName": "core/paragraph",
"attrs": [],
"innerHTML": "\n\u003cp>\u003c/p>\n",
"innerContent": [
"\n\u003cp>\u003c/p>\n"
],
"innerBlocks": []
}
],
"excerpt": "Cookbook author Anna Voloshyna takes residence in Oxbow Public Market, and she’s bringing the buttery chicken Kyiv. ",
"status": "publish",
"parent": 0,
"modified": 1782276908,
"stats": {
"hasAudio": false,
"hasVideo": false,
"hasChartOrMap": false,
"iframeSrcs": [],
"hasGoogleForm": false,
"hasGallery": false,
"hasHearkenModule": false,
"hasPolis": false,
"paragraphCount": 15,
"wordCount": 1037
},
"headData": {
"title": "Napa's Only Ukrainian Restaurant Pops Up for One Month This Summer | KQED",
"description": "Cookbook author Anna Voloshyna takes residence in Oxbow Public Market, and she’s bringing the buttery chicken Kyiv. ",
"ogTitle": "The Only Ukrainian Restaurant in Wine Country Pops Open for One Month This Summer",
"ogDescription": "",
"ogImgId": "",
"twTitle": "The Only Ukrainian Restaurant in Wine Country Pops Open for One Month This Summer",
"twDescription": "",
"twImgId": "",
"socialTitle": "Napa's Only Ukrainian Restaurant Pops Up for One Month This Summer %%page%% %%sep%% KQED",
"schema": {
"@context": "https://schema.org",
"@type": "Article",
"headline": "The Only Ukrainian Restaurant in Wine Country Pops Open for One Month This Summer",
"datePublished": "2026-06-24T10:00:00-07:00",
"dateModified": "2026-06-23T21:55:08-07:00",
"image": "https://cdn.kqed.org/wp-content/uploads/2020/02/KQED-OG-Image@1x.png"
}
},
"primaryCategory": {
"termId": 12276,
"slug": "food",
"name": "Food"
},
"source": "Food",
"sourceUrl": "https://www.kqed.org/food",
"sticky": false,
"templateType": "standard",
"featuredImageType": "standard",
"excludeFromSiteSearch": "Include",
"articleAge": "0",
"path": "/arts/13990975/ukrainian-restaurant-napa-anna-voloshyna-oxbow-public-market-pop-up",
"audioTrackLength": null,
"parsedContent": [
{
"type": "contentString",
"content": "\u003cdiv class=\"post-body\">\u003cp>\u003cp>\u003ca href=\"https://www.annavoloshyna.com\">Anna Voloshyna\u003c/a> never dreamed of opening a restaurant. The chef and author has been busy planning a tour for her second cookbook, hosting events \u003ca href=\"https://www.kqed.org/news/11908537/ukrainian-chef-in-sf-finds-comfort-cooking-traditional-food-and-raises-thousands-in-relief-aid\">and fundraisers\u003c/a>, and running her IACP award-winning \u003ca href=\"https://www.instagram.com/annavoloshynacooks/\">Instagram\u003c/a> account, all celebrating the cooking of her native Ukraine. But she got talked into a residency at \u003ca href=\"https://rotationnapa.com\">Rotation by Feast It Forward\u003c/a> at Oxbow Public Market in Napa, which means she’s effectively opening the only Ukrainian restaurant in wine country — if only for the month of July. \u003c/p>\n\n\n\n\u003cp>“People have been bugging me forever,” Voloshyna says. “Like, ‘Where can we try your food?’” Or any Ukrainian food, anywhere across the Bay Area, for that matter? \u003c/p>\n\n\n\n\u003cp>Northern California is home to a few small food businesses that proudly rep Ukraine, including \u003ca href=\"https://lelekasf.com\">Leleka\u003c/a> focusing on dumpling delivery in SF, San Mateo and Sunnyvale; \u003ca href=\"https://nataliasdacha.com\">Natalia’s Dacha\u003c/a> serving honey cakes at Napa County farmers markets; and the \u003ca href=\"https://borschmobile.com\">Borsch Mobile\u003c/a> truck bringing beet soup to the people across the Bay Area. And plenty of restaurants serve more broadly Eastern European–inspired menus with similar dishes. But given the context of the ongoing Russian war against Ukraine, Voloshyna has doubled down on specifically showcasing the hearty dishes and fermented flavors of her home country, and can’t wait to serve a sit-down dinner experience. \u003c/p>\n\n\n\n\u003cp>“This is the place where Ukrainian cuisine and culture will be celebrated, and I will shout about it nonstop for the whole month,” she says. \u003c/p>\n\n\n\n\u003cfigure class=\"wp-block-image size-full\">\u003cimg loading=\"lazy\" decoding=\"async\" width=\"2000\" height=\"1333\" src=\"https://cdn.kqed.org/wp-content/uploads/sites/2/2026/06/anna-voloshyna_jason-perry.jpg\" alt=\"Portrait of a smiling chef holding a glass of white wine inside her restaurant.\" class=\"wp-image-13991033\" srcset=\"https://cdn.kqed.org/wp-content/uploads/sites/2/2026/06/anna-voloshyna_jason-perry.jpg 2000w, https://cdn.kqed.org/wp-content/uploads/sites/2/2026/06/anna-voloshyna_jason-perry-160x107.jpg 160w, https://cdn.kqed.org/wp-content/uploads/sites/2/2026/06/anna-voloshyna_jason-perry-768x512.jpg 768w, https://cdn.kqed.org/wp-content/uploads/sites/2/2026/06/anna-voloshyna_jason-perry-1536x1024.jpg 1536w\" sizes=\"auto, (max-width: 2000px) 100vw, 2000px\">\u003cfigcaption class=\"wp-element-caption\">Voloshyna will be the guest chef at Rotation by Feast It Forward, a new restaurant that hosts star chefs from around the country. Her second cookbook, ‘Ukraine,’ comes out in October 2026. (Jason Perry)\u003c/figcaption>\u003c/figure>\n\n\n\n\u003cp>Rotation is a new project from Katie Hamilton Shaffer of Feast It Forward, the events space and media network across the street from Oxbow. She took over a restaurant in a corner of the market, welcoming star guest chefs from across the country. The month-long chef residencies kicked off in February with Martin Yan from SF, followed by Tristen Epps from Houston and Lee Anne Wong from Honolulu, showcasing Chinese, Trinidadian, and Hawaiian flavors, respectively. None of these chefs phoned it in — Voloshyna’s staying in a cottage in Napa for the month, along with her husband and little wolf of a dog. She’ll be shopping the farmers market and working closely in the kitchen with Rotation executive chef Jeff Mosher and his team. \u003c/p>\n\n\n\n\u003cp>\u003c/p>\u003c/div>",
"attributes": {
"named": {},
"numeric": []
}
},
{
"type": "component",
"content": "",
"name": "ad",
"attributes": {
"named": {
"label": "fullwidth"
},
"numeric": [
"fullwidth"
]
}
},
{
"type": "contentString",
"content": "\u003cdiv class=\"post-body\">\u003cp>\u003c/p>\n\u003cp>They’re throwing down a full menu, focusing on classics presented in a modern and refined way, Voloshyna says. A meal might start with beet-pickled deviled eggs with smoked trout roe, varenyky (dumplings) stuffed with farmer cheese and confit pork belly, and kholodnyk (chilled borsch) with refreshing raw veggies. Diners won’t want to miss the quintessential chicken Kyiv — “with a crispy crust and inside garlic butter — what’s not to love?” Voloshyna says. She’s already fermenting beet kvass to season the shpundra (braised short ribs), best served over banosh (polenta) with brynza sheep cheese and crispy onions. The grilled squash with preserved lemons comes from her first cookbook; the roasted eggplant with herbed yogurt will be in her second. And sour cream, pickles and fresh dill scatter across everything. \u003c/p>\n\n\n\n\u003cfigure class=\"wp-block-gallery has-nested-images columns-default is-cropped wp-block-gallery-1 is-layout-flex wp-block-gallery-is-layout-flex\">\n\u003cfigure class=\"wp-block-image size-large\">\u003cimg loading=\"lazy\" decoding=\"async\" width=\"1429\" height=\"2000\" data-id=\"13991038\" src=\"https://cdn.kqed.org/wp-content/uploads/sites/2/2026/06/deviled-eggs_jason-perry.jpg\" alt=\"Bright purple deviled eggs topped with orange fish roe.\" class=\"wp-image-13991038\" srcset=\"https://cdn.kqed.org/wp-content/uploads/sites/2/2026/06/deviled-eggs_jason-perry.jpg 1429w, https://cdn.kqed.org/wp-content/uploads/sites/2/2026/06/deviled-eggs_jason-perry-160x224.jpg 160w, https://cdn.kqed.org/wp-content/uploads/sites/2/2026/06/deviled-eggs_jason-perry-768x1075.jpg 768w, https://cdn.kqed.org/wp-content/uploads/sites/2/2026/06/deviled-eggs_jason-perry-1097x1536.jpg 1097w\" sizes=\"auto, (max-width: 1429px) 100vw, 1429px\">\u003cfigcaption class=\"wp-element-caption\">Beet-pickled deviled eggs topped with trout roe. (Jason Perry)\u003c/figcaption>\u003c/figure>\n\n\n\n\u003cfigure class=\"wp-block-image size-large\">\u003cimg loading=\"lazy\" decoding=\"async\" width=\"1429\" height=\"2000\" data-id=\"13991035\" src=\"https://cdn.kqed.org/wp-content/uploads/sites/2/2026/06/short-rib_jason-perry.jpg\" alt=\"Purple braised short rib over a bed of polenta with sliced radishes sprinkled on top.\" class=\"wp-image-13991035\" srcset=\"https://cdn.kqed.org/wp-content/uploads/sites/2/2026/06/short-rib_jason-perry.jpg 1429w, https://cdn.kqed.org/wp-content/uploads/sites/2/2026/06/short-rib_jason-perry-160x224.jpg 160w, https://cdn.kqed.org/wp-content/uploads/sites/2/2026/06/short-rib_jason-perry-768x1075.jpg 768w, https://cdn.kqed.org/wp-content/uploads/sites/2/2026/06/short-rib_jason-perry-1097x1536.jpg 1097w\" sizes=\"auto, (max-width: 1429px) 100vw, 1429px\">\u003cfigcaption class=\"wp-element-caption\">Braised short ribs seasoned with fermented beets. (Jason Perry)\u003c/figcaption>\u003c/figure>\n\u003c/figure>\n\n\n\n\u003cp>Desserts include a sunflower semifreddo inspired by childhood snacks of sunflower halva: “That flavor is carved into my brain,” Voloshyna says. She grew up in a small town named Snihurivka in the south, a couple of hours from Odesa, surrounded by “fields and fields” of sunflowers. Despite the war, Ukraine remains a leading exporter of sunflower oil, so those cooking and finishing oils are foundational flavors, and the flowers shine as a national symbol of resilience. \u003c/p>\n\n\n\n\u003cp>Rotation serves its own menu at lunch, although Voloshyna will slide in at least one special — khachapuri. The Georgian cheese boats are now wildly popular across Ukraine. Shaffer, the owner, curates the wine list, focusing on locals from Napa and Sonoma, and cocktails include a signature old fashioned with bourbon washed in duck fat. \u003c/p>\n\n\n\n\u003cp>Rotation is located toward the back of Oxbow, across from Hog Island Oyster Co. It’s not simply a market stall; it’s a generous restaurant with 5,000 square feet and 125 seats, centered on an open kitchen with a wood-fired oven. Voloshyna plans to set up a cookbook display for anyone who wants to buy a signed copy of her first cookbook, \u003ca href=\"https://omnivorebooks.myshopify.com/products/pre-order-ukrainian-anna-voloshyna-budmo-recipes-from-a-ukrainian-kitchen\">\u003cem>Budmo!\u003c/em>\u003c/a> (“cheers!” in Ukrainian), or preorder her second. \u003c/p>\n\n\n\n\n\n\u003cp>When Voloshyna published \u003ca href=\"https://omnivorebooks.myshopify.com/products/pre-order-ukrainian-anna-voloshyna-budmo-recipes-from-a-ukrainian-kitchen\">\u003cem>Budmo!\u003c/em>\u003c/a> in the fall of 2022, Russia had already been occupying Ukraine since 2014. It launched the full-scale invasion in February 2022, bringing even more bittersweet meaning to this collection of recipes celebrating the foods Voloshyna grew up with. Since then, she spent three years researching her second book \u003ca href=\"https://www.barnesandnoble.com/w/ukraine-anna-voloshyna/1149390099?utm_source=ig&utm_medium=social&utm_content=link_in_bio&fbclid=PAZXh0bgNhZW0CMTEAc3J0YwZhcHBfaWQPOTM2NjE5NzQzMzkyNDU5AAGnwGp82l-bSB-MR4FT3SOHQn3QaGD0Q4D_H-jUHLVsdBStaUfpj3osn0YufHI_aem_1dx-xXKjUhwTLE2P_AaQxw\">\u003cem>Ukraïne\u003c/em>\u003c/a>, which comes out this October, traveling to many regions and near the frontline, gathering recipes, essays and photos. At a time when her country is fighting for its existence, she believes in the importance of calling even the most humble bowl of borsch Ukrainian. “We need to remember the roots and honor the culture,” she says. \u003c/p>\n\n\n\n\u003cp>Whether folks are tasting her food at the restaurant or trying one of her recipes at home, Voloshyna hopes to help them understand and appreciate Ukrainian cooking. “Because of this war, we remembered who we are as a nation,” she says. “Food is one way to showcase, ‘This is who we are.’ We want to show that to the world. We are not Russia. We are Ukraine.” \u003c/p>\n\n\n\n\u003chr class=\"wp-block-separator has-alpha-channel-opacity\">\n\n\n\n\u003cp>\u003ca href=\"https://rotationnapa.com\">\u003cem>Rotation by Feast It Forward\u003c/em>\u003c/a>\u003cem> is open Monday and Tuesday noon–3 p.m.; Wednesday, Thursday and Sunday noon–8 p.m.; and Friday and Saturday noon–9 p.m. \u003c/em>\u003ca href=\"https://rotationnapa.com/chef/chef-anna-voloshyna\">\u003cem>Anna Voloshyna\u003c/em>\u003c/a>\u003cem> will be in residency for the month of July, and \u003c/em>\u003ca href=\"https://www.opentable.com/r/rotation-by-feast-it-forward-napa\">\u003cem>reservations\u003c/em>\u003c/a>\u003cem> are live.\u003c/em>\u003c/p>\n\n\n\n\u003cp>\u003c/p>\n\u003cp>\u003c/p>\n\n\u003c/div>\u003c/p>",
"attributes": {
"named": {},
"numeric": []
}
}
],
"link": "/arts/13990975/ukrainian-restaurant-napa-anna-voloshyna-oxbow-public-market-pop-up",
"authors": [
"11902"
],
"programs": [
"arts_140"
],
"categories": [
"arts_1",
"arts_12276"
],
"tags": [
"arts_16106",
"arts_10278",
"arts_1297",
"arts_1855",
"arts_14089",
"arts_16761",
"arts_2845"
],
"featImg": "arts_13991041",
"label": "source_arts_13990975"
},
"arts_13990903": {
"type": "posts",
"id": "arts_13990903",
"meta": {
"index": "posts_1716263798",
"site": "arts",
"id": "13990903",
"score": null,
"sort": [
1781825185000
]
},
"guestAuthors": [],
"slug": "as-kneaded-cafe-san-leandro-library-baguette-quiche",
"title": "The East Bay’s Most Enticing New Cafe? It’s at the Library",
"publishDate": 1781825185,
"format": "standard",
"headTitle": "The East Bay’s Most Enticing New Cafe? It’s at the Library | KQED",
"labelTerm": {},
"content": "\u003cp>Last January, Iliana Berkowitz was paying her weekly visit to the main branch of the San Leandro Public \u003ca href=\"https://www.kqed.org/arts/tag/library\">Library\u003c/a> with her kids when she noticed that the little \u003ca href=\"https://www.sanleandro.org/552/Friends-of-the-San-Leandro-Library\">volunteer\u003c/a>-run cafe inside had been closed for some time. As it turns out, Berkowitz is the baker-owner of \u003ca href=\"https://www.instagram.com/as.kneaded.bakery/\">As Kneaded Bakery\u003c/a>, and she’d been looking for a place to open her first proper cafe. \u003c/p>\n\n\n\n\u003cp>“I had the vision right away for what I wanted to do,” she says. \u003c/p>\n\n\n\n\u003cp>Berkowitz reached out to the library director, who, it so happened, was at that moment about to put out a request for proposals for the vacant cafe space. One thing led to another, and, after a months-long process of bid submissions and lease negotiations, Berkowitz opened \u003ca href=\"https://www.instagram.com/as.kneaded.cafe/\">As Kneaded Cafe\u003c/a> this past February. Now, San Leandrans have a new spot where they can sit down and enjoy a slice of warm quiche, a sticky-chewy compost cookie or a sandwich served on one of the Bay Area’s best French baguettes — \u003cem>and \u003c/em>check out a couple of cozy \u003ca href=\"https://www.kqed.org/arts/13989727/5-best-books-summer-2026\">summer beach reads\u003c/a>, all in the same trip.\u003c/p>\n\n\n\n\u003cp>As Kneaded isn’t the only cafe in the Bay Area that’s located inside a public library, but it might be the one that’s most enticing to food enthusiasts, given its connection to a bona fide artisan breadmaker. Berkowitz has long made one of my favorite baguettes, baked in the true French style — no sourdough tang, but with a dark, crackly crust and deeply satisfying chew. Her smaller-sized demi-baguettes make a great vehicle for the cafe’s simple sandwiches: The “Chez Aline,” with ham, thin slices of watermelon radish and a thick smear of butter, is exactly the kind of thing you might buy at a corner bakery in Paris. As Kneaded also serves one of the tastiest versions of a quiche Lorraine I’ve had in recent memory — appealingly jiggly and juicy, with a buttery crust and a layer of crisp, caramelized cheese on top. (Just make sure you ask them to warm it up.) \u003c/p>\n\n\n\n\u003cfigure class=\"wp-block-image size-full\">\u003cimg loading=\"lazy\" decoding=\"async\" width=\"2000\" height=\"1333\" src=\"https://cdn.kqed.org/wp-content/uploads/sites/2/2026/06/as-kneaded-sandwich.jpg\" alt=\"Overhead view of a baguette sandwich and a glass of lemonade.\" class=\"wp-image-13990915\" srcset=\"https://cdn.kqed.org/wp-content/uploads/sites/2/2026/06/as-kneaded-sandwich.jpg 2000w, https://cdn.kqed.org/wp-content/uploads/sites/2/2026/06/as-kneaded-sandwich-160x107.jpg 160w, https://cdn.kqed.org/wp-content/uploads/sites/2/2026/06/as-kneaded-sandwich-768x512.jpg 768w, https://cdn.kqed.org/wp-content/uploads/sites/2/2026/06/as-kneaded-sandwich-1536x1024.jpg 1536w\" sizes=\"auto, (max-width: 2000px) 100vw, 2000px\">\u003cfigcaption class=\"wp-element-caption\">The very French ‘Chez Aline’ features ham, butter and watermelon radish. (Luke Tsai/KQED)\u003c/figcaption>\u003c/figure>\n\n\n\n\u003cp>The cafe has also given Berkowitz the chance to start a coffee program for the first time, with a full slate of espresso drinks. This isn’t one of those push-a-button coffee operations; the flat white I tried during my visit was excellent.\u003c/p>\n\n\n\n\u003cp>[ad fullwidth]\u003c/p>\n\u003cp>Berkowitz says once her bid was accepted, she toured other library cafes around the Bay Area for inspiration. (She was especially impressed by how efficiently \u003ca href=\"https://prologue-coffee.com/\">Prologue\u003c/a>, a Vietnamese American–owned coffee shop at the Walnut Creek library, is able to use its space.) There are, after all, some inherent challenges to running a cafe inside a library. The biggest is that the San Leandro library cafe space doesn’t have an actual kitchen — part of the reason why Berkowitz doesn’t serve hot sandwiches.\u003c/p>\n\n\n\n\u003cfigure class=\"wp-block-image size-full\">\u003cimg loading=\"lazy\" decoding=\"async\" width=\"2000\" height=\"2000\" src=\"https://cdn.kqed.org/wp-content/uploads/sites/2/2026/06/as-kneaded-cafe_courtesy.jpg\" alt=\"Exterior of a library with a cafe space in front.\" class=\"wp-image-13990917\" srcset=\"https://cdn.kqed.org/wp-content/uploads/sites/2/2026/06/as-kneaded-cafe_courtesy.jpg 2000w, https://cdn.kqed.org/wp-content/uploads/sites/2/2026/06/as-kneaded-cafe_courtesy-160x160.jpg 160w, https://cdn.kqed.org/wp-content/uploads/sites/2/2026/06/as-kneaded-cafe_courtesy-768x768.jpg 768w, https://cdn.kqed.org/wp-content/uploads/sites/2/2026/06/as-kneaded-cafe_courtesy-1536x1536.jpg 1536w, https://cdn.kqed.org/wp-content/uploads/sites/2/2026/06/as-kneaded-cafe_courtesy-600x600.jpg 600w\" sizes=\"auto, (max-width: 2000px) 100vw, 2000px\">\u003cfigcaption class=\"wp-element-caption\">The cafe — seen here on the right — has a patio area and entrances both inside and outside the library. (Courtesy of As Kneaded Cafe)\u003c/figcaption>\u003c/figure>\n\n\n\n\u003cp>The cafe is also affected by the flow of whatever might be happening at the library on a given day — and, in turn, by the funding cuts that have hit public libraries all over the Bay Area. Recently, for instance, the San Leandro city council voted to close the library on Mondays, starting in July. \u003c/p>\n\n\n\n\n\n\u003cp>“Right now, Mondays are a great day for us,” Berkowitz says. For now, the cafe will stay open on Mondays while the library remains closed, but she says she’ll have to keep an eye on it to see whether that continues to make sense.\u003c/p>\n\n\n\n\u003cp>For Berkowitz, the best part of having a proper, sit-down cafe for the first time is the opportunity for “extended hospitality” that she doesn’t have at her bakery, where the average customer only comes in for three or four minutes. Being inside the library only accentuates that sense of hospitality; Berkowitz says all kinds of people come through and wind up hanging out in the cafe. \u003c/p>\n\n\n\n\u003cfigure class=\"wp-block-image size-full\">\u003cimg loading=\"lazy\" decoding=\"async\" width=\"2000\" height=\"1333\" src=\"https://cdn.kqed.org/wp-content/uploads/sites/2/2026/06/as-kneaded-flat-white.jpg\" alt=\"A flat white coffee drink inside an airy, sunny cafe.\" class=\"wp-image-13990911\" srcset=\"https://cdn.kqed.org/wp-content/uploads/sites/2/2026/06/as-kneaded-flat-white.jpg 2000w, https://cdn.kqed.org/wp-content/uploads/sites/2/2026/06/as-kneaded-flat-white-160x107.jpg 160w, https://cdn.kqed.org/wp-content/uploads/sites/2/2026/06/as-kneaded-flat-white-768x512.jpg 768w, https://cdn.kqed.org/wp-content/uploads/sites/2/2026/06/as-kneaded-flat-white-1536x1024.jpg 1536w\" sizes=\"auto, (max-width: 2000px) 100vw, 2000px\">\u003cfigcaption class=\"wp-element-caption\">The cafe offers a full slate of espresso drinks, including a very good flat white (pictured). (Luke Tsai/KQED)\u003c/figcaption>\u003c/figure>\n\n\n\n\u003cp>“[The library] is such a beating heart of the community,” she says. People might be there to access social services, print out a document, attend a meeting on renters’ rights, or visit the nearby Wednesday farmers market — in addition to folks who make a special trip because they’re diehard fans of As Kneaded’s bread. \u003c/p>\n\n\n\n\u003cp>The upshot? “We’re seeing a lot more different types of people, and that’s really cool, actually,” Berkowitz says.\u003c/p>\n\n\n\n\u003chr class=\"wp-block-separator has-alpha-channel-opacity\">\n\n\n\n\u003cp>\u003c/p>\n\u003cp>\u003cem>\u003ca href=\"https://www.askneadedcafe.com/\">As Kneaded Cafe\u003c/a> is open Tuesday through Thursday 9 a.m.–7 p.m. and Friday, Saturday and Monday 9 a.m.–5 p.m. at the main branch of the San Leandro Public Library (300 Estudillo Ave., San Leandro).\u003c/em>\u003c/p>\n\n",
"blocks": [
{
"blockName": "core/paragraph",
"attrs": [],
"innerHTML": "\n\u003cp>Last January, Iliana Berkowitz was paying her weekly visit to the main branch of the San Leandro Public \u003ca href=\"https://www.kqed.org/arts/tag/library\">Library\u003c/a> with her kids when she noticed that the little \u003ca href=\"https://www.sanleandro.org/552/Friends-of-the-San-Leandro-Library\">volunteer\u003c/a>-run cafe inside had been closed for some time. As it turns out, Berkowitz is the baker-owner of \u003ca href=\"https://www.instagram.com/as.kneaded.bakery/\">As Kneaded Bakery\u003c/a>, and she’d been looking for a place to open her first proper cafe. \u003c/p>\n",
"innerContent": [
"\n\u003cp>Last January, Iliana Berkowitz was paying her weekly visit to the main branch of the San Leandro Public \u003ca href=\"https://www.kqed.org/arts/tag/library\">Library\u003c/a> with her kids when she noticed that the little \u003ca href=\"https://www.sanleandro.org/552/Friends-of-the-San-Leandro-Library\">volunteer\u003c/a>-run cafe inside had been closed for some time. As it turns out, Berkowitz is the baker-owner of \u003ca href=\"https://www.instagram.com/as.kneaded.bakery/\">As Kneaded Bakery\u003c/a>, and she’d been looking for a place to open her first proper cafe. \u003c/p>\n"
],
"innerBlocks": []
},
{
"blockName": "core/paragraph",
"attrs": [],
"innerHTML": "\n\u003cp>“I had the vision right away for what I wanted to do,” she says. \u003c/p>\n",
"innerContent": [
"\n\u003cp>“I had the vision right away for what I wanted to do,” she says. \u003c/p>\n"
],
"innerBlocks": []
},
{
"blockName": "core/paragraph",
"attrs": [],
"innerHTML": "\n\u003cp>Berkowitz reached out to the library director, who, it so happened, was at that moment about to put out a request for proposals for the vacant cafe space. One thing led to another, and, after a months-long process of bid submissions and lease negotiations, Berkowitz opened \u003ca href=\"https://www.instagram.com/as.kneaded.cafe/\">As Kneaded Cafe\u003c/a> this past February. Now, San Leandrans have a new spot where they can sit down and enjoy a slice of warm quiche, a sticky-chewy compost cookie or a sandwich served on one of the Bay Area’s best French baguettes — \u003cem>and \u003c/em>check out a couple of cozy \u003ca href=\"https://www.kqed.org/arts/13989727/5-best-books-summer-2026\">summer beach reads\u003c/a>, all in the same trip.\u003c/p>\n",
"innerContent": [
"\n\u003cp>Berkowitz reached out to the library director, who, it so happened, was at that moment about to put out a request for proposals for the vacant cafe space. One thing led to another, and, after a months-long process of bid submissions and lease negotiations, Berkowitz opened \u003ca href=\"https://www.instagram.com/as.kneaded.cafe/\">As Kneaded Cafe\u003c/a> this past February. Now, San Leandrans have a new spot where they can sit down and enjoy a slice of warm quiche, a sticky-chewy compost cookie or a sandwich served on one of the Bay Area’s best French baguettes — \u003cem>and \u003c/em>check out a couple of cozy \u003ca href=\"https://www.kqed.org/arts/13989727/5-best-books-summer-2026\">summer beach reads\u003c/a>, all in the same trip.\u003c/p>\n"
],
"innerBlocks": []
},
{
"blockName": "core/paragraph",
"attrs": [],
"innerHTML": "\n\u003cp>As Kneaded isn’t the only cafe in the Bay Area that’s located inside a public library, but it might be the one that’s most enticing to food enthusiasts, given its connection to a bona fide artisan breadmaker. Berkowitz has long made one of my favorite baguettes, baked in the true French style — no sourdough tang, but with a dark, crackly crust and deeply satisfying chew. Her smaller-sized demi-baguettes make a great vehicle for the cafe’s simple sandwiches: The “Chez Aline,” with ham, thin slices of watermelon radish and a thick smear of butter, is exactly the kind of thing you might buy at a corner bakery in Paris. As Kneaded also serves one of the tastiest versions of a quiche Lorraine I’ve had in recent memory — appealingly jiggly and juicy, with a buttery crust and a layer of crisp, caramelized cheese on top. (Just make sure you ask them to warm it up.) \u003c/p>\n",
"innerContent": [
"\n\u003cp>As Kneaded isn’t the only cafe in the Bay Area that’s located inside a public library, but it might be the one that’s most enticing to food enthusiasts, given its connection to a bona fide artisan breadmaker. Berkowitz has long made one of my favorite baguettes, baked in the true French style — no sourdough tang, but with a dark, crackly crust and deeply satisfying chew. Her smaller-sized demi-baguettes make a great vehicle for the cafe’s simple sandwiches: The “Chez Aline,” with ham, thin slices of watermelon radish and a thick smear of butter, is exactly the kind of thing you might buy at a corner bakery in Paris. As Kneaded also serves one of the tastiest versions of a quiche Lorraine I’ve had in recent memory — appealingly jiggly and juicy, with a buttery crust and a layer of crisp, caramelized cheese on top. (Just make sure you ask them to warm it up.) \u003c/p>\n"
],
"innerBlocks": []
},
{
"blockName": "core/image",
"attrs": {
"id": 13990915,
"sizeSlug": "full",
"linkDestination": "none",
"imageCredit": "Luke Tsai/KQED",
"srcset": "https://cdn.kqed.org/wp-content/uploads/sites/2/2026/06/as-kneaded-sandwich.jpg 2000w, https://cdn.kqed.org/wp-content/uploads/sites/2/2026/06/as-kneaded-sandwich-160x107.jpg 160w, https://cdn.kqed.org/wp-content/uploads/sites/2/2026/06/as-kneaded-sandwich-768x512.jpg 768w, https://cdn.kqed.org/wp-content/uploads/sites/2/2026/06/as-kneaded-sandwich-1536x1024.jpg 1536w",
"sizes": "(min-width: 992px) min(100vw, 1536px), (min-width: 768px) min(100vw, 1280px), min(100vw, 1020px)"
},
"innerHTML": "\n\u003cfigure class=\"wp-block-image size-full\">\u003cimg src=\"https://cdn.kqed.org/wp-content/uploads/sites/2/2026/06/as-kneaded-sandwich.jpg\" alt=\"Overhead view of a baguette sandwich and a glass of lemonade.\" class=\"wp-image-13990915\" srcset=\"https://cdn.kqed.org/wp-content/uploads/sites/2/2026/06/as-kneaded-sandwich.jpg 2000w, https://cdn.kqed.org/wp-content/uploads/sites/2/2026/06/as-kneaded-sandwich-160x107.jpg 160w, https://cdn.kqed.org/wp-content/uploads/sites/2/2026/06/as-kneaded-sandwich-768x512.jpg 768w, https://cdn.kqed.org/wp-content/uploads/sites/2/2026/06/as-kneaded-sandwich-1536x1024.jpg 1536w\" sizes=\"(min-width: 992px) min(100vw, 1536px), (min-width: 768px) min(100vw, 1280px), min(100vw, 1020px)\" />\u003cfigcaption class=\"wp-element-caption\">The very French ‘Chez Aline’ features ham, butter and watermelon radish. \u003c/figcaption>\u003c/figure>\n",
"innerContent": [
"\n\u003cfigure class=\"wp-block-image size-full\">\u003cimg src=\"https://cdn.kqed.org/wp-content/uploads/sites/2/2026/06/as-kneaded-sandwich.jpg\" alt=\"Overhead view of a baguette sandwich and a glass of lemonade.\" class=\"wp-image-13990915\" />\u003cfigcaption class=\"wp-element-caption\">The very French ‘Chez Aline’ features ham, butter and watermelon radish. \u003c/figcaption>\u003c/figure>\n"
],
"innerBlocks": []
},
{
"blockName": "core/paragraph",
"attrs": [],
"innerHTML": "\n\u003cp>The cafe has also given Berkowitz the chance to start a coffee program for the first time, with a full slate of espresso drinks. This isn’t one of those push-a-button coffee operations; the flat white I tried during my visit was excellent.\u003c/p>\n",
"innerContent": [
"\n\u003cp>The cafe has also given Berkowitz the chance to start a coffee program for the first time, with a full slate of espresso drinks. This isn’t one of those push-a-button coffee operations; the flat white I tried during my visit was excellent.\u003c/p>\n"
],
"innerBlocks": []
},
{
"blockName": "kqed/ad",
"attrs": {
"format": "fullwidth"
},
"innerBlocks": [],
"innerHTML": "",
"innerContent": []
},
{
"blockName": "core/paragraph",
"attrs": [],
"innerHTML": "\n\u003cp>Berkowitz says once her bid was accepted, she toured other library cafes around the Bay Area for inspiration. (She was especially impressed by how efficiently \u003ca href=\"https://prologue-coffee.com/\">Prologue\u003c/a>, a Vietnamese American–owned coffee shop at the Walnut Creek library, is able to use its space.) There are, after all, some inherent challenges to running a cafe inside a library. The biggest is that the San Leandro library cafe space doesn’t have an actual kitchen — part of the reason why Berkowitz doesn’t serve hot sandwiches.\u003c/p>\n",
"innerContent": [
"\n\u003cp>Berkowitz says once her bid was accepted, she toured other library cafes around the Bay Area for inspiration. (She was especially impressed by how efficiently \u003ca href=\"https://prologue-coffee.com/\">Prologue\u003c/a>, a Vietnamese American–owned coffee shop at the Walnut Creek library, is able to use its space.) There are, after all, some inherent challenges to running a cafe inside a library. The biggest is that the San Leandro library cafe space doesn’t have an actual kitchen — part of the reason why Berkowitz doesn’t serve hot sandwiches.\u003c/p>\n"
],
"innerBlocks": []
},
{
"blockName": "core/image",
"attrs": {
"id": 13990917,
"sizeSlug": "full",
"linkDestination": "none",
"imageCredit": "Courtesy of As Kneaded Cafe",
"srcset": "https://cdn.kqed.org/wp-content/uploads/sites/2/2026/06/as-kneaded-cafe_courtesy.jpg 2000w, https://cdn.kqed.org/wp-content/uploads/sites/2/2026/06/as-kneaded-cafe_courtesy-160x160.jpg 160w, https://cdn.kqed.org/wp-content/uploads/sites/2/2026/06/as-kneaded-cafe_courtesy-768x768.jpg 768w, https://cdn.kqed.org/wp-content/uploads/sites/2/2026/06/as-kneaded-cafe_courtesy-1536x1536.jpg 1536w, https://cdn.kqed.org/wp-content/uploads/sites/2/2026/06/as-kneaded-cafe_courtesy-600x600.jpg 600w",
"sizes": "(min-width: 992px) min(100vw, 1536px), (min-width: 768px) min(100vw, 1280px), min(100vw, 1020px)"
},
"innerHTML": "\n\u003cfigure class=\"wp-block-image size-full\">\u003cimg src=\"https://cdn.kqed.org/wp-content/uploads/sites/2/2026/06/as-kneaded-cafe_courtesy.jpg\" alt=\"Exterior of a library with a cafe space in front.\" class=\"wp-image-13990917\" srcset=\"https://cdn.kqed.org/wp-content/uploads/sites/2/2026/06/as-kneaded-cafe_courtesy.jpg 2000w, https://cdn.kqed.org/wp-content/uploads/sites/2/2026/06/as-kneaded-cafe_courtesy-160x160.jpg 160w, https://cdn.kqed.org/wp-content/uploads/sites/2/2026/06/as-kneaded-cafe_courtesy-768x768.jpg 768w, https://cdn.kqed.org/wp-content/uploads/sites/2/2026/06/as-kneaded-cafe_courtesy-1536x1536.jpg 1536w, https://cdn.kqed.org/wp-content/uploads/sites/2/2026/06/as-kneaded-cafe_courtesy-600x600.jpg 600w\" sizes=\"(min-width: 992px) min(100vw, 1536px), (min-width: 768px) min(100vw, 1280px), min(100vw, 1020px)\" />\u003cfigcaption class=\"wp-element-caption\">The cafe — seen here on the right — has a patio area and entrances both inside and outside the library. \u003c/figcaption>\u003c/figure>\n",
"innerContent": [
"\n\u003cfigure class=\"wp-block-image size-full\">\u003cimg src=\"https://cdn.kqed.org/wp-content/uploads/sites/2/2026/06/as-kneaded-cafe_courtesy.jpg\" alt=\"Exterior of a library with a cafe space in front.\" class=\"wp-image-13990917\" />\u003cfigcaption class=\"wp-element-caption\">The cafe — seen here on the right — has a patio area and entrances both inside and outside the library. \u003c/figcaption>\u003c/figure>\n"
],
"innerBlocks": []
},
{
"blockName": "core/paragraph",
"attrs": [],
"innerHTML": "\n\u003cp>The cafe is also affected by the flow of whatever might be happening at the library on a given day — and, in turn, by the funding cuts that have hit public libraries all over the Bay Area. Recently, for instance, the San Leandro city council voted to close the library on Mondays, starting in July. \u003c/p>\n",
"innerContent": [
"\n\u003cp>The cafe is also affected by the flow of whatever might be happening at the library on a given day — and, in turn, by the funding cuts that have hit public libraries all over the Bay Area. Recently, for instance, the San Leandro city council voted to close the library on Mondays, starting in July. \u003c/p>\n"
],
"innerBlocks": []
},
{
"blockName": "kqed-v2/related-articles",
"attrs": {
"postIds": [
"arts_13975908",
"arts_13969092"
],
"labelWasCleared": true
},
"innerHTML": "",
"innerContent": [],
"innerBlocks": []
},
{
"blockName": "core/paragraph",
"attrs": [],
"innerHTML": "\n\u003cp>“Right now, Mondays are a great day for us,” Berkowitz says. For now, the cafe will stay open on Mondays while the library remains closed, but she says she’ll have to keep an eye on it to see whether that continues to make sense.\u003c/p>\n",
"innerContent": [
"\n\u003cp>“Right now, Mondays are a great day for us,” Berkowitz says. For now, the cafe will stay open on Mondays while the library remains closed, but she says she’ll have to keep an eye on it to see whether that continues to make sense.\u003c/p>\n"
],
"innerBlocks": []
},
{
"blockName": "core/paragraph",
"attrs": [],
"innerHTML": "\n\u003cp>For Berkowitz, the best part of having a proper, sit-down cafe for the first time is the opportunity for “extended hospitality” that she doesn’t have at her bakery, where the average customer only comes in for three or four minutes. Being inside the library only accentuates that sense of hospitality; Berkowitz says all kinds of people come through and wind up hanging out in the cafe. \u003c/p>\n",
"innerContent": [
"\n\u003cp>For Berkowitz, the best part of having a proper, sit-down cafe for the first time is the opportunity for “extended hospitality” that she doesn’t have at her bakery, where the average customer only comes in for three or four minutes. Being inside the library only accentuates that sense of hospitality; Berkowitz says all kinds of people come through and wind up hanging out in the cafe. \u003c/p>\n"
],
"innerBlocks": []
},
{
"blockName": "core/image",
"attrs": {
"id": 13990911,
"sizeSlug": "full",
"linkDestination": "none",
"imageCredit": "Luke Tsai/KQED",
"srcset": "https://cdn.kqed.org/wp-content/uploads/sites/2/2026/06/as-kneaded-flat-white.jpg 2000w, https://cdn.kqed.org/wp-content/uploads/sites/2/2026/06/as-kneaded-flat-white-160x107.jpg 160w, https://cdn.kqed.org/wp-content/uploads/sites/2/2026/06/as-kneaded-flat-white-768x512.jpg 768w, https://cdn.kqed.org/wp-content/uploads/sites/2/2026/06/as-kneaded-flat-white-1536x1024.jpg 1536w",
"sizes": "(min-width: 992px) min(100vw, 1536px), (min-width: 768px) min(100vw, 1280px), min(100vw, 1020px)"
},
"innerHTML": "\n\u003cfigure class=\"wp-block-image size-full\">\u003cimg src=\"https://cdn.kqed.org/wp-content/uploads/sites/2/2026/06/as-kneaded-flat-white.jpg\" alt=\"A flat white coffee drink inside an airy, sunny cafe.\" class=\"wp-image-13990911\" srcset=\"https://cdn.kqed.org/wp-content/uploads/sites/2/2026/06/as-kneaded-flat-white.jpg 2000w, https://cdn.kqed.org/wp-content/uploads/sites/2/2026/06/as-kneaded-flat-white-160x107.jpg 160w, https://cdn.kqed.org/wp-content/uploads/sites/2/2026/06/as-kneaded-flat-white-768x512.jpg 768w, https://cdn.kqed.org/wp-content/uploads/sites/2/2026/06/as-kneaded-flat-white-1536x1024.jpg 1536w\" sizes=\"(min-width: 992px) min(100vw, 1536px), (min-width: 768px) min(100vw, 1280px), min(100vw, 1020px)\" />\u003cfigcaption class=\"wp-element-caption\">The cafe offers a full slate of espresso drinks, including a very good flat white (pictured).\u003c/figcaption>\u003c/figure>\n",
"innerContent": [
"\n\u003cfigure class=\"wp-block-image size-full\">\u003cimg src=\"https://cdn.kqed.org/wp-content/uploads/sites/2/2026/06/as-kneaded-flat-white.jpg\" alt=\"A flat white coffee drink inside an airy, sunny cafe.\" class=\"wp-image-13990911\" />\u003cfigcaption class=\"wp-element-caption\">The cafe offers a full slate of espresso drinks, including a very good flat white (pictured).\u003c/figcaption>\u003c/figure>\n"
],
"innerBlocks": []
},
{
"blockName": "core/paragraph",
"attrs": [],
"innerHTML": "\n\u003cp>“[The library] is such a beating heart of the community,” she says. People might be there to access social services, print out a document, attend a meeting on renters’ rights, or visit the nearby Wednesday farmers market — in addition to folks who make a special trip because they’re diehard fans of As Kneaded’s bread. \u003c/p>\n",
"innerContent": [
"\n\u003cp>“[The library] is such a beating heart of the community,” she says. People might be there to access social services, print out a document, attend a meeting on renters’ rights, or visit the nearby Wednesday farmers market — in addition to folks who make a special trip because they’re diehard fans of As Kneaded’s bread. \u003c/p>\n"
],
"innerBlocks": []
},
{
"blockName": "core/paragraph",
"attrs": [],
"innerHTML": "\n\u003cp>The upshot? “We’re seeing a lot more different types of people, and that’s really cool, actually,” Berkowitz says.\u003c/p>\n",
"innerContent": [
"\n\u003cp>The upshot? “We’re seeing a lot more different types of people, and that’s really cool, actually,” Berkowitz says.\u003c/p>\n"
],
"innerBlocks": []
},
{
"blockName": "core/separator",
"attrs": [],
"innerHTML": "\n\u003chr class=\"wp-block-separator has-alpha-channel-opacity\" />\n",
"innerContent": [
"\n\u003chr class=\"wp-block-separator has-alpha-channel-opacity\" />\n"
],
"innerBlocks": []
},
{
"blockName": "kqed/ad",
"attrs": {
"format": "floatright"
},
"innerBlocks": [],
"innerHTML": "",
"innerContent": []
},
{
"blockName": "core/paragraph",
"attrs": [],
"innerHTML": "\n\u003cp>\u003cem>\u003ca href=\"https://www.askneadedcafe.com/\">As Kneaded Cafe\u003c/a> is open Tuesday through Thursday 9 a.m.–7 p.m. and Friday, Saturday and Monday 9 a.m.–5 p.m. at the main branch of the San Leandro Public Library (300 Estudillo Ave., San Leandro).\u003c/em>\u003c/p>\n",
"innerContent": [
"\n\u003cp>\u003cem>\u003ca href=\"https://www.askneadedcafe.com/\">As Kneaded Cafe\u003c/a> is open Tuesday through Thursday 9 a.m.–7 p.m. and Friday, Saturday and Monday 9 a.m.–5 p.m. at the main branch of the San Leandro Public Library (300 Estudillo Ave., San Leandro).\u003c/em>\u003c/p>\n"
],
"innerBlocks": []
}
],
"excerpt": "As Kneaded Bakery’s first cafe has turned the San Leandro Public Library into a hotspot for food lovers.",
"status": "publish",
"parent": 0,
"modified": 1781825355,
"stats": {
"hasAudio": false,
"hasVideo": false,
"hasChartOrMap": false,
"iframeSrcs": [],
"hasGoogleForm": false,
"hasGallery": false,
"hasHearkenModule": false,
"hasPolis": false,
"paragraphCount": 14,
"wordCount": 867
},
"headData": {
"title": "The East Bay’s Most Enticing New Cafe? It’s at the Library | KQED",
"description": "As Kneaded Bakery’s first cafe has turned the San Leandro Public Library into a hotspot for food lovers.",
"ogTitle": "The East Bay’s Most Enticing New Cafe? It’s at the Library",
"ogDescription": "",
"ogImgId": "",
"twTitle": "The East Bay’s Most Enticing New Cafe? It’s at the Library",
"twDescription": "",
"twImgId": "",
"schema": {
"@context": "https://schema.org",
"@type": "Article",
"headline": "The East Bay’s Most Enticing New Cafe? It’s at the Library",
"datePublished": "2026-06-18T16:26:25-07:00",
"dateModified": "2026-06-18T16:29:15-07:00",
"image": "https://cdn.kqed.org/wp-content/uploads/2020/02/KQED-OG-Image@1x.png"
}
},
"primaryCategory": {
"termId": 12276,
"slug": "food",
"name": "Food"
},
"source": "Food",
"sourceUrl": "https://www.kqed.org/food",
"sticky": false,
"nprStoryId": "kqed-13990903",
"templateType": "standard",
"featuredImageType": "standard",
"excludeFromSiteSearch": "Include",
"articleAge": "0",
"path": "/arts/13990903/as-kneaded-cafe-san-leandro-library-baguette-quiche",
"audioTrackLength": null,
"parsedContent": [
{
"type": "contentString",
"content": "\u003cdiv class=\"post-body\">\u003cp>\u003cp>Last January, Iliana Berkowitz was paying her weekly visit to the main branch of the San Leandro Public \u003ca href=\"https://www.kqed.org/arts/tag/library\">Library\u003c/a> with her kids when she noticed that the little \u003ca href=\"https://www.sanleandro.org/552/Friends-of-the-San-Leandro-Library\">volunteer\u003c/a>-run cafe inside had been closed for some time. As it turns out, Berkowitz is the baker-owner of \u003ca href=\"https://www.instagram.com/as.kneaded.bakery/\">As Kneaded Bakery\u003c/a>, and she’d been looking for a place to open her first proper cafe. \u003c/p>\n\n\n\n\u003cp>“I had the vision right away for what I wanted to do,” she says. \u003c/p>\n\n\n\n\u003cp>Berkowitz reached out to the library director, who, it so happened, was at that moment about to put out a request for proposals for the vacant cafe space. One thing led to another, and, after a months-long process of bid submissions and lease negotiations, Berkowitz opened \u003ca href=\"https://www.instagram.com/as.kneaded.cafe/\">As Kneaded Cafe\u003c/a> this past February. Now, San Leandrans have a new spot where they can sit down and enjoy a slice of warm quiche, a sticky-chewy compost cookie or a sandwich served on one of the Bay Area’s best French baguettes — \u003cem>and \u003c/em>check out a couple of cozy \u003ca href=\"https://www.kqed.org/arts/13989727/5-best-books-summer-2026\">summer beach reads\u003c/a>, all in the same trip.\u003c/p>\n\n\n\n\u003cp>As Kneaded isn’t the only cafe in the Bay Area that’s located inside a public library, but it might be the one that’s most enticing to food enthusiasts, given its connection to a bona fide artisan breadmaker. Berkowitz has long made one of my favorite baguettes, baked in the true French style — no sourdough tang, but with a dark, crackly crust and deeply satisfying chew. Her smaller-sized demi-baguettes make a great vehicle for the cafe’s simple sandwiches: The “Chez Aline,” with ham, thin slices of watermelon radish and a thick smear of butter, is exactly the kind of thing you might buy at a corner bakery in Paris. As Kneaded also serves one of the tastiest versions of a quiche Lorraine I’ve had in recent memory — appealingly jiggly and juicy, with a buttery crust and a layer of crisp, caramelized cheese on top. (Just make sure you ask them to warm it up.) \u003c/p>\n\n\n\n\u003cfigure class=\"wp-block-image size-full\">\u003cimg loading=\"lazy\" decoding=\"async\" width=\"2000\" height=\"1333\" src=\"https://cdn.kqed.org/wp-content/uploads/sites/2/2026/06/as-kneaded-sandwich.jpg\" alt=\"Overhead view of a baguette sandwich and a glass of lemonade.\" class=\"wp-image-13990915\" srcset=\"https://cdn.kqed.org/wp-content/uploads/sites/2/2026/06/as-kneaded-sandwich.jpg 2000w, https://cdn.kqed.org/wp-content/uploads/sites/2/2026/06/as-kneaded-sandwich-160x107.jpg 160w, https://cdn.kqed.org/wp-content/uploads/sites/2/2026/06/as-kneaded-sandwich-768x512.jpg 768w, https://cdn.kqed.org/wp-content/uploads/sites/2/2026/06/as-kneaded-sandwich-1536x1024.jpg 1536w\" sizes=\"auto, (max-width: 2000px) 100vw, 2000px\">\u003cfigcaption class=\"wp-element-caption\">The very French ‘Chez Aline’ features ham, butter and watermelon radish. (Luke Tsai/KQED)\u003c/figcaption>\u003c/figure>\n\n\n\n\u003cp>The cafe has also given Berkowitz the chance to start a coffee program for the first time, with a full slate of espresso drinks. This isn’t one of those push-a-button coffee operations; the flat white I tried during my visit was excellent.\u003c/p>\n\n\n\n\u003cp>\u003c/p>\u003c/div>",
"attributes": {
"named": {},
"numeric": []
}
},
{
"type": "component",
"content": "",
"name": "ad",
"attributes": {
"named": {
"label": "fullwidth"
},
"numeric": [
"fullwidth"
]
}
},
{
"type": "contentString",
"content": "\u003cdiv class=\"post-body\">\u003cp>\u003c/p>\n\u003cp>Berkowitz says once her bid was accepted, she toured other library cafes around the Bay Area for inspiration. (She was especially impressed by how efficiently \u003ca href=\"https://prologue-coffee.com/\">Prologue\u003c/a>, a Vietnamese American–owned coffee shop at the Walnut Creek library, is able to use its space.) There are, after all, some inherent challenges to running a cafe inside a library. The biggest is that the San Leandro library cafe space doesn’t have an actual kitchen — part of the reason why Berkowitz doesn’t serve hot sandwiches.\u003c/p>\n\n\n\n\u003cfigure class=\"wp-block-image size-full\">\u003cimg loading=\"lazy\" decoding=\"async\" width=\"2000\" height=\"2000\" src=\"https://cdn.kqed.org/wp-content/uploads/sites/2/2026/06/as-kneaded-cafe_courtesy.jpg\" alt=\"Exterior of a library with a cafe space in front.\" class=\"wp-image-13990917\" srcset=\"https://cdn.kqed.org/wp-content/uploads/sites/2/2026/06/as-kneaded-cafe_courtesy.jpg 2000w, https://cdn.kqed.org/wp-content/uploads/sites/2/2026/06/as-kneaded-cafe_courtesy-160x160.jpg 160w, https://cdn.kqed.org/wp-content/uploads/sites/2/2026/06/as-kneaded-cafe_courtesy-768x768.jpg 768w, https://cdn.kqed.org/wp-content/uploads/sites/2/2026/06/as-kneaded-cafe_courtesy-1536x1536.jpg 1536w, https://cdn.kqed.org/wp-content/uploads/sites/2/2026/06/as-kneaded-cafe_courtesy-600x600.jpg 600w\" sizes=\"auto, (max-width: 2000px) 100vw, 2000px\">\u003cfigcaption class=\"wp-element-caption\">The cafe — seen here on the right — has a patio area and entrances both inside and outside the library. (Courtesy of As Kneaded Cafe)\u003c/figcaption>\u003c/figure>\n\n\n\n\u003cp>The cafe is also affected by the flow of whatever might be happening at the library on a given day — and, in turn, by the funding cuts that have hit public libraries all over the Bay Area. Recently, for instance, the San Leandro city council voted to close the library on Mondays, starting in July. \u003c/p>\n\n\n\n\n\n\u003cp>“Right now, Mondays are a great day for us,” Berkowitz says. For now, the cafe will stay open on Mondays while the library remains closed, but she says she’ll have to keep an eye on it to see whether that continues to make sense.\u003c/p>\n\n\n\n\u003cp>For Berkowitz, the best part of having a proper, sit-down cafe for the first time is the opportunity for “extended hospitality” that she doesn’t have at her bakery, where the average customer only comes in for three or four minutes. Being inside the library only accentuates that sense of hospitality; Berkowitz says all kinds of people come through and wind up hanging out in the cafe. \u003c/p>\n\n\n\n\u003cfigure class=\"wp-block-image size-full\">\u003cimg loading=\"lazy\" decoding=\"async\" width=\"2000\" height=\"1333\" src=\"https://cdn.kqed.org/wp-content/uploads/sites/2/2026/06/as-kneaded-flat-white.jpg\" alt=\"A flat white coffee drink inside an airy, sunny cafe.\" class=\"wp-image-13990911\" srcset=\"https://cdn.kqed.org/wp-content/uploads/sites/2/2026/06/as-kneaded-flat-white.jpg 2000w, https://cdn.kqed.org/wp-content/uploads/sites/2/2026/06/as-kneaded-flat-white-160x107.jpg 160w, https://cdn.kqed.org/wp-content/uploads/sites/2/2026/06/as-kneaded-flat-white-768x512.jpg 768w, https://cdn.kqed.org/wp-content/uploads/sites/2/2026/06/as-kneaded-flat-white-1536x1024.jpg 1536w\" sizes=\"auto, (max-width: 2000px) 100vw, 2000px\">\u003cfigcaption class=\"wp-element-caption\">The cafe offers a full slate of espresso drinks, including a very good flat white (pictured). (Luke Tsai/KQED)\u003c/figcaption>\u003c/figure>\n\n\n\n\u003cp>“[The library] is such a beating heart of the community,” she says. People might be there to access social services, print out a document, attend a meeting on renters’ rights, or visit the nearby Wednesday farmers market — in addition to folks who make a special trip because they’re diehard fans of As Kneaded’s bread. \u003c/p>\n\n\n\n\u003cp>The upshot? “We’re seeing a lot more different types of people, and that’s really cool, actually,” Berkowitz says.\u003c/p>\n\n\n\n\u003chr class=\"wp-block-separator has-alpha-channel-opacity\">\n\n\n\n\u003cp>\u003c/p>\n\u003cp>\u003cem>\u003ca href=\"https://www.askneadedcafe.com/\">As Kneaded Cafe\u003c/a> is open Tuesday through Thursday 9 a.m.–7 p.m. and Friday, Saturday and Monday 9 a.m.–5 p.m. at the main branch of the San Leandro Public Library (300 Estudillo Ave., San Leandro).\u003c/em>\u003c/p>\n\n\u003c/div>\u003c/p>",
"attributes": {
"named": {},
"numeric": []
}
}
],
"link": "/arts/13990903/as-kneaded-cafe-san-leandro-library-baguette-quiche",
"authors": [
"11743"
],
"categories": [
"arts_1",
"arts_12276"
],
"tags": [
"arts_20950",
"arts_10278",
"arts_1297",
"arts_21744",
"arts_1635"
],
"featImg": "arts_13990910",
"label": "source_arts_13990903"
},
"news_12087737": {
"type": "posts",
"id": "news_12087737",
"meta": {
"index": "posts_1716263798",
"site": "news",
"id": "12087737",
"score": null,
"sort": [
1781649048000
]
},
"guestAuthors": [],
"slug": "to-fund-affordable-food-san-francisco-looks-to-tax-vacant-grocery-stores-pharmacies",
"title": "To Fund Affordable Food, San Francisco Looks to Tax Vacant Grocery Stores, Pharmacies",
"publishDate": 1781649048,
"format": "standard",
"headTitle": "To Fund Affordable Food, San Francisco Looks to Tax Vacant Grocery Stores, Pharmacies | KQED",
"labelTerm": {
"site": "news"
},
"content": "\u003cp>\u003ca href=\"https://www.kqed.org/news/tag/san-francisco-supervisors\">San Francisco supervisors\u003c/a> are proposing a plan to limit vacant pharmacies and grocery stores around the city while boosting access to affordable, healthy food.\u003c/p>\n\u003cp>The Affordable Groceries Act comes as many San Franciscans struggle to afford food and prescriptions, and after dozens of retail pharmacy stores like Walgreens and grocery chains like Safeway have closed stores in the city.\u003c/p>\n\u003cp>Nearly a third of San Franciscans living below the poverty line are food insecure, according to a \u003ca href=\"https://media.api.sf.gov/documents/2026_FSTF_Recommendations_Official_NSl25y8.pdf\">2024 report\u003c/a> by the city’s Food Security Task Force, and nearly 110,000 residents utilize CalFresh, a food benefits program that the Trump administration has made qualifying for more difficult.\u003c/p>\n\u003cp>[ad fullwidth]\u003c/p>\n\u003cp>Some retail pharmacy chains and grocery stores that have closed in recent years still hold their leases, making it difficult for new businesses to fill the empty storefronts.\u003c/p>\n\u003cp>The measures, which could appear on the November ballot as two separate initiatives, would essentially create a vacancy tax on those empty storefronts to disincentivize large retailers from leaving behind what Supervisor Bilal Mahmood calls “zombie stores.”\u003c/p>\n\u003cp>“They hold the lease but won’t let anyone take it over, and they’re intentionally keeping it vacant to block competition,” said Mahmood, who represents the Tenderloin neighborhood, which has a dearth of grocery store options, and introduced the package of ordinances. “People have to drive across the city just to fill their prescriptions and seniors and families can’t walk to their neighborhood grocery store to get fresh produce.”\u003c/p>\n\u003cfigure id=\"attachment_12087847\" class=\"wp-caption aligncenter\" style=\"max-width: 2000px\">\u003cimg loading=\"lazy\" decoding=\"async\" class=\"size-full wp-image-12087847\" src=\"https://cdn.kqed.org/wp-content/uploads/sites/10/2026/06/260616-SFAffordableGroceries-08-BL-KQED.jpg\" alt=\"\" width=\"2000\" height=\"1333\" srcset=\"https://cdn.kqed.org/wp-content/uploads/sites/10/2026/06/260616-SFAffordableGroceries-08-BL-KQED.jpg 2000w, https://cdn.kqed.org/wp-content/uploads/sites/10/2026/06/260616-SFAffordableGroceries-08-BL-KQED-160x107.jpg 160w, https://cdn.kqed.org/wp-content/uploads/sites/10/2026/06/260616-SFAffordableGroceries-08-BL-KQED-1536x1024.jpg 1536w\" sizes=\"auto, (max-width: 2000px) 100vw, 2000px\">\u003cfigcaption class=\"wp-caption-text\">Dalda’s Community Market in San Francisco’s Tenderloin neighborhood on June 16, 2026, offers fresh produce and other healthy food options in a neighborhood with limited grocery access. \u003ccite>(Beth LaBerge/KQED)\u003c/cite>\u003c/figcaption>\u003c/figure>\n\u003cp>The vacancy tax would apply only to stores already operating in San Francisco, in an effort to keep existing stores open and not discourage new ones.\u003c/p>\n\u003cp>In addition to taxing large retail chains that leave their storefronts empty, the plan’s “abandoned pharmacy and grocery stimulus” would also create incentives through tax credits and streamlined permitting for grocery stores and pharmacies to move into empty properties.\u003c/p>\n\u003cp>Taxes collected on the vacant storefronts could go toward a new affordable grocery fund, which would also accept private donations if both measures pass. The fund would be intended for a variety of different affordability programs focused on healthy food.[aside postID=news_12086417 hero='https://cdn.kqed.org/wp-content/uploads/sites/10/2026/06/SummerMealsGetty.jpg']One idea, inspired by a different program under New York Mayor Zohran Mamdani, is to use the funds to help the city buy vacant buildings and lease them to affordable grocers at below-market rents.\u003c/p>\n\u003cp>Another would be to revamp an earlier model that San Francisco utilized to help liquor stores convert into fresh grocery stores, called Healthy Retail SF, spearheaded by former supervisors Eric Mar, Jane Kim and Malia Cohen.\u003c/p>\n\u003cp>The program ran from 2017 to 2021, and exceeded its goals by recruiting and maintaining 12 stores that agreed to make the switch and carry healthier products, according to a \u003ca href=\"https://sanfranciscotobaccofreeproject.org/wp-content/uploads/HRSF-FER-17-21.pdf\">2021 analysis report\u003c/a>.\u003c/p>\n\u003cp>That program was successful for Tenderloin business owners like Satwinder Multani. He previously ran a liquor store in the neighborhood, but now oversees Dalda’s Community Market, a fully stocked grocery store just around the corner from his previous location.\u003c/p>\n\u003cp>It took a few years to complete the transition, but he said it’s been worth the hassle. The business is doing well, and he can tell his store is filling a real need in the neighborhood for fresh produce.\u003c/p>\n\u003cp>“Our sales went up ever since we moved here. It took us a while, but now I think we are doing much better than when we had the smaller version. I see more families shopping here, and if people see something we are missing, they let us know.”\u003c/p>\n\u003cfigure id=\"attachment_12087848\" class=\"wp-caption aligncenter\" style=\"max-width: 2000px\">\u003cimg loading=\"lazy\" decoding=\"async\" class=\"size-full wp-image-12087848\" src=\"https://cdn.kqed.org/wp-content/uploads/sites/10/2026/06/260616-SFAffordableGroceries-12-BL-KQED.jpg\" alt=\"\" width=\"2000\" height=\"1333\" srcset=\"https://cdn.kqed.org/wp-content/uploads/sites/10/2026/06/260616-SFAffordableGroceries-12-BL-KQED.jpg 2000w, https://cdn.kqed.org/wp-content/uploads/sites/10/2026/06/260616-SFAffordableGroceries-12-BL-KQED-160x107.jpg 160w, https://cdn.kqed.org/wp-content/uploads/sites/10/2026/06/260616-SFAffordableGroceries-12-BL-KQED-1536x1024.jpg 1536w\" sizes=\"auto, (max-width: 2000px) 100vw, 2000px\">\u003cfigcaption class=\"wp-caption-text\">Neighborhood resident Anthony Partlow and his dog Anubis stand outside of Dalda’s Community Market in San Francisco’s Tenderloin neighborhood on June 16, 2026. The market offers fresh produce and other healthy food options in a neighborhood with limited grocery access. \u003ccite>(Beth LaBerge/KQED)\u003c/cite>\u003c/figcaption>\u003c/figure>\n\u003cp>Anthony Partlow lives just up the block from Dalda’s. Once a month, he’ll travel by e-bike about 45 minutes to pick up certain meats and nonperishables from large grocery chains. But he goes to Dalda’s almost every day for fresh foods like lettuce and other basic items.\u003c/p>\n\u003cp>“It’s actually quite difficult to find fresh groceries in the area, and it’s expensive. This place is the only one I really trust as far as fresh produce goes,” he said, standing outside of Dalda’s. “It’s really hard to eat fresh if the stores aren’t providing fresh produce.”\u003c/p>\n\u003cp>Both he and the store owner said they’d welcome more grocery stores and pharmacies into the neighborhood. But the fund that spurred the kind of corner store transitions like Dalda’s has run dry.\u003c/p>\n\u003cp>“There’s a lot of successful models that we’ve seen, including some success over time, but either they’re underfunded or not supported by the city,” Mahmood said. “It’s time for the city to help accelerate what we’ve seen work well and resurrect the programs that worked well in the past, but we’re not supporting anymore.”\u003c/p>\n\u003cp>Mahmood hopes the measures will help more families access reasonably priced groceries by shrinking local food deserts, neighborhoods that lack access to affordable, nutritious food.\u003c/p>\n\u003cp>The Tenderloin is not the only part of the city experiencing disparities around healthy food options or lacking accessible places to fill a prescription. Empty pharmacy and grocery stores are scattered across neighborhoods like the Mission, Bayview, Fillmore and other areas.\u003c/p>\n\u003cp>In Sunnydale, a nonprofit organization and philanthropists are working to open a privately funded grocery store operated by Bi-Rite, an upscale grocer in San Francisco, that will sell fresh produce and other pantry goods at wholesale prices.\u003c/p>\n\u003cp>Mahmood said his vision is for the city to boost those kinds of efforts while promoting more affordable grocery options.\u003c/p>\n\u003cfigure id=\"attachment_12087849\" class=\"wp-caption aligncenter\" style=\"max-width: 2000px\">\u003cimg loading=\"lazy\" decoding=\"async\" class=\"size-full wp-image-12087849\" src=\"https://cdn.kqed.org/wp-content/uploads/sites/10/2026/06/260616-SFAffordableGroceries-14-BL-KQED.jpg\" alt=\"\" width=\"2000\" height=\"1333\" srcset=\"https://cdn.kqed.org/wp-content/uploads/sites/10/2026/06/260616-SFAffordableGroceries-14-BL-KQED.jpg 2000w, https://cdn.kqed.org/wp-content/uploads/sites/10/2026/06/260616-SFAffordableGroceries-14-BL-KQED-160x107.jpg 160w, https://cdn.kqed.org/wp-content/uploads/sites/10/2026/06/260616-SFAffordableGroceries-14-BL-KQED-1536x1024.jpg 1536w\" sizes=\"auto, (max-width: 2000px) 100vw, 2000px\">\u003cfigcaption class=\"wp-caption-text\">Dalda’s Community Market in San Francisco’s Tenderloin neighborhood on June 16, 2026, offers fresh produce and other healthy food options in a neighborhood with limited grocery access. \u003ccite>(Beth LaBerge/KQED)\u003c/cite>\u003c/figcaption>\u003c/figure>\n\u003cp>“Imagine if the city was funding a component of that to help it move along at an even more cost-effective rate,” he said.\u003c/p>\n\u003cp>The proposal has drawn early support from food justice groups in the city, such as Food and Agriculture Action Coalition Toward Sovereignty, and Farming Hope, as well as food and service unions like United Food and Commercial Workers and SEIU Local 87.\u003c/p>\n\u003cp>“San Francisco needs to seriously address food as part of its affordability crisis,” Andie Sobrepeña, co-executive director of Farming Hope, a culinary job training and food justice nonprofit, said in a statement. “The Affordable Grocery Act is a step forward to provide a solution to transform access to food in San Francisco.”\u003c/p>\n\u003cp>Co-sponsoring Supervisors Myrna Melgar, Stephen Sherrill, Chyanne Chen and Danny Sauter are also backing the plan, which the board will vote on in July. If passed, the ballot measures for the tax and fund would go before voters in November.\u003c/p>\n\u003cp>[ad floatright]\u003c/p>\n",
"blocks": [],
"excerpt": "The Affordable Groceries Act would also incentivize grocery stores and pharmacies to fill empty lots and create a fund for subsidized grocery initiatives.",
"status": "publish",
"parent": 0,
"modified": 1781717141,
"stats": {
"hasAudio": false,
"hasVideo": false,
"hasChartOrMap": false,
"iframeSrcs": [],
"hasGoogleForm": false,
"hasGallery": false,
"hasHearkenModule": false,
"hasPolis": false,
"paragraphCount": 28,
"wordCount": 1249
},
"headData": {
"title": "To Fund Affordable Food, San Francisco Looks to Tax Vacant Grocery Stores, Pharmacies | KQED",
"description": "The Affordable Groceries Act would also incentivize grocery stores and pharmacies to fill empty lots and create a fund for subsidized grocery initiatives.",
"ogTitle": "",
"ogDescription": "",
"ogImgId": "",
"twTitle": "",
"twDescription": "",
"twImgId": "",
"schema": {
"@context": "https://schema.org",
"@type": "NewsArticle",
"headline": "To Fund Affordable Food, San Francisco Looks to Tax Vacant Grocery Stores, Pharmacies",
"datePublished": "2026-06-16T15:30:48-07:00",
"dateModified": "2026-06-17T10:25:41-07:00",
"image": "https://cdn.kqed.org/wp-content/uploads/2020/02/KQED-OG-Image@1x.png",
"isAccessibleForFree": "True",
"publisher": {
"@type": "NewsMediaOrganization",
"@id": "https://www.kqed.org/#organization",
"name": "KQED",
"logo": "https://cdn.kqed.org/wp-content/uploads/2020/02/KQED-OG-Image@1x.png",
"url": "https://www.kqed.org",
"sameAs": [
"https://www.facebook.com/KQED",
"https://twitter.com/KQED",
"https://www.instagram.com/kqed/",
"https://www.tiktok.com/@kqedofficial",
"https://www.linkedin.com/company/kqed",
"https://www.youtube.com/channel/UCeC0IOo7i1P_61zVUWbJ4nw"
]
}
}
},
"primaryCategory": {
"termId": 24114,
"slug": "food",
"name": "Food"
},
"sticky": false,
"nprStoryId": "kqed-12087737",
"templateType": "standard",
"featuredImageType": "standard",
"excludeFromSiteSearch": "Include",
"articleAge": "0",
"path": "/news/12087737/to-fund-affordable-food-san-francisco-looks-to-tax-vacant-grocery-stores-pharmacies",
"audioTrackLength": null,
"parsedContent": [
{
"type": "contentString",
"content": "\u003cdiv class=\"post-body\">\u003cp>\u003cp>\u003ca href=\"https://www.kqed.org/news/tag/san-francisco-supervisors\">San Francisco supervisors\u003c/a> are proposing a plan to limit vacant pharmacies and grocery stores around the city while boosting access to affordable, healthy food.\u003c/p>\n\u003cp>The Affordable Groceries Act comes as many San Franciscans struggle to afford food and prescriptions, and after dozens of retail pharmacy stores like Walgreens and grocery chains like Safeway have closed stores in the city.\u003c/p>\n\u003cp>Nearly a third of San Franciscans living below the poverty line are food insecure, according to a \u003ca href=\"https://media.api.sf.gov/documents/2026_FSTF_Recommendations_Official_NSl25y8.pdf\">2024 report\u003c/a> by the city’s Food Security Task Force, and nearly 110,000 residents utilize CalFresh, a food benefits program that the Trump administration has made qualifying for more difficult.\u003c/p>\n\u003cp>\u003c/p>\u003c/div>",
"attributes": {
"named": {},
"numeric": []
}
},
{
"type": "component",
"content": "",
"name": "ad",
"attributes": {
"named": {
"label": "fullwidth"
},
"numeric": [
"fullwidth"
]
}
},
{
"type": "contentString",
"content": "\u003cdiv class=\"post-body\">\u003cp>\u003c/p>\n\u003cp>Some retail pharmacy chains and grocery stores that have closed in recent years still hold their leases, making it difficult for new businesses to fill the empty storefronts.\u003c/p>\n\u003cp>The measures, which could appear on the November ballot as two separate initiatives, would essentially create a vacancy tax on those empty storefronts to disincentivize large retailers from leaving behind what Supervisor Bilal Mahmood calls “zombie stores.”\u003c/p>\n\u003cp>“They hold the lease but won’t let anyone take it over, and they’re intentionally keeping it vacant to block competition,” said Mahmood, who represents the Tenderloin neighborhood, which has a dearth of grocery store options, and introduced the package of ordinances. “People have to drive across the city just to fill their prescriptions and seniors and families can’t walk to their neighborhood grocery store to get fresh produce.”\u003c/p>\n\u003cfigure id=\"attachment_12087847\" class=\"wp-caption aligncenter\" style=\"max-width: 2000px\">\u003cimg loading=\"lazy\" decoding=\"async\" class=\"size-full wp-image-12087847\" src=\"https://cdn.kqed.org/wp-content/uploads/sites/10/2026/06/260616-SFAffordableGroceries-08-BL-KQED.jpg\" alt=\"\" width=\"2000\" height=\"1333\" srcset=\"https://cdn.kqed.org/wp-content/uploads/sites/10/2026/06/260616-SFAffordableGroceries-08-BL-KQED.jpg 2000w, https://cdn.kqed.org/wp-content/uploads/sites/10/2026/06/260616-SFAffordableGroceries-08-BL-KQED-160x107.jpg 160w, https://cdn.kqed.org/wp-content/uploads/sites/10/2026/06/260616-SFAffordableGroceries-08-BL-KQED-1536x1024.jpg 1536w\" sizes=\"auto, (max-width: 2000px) 100vw, 2000px\">\u003cfigcaption class=\"wp-caption-text\">Dalda’s Community Market in San Francisco’s Tenderloin neighborhood on June 16, 2026, offers fresh produce and other healthy food options in a neighborhood with limited grocery access. \u003ccite>(Beth LaBerge/KQED)\u003c/cite>\u003c/figcaption>\u003c/figure>\n\u003cp>The vacancy tax would apply only to stores already operating in San Francisco, in an effort to keep existing stores open and not discourage new ones.\u003c/p>\n\u003cp>In addition to taxing large retail chains that leave their storefronts empty, the plan’s “abandoned pharmacy and grocery stimulus” would also create incentives through tax credits and streamlined permitting for grocery stores and pharmacies to move into empty properties.\u003c/p>\n\u003cp>Taxes collected on the vacant storefronts could go toward a new affordable grocery fund, which would also accept private donations if both measures pass. The fund would be intended for a variety of different affordability programs focused on healthy food.\u003c/p>\u003c/div>",
"attributes": {
"named": {},
"numeric": []
}
},
{
"type": "component",
"content": "",
"name": "aside",
"attributes": {
"named": {
"postid": "news_12086417",
"hero": "https://cdn.kqed.org/wp-content/uploads/sites/10/2026/06/SummerMealsGetty.jpg",
"label": ""
},
"numeric": []
}
},
{
"type": "contentString",
"content": "\u003cdiv class=\"post-body\">\u003cp>One idea, inspired by a different program under New York Mayor Zohran Mamdani, is to use the funds to help the city buy vacant buildings and lease them to affordable grocers at below-market rents.\u003c/p>\n\u003cp>Another would be to revamp an earlier model that San Francisco utilized to help liquor stores convert into fresh grocery stores, called Healthy Retail SF, spearheaded by former supervisors Eric Mar, Jane Kim and Malia Cohen.\u003c/p>\n\u003cp>The program ran from 2017 to 2021, and exceeded its goals by recruiting and maintaining 12 stores that agreed to make the switch and carry healthier products, according to a \u003ca href=\"https://sanfranciscotobaccofreeproject.org/wp-content/uploads/HRSF-FER-17-21.pdf\">2021 analysis report\u003c/a>.\u003c/p>\n\u003cp>That program was successful for Tenderloin business owners like Satwinder Multani. He previously ran a liquor store in the neighborhood, but now oversees Dalda’s Community Market, a fully stocked grocery store just around the corner from his previous location.\u003c/p>\n\u003cp>It took a few years to complete the transition, but he said it’s been worth the hassle. The business is doing well, and he can tell his store is filling a real need in the neighborhood for fresh produce.\u003c/p>\n\u003cp>“Our sales went up ever since we moved here. It took us a while, but now I think we are doing much better than when we had the smaller version. I see more families shopping here, and if people see something we are missing, they let us know.”\u003c/p>\n\u003cfigure id=\"attachment_12087848\" class=\"wp-caption aligncenter\" style=\"max-width: 2000px\">\u003cimg loading=\"lazy\" decoding=\"async\" class=\"size-full wp-image-12087848\" src=\"https://cdn.kqed.org/wp-content/uploads/sites/10/2026/06/260616-SFAffordableGroceries-12-BL-KQED.jpg\" alt=\"\" width=\"2000\" height=\"1333\" srcset=\"https://cdn.kqed.org/wp-content/uploads/sites/10/2026/06/260616-SFAffordableGroceries-12-BL-KQED.jpg 2000w, https://cdn.kqed.org/wp-content/uploads/sites/10/2026/06/260616-SFAffordableGroceries-12-BL-KQED-160x107.jpg 160w, https://cdn.kqed.org/wp-content/uploads/sites/10/2026/06/260616-SFAffordableGroceries-12-BL-KQED-1536x1024.jpg 1536w\" sizes=\"auto, (max-width: 2000px) 100vw, 2000px\">\u003cfigcaption class=\"wp-caption-text\">Neighborhood resident Anthony Partlow and his dog Anubis stand outside of Dalda’s Community Market in San Francisco’s Tenderloin neighborhood on June 16, 2026. The market offers fresh produce and other healthy food options in a neighborhood with limited grocery access. \u003ccite>(Beth LaBerge/KQED)\u003c/cite>\u003c/figcaption>\u003c/figure>\n\u003cp>Anthony Partlow lives just up the block from Dalda’s. Once a month, he’ll travel by e-bike about 45 minutes to pick up certain meats and nonperishables from large grocery chains. But he goes to Dalda’s almost every day for fresh foods like lettuce and other basic items.\u003c/p>\n\u003cp>“It’s actually quite difficult to find fresh groceries in the area, and it’s expensive. This place is the only one I really trust as far as fresh produce goes,” he said, standing outside of Dalda’s. “It’s really hard to eat fresh if the stores aren’t providing fresh produce.”\u003c/p>\n\u003cp>Both he and the store owner said they’d welcome more grocery stores and pharmacies into the neighborhood. But the fund that spurred the kind of corner store transitions like Dalda’s has run dry.\u003c/p>\n\u003cp>“There’s a lot of successful models that we’ve seen, including some success over time, but either they’re underfunded or not supported by the city,” Mahmood said. “It’s time for the city to help accelerate what we’ve seen work well and resurrect the programs that worked well in the past, but we’re not supporting anymore.”\u003c/p>\n\u003cp>Mahmood hopes the measures will help more families access reasonably priced groceries by shrinking local food deserts, neighborhoods that lack access to affordable, nutritious food.\u003c/p>\n\u003cp>The Tenderloin is not the only part of the city experiencing disparities around healthy food options or lacking accessible places to fill a prescription. Empty pharmacy and grocery stores are scattered across neighborhoods like the Mission, Bayview, Fillmore and other areas.\u003c/p>\n\u003cp>In Sunnydale, a nonprofit organization and philanthropists are working to open a privately funded grocery store operated by Bi-Rite, an upscale grocer in San Francisco, that will sell fresh produce and other pantry goods at wholesale prices.\u003c/p>\n\u003cp>Mahmood said his vision is for the city to boost those kinds of efforts while promoting more affordable grocery options.\u003c/p>\n\u003cfigure id=\"attachment_12087849\" class=\"wp-caption aligncenter\" style=\"max-width: 2000px\">\u003cimg loading=\"lazy\" decoding=\"async\" class=\"size-full wp-image-12087849\" src=\"https://cdn.kqed.org/wp-content/uploads/sites/10/2026/06/260616-SFAffordableGroceries-14-BL-KQED.jpg\" alt=\"\" width=\"2000\" height=\"1333\" srcset=\"https://cdn.kqed.org/wp-content/uploads/sites/10/2026/06/260616-SFAffordableGroceries-14-BL-KQED.jpg 2000w, https://cdn.kqed.org/wp-content/uploads/sites/10/2026/06/260616-SFAffordableGroceries-14-BL-KQED-160x107.jpg 160w, https://cdn.kqed.org/wp-content/uploads/sites/10/2026/06/260616-SFAffordableGroceries-14-BL-KQED-1536x1024.jpg 1536w\" sizes=\"auto, (max-width: 2000px) 100vw, 2000px\">\u003cfigcaption class=\"wp-caption-text\">Dalda’s Community Market in San Francisco’s Tenderloin neighborhood on June 16, 2026, offers fresh produce and other healthy food options in a neighborhood with limited grocery access. \u003ccite>(Beth LaBerge/KQED)\u003c/cite>\u003c/figcaption>\u003c/figure>\n\u003cp>“Imagine if the city was funding a component of that to help it move along at an even more cost-effective rate,” he said.\u003c/p>\n\u003cp>The proposal has drawn early support from food justice groups in the city, such as Food and Agriculture Action Coalition Toward Sovereignty, and Farming Hope, as well as food and service unions like United Food and Commercial Workers and SEIU Local 87.\u003c/p>\n\u003cp>“San Francisco needs to seriously address food as part of its affordability crisis,” Andie Sobrepeña, co-executive director of Farming Hope, a culinary job training and food justice nonprofit, said in a statement. “The Affordable Grocery Act is a step forward to provide a solution to transform access to food in San Francisco.”\u003c/p>\n\u003cp>Co-sponsoring Supervisors Myrna Melgar, Stephen Sherrill, Chyanne Chen and Danny Sauter are also backing the plan, which the board will vote on in July. If passed, the ballot measures for the tax and fund would go before voters in November.\u003c/p>\n\u003cp>\u003c/p>\u003c/div>",
"attributes": {
"named": {},
"numeric": []
}
},
{
"type": "component",
"content": "",
"name": "ad",
"attributes": {
"named": {
"label": "floatright"
},
"numeric": [
"floatright"
]
}
},
{
"type": "contentString",
"content": "\u003cdiv class=\"post-body\">\u003cp>\u003c/p>\n\u003c/div>\u003c/p>",
"attributes": {
"named": {},
"numeric": []
}
}
],
"link": "/news/12087737/to-fund-affordable-food-san-francisco-looks-to-tax-vacant-grocery-stores-pharmacies",
"authors": [
"11840"
],
"categories": [
"news_1758",
"news_24114",
"news_8"
],
"tags": [
"news_26598",
"news_35283",
"news_35666",
"news_333",
"news_18543",
"news_20147"
],
"featImg": "news_12087846",
"label": "news"
},
"arts_13990715": {
"type": "posts",
"id": "arts_13990715",
"meta": {
"index": "posts_1716263798",
"site": "arts",
"id": "13990715",
"score": null,
"sort": [
1781222414000
]
},
"guestAuthors": [],
"slug": "sunnyvale-indian-ice-cream-pints-of-joy-late-night",
"title": "The Exuberant Joy of an Indian Ice Cream Shop at 11 PM",
"publishDate": 1781222414,
"format": "standard",
"headTitle": "The Exuberant Joy of an Indian Ice Cream Shop at 11 PM | KQED",
"labelTerm": {},
"content": "\u003cfigure class=\"wp-block-image size-full\">\u003cimg loading=\"lazy\" decoding=\"async\" width=\"1920\" height=\"1920\" src=\"https://cdn.kqed.org/wp-content/uploads/sites/2/2026/06/PintsOfLove2.jpg\" alt=\"Illustration: Two men eagerly eating many varieties of ice cream.\" class=\"wp-image-13990722\" srcset=\"https://cdn.kqed.org/wp-content/uploads/sites/2/2026/06/PintsOfLove2.jpg 1920w, https://cdn.kqed.org/wp-content/uploads/sites/2/2026/06/PintsOfLove2-160x160.jpg 160w, https://cdn.kqed.org/wp-content/uploads/sites/2/2026/06/PintsOfLove2-768x768.jpg 768w, https://cdn.kqed.org/wp-content/uploads/sites/2/2026/06/PintsOfLove2-1536x1536.jpg 1536w, https://cdn.kqed.org/wp-content/uploads/sites/2/2026/06/PintsOfLove2-600x600.jpg 600w\" sizes=\"auto, (max-width: 1920px) 100vw, 1920px\">\u003cfigcaption class=\"wp-element-caption\">Pints of Joy is known for its wide selection of Indian-inspired ice cream flavors. The original Sunnyvale location stays open until 11 p.m. on weekends. (Thien Pham)\u003c/figcaption>\u003c/figure>\n\n\n\n\u003cp>\u003ca href=\"https://www.kqed.org/arts/tag/the-midnight-diners\">\u003cem>The Midnight Diners\u003c/em>\u003c/a>\u003cem> is a regular collaboration between KQED food editor Luke Tsai and graphic novelist \u003c/em>\u003ca href=\"https://www.instagram.com/thiendog/?hl=en\">\u003cem>Thien Pham\u003c/em>\u003c/a>\u003cem>. Follow them each week as they explore the hot pot restaurants, taco carts and 24-hour casino buffets that make up the Bay Area’s after-hours dining scene. \u003c/em>\u003c/p>\n\n\n\n\u003cp>The line outside the Indian \u003ca href=\"https://www.kqed.org/arts/tag/ice-cream\">ice cream\u003c/a> shop is, in a word, outrageous. \u003c/p>\n\n\n\n\u003cp>Sandwiched between a dental office and an injection clinic in an anonymous Sunnyvale plaza, \u003ca href=\"https://pintsofjoy.com/\">Pints of Joy\u003c/a> doesn’t, at first glance, \u003cem>look\u003c/em> like it’d be the site of an exuberant after-hours party. And yet: There are at least 15 or 20 customers ahead of us in line when we pull up to the scoop shop at a quarter past 10 on a recent Friday night — and easily another 30 ice cream eaters seated inside, or at the handful of tables on the string light–bedecked courtyard, or just sprawled out on the decorative planter boxes in front. \u003c/p>\n\n\n\n\u003cp>Almost everyone appears to be South Asian. And because a good chunk of the crowd has come in big, boisterous groups of five or six, the place pulses with the electricity of happy late-night conversation. At one outdoor table, a multigenerational family — Boomer grandparents, Gen X kids, Gen Z grandkids — teases each other over waffle cones. Inside, a table of eight bespectacled men in their 20s gesticulate vigorously with their hands, in the thick of some lively discussion. (Speaking as two glasses-wearing Asians, we never felt more at home among our people than at this Sunnyvale ice cream shop.)\u003c/p>\n\n\n\n\u003cfigure class=\"wp-block-image size-full\">\u003cimg loading=\"lazy\" decoding=\"async\" width=\"1920\" height=\"1920\" src=\"https://cdn.kqed.org/wp-content/uploads/sites/2/2026/06/PintsOfLove.jpg\" alt='Illustration: An ice cream shop lit up at night, with a long line of customers waiting outside. The sign reads, \"Pints of Joy.\"' class=\"wp-image-13990725\" srcset=\"https://cdn.kqed.org/wp-content/uploads/sites/2/2026/06/PintsOfLove.jpg 1920w, https://cdn.kqed.org/wp-content/uploads/sites/2/2026/06/PintsOfLove-160x160.jpg 160w, https://cdn.kqed.org/wp-content/uploads/sites/2/2026/06/PintsOfLove-768x768.jpg 768w, https://cdn.kqed.org/wp-content/uploads/sites/2/2026/06/PintsOfLove-1536x1536.jpg 1536w, https://cdn.kqed.org/wp-content/uploads/sites/2/2026/06/PintsOfLove-600x600.jpg 600w\" sizes=\"auto, (max-width: 1920px) 100vw, 1920px\">\u003cfigcaption class=\"wp-element-caption\">Shortly before closing on a Friday night, the line outside the shop still stretched 15 or 20 people deep. (Thien Pham)\u003c/figcaption>\u003c/figure>\n\n\n\n\u003cp>The reason for Pints of Joy’s popularity isn’t \u003cem>just\u003c/em> the convenience of being an ice cream parlor that stays open until 11 p.m. on weekends. What sets the shop apart is its lineup of Indian-inspired flavors — a breathtaking array even among the Bay Area’s small handful of other \u003ca href=\"https://www.kqed.org/bayareabites/139737/a-bay-area-creamery-gives-kamala-harris-its-highest-honor-an-ice-cream-flavor\">new-school South Asian ice cream\u003c/a> brands. There are flavors named after traditional, spice-laden Indian desserts like ras malai, falooda and malai kulfi. There are tropical fruits I love (mango! jackfruit!) and others I’d never heard of, like chikoo — a grainy, vaguely pear-like fruit that folks in India sometimes \u003ca href=\"https://www.whetstonemagazine.com/journal/in-india-the-chikoo-fruit-spreads-its-sweet-legacy\">add to milkshakes or turn into dehydrated chips\u003c/a>. One flavor, the \u003ca href=\"https://pintsofjoy.com/collections/order-ahead/products/meetha-paan\">meetha paan\u003c/a>, even features fresh betel leaves. \u003c/p>\n\n\n\n\u003cp>[ad fullwidth]\u003c/p>\n\u003cp>All told, there were nearly 30 flavors to choose from, all intriguing. For probably a third of them, I couldn’t even begin to imagine what the ice cream might taste like. On a busy night like this one, when it wasn’t possible for us to take our time sampling three or four different flavors before making up our minds, the shop’s four-scoop flight ($14.99), served on a handsome wooden tray, is a nice option — especially if you’re sharing with a couple of friends. \u003c/p>\n\n\n\n\u003cp>We wound up picking more or less at random, but all of the flavors we chose were a hit. The gulab jamun flavor is a fun, inspired twist on the syrup-soaked “Indian donuts,” with chunks of the sweet dough balls mixed into the ice cream itself. \u003c/p>\n\n\n\n\n\n\u003cp>Meanwhile, our scooper’s top recommendation is the Biscoff cookie flavor, which features crumbled bits of the crisp, caramelly cookies (a \u003ca href=\"https://www.thestatesman.com/inspiration-hub/biscoff-in-india-the-biscuit-that-lost-its-bite-1503544174.html\">popular treat in India\u003c/a>, it turns out). This winds up being our favorite; it’s extravagantly delicious, like a bolder, more texturally interesting cookies and cream.\u003c/p>\n\n\n\n\u003cp>In addition to the audaciousness of the flavors, the other distinguishing feature of the ice cream at Pints of Joy is that it doesn’t have any eggs in it, so the scoops aren’t as dense or creamy as the ones at some of my favorite high-end creameries, like Bi-Rite or Lush Gelato. The texture is lighter here; the ice cream melts a little bit faster. \u003c/p>\n\n\n\n\u003cp>The bonus is that the eggless approach makes for flavors that are more vivid and refreshing, perfect for the shop’s dazzling palette of tropical fruits. So, for the third scoop in our flight, I loved the intense, honeyed sweetness of the Alphonso mango ice cream, made with the pulp from real Indian mangoes, aka the “\u003ca href=\"https://www.kqed.org/arts/13990218/indian-mango-party-san-francisco-mission\">king of fruits\u003c/a>.” And the most provocative flavor of the night was the custard apple, aka sitaphal, which includes strands of the fruit’s creamy, delicate flesh. The flavor lies somewhere between a banana and a less pungent durian. \u003c/p>\n\n\n\n\u003cp>For Indian sweets lovers who want their frozen confections to taste \u003cem>even more \u003c/em>Indian, Pints of Joy also offers a selection of ice cream desserts modeled closely after traditional Indian sweets. The maximalist gajar halwa sundae comes dusted with almonds and crushed pistachios and has a layer of sticky-sweet carrot gelatin (the “gajar halwa”) on the bottom of the bowl. The mango mastani, meanwhile, is like if you took a mango lassi and added a scoop of mango ice cream, and also scattered a handful of Tutti-Frutti candy and nuts on top. \u003c/p>\n\n\n\n\u003cp>Suffice it to say, we’re on a bit of a sugar high by the end of the night. \u003c/p>\n\n\n\n\u003cp>All around us, though, the party rages on. Even as late as 10:45 p.m., we see children, maybe 8 or 9 years old, out past their bedtime, getting in line with their parents. The very last customer is a young South Asian woman in pajamas who sneaks in the door right as the store is closing up shop and walks out a few minutes later holding two pints in a plastic bag. She’s on the phone, probably letting friends or family know that her late-night mission was a success. \u003c/p>\n\n\n\n\u003cp>By this point, it’s well past 11 o’clock, and Pints of Joy has technically closed. But even halfway across the parking lot, we still hear the echoes of everyone’s happy chatter.\u003c/p>\n\n\n\n\u003chr class=\"wp-block-separator has-alpha-channel-opacity\">\n\n\n\n\u003cp>\u003ca href=\"https://www.instagram.com/pintsofjoyicecream/\">\u003cem>Pints of Joy\u003c/em>\u003c/a>\u003cem> is open Tuesday to Thursday 11 a.m.–9 p.m., Friday to Saturday 11 a.m.–11 p.m. and Sunday noon to 10 p.m. at 717 E. El Camino Real in Sunnyvale. The shop also has locations in \u003c/em>\u003ca href=\"https://pintsofjoy.com/pages/fremont\">\u003cem>Fremont\u003c/em>\u003c/a>\u003cem> and \u003c/em>\u003ca href=\"https://pintsofjoy.com/pages/best-ice-cream-parlour-in-palo-alto\">\u003cem>Palo Alto\u003c/em>\u003c/a>\u003cem> (at Rick’s Ice Cream).\u003c/em>\u003c/p>\n\n\n\n\u003cp>[ad floatright]\u003c/p>\n\u003cp>\u003c/p>\n\n",
"blocks": [
{
"blockName": "core/image",
"attrs": {
"id": 13990722,
"sizeSlug": "full",
"linkDestination": "none",
"imageCredit": "Thien Pham",
"srcset": "https://cdn.kqed.org/wp-content/uploads/sites/2/2026/06/PintsOfLove2.jpg 1920w, https://cdn.kqed.org/wp-content/uploads/sites/2/2026/06/PintsOfLove2-160x160.jpg 160w, https://cdn.kqed.org/wp-content/uploads/sites/2/2026/06/PintsOfLove2-768x768.jpg 768w, https://cdn.kqed.org/wp-content/uploads/sites/2/2026/06/PintsOfLove2-1536x1536.jpg 1536w, https://cdn.kqed.org/wp-content/uploads/sites/2/2026/06/PintsOfLove2-600x600.jpg 600w",
"sizes": "(min-width: 992px) min(100vw, 1536px), (min-width: 768px) min(100vw, 1280px), min(100vw, 1020px)"
},
"innerHTML": "\n\u003cfigure class=\"wp-block-image size-full\">\u003cimg src=\"https://cdn.kqed.org/wp-content/uploads/sites/2/2026/06/PintsOfLove2.jpg\" alt=\"Illustration: Two men eagerly eating many varieties of ice cream.\" class=\"wp-image-13990722\" srcset=\"https://cdn.kqed.org/wp-content/uploads/sites/2/2026/06/PintsOfLove2.jpg 1920w, https://cdn.kqed.org/wp-content/uploads/sites/2/2026/06/PintsOfLove2-160x160.jpg 160w, https://cdn.kqed.org/wp-content/uploads/sites/2/2026/06/PintsOfLove2-768x768.jpg 768w, https://cdn.kqed.org/wp-content/uploads/sites/2/2026/06/PintsOfLove2-1536x1536.jpg 1536w, https://cdn.kqed.org/wp-content/uploads/sites/2/2026/06/PintsOfLove2-600x600.jpg 600w\" sizes=\"(min-width: 992px) min(100vw, 1536px), (min-width: 768px) min(100vw, 1280px), min(100vw, 1020px)\" />\u003cfigcaption class=\"wp-element-caption\">Pints of Joy is known for its wide selection of Indian-inspired ice cream flavors. The original Sunnyvale location stays open until 11 p.m. on weekends.\u003c/figcaption>\u003c/figure>\n",
"innerContent": [
"\n\u003cfigure class=\"wp-block-image size-full\">\u003cimg src=\"https://cdn.kqed.org/wp-content/uploads/sites/2/2026/06/PintsOfLove2.jpg\" alt=\"Illustration: Two men eagerly eating many varieties of ice cream.\" class=\"wp-image-13990722\" />\u003cfigcaption class=\"wp-element-caption\">Pints of Joy is known for its wide selection of Indian-inspired ice cream flavors. The original Sunnyvale location stays open until 11 p.m. on weekends.\u003c/figcaption>\u003c/figure>\n"
],
"innerBlocks": []
},
{
"blockName": "core/paragraph",
"attrs": [],
"innerHTML": "\n\u003cp>\u003ca href=\"https://www.kqed.org/arts/tag/the-midnight-diners\">\u003cem>The Midnight Diners\u003c/em>\u003c/a>\u003cem> is a regular collaboration between KQED food editor Luke Tsai and graphic novelist \u003c/em>\u003ca href=\"https://www.instagram.com/thiendog/?hl=en\">\u003cem>Thien Pham\u003c/em>\u003c/a>\u003cem>. Follow them each week as they explore the hot pot restaurants, taco carts and 24-hour casino buffets that make up the Bay Area’s after-hours dining scene. \u003c/em>\u003c/p>\n",
"innerContent": [
"\n\u003cp>\u003ca href=\"https://www.kqed.org/arts/tag/the-midnight-diners\">\u003cem>The Midnight Diners\u003c/em>\u003c/a>\u003cem> is a regular collaboration between KQED food editor Luke Tsai and graphic novelist \u003c/em>\u003ca href=\"https://www.instagram.com/thiendog/?hl=en\">\u003cem>Thien Pham\u003c/em>\u003c/a>\u003cem>. Follow them each week as they explore the hot pot restaurants, taco carts and 24-hour casino buffets that make up the Bay Area’s after-hours dining scene. \u003c/em>\u003c/p>\n"
],
"innerBlocks": []
},
{
"blockName": "core/paragraph",
"attrs": [],
"innerHTML": "\n\u003cp>The line outside the Indian \u003ca href=\"https://www.kqed.org/arts/tag/ice-cream\">ice cream\u003c/a> shop is, in a word, outrageous. \u003c/p>\n",
"innerContent": [
"\n\u003cp>The line outside the Indian \u003ca href=\"https://www.kqed.org/arts/tag/ice-cream\">ice cream\u003c/a> shop is, in a word, outrageous. \u003c/p>\n"
],
"innerBlocks": []
},
{
"blockName": "core/paragraph",
"attrs": [],
"innerHTML": "\n\u003cp>Sandwiched between a dental office and an injection clinic in an anonymous Sunnyvale plaza, \u003ca href=\"https://pintsofjoy.com/\">Pints of Joy\u003c/a> doesn’t, at first glance, \u003cem>look\u003c/em> like it’d be the site of an exuberant after-hours party. And yet: There are at least 15 or 20 customers ahead of us in line when we pull up to the scoop shop at a quarter past 10 on a recent Friday night — and easily another 30 ice cream eaters seated inside, or at the handful of tables on the string light–bedecked courtyard, or just sprawled out on the decorative planter boxes in front. \u003c/p>\n",
"innerContent": [
"\n\u003cp>Sandwiched between a dental office and an injection clinic in an anonymous Sunnyvale plaza, \u003ca href=\"https://pintsofjoy.com/\">Pints of Joy\u003c/a> doesn’t, at first glance, \u003cem>look\u003c/em> like it’d be the site of an exuberant after-hours party. And yet: There are at least 15 or 20 customers ahead of us in line when we pull up to the scoop shop at a quarter past 10 on a recent Friday night — and easily another 30 ice cream eaters seated inside, or at the handful of tables on the string light–bedecked courtyard, or just sprawled out on the decorative planter boxes in front. \u003c/p>\n"
],
"innerBlocks": []
},
{
"blockName": "core/paragraph",
"attrs": [],
"innerHTML": "\n\u003cp>Almost everyone appears to be South Asian. And because a good chunk of the crowd has come in big, boisterous groups of five or six, the place pulses with the electricity of happy late-night conversation. At one outdoor table, a multigenerational family — Boomer grandparents, Gen X kids, Gen Z grandkids — teases each other over waffle cones. Inside, a table of eight bespectacled men in their 20s gesticulate vigorously with their hands, in the thick of some lively discussion. (Speaking as two glasses-wearing Asians, we never felt more at home among our people than at this Sunnyvale ice cream shop.)\u003c/p>\n",
"innerContent": [
"\n\u003cp>Almost everyone appears to be South Asian. And because a good chunk of the crowd has come in big, boisterous groups of five or six, the place pulses with the electricity of happy late-night conversation. At one outdoor table, a multigenerational family — Boomer grandparents, Gen X kids, Gen Z grandkids — teases each other over waffle cones. Inside, a table of eight bespectacled men in their 20s gesticulate vigorously with their hands, in the thick of some lively discussion. (Speaking as two glasses-wearing Asians, we never felt more at home among our people than at this Sunnyvale ice cream shop.)\u003c/p>\n"
],
"innerBlocks": []
},
{
"blockName": "core/image",
"attrs": {
"id": 13990725,
"sizeSlug": "full",
"linkDestination": "none",
"imageCredit": "Thien Pham",
"srcset": "https://cdn.kqed.org/wp-content/uploads/sites/2/2026/06/PintsOfLove.jpg 1920w, https://cdn.kqed.org/wp-content/uploads/sites/2/2026/06/PintsOfLove-160x160.jpg 160w, https://cdn.kqed.org/wp-content/uploads/sites/2/2026/06/PintsOfLove-768x768.jpg 768w, https://cdn.kqed.org/wp-content/uploads/sites/2/2026/06/PintsOfLove-1536x1536.jpg 1536w, https://cdn.kqed.org/wp-content/uploads/sites/2/2026/06/PintsOfLove-600x600.jpg 600w",
"sizes": "(min-width: 992px) min(100vw, 1536px), (min-width: 768px) min(100vw, 1280px), min(100vw, 1020px)"
},
"innerHTML": "\n\u003cfigure class=\"wp-block-image size-full\">\u003cimg src=\"https://cdn.kqed.org/wp-content/uploads/sites/2/2026/06/PintsOfLove.jpg\" alt=\"Illustration: An ice cream shop lit up at night, with a long line of customers waiting outside. The sign reads, "Pints of Joy."\" class=\"wp-image-13990725\" srcset=\"https://cdn.kqed.org/wp-content/uploads/sites/2/2026/06/PintsOfLove.jpg 1920w, https://cdn.kqed.org/wp-content/uploads/sites/2/2026/06/PintsOfLove-160x160.jpg 160w, https://cdn.kqed.org/wp-content/uploads/sites/2/2026/06/PintsOfLove-768x768.jpg 768w, https://cdn.kqed.org/wp-content/uploads/sites/2/2026/06/PintsOfLove-1536x1536.jpg 1536w, https://cdn.kqed.org/wp-content/uploads/sites/2/2026/06/PintsOfLove-600x600.jpg 600w\" sizes=\"(min-width: 992px) min(100vw, 1536px), (min-width: 768px) min(100vw, 1280px), min(100vw, 1020px)\" />\u003cfigcaption class=\"wp-element-caption\">Shortly before closing on a Friday night, the line outside the shop still stretched 15 or 20 people deep.\u003c/figcaption>\u003c/figure>\n",
"innerContent": [
"\n\u003cfigure class=\"wp-block-image size-full\">\u003cimg src=\"https://cdn.kqed.org/wp-content/uploads/sites/2/2026/06/PintsOfLove.jpg\" alt=\"Illustration: An ice cream shop lit up at night, with a long line of customers waiting outside. The sign reads, "Pints of Joy."\" class=\"wp-image-13990725\" />\u003cfigcaption class=\"wp-element-caption\">Shortly before closing on a Friday night, the line outside the shop still stretched 15 or 20 people deep.\u003c/figcaption>\u003c/figure>\n"
],
"innerBlocks": []
},
{
"blockName": "core/paragraph",
"attrs": [],
"innerHTML": "\n\u003cp>The reason for Pints of Joy’s popularity isn’t \u003cem>just\u003c/em> the convenience of being an ice cream parlor that stays open until 11 p.m. on weekends. What sets the shop apart is its lineup of Indian-inspired flavors — a breathtaking array even among the Bay Area’s small handful of other \u003ca href=\"https://www.kqed.org/bayareabites/139737/a-bay-area-creamery-gives-kamala-harris-its-highest-honor-an-ice-cream-flavor\">new-school South Asian ice cream\u003c/a> brands. There are flavors named after traditional, spice-laden Indian desserts like ras malai, falooda and malai kulfi. There are tropical fruits I love (mango! jackfruit!) and others I’d never heard of, like chikoo — a grainy, vaguely pear-like fruit that folks in India sometimes \u003ca href=\"https://www.whetstonemagazine.com/journal/in-india-the-chikoo-fruit-spreads-its-sweet-legacy\">add to milkshakes or turn into dehydrated chips\u003c/a>. One flavor, the \u003ca href=\"https://pintsofjoy.com/collections/order-ahead/products/meetha-paan\">meetha paan\u003c/a>, even features fresh betel leaves. \u003c/p>\n",
"innerContent": [
"\n\u003cp>The reason for Pints of Joy’s popularity isn’t \u003cem>just\u003c/em> the convenience of being an ice cream parlor that stays open until 11 p.m. on weekends. What sets the shop apart is its lineup of Indian-inspired flavors — a breathtaking array even among the Bay Area’s small handful of other \u003ca href=\"https://www.kqed.org/bayareabites/139737/a-bay-area-creamery-gives-kamala-harris-its-highest-honor-an-ice-cream-flavor\">new-school South Asian ice cream\u003c/a> brands. There are flavors named after traditional, spice-laden Indian desserts like ras malai, falooda and malai kulfi. There are tropical fruits I love (mango! jackfruit!) and others I’d never heard of, like chikoo — a grainy, vaguely pear-like fruit that folks in India sometimes \u003ca href=\"https://www.whetstonemagazine.com/journal/in-india-the-chikoo-fruit-spreads-its-sweet-legacy\">add to milkshakes or turn into dehydrated chips\u003c/a>. One flavor, the \u003ca href=\"https://pintsofjoy.com/collections/order-ahead/products/meetha-paan\">meetha paan\u003c/a>, even features fresh betel leaves. \u003c/p>\n"
],
"innerBlocks": []
},
{
"blockName": "kqed/ad",
"attrs": {
"format": "fullwidth"
},
"innerBlocks": [],
"innerHTML": "",
"innerContent": []
},
{
"blockName": "core/paragraph",
"attrs": [],
"innerHTML": "\n\u003cp>All told, there were nearly 30 flavors to choose from, all intriguing. For probably a third of them, I couldn’t even begin to imagine what the ice cream might taste like. On a busy night like this one, when it wasn’t possible for us to take our time sampling three or four different flavors before making up our minds, the shop’s four-scoop flight ($14.99), served on a handsome wooden tray, is a nice option — especially if you’re sharing with a couple of friends. \u003c/p>\n",
"innerContent": [
"\n\u003cp>All told, there were nearly 30 flavors to choose from, all intriguing. For probably a third of them, I couldn’t even begin to imagine what the ice cream might taste like. On a busy night like this one, when it wasn’t possible for us to take our time sampling three or four different flavors before making up our minds, the shop’s four-scoop flight ($14.99), served on a handsome wooden tray, is a nice option — especially if you’re sharing with a couple of friends. \u003c/p>\n"
],
"innerBlocks": []
},
{
"blockName": "core/paragraph",
"attrs": [],
"innerHTML": "\n\u003cp>We wound up picking more or less at random, but all of the flavors we chose were a hit. The gulab jamun flavor is a fun, inspired twist on the syrup-soaked “Indian donuts,” with chunks of the sweet dough balls mixed into the ice cream itself. \u003c/p>\n",
"innerContent": [
"\n\u003cp>We wound up picking more or less at random, but all of the flavors we chose were a hit. The gulab jamun flavor is a fun, inspired twist on the syrup-soaked “Indian donuts,” with chunks of the sweet dough balls mixed into the ice cream itself. \u003c/p>\n"
],
"innerBlocks": []
},
{
"blockName": "kqed-v2/related-articles",
"attrs": {
"postIds": [
"arts_13990274",
"arts_13955884",
"arts_13966812"
],
"labelWasCleared": true
},
"innerHTML": "",
"innerContent": [],
"innerBlocks": []
},
{
"blockName": "core/paragraph",
"attrs": [],
"innerHTML": "\n\u003cp>Meanwhile, our scooper’s top recommendation is the Biscoff cookie flavor, which features crumbled bits of the crisp, caramelly cookies (a \u003ca href=\"https://www.thestatesman.com/inspiration-hub/biscoff-in-india-the-biscuit-that-lost-its-bite-1503544174.html\">popular treat in India\u003c/a>, it turns out). This winds up being our favorite; it’s extravagantly delicious, like a bolder, more texturally interesting cookies and cream.\u003c/p>\n",
"innerContent": [
"\n\u003cp>Meanwhile, our scooper’s top recommendation is the Biscoff cookie flavor, which features crumbled bits of the crisp, caramelly cookies (a \u003ca href=\"https://www.thestatesman.com/inspiration-hub/biscoff-in-india-the-biscuit-that-lost-its-bite-1503544174.html\">popular treat in India\u003c/a>, it turns out). This winds up being our favorite; it’s extravagantly delicious, like a bolder, more texturally interesting cookies and cream.\u003c/p>\n"
],
"innerBlocks": []
},
{
"blockName": "core/paragraph",
"attrs": [],
"innerHTML": "\n\u003cp>In addition to the audaciousness of the flavors, the other distinguishing feature of the ice cream at Pints of Joy is that it doesn’t have any eggs in it, so the scoops aren’t as dense or creamy as the ones at some of my favorite high-end creameries, like Bi-Rite or Lush Gelato. The texture is lighter here; the ice cream melts a little bit faster. \u003c/p>\n",
"innerContent": [
"\n\u003cp>In addition to the audaciousness of the flavors, the other distinguishing feature of the ice cream at Pints of Joy is that it doesn’t have any eggs in it, so the scoops aren’t as dense or creamy as the ones at some of my favorite high-end creameries, like Bi-Rite or Lush Gelato. The texture is lighter here; the ice cream melts a little bit faster. \u003c/p>\n"
],
"innerBlocks": []
},
{
"blockName": "core/paragraph",
"attrs": [],
"innerHTML": "\n\u003cp>The bonus is that the eggless approach makes for flavors that are more vivid and refreshing, perfect for the shop’s dazzling palette of tropical fruits. So, for the third scoop in our flight, I loved the intense, honeyed sweetness of the Alphonso mango ice cream, made with the pulp from real Indian mangoes, aka the “\u003ca href=\"https://www.kqed.org/arts/13990218/indian-mango-party-san-francisco-mission\">king of fruits\u003c/a>.” And the most provocative flavor of the night was the custard apple, aka sitaphal, which includes strands of the fruit’s creamy, delicate flesh. The flavor lies somewhere between a banana and a less pungent durian. \u003c/p>\n",
"innerContent": [
"\n\u003cp>The bonus is that the eggless approach makes for flavors that are more vivid and refreshing, perfect for the shop’s dazzling palette of tropical fruits. So, for the third scoop in our flight, I loved the intense, honeyed sweetness of the Alphonso mango ice cream, made with the pulp from real Indian mangoes, aka the “\u003ca href=\"https://www.kqed.org/arts/13990218/indian-mango-party-san-francisco-mission\">king of fruits\u003c/a>.” And the most provocative flavor of the night was the custard apple, aka sitaphal, which includes strands of the fruit’s creamy, delicate flesh. The flavor lies somewhere between a banana and a less pungent durian. \u003c/p>\n"
],
"innerBlocks": []
},
{
"blockName": "core/paragraph",
"attrs": [],
"innerHTML": "\n\u003cp>For Indian sweets lovers who want their frozen confections to taste \u003cem>even more \u003c/em>Indian, Pints of Joy also offers a selection of ice cream desserts modeled closely after traditional Indian sweets. The maximalist gajar halwa sundae comes dusted with almonds and crushed pistachios and has a layer of sticky-sweet carrot gelatin (the “gajar halwa”) on the bottom of the bowl. The mango mastani, meanwhile, is like if you took a mango lassi and added a scoop of mango ice cream, and also scattered a handful of Tutti-Frutti candy and nuts on top. \u003c/p>\n",
"innerContent": [
"\n\u003cp>For Indian sweets lovers who want their frozen confections to taste \u003cem>even more \u003c/em>Indian, Pints of Joy also offers a selection of ice cream desserts modeled closely after traditional Indian sweets. The maximalist gajar halwa sundae comes dusted with almonds and crushed pistachios and has a layer of sticky-sweet carrot gelatin (the “gajar halwa”) on the bottom of the bowl. The mango mastani, meanwhile, is like if you took a mango lassi and added a scoop of mango ice cream, and also scattered a handful of Tutti-Frutti candy and nuts on top. \u003c/p>\n"
],
"innerBlocks": []
},
{
"blockName": "core/paragraph",
"attrs": [],
"innerHTML": "\n\u003cp>Suffice it to say, we’re on a bit of a sugar high by the end of the night. \u003c/p>\n",
"innerContent": [
"\n\u003cp>Suffice it to say, we’re on a bit of a sugar high by the end of the night. \u003c/p>\n"
],
"innerBlocks": []
},
{
"blockName": "core/paragraph",
"attrs": [],
"innerHTML": "\n\u003cp>All around us, though, the party rages on. Even as late as 10:45 p.m., we see children, maybe 8 or 9 years old, out past their bedtime, getting in line with their parents. The very last customer is a young South Asian woman in pajamas who sneaks in the door right as the store is closing up shop and walks out a few minutes later holding two pints in a plastic bag. She’s on the phone, probably letting friends or family know that her late-night mission was a success. \u003c/p>\n",
"innerContent": [
"\n\u003cp>All around us, though, the party rages on. Even as late as 10:45 p.m., we see children, maybe 8 or 9 years old, out past their bedtime, getting in line with their parents. The very last customer is a young South Asian woman in pajamas who sneaks in the door right as the store is closing up shop and walks out a few minutes later holding two pints in a plastic bag. She’s on the phone, probably letting friends or family know that her late-night mission was a success. \u003c/p>\n"
],
"innerBlocks": []
},
{
"blockName": "core/paragraph",
"attrs": [],
"innerHTML": "\n\u003cp>By this point, it’s well past 11 o’clock, and Pints of Joy has technically closed. But even halfway across the parking lot, we still hear the echoes of everyone’s happy chatter.\u003c/p>\n",
"innerContent": [
"\n\u003cp>By this point, it’s well past 11 o’clock, and Pints of Joy has technically closed. But even halfway across the parking lot, we still hear the echoes of everyone’s happy chatter.\u003c/p>\n"
],
"innerBlocks": []
},
{
"blockName": "core/separator",
"attrs": [],
"innerHTML": "\n\u003chr class=\"wp-block-separator has-alpha-channel-opacity\" />\n",
"innerContent": [
"\n\u003chr class=\"wp-block-separator has-alpha-channel-opacity\" />\n"
],
"innerBlocks": []
},
{
"blockName": "core/paragraph",
"attrs": [],
"innerHTML": "\n\u003cp>\u003ca href=\"https://www.instagram.com/pintsofjoyicecream/\">\u003cem>Pints of Joy\u003c/em>\u003c/a>\u003cem> is open Tuesday to Thursday 11 a.m.–9 p.m., Friday to Saturday 11 a.m.–11 p.m. and Sunday noon to 10 p.m. at 717 E. El Camino Real in Sunnyvale. The shop also has locations in \u003c/em>\u003ca href=\"https://pintsofjoy.com/pages/fremont\">\u003cem>Fremont\u003c/em>\u003c/a>\u003cem> and \u003c/em>\u003ca href=\"https://pintsofjoy.com/pages/best-ice-cream-parlour-in-palo-alto\">\u003cem>Palo Alto\u003c/em>\u003c/a>\u003cem> (at Rick’s Ice Cream).\u003c/em>\u003c/p>\n",
"innerContent": [
"\n\u003cp>\u003ca href=\"https://www.instagram.com/pintsofjoyicecream/\">\u003cem>Pints of Joy\u003c/em>\u003c/a>\u003cem> is open Tuesday to Thursday 11 a.m.–9 p.m., Friday to Saturday 11 a.m.–11 p.m. and Sunday noon to 10 p.m. at 717 E. El Camino Real in Sunnyvale. The shop also has locations in \u003c/em>\u003ca href=\"https://pintsofjoy.com/pages/fremont\">\u003cem>Fremont\u003c/em>\u003c/a>\u003cem> and \u003c/em>\u003ca href=\"https://pintsofjoy.com/pages/best-ice-cream-parlour-in-palo-alto\">\u003cem>Palo Alto\u003c/em>\u003c/a>\u003cem> (at Rick’s Ice Cream).\u003c/em>\u003c/p>\n"
],
"innerBlocks": []
},
{
"blockName": "kqed/ad",
"attrs": {
"format": "floatright"
},
"innerBlocks": [],
"innerHTML": "",
"innerContent": []
},
{
"blockName": "core/paragraph",
"attrs": [],
"innerHTML": "\n\u003cp>\u003c/p>\n",
"innerContent": [
"\n\u003cp>\u003c/p>\n"
],
"innerBlocks": []
}
],
"excerpt": "Pints of Joy is Sunnyvale’s sweetest late-night party.",
"status": "publish",
"parent": 0,
"modified": 1781305945,
"stats": {
"hasAudio": false,
"hasVideo": false,
"hasChartOrMap": false,
"iframeSrcs": [],
"hasGoogleForm": false,
"hasGallery": false,
"hasHearkenModule": false,
"hasPolis": false,
"paragraphCount": 18,
"wordCount": 1129
},
"headData": {
"title": "Pints of Joy Is Sunnyvale's Late-Night Indian Ice Cream Shop | KQED",
"description": "Pints of Joy is Sunnyvale’s sweetest late-night party.",
"ogTitle": "The Exuberant Joy of an Indian Ice Cream Shop at 11 PM",
"ogDescription": "",
"ogImgId": "",
"twTitle": "The Exuberant Joy of an Indian Ice Cream Shop at 11 PM",
"twDescription": "",
"twImgId": "",
"socialTitle": "Pints of Joy Is Sunnyvale's Late-Night Indian Ice Cream Shop %%page%% %%sep%% KQED",
"schema": {
"@context": "https://schema.org",
"@type": "Article",
"headline": "The Exuberant Joy of an Indian Ice Cream Shop at 11 PM",
"datePublished": "2026-06-11T17:00:14-07:00",
"dateModified": "2026-06-12T16:12:25-07:00",
"image": "https://cdn.kqed.org/wp-content/uploads/2020/02/KQED-OG-Image@1x.png"
}
},
"primaryCategory": {
"termId": 1,
"slug": "arts",
"name": "Arts"
},
"source": "The Midnight Diners",
"sourceUrl": "https://www.kqed.org/arts/tag/the-midnight-diners",
"sticky": false,
"nprStoryId": "kqed-13990715",
"templateType": "standard",
"featuredImageType": "none",
"excludeFromSiteSearch": "Include",
"articleAge": "0",
"path": "/arts/13990715/sunnyvale-indian-ice-cream-pints-of-joy-late-night",
"audioTrackLength": null,
"parsedContent": [
{
"type": "contentString",
"content": "\u003cdiv class=\"post-body\">\u003cp>\u003cfigure class=\"wp-block-image size-full\">\u003cimg loading=\"lazy\" decoding=\"async\" width=\"1920\" height=\"1920\" src=\"https://cdn.kqed.org/wp-content/uploads/sites/2/2026/06/PintsOfLove2.jpg\" alt=\"Illustration: Two men eagerly eating many varieties of ice cream.\" class=\"wp-image-13990722\" srcset=\"https://cdn.kqed.org/wp-content/uploads/sites/2/2026/06/PintsOfLove2.jpg 1920w, https://cdn.kqed.org/wp-content/uploads/sites/2/2026/06/PintsOfLove2-160x160.jpg 160w, https://cdn.kqed.org/wp-content/uploads/sites/2/2026/06/PintsOfLove2-768x768.jpg 768w, https://cdn.kqed.org/wp-content/uploads/sites/2/2026/06/PintsOfLove2-1536x1536.jpg 1536w, https://cdn.kqed.org/wp-content/uploads/sites/2/2026/06/PintsOfLove2-600x600.jpg 600w\" sizes=\"auto, (max-width: 1920px) 100vw, 1920px\">\u003cfigcaption class=\"wp-element-caption\">Pints of Joy is known for its wide selection of Indian-inspired ice cream flavors. The original Sunnyvale location stays open until 11 p.m. on weekends. (Thien Pham)\u003c/figcaption>\u003c/figure>\n\n\n\n\u003cp>\u003ca href=\"https://www.kqed.org/arts/tag/the-midnight-diners\">\u003cem>The Midnight Diners\u003c/em>\u003c/a>\u003cem> is a regular collaboration between KQED food editor Luke Tsai and graphic novelist \u003c/em>\u003ca href=\"https://www.instagram.com/thiendog/?hl=en\">\u003cem>Thien Pham\u003c/em>\u003c/a>\u003cem>. Follow them each week as they explore the hot pot restaurants, taco carts and 24-hour casino buffets that make up the Bay Area’s after-hours dining scene. \u003c/em>\u003c/p>\n\n\n\n\u003cp>The line outside the Indian \u003ca href=\"https://www.kqed.org/arts/tag/ice-cream\">ice cream\u003c/a> shop is, in a word, outrageous. \u003c/p>\n\n\n\n\u003cp>Sandwiched between a dental office and an injection clinic in an anonymous Sunnyvale plaza, \u003ca href=\"https://pintsofjoy.com/\">Pints of Joy\u003c/a> doesn’t, at first glance, \u003cem>look\u003c/em> like it’d be the site of an exuberant after-hours party. And yet: There are at least 15 or 20 customers ahead of us in line when we pull up to the scoop shop at a quarter past 10 on a recent Friday night — and easily another 30 ice cream eaters seated inside, or at the handful of tables on the string light–bedecked courtyard, or just sprawled out on the decorative planter boxes in front. \u003c/p>\n\n\n\n\u003cp>Almost everyone appears to be South Asian. And because a good chunk of the crowd has come in big, boisterous groups of five or six, the place pulses with the electricity of happy late-night conversation. At one outdoor table, a multigenerational family — Boomer grandparents, Gen X kids, Gen Z grandkids — teases each other over waffle cones. Inside, a table of eight bespectacled men in their 20s gesticulate vigorously with their hands, in the thick of some lively discussion. (Speaking as two glasses-wearing Asians, we never felt more at home among our people than at this Sunnyvale ice cream shop.)\u003c/p>\n\n\n\n\u003cfigure class=\"wp-block-image size-full\">\u003cimg loading=\"lazy\" decoding=\"async\" width=\"1920\" height=\"1920\" src=\"https://cdn.kqed.org/wp-content/uploads/sites/2/2026/06/PintsOfLove.jpg\" alt='Illustration: An ice cream shop lit up at night, with a long line of customers waiting outside. The sign reads, \"Pints of Joy.\"' class=\"wp-image-13990725\" srcset=\"https://cdn.kqed.org/wp-content/uploads/sites/2/2026/06/PintsOfLove.jpg 1920w, https://cdn.kqed.org/wp-content/uploads/sites/2/2026/06/PintsOfLove-160x160.jpg 160w, https://cdn.kqed.org/wp-content/uploads/sites/2/2026/06/PintsOfLove-768x768.jpg 768w, https://cdn.kqed.org/wp-content/uploads/sites/2/2026/06/PintsOfLove-1536x1536.jpg 1536w, https://cdn.kqed.org/wp-content/uploads/sites/2/2026/06/PintsOfLove-600x600.jpg 600w\" sizes=\"auto, (max-width: 1920px) 100vw, 1920px\">\u003cfigcaption class=\"wp-element-caption\">Shortly before closing on a Friday night, the line outside the shop still stretched 15 or 20 people deep. (Thien Pham)\u003c/figcaption>\u003c/figure>\n\n\n\n\u003cp>The reason for Pints of Joy’s popularity isn’t \u003cem>just\u003c/em> the convenience of being an ice cream parlor that stays open until 11 p.m. on weekends. What sets the shop apart is its lineup of Indian-inspired flavors — a breathtaking array even among the Bay Area’s small handful of other \u003ca href=\"https://www.kqed.org/bayareabites/139737/a-bay-area-creamery-gives-kamala-harris-its-highest-honor-an-ice-cream-flavor\">new-school South Asian ice cream\u003c/a> brands. There are flavors named after traditional, spice-laden Indian desserts like ras malai, falooda and malai kulfi. There are tropical fruits I love (mango! jackfruit!) and others I’d never heard of, like chikoo — a grainy, vaguely pear-like fruit that folks in India sometimes \u003ca href=\"https://www.whetstonemagazine.com/journal/in-india-the-chikoo-fruit-spreads-its-sweet-legacy\">add to milkshakes or turn into dehydrated chips\u003c/a>. One flavor, the \u003ca href=\"https://pintsofjoy.com/collections/order-ahead/products/meetha-paan\">meetha paan\u003c/a>, even features fresh betel leaves. \u003c/p>\n\n\n\n\u003cp>\u003c/p>\u003c/div>",
"attributes": {
"named": {},
"numeric": []
}
},
{
"type": "component",
"content": "",
"name": "ad",
"attributes": {
"named": {
"label": "fullwidth"
},
"numeric": [
"fullwidth"
]
}
},
{
"type": "contentString",
"content": "\u003cdiv class=\"post-body\">\u003cp>\u003c/p>\n\u003cp>All told, there were nearly 30 flavors to choose from, all intriguing. For probably a third of them, I couldn’t even begin to imagine what the ice cream might taste like. On a busy night like this one, when it wasn’t possible for us to take our time sampling three or four different flavors before making up our minds, the shop’s four-scoop flight ($14.99), served on a handsome wooden tray, is a nice option — especially if you’re sharing with a couple of friends. \u003c/p>\n\n\n\n\u003cp>We wound up picking more or less at random, but all of the flavors we chose were a hit. The gulab jamun flavor is a fun, inspired twist on the syrup-soaked “Indian donuts,” with chunks of the sweet dough balls mixed into the ice cream itself. \u003c/p>\n\n\n\n\n\n\u003cp>Meanwhile, our scooper’s top recommendation is the Biscoff cookie flavor, which features crumbled bits of the crisp, caramelly cookies (a \u003ca href=\"https://www.thestatesman.com/inspiration-hub/biscoff-in-india-the-biscuit-that-lost-its-bite-1503544174.html\">popular treat in India\u003c/a>, it turns out). This winds up being our favorite; it’s extravagantly delicious, like a bolder, more texturally interesting cookies and cream.\u003c/p>\n\n\n\n\u003cp>In addition to the audaciousness of the flavors, the other distinguishing feature of the ice cream at Pints of Joy is that it doesn’t have any eggs in it, so the scoops aren’t as dense or creamy as the ones at some of my favorite high-end creameries, like Bi-Rite or Lush Gelato. The texture is lighter here; the ice cream melts a little bit faster. \u003c/p>\n\n\n\n\u003cp>The bonus is that the eggless approach makes for flavors that are more vivid and refreshing, perfect for the shop’s dazzling palette of tropical fruits. So, for the third scoop in our flight, I loved the intense, honeyed sweetness of the Alphonso mango ice cream, made with the pulp from real Indian mangoes, aka the “\u003ca href=\"https://www.kqed.org/arts/13990218/indian-mango-party-san-francisco-mission\">king of fruits\u003c/a>.” And the most provocative flavor of the night was the custard apple, aka sitaphal, which includes strands of the fruit’s creamy, delicate flesh. The flavor lies somewhere between a banana and a less pungent durian. \u003c/p>\n\n\n\n\u003cp>For Indian sweets lovers who want their frozen confections to taste \u003cem>even more \u003c/em>Indian, Pints of Joy also offers a selection of ice cream desserts modeled closely after traditional Indian sweets. The maximalist gajar halwa sundae comes dusted with almonds and crushed pistachios and has a layer of sticky-sweet carrot gelatin (the “gajar halwa”) on the bottom of the bowl. The mango mastani, meanwhile, is like if you took a mango lassi and added a scoop of mango ice cream, and also scattered a handful of Tutti-Frutti candy and nuts on top. \u003c/p>\n\n\n\n\u003cp>Suffice it to say, we’re on a bit of a sugar high by the end of the night. \u003c/p>\n\n\n\n\u003cp>All around us, though, the party rages on. Even as late as 10:45 p.m., we see children, maybe 8 or 9 years old, out past their bedtime, getting in line with their parents. The very last customer is a young South Asian woman in pajamas who sneaks in the door right as the store is closing up shop and walks out a few minutes later holding two pints in a plastic bag. She’s on the phone, probably letting friends or family know that her late-night mission was a success. \u003c/p>\n\n\n\n\u003cp>By this point, it’s well past 11 o’clock, and Pints of Joy has technically closed. But even halfway across the parking lot, we still hear the echoes of everyone’s happy chatter.\u003c/p>\n\n\n\n\u003chr class=\"wp-block-separator has-alpha-channel-opacity\">\n\n\n\n\u003cp>\u003ca href=\"https://www.instagram.com/pintsofjoyicecream/\">\u003cem>Pints of Joy\u003c/em>\u003c/a>\u003cem> is open Tuesday to Thursday 11 a.m.–9 p.m., Friday to Saturday 11 a.m.–11 p.m. and Sunday noon to 10 p.m. at 717 E. El Camino Real in Sunnyvale. The shop also has locations in \u003c/em>\u003ca href=\"https://pintsofjoy.com/pages/fremont\">\u003cem>Fremont\u003c/em>\u003c/a>\u003cem> and \u003c/em>\u003ca href=\"https://pintsofjoy.com/pages/best-ice-cream-parlour-in-palo-alto\">\u003cem>Palo Alto\u003c/em>\u003c/a>\u003cem> (at Rick’s Ice Cream).\u003c/em>\u003c/p>\n\n\n\n\u003cp>\u003c/p>\u003c/div>",
"attributes": {
"named": {},
"numeric": []
}
},
{
"type": "component",
"content": "",
"name": "ad",
"attributes": {
"named": {
"label": "floatright"
},
"numeric": [
"floatright"
]
}
},
{
"type": "contentString",
"content": "\u003cdiv class=\"post-body\">\u003cp>\u003c/p>\n\u003cp>\u003c/p>\n\n\u003c/div>\u003c/p>",
"attributes": {
"named": {},
"numeric": []
}
}
],
"link": "/arts/13990715/sunnyvale-indian-ice-cream-pints-of-joy-late-night",
"authors": [
"11743",
"11753"
],
"series": [
"arts_22316"
],
"categories": [
"arts_1",
"arts_12276"
],
"tags": [
"arts_10278",
"arts_1297",
"arts_22078",
"arts_8805",
"arts_2475",
"arts_14954",
"arts_21928"
],
"featImg": "arts_13990721",
"label": "source_arts_13990715"
},
"arts_13990663": {
"type": "posts",
"id": "arts_13990663",
"meta": {
"index": "posts_1716263798",
"site": "arts",
"id": "13990663",
"score": null,
"sort": [
1781107200000
]
},
"guestAuthors": [],
"slug": "san-jose-first-nigerian-restaurant-folafela-jollof-egusi-soup",
"title": "The South Bay’s First Nigerian Restaurant Takes Off in San José",
"publishDate": 1781107200,
"format": "standard",
"headTitle": "The South Bay’s First Nigerian Restaurant Takes Off in San José | KQED",
"labelTerm": {},
"content": "\u003cp>When Folake Adewole first moved to \u003ca href=\"https://www.kqed.org/arts/tag/san-jose\">San José\u003c/a> in 2017 to take a job as a travel nurse, there wasn’t a single Nigerian restaurant in the area. For the past 10 years, whenever she was craving beef suya or jollof rice, she had to drive up to Hayward — or, more likely, just cook it herself. \u003c/p>\n\n\n\n\u003cp>In March, Adewole finally decided to take things into her own hands: She opened \u003ca href=\"https://www.instagram.com/folafela001/\">FolaFela\u003c/a>, a small Nigerian restaurant tucked into a strip mall in East San José. It’s the South Bay’s first proper brick-and-mortar Nigerian restaurant.\u003c/p>\n\n\n\n\u003cp>The shop has only a handful of tables, along with a mini African grocery store in the back. But the menu is surprisingly expansive, featuring dishes like gizz dodo (fried gizzards and plantains) and asun coconut rice. The main draw is the assortment of fourteen Nigerian soups, served with starchy dough balls known as swallows or okele. Already, the thick, complex soups have been a hit, drawing flocks of diners from as far away as Santa Cruz.\u003c/p>\n\n\n\n\u003cfigure class=\"wp-block-image size-full\">\u003cimg loading=\"lazy\" decoding=\"async\" width=\"2000\" height=\"1334\" src=\"https://cdn.kqed.org/wp-content/uploads/sites/2/2026/06/Fola-Fela-storefront.jpg\" alt='Exterior of a Nigerian restaurant and market. The sign above, in large, stylized yellow letters, reads, \"FolaFela.\"' class=\"wp-image-13990680\" srcset=\"https://cdn.kqed.org/wp-content/uploads/sites/2/2026/06/Fola-Fela-storefront.jpg 2000w, https://cdn.kqed.org/wp-content/uploads/sites/2/2026/06/Fola-Fela-storefront-160x107.jpg 160w, https://cdn.kqed.org/wp-content/uploads/sites/2/2026/06/Fola-Fela-storefront-768x512.jpg 768w, https://cdn.kqed.org/wp-content/uploads/sites/2/2026/06/Fola-Fela-storefront-1536x1025.jpg 1536w\" sizes=\"auto, (max-width: 2000px) 100vw, 2000px\">\u003cfigcaption class=\"wp-element-caption\">Open since March 2026, FolaFela also features a small African grocery store in back. (Octavio Peña)\u003c/figcaption>\u003c/figure>\n\n\n\n\u003cp>Adewole didn’t have any restaurant experience before opening FolaFela, but she has been selling Nigerian dishes since her youth. Growing up in the city of Ile-Ifẹ, in Nigeria’s Osun state, Adewole would help her mother prepare and sell ofada rice — a rice dish topped with a crayfish and pepper stew that now serves at the restaurant, using the same recipe. Soon after she settled in San José, she decided to fill the culinary void by making Nigerian plates to share with coworkers and friends from church. By 2021, she was catering for events with as many as 300 guests. So, after much encouragement from her customers, she decided to open the restaurant while still juggling her day job as a registered nurse at the Stanford hospital. \u003c/p>\n\n\n\n\n\n\u003cp>Over the course of several visits to the restaurant, the jollof rice was my favorite dish on the menu. The tomato-infused rice tastes like it was cooked over a campfire due to its bold, smoky aroma — a \u003ca href=\"https://www.kqed.org/arts/13960580/jollof-festival-oakland-west-african-food-competition-nigerian-sierra-leone\">signature of the Nigerian style\u003c/a>. \u003c/p>\n\n\n\n\u003cp>[ad fullwidth]\u003c/p>\n\u003cp>“A lot of people think jollof rice can only be smoky if they burn it,” Adewole says. “But it doesn’t have to be like that.” \u003c/p>\n\n\n\n\u003cp>Instead, Adewole develops layers of flavor by using a thoughtfully curated selection of smoked and toasted spices including ginger, garlic, rosemary, nutmeg and star anise. The jollof I ordered came with fried plantains and a maroon-colored chicken leg that melted off the bone. You can swap out the poultry for goat, fish or beef.\u003c/p>\n\n\n\n\u003cfigure class=\"wp-block-image size-full\">\u003cimg loading=\"lazy\" decoding=\"async\" width=\"2000\" height=\"1333\" src=\"https://cdn.kqed.org/wp-content/uploads/sites/2/2026/06/Egusi-soup-and-fufu.jpg\" alt=\"A bowl of egusi soup, served with a white ball of pounded yam on the side.\" class=\"wp-image-13990683\" srcset=\"https://cdn.kqed.org/wp-content/uploads/sites/2/2026/06/Egusi-soup-and-fufu.jpg 2000w, https://cdn.kqed.org/wp-content/uploads/sites/2/2026/06/Egusi-soup-and-fufu-160x107.jpg 160w, https://cdn.kqed.org/wp-content/uploads/sites/2/2026/06/Egusi-soup-and-fufu-768x512.jpg 768w, https://cdn.kqed.org/wp-content/uploads/sites/2/2026/06/Egusi-soup-and-fufu-1536x1024.jpg 1536w\" sizes=\"auto, (max-width: 2000px) 100vw, 2000px\">\u003cfigcaption class=\"wp-element-caption\">The restaurant’s calling card is its selection of 14 different Nigerian soups. The egusi, pictured here with a ball of pounded yam, is the most popular. (Octavio Peña)\u003c/figcaption>\u003c/figure>\n\n\n\n\u003cp>Most of FolaFela’s soups, on the other hand, highlight leaves and seeds native to Nigeria. The most popular one is a Yoruba dish called egusi soup, named after the dried ground melon seeds used to thicken it. Adewole’s version is specked with bitter leafy greens and served with poundo yam, a type of swallow made with yam flour. The stretchy, pillowy dough balls have been trending on social media lately, as \u003ca href=\"https://www.youtube.com/shorts/yo2E1uszAFs\">mukbang influencers\u003c/a> post videos of themselves dunking them in stew and theatrically chewing on each sauce-soaked bite. \u003c/p>\n\n\n\n\u003cp>Adewole decided to focus on soups because it’s a food that’s deeply nostalgic for West African people, in particular. Since the soups are often associated with celebrations and other large gatherings, she offers them in increments of up to four liters. \u003c/p>\n\n\n\n\u003cp>“I have customers come in asking for particular soups that their grandma used to make,” Adewole says. Meanwhile, she recognizes that other customers might be having Nigerian cuisine for the very first time. For those newcomers, FolaFela can be a great place to learn about the origins of the food. \u003c/p>\n\n\n\n\u003cfigure class=\"wp-block-image size-full\">\u003cimg loading=\"lazy\" decoding=\"async\" width=\"2000\" height=\"1333\" src=\"https://cdn.kqed.org/wp-content/uploads/sites/2/2026/06/Folake-Adewole.jpg\" alt=\"A smiling Nigerian woman poses in front of an orange wall inside her restaurant.\" class=\"wp-image-13990684\" srcset=\"https://cdn.kqed.org/wp-content/uploads/sites/2/2026/06/Folake-Adewole.jpg 2000w, https://cdn.kqed.org/wp-content/uploads/sites/2/2026/06/Folake-Adewole-160x107.jpg 160w, https://cdn.kqed.org/wp-content/uploads/sites/2/2026/06/Folake-Adewole-768x512.jpg 768w, https://cdn.kqed.org/wp-content/uploads/sites/2/2026/06/Folake-Adewole-1536x1024.jpg 1536w\" sizes=\"auto, (max-width: 2000px) 100vw, 2000px\">\u003cfigcaption class=\"wp-element-caption\">Folake Adewole has been cooking Nigerian food for friends and coworkers ever since she moved to San José in 2017. (Octavio Peña)\u003c/figcaption>\u003c/figure>\n\n\n\n\u003cp>“A lot of Africans in the Bay Area are very scattered,” Adewole says. She sees her restaurant as a place for the community to congregate — where African immigrants can have conversations about what part of the continent their family is from and chat about their regional dishes. The grocery store section provides another point of connection, as Adewole travels to Los Angeles and Sacramento to stock the shop’s pantry and freezers with hard-to-find flours and spices. Her largest struggle is sourcing frozen and dried kote fish, or horse mackerel, which she serves fried and in stews.\u003c/p>\n\n\n\n\u003cp>Although FolaFela is still in its early stages, Adewole has ambitious ideas for where it’s heading next. Eventually, she hopes to open a second FolaFela location somewhere near Palo Alto to make Nigerian food more accessible to people on the Peninsula. And she is developing recipes to expand her menu to include dishes from other Nigerian ethnic groups like the Hausa. \u003c/p>\n\n\n\n\u003cp>“What I would love to do is bring more Igbo food onto my menu,” Adewole says. “I’m thinking of doing a white soup with cocoyam.”\u003c/p>\n\n\n\n\u003chr class=\"wp-block-separator has-alpha-channel-opacity\">\n\n\n\n\u003cp>\u003ca href=\"https://www.instagram.com/folafela001/\">\u003cem>FolaFela\u003c/em>\u003c/a>\u003cem> is open Tuesday to Saturday 11:30–9 p.m., and Sunday 3 p.m.–9 p.m. at 2762 Aborn Rd. in San José.\u003c/em>\u003c/p>\n\n\n\n\u003cp>\u003c/p>\n\u003cp>\u003c/p>\n\n",
"blocks": [
{
"blockName": "core/paragraph",
"attrs": [],
"innerHTML": "\n\u003cp>When Folake Adewole first moved to \u003ca href=\"https://www.kqed.org/arts/tag/san-jose\">San José\u003c/a> in 2017 to take a job as a travel nurse, there wasn’t a single Nigerian restaurant in the area. For the past 10 years, whenever she was craving beef suya or jollof rice, she had to drive up to Hayward — or, more likely, just cook it herself. \u003c/p>\n",
"innerContent": [
"\n\u003cp>When Folake Adewole first moved to \u003ca href=\"https://www.kqed.org/arts/tag/san-jose\">San José\u003c/a> in 2017 to take a job as a travel nurse, there wasn’t a single Nigerian restaurant in the area. For the past 10 years, whenever she was craving beef suya or jollof rice, she had to drive up to Hayward — or, more likely, just cook it herself. \u003c/p>\n"
],
"innerBlocks": []
},
{
"blockName": "core/paragraph",
"attrs": [],
"innerHTML": "\n\u003cp>In March, Adewole finally decided to take things into her own hands: She opened \u003ca href=\"https://www.instagram.com/folafela001/\">FolaFela\u003c/a>, a small Nigerian restaurant tucked into a strip mall in East San José. It’s the South Bay’s first proper brick-and-mortar Nigerian restaurant.\u003c/p>\n",
"innerContent": [
"\n\u003cp>In March, Adewole finally decided to take things into her own hands: She opened \u003ca href=\"https://www.instagram.com/folafela001/\">FolaFela\u003c/a>, a small Nigerian restaurant tucked into a strip mall in East San José. It’s the South Bay’s first proper brick-and-mortar Nigerian restaurant.\u003c/p>\n"
],
"innerBlocks": []
},
{
"blockName": "core/paragraph",
"attrs": [],
"innerHTML": "\n\u003cp>The shop has only a handful of tables, along with a mini African grocery store in the back. But the menu is surprisingly expansive, featuring dishes like gizz dodo (fried gizzards and plantains) and asun coconut rice. The main draw is the assortment of fourteen Nigerian soups, served with starchy dough balls known as swallows or okele. Already, the thick, complex soups have been a hit, drawing flocks of diners from as far away as Santa Cruz.\u003c/p>\n",
"innerContent": [
"\n\u003cp>The shop has only a handful of tables, along with a mini African grocery store in the back. But the menu is surprisingly expansive, featuring dishes like gizz dodo (fried gizzards and plantains) and asun coconut rice. The main draw is the assortment of fourteen Nigerian soups, served with starchy dough balls known as swallows or okele. Already, the thick, complex soups have been a hit, drawing flocks of diners from as far away as Santa Cruz.\u003c/p>\n"
],
"innerBlocks": []
},
{
"blockName": "core/image",
"attrs": {
"id": 13990680,
"sizeSlug": "full",
"linkDestination": "none",
"imageCredit": "Octavio Peña",
"srcset": "https://cdn.kqed.org/wp-content/uploads/sites/2/2026/06/Fola-Fela-storefront.jpg 2000w, https://cdn.kqed.org/wp-content/uploads/sites/2/2026/06/Fola-Fela-storefront-160x107.jpg 160w, https://cdn.kqed.org/wp-content/uploads/sites/2/2026/06/Fola-Fela-storefront-768x512.jpg 768w, https://cdn.kqed.org/wp-content/uploads/sites/2/2026/06/Fola-Fela-storefront-1536x1025.jpg 1536w",
"sizes": "(min-width: 992px) min(100vw, 1536px), (min-width: 768px) min(100vw, 1280px), min(100vw, 1020px)"
},
"innerHTML": "\n\u003cfigure class=\"wp-block-image size-full\">\u003cimg src=\"https://cdn.kqed.org/wp-content/uploads/sites/2/2026/06/Fola-Fela-storefront.jpg\" alt=\"Exterior of a Nigerian restaurant and market. The sign above, in large, stylized yellow letters, reads, "FolaFela."\" class=\"wp-image-13990680\" srcset=\"https://cdn.kqed.org/wp-content/uploads/sites/2/2026/06/Fola-Fela-storefront.jpg 2000w, https://cdn.kqed.org/wp-content/uploads/sites/2/2026/06/Fola-Fela-storefront-160x107.jpg 160w, https://cdn.kqed.org/wp-content/uploads/sites/2/2026/06/Fola-Fela-storefront-768x512.jpg 768w, https://cdn.kqed.org/wp-content/uploads/sites/2/2026/06/Fola-Fela-storefront-1536x1025.jpg 1536w\" sizes=\"(min-width: 992px) min(100vw, 1536px), (min-width: 768px) min(100vw, 1280px), min(100vw, 1020px)\" />\u003cfigcaption class=\"wp-element-caption\">Open since March 2026, FolaFela also features a small African grocery store in back.\u003c/figcaption>\u003c/figure>\n",
"innerContent": [
"\n\u003cfigure class=\"wp-block-image size-full\">\u003cimg src=\"https://cdn.kqed.org/wp-content/uploads/sites/2/2026/06/Fola-Fela-storefront.jpg\" alt=\"Exterior of a Nigerian restaurant and market. The sign above, in large, stylized yellow letters, reads, "FolaFela."\" class=\"wp-image-13990680\" />\u003cfigcaption class=\"wp-element-caption\">Open since March 2026, FolaFela also features a small African grocery store in back.\u003c/figcaption>\u003c/figure>\n"
],
"innerBlocks": []
},
{
"blockName": "core/paragraph",
"attrs": [],
"innerHTML": "\n\u003cp>Adewole didn’t have any restaurant experience before opening FolaFela, but she has been selling Nigerian dishes since her youth. Growing up in the city of Ile-Ifẹ, in Nigeria’s Osun state, Adewole would help her mother prepare and sell ofada rice — a rice dish topped with a crayfish and pepper stew that now serves at the restaurant, using the same recipe. Soon after she settled in San José, she decided to fill the culinary void by making Nigerian plates to share with coworkers and friends from church. By 2021, she was catering for events with as many as 300 guests. So, after much encouragement from her customers, she decided to open the restaurant while still juggling her day job as a registered nurse at the Stanford hospital. \u003c/p>\n",
"innerContent": [
"\n\u003cp>Adewole didn’t have any restaurant experience before opening FolaFela, but she has been selling Nigerian dishes since her youth. Growing up in the city of Ile-Ifẹ, in Nigeria’s Osun state, Adewole would help her mother prepare and sell ofada rice — a rice dish topped with a crayfish and pepper stew that now serves at the restaurant, using the same recipe. Soon after she settled in San José, she decided to fill the culinary void by making Nigerian plates to share with coworkers and friends from church. By 2021, she was catering for events with as many as 300 guests. So, after much encouragement from her customers, she decided to open the restaurant while still juggling her day job as a registered nurse at the Stanford hospital. \u003c/p>\n"
],
"innerBlocks": []
},
{
"blockName": "kqed-v2/related-articles",
"attrs": {
"postIds": [
"arts_13987415",
"arts_13988689"
],
"labelWasCleared": true
},
"innerHTML": "",
"innerContent": [],
"innerBlocks": []
},
{
"blockName": "core/paragraph",
"attrs": [],
"innerHTML": "\n\u003cp>Over the course of several visits to the restaurant, the jollof rice was my favorite dish on the menu. The tomato-infused rice tastes like it was cooked over a campfire due to its bold, smoky aroma — a \u003ca href=\"https://www.kqed.org/arts/13960580/jollof-festival-oakland-west-african-food-competition-nigerian-sierra-leone\">signature of the Nigerian style\u003c/a>. \u003c/p>\n",
"innerContent": [
"\n\u003cp>Over the course of several visits to the restaurant, the jollof rice was my favorite dish on the menu. The tomato-infused rice tastes like it was cooked over a campfire due to its bold, smoky aroma — a \u003ca href=\"https://www.kqed.org/arts/13960580/jollof-festival-oakland-west-african-food-competition-nigerian-sierra-leone\">signature of the Nigerian style\u003c/a>. \u003c/p>\n"
],
"innerBlocks": []
},
{
"blockName": "kqed/ad",
"attrs": {
"format": "fullwidth"
},
"innerBlocks": [],
"innerHTML": "",
"innerContent": []
},
{
"blockName": "core/paragraph",
"attrs": [],
"innerHTML": "\n\u003cp>“A lot of people think jollof rice can only be smoky if they burn it,” Adewole says. “But it doesn’t have to be like that.” \u003c/p>\n",
"innerContent": [
"\n\u003cp>“A lot of people think jollof rice can only be smoky if they burn it,” Adewole says. “But it doesn’t have to be like that.” \u003c/p>\n"
],
"innerBlocks": []
},
{
"blockName": "core/paragraph",
"attrs": [],
"innerHTML": "\n\u003cp>Instead, Adewole develops layers of flavor by using a thoughtfully curated selection of smoked and toasted spices including ginger, garlic, rosemary, nutmeg and star anise. The jollof I ordered came with fried plantains and a maroon-colored chicken leg that melted off the bone. You can swap out the poultry for goat, fish or beef.\u003c/p>\n",
"innerContent": [
"\n\u003cp>Instead, Adewole develops layers of flavor by using a thoughtfully curated selection of smoked and toasted spices including ginger, garlic, rosemary, nutmeg and star anise. The jollof I ordered came with fried plantains and a maroon-colored chicken leg that melted off the bone. You can swap out the poultry for goat, fish or beef.\u003c/p>\n"
],
"innerBlocks": []
},
{
"blockName": "core/image",
"attrs": {
"id": 13990683,
"sizeSlug": "full",
"linkDestination": "none",
"imageCredit": "Octavio Peña",
"srcset": "https://cdn.kqed.org/wp-content/uploads/sites/2/2026/06/Egusi-soup-and-fufu.jpg 2000w, https://cdn.kqed.org/wp-content/uploads/sites/2/2026/06/Egusi-soup-and-fufu-160x107.jpg 160w, https://cdn.kqed.org/wp-content/uploads/sites/2/2026/06/Egusi-soup-and-fufu-768x512.jpg 768w, https://cdn.kqed.org/wp-content/uploads/sites/2/2026/06/Egusi-soup-and-fufu-1536x1024.jpg 1536w",
"sizes": "(min-width: 992px) min(100vw, 1536px), (min-width: 768px) min(100vw, 1280px), min(100vw, 1020px)"
},
"innerHTML": "\n\u003cfigure class=\"wp-block-image size-full\">\u003cimg src=\"https://cdn.kqed.org/wp-content/uploads/sites/2/2026/06/Egusi-soup-and-fufu.jpg\" alt=\"A bowl of egusi soup, served with a white ball of pounded yam on the side.\" class=\"wp-image-13990683\" srcset=\"https://cdn.kqed.org/wp-content/uploads/sites/2/2026/06/Egusi-soup-and-fufu.jpg 2000w, https://cdn.kqed.org/wp-content/uploads/sites/2/2026/06/Egusi-soup-and-fufu-160x107.jpg 160w, https://cdn.kqed.org/wp-content/uploads/sites/2/2026/06/Egusi-soup-and-fufu-768x512.jpg 768w, https://cdn.kqed.org/wp-content/uploads/sites/2/2026/06/Egusi-soup-and-fufu-1536x1024.jpg 1536w\" sizes=\"(min-width: 992px) min(100vw, 1536px), (min-width: 768px) min(100vw, 1280px), min(100vw, 1020px)\" />\u003cfigcaption class=\"wp-element-caption\">The restaurant’s calling card is its selection of 14 different Nigerian soups. The egusi, pictured here with a ball of pounded yam, is the most popular.\u003c/figcaption>\u003c/figure>\n",
"innerContent": [
"\n\u003cfigure class=\"wp-block-image size-full\">\u003cimg src=\"https://cdn.kqed.org/wp-content/uploads/sites/2/2026/06/Egusi-soup-and-fufu.jpg\" alt=\"A bowl of egusi soup, served with a white ball of pounded yam on the side.\" class=\"wp-image-13990683\" />\u003cfigcaption class=\"wp-element-caption\">The restaurant’s calling card is its selection of 14 different Nigerian soups. The egusi, pictured here with a ball of pounded yam, is the most popular.\u003c/figcaption>\u003c/figure>\n"
],
"innerBlocks": []
},
{
"blockName": "core/paragraph",
"attrs": [],
"innerHTML": "\n\u003cp>Most of FolaFela’s soups, on the other hand, highlight leaves and seeds native to Nigeria. The most popular one is a Yoruba dish called egusi soup, named after the dried ground melon seeds used to thicken it. Adewole’s version is specked with bitter leafy greens and served with poundo yam, a type of swallow made with yam flour. The stretchy, pillowy dough balls have been trending on social media lately, as \u003ca href=\"https://www.youtube.com/shorts/yo2E1uszAFs\">mukbang influencers\u003c/a> post videos of themselves dunking them in stew and theatrically chewing on each sauce-soaked bite. \u003c/p>\n",
"innerContent": [
"\n\u003cp>Most of FolaFela’s soups, on the other hand, highlight leaves and seeds native to Nigeria. The most popular one is a Yoruba dish called egusi soup, named after the dried ground melon seeds used to thicken it. Adewole’s version is specked with bitter leafy greens and served with poundo yam, a type of swallow made with yam flour. The stretchy, pillowy dough balls have been trending on social media lately, as \u003ca href=\"https://www.youtube.com/shorts/yo2E1uszAFs\">mukbang influencers\u003c/a> post videos of themselves dunking them in stew and theatrically chewing on each sauce-soaked bite. \u003c/p>\n"
],
"innerBlocks": []
},
{
"blockName": "core/paragraph",
"attrs": [],
"innerHTML": "\n\u003cp>Adewole decided to focus on soups because it’s a food that’s deeply nostalgic for West African people, in particular. Since the soups are often associated with celebrations and other large gatherings, she offers them in increments of up to four liters. \u003c/p>\n",
"innerContent": [
"\n\u003cp>Adewole decided to focus on soups because it’s a food that’s deeply nostalgic for West African people, in particular. Since the soups are often associated with celebrations and other large gatherings, she offers them in increments of up to four liters. \u003c/p>\n"
],
"innerBlocks": []
},
{
"blockName": "core/paragraph",
"attrs": [],
"innerHTML": "\n\u003cp>“I have customers come in asking for particular soups that their grandma used to make,” Adewole says. Meanwhile, she recognizes that other customers might be having Nigerian cuisine for the very first time. For those newcomers, FolaFela can be a great place to learn about the origins of the food. \u003c/p>\n",
"innerContent": [
"\n\u003cp>“I have customers come in asking for particular soups that their grandma used to make,” Adewole says. Meanwhile, she recognizes that other customers might be having Nigerian cuisine for the very first time. For those newcomers, FolaFela can be a great place to learn about the origins of the food. \u003c/p>\n"
],
"innerBlocks": []
},
{
"blockName": "core/image",
"attrs": {
"id": 13990684,
"sizeSlug": "full",
"linkDestination": "none",
"imageCredit": "Octavio Peña",
"srcset": "https://cdn.kqed.org/wp-content/uploads/sites/2/2026/06/Folake-Adewole.jpg 2000w, https://cdn.kqed.org/wp-content/uploads/sites/2/2026/06/Folake-Adewole-160x107.jpg 160w, https://cdn.kqed.org/wp-content/uploads/sites/2/2026/06/Folake-Adewole-768x512.jpg 768w, https://cdn.kqed.org/wp-content/uploads/sites/2/2026/06/Folake-Adewole-1536x1024.jpg 1536w",
"sizes": "(min-width: 992px) min(100vw, 1536px), (min-width: 768px) min(100vw, 1280px), min(100vw, 1020px)"
},
"innerHTML": "\n\u003cfigure class=\"wp-block-image size-full\">\u003cimg src=\"https://cdn.kqed.org/wp-content/uploads/sites/2/2026/06/Folake-Adewole.jpg\" alt=\"A smiling Nigerian woman poses in front of an orange wall inside her restaurant.\" class=\"wp-image-13990684\" srcset=\"https://cdn.kqed.org/wp-content/uploads/sites/2/2026/06/Folake-Adewole.jpg 2000w, https://cdn.kqed.org/wp-content/uploads/sites/2/2026/06/Folake-Adewole-160x107.jpg 160w, https://cdn.kqed.org/wp-content/uploads/sites/2/2026/06/Folake-Adewole-768x512.jpg 768w, https://cdn.kqed.org/wp-content/uploads/sites/2/2026/06/Folake-Adewole-1536x1024.jpg 1536w\" sizes=\"(min-width: 992px) min(100vw, 1536px), (min-width: 768px) min(100vw, 1280px), min(100vw, 1020px)\" />\u003cfigcaption class=\"wp-element-caption\">Folake Adewole has been cooking Nigerian food for friends and coworkers ever since she moved to San José in 2017.\u003c/figcaption>\u003c/figure>\n",
"innerContent": [
"\n\u003cfigure class=\"wp-block-image size-full\">\u003cimg src=\"https://cdn.kqed.org/wp-content/uploads/sites/2/2026/06/Folake-Adewole.jpg\" alt=\"A smiling Nigerian woman poses in front of an orange wall inside her restaurant.\" class=\"wp-image-13990684\" />\u003cfigcaption class=\"wp-element-caption\">Folake Adewole has been cooking Nigerian food for friends and coworkers ever since she moved to San José in 2017.\u003c/figcaption>\u003c/figure>\n"
],
"innerBlocks": []
},
{
"blockName": "core/paragraph",
"attrs": [],
"innerHTML": "\n\u003cp>“A lot of Africans in the Bay Area are very scattered,” Adewole says. She sees her restaurant as a place for the community to congregate — where African immigrants can have conversations about what part of the continent their family is from and chat about their regional dishes. The grocery store section provides another point of connection, as Adewole travels to Los Angeles and Sacramento to stock the shop’s pantry and freezers with hard-to-find flours and spices. Her largest struggle is sourcing frozen and dried kote fish, or horse mackerel, which she serves fried and in stews.\u003c/p>\n",
"innerContent": [
"\n\u003cp>“A lot of Africans in the Bay Area are very scattered,” Adewole says. She sees her restaurant as a place for the community to congregate — where African immigrants can have conversations about what part of the continent their family is from and chat about their regional dishes. The grocery store section provides another point of connection, as Adewole travels to Los Angeles and Sacramento to stock the shop’s pantry and freezers with hard-to-find flours and spices. Her largest struggle is sourcing frozen and dried kote fish, or horse mackerel, which she serves fried and in stews.\u003c/p>\n"
],
"innerBlocks": []
},
{
"blockName": "core/paragraph",
"attrs": [],
"innerHTML": "\n\u003cp>Although FolaFela is still in its early stages, Adewole has ambitious ideas for where it’s heading next. Eventually, she hopes to open a second FolaFela location somewhere near Palo Alto to make Nigerian food more accessible to people on the Peninsula. And she is developing recipes to expand her menu to include dishes from other Nigerian ethnic groups like the Hausa. \u003c/p>\n",
"innerContent": [
"\n\u003cp>Although FolaFela is still in its early stages, Adewole has ambitious ideas for where it’s heading next. Eventually, she hopes to open a second FolaFela location somewhere near Palo Alto to make Nigerian food more accessible to people on the Peninsula. And she is developing recipes to expand her menu to include dishes from other Nigerian ethnic groups like the Hausa. \u003c/p>\n"
],
"innerBlocks": []
},
{
"blockName": "core/paragraph",
"attrs": [],
"innerHTML": "\n\u003cp>“What I would love to do is bring more Igbo food onto my menu,” Adewole says. “I’m thinking of doing a white soup with cocoyam.”\u003c/p>\n",
"innerContent": [
"\n\u003cp>“What I would love to do is bring more Igbo food onto my menu,” Adewole says. “I’m thinking of doing a white soup with cocoyam.”\u003c/p>\n"
],
"innerBlocks": []
},
{
"blockName": "core/separator",
"attrs": [],
"innerHTML": "\n\u003chr class=\"wp-block-separator has-alpha-channel-opacity\" />\n",
"innerContent": [
"\n\u003chr class=\"wp-block-separator has-alpha-channel-opacity\" />\n"
],
"innerBlocks": []
},
{
"blockName": "core/paragraph",
"attrs": [],
"innerHTML": "\n\u003cp>\u003ca href=\"https://www.instagram.com/folafela001/\">\u003cem>FolaFela\u003c/em>\u003c/a>\u003cem> is open Tuesday to Saturday 11:30–9 p.m., and Sunday 3 p.m.–9 p.m. at 2762 Aborn Rd. in San José.\u003c/em>\u003c/p>\n",
"innerContent": [
"\n\u003cp>\u003ca href=\"https://www.instagram.com/folafela001/\">\u003cem>FolaFela\u003c/em>\u003c/a>\u003cem> is open Tuesday to Saturday 11:30–9 p.m., and Sunday 3 p.m.–9 p.m. at 2762 Aborn Rd. in San José.\u003c/em>\u003c/p>\n"
],
"innerBlocks": []
},
{
"blockName": "kqed/ad",
"attrs": {
"format": "floatright"
},
"innerBlocks": [],
"innerHTML": "",
"innerContent": []
},
{
"blockName": "core/paragraph",
"attrs": [],
"innerHTML": "\n\u003cp>\u003c/p>\n",
"innerContent": [
"\n\u003cp>\u003c/p>\n"
],
"innerBlocks": []
}
],
"excerpt": "FolaFela specializes in jollof rice and a large variety of delicious soups and stews.",
"status": "publish",
"parent": 0,
"modified": 1781108343,
"stats": {
"hasAudio": false,
"hasVideo": false,
"hasChartOrMap": false,
"iframeSrcs": [],
"hasGoogleForm": false,
"hasGallery": false,
"hasHearkenModule": false,
"hasPolis": false,
"paragraphCount": 17,
"wordCount": 947
},
"headData": {
"title": "The South Bay’s First Nigerian Restaurant Takes Off in San José | KQED",
"description": "FolaFela specializes in jollof rice and a large variety of delicious soups and stews.",
"ogTitle": "",
"ogDescription": "",
"ogImgId": "",
"twTitle": "",
"twDescription": "",
"twImgId": "",
"schema": {
"@context": "https://schema.org",
"@type": "Article",
"headline": "The South Bay’s First Nigerian Restaurant Takes Off in San José",
"datePublished": "2026-06-10T09:00:00-07:00",
"dateModified": "2026-06-10T09:19:03-07:00",
"image": "https://cdn.kqed.org/wp-content/uploads/2020/02/KQED-OG-Image@1x.png"
}
},
"primaryCategory": {
"termId": 12276,
"slug": "food",
"name": "Food"
},
"source": "Food",
"sourceUrl": "https://www.kqed.org/food",
"sticky": false,
"nprStoryId": "kqed-13990663",
"templateType": "standard",
"featuredImageType": "standard",
"excludeFromSiteSearch": "Include",
"articleAge": "0",
"path": "/arts/13990663/san-jose-first-nigerian-restaurant-folafela-jollof-egusi-soup",
"audioTrackLength": null,
"parsedContent": [
{
"type": "contentString",
"content": "\u003cdiv class=\"post-body\">\u003cp>\u003cp>When Folake Adewole first moved to \u003ca href=\"https://www.kqed.org/arts/tag/san-jose\">San José\u003c/a> in 2017 to take a job as a travel nurse, there wasn’t a single Nigerian restaurant in the area. For the past 10 years, whenever she was craving beef suya or jollof rice, she had to drive up to Hayward — or, more likely, just cook it herself. \u003c/p>\n\n\n\n\u003cp>In March, Adewole finally decided to take things into her own hands: She opened \u003ca href=\"https://www.instagram.com/folafela001/\">FolaFela\u003c/a>, a small Nigerian restaurant tucked into a strip mall in East San José. It’s the South Bay’s first proper brick-and-mortar Nigerian restaurant.\u003c/p>\n\n\n\n\u003cp>The shop has only a handful of tables, along with a mini African grocery store in the back. But the menu is surprisingly expansive, featuring dishes like gizz dodo (fried gizzards and plantains) and asun coconut rice. The main draw is the assortment of fourteen Nigerian soups, served with starchy dough balls known as swallows or okele. Already, the thick, complex soups have been a hit, drawing flocks of diners from as far away as Santa Cruz.\u003c/p>\n\n\n\n\u003cfigure class=\"wp-block-image size-full\">\u003cimg loading=\"lazy\" decoding=\"async\" width=\"2000\" height=\"1334\" src=\"https://cdn.kqed.org/wp-content/uploads/sites/2/2026/06/Fola-Fela-storefront.jpg\" alt='Exterior of a Nigerian restaurant and market. The sign above, in large, stylized yellow letters, reads, \"FolaFela.\"' class=\"wp-image-13990680\" srcset=\"https://cdn.kqed.org/wp-content/uploads/sites/2/2026/06/Fola-Fela-storefront.jpg 2000w, https://cdn.kqed.org/wp-content/uploads/sites/2/2026/06/Fola-Fela-storefront-160x107.jpg 160w, https://cdn.kqed.org/wp-content/uploads/sites/2/2026/06/Fola-Fela-storefront-768x512.jpg 768w, https://cdn.kqed.org/wp-content/uploads/sites/2/2026/06/Fola-Fela-storefront-1536x1025.jpg 1536w\" sizes=\"auto, (max-width: 2000px) 100vw, 2000px\">\u003cfigcaption class=\"wp-element-caption\">Open since March 2026, FolaFela also features a small African grocery store in back. (Octavio Peña)\u003c/figcaption>\u003c/figure>\n\n\n\n\u003cp>Adewole didn’t have any restaurant experience before opening FolaFela, but she has been selling Nigerian dishes since her youth. Growing up in the city of Ile-Ifẹ, in Nigeria’s Osun state, Adewole would help her mother prepare and sell ofada rice — a rice dish topped with a crayfish and pepper stew that now serves at the restaurant, using the same recipe. Soon after she settled in San José, she decided to fill the culinary void by making Nigerian plates to share with coworkers and friends from church. By 2021, she was catering for events with as many as 300 guests. So, after much encouragement from her customers, she decided to open the restaurant while still juggling her day job as a registered nurse at the Stanford hospital. \u003c/p>\n\n\n\n\n\n\u003cp>Over the course of several visits to the restaurant, the jollof rice was my favorite dish on the menu. The tomato-infused rice tastes like it was cooked over a campfire due to its bold, smoky aroma — a \u003ca href=\"https://www.kqed.org/arts/13960580/jollof-festival-oakland-west-african-food-competition-nigerian-sierra-leone\">signature of the Nigerian style\u003c/a>. \u003c/p>\n\n\n\n\u003cp>\u003c/p>\u003c/div>",
"attributes": {
"named": {},
"numeric": []
}
},
{
"type": "component",
"content": "",
"name": "ad",
"attributes": {
"named": {
"label": "fullwidth"
},
"numeric": [
"fullwidth"
]
}
},
{
"type": "contentString",
"content": "\u003cdiv class=\"post-body\">\u003cp>\u003c/p>\n\u003cp>“A lot of people think jollof rice can only be smoky if they burn it,” Adewole says. “But it doesn’t have to be like that.” \u003c/p>\n\n\n\n\u003cp>Instead, Adewole develops layers of flavor by using a thoughtfully curated selection of smoked and toasted spices including ginger, garlic, rosemary, nutmeg and star anise. The jollof I ordered came with fried plantains and a maroon-colored chicken leg that melted off the bone. You can swap out the poultry for goat, fish or beef.\u003c/p>\n\n\n\n\u003cfigure class=\"wp-block-image size-full\">\u003cimg loading=\"lazy\" decoding=\"async\" width=\"2000\" height=\"1333\" src=\"https://cdn.kqed.org/wp-content/uploads/sites/2/2026/06/Egusi-soup-and-fufu.jpg\" alt=\"A bowl of egusi soup, served with a white ball of pounded yam on the side.\" class=\"wp-image-13990683\" srcset=\"https://cdn.kqed.org/wp-content/uploads/sites/2/2026/06/Egusi-soup-and-fufu.jpg 2000w, https://cdn.kqed.org/wp-content/uploads/sites/2/2026/06/Egusi-soup-and-fufu-160x107.jpg 160w, https://cdn.kqed.org/wp-content/uploads/sites/2/2026/06/Egusi-soup-and-fufu-768x512.jpg 768w, https://cdn.kqed.org/wp-content/uploads/sites/2/2026/06/Egusi-soup-and-fufu-1536x1024.jpg 1536w\" sizes=\"auto, (max-width: 2000px) 100vw, 2000px\">\u003cfigcaption class=\"wp-element-caption\">The restaurant’s calling card is its selection of 14 different Nigerian soups. The egusi, pictured here with a ball of pounded yam, is the most popular. (Octavio Peña)\u003c/figcaption>\u003c/figure>\n\n\n\n\u003cp>Most of FolaFela’s soups, on the other hand, highlight leaves and seeds native to Nigeria. The most popular one is a Yoruba dish called egusi soup, named after the dried ground melon seeds used to thicken it. Adewole’s version is specked with bitter leafy greens and served with poundo yam, a type of swallow made with yam flour. The stretchy, pillowy dough balls have been trending on social media lately, as \u003ca href=\"https://www.youtube.com/shorts/yo2E1uszAFs\">mukbang influencers\u003c/a> post videos of themselves dunking them in stew and theatrically chewing on each sauce-soaked bite. \u003c/p>\n\n\n\n\u003cp>Adewole decided to focus on soups because it’s a food that’s deeply nostalgic for West African people, in particular. Since the soups are often associated with celebrations and other large gatherings, she offers them in increments of up to four liters. \u003c/p>\n\n\n\n\u003cp>“I have customers come in asking for particular soups that their grandma used to make,” Adewole says. Meanwhile, she recognizes that other customers might be having Nigerian cuisine for the very first time. For those newcomers, FolaFela can be a great place to learn about the origins of the food. \u003c/p>\n\n\n\n\u003cfigure class=\"wp-block-image size-full\">\u003cimg loading=\"lazy\" decoding=\"async\" width=\"2000\" height=\"1333\" src=\"https://cdn.kqed.org/wp-content/uploads/sites/2/2026/06/Folake-Adewole.jpg\" alt=\"A smiling Nigerian woman poses in front of an orange wall inside her restaurant.\" class=\"wp-image-13990684\" srcset=\"https://cdn.kqed.org/wp-content/uploads/sites/2/2026/06/Folake-Adewole.jpg 2000w, https://cdn.kqed.org/wp-content/uploads/sites/2/2026/06/Folake-Adewole-160x107.jpg 160w, https://cdn.kqed.org/wp-content/uploads/sites/2/2026/06/Folake-Adewole-768x512.jpg 768w, https://cdn.kqed.org/wp-content/uploads/sites/2/2026/06/Folake-Adewole-1536x1024.jpg 1536w\" sizes=\"auto, (max-width: 2000px) 100vw, 2000px\">\u003cfigcaption class=\"wp-element-caption\">Folake Adewole has been cooking Nigerian food for friends and coworkers ever since she moved to San José in 2017. (Octavio Peña)\u003c/figcaption>\u003c/figure>\n\n\n\n\u003cp>“A lot of Africans in the Bay Area are very scattered,” Adewole says. She sees her restaurant as a place for the community to congregate — where African immigrants can have conversations about what part of the continent their family is from and chat about their regional dishes. The grocery store section provides another point of connection, as Adewole travels to Los Angeles and Sacramento to stock the shop’s pantry and freezers with hard-to-find flours and spices. Her largest struggle is sourcing frozen and dried kote fish, or horse mackerel, which she serves fried and in stews.\u003c/p>\n\n\n\n\u003cp>Although FolaFela is still in its early stages, Adewole has ambitious ideas for where it’s heading next. Eventually, she hopes to open a second FolaFela location somewhere near Palo Alto to make Nigerian food more accessible to people on the Peninsula. And she is developing recipes to expand her menu to include dishes from other Nigerian ethnic groups like the Hausa. \u003c/p>\n\n\n\n\u003cp>“What I would love to do is bring more Igbo food onto my menu,” Adewole says. “I’m thinking of doing a white soup with cocoyam.”\u003c/p>\n\n\n\n\u003chr class=\"wp-block-separator has-alpha-channel-opacity\">\n\n\n\n\u003cp>\u003ca href=\"https://www.instagram.com/folafela001/\">\u003cem>FolaFela\u003c/em>\u003c/a>\u003cem> is open Tuesday to Saturday 11:30–9 p.m., and Sunday 3 p.m.–9 p.m. at 2762 Aborn Rd. in San José.\u003c/em>\u003c/p>\n\n\n\n\u003cp>\u003c/p>\n\u003cp>\u003c/p>\n\n\u003c/div>\u003c/p>",
"attributes": {
"named": {},
"numeric": []
}
}
],
"link": "/arts/13990663/san-jose-first-nigerian-restaurant-folafela-jollof-egusi-soup",
"authors": [
"11903"
],
"categories": [
"arts_1",
"arts_12276"
],
"tags": [
"arts_2438",
"arts_10278",
"arts_1297",
"arts_1084",
"arts_21774"
],
"featImg": "arts_13990675",
"label": "source_arts_13990663"
},
"news_12086417": {
"type": "posts",
"id": "news_12086417",
"meta": {
"index": "posts_1716263798",
"site": "news",
"id": "12086417",
"score": null,
"sort": [
1781031600000
]
},
"guestAuthors": [],
"slug": "as-calfresh-guidelines-expand-where-can-students-who-rely-on-school-meals-go",
"title": "As CalFresh Guidelines Expand, Where Can Students Who Rely on School Meals Go?",
"publishDate": 1781031600,
"format": "standard",
"headTitle": "As CalFresh Guidelines Expand, Where Can Students Who Rely on School Meals Go? | KQED",
"labelTerm": {
"site": "news"
},
"content": "\u003cp>This June, California started enforcing\u003ca href=\"https://www.kqed.org/news/12083922/calfresh-snap-new-work-requirements-rules-2026-hr1-eligibility-who-is-exempt-food-stamps\"> new and expanded federal guidelines\u003c/a> that will now impact the CalFresh eligibility of households with a child 14 and older, right as the school year ends.\u003c/p>\n\u003cp>The timing has prompted food advocates to remind parents and caregivers that there \u003cem>are \u003c/em>meal options for students throughout summer break.\u003c/p>\n\u003cp>Since the pandemic, California has been under a statewide waiver that exempted residents from completing a certain number of work hours to be eligible for the Supplemental Nutrition Assistance Program — known as SNAP nationwide and CalFresh in the state.\u003c/p>\n\u003cp>[ad fullwidth]\u003c/p>\n\u003cp>Now — because of H.R. 1, \u003ca href=\"https://www.kqed.org/news/12083922/calfresh-snap-new-work-requirements-rules-2026-hr1-eligibility-who-is-exempt-food-stamps\">President Donald Trump’s so-called “One Big Beautiful Bill”\u003c/a> — the state must bring back the requirement that some CalFresh recipients must work \u003cem>and \u003c/em>show proof that they are working 20 hours a week, or an average of 80 hours a month. For those who don’t fulfill the requirements, a stark reduction in food benefits will ensue.\u003c/p>\n\u003cp>“Not only does it add in the onerous work requirement — a lot of people who are already receiving CalFresh are working — but now they have this bureaucratic paperwork to provide,” said Kathy Saile, the state director of California’s branch of the national nonprofit No Kid Hungry. “There’s some real concern that people could lose benefits just because they couldn’t figure out the paperwork.”\u003c/p>\n\u003cul>\n\u003cli>\u003cstrong>Jump to: \u003ca href=\"#WherecanteenagersandyoungpeoplefindmealsintheBayAreathissummer\">Where can teenagers and young people find meals in the Bay Area this summer?\u003c/a>\u003c/strong>\u003c/li>\n\u003c/ul>\n\u003cp>H.R.1’s impact, which also takes away food benefits for \u003ca href=\"https://www.kqed.org/news/12078168/april-1-snap-food-stamps-cal-fresh-eligibility-change-2026-immigrants-refugees-asylum-seekers-recertify-where-to-find-food-bank\">some humanitarian immigrants\u003c/a>, is apparent, according to \u003ca href=\"https://www.cbpp.org/research/food-assistance/snap-tracker-people-are-losing-food-assistance-as-the-republican-megabill\">federal data analyzed\u003c/a> by the nonpartisan research group Center on Budget and Policy Priorities.\u003c/p>\n\u003cp>The center estimated that nationwide, SNAP participation fell by almost 9% — more than 3.5 million people — between H.R.1’s start in July 2025 and February 2026.\u003c/p>\n\u003cp>Along with being stricter about implementing the work hours, the bill expands the age range. Now, barring exemptions, CalFresh recipients between the ages of 18 and 64 who do not live with a child under the age of 14 are required to fulfill the hours.\u003c/p>\n\u003cfigure id=\"attachment_12039841\" class=\"wp-caption aligncenter\" style=\"max-width: 2000px\">\u003cimg loading=\"lazy\" decoding=\"async\" class=\"size-full wp-image-12039841\" src=\"https://cdn.kqed.org/wp-content/uploads/sites/10/2025/05/OaklandSchoolChildren.jpg\" alt=\"\" width=\"2000\" height=\"1364\" srcset=\"https://cdn.kqed.org/wp-content/uploads/sites/10/2025/05/OaklandSchoolChildren.jpg 2000w, https://cdn.kqed.org/wp-content/uploads/sites/10/2025/05/OaklandSchoolChildren-800x546.jpg 800w, https://cdn.kqed.org/wp-content/uploads/sites/10/2025/05/OaklandSchoolChildren-1020x696.jpg 1020w, https://cdn.kqed.org/wp-content/uploads/sites/10/2025/05/OaklandSchoolChildren-160x109.jpg 160w, https://cdn.kqed.org/wp-content/uploads/sites/10/2025/05/OaklandSchoolChildren-1536x1048.jpg 1536w, https://cdn.kqed.org/wp-content/uploads/sites/10/2025/05/OaklandSchoolChildren-1920x1309.jpg 1920w\" sizes=\"auto, (max-width: 2000px) 100vw, 2000px\">\u003cfigcaption class=\"wp-caption-text\">First-grade students grab lunch in the cafeteria at Franklin Elementary School on Sept. 7, 2018, in Oakland, California. \u003ccite>(Liz Hafalia/The San Francisco Chronicle via Getty Images)\u003c/cite>\u003c/figcaption>\u003c/figure>\n\u003cp>Previously, the age range was between 18 and \u003cem>55\u003c/em>. Also notable is that, in the past, parents or caregivers with a child aged 17 or younger were also exempt.\u003c/p>\n\u003cp>The new guidelines do not kick in right away for all 5.5 million CalFresh recipients; they apply to new applicants and people who need to recertify their eligibility.\u003c/p>\n\u003cp>The rule changes \u003cem>also \u003c/em>do not mean that if a parent loses their benefits, their children will too.\u003c/p>\n\u003cfigure id=\"attachment_12078496\" class=\"wp-caption aligncenter\" style=\"max-width: 2000px\">\u003cimg loading=\"lazy\" decoding=\"async\" class=\"size-full wp-image-12078496\" src=\"https://cdn.kqed.org/wp-content/uploads/sites/10/2026/04/GroceriesAP.jpg\" alt=\"\" width=\"2000\" height=\"1333\" srcset=\"https://cdn.kqed.org/wp-content/uploads/sites/10/2026/04/GroceriesAP.jpg 2000w, https://cdn.kqed.org/wp-content/uploads/sites/10/2026/04/GroceriesAP-160x107.jpg 160w, https://cdn.kqed.org/wp-content/uploads/sites/10/2026/04/GroceriesAP-1536x1024.jpg 1536w\" sizes=\"auto, (max-width: 2000px) 100vw, 2000px\">\u003cfigcaption class=\"wp-caption-text\">A California’s SNAP benefits shopper pushes a cart through a supermarket in Bellflower, California, on Feb. 13, 2023. \u003ccite>(Allison Dinner/AP Photo)\u003c/cite>\u003c/figcaption>\u003c/figure>\n\u003cp>However, “what we’re concerned about is that the parent or caregiver may not understand that the whole household is not losing benefits, or may not be able to get the paperwork and the continued recertification for their children,” Saile said.\u003c/p>\n\u003cp>This potential loss for the child may come during the summer, which she said “can be the hungriest time of the year, because they don’t have access to school meals.”\u003c/p>\n\u003cp>Read more for summertime food options for kids and teens in the Bay Area. Keep in mind that this guide focuses on students 18 and under; there is \u003ca href=\"https://www.sfhsa.org/services/jobs/keep-benefits\">a work hour exemption for eligible college students\u003c/a> who are enrolled at least half-time.\u003c/p>\n\u003ch2>\u003ca id=\"WherecanteenagersandyoungpeoplefindmealsintheBayAreathissummer\">\u003c/a>Where can teenagers and young people go for meals?\u003c/h2>\n\u003cp>\u003cstrong>Make sure your kid is still on CalFresh\u003c/strong>\u003c/p>\n\u003cp>If someone is a parent who has been impacted by the new work hour guidelines, Saile recommended that they “make sure that they’re staying in close contact with their caseworker.”[aside postID=news_12083922 hero='https://cdn.kqed.org/wp-content/uploads/sites/10/2025/12/CalFreshGetty.jpg']“Going online and making sure they’re not missing any deadlines or recertification appointments, and just paying attention to those details,” she added.\u003c/p>\n\u003cp>Saile pointed to recent research from the Center on Budget and Policy Priorities, which found that among 12 states with available data, \u003ca href=\"https://www.cbpp.org/blog/sharp-drop-in-number-of-children-receiving-snap-food-assistance-under-new-federal-law\">“the number of children receiving SNAP food assistance has fallen by more than 700,000”\u003c/a> since H.R.1 in July 2025. The states include Texas, Ohio, Michigan and Massachusetts.\u003c/p>\n\u003cp>“Even though kids weren’t the stated target of H R.1, it’s certainly resulting in loss of food assistance for children,” she said.\u003c/p>\n\u003cp>There is “also the chilling effect,” she said. “There are a lot of families who are afraid to participate in programs right now.”\u003c/p>\n\u003cp>\u003cstrong>Receive your SUN Bucks card\u003c/strong>\u003c/p>\n\u003cp>Saile said children on CalFresh are automatically enrolled in other programs like \u003ca href=\"https://cdss.ca.gov/sun-bucks\">SUN Bucks\u003c/a>, where a child can get $120 to buy food during the summer.\u003c/p>\n\u003cp>The card can be used at places like \u003ca href=\"https://www.cdss.ca.gov/sun-bucks/faq\">grocery stores, farmers’ markets, Walmart and Amazon\u003c/a>. According to an FAQ from the state, people can use the card to buy food like fruits, vegetables, dairy and meat. However, the card — \u003ca href=\"https://www.fns.usda.gov/snap/eligible-food-items\">like most EBT cards\u003c/a> — cannot be used to buy things like \u003ca href=\"https://www.cdss.ca.gov/sun-bucks/faq\">“hot foods, pet foods, cleaning or household supplies, personal hygiene items, or medicine.”\u003c/a>\u003c/p>\n\u003cp>If the child is on CalFresh, the card “will just come automatically in the mail,” Saile said. “The parent or caregiver just creates a PIN for the card and then can use the card throughout the summer.”\u003c/p>\n\u003cfigure id=\"attachment_12086650\" class=\"wp-caption alignleft\" style=\"max-width: 1209px\">\u003cimg loading=\"lazy\" decoding=\"async\" class=\"size-full wp-image-12086650\" src=\"https://cdn.kqed.org/wp-content/uploads/sites/10/2026/06/SUN-BUCKS.jpg\" alt=\"\" width=\"1209\" height=\"385\" srcset=\"https://cdn.kqed.org/wp-content/uploads/sites/10/2026/06/SUN-BUCKS.jpg 1209w, https://cdn.kqed.org/wp-content/uploads/sites/10/2026/06/SUN-BUCKS-160x51.jpg 160w\" sizes=\"auto, (max-width: 1209px) 100vw, 1209px\">\u003cfigcaption class=\"wp-caption-text\">A Sun Bucks card.\u003c/figcaption>\u003c/figure>\n\u003cp>If a child is not enrolled in CalFresh but is income-eligible (\u003ca href=\"https://www.summerebt.org/faq\">in households at or under 185% of federal poverty guidelines\u003c/a>; \u003ca href=\"https://www.cde.ca.gov/ls/nu/rs/scales2526.asp\">see California’s breakdown on its website\u003c/a>), Saile said the parent or caregiver should contact their school and ask for \u003ca href=\"https://www.cde.ca.gov/ls/nu/sunbucks.asp#:~:text=What%20is%20the%20Universal%20Benefits,for%202025%20SUN%20Bucks%20eligibility.\">a universal benefit application form\u003c/a>. The form must be \u003ca href=\"https://www.cdss.ca.gov/sun-bucks/faq\">submitted back to the school\u003c/a>.\u003c/p>\n\u003cp>Parents can do that anytime during the summer before Aug. 31, Saile said.\u003c/p>\n\u003cp>When the card arrives, it may show up in a plain white envelope “for security reasons,” she said. “And people don’t know what it is. They think it might be a scam.”\u003c/p>\n\u003cp>To recognize it, look for the card’s logo: blocky capitalized letters in orange, yellow and teal that say SUN Bucks. There is a little image of a sun with a knife and fork in the corner.\u003c/p>\n\u003cp>For more information, people can call the SUN Bucks hotline at (877) 328-9677, which also has assistance in different languages.\u003c/p>\n\u003cp>\u003cstrong>Find nearby Summer Meals programs (also known as SUN Meals)\u003c/strong>\u003c/p>\n\u003cp>\u003ca href=\"https://state.nokidhungry.org/california/ca-summer-food-resources/\">SUN Meals\u003c/a> are \u003cem>free \u003c/em>meals available to kids 18 and under at places like schools, libraries and parks throughout the summer.\u003c/p>\n\u003cp>Depending on the location, kids are \u003ca href=\"https://state.nokidhungry.org/program-toolkit/#5\">required\u003c/a> to either eat on-site or take a meal home with them. Some locations will not allow kids to take the meals home with them or have a parent pick up their meal.\u003c/p>\n\u003cp>According to \u003ca href=\"https://state.nokidhungry.org/program-toolkit/#5\">the No Kid Hungry campaign\u003c/a>, no application is required, and no proof of income, residency or citizenship will be requested.\u003c/p>\n\u003cp>\u003c!-- iframe plugin v.4.3 wordpress.org/plugins/iframe/ -->\u003cbr>\n\u003ciframe loading=\"lazy\" width=\"900\" height=\"600\" frameborder=\"0\" src=\"https://arcg.is/1Han113\" scrolling=\"yes\" class=\"iframe-class\">\u003c/iframe>\u003c/p>\n\u003cp>The United States Department of Agriculture has \u003ca href=\"https://experience.arcgis.com/experience/bded45358b994a8fa009e1f88133eb03?org=USDA-FNS\">a comprehensive and regularly updated map of locations\u003c/a> that young people can visit for SUN Meals.\u003c/p>\n\u003cp>According to the USDA website, \u003ca href=\"https://www.fns.usda.gov/sfsp/faqs\">“at most sites, children receive either one or two reimbursable meals each day.”\u003c/a> Meals tend to follow USDA nutrition guidelines, including milk, vegetables, fruit and grain. An example of a meal could be a \u003ca href=\"https://state.nokidhungry.org/program-toolkit/#5\">turkey sandwich on wheat bread with an apple and salad\u003c/a>.\u003c/p>\n\u003cp>The No Kid Hungry California campaign suggests \u003ca href=\"https://state.nokidhungry.org/california/ca-summer-food-resources/\">on its website\u003c/a> that families double-check the hours of the meal site before heading out to make sure the information is up to date. Families can also call \u003ca href=\"https://www.fns.usda.gov/national-hunger-hotline\">the National Hunger Hotline at 1-866-348-6479\u003c/a> to find a location closest to them.\u003c/p>\n\u003cp>You can also download the state’s mobile app, \u003ca href=\"https://www.cde.ca.gov/re/mo/cameals.asp\">CA Meals for Kids\u003c/a>.\u003c/p>\n\u003cp>\u003cstrong>Get familiar with Bay Area food banks \u003c/strong>\u003c/p>\n\u003cp>KQED has a thorough guide on using food banks or food pantries near you in both \u003ca href=\"https://www.kqed.org/news/12061440/calfresh-snap-ebt-shutdown-find-food-banks-near-me-san-francisco-bay-area-alameda-oakland-contra-costa-newsom-national-guard\">English\u003c/a> and \u003ca href=\"https://www.kqed.org/news/12062427/como-encontrar-un-banco-de-alimentos-o-despensa-cerca-de-usted-en-el-area-de-la-bahia\">Spanish\u003c/a>. The big takeaways:\u003c/p>\n\u003cp>Major food banks, like the \u003ca href=\"https://www.sfmfoodbank.org/workplace-giving/?ea.tracking.id=DigAd2526-PMG&utm_source=google&utm_medium=pmax&utm_campaign=evergreen&utm_content=workplacegiving&ea.tracking.id=DigAd2526-PMG&utm_source=google&utm_medium=pmax&utm_campaign=evergreen&gad_source=1&gad_campaignid=22903428179&gbraid=0AAAAACKCveNd07Igg9N0gD73ISiw1-uWD&gclid=CjwKCAjwpOfHBhAxEiwAm1SwErwV4xaFN_FEK7A9GBHjFfCEezDoE97Ft7G8ZkERCFXMNDrJVQO7YhoCKBsQAvD_BwE\">SF-Marin Food Bank\u003c/a>, the \u003ca href=\"https://www.cafoodbanks.org/our-members/\">California Association of Food Banks\u003c/a> or the \u003ca href=\"https://www.foodbankccs.org/find-food/foodbycity/?_gl=1*3ajdlo*_up*MQ..*_ga*MjA5ODkyMDQ5NS4xNzYxMjQ2NjU0*_ga_8BLR9BK6YN*czE3NjEyNDY2NTMkbzEkZzAkdDE3NjEyNDY2NTMkajYwJGwwJGgw\">Alameda County Community Food Bank\u003c/a>, will likely have \u003ca href=\"https://foodlocator.sfmfoodbank.org/?_gl=1*1lbew87*_gcl_au*MTkzNzUwMDUyLjE3NjEyNDUwMzE.&_ga=2.54192875.2143041145.1761245031-1508876033.1761245031\">a tool online that can help you locate food resources\u003c/a> near you. These maps or search engines can list locations ranging from large operations to small community fridges.\u003c/p>\n\u003cp>You can also call \u003ca href=\"https://211ca.org/\">the 211 state hotline \u003c/a>for more information.\u003c/p>\n\u003cfigure id=\"attachment_12064446\" class=\"wp-caption aligncenter\" style=\"max-width: 2000px\">\u003cimg loading=\"lazy\" decoding=\"async\" class=\"size-full wp-image-12064446\" src=\"https://cdn.kqed.org/wp-content/uploads/sites/10/2025/11/251113-SNAPDELAYSFEATURE00936_TV-KQED.jpg\" alt=\"\" width=\"2000\" height=\"1333\" srcset=\"https://cdn.kqed.org/wp-content/uploads/sites/10/2025/11/251113-SNAPDELAYSFEATURE00936_TV-KQED.jpg 2000w, https://cdn.kqed.org/wp-content/uploads/sites/10/2025/11/251113-SNAPDELAYSFEATURE00936_TV-KQED-160x107.jpg 160w, https://cdn.kqed.org/wp-content/uploads/sites/10/2025/11/251113-SNAPDELAYSFEATURE00936_TV-KQED-1536x1024.jpg 1536w\" sizes=\"auto, (max-width: 2000px) 100vw, 2000px\">\u003cfigcaption class=\"wp-caption-text\">Shopping carts are parked around the Alameda Food Bank on Nov. 14, 2025. \u003ccite>(Tâm Vũ/KQED)\u003c/cite>\u003c/figcaption>\u003c/figure>\n\u003cp>Once you find a spot, be sure to check out the food bank or pantry online before heading out. Note what hours they are open, and for how long. Some locations are open to anyone and to walk-ins, but some may require people to register for a spot beforehand or live in a specific zip code.\u003c/p>\n\u003cp>Many food banks serve people regardless of immigration status. For example, the \u003ca href=\"https://www.sfmfoodbank.org/find-food/\">SF-Marin Food Bank states on its website\u003c/a> that it “is committed to serving residents regardless of their immigration status or identity” and, as a non-government agency, does “not collect the immigration status of participants.”\u003c/p>\n\u003cp>But food advocates suggest double-checking by calling the food bank and seeing if it has reporting requirements.\u003c/p>\n\u003cp>[ad floatright]\u003c/p>\n",
"blocks": [],
"excerpt": "With summer break on the way and CalFresh’s new, expanded federal guidelines in place, advocates say there are resources available to support students during what some call “the hungriest time of the year.”",
"status": "publish",
"parent": 0,
"modified": 1781029745,
"stats": {
"hasAudio": false,
"hasVideo": false,
"hasChartOrMap": true,
"iframeSrcs": [
"https://arcg.is/1Han113"
],
"hasGoogleForm": false,
"hasGallery": false,
"hasHearkenModule": false,
"hasPolis": false,
"paragraphCount": 46,
"wordCount": 1605
},
"headData": {
"title": "As CalFresh Guidelines Expand, Where Can Students Who Rely on School Meals Go? | KQED",
"description": "With summer break on the way and CalFresh’s new, expanded federal guidelines in place, advocates say there are resources available to support students during what some call “the hungriest time of the year.”",
"ogTitle": "",
"ogDescription": "",
"ogImgId": "",
"twTitle": "",
"twDescription": "",
"twImgId": "",
"schema": {
"@context": "https://schema.org",
"@type": "NewsArticle",
"headline": "As CalFresh Guidelines Expand, Where Can Students Who Rely on School Meals Go?",
"datePublished": "2026-06-09T12:00:00-07:00",
"dateModified": "2026-06-09T11:29:05-07:00",
"image": "https://cdn.kqed.org/wp-content/uploads/2020/02/KQED-OG-Image@1x.png",
"isAccessibleForFree": "True",
"publisher": {
"@type": "NewsMediaOrganization",
"@id": "https://www.kqed.org/#organization",
"name": "KQED",
"logo": "https://cdn.kqed.org/wp-content/uploads/2020/02/KQED-OG-Image@1x.png",
"url": "https://www.kqed.org",
"sameAs": [
"https://www.facebook.com/KQED",
"https://twitter.com/KQED",
"https://www.instagram.com/kqed/",
"https://www.tiktok.com/@kqedofficial",
"https://www.linkedin.com/company/kqed",
"https://www.youtube.com/channel/UCeC0IOo7i1P_61zVUWbJ4nw"
]
}
}
},
"primaryCategory": {
"termId": 34168,
"slug": "guides-and-explainers",
"name": "Guides and Explainers"
},
"sticky": false,
"templateType": "standard",
"featuredImageType": "standard",
"excludeFromSiteSearch": "Include",
"articleAge": "0",
"path": "/news/12086417/as-calfresh-guidelines-expand-where-can-students-who-rely-on-school-meals-go",
"audioTrackLength": null,
"parsedContent": [
{
"type": "contentString",
"content": "\u003cdiv class=\"post-body\">\u003cp>\u003cp>This June, California started enforcing\u003ca href=\"https://www.kqed.org/news/12083922/calfresh-snap-new-work-requirements-rules-2026-hr1-eligibility-who-is-exempt-food-stamps\"> new and expanded federal guidelines\u003c/a> that will now impact the CalFresh eligibility of households with a child 14 and older, right as the school year ends.\u003c/p>\n\u003cp>The timing has prompted food advocates to remind parents and caregivers that there \u003cem>are \u003c/em>meal options for students throughout summer break.\u003c/p>\n\u003cp>Since the pandemic, California has been under a statewide waiver that exempted residents from completing a certain number of work hours to be eligible for the Supplemental Nutrition Assistance Program — known as SNAP nationwide and CalFresh in the state.\u003c/p>\n\u003cp>\u003c/p>\u003c/div>",
"attributes": {
"named": {},
"numeric": []
}
},
{
"type": "component",
"content": "",
"name": "ad",
"attributes": {
"named": {
"label": "fullwidth"
},
"numeric": [
"fullwidth"
]
}
},
{
"type": "contentString",
"content": "\u003cdiv class=\"post-body\">\u003cp>\u003c/p>\n\u003cp>Now — because of H.R. 1, \u003ca href=\"https://www.kqed.org/news/12083922/calfresh-snap-new-work-requirements-rules-2026-hr1-eligibility-who-is-exempt-food-stamps\">President Donald Trump’s so-called “One Big Beautiful Bill”\u003c/a> — the state must bring back the requirement that some CalFresh recipients must work \u003cem>and \u003c/em>show proof that they are working 20 hours a week, or an average of 80 hours a month. For those who don’t fulfill the requirements, a stark reduction in food benefits will ensue.\u003c/p>\n\u003cp>“Not only does it add in the onerous work requirement — a lot of people who are already receiving CalFresh are working — but now they have this bureaucratic paperwork to provide,” said Kathy Saile, the state director of California’s branch of the national nonprofit No Kid Hungry. “There’s some real concern that people could lose benefits just because they couldn’t figure out the paperwork.”\u003c/p>\n\u003cul>\n\u003cli>\u003cstrong>Jump to: \u003ca href=\"#WherecanteenagersandyoungpeoplefindmealsintheBayAreathissummer\">Where can teenagers and young people find meals in the Bay Area this summer?\u003c/a>\u003c/strong>\u003c/li>\n\u003c/ul>\n\u003cp>H.R.1’s impact, which also takes away food benefits for \u003ca href=\"https://www.kqed.org/news/12078168/april-1-snap-food-stamps-cal-fresh-eligibility-change-2026-immigrants-refugees-asylum-seekers-recertify-where-to-find-food-bank\">some humanitarian immigrants\u003c/a>, is apparent, according to \u003ca href=\"https://www.cbpp.org/research/food-assistance/snap-tracker-people-are-losing-food-assistance-as-the-republican-megabill\">federal data analyzed\u003c/a> by the nonpartisan research group Center on Budget and Policy Priorities.\u003c/p>\n\u003cp>The center estimated that nationwide, SNAP participation fell by almost 9% — more than 3.5 million people — between H.R.1’s start in July 2025 and February 2026.\u003c/p>\n\u003cp>Along with being stricter about implementing the work hours, the bill expands the age range. Now, barring exemptions, CalFresh recipients between the ages of 18 and 64 who do not live with a child under the age of 14 are required to fulfill the hours.\u003c/p>\n\u003cfigure id=\"attachment_12039841\" class=\"wp-caption aligncenter\" style=\"max-width: 2000px\">\u003cimg loading=\"lazy\" decoding=\"async\" class=\"size-full wp-image-12039841\" src=\"https://cdn.kqed.org/wp-content/uploads/sites/10/2025/05/OaklandSchoolChildren.jpg\" alt=\"\" width=\"2000\" height=\"1364\" srcset=\"https://cdn.kqed.org/wp-content/uploads/sites/10/2025/05/OaklandSchoolChildren.jpg 2000w, https://cdn.kqed.org/wp-content/uploads/sites/10/2025/05/OaklandSchoolChildren-800x546.jpg 800w, https://cdn.kqed.org/wp-content/uploads/sites/10/2025/05/OaklandSchoolChildren-1020x696.jpg 1020w, https://cdn.kqed.org/wp-content/uploads/sites/10/2025/05/OaklandSchoolChildren-160x109.jpg 160w, https://cdn.kqed.org/wp-content/uploads/sites/10/2025/05/OaklandSchoolChildren-1536x1048.jpg 1536w, https://cdn.kqed.org/wp-content/uploads/sites/10/2025/05/OaklandSchoolChildren-1920x1309.jpg 1920w\" sizes=\"auto, (max-width: 2000px) 100vw, 2000px\">\u003cfigcaption class=\"wp-caption-text\">First-grade students grab lunch in the cafeteria at Franklin Elementary School on Sept. 7, 2018, in Oakland, California. \u003ccite>(Liz Hafalia/The San Francisco Chronicle via Getty Images)\u003c/cite>\u003c/figcaption>\u003c/figure>\n\u003cp>Previously, the age range was between 18 and \u003cem>55\u003c/em>. Also notable is that, in the past, parents or caregivers with a child aged 17 or younger were also exempt.\u003c/p>\n\u003cp>The new guidelines do not kick in right away for all 5.5 million CalFresh recipients; they apply to new applicants and people who need to recertify their eligibility.\u003c/p>\n\u003cp>The rule changes \u003cem>also \u003c/em>do not mean that if a parent loses their benefits, their children will too.\u003c/p>\n\u003cfigure id=\"attachment_12078496\" class=\"wp-caption aligncenter\" style=\"max-width: 2000px\">\u003cimg loading=\"lazy\" decoding=\"async\" class=\"size-full wp-image-12078496\" src=\"https://cdn.kqed.org/wp-content/uploads/sites/10/2026/04/GroceriesAP.jpg\" alt=\"\" width=\"2000\" height=\"1333\" srcset=\"https://cdn.kqed.org/wp-content/uploads/sites/10/2026/04/GroceriesAP.jpg 2000w, https://cdn.kqed.org/wp-content/uploads/sites/10/2026/04/GroceriesAP-160x107.jpg 160w, https://cdn.kqed.org/wp-content/uploads/sites/10/2026/04/GroceriesAP-1536x1024.jpg 1536w\" sizes=\"auto, (max-width: 2000px) 100vw, 2000px\">\u003cfigcaption class=\"wp-caption-text\">A California’s SNAP benefits shopper pushes a cart through a supermarket in Bellflower, California, on Feb. 13, 2023. \u003ccite>(Allison Dinner/AP Photo)\u003c/cite>\u003c/figcaption>\u003c/figure>\n\u003cp>However, “what we’re concerned about is that the parent or caregiver may not understand that the whole household is not losing benefits, or may not be able to get the paperwork and the continued recertification for their children,” Saile said.\u003c/p>\n\u003cp>This potential loss for the child may come during the summer, which she said “can be the hungriest time of the year, because they don’t have access to school meals.”\u003c/p>\n\u003cp>Read more for summertime food options for kids and teens in the Bay Area. Keep in mind that this guide focuses on students 18 and under; there is \u003ca href=\"https://www.sfhsa.org/services/jobs/keep-benefits\">a work hour exemption for eligible college students\u003c/a> who are enrolled at least half-time.\u003c/p>\n\u003ch2>\u003ca id=\"WherecanteenagersandyoungpeoplefindmealsintheBayAreathissummer\">\u003c/a>Where can teenagers and young people go for meals?\u003c/h2>\n\u003cp>\u003cstrong>Make sure your kid is still on CalFresh\u003c/strong>\u003c/p>\n\u003cp>If someone is a parent who has been impacted by the new work hour guidelines, Saile recommended that they “make sure that they’re staying in close contact with their caseworker.”\u003c/p>\u003c/div>",
"attributes": {
"named": {},
"numeric": []
}
},
{
"type": "component",
"content": "",
"name": "aside",
"attributes": {
"named": {
"postid": "news_12083922",
"hero": "https://cdn.kqed.org/wp-content/uploads/sites/10/2025/12/CalFreshGetty.jpg",
"label": ""
},
"numeric": []
}
},
{
"type": "contentString",
"content": "\u003cdiv class=\"post-body\">\u003cp>“Going online and making sure they’re not missing any deadlines or recertification appointments, and just paying attention to those details,” she added.\u003c/p>\n\u003cp>Saile pointed to recent research from the Center on Budget and Policy Priorities, which found that among 12 states with available data, \u003ca href=\"https://www.cbpp.org/blog/sharp-drop-in-number-of-children-receiving-snap-food-assistance-under-new-federal-law\">“the number of children receiving SNAP food assistance has fallen by more than 700,000”\u003c/a> since H.R.1 in July 2025. The states include Texas, Ohio, Michigan and Massachusetts.\u003c/p>\n\u003cp>“Even though kids weren’t the stated target of H R.1, it’s certainly resulting in loss of food assistance for children,” she said.\u003c/p>\n\u003cp>There is “also the chilling effect,” she said. “There are a lot of families who are afraid to participate in programs right now.”\u003c/p>\n\u003cp>\u003cstrong>Receive your SUN Bucks card\u003c/strong>\u003c/p>\n\u003cp>Saile said children on CalFresh are automatically enrolled in other programs like \u003ca href=\"https://cdss.ca.gov/sun-bucks\">SUN Bucks\u003c/a>, where a child can get $120 to buy food during the summer.\u003c/p>\n\u003cp>The card can be used at places like \u003ca href=\"https://www.cdss.ca.gov/sun-bucks/faq\">grocery stores, farmers’ markets, Walmart and Amazon\u003c/a>. According to an FAQ from the state, people can use the card to buy food like fruits, vegetables, dairy and meat. However, the card — \u003ca href=\"https://www.fns.usda.gov/snap/eligible-food-items\">like most EBT cards\u003c/a> — cannot be used to buy things like \u003ca href=\"https://www.cdss.ca.gov/sun-bucks/faq\">“hot foods, pet foods, cleaning or household supplies, personal hygiene items, or medicine.”\u003c/a>\u003c/p>\n\u003cp>If the child is on CalFresh, the card “will just come automatically in the mail,” Saile said. “The parent or caregiver just creates a PIN for the card and then can use the card throughout the summer.”\u003c/p>\n\u003cfigure id=\"attachment_12086650\" class=\"wp-caption alignleft\" style=\"max-width: 1209px\">\u003cimg loading=\"lazy\" decoding=\"async\" class=\"size-full wp-image-12086650\" src=\"https://cdn.kqed.org/wp-content/uploads/sites/10/2026/06/SUN-BUCKS.jpg\" alt=\"\" width=\"1209\" height=\"385\" srcset=\"https://cdn.kqed.org/wp-content/uploads/sites/10/2026/06/SUN-BUCKS.jpg 1209w, https://cdn.kqed.org/wp-content/uploads/sites/10/2026/06/SUN-BUCKS-160x51.jpg 160w\" sizes=\"auto, (max-width: 1209px) 100vw, 1209px\">\u003cfigcaption class=\"wp-caption-text\">A Sun Bucks card.\u003c/figcaption>\u003c/figure>\n\u003cp>If a child is not enrolled in CalFresh but is income-eligible (\u003ca href=\"https://www.summerebt.org/faq\">in households at or under 185% of federal poverty guidelines\u003c/a>; \u003ca href=\"https://www.cde.ca.gov/ls/nu/rs/scales2526.asp\">see California’s breakdown on its website\u003c/a>), Saile said the parent or caregiver should contact their school and ask for \u003ca href=\"https://www.cde.ca.gov/ls/nu/sunbucks.asp#:~:text=What%20is%20the%20Universal%20Benefits,for%202025%20SUN%20Bucks%20eligibility.\">a universal benefit application form\u003c/a>. The form must be \u003ca href=\"https://www.cdss.ca.gov/sun-bucks/faq\">submitted back to the school\u003c/a>.\u003c/p>\n\u003cp>Parents can do that anytime during the summer before Aug. 31, Saile said.\u003c/p>\n\u003cp>When the card arrives, it may show up in a plain white envelope “for security reasons,” she said. “And people don’t know what it is. They think it might be a scam.”\u003c/p>\n\u003cp>To recognize it, look for the card’s logo: blocky capitalized letters in orange, yellow and teal that say SUN Bucks. There is a little image of a sun with a knife and fork in the corner.\u003c/p>\n\u003cp>For more information, people can call the SUN Bucks hotline at (877) 328-9677, which also has assistance in different languages.\u003c/p>\n\u003cp>\u003cstrong>Find nearby Summer Meals programs (also known as SUN Meals)\u003c/strong>\u003c/p>\n\u003cp>\u003ca href=\"https://state.nokidhungry.org/california/ca-summer-food-resources/\">SUN Meals\u003c/a> are \u003cem>free \u003c/em>meals available to kids 18 and under at places like schools, libraries and parks throughout the summer.\u003c/p>\n\u003cp>Depending on the location, kids are \u003ca href=\"https://state.nokidhungry.org/program-toolkit/#5\">required\u003c/a> to either eat on-site or take a meal home with them. Some locations will not allow kids to take the meals home with them or have a parent pick up their meal.\u003c/p>\n\u003cp>According to \u003ca href=\"https://state.nokidhungry.org/program-toolkit/#5\">the No Kid Hungry campaign\u003c/a>, no application is required, and no proof of income, residency or citizenship will be requested.\u003c/p>\n\u003cp>\u003c!-- iframe plugin v.4.3 wordpress.org/plugins/iframe/ -->\u003cbr>\n\u003ciframe loading=\"lazy\" width=\"900\" height=\"600\" frameborder=\"0\" src=\"https://arcg.is/1Han113\" scrolling=\"yes\" class=\"iframe-class\">\u003c/iframe>\u003c/p>\n\u003cp>The United States Department of Agriculture has \u003ca href=\"https://experience.arcgis.com/experience/bded45358b994a8fa009e1f88133eb03?org=USDA-FNS\">a comprehensive and regularly updated map of locations\u003c/a> that young people can visit for SUN Meals.\u003c/p>\n\u003cp>According to the USDA website, \u003ca href=\"https://www.fns.usda.gov/sfsp/faqs\">“at most sites, children receive either one or two reimbursable meals each day.”\u003c/a> Meals tend to follow USDA nutrition guidelines, including milk, vegetables, fruit and grain. An example of a meal could be a \u003ca href=\"https://state.nokidhungry.org/program-toolkit/#5\">turkey sandwich on wheat bread with an apple and salad\u003c/a>.\u003c/p>\n\u003cp>The No Kid Hungry California campaign suggests \u003ca href=\"https://state.nokidhungry.org/california/ca-summer-food-resources/\">on its website\u003c/a> that families double-check the hours of the meal site before heading out to make sure the information is up to date. Families can also call \u003ca href=\"https://www.fns.usda.gov/national-hunger-hotline\">the National Hunger Hotline at 1-866-348-6479\u003c/a> to find a location closest to them.\u003c/p>\n\u003cp>You can also download the state’s mobile app, \u003ca href=\"https://www.cde.ca.gov/re/mo/cameals.asp\">CA Meals for Kids\u003c/a>.\u003c/p>\n\u003cp>\u003cstrong>Get familiar with Bay Area food banks \u003c/strong>\u003c/p>\n\u003cp>KQED has a thorough guide on using food banks or food pantries near you in both \u003ca href=\"https://www.kqed.org/news/12061440/calfresh-snap-ebt-shutdown-find-food-banks-near-me-san-francisco-bay-area-alameda-oakland-contra-costa-newsom-national-guard\">English\u003c/a> and \u003ca href=\"https://www.kqed.org/news/12062427/como-encontrar-un-banco-de-alimentos-o-despensa-cerca-de-usted-en-el-area-de-la-bahia\">Spanish\u003c/a>. The big takeaways:\u003c/p>\n\u003cp>Major food banks, like the \u003ca href=\"https://www.sfmfoodbank.org/workplace-giving/?ea.tracking.id=DigAd2526-PMG&utm_source=google&utm_medium=pmax&utm_campaign=evergreen&utm_content=workplacegiving&ea.tracking.id=DigAd2526-PMG&utm_source=google&utm_medium=pmax&utm_campaign=evergreen&gad_source=1&gad_campaignid=22903428179&gbraid=0AAAAACKCveNd07Igg9N0gD73ISiw1-uWD&gclid=CjwKCAjwpOfHBhAxEiwAm1SwErwV4xaFN_FEK7A9GBHjFfCEezDoE97Ft7G8ZkERCFXMNDrJVQO7YhoCKBsQAvD_BwE\">SF-Marin Food Bank\u003c/a>, the \u003ca href=\"https://www.cafoodbanks.org/our-members/\">California Association of Food Banks\u003c/a> or the \u003ca href=\"https://www.foodbankccs.org/find-food/foodbycity/?_gl=1*3ajdlo*_up*MQ..*_ga*MjA5ODkyMDQ5NS4xNzYxMjQ2NjU0*_ga_8BLR9BK6YN*czE3NjEyNDY2NTMkbzEkZzAkdDE3NjEyNDY2NTMkajYwJGwwJGgw\">Alameda County Community Food Bank\u003c/a>, will likely have \u003ca href=\"https://foodlocator.sfmfoodbank.org/?_gl=1*1lbew87*_gcl_au*MTkzNzUwMDUyLjE3NjEyNDUwMzE.&_ga=2.54192875.2143041145.1761245031-1508876033.1761245031\">a tool online that can help you locate food resources\u003c/a> near you. These maps or search engines can list locations ranging from large operations to small community fridges.\u003c/p>\n\u003cp>You can also call \u003ca href=\"https://211ca.org/\">the 211 state hotline \u003c/a>for more information.\u003c/p>\n\u003cfigure id=\"attachment_12064446\" class=\"wp-caption aligncenter\" style=\"max-width: 2000px\">\u003cimg loading=\"lazy\" decoding=\"async\" class=\"size-full wp-image-12064446\" src=\"https://cdn.kqed.org/wp-content/uploads/sites/10/2025/11/251113-SNAPDELAYSFEATURE00936_TV-KQED.jpg\" alt=\"\" width=\"2000\" height=\"1333\" srcset=\"https://cdn.kqed.org/wp-content/uploads/sites/10/2025/11/251113-SNAPDELAYSFEATURE00936_TV-KQED.jpg 2000w, https://cdn.kqed.org/wp-content/uploads/sites/10/2025/11/251113-SNAPDELAYSFEATURE00936_TV-KQED-160x107.jpg 160w, https://cdn.kqed.org/wp-content/uploads/sites/10/2025/11/251113-SNAPDELAYSFEATURE00936_TV-KQED-1536x1024.jpg 1536w\" sizes=\"auto, (max-width: 2000px) 100vw, 2000px\">\u003cfigcaption class=\"wp-caption-text\">Shopping carts are parked around the Alameda Food Bank on Nov. 14, 2025. \u003ccite>(Tâm Vũ/KQED)\u003c/cite>\u003c/figcaption>\u003c/figure>\n\u003cp>Once you find a spot, be sure to check out the food bank or pantry online before heading out. Note what hours they are open, and for how long. Some locations are open to anyone and to walk-ins, but some may require people to register for a spot beforehand or live in a specific zip code.\u003c/p>\n\u003cp>Many food banks serve people regardless of immigration status. For example, the \u003ca href=\"https://www.sfmfoodbank.org/find-food/\">SF-Marin Food Bank states on its website\u003c/a> that it “is committed to serving residents regardless of their immigration status or identity” and, as a non-government agency, does “not collect the immigration status of participants.”\u003c/p>\n\u003cp>But food advocates suggest double-checking by calling the food bank and seeing if it has reporting requirements.\u003c/p>\n\u003cp>\u003c/p>\u003c/div>",
"attributes": {
"named": {},
"numeric": []
}
},
{
"type": "component",
"content": "",
"name": "ad",
"attributes": {
"named": {
"label": "floatright"
},
"numeric": [
"floatright"
]
}
},
{
"type": "contentString",
"content": "\u003cdiv class=\"post-body\">\u003cp>\u003c/p>\n\u003c/div>\u003c/p>",
"attributes": {
"named": {},
"numeric": []
}
}
],
"link": "/news/12086417/as-calfresh-guidelines-expand-where-can-students-who-rely-on-school-meals-go",
"authors": [
"11867"
],
"categories": [
"news_18540",
"news_24114",
"news_34168",
"news_28250",
"news_8"
],
"tags": [
"news_32707",
"news_1386",
"news_22578",
"news_29886",
"news_20013",
"news_35888",
"news_27626",
"news_333",
"news_20337",
"news_21602",
"news_3365",
"news_22992"
],
"featImg": "news_12086641",
"label": "news"
},
"arts_13990274": {
"type": "posts",
"id": "arts_13990274",
"meta": {
"index": "posts_1716263798",
"site": "arts",
"id": "13990274",
"score": null,
"sort": [
1780066800000
]
},
"guestAuthors": [],
"slug": "tita-beccas-filipino-diner-oakland-late-night",
"title": "This Late-Night Filipino Diner in Downtown Oakland Is Hidden in Plain Sight",
"publishDate": 1780066800,
"format": "standard",
"headTitle": "This Late-Night Filipino Diner in Downtown Oakland Is Hidden in Plain Sight | KQED",
"labelTerm": {},
"content": "\u003cfigure class=\"wp-block-image size-full\">\u003cimg loading=\"lazy\" decoding=\"async\" width=\"1920\" height=\"1920\" src=\"https://cdn.kqed.org/wp-content/uploads/sites/2/2026/05/TitaBeccas2.jpg\" alt=\"Illustration: Man devouring a shrimp lumpia while seating a diner counter. There's a huge spread of Filipino food in front of him.\" class=\"wp-image-13990278\" srcset=\"https://cdn.kqed.org/wp-content/uploads/sites/2/2026/05/TitaBeccas2.jpg 1920w, https://cdn.kqed.org/wp-content/uploads/sites/2/2026/05/TitaBeccas2-160x160.jpg 160w, https://cdn.kqed.org/wp-content/uploads/sites/2/2026/05/TitaBeccas2-768x768.jpg 768w, https://cdn.kqed.org/wp-content/uploads/sites/2/2026/05/TitaBeccas2-1536x1536.jpg 1536w, https://cdn.kqed.org/wp-content/uploads/sites/2/2026/05/TitaBeccas2-600x600.jpg 600w\" sizes=\"auto, (max-width: 1920px) 100vw, 1920px\">\u003cfigcaption class=\"wp-element-caption\">In downtown Oakland, Tita Becca’s serves some of the tastiest homestyle Filipino food in the Bay Area — until as late as 2 a.m. on weekends. (Thien Pham)\u003c/figcaption>\u003c/figure>\n\n\n\n\u003cp>\u003ca href=\"https://www.kqed.org/arts/tag/the-midnight-diners\">\u003cem>The Midnight Diners\u003c/em>\u003c/a>\u003cem> is a regular collaboration between KQED food editor Luke Tsai and graphic novelist \u003c/em>\u003ca href=\"https://www.instagram.com/thiendog/?hl=en\">\u003cem>Thien Pham\u003c/em>\u003c/a>\u003cem>. Follow them each week as they explore the hot pot restaurants, taco carts and 24-hour casino buffets that make up the Bay Area’s after-hours dining scene. \u003c/em>\u003c/p>\n\n\n\n\u003cp>\u003ca href=\"https://www.google.com/maps/place/Tita+Becca's/@37.8050666,-122.269489,17z/data=!3m1!4b1!4m6!3m5!1s0x808f810010cb4c49:0x6216a723cfa2d8bc!8m2!3d37.8050666!4d-122.269489!16s%2Fg%2F11nc868hz3!18m1!1e1?entry=ttu&g_ep=EgoyMDI2MDUyNi4wIKXMDSoASAFQAw%3D%3D\">Tita Becca’s\u003c/a> is the kind of restaurant that almost doesn’t seem real. \u003c/p>\n\n\n\n\u003cp>What do you \u003cem>mean\u003c/em> there’s an old-fashioned \u003ca href=\"https://www.kqed.org/arts/tag/filipino\">Filipino\u003c/a> diner right smack in the middle of downtown Oakland where you can sit on a ’50s-style bar stool eating some of the most delicious pork sisig and kare-kare you’ve ever tasted — as late as 2 o’clock in the morning, no less? \u003c/p>\n\n\n\n\u003cp>Even as we savored each bite, it felt like some kind of fever dream. At the time of our visit, a couple weeks ago, the restaurant had no \u003ca href=\"https://www.yelp.com/biz/tita-beccas-oakland\">Yelp reviews\u003c/a> and barely any \u003ca href=\"https://www.instagram.com/titabeccas/\">social media presence\u003c/a>. The lone “Tita Becca’s” sign painted on the wall outside gave no indication of what kind of food we might find inside (though a Pinoy would have recognized the \u003ca href=\"https://en.wikipedia.org/wiki/Flag_of_the_Philippines\">bright yellow sun\u003c/a> in the logo). The only reason we’d heard of the place at all was because of a kind reader who emailed us a glowing report.\u003c/p>\n\n\n\n\u003cp>When we pulled up to the restaurant at a little before 10 p.m. on a recent Friday, an older Filipino dude in a Warriors jersey and flip-flops was posted up outside, nursing the last few sips of a bottle of beer. Inside, the dining room was set up like the kind of old-timey diner you might see painted on a picture postcard: the long counter, the vintage stools, the nostalgic red and turquoise color scheme. The restaurant was almost entirely empty — just one young Filipino guy sitting at the counter, ladling pork sinigang over a bowl of white rice. The R&B playlist blaring from the speakers consisted almost entirely of sultry Mariah Carey jams. \u003c/p>\n\n\n\n\u003cp>[ad fullwidth]\u003c/p>\n\u003cp>Already, the place passed the vibe check. A perfect hundred out of a hundred points.\u003c/p>\n\n\n\n\u003cp>What you might expect to find at a restaurant that looks like this are three-egg omelettes and big stacks of pancakes with a pile of hash browns on the side. (We found out later that until late last year, the space had been home to a more classic American greasy spoon called Leo’s Diner.) Instead, Tita Becca’s serves a full — and surprisingly extensive — menu of homestyle Filipino dishes.\u003c/p>\n\n\n\n\u003cfigure class=\"wp-block-image size-full\">\u003cimg loading=\"lazy\" decoding=\"async\" width=\"1920\" height=\"1920\" src=\"https://cdn.kqed.org/wp-content/uploads/sites/2/2026/05/TitaBeccas1.jpg\" alt=\"Illustration: a low-slung diner lit up at night. The sign painted on the wall reads "Tita Becca's," with a yellow sun logo above.\" class=\"wp-image-13990281\" srcset=\"https://cdn.kqed.org/wp-content/uploads/sites/2/2026/05/TitaBeccas1.jpg 1920w, https://cdn.kqed.org/wp-content/uploads/sites/2/2026/05/TitaBeccas1-160x160.jpg 160w, https://cdn.kqed.org/wp-content/uploads/sites/2/2026/05/TitaBeccas1-768x768.jpg 768w, https://cdn.kqed.org/wp-content/uploads/sites/2/2026/05/TitaBeccas1-1536x1536.jpg 1536w, https://cdn.kqed.org/wp-content/uploads/sites/2/2026/05/TitaBeccas1-600x600.jpg 600w\" sizes=\"auto, (max-width: 1920px) 100vw, 1920px\">\u003cfigcaption class=\"wp-element-caption\">The restaurant is set up like a classic all-American diner — except that all of the food is Filipino. (Thien Pham)\u003c/figcaption>\u003c/figure>\n\n\n\n\u003cp>Chatting with the staff a bit, we learned that the restaurant is a family enterprise through and through. Mark, a gregarious middle-aged Filipino American with a wispy beard, is the main owner and public face of the business. His adult son was working up front, behind the counter, taking orders. And though she only popped her head out of the kitchen once or twice, we could see that Mark’s mother, \u003cem>the\u003c/em> Tita Becca herself, was the real heart and soul of the restaurant — the one whose recipes made us start to feel homesick and nostalgic for her food even before we’d finished eating.\u003c/p>\n\n\n\n\u003cp>To put it plainly: Everything was mind-blowingly delicious. We started with an order of shrimp lumpia — whole large shrimp, their tails still attached, encased by the wrapper and deep fried until they were super-crunchy and almost too hot to eat. These were deeply satisfying, with or without the obligatory sweet chili dipping sauce. \u003c/p>\n\n\n\n\u003cp>Meanwhile, the Pampanga-style pork sisig was a revelation of textures and flavors. There was the crispiness of fried pork skin, along with the soft fat and the meaty, gelatinous bits. There was the heat of the chiles, the crisp tanginess of red onions and also an earthy undercurrent from the bits of chicken liver that they’d mixed into the sauce. Most of all, there was this wonderful brightness, from calamansi and lemon juice, that cut into the richness of the dish. Ladling the sisig over rice, we were able to keep eating it and eating it without ever getting tired of the taste.\u003c/p>\n\n\n\n\n\n\u003cp>Later, the owner confided that this wasn’t even the full version of the dish. They’d run out of the pig’s head meats — the ears, cheeks and so forth — that usually go into it, so they made a cobbled-together version using chopped up lechon.\u003c/p>\n\n\n\n\u003cp>If we’d known that ahead of time, we probably wouldn’t have also ordered the lechon kawali, the beloved Filipino dish of fried skin-on pork belly. We didn’t exactly have anything to complain about, though — it was one of the moistest and most jigglingly tender versions we’ve had in the Bay, with some of the crunchiest skin. The fatty pork was especially nice with either of the vinegar dips the shop offers, one spiked with chiles and the other with both chiles and chopped tomatoes. \u003c/p>\n\n\n\n\u003cp>And perhaps everyone knows by now that \u003ca href=\"https://www.kqed.org/arts/13956683/late-night-filipino-food-24-hour-cafe-colma-lucky-chances\">I can’t ever \u003cem>not \u003c/em>order oxtail kare-kare\u003c/a> if I see it on a menu. The peanut sauce in Tita Becca’s version was rich and velvety; the eggplant, bok choy and string beans were all cooked to exactly the right texture. And while the oxtails were small, there were \u003cem>a lot\u003c/em> of them — the meat was so tender, and it was so very satisfying to suck on the bones.\u003c/p>\n\n\n\n\u003cp>Most impressive of all? Tita Becca’s makes its own bagoong (fermented shrimp paste), the salty-funky condiment traditionally served with kare-kare, in house, so that it was less aggressively salty than the jarred kind, with the same pungent umami punch. We kept stirring it in, and the dish kept tasting better and better. We could’ve eaten infinite amounts of rice.\u003c/p>\n\n\n\n\u003cp>In the end, our only regret was that we only had the stomach space to try four dishes — that we’d missed out on the other homey stews like the sinigang and the Bicol Express. How could any of it not have been delicious? Someone’s mom was cooking for us back there, probably the best home cook we knew in our circle of friends. That was the feeling we got, anyway.\u003c/p>\n\n\n\n\u003cp>By the time we finished our meal, only a few more customers had straggled in through the door. A millennial Filipina who sat at the restaurant’s one larger table and ordered a family-style meal for her group of non-Filipino friends. A couple of takeout customers bringing food over to the queer bar next door. It really felt like we had stumbled on a secret hiding in plain sight. And after we walked out at the end of the night, I started to worry, sincerely, that maybe we’d dreamed the whole thing. \u003c/p>\n\n\n\n\u003chr class=\"wp-block-separator has-alpha-channel-opacity\">\n\n\n\n\u003cp>[ad floatright]\u003c/p>\n\u003cp>\u003ca href=\"https://www.instagram.com/titabeccas/\">\u003cem>Tita Becca’s\u003c/em>\u003c/a>\u003cem> is open Tuesday to Thursday 5–9 p.m., Friday 5 p.m.–2 a.m., Saturday noon–2 a.m. and Sunday noon to 6 p.m. at 400 15th St. in Oakland.\u003c/em>\u003c/p>\n\n",
"blocks": [
{
"blockName": "core/image",
"attrs": {
"id": 13990278,
"sizeSlug": "full",
"linkDestination": "none",
"imageCredit": "Thien Pham",
"srcset": "https://cdn.kqed.org/wp-content/uploads/sites/2/2026/05/TitaBeccas2.jpg 1920w, https://cdn.kqed.org/wp-content/uploads/sites/2/2026/05/TitaBeccas2-160x160.jpg 160w, https://cdn.kqed.org/wp-content/uploads/sites/2/2026/05/TitaBeccas2-768x768.jpg 768w, https://cdn.kqed.org/wp-content/uploads/sites/2/2026/05/TitaBeccas2-1536x1536.jpg 1536w, https://cdn.kqed.org/wp-content/uploads/sites/2/2026/05/TitaBeccas2-600x600.jpg 600w",
"sizes": "(min-width: 992px) min(100vw, 1536px), (min-width: 768px) min(100vw, 1280px), min(100vw, 1020px)"
},
"innerHTML": "\n\u003cfigure class=\"wp-block-image size-full\">\u003cimg src=\"https://cdn.kqed.org/wp-content/uploads/sites/2/2026/05/TitaBeccas2.jpg\" alt=\"Illustration: Man devouring a shrimp lumpia while seating a diner counter. There's a huge spread of Filipino food in front of him.\" class=\"wp-image-13990278\" srcset=\"https://cdn.kqed.org/wp-content/uploads/sites/2/2026/05/TitaBeccas2.jpg 1920w, https://cdn.kqed.org/wp-content/uploads/sites/2/2026/05/TitaBeccas2-160x160.jpg 160w, https://cdn.kqed.org/wp-content/uploads/sites/2/2026/05/TitaBeccas2-768x768.jpg 768w, https://cdn.kqed.org/wp-content/uploads/sites/2/2026/05/TitaBeccas2-1536x1536.jpg 1536w, https://cdn.kqed.org/wp-content/uploads/sites/2/2026/05/TitaBeccas2-600x600.jpg 600w\" sizes=\"(min-width: 992px) min(100vw, 1536px), (min-width: 768px) min(100vw, 1280px), min(100vw, 1020px)\" />\u003cfigcaption class=\"wp-element-caption\">In downtown Oakland, Tita Becca’s serves some of the tastiest homestyle Filipino food in the Bay Area — until as late as 2 a.m. on weekends.\u003c/figcaption>\u003c/figure>\n",
"innerContent": [
"\n\u003cfigure class=\"wp-block-image size-full\">\u003cimg src=\"https://cdn.kqed.org/wp-content/uploads/sites/2/2026/05/TitaBeccas2.jpg\" alt=\"Illustration: Man devouring a shrimp lumpia while seating a diner counter. There's a huge spread of Filipino food in front of him.\" class=\"wp-image-13990278\" />\u003cfigcaption class=\"wp-element-caption\">In downtown Oakland, Tita Becca’s serves some of the tastiest homestyle Filipino food in the Bay Area — until as late as 2 a.m. on weekends.\u003c/figcaption>\u003c/figure>\n"
],
"innerBlocks": []
},
{
"blockName": "core/paragraph",
"attrs": [],
"innerHTML": "\n\u003cp>\u003ca href=\"https://www.kqed.org/arts/tag/the-midnight-diners\">\u003cem>The Midnight Diners\u003c/em>\u003c/a>\u003cem> is a regular collaboration between KQED food editor Luke Tsai and graphic novelist \u003c/em>\u003ca href=\"https://www.instagram.com/thiendog/?hl=en\">\u003cem>Thien Pham\u003c/em>\u003c/a>\u003cem>. Follow them each week as they explore the hot pot restaurants, taco carts and 24-hour casino buffets that make up the Bay Area’s after-hours dining scene. \u003c/em>\u003c/p>\n",
"innerContent": [
"\n\u003cp>\u003ca href=\"https://www.kqed.org/arts/tag/the-midnight-diners\">\u003cem>The Midnight Diners\u003c/em>\u003c/a>\u003cem> is a regular collaboration between KQED food editor Luke Tsai and graphic novelist \u003c/em>\u003ca href=\"https://www.instagram.com/thiendog/?hl=en\">\u003cem>Thien Pham\u003c/em>\u003c/a>\u003cem>. Follow them each week as they explore the hot pot restaurants, taco carts and 24-hour casino buffets that make up the Bay Area’s after-hours dining scene. \u003c/em>\u003c/p>\n"
],
"innerBlocks": []
},
{
"blockName": "core/paragraph",
"attrs": [],
"innerHTML": "\n\u003cp>\u003ca href=\"https://www.google.com/maps/place/Tita+Becca's/@37.8050666,-122.269489,17z/data=!3m1!4b1!4m6!3m5!1s0x808f810010cb4c49:0x6216a723cfa2d8bc!8m2!3d37.8050666!4d-122.269489!16s%2Fg%2F11nc868hz3!18m1!1e1?entry=ttu&g_ep=EgoyMDI2MDUyNi4wIKXMDSoASAFQAw%3D%3D\">Tita Becca’s\u003c/a> is the kind of restaurant that almost doesn’t seem real. \u003c/p>\n",
"innerContent": [
"\n\u003cp>\u003ca href=\"https://www.google.com/maps/place/Tita+Becca's/@37.8050666,-122.269489,17z/data=!3m1!4b1!4m6!3m5!1s0x808f810010cb4c49:0x6216a723cfa2d8bc!8m2!3d37.8050666!4d-122.269489!16s%2Fg%2F11nc868hz3!18m1!1e1?entry=ttu&g_ep=EgoyMDI2MDUyNi4wIKXMDSoASAFQAw%3D%3D\">Tita Becca’s\u003c/a> is the kind of restaurant that almost doesn’t seem real. \u003c/p>\n"
],
"innerBlocks": []
},
{
"blockName": "core/paragraph",
"attrs": [],
"innerHTML": "\n\u003cp>What do you \u003cem>mean\u003c/em> there’s an old-fashioned \u003ca href=\"https://www.kqed.org/arts/tag/filipino\">Filipino\u003c/a> diner right smack in the middle of downtown Oakland where you can sit on a ’50s-style bar stool eating some of the most delicious pork sisig and kare-kare you’ve ever tasted — as late as 2 o’clock in the morning, no less? \u003c/p>\n",
"innerContent": [
"\n\u003cp>What do you \u003cem>mean\u003c/em> there’s an old-fashioned \u003ca href=\"https://www.kqed.org/arts/tag/filipino\">Filipino\u003c/a> diner right smack in the middle of downtown Oakland where you can sit on a ’50s-style bar stool eating some of the most delicious pork sisig and kare-kare you’ve ever tasted — as late as 2 o’clock in the morning, no less? \u003c/p>\n"
],
"innerBlocks": []
},
{
"blockName": "core/paragraph",
"attrs": [],
"innerHTML": "\n\u003cp>Even as we savored each bite, it felt like some kind of fever dream. At the time of our visit, a couple weeks ago, the restaurant had no \u003ca href=\"https://www.yelp.com/biz/tita-beccas-oakland\">Yelp reviews\u003c/a> and barely any \u003ca href=\"https://www.instagram.com/titabeccas/\">social media presence\u003c/a>. The lone “Tita Becca’s” sign painted on the wall outside gave no indication of what kind of food we might find inside (though a Pinoy would have recognized the \u003ca href=\"https://en.wikipedia.org/wiki/Flag_of_the_Philippines\">bright yellow sun\u003c/a> in the logo). The only reason we’d heard of the place at all was because of a kind reader who emailed us a glowing report.\u003c/p>\n",
"innerContent": [
"\n\u003cp>Even as we savored each bite, it felt like some kind of fever dream. At the time of our visit, a couple weeks ago, the restaurant had no \u003ca href=\"https://www.yelp.com/biz/tita-beccas-oakland\">Yelp reviews\u003c/a> and barely any \u003ca href=\"https://www.instagram.com/titabeccas/\">social media presence\u003c/a>. The lone “Tita Becca’s” sign painted on the wall outside gave no indication of what kind of food we might find inside (though a Pinoy would have recognized the \u003ca href=\"https://en.wikipedia.org/wiki/Flag_of_the_Philippines\">bright yellow sun\u003c/a> in the logo). The only reason we’d heard of the place at all was because of a kind reader who emailed us a glowing report.\u003c/p>\n"
],
"innerBlocks": []
},
{
"blockName": "core/paragraph",
"attrs": [],
"innerHTML": "\n\u003cp>When we pulled up to the restaurant at a little before 10 p.m. on a recent Friday, an older Filipino dude in a Warriors jersey and flip-flops was posted up outside, nursing the last few sips of a bottle of beer. Inside, the dining room was set up like the kind of old-timey diner you might see painted on a picture postcard: the long counter, the vintage stools, the nostalgic red and turquoise color scheme. The restaurant was almost entirely empty — just one young Filipino guy sitting at the counter, ladling pork sinigang over a bowl of white rice. The R&B playlist blaring from the speakers consisted almost entirely of sultry Mariah Carey jams. \u003c/p>\n",
"innerContent": [
"\n\u003cp>When we pulled up to the restaurant at a little before 10 p.m. on a recent Friday, an older Filipino dude in a Warriors jersey and flip-flops was posted up outside, nursing the last few sips of a bottle of beer. Inside, the dining room was set up like the kind of old-timey diner you might see painted on a picture postcard: the long counter, the vintage stools, the nostalgic red and turquoise color scheme. The restaurant was almost entirely empty — just one young Filipino guy sitting at the counter, ladling pork sinigang over a bowl of white rice. The R&B playlist blaring from the speakers consisted almost entirely of sultry Mariah Carey jams. \u003c/p>\n"
],
"innerBlocks": []
},
{
"blockName": "kqed/ad",
"attrs": {
"format": "fullwidth"
},
"innerBlocks": [],
"innerHTML": "",
"innerContent": []
},
{
"blockName": "core/paragraph",
"attrs": [],
"innerHTML": "\n\u003cp>Already, the place passed the vibe check. A perfect hundred out of a hundred points.\u003c/p>\n",
"innerContent": [
"\n\u003cp>Already, the place passed the vibe check. A perfect hundred out of a hundred points.\u003c/p>\n"
],
"innerBlocks": []
},
{
"blockName": "core/paragraph",
"attrs": [],
"innerHTML": "\n\u003cp>What you might expect to find at a restaurant that looks like this are three-egg omelettes and big stacks of pancakes with a pile of hash browns on the side. (We found out later that until late last year, the space had been home to a more classic American greasy spoon called Leo’s Diner.) Instead, Tita Becca’s serves a full — and surprisingly extensive — menu of homestyle Filipino dishes.\u003c/p>\n",
"innerContent": [
"\n\u003cp>What you might expect to find at a restaurant that looks like this are three-egg omelettes and big stacks of pancakes with a pile of hash browns on the side. (We found out later that until late last year, the space had been home to a more classic American greasy spoon called Leo’s Diner.) Instead, Tita Becca’s serves a full — and surprisingly extensive — menu of homestyle Filipino dishes.\u003c/p>\n"
],
"innerBlocks": []
},
{
"blockName": "core/image",
"attrs": {
"id": 13990281,
"sizeSlug": "full",
"linkDestination": "none",
"imageCredit": "Thien Pham",
"srcset": "https://cdn.kqed.org/wp-content/uploads/sites/2/2026/05/TitaBeccas1.jpg 1920w, https://cdn.kqed.org/wp-content/uploads/sites/2/2026/05/TitaBeccas1-160x160.jpg 160w, https://cdn.kqed.org/wp-content/uploads/sites/2/2026/05/TitaBeccas1-768x768.jpg 768w, https://cdn.kqed.org/wp-content/uploads/sites/2/2026/05/TitaBeccas1-1536x1536.jpg 1536w, https://cdn.kqed.org/wp-content/uploads/sites/2/2026/05/TitaBeccas1-600x600.jpg 600w",
"sizes": "(min-width: 992px) min(100vw, 1536px), (min-width: 768px) min(100vw, 1280px), min(100vw, 1020px)"
},
"innerHTML": "\n\u003cfigure class=\"wp-block-image size-full\">\u003cimg src=\"https://cdn.kqed.org/wp-content/uploads/sites/2/2026/05/TitaBeccas1.jpg\" alt=\"Illustration: a low-slung diner lit up at night. The sign painted on the wall reads "Tita Becca's," with a yellow sun logo above.\" class=\"wp-image-13990281\" srcset=\"https://cdn.kqed.org/wp-content/uploads/sites/2/2026/05/TitaBeccas1.jpg 1920w, https://cdn.kqed.org/wp-content/uploads/sites/2/2026/05/TitaBeccas1-160x160.jpg 160w, https://cdn.kqed.org/wp-content/uploads/sites/2/2026/05/TitaBeccas1-768x768.jpg 768w, https://cdn.kqed.org/wp-content/uploads/sites/2/2026/05/TitaBeccas1-1536x1536.jpg 1536w, https://cdn.kqed.org/wp-content/uploads/sites/2/2026/05/TitaBeccas1-600x600.jpg 600w\" sizes=\"(min-width: 992px) min(100vw, 1536px), (min-width: 768px) min(100vw, 1280px), min(100vw, 1020px)\" />\u003cfigcaption class=\"wp-element-caption\">The restaurant is set up like a classic all-American diner — except that all of the food is Filipino.\u003c/figcaption>\u003c/figure>\n",
"innerContent": [
"\n\u003cfigure class=\"wp-block-image size-full\">\u003cimg src=\"https://cdn.kqed.org/wp-content/uploads/sites/2/2026/05/TitaBeccas1.jpg\" alt=\"Illustration: a low-slung diner lit up at night. The sign painted on the wall reads "Tita Becca's," with a yellow sun logo above.\" class=\"wp-image-13990281\" />\u003cfigcaption class=\"wp-element-caption\">The restaurant is set up like a classic all-American diner — except that all of the food is Filipino.\u003c/figcaption>\u003c/figure>\n"
],
"innerBlocks": []
},
{
"blockName": "core/paragraph",
"attrs": [],
"innerHTML": "\n\u003cp>Chatting with the staff a bit, we learned that the restaurant is a family enterprise through and through. Mark, a gregarious middle-aged Filipino American with a wispy beard, is the main owner and public face of the business. His adult son was working up front, behind the counter, taking orders. And though she only popped her head out of the kitchen once or twice, we could see that Mark’s mother, \u003cem>the\u003c/em> Tita Becca herself, was the real heart and soul of the restaurant — the one whose recipes made us start to feel homesick and nostalgic for her food even before we’d finished eating.\u003c/p>\n",
"innerContent": [
"\n\u003cp>Chatting with the staff a bit, we learned that the restaurant is a family enterprise through and through. Mark, a gregarious middle-aged Filipino American with a wispy beard, is the main owner and public face of the business. His adult son was working up front, behind the counter, taking orders. And though she only popped her head out of the kitchen once or twice, we could see that Mark’s mother, \u003cem>the\u003c/em> Tita Becca herself, was the real heart and soul of the restaurant — the one whose recipes made us start to feel homesick and nostalgic for her food even before we’d finished eating.\u003c/p>\n"
],
"innerBlocks": []
},
{
"blockName": "core/paragraph",
"attrs": [],
"innerHTML": "\n\u003cp>To put it plainly: Everything was mind-blowingly delicious. We started with an order of shrimp lumpia — whole large shrimp, their tails still attached, encased by the wrapper and deep fried until they were super-crunchy and almost too hot to eat. These were deeply satisfying, with or without the obligatory sweet chili dipping sauce. \u003c/p>\n",
"innerContent": [
"\n\u003cp>To put it plainly: Everything was mind-blowingly delicious. We started with an order of shrimp lumpia — whole large shrimp, their tails still attached, encased by the wrapper and deep fried until they were super-crunchy and almost too hot to eat. These were deeply satisfying, with or without the obligatory sweet chili dipping sauce. \u003c/p>\n"
],
"innerBlocks": []
},
{
"blockName": "core/paragraph",
"attrs": [],
"innerHTML": "\n\u003cp>Meanwhile, the Pampanga-style pork sisig was a revelation of textures and flavors. There was the crispiness of fried pork skin, along with the soft fat and the meaty, gelatinous bits. There was the heat of the chiles, the crisp tanginess of red onions and also an earthy undercurrent from the bits of chicken liver that they’d mixed into the sauce. Most of all, there was this wonderful brightness, from calamansi and lemon juice, that cut into the richness of the dish. Ladling the sisig over rice, we were able to keep eating it and eating it without ever getting tired of the taste.\u003c/p>\n",
"innerContent": [
"\n\u003cp>Meanwhile, the Pampanga-style pork sisig was a revelation of textures and flavors. There was the crispiness of fried pork skin, along with the soft fat and the meaty, gelatinous bits. There was the heat of the chiles, the crisp tanginess of red onions and also an earthy undercurrent from the bits of chicken liver that they’d mixed into the sauce. Most of all, there was this wonderful brightness, from calamansi and lemon juice, that cut into the richness of the dish. Ladling the sisig over rice, we were able to keep eating it and eating it without ever getting tired of the taste.\u003c/p>\n"
],
"innerBlocks": []
},
{
"blockName": "kqed-v2/related-articles",
"attrs": {
"postIds": [
"arts_13989673",
"arts_13978355",
"arts_13956683"
],
"labelWasCleared": true
},
"innerHTML": "",
"innerContent": [],
"innerBlocks": []
},
{
"blockName": "core/paragraph",
"attrs": [],
"innerHTML": "\n\u003cp>Later, the owner confided that this wasn’t even the full version of the dish. They’d run out of the pig’s head meats — the ears, cheeks and so forth — that usually go into it, so they made a cobbled-together version using chopped up lechon.\u003c/p>\n",
"innerContent": [
"\n\u003cp>Later, the owner confided that this wasn’t even the full version of the dish. They’d run out of the pig’s head meats — the ears, cheeks and so forth — that usually go into it, so they made a cobbled-together version using chopped up lechon.\u003c/p>\n"
],
"innerBlocks": []
},
{
"blockName": "core/paragraph",
"attrs": [],
"innerHTML": "\n\u003cp>If we’d known that ahead of time, we probably wouldn’t have also ordered the lechon kawali, the beloved Filipino dish of fried skin-on pork belly. We didn’t exactly have anything to complain about, though — it was one of the moistest and most jigglingly tender versions we’ve had in the Bay, with some of the crunchiest skin. The fatty pork was especially nice with either of the vinegar dips the shop offers, one spiked with chiles and the other with both chiles and chopped tomatoes. \u003c/p>\n",
"innerContent": [
"\n\u003cp>If we’d known that ahead of time, we probably wouldn’t have also ordered the lechon kawali, the beloved Filipino dish of fried skin-on pork belly. We didn’t exactly have anything to complain about, though — it was one of the moistest and most jigglingly tender versions we’ve had in the Bay, with some of the crunchiest skin. The fatty pork was especially nice with either of the vinegar dips the shop offers, one spiked with chiles and the other with both chiles and chopped tomatoes. \u003c/p>\n"
],
"innerBlocks": []
},
{
"blockName": "core/paragraph",
"attrs": [],
"innerHTML": "\n\u003cp>And perhaps everyone knows by now that \u003ca href=\"https://www.kqed.org/arts/13956683/late-night-filipino-food-24-hour-cafe-colma-lucky-chances\">I can’t ever \u003cem>not \u003c/em>order oxtail kare-kare\u003c/a> if I see it on a menu. The peanut sauce in Tita Becca’s version was rich and velvety; the eggplant, bok choy and string beans were all cooked to exactly the right texture. And while the oxtails were small, there were \u003cem>a lot\u003c/em> of them — the meat was so tender, and it was so very satisfying to suck on the bones.\u003c/p>\n",
"innerContent": [
"\n\u003cp>And perhaps everyone knows by now that \u003ca href=\"https://www.kqed.org/arts/13956683/late-night-filipino-food-24-hour-cafe-colma-lucky-chances\">I can’t ever \u003cem>not \u003c/em>order oxtail kare-kare\u003c/a> if I see it on a menu. The peanut sauce in Tita Becca’s version was rich and velvety; the eggplant, bok choy and string beans were all cooked to exactly the right texture. And while the oxtails were small, there were \u003cem>a lot\u003c/em> of them — the meat was so tender, and it was so very satisfying to suck on the bones.\u003c/p>\n"
],
"innerBlocks": []
},
{
"blockName": "core/paragraph",
"attrs": [],
"innerHTML": "\n\u003cp>Most impressive of all? Tita Becca’s makes its own bagoong (fermented shrimp paste), the salty-funky condiment traditionally served with kare-kare, in house, so that it was less aggressively salty than the jarred kind, with the same pungent umami punch. We kept stirring it in, and the dish kept tasting better and better. We could’ve eaten infinite amounts of rice.\u003c/p>\n",
"innerContent": [
"\n\u003cp>Most impressive of all? Tita Becca’s makes its own bagoong (fermented shrimp paste), the salty-funky condiment traditionally served with kare-kare, in house, so that it was less aggressively salty than the jarred kind, with the same pungent umami punch. We kept stirring it in, and the dish kept tasting better and better. We could’ve eaten infinite amounts of rice.\u003c/p>\n"
],
"innerBlocks": []
},
{
"blockName": "core/paragraph",
"attrs": [],
"innerHTML": "\n\u003cp>In the end, our only regret was that we only had the stomach space to try four dishes — that we’d missed out on the other homey stews like the sinigang and the Bicol Express. How could any of it not have been delicious? Someone’s mom was cooking for us back there, probably the best home cook we knew in our circle of friends. That was the feeling we got, anyway.\u003c/p>\n",
"innerContent": [
"\n\u003cp>In the end, our only regret was that we only had the stomach space to try four dishes — that we’d missed out on the other homey stews like the sinigang and the Bicol Express. How could any of it not have been delicious? Someone’s mom was cooking for us back there, probably the best home cook we knew in our circle of friends. That was the feeling we got, anyway.\u003c/p>\n"
],
"innerBlocks": []
},
{
"blockName": "core/paragraph",
"attrs": [],
"innerHTML": "\n\u003cp>By the time we finished our meal, only a few more customers had straggled in through the door. A millennial Filipina who sat at the restaurant’s one larger table and ordered a family-style meal for her group of non-Filipino friends. A couple of takeout customers bringing food over to the queer bar next door. It really felt like we had stumbled on a secret hiding in plain sight. And after we walked out at the end of the night, I started to worry, sincerely, that maybe we’d dreamed the whole thing. \u003c/p>\n",
"innerContent": [
"\n\u003cp>By the time we finished our meal, only a few more customers had straggled in through the door. A millennial Filipina who sat at the restaurant’s one larger table and ordered a family-style meal for her group of non-Filipino friends. A couple of takeout customers bringing food over to the queer bar next door. It really felt like we had stumbled on a secret hiding in plain sight. And after we walked out at the end of the night, I started to worry, sincerely, that maybe we’d dreamed the whole thing. \u003c/p>\n"
],
"innerBlocks": []
},
{
"blockName": "core/separator",
"attrs": [],
"innerHTML": "\n\u003chr class=\"wp-block-separator has-alpha-channel-opacity\" />\n",
"innerContent": [
"\n\u003chr class=\"wp-block-separator has-alpha-channel-opacity\" />\n"
],
"innerBlocks": []
},
{
"blockName": "kqed/ad",
"attrs": {
"format": "floatright"
},
"innerBlocks": [],
"innerHTML": "",
"innerContent": []
},
{
"blockName": "core/paragraph",
"attrs": [],
"innerHTML": "\n\u003cp>\u003ca href=\"https://www.instagram.com/titabeccas/\">\u003cem>Tita Becca’s\u003c/em>\u003c/a>\u003cem> is open Tuesday to Thursday 5–9 p.m., Friday 5 p.m.–2 a.m., Saturday noon–2 a.m. and Sunday noon to 6 p.m. at 400 15th St. in Oakland.\u003c/em>\u003c/p>\n",
"innerContent": [
"\n\u003cp>\u003ca href=\"https://www.instagram.com/titabeccas/\">\u003cem>Tita Becca’s\u003c/em>\u003c/a>\u003cem> is open Tuesday to Thursday 5–9 p.m., Friday 5 p.m.–2 a.m., Saturday noon–2 a.m. and Sunday noon to 6 p.m. at 400 15th St. in Oakland.\u003c/em>\u003c/p>\n"
],
"innerBlocks": []
}
],
"excerpt": "The secret is out about Tita Becca’s amazing homestyle pork sisig and kare-kare. ",
"status": "publish",
"parent": 0,
"modified": 1780385651,
"stats": {
"hasAudio": false,
"hasVideo": false,
"hasChartOrMap": false,
"iframeSrcs": [],
"hasGoogleForm": false,
"hasGallery": false,
"hasHearkenModule": false,
"hasPolis": false,
"paragraphCount": 19,
"wordCount": 1275
},
"headData": {
"title": "Tita Becca's Is Oakland's Great Late-Night Filipino Diner | KQED",
"description": "The secret is out about Tita Becca’s amazing homestyle pork sisig and kare-kare. ",
"ogTitle": "This Late-Night Filipino Diner in Downtown Oakland Is Hidden in Plain Sight",
"ogDescription": "",
"ogImgId": "",
"twTitle": "This Late-Night Filipino Diner in Downtown Oakland Is Hidden in Plain Sight",
"twDescription": "",
"twImgId": "",
"socialTitle": "Tita Becca's Is Oakland's Great Late-Night Filipino Diner %%page%% %%sep%% KQED",
"schema": {
"@context": "https://schema.org",
"@type": "Article",
"headline": "This Late-Night Filipino Diner in Downtown Oakland Is Hidden in Plain Sight",
"datePublished": "2026-05-29T08:00:00-07:00",
"dateModified": "2026-06-02T00:34:11-07:00",
"image": "https://cdn.kqed.org/wp-content/uploads/2020/02/KQED-OG-Image@1x.png"
}
},
"primaryCategory": {
"termId": 12276,
"slug": "food",
"name": "Food"
},
"source": "The Midnight Diners",
"sourceUrl": "https://www.kqed.org/arts/tag/the-midnight-diners",
"sticky": false,
"nprStoryId": "kqed-13990274",
"templateType": "standard",
"featuredImageType": "none",
"excludeFromSiteSearch": "Include",
"articleAge": "0",
"path": "/arts/13990274/tita-beccas-filipino-diner-oakland-late-night",
"audioTrackLength": null,
"parsedContent": [
{
"type": "contentString",
"content": "\u003cdiv class=\"post-body\">\u003cp>\u003cfigure class=\"wp-block-image size-full\">\u003cimg loading=\"lazy\" decoding=\"async\" width=\"1920\" height=\"1920\" src=\"https://cdn.kqed.org/wp-content/uploads/sites/2/2026/05/TitaBeccas2.jpg\" alt=\"Illustration: Man devouring a shrimp lumpia while seating a diner counter. There's a huge spread of Filipino food in front of him.\" class=\"wp-image-13990278\" srcset=\"https://cdn.kqed.org/wp-content/uploads/sites/2/2026/05/TitaBeccas2.jpg 1920w, https://cdn.kqed.org/wp-content/uploads/sites/2/2026/05/TitaBeccas2-160x160.jpg 160w, https://cdn.kqed.org/wp-content/uploads/sites/2/2026/05/TitaBeccas2-768x768.jpg 768w, https://cdn.kqed.org/wp-content/uploads/sites/2/2026/05/TitaBeccas2-1536x1536.jpg 1536w, https://cdn.kqed.org/wp-content/uploads/sites/2/2026/05/TitaBeccas2-600x600.jpg 600w\" sizes=\"auto, (max-width: 1920px) 100vw, 1920px\">\u003cfigcaption class=\"wp-element-caption\">In downtown Oakland, Tita Becca’s serves some of the tastiest homestyle Filipino food in the Bay Area — until as late as 2 a.m. on weekends. (Thien Pham)\u003c/figcaption>\u003c/figure>\n\n\n\n\u003cp>\u003ca href=\"https://www.kqed.org/arts/tag/the-midnight-diners\">\u003cem>The Midnight Diners\u003c/em>\u003c/a>\u003cem> is a regular collaboration between KQED food editor Luke Tsai and graphic novelist \u003c/em>\u003ca href=\"https://www.instagram.com/thiendog/?hl=en\">\u003cem>Thien Pham\u003c/em>\u003c/a>\u003cem>. Follow them each week as they explore the hot pot restaurants, taco carts and 24-hour casino buffets that make up the Bay Area’s after-hours dining scene. \u003c/em>\u003c/p>\n\n\n\n\u003cp>\u003ca href=\"https://www.google.com/maps/place/Tita+Becca's/@37.8050666,-122.269489,17z/data=!3m1!4b1!4m6!3m5!1s0x808f810010cb4c49:0x6216a723cfa2d8bc!8m2!3d37.8050666!4d-122.269489!16s%2Fg%2F11nc868hz3!18m1!1e1?entry=ttu&g_ep=EgoyMDI2MDUyNi4wIKXMDSoASAFQAw%3D%3D\">Tita Becca’s\u003c/a> is the kind of restaurant that almost doesn’t seem real. \u003c/p>\n\n\n\n\u003cp>What do you \u003cem>mean\u003c/em> there’s an old-fashioned \u003ca href=\"https://www.kqed.org/arts/tag/filipino\">Filipino\u003c/a> diner right smack in the middle of downtown Oakland where you can sit on a ’50s-style bar stool eating some of the most delicious pork sisig and kare-kare you’ve ever tasted — as late as 2 o’clock in the morning, no less? \u003c/p>\n\n\n\n\u003cp>Even as we savored each bite, it felt like some kind of fever dream. At the time of our visit, a couple weeks ago, the restaurant had no \u003ca href=\"https://www.yelp.com/biz/tita-beccas-oakland\">Yelp reviews\u003c/a> and barely any \u003ca href=\"https://www.instagram.com/titabeccas/\">social media presence\u003c/a>. The lone “Tita Becca’s” sign painted on the wall outside gave no indication of what kind of food we might find inside (though a Pinoy would have recognized the \u003ca href=\"https://en.wikipedia.org/wiki/Flag_of_the_Philippines\">bright yellow sun\u003c/a> in the logo). The only reason we’d heard of the place at all was because of a kind reader who emailed us a glowing report.\u003c/p>\n\n\n\n\u003cp>When we pulled up to the restaurant at a little before 10 p.m. on a recent Friday, an older Filipino dude in a Warriors jersey and flip-flops was posted up outside, nursing the last few sips of a bottle of beer. Inside, the dining room was set up like the kind of old-timey diner you might see painted on a picture postcard: the long counter, the vintage stools, the nostalgic red and turquoise color scheme. The restaurant was almost entirely empty — just one young Filipino guy sitting at the counter, ladling pork sinigang over a bowl of white rice. The R&B playlist blaring from the speakers consisted almost entirely of sultry Mariah Carey jams. \u003c/p>\n\n\n\n\u003cp>\u003c/p>\u003c/div>",
"attributes": {
"named": {},
"numeric": []
}
},
{
"type": "component",
"content": "",
"name": "ad",
"attributes": {
"named": {
"label": "fullwidth"
},
"numeric": [
"fullwidth"
]
}
},
{
"type": "contentString",
"content": "\u003cdiv class=\"post-body\">\u003cp>\u003c/p>\n\u003cp>Already, the place passed the vibe check. A perfect hundred out of a hundred points.\u003c/p>\n\n\n\n\u003cp>What you might expect to find at a restaurant that looks like this are three-egg omelettes and big stacks of pancakes with a pile of hash browns on the side. (We found out later that until late last year, the space had been home to a more classic American greasy spoon called Leo’s Diner.) Instead, Tita Becca’s serves a full — and surprisingly extensive — menu of homestyle Filipino dishes.\u003c/p>\n\n\n\n\u003cfigure class=\"wp-block-image size-full\">\u003cimg loading=\"lazy\" decoding=\"async\" width=\"1920\" height=\"1920\" src=\"https://cdn.kqed.org/wp-content/uploads/sites/2/2026/05/TitaBeccas1.jpg\" alt=\"Illustration: a low-slung diner lit up at night. The sign painted on the wall reads "Tita Becca's," with a yellow sun logo above.\" class=\"wp-image-13990281\" srcset=\"https://cdn.kqed.org/wp-content/uploads/sites/2/2026/05/TitaBeccas1.jpg 1920w, https://cdn.kqed.org/wp-content/uploads/sites/2/2026/05/TitaBeccas1-160x160.jpg 160w, https://cdn.kqed.org/wp-content/uploads/sites/2/2026/05/TitaBeccas1-768x768.jpg 768w, https://cdn.kqed.org/wp-content/uploads/sites/2/2026/05/TitaBeccas1-1536x1536.jpg 1536w, https://cdn.kqed.org/wp-content/uploads/sites/2/2026/05/TitaBeccas1-600x600.jpg 600w\" sizes=\"auto, (max-width: 1920px) 100vw, 1920px\">\u003cfigcaption class=\"wp-element-caption\">The restaurant is set up like a classic all-American diner — except that all of the food is Filipino. (Thien Pham)\u003c/figcaption>\u003c/figure>\n\n\n\n\u003cp>Chatting with the staff a bit, we learned that the restaurant is a family enterprise through and through. Mark, a gregarious middle-aged Filipino American with a wispy beard, is the main owner and public face of the business. His adult son was working up front, behind the counter, taking orders. And though she only popped her head out of the kitchen once or twice, we could see that Mark’s mother, \u003cem>the\u003c/em> Tita Becca herself, was the real heart and soul of the restaurant — the one whose recipes made us start to feel homesick and nostalgic for her food even before we’d finished eating.\u003c/p>\n\n\n\n\u003cp>To put it plainly: Everything was mind-blowingly delicious. We started with an order of shrimp lumpia — whole large shrimp, their tails still attached, encased by the wrapper and deep fried until they were super-crunchy and almost too hot to eat. These were deeply satisfying, with or without the obligatory sweet chili dipping sauce. \u003c/p>\n\n\n\n\u003cp>Meanwhile, the Pampanga-style pork sisig was a revelation of textures and flavors. There was the crispiness of fried pork skin, along with the soft fat and the meaty, gelatinous bits. There was the heat of the chiles, the crisp tanginess of red onions and also an earthy undercurrent from the bits of chicken liver that they’d mixed into the sauce. Most of all, there was this wonderful brightness, from calamansi and lemon juice, that cut into the richness of the dish. Ladling the sisig over rice, we were able to keep eating it and eating it without ever getting tired of the taste.\u003c/p>\n\n\n\n\n\n\u003cp>Later, the owner confided that this wasn’t even the full version of the dish. They’d run out of the pig’s head meats — the ears, cheeks and so forth — that usually go into it, so they made a cobbled-together version using chopped up lechon.\u003c/p>\n\n\n\n\u003cp>If we’d known that ahead of time, we probably wouldn’t have also ordered the lechon kawali, the beloved Filipino dish of fried skin-on pork belly. We didn’t exactly have anything to complain about, though — it was one of the moistest and most jigglingly tender versions we’ve had in the Bay, with some of the crunchiest skin. The fatty pork was especially nice with either of the vinegar dips the shop offers, one spiked with chiles and the other with both chiles and chopped tomatoes. \u003c/p>\n\n\n\n\u003cp>And perhaps everyone knows by now that \u003ca href=\"https://www.kqed.org/arts/13956683/late-night-filipino-food-24-hour-cafe-colma-lucky-chances\">I can’t ever \u003cem>not \u003c/em>order oxtail kare-kare\u003c/a> if I see it on a menu. The peanut sauce in Tita Becca’s version was rich and velvety; the eggplant, bok choy and string beans were all cooked to exactly the right texture. And while the oxtails were small, there were \u003cem>a lot\u003c/em> of them — the meat was so tender, and it was so very satisfying to suck on the bones.\u003c/p>\n\n\n\n\u003cp>Most impressive of all? Tita Becca’s makes its own bagoong (fermented shrimp paste), the salty-funky condiment traditionally served with kare-kare, in house, so that it was less aggressively salty than the jarred kind, with the same pungent umami punch. We kept stirring it in, and the dish kept tasting better and better. We could’ve eaten infinite amounts of rice.\u003c/p>\n\n\n\n\u003cp>In the end, our only regret was that we only had the stomach space to try four dishes — that we’d missed out on the other homey stews like the sinigang and the Bicol Express. How could any of it not have been delicious? Someone’s mom was cooking for us back there, probably the best home cook we knew in our circle of friends. That was the feeling we got, anyway.\u003c/p>\n\n\n\n\u003cp>By the time we finished our meal, only a few more customers had straggled in through the door. A millennial Filipina who sat at the restaurant’s one larger table and ordered a family-style meal for her group of non-Filipino friends. A couple of takeout customers bringing food over to the queer bar next door. It really felt like we had stumbled on a secret hiding in plain sight. And after we walked out at the end of the night, I started to worry, sincerely, that maybe we’d dreamed the whole thing. \u003c/p>\n\n\n\n\u003chr class=\"wp-block-separator has-alpha-channel-opacity\">\n\n\n\n\u003cp>\u003c/p>\u003c/div>",
"attributes": {
"named": {},
"numeric": []
}
},
{
"type": "component",
"content": "",
"name": "ad",
"attributes": {
"named": {
"label": "floatright"
},
"numeric": [
"floatright"
]
}
},
{
"type": "contentString",
"content": "\u003cdiv class=\"post-body\">\u003cp>\u003c/p>\n\u003cp>\u003ca href=\"https://www.instagram.com/titabeccas/\">\u003cem>Tita Becca’s\u003c/em>\u003c/a>\u003cem> is open Tuesday to Thursday 5–9 p.m., Friday 5 p.m.–2 a.m., Saturday noon–2 a.m. and Sunday noon to 6 p.m. at 400 15th St. in Oakland.\u003c/em>\u003c/p>\n\n\u003c/div>\u003c/p>",
"attributes": {
"named": {},
"numeric": []
}
}
],
"link": "/arts/13990274/tita-beccas-filipino-diner-oakland-late-night",
"authors": [
"11743",
"11753"
],
"series": [
"arts_22316"
],
"categories": [
"arts_1",
"arts_12276",
"arts_235"
],
"tags": [
"arts_10278",
"arts_2855",
"arts_14183",
"arts_1297",
"arts_8805",
"arts_1143",
"arts_21928"
],
"featImg": "arts_13990277",
"label": "source_arts_13990274"
},
"arts_13990218": {
"type": "posts",
"id": "arts_13990218",
"meta": {
"index": "posts_1716263798",
"site": "arts",
"id": "13990218",
"score": null,
"sort": [
1779994161000
]
},
"guestAuthors": [],
"slug": "indian-mango-party-san-francisco-mission",
"title": "Indian Mangoes Are the ‘Fruit of the Gods.’ Now, in San Francisco, They Have Their Own Party",
"publishDate": 1779994161,
"format": "standard",
"headTitle": "Indian Mangoes Are the ‘Fruit of the Gods.’ Now, in San Francisco, They Have Their Own Party | KQED",
"labelTerm": {},
"content": "\u003cp>King of fruits. Fruit of the gods. These are only two of the grand titles given to the mango, which people began cultivating over 4,000 years ago. In the millennia since, the fruit has been spiritually worshipped, \u003ca href=\"https://www.bbc.com/news/magazine-35461265\">politically propagandized\u003c/a> and, most simply, enjoyed — perhaps nowhere more than on the \u003ca href=\"https://www.kqed.org/arts/tag/india\">Indian subcontinent\u003c/a>. \u003c/p>\n\n\n\n\u003cp>Here in the Bay Area, however, the Indian diaspora has mostly had to settle for a sad, fibrous version of the fruit. But a group of San Franciscans of Indian descent are hoping to change that, introducing Americans to the glories of the Indian mango. On Sunday, May 31, from 1–4 p.m., San Francisco resident Darshil Patel will host his third annual grassroots mango party in the Mission alongside co-organizers Deep Mehta, Fareeha Salahuddin, Parth Patel and Dylan Patel.\u003c/p>\n\n\n\n\u003cp>For mango lovers, the day has come. Hundreds of Indian \u003ca href=\"https://www.scmp.com/week-asia/economics/article/3082471/indians-know-alphonso-king-mangoes-if-only-they-could-buy-some\">Alphonso\u003c/a> and \u003ca href=\"https://timesofindia.indiatimes.com/life-style/food-news/how-gujarats-kesar-mangoes-became-a-seasonal-favourite-in-london-heathrow/articleshow/131307607.cms\">Kesar\u003c/a> mangoes will be distributed for free, as volunteers peel and slice the fruit on the spot. (Pre-cutting degrades quality.) \u003c/p>\n\n\n\n\u003cp>At last year’s edition, some attendees brought mango desserts, like mango sticky rice and \u003ca href=\"https://www.instagram.com/reel/DJ5GkB7BSXO/?utm_source=ig_web_button_share_sheet\">mango sablée tartlets\u003c/a>, to share with the group. Partygoers picked up free \u003ca href=\"https://x.com/AndrewYatzkan/status/1923855295144657073?s=20\">“Mango Tango”\u003c/a> T-shirts and joined spikeball games while a DJ performed. \u003c/p>\n\n\n\n\u003cp>Sunday’s party should be another wholesome event. Last year, a toddler tried her very first mango.\u003c/p>\n\n\n\n\u003cfigure class=\"wp-block-image size-full\">\u003cimg loading=\"lazy\" decoding=\"async\" width=\"2000\" height=\"1333\" src=\"https://cdn.kqed.org/wp-content/uploads/sites/2/2026/05/mango-toddler.jpg\" alt=\"A father holding a young toddler feeds the child a piece of mango.\" class=\"wp-image-13990230\" srcset=\"https://cdn.kqed.org/wp-content/uploads/sites/2/2026/05/mango-toddler.jpg 2000w, https://cdn.kqed.org/wp-content/uploads/sites/2/2026/05/mango-toddler-160x107.jpg 160w, https://cdn.kqed.org/wp-content/uploads/sites/2/2026/05/mango-toddler-768x512.jpg 768w, https://cdn.kqed.org/wp-content/uploads/sites/2/2026/05/mango-toddler-1536x1024.jpg 1536w\" sizes=\"auto, (max-width: 2000px) 100vw, 2000px\">\u003cfigcaption class=\"wp-element-caption\">Some attendees of the 2025 party had been enjoying mangoes their whole lives. For others, it was their very first. (Courtesy of Deep Mehta)\u003c/figcaption>\u003c/figure>\n\n\n\n\u003cp>What began as a casual meeting of eight friends sharing a box of mangoes in 2023 has ballooned into an hours-long extravaganza backed by silent sponsors, who help cover the cost of the mangoes. Roughly 250 people are expected to attend this year. \u003c/p>\n\n\n\n\u003cp>[ad fullwidth]\u003c/p>\n\u003cp>It started in 2024, when Patel \u003ca href=\"https://x.com/darshil/status/1802748248949670386?s=20\">tweeted\u003c/a> about throwing a mango party to gauge public interest. The response was overwhelming, as dozens of mango lovers replied, expressing their curiosity about Indian varieties or, in many cases, their longing for a taste of home.\u003c/p>\n\n\n\n\u003cp>Like Patel, many of the people who were most excited about the party have roots in India, where the mango is the national fruit. There, the fruit is so beloved it’s woven into cultural traditions, from hanging mango leaves during weddings and housewarmings for good luck to stories in Hindu mythology: Ganesha wins a divine mango of knowledge, while mango blossoms tip the arrows of the love god Kama.\u003c/p>\n\n\n\n\u003cp>For Indians today, particularly those living abroad, the Indian mango is a nostalgic reminder of childhood and family. \u003c/p>\n\n\n\n\u003cfigure class=\"wp-block-image size-full\">\u003cimg loading=\"lazy\" decoding=\"async\" width=\"2000\" height=\"1326\" src=\"https://cdn.kqed.org/wp-content/uploads/sites/2/2026/05/sliced-mangoes.jpg\" alt=\"A spread of sliced mangoes on a picnic table.\" class=\"wp-image-13990243\" srcset=\"https://cdn.kqed.org/wp-content/uploads/sites/2/2026/05/sliced-mangoes.jpg 2000w, https://cdn.kqed.org/wp-content/uploads/sites/2/2026/05/sliced-mangoes-160x106.jpg 160w, https://cdn.kqed.org/wp-content/uploads/sites/2/2026/05/sliced-mangoes-768x509.jpg 768w, https://cdn.kqed.org/wp-content/uploads/sites/2/2026/05/sliced-mangoes-1536x1018.jpg 1536w\" sizes=\"auto, (max-width: 2000px) 100vw, 2000px\">\u003cfigcaption class=\"wp-element-caption\">Alphonso and Kesar mangoes, sliced fresh so the fruit doesn’t deteriorate. (Courtesy of Deep Mehta)\u003c/figcaption>\u003c/figure>\n\n\n\n\u003cp>Co-organizer Deep Mehta has visceral memories of his grandmother hand-feeding him pulped mango at home in Mumbai, in the state Maharashtra, where \u003ca href=\"https://www.scmp.com/week-asia/economics/article/3082471/indians-know-alphonso-king-mangoes-if-only-they-could-buy-some\">Alphonso\u003c/a> mangoes — “objectively the best,” Mehta says — are native.\u003c/p>\n\n\n\n\u003cp>“When I see a mango [in the U.S.], my brain is thinking, ‘This is going to be super sweet and juicy,’ and then it just doesn’t meet those expectations,” he says.\u003c/p>\n\n\n\n\u003cp>Sarv Kulpati, who left India at 9, vividly remembers his grandmother cutting mangoes “hedgehog style” (crisscrossing the fruit and turning it inside out) while the family gathered around the table, hands sticky with juice. “A mango means a bunch of people sitting together,” says Kulpati, who attended last year’s event. “Honestly, I do not have any memories of eating mango by myself.”\u003c/p>\n\n\n\n\u003cfigure class=\"wp-block-image size-full\">\u003cimg loading=\"lazy\" decoding=\"async\" width=\"2000\" height=\"1326\" src=\"https://cdn.kqed.org/wp-content/uploads/sites/2/2026/05/mango-abundance.jpg\" alt=\"A man slices mangoes outdoors while a smiling woman looks on.\" class=\"wp-image-13990245\" srcset=\"https://cdn.kqed.org/wp-content/uploads/sites/2/2026/05/mango-abundance.jpg 2000w, https://cdn.kqed.org/wp-content/uploads/sites/2/2026/05/mango-abundance-160x106.jpg 160w, https://cdn.kqed.org/wp-content/uploads/sites/2/2026/05/mango-abundance-768x509.jpg 768w, https://cdn.kqed.org/wp-content/uploads/sites/2/2026/05/mango-abundance-1536x1018.jpg 1536w\" sizes=\"auto, (max-width: 2000px) 100vw, 2000px\">\u003cfigcaption class=\"wp-element-caption\">New to San Francisco at the time, Sarv Kulpati (right) spent most of the 2025 event cutting the mangoes. (Courtesy of Deep Mehta)\u003c/figcaption>\u003c/figure>\n\n\n\n\u003cp>Patel recalls eating mango ras (blended ripe mangoes) with his cousin every day after school in India, where he lived until he was 8. “It would just put us to sleep because there’s so much sugar,” he says. \u003c/p>\n\n\n\n\u003cp>Ultimately, Patel and Mehta argue, most Americans \u003ca href=\"https://www.theguardian.com/lifeandstyle/wordofmouth/2012/apr/27/do-you-know-alphonso-mango\">don’t know what they’re missing\u003c/a>. “It’s like a different fruit,” they both say, citing the sweetness, flavor and sheer aroma. Mehta can’t bring himself to eat an American mango. “It just doesn’t hit the same.”\u003c/p>\n\n\n\n\u003cp>Mehta’s a purist, but he might have a point. \u003c/p>\n\n\n\n\n\n\u003cp>The mangoes most commonly found in U.S. grocery stores are the \u003ca href=\"https://www.mango.org/wp-content/uploads/PDF/Mango_Crop_Forecast.pdf\">Tommy Atkins variety\u003c/a>, sourced almost exclusively from Latin America, which \u003ca href=\"https://www.mango.org/wp-content/uploads/2026/03/3-Year-trend-2025_mango_imports_eng-1.pdf\">accounts for roughly 98% of mango imports\u003c/a>. Originally cultivated by a farmer named Thomas Atkins from Broward County, Florida, Tommy Atkins mangoes are known for their unremarkable flavor, dense fibrousness and extreme durability — the last of which ultimately led to commercial success. But from the outset, the mango had critics: In the 1950s, the \u003ca href=\"https://drive.google.com/file/d/1dLDxi1V1ry58n6JYPKmK9f8mw3GBPefu/view?usp=sharing\">Florida Mango Forum\u003c/a> rejected the Atkins mango multiple times because of its disappointing flavor profile.\u003c/p>\n\n\n\n\u003cp>That’s the mango most Americans grew up eating. For many South Asians, then, President George W. Bush is remembered not only for 9/11 and the War on Terror, but for the 2006 “\u003ca href=\"https://www.thejuggernaut.com/indian-mangos\">nuclear mango deal\u003c/a>,” which ended a 17-year U.S. ban on Indian mango imports.\u003c/p>\n\n\n\n\u003cp>Which isn’t to say that it’s easy to find Indian mangoes here in the Bay Area. \u003c/p>\n\n\n\n\u003cp>Dealing mangoes can be something of an extreme sport. The \u003ca href=\"https://www.wsj.com/us-news/americans-will-do-anything-to-get-indian-mangoes-3a711ce8\">\u003cem>Wall Street Journal\u003c/em>\u003c/a> recently covered hustlers powering the Indian mango supply in the U.S., including a senior tech manager in the D.C. area who moonlights as a mango dealer during the fruit’s short season, picking up hundreds of boxes of mangoes at Virginia’s Dulles International Airport multiple times a week. \u003c/p>\n\n\n\n\u003cp>These days, you can buy Indian mangoes by joining WhatsApp groups and monitoring the chat for shipment details and \u003ca href=\"https://x.com/liminalsnake/status/2053209580440793184?s=20\">updates from a particular dealer\u003c/a>. A few websites offering hyperlocal mango delivery, often powered by small teams of fruit vendors, have also sprung up. Today, a six-pound box of Indian mangoes — roughly nine to 12 fruits — costs $50 to $60, inflated this year by tariff uncertainty and increased fuel prices from the Iran war. \u003c/p>\n\n\n\n\u003cp>For previous mango parties, Patel would \u003ca href=\"https://x.com/darshil/status/1916991896544817335?s=20\">call a local Indian grocery store\u003c/a> every day. When the mango shipment finally arrived, it’d be a race to the store to buy the boxes he needed before they ran out. This year, he’s providing mangoes through \u003ca href=\"https://aumpi.com/pages/copy-of-contact\">AumPi\u003c/a>, a Bay Area–based grassroots mango distributor that donates its profits toward tackling malnutrition in India.\u003c/p>\n\n\n\n\u003cfigure class=\"wp-block-image size-full\">\u003cimg loading=\"lazy\" decoding=\"async\" width=\"2000\" height=\"1326\" src=\"https://cdn.kqed.org/wp-content/uploads/sites/2/2026/05/mango-drink.jpg\" alt='Man and woman pose in front of a mango drink dispenser labeled \"hot.\"' class=\"wp-image-13990248\" srcset=\"https://cdn.kqed.org/wp-content/uploads/sites/2/2026/05/mango-drink.jpg 2000w, https://cdn.kqed.org/wp-content/uploads/sites/2/2026/05/mango-drink-160x106.jpg 160w, https://cdn.kqed.org/wp-content/uploads/sites/2/2026/05/mango-drink-768x509.jpg 768w, https://cdn.kqed.org/wp-content/uploads/sites/2/2026/05/mango-drink-1536x1018.jpg 1536w\" sizes=\"auto, (max-width: 2000px) 100vw, 2000px\">\u003cfigcaption class=\"wp-element-caption\">Deep Mehta (left) poses in front of a mango drink with Raina Doshi, who co-organized the 2025 mango party. (Courtesy of Deep Mehta)\u003c/figcaption>\u003c/figure>\n\n\n\n\u003cp>If getting the fruit takes persistence, enjoying it on Sunday will not. For Mehta, the party at the park is a way of “spreading the love” of a tasty fruit. Indian mangoes are a “largely undiscovered” treasure “that should be shared,” he says.\u003c/p>\n\n\n\n\u003cp>This year’s mango party will be held at a park in the Mission — the organizers aren’t publicizing the exact location for fear that \u003cem>too \u003c/em>many people will show up, and they want to make sure there are enough mangoes for everyone. Those interested in attending can send a brief love letter to mangoes via \u003ca href=\"mailto:darshil4133@gmail.com\">email\u003c/a> to Patel, who’s working with his co-organizers to curate the guest list. Space is limited.\u003c/p>\n\n\n\n\u003cp>So far, Patel says, three different people have sent him photos of their cats named Mango. They’re in. \u003c/p>\n\n\n\n\u003chr class=\"wp-block-separator has-alpha-channel-opacity\">\n\n\n\n\u003cp>[ad floatright]\u003c/p>\n\u003cp>\u003cem>The mango party will take place on Sunday, May 31, 1–4 p.m., in San Francisco’s Mission District. \u003ca href=\"mailto:darshil4133@gmail.com\">Email the organizers\u003c/a> to get on the guest list and to receive the exact location.\u003c/em> \u003cem>\u003cstrong>Editor’s note:\u003c/strong> As of May 30, the organizers say the event has reached capacity.\u003c/em>\u003c/p>\n\n",
"blocks": [
{
"blockName": "core/paragraph",
"attrs": [],
"innerHTML": "\n\u003cp>King of fruits. Fruit of the gods. These are only two of the grand titles given to the mango, which people began cultivating over 4,000 years ago. In the millennia since, the fruit has been spiritually worshipped, \u003ca href=\"https://www.bbc.com/news/magazine-35461265\">politically propagandized\u003c/a> and, most simply, enjoyed — perhaps nowhere more than on the \u003ca href=\"https://www.kqed.org/arts/tag/india\">Indian subcontinent\u003c/a>. \u003c/p>\n",
"innerContent": [
"\n\u003cp>King of fruits. Fruit of the gods. These are only two of the grand titles given to the mango, which people began cultivating over 4,000 years ago. In the millennia since, the fruit has been spiritually worshipped, \u003ca href=\"https://www.bbc.com/news/magazine-35461265\">politically propagandized\u003c/a> and, most simply, enjoyed — perhaps nowhere more than on the \u003ca href=\"https://www.kqed.org/arts/tag/india\">Indian subcontinent\u003c/a>. \u003c/p>\n"
],
"innerBlocks": []
},
{
"blockName": "core/paragraph",
"attrs": [],
"innerHTML": "\n\u003cp>Here in the Bay Area, however, the Indian diaspora has mostly had to settle for a sad, fibrous version of the fruit. But a group of San Franciscans of Indian descent are hoping to change that, introducing Americans to the glories of the Indian mango. On Sunday, May 31, from 1–4 p.m., San Francisco resident Darshil Patel will host his third annual grassroots mango party in the Mission alongside co-organizers Deep Mehta, Fareeha Salahuddin, Parth Patel and Dylan Patel.\u003c/p>\n",
"innerContent": [
"\n\u003cp>Here in the Bay Area, however, the Indian diaspora has mostly had to settle for a sad, fibrous version of the fruit. But a group of San Franciscans of Indian descent are hoping to change that, introducing Americans to the glories of the Indian mango. On Sunday, May 31, from 1–4 p.m., San Francisco resident Darshil Patel will host his third annual grassroots mango party in the Mission alongside co-organizers Deep Mehta, Fareeha Salahuddin, Parth Patel and Dylan Patel.\u003c/p>\n"
],
"innerBlocks": []
},
{
"blockName": "core/paragraph",
"attrs": [],
"innerHTML": "\n\u003cp>For mango lovers, the day has come. Hundreds of Indian \u003ca href=\"https://www.scmp.com/week-asia/economics/article/3082471/indians-know-alphonso-king-mangoes-if-only-they-could-buy-some\">Alphonso\u003c/a> and \u003ca href=\"https://timesofindia.indiatimes.com/life-style/food-news/how-gujarats-kesar-mangoes-became-a-seasonal-favourite-in-london-heathrow/articleshow/131307607.cms\">Kesar\u003c/a> mangoes will be distributed for free, as volunteers peel and slice the fruit on the spot. (Pre-cutting degrades quality.) \u003c/p>\n",
"innerContent": [
"\n\u003cp>For mango lovers, the day has come. Hundreds of Indian \u003ca href=\"https://www.scmp.com/week-asia/economics/article/3082471/indians-know-alphonso-king-mangoes-if-only-they-could-buy-some\">Alphonso\u003c/a> and \u003ca href=\"https://timesofindia.indiatimes.com/life-style/food-news/how-gujarats-kesar-mangoes-became-a-seasonal-favourite-in-london-heathrow/articleshow/131307607.cms\">Kesar\u003c/a> mangoes will be distributed for free, as volunteers peel and slice the fruit on the spot. (Pre-cutting degrades quality.) \u003c/p>\n"
],
"innerBlocks": []
},
{
"blockName": "core/paragraph",
"attrs": [],
"innerHTML": "\n\u003cp>At last year’s edition, some attendees brought mango desserts, like mango sticky rice and \u003ca href=\"https://www.instagram.com/reel/DJ5GkB7BSXO/?utm_source=ig_web_button_share_sheet\">mango sablée tartlets\u003c/a>, to share with the group. Partygoers picked up free \u003ca href=\"https://x.com/AndrewYatzkan/status/1923855295144657073?s=20\">“Mango Tango”\u003c/a> T-shirts and joined spikeball games while a DJ performed. \u003c/p>\n",
"innerContent": [
"\n\u003cp>At last year’s edition, some attendees brought mango desserts, like mango sticky rice and \u003ca href=\"https://www.instagram.com/reel/DJ5GkB7BSXO/?utm_source=ig_web_button_share_sheet\">mango sablée tartlets\u003c/a>, to share with the group. Partygoers picked up free \u003ca href=\"https://x.com/AndrewYatzkan/status/1923855295144657073?s=20\">“Mango Tango”\u003c/a> T-shirts and joined spikeball games while a DJ performed. \u003c/p>\n"
],
"innerBlocks": []
},
{
"blockName": "core/paragraph",
"attrs": [],
"innerHTML": "\n\u003cp>Sunday’s party should be another wholesome event. Last year, a toddler tried her very first mango.\u003c/p>\n",
"innerContent": [
"\n\u003cp>Sunday’s party should be another wholesome event. Last year, a toddler tried her very first mango.\u003c/p>\n"
],
"innerBlocks": []
},
{
"blockName": "core/image",
"attrs": {
"id": 13990230,
"sizeSlug": "full",
"linkDestination": "none",
"imageCredit": "Courtesy of Deep Mehta",
"srcset": "https://cdn.kqed.org/wp-content/uploads/sites/2/2026/05/mango-toddler.jpg 2000w, https://cdn.kqed.org/wp-content/uploads/sites/2/2026/05/mango-toddler-160x107.jpg 160w, https://cdn.kqed.org/wp-content/uploads/sites/2/2026/05/mango-toddler-768x512.jpg 768w, https://cdn.kqed.org/wp-content/uploads/sites/2/2026/05/mango-toddler-1536x1024.jpg 1536w",
"sizes": "(min-width: 992px) min(100vw, 1536px), (min-width: 768px) min(100vw, 1280px), min(100vw, 1020px)"
},
"innerHTML": "\n\u003cfigure class=\"wp-block-image size-full\">\u003cimg src=\"https://cdn.kqed.org/wp-content/uploads/sites/2/2026/05/mango-toddler.jpg\" alt=\"A father holding a young toddler feeds the child a piece of mango.\" class=\"wp-image-13990230\" srcset=\"https://cdn.kqed.org/wp-content/uploads/sites/2/2026/05/mango-toddler.jpg 2000w, https://cdn.kqed.org/wp-content/uploads/sites/2/2026/05/mango-toddler-160x107.jpg 160w, https://cdn.kqed.org/wp-content/uploads/sites/2/2026/05/mango-toddler-768x512.jpg 768w, https://cdn.kqed.org/wp-content/uploads/sites/2/2026/05/mango-toddler-1536x1024.jpg 1536w\" sizes=\"(min-width: 992px) min(100vw, 1536px), (min-width: 768px) min(100vw, 1280px), min(100vw, 1020px)\" />\u003cfigcaption class=\"wp-element-caption\">Some attendees of the 2025 party had been enjoying mangoes their whole lives. For others, it was their very first.\u003c/figcaption>\u003c/figure>\n",
"innerContent": [
"\n\u003cfigure class=\"wp-block-image size-full\">\u003cimg src=\"https://cdn.kqed.org/wp-content/uploads/sites/2/2026/05/mango-toddler.jpg\" alt=\"A father holding a young toddler feeds the child a piece of mango.\" class=\"wp-image-13990230\" />\u003cfigcaption class=\"wp-element-caption\">Some attendees of the 2025 party had been enjoying mangoes their whole lives. For others, it was their very first.\u003c/figcaption>\u003c/figure>\n"
],
"innerBlocks": []
},
{
"blockName": "core/paragraph",
"attrs": [],
"innerHTML": "\n\u003cp>What began as a casual meeting of eight friends sharing a box of mangoes in 2023 has ballooned into an hours-long extravaganza backed by silent sponsors, who help cover the cost of the mangoes. Roughly 250 people are expected to attend this year. \u003c/p>\n",
"innerContent": [
"\n\u003cp>What began as a casual meeting of eight friends sharing a box of mangoes in 2023 has ballooned into an hours-long extravaganza backed by silent sponsors, who help cover the cost of the mangoes. Roughly 250 people are expected to attend this year. \u003c/p>\n"
],
"innerBlocks": []
},
{
"blockName": "kqed/ad",
"attrs": {
"format": "fullwidth"
},
"innerBlocks": [],
"innerHTML": "",
"innerContent": []
},
{
"blockName": "core/paragraph",
"attrs": [],
"innerHTML": "\n\u003cp>It started in 2024, when Patel \u003ca href=\"https://x.com/darshil/status/1802748248949670386?s=20\">tweeted\u003c/a> about throwing a mango party to gauge public interest. The response was overwhelming, as dozens of mango lovers replied, expressing their curiosity about Indian varieties or, in many cases, their longing for a taste of home.\u003c/p>\n",
"innerContent": [
"\n\u003cp>It started in 2024, when Patel \u003ca href=\"https://x.com/darshil/status/1802748248949670386?s=20\">tweeted\u003c/a> about throwing a mango party to gauge public interest. The response was overwhelming, as dozens of mango lovers replied, expressing their curiosity about Indian varieties or, in many cases, their longing for a taste of home.\u003c/p>\n"
],
"innerBlocks": []
},
{
"blockName": "core/paragraph",
"attrs": [],
"innerHTML": "\n\u003cp>Like Patel, many of the people who were most excited about the party have roots in India, where the mango is the national fruit. There, the fruit is so beloved it’s woven into cultural traditions, from hanging mango leaves during weddings and housewarmings for good luck to stories in Hindu mythology: Ganesha wins a divine mango of knowledge, while mango blossoms tip the arrows of the love god Kama.\u003c/p>\n",
"innerContent": [
"\n\u003cp>Like Patel, many of the people who were most excited about the party have roots in India, where the mango is the national fruit. There, the fruit is so beloved it’s woven into cultural traditions, from hanging mango leaves during weddings and housewarmings for good luck to stories in Hindu mythology: Ganesha wins a divine mango of knowledge, while mango blossoms tip the arrows of the love god Kama.\u003c/p>\n"
],
"innerBlocks": []
},
{
"blockName": "core/paragraph",
"attrs": [],
"innerHTML": "\n\u003cp>For Indians today, particularly those living abroad, the Indian mango is a nostalgic reminder of childhood and family. \u003c/p>\n",
"innerContent": [
"\n\u003cp>For Indians today, particularly those living abroad, the Indian mango is a nostalgic reminder of childhood and family. \u003c/p>\n"
],
"innerBlocks": []
},
{
"blockName": "core/image",
"attrs": {
"id": 13990243,
"sizeSlug": "full",
"linkDestination": "none",
"imageCredit": "Courtesy of Deep Mehta",
"srcset": "https://cdn.kqed.org/wp-content/uploads/sites/2/2026/05/sliced-mangoes.jpg 2000w, https://cdn.kqed.org/wp-content/uploads/sites/2/2026/05/sliced-mangoes-160x106.jpg 160w, https://cdn.kqed.org/wp-content/uploads/sites/2/2026/05/sliced-mangoes-768x509.jpg 768w, https://cdn.kqed.org/wp-content/uploads/sites/2/2026/05/sliced-mangoes-1536x1018.jpg 1536w",
"sizes": "(min-width: 992px) min(100vw, 1536px), (min-width: 768px) min(100vw, 1280px), min(100vw, 1020px)"
},
"innerHTML": "\n\u003cfigure class=\"wp-block-image size-full\">\u003cimg src=\"https://cdn.kqed.org/wp-content/uploads/sites/2/2026/05/sliced-mangoes.jpg\" alt=\"A spread of sliced mangoes on a picnic table.\" class=\"wp-image-13990243\" srcset=\"https://cdn.kqed.org/wp-content/uploads/sites/2/2026/05/sliced-mangoes.jpg 2000w, https://cdn.kqed.org/wp-content/uploads/sites/2/2026/05/sliced-mangoes-160x106.jpg 160w, https://cdn.kqed.org/wp-content/uploads/sites/2/2026/05/sliced-mangoes-768x509.jpg 768w, https://cdn.kqed.org/wp-content/uploads/sites/2/2026/05/sliced-mangoes-1536x1018.jpg 1536w\" sizes=\"(min-width: 992px) min(100vw, 1536px), (min-width: 768px) min(100vw, 1280px), min(100vw, 1020px)\" />\u003cfigcaption class=\"wp-element-caption\">Alphonso and Kesar mangoes, sliced fresh so the fruit doesn’t deteriorate. \u003c/figcaption>\u003c/figure>\n",
"innerContent": [
"\n\u003cfigure class=\"wp-block-image size-full\">\u003cimg src=\"https://cdn.kqed.org/wp-content/uploads/sites/2/2026/05/sliced-mangoes.jpg\" alt=\"A spread of sliced mangoes on a picnic table.\" class=\"wp-image-13990243\" />\u003cfigcaption class=\"wp-element-caption\">Alphonso and Kesar mangoes, sliced fresh so the fruit doesn’t deteriorate. \u003c/figcaption>\u003c/figure>\n"
],
"innerBlocks": []
},
{
"blockName": "core/paragraph",
"attrs": [],
"innerHTML": "\n\u003cp>Co-organizer Deep Mehta has visceral memories of his grandmother hand-feeding him pulped mango at home in Mumbai, in the state Maharashtra, where \u003ca href=\"https://www.scmp.com/week-asia/economics/article/3082471/indians-know-alphonso-king-mangoes-if-only-they-could-buy-some\">Alphonso\u003c/a> mangoes — “objectively the best,” Mehta says — are native.\u003c/p>\n",
"innerContent": [
"\n\u003cp>Co-organizer Deep Mehta has visceral memories of his grandmother hand-feeding him pulped mango at home in Mumbai, in the state Maharashtra, where \u003ca href=\"https://www.scmp.com/week-asia/economics/article/3082471/indians-know-alphonso-king-mangoes-if-only-they-could-buy-some\">Alphonso\u003c/a> mangoes — “objectively the best,” Mehta says — are native.\u003c/p>\n"
],
"innerBlocks": []
},
{
"blockName": "core/paragraph",
"attrs": [],
"innerHTML": "\n\u003cp>“When I see a mango [in the U.S.], my brain is thinking, ‘This is going to be super sweet and juicy,’ and then it just doesn’t meet those expectations,” he says.\u003c/p>\n",
"innerContent": [
"\n\u003cp>“When I see a mango [in the U.S.], my brain is thinking, ‘This is going to be super sweet and juicy,’ and then it just doesn’t meet those expectations,” he says.\u003c/p>\n"
],
"innerBlocks": []
},
{
"blockName": "core/paragraph",
"attrs": [],
"innerHTML": "\n\u003cp>Sarv Kulpati, who left India at 9, vividly remembers his grandmother cutting mangoes “hedgehog style” (crisscrossing the fruit and turning it inside out) while the family gathered around the table, hands sticky with juice. “A mango means a bunch of people sitting together,” says Kulpati, who attended last year’s event. “Honestly, I do not have any memories of eating mango by myself.”\u003c/p>\n",
"innerContent": [
"\n\u003cp>Sarv Kulpati, who left India at 9, vividly remembers his grandmother cutting mangoes “hedgehog style” (crisscrossing the fruit and turning it inside out) while the family gathered around the table, hands sticky with juice. “A mango means a bunch of people sitting together,” says Kulpati, who attended last year’s event. “Honestly, I do not have any memories of eating mango by myself.”\u003c/p>\n"
],
"innerBlocks": []
},
{
"blockName": "core/image",
"attrs": {
"id": 13990245,
"sizeSlug": "full",
"linkDestination": "none",
"imageCredit": "Courtesy of Deep Mehta",
"srcset": "https://cdn.kqed.org/wp-content/uploads/sites/2/2026/05/mango-abundance.jpg 2000w, https://cdn.kqed.org/wp-content/uploads/sites/2/2026/05/mango-abundance-160x106.jpg 160w, https://cdn.kqed.org/wp-content/uploads/sites/2/2026/05/mango-abundance-768x509.jpg 768w, https://cdn.kqed.org/wp-content/uploads/sites/2/2026/05/mango-abundance-1536x1018.jpg 1536w",
"sizes": "(min-width: 992px) min(100vw, 1536px), (min-width: 768px) min(100vw, 1280px), min(100vw, 1020px)"
},
"innerHTML": "\n\u003cfigure class=\"wp-block-image size-full\">\u003cimg src=\"https://cdn.kqed.org/wp-content/uploads/sites/2/2026/05/mango-abundance.jpg\" alt=\"A man slices mangoes outdoors while a smiling woman looks on.\" class=\"wp-image-13990245\" srcset=\"https://cdn.kqed.org/wp-content/uploads/sites/2/2026/05/mango-abundance.jpg 2000w, https://cdn.kqed.org/wp-content/uploads/sites/2/2026/05/mango-abundance-160x106.jpg 160w, https://cdn.kqed.org/wp-content/uploads/sites/2/2026/05/mango-abundance-768x509.jpg 768w, https://cdn.kqed.org/wp-content/uploads/sites/2/2026/05/mango-abundance-1536x1018.jpg 1536w\" sizes=\"(min-width: 992px) min(100vw, 1536px), (min-width: 768px) min(100vw, 1280px), min(100vw, 1020px)\" />\u003cfigcaption class=\"wp-element-caption\">New to San Francisco at the time, Sarv Kulpati (right) spent most of the 2025 event cutting the mangoes.\u003c/figcaption>\u003c/figure>\n",
"innerContent": [
"\n\u003cfigure class=\"wp-block-image size-full\">\u003cimg src=\"https://cdn.kqed.org/wp-content/uploads/sites/2/2026/05/mango-abundance.jpg\" alt=\"A man slices mangoes outdoors while a smiling woman looks on.\" class=\"wp-image-13990245\" />\u003cfigcaption class=\"wp-element-caption\">New to San Francisco at the time, Sarv Kulpati (right) spent most of the 2025 event cutting the mangoes.\u003c/figcaption>\u003c/figure>\n"
],
"innerBlocks": []
},
{
"blockName": "core/paragraph",
"attrs": [],
"innerHTML": "\n\u003cp>Patel recalls eating mango ras (blended ripe mangoes) with his cousin every day after school in India, where he lived until he was 8. “It would just put us to sleep because there’s so much sugar,” he says. \u003c/p>\n",
"innerContent": [
"\n\u003cp>Patel recalls eating mango ras (blended ripe mangoes) with his cousin every day after school in India, where he lived until he was 8. “It would just put us to sleep because there’s so much sugar,” he says. \u003c/p>\n"
],
"innerBlocks": []
},
{
"blockName": "core/paragraph",
"attrs": [],
"innerHTML": "\n\u003cp>Ultimately, Patel and Mehta argue, most Americans \u003ca href=\"https://www.theguardian.com/lifeandstyle/wordofmouth/2012/apr/27/do-you-know-alphonso-mango\">don’t know what they’re missing\u003c/a>. “It’s like a different fruit,” they both say, citing the sweetness, flavor and sheer aroma. Mehta can’t bring himself to eat an American mango. “It just doesn’t hit the same.”\u003c/p>\n",
"innerContent": [
"\n\u003cp>Ultimately, Patel and Mehta argue, most Americans \u003ca href=\"https://www.theguardian.com/lifeandstyle/wordofmouth/2012/apr/27/do-you-know-alphonso-mango\">don’t know what they’re missing\u003c/a>. “It’s like a different fruit,” they both say, citing the sweetness, flavor and sheer aroma. Mehta can’t bring himself to eat an American mango. “It just doesn’t hit the same.”\u003c/p>\n"
],
"innerBlocks": []
},
{
"blockName": "core/paragraph",
"attrs": [],
"innerHTML": "\n\u003cp>Mehta’s a purist, but he might have a point. \u003c/p>\n",
"innerContent": [
"\n\u003cp>Mehta’s a purist, but he might have a point. \u003c/p>\n"
],
"innerBlocks": []
},
{
"blockName": "kqed-v2/related-articles",
"attrs": {
"postIds": [
"arts_13925835",
"arts_13981935"
],
"labelWasCleared": true
},
"innerHTML": "",
"innerContent": [],
"innerBlocks": []
},
{
"blockName": "core/paragraph",
"attrs": [],
"innerHTML": "\n\u003cp>The mangoes most commonly found in U.S. grocery stores are the \u003ca href=\"https://www.mango.org/wp-content/uploads/PDF/Mango_Crop_Forecast.pdf\">Tommy Atkins variety\u003c/a>, sourced almost exclusively from Latin America, which \u003ca href=\"https://www.mango.org/wp-content/uploads/2026/03/3-Year-trend-2025_mango_imports_eng-1.pdf\">accounts for roughly 98% of mango imports\u003c/a>. Originally cultivated by a farmer named Thomas Atkins from Broward County, Florida, Tommy Atkins mangoes are known for their unremarkable flavor, dense fibrousness and extreme durability — the last of which ultimately led to commercial success. But from the outset, the mango had critics: In the 1950s, the \u003ca href=\"https://drive.google.com/file/d/1dLDxi1V1ry58n6JYPKmK9f8mw3GBPefu/view?usp=sharing\">Florida Mango Forum\u003c/a> rejected the Atkins mango multiple times because of its disappointing flavor profile.\u003c/p>\n",
"innerContent": [
"\n\u003cp>The mangoes most commonly found in U.S. grocery stores are the \u003ca href=\"https://www.mango.org/wp-content/uploads/PDF/Mango_Crop_Forecast.pdf\">Tommy Atkins variety\u003c/a>, sourced almost exclusively from Latin America, which \u003ca href=\"https://www.mango.org/wp-content/uploads/2026/03/3-Year-trend-2025_mango_imports_eng-1.pdf\">accounts for roughly 98% of mango imports\u003c/a>. Originally cultivated by a farmer named Thomas Atkins from Broward County, Florida, Tommy Atkins mangoes are known for their unremarkable flavor, dense fibrousness and extreme durability — the last of which ultimately led to commercial success. But from the outset, the mango had critics: In the 1950s, the \u003ca href=\"https://drive.google.com/file/d/1dLDxi1V1ry58n6JYPKmK9f8mw3GBPefu/view?usp=sharing\">Florida Mango Forum\u003c/a> rejected the Atkins mango multiple times because of its disappointing flavor profile.\u003c/p>\n"
],
"innerBlocks": []
},
{
"blockName": "core/paragraph",
"attrs": [],
"innerHTML": "\n\u003cp>That’s the mango most Americans grew up eating. For many South Asians, then, President George W. Bush is remembered not only for 9/11 and the War on Terror, but for the 2006 “\u003ca href=\"https://www.thejuggernaut.com/indian-mangos\">nuclear mango deal\u003c/a>,” which ended a 17-year U.S. ban on Indian mango imports.\u003c/p>\n",
"innerContent": [
"\n\u003cp>That’s the mango most Americans grew up eating. For many South Asians, then, President George W. Bush is remembered not only for 9/11 and the War on Terror, but for the 2006 “\u003ca href=\"https://www.thejuggernaut.com/indian-mangos\">nuclear mango deal\u003c/a>,” which ended a 17-year U.S. ban on Indian mango imports.\u003c/p>\n"
],
"innerBlocks": []
},
{
"blockName": "core/paragraph",
"attrs": [],
"innerHTML": "\n\u003cp>Which isn’t to say that it’s easy to find Indian mangoes here in the Bay Area. \u003c/p>\n",
"innerContent": [
"\n\u003cp>Which isn’t to say that it’s easy to find Indian mangoes here in the Bay Area. \u003c/p>\n"
],
"innerBlocks": []
},
{
"blockName": "core/paragraph",
"attrs": [],
"innerHTML": "\n\u003cp>Dealing mangoes can be something of an extreme sport. The \u003ca href=\"https://www.wsj.com/us-news/americans-will-do-anything-to-get-indian-mangoes-3a711ce8\">\u003cem>Wall Street Journal\u003c/em>\u003c/a> recently covered hustlers powering the Indian mango supply in the U.S., including a senior tech manager in the D.C. area who moonlights as a mango dealer during the fruit’s short season, picking up hundreds of boxes of mangoes at Virginia’s Dulles International Airport multiple times a week. \u003c/p>\n",
"innerContent": [
"\n\u003cp>Dealing mangoes can be something of an extreme sport. The \u003ca href=\"https://www.wsj.com/us-news/americans-will-do-anything-to-get-indian-mangoes-3a711ce8\">\u003cem>Wall Street Journal\u003c/em>\u003c/a> recently covered hustlers powering the Indian mango supply in the U.S., including a senior tech manager in the D.C. area who moonlights as a mango dealer during the fruit’s short season, picking up hundreds of boxes of mangoes at Virginia’s Dulles International Airport multiple times a week. \u003c/p>\n"
],
"innerBlocks": []
},
{
"blockName": "core/paragraph",
"attrs": [],
"innerHTML": "\n\u003cp>These days, you can buy Indian mangoes by joining WhatsApp groups and monitoring the chat for shipment details and \u003ca href=\"https://x.com/liminalsnake/status/2053209580440793184?s=20\">updates from a particular dealer\u003c/a>. A few websites offering hyperlocal mango delivery, often powered by small teams of fruit vendors, have also sprung up. Today, a six-pound box of Indian mangoes — roughly nine to 12 fruits — costs $50 to $60, inflated this year by tariff uncertainty and increased fuel prices from the Iran war. \u003c/p>\n",
"innerContent": [
"\n\u003cp>These days, you can buy Indian mangoes by joining WhatsApp groups and monitoring the chat for shipment details and \u003ca href=\"https://x.com/liminalsnake/status/2053209580440793184?s=20\">updates from a particular dealer\u003c/a>. A few websites offering hyperlocal mango delivery, often powered by small teams of fruit vendors, have also sprung up. Today, a six-pound box of Indian mangoes — roughly nine to 12 fruits — costs $50 to $60, inflated this year by tariff uncertainty and increased fuel prices from the Iran war. \u003c/p>\n"
],
"innerBlocks": []
},
{
"blockName": "core/paragraph",
"attrs": [],
"innerHTML": "\n\u003cp>For previous mango parties, Patel would \u003ca href=\"https://x.com/darshil/status/1916991896544817335?s=20\">call a local Indian grocery store\u003c/a> every day. When the mango shipment finally arrived, it’d be a race to the store to buy the boxes he needed before they ran out. This year, he’s providing mangoes through \u003ca href=\"https://aumpi.com/pages/copy-of-contact\">AumPi\u003c/a>, a Bay Area–based grassroots mango distributor that donates its profits toward tackling malnutrition in India.\u003c/p>\n",
"innerContent": [
"\n\u003cp>For previous mango parties, Patel would \u003ca href=\"https://x.com/darshil/status/1916991896544817335?s=20\">call a local Indian grocery store\u003c/a> every day. When the mango shipment finally arrived, it’d be a race to the store to buy the boxes he needed before they ran out. This year, he’s providing mangoes through \u003ca href=\"https://aumpi.com/pages/copy-of-contact\">AumPi\u003c/a>, a Bay Area–based grassroots mango distributor that donates its profits toward tackling malnutrition in India.\u003c/p>\n"
],
"innerBlocks": []
},
{
"blockName": "core/image",
"attrs": {
"id": 13990248,
"sizeSlug": "full",
"linkDestination": "none",
"imageCredit": "Courtesy of Deep Mehta",
"srcset": "https://cdn.kqed.org/wp-content/uploads/sites/2/2026/05/mango-drink.jpg 2000w, https://cdn.kqed.org/wp-content/uploads/sites/2/2026/05/mango-drink-160x106.jpg 160w, https://cdn.kqed.org/wp-content/uploads/sites/2/2026/05/mango-drink-768x509.jpg 768w, https://cdn.kqed.org/wp-content/uploads/sites/2/2026/05/mango-drink-1536x1018.jpg 1536w",
"sizes": "(min-width: 992px) min(100vw, 1536px), (min-width: 768px) min(100vw, 1280px), min(100vw, 1020px)"
},
"innerHTML": "\n\u003cfigure class=\"wp-block-image size-full\">\u003cimg src=\"https://cdn.kqed.org/wp-content/uploads/sites/2/2026/05/mango-drink.jpg\" alt=\"Man and woman pose in front of a mango drink dispenser labeled "hot."\" class=\"wp-image-13990248\" srcset=\"https://cdn.kqed.org/wp-content/uploads/sites/2/2026/05/mango-drink.jpg 2000w, https://cdn.kqed.org/wp-content/uploads/sites/2/2026/05/mango-drink-160x106.jpg 160w, https://cdn.kqed.org/wp-content/uploads/sites/2/2026/05/mango-drink-768x509.jpg 768w, https://cdn.kqed.org/wp-content/uploads/sites/2/2026/05/mango-drink-1536x1018.jpg 1536w\" sizes=\"(min-width: 992px) min(100vw, 1536px), (min-width: 768px) min(100vw, 1280px), min(100vw, 1020px)\" />\u003cfigcaption class=\"wp-element-caption\">Deep Mehta (left) poses in front of a mango drink with Raina Doshi, who co-organized the 2025 mango party.\u003c/figcaption>\u003c/figure>\n",
"innerContent": [
"\n\u003cfigure class=\"wp-block-image size-full\">\u003cimg src=\"https://cdn.kqed.org/wp-content/uploads/sites/2/2026/05/mango-drink.jpg\" alt=\"Man and woman pose in front of a mango drink dispenser labeled "hot."\" class=\"wp-image-13990248\" />\u003cfigcaption class=\"wp-element-caption\">Deep Mehta (left) poses in front of a mango drink with Raina Doshi, who co-organized the 2025 mango party.\u003c/figcaption>\u003c/figure>\n"
],
"innerBlocks": []
},
{
"blockName": "core/paragraph",
"attrs": [],
"innerHTML": "\n\u003cp>If getting the fruit takes persistence, enjoying it on Sunday will not. For Mehta, the party at the park is a way of “spreading the love” of a tasty fruit. Indian mangoes are a “largely undiscovered” treasure “that should be shared,” he says.\u003c/p>\n",
"innerContent": [
"\n\u003cp>If getting the fruit takes persistence, enjoying it on Sunday will not. For Mehta, the party at the park is a way of “spreading the love” of a tasty fruit. Indian mangoes are a “largely undiscovered” treasure “that should be shared,” he says.\u003c/p>\n"
],
"innerBlocks": []
},
{
"blockName": "core/paragraph",
"attrs": [],
"innerHTML": "\n\u003cp>This year’s mango party will be held at a park in the Mission — the organizers aren’t publicizing the exact location for fear that \u003cem>too \u003c/em>many people will show up, and they want to make sure there are enough mangoes for everyone. Those interested in attending can send a brief love letter to mangoes via \u003ca href=\"mailto:darshil4133@gmail.com\">email\u003c/a> to Patel, who’s working with his co-organizers to curate the guest list. Space is limited.\u003c/p>\n",
"innerContent": [
"\n\u003cp>This year’s mango party will be held at a park in the Mission — the organizers aren’t publicizing the exact location for fear that \u003cem>too \u003c/em>many people will show up, and they want to make sure there are enough mangoes for everyone. Those interested in attending can send a brief love letter to mangoes via \u003ca href=\"mailto:darshil4133@gmail.com\">email\u003c/a> to Patel, who’s working with his co-organizers to curate the guest list. Space is limited.\u003c/p>\n"
],
"innerBlocks": []
},
{
"blockName": "core/paragraph",
"attrs": [],
"innerHTML": "\n\u003cp>So far, Patel says, three different people have sent him photos of their cats named Mango. They’re in. \u003c/p>\n",
"innerContent": [
"\n\u003cp>So far, Patel says, three different people have sent him photos of their cats named Mango. They’re in. \u003c/p>\n"
],
"innerBlocks": []
},
{
"blockName": "core/separator",
"attrs": [],
"innerHTML": "\n\u003chr class=\"wp-block-separator has-alpha-channel-opacity\" />\n",
"innerContent": [
"\n\u003chr class=\"wp-block-separator has-alpha-channel-opacity\" />\n"
],
"innerBlocks": []
},
{
"blockName": "kqed/ad",
"attrs": {
"format": "floatright"
},
"innerBlocks": [],
"innerHTML": "",
"innerContent": []
},
{
"blockName": "core/paragraph",
"attrs": [],
"innerHTML": "\n\u003cp>\u003cem>The mango party will take place on Sunday, May 31, 1–4 p.m., in San Francisco’s Mission District. \u003ca href=\"mailto:darshil4133@gmail.com\">Email the organizers\u003c/a> to get on the guest list and to receive the exact location.\u003c/em> \u003cem>\u003cstrong>Editor’s note:\u003c/strong> As of May 30, the organizers say the event has reached capacity.\u003c/em>\u003c/p>\n",
"innerContent": [
"\n\u003cp>\u003cem>The mango party will take place on Sunday, May 31, 1–4 p.m., in San Francisco’s Mission District. \u003ca href=\"mailto:darshil4133@gmail.com\">Email the organizers\u003c/a> to get on the guest list and to receive the exact location.\u003c/em> \u003cem>\u003cstrong>Editor’s note:\u003c/strong> As of May 30, the organizers say the event has reached capacity.\u003c/em>\u003c/p>\n"
],
"innerBlocks": []
}
],
"excerpt": "Inside the grassroots movement to get Americans to eat a better mango.",
"status": "publish",
"parent": 0,
"modified": 1780157420,
"stats": {
"hasAudio": false,
"hasVideo": false,
"hasChartOrMap": false,
"iframeSrcs": [],
"hasGoogleForm": false,
"hasGallery": false,
"hasHearkenModule": false,
"hasPolis": false,
"paragraphCount": 27,
"wordCount": 1336
},
"headData": {
"title": "An Indian Mango Party in SF Celebrates the World's Greatest Mangoes | KQED",
"description": "Inside the grassroots movement to get Americans to eat a better mango.",
"ogTitle": "Indian Mangoes Are the ‘Fruit of the Gods.’ Now, in San Francisco, They Have Their Own Party",
"ogDescription": "",
"ogImgId": "",
"twTitle": "Indian Mangoes Are the ‘Fruit of the Gods.’ Now, in San Francisco, They Have Their Own Party",
"twDescription": "",
"twImgId": "",
"socialTitle": "An Indian Mango Party in SF Celebrates the World's Greatest Mangoes %%page%% %%sep%% KQED",
"schema": {
"@context": "https://schema.org",
"@type": "Article",
"headline": "Indian Mangoes Are the ‘Fruit of the Gods.’ Now, in San Francisco, They Have Their Own Party",
"datePublished": "2026-05-28T11:49:21-07:00",
"dateModified": "2026-05-30T09:10:20-07:00",
"image": "https://cdn.kqed.org/wp-content/uploads/2020/02/KQED-OG-Image@1x.png"
}
},
"primaryCategory": {
"termId": 12276,
"slug": "food",
"name": "Food"
},
"source": "Food",
"sourceUrl": "https://www.kqed.org/arts/13990218/indian-mango-party-san-francisco-mission",
"sticky": false,
"nprByline": "Kajsa Kedefors",
"nprStoryId": "kqed-13990218",
"templateType": "standard",
"featuredImageType": "standard",
"excludeFromSiteSearch": "Include",
"showOnAuthorArchivePages": "No",
"articleAge": "0",
"path": "/arts/13990218/indian-mango-party-san-francisco-mission",
"audioTrackLength": null,
"parsedContent": [
{
"type": "contentString",
"content": "\u003cdiv class=\"post-body\">\u003cp>\u003cp>King of fruits. Fruit of the gods. These are only two of the grand titles given to the mango, which people began cultivating over 4,000 years ago. In the millennia since, the fruit has been spiritually worshipped, \u003ca href=\"https://www.bbc.com/news/magazine-35461265\">politically propagandized\u003c/a> and, most simply, enjoyed — perhaps nowhere more than on the \u003ca href=\"https://www.kqed.org/arts/tag/india\">Indian subcontinent\u003c/a>. \u003c/p>\n\n\n\n\u003cp>Here in the Bay Area, however, the Indian diaspora has mostly had to settle for a sad, fibrous version of the fruit. But a group of San Franciscans of Indian descent are hoping to change that, introducing Americans to the glories of the Indian mango. On Sunday, May 31, from 1–4 p.m., San Francisco resident Darshil Patel will host his third annual grassroots mango party in the Mission alongside co-organizers Deep Mehta, Fareeha Salahuddin, Parth Patel and Dylan Patel.\u003c/p>\n\n\n\n\u003cp>For mango lovers, the day has come. Hundreds of Indian \u003ca href=\"https://www.scmp.com/week-asia/economics/article/3082471/indians-know-alphonso-king-mangoes-if-only-they-could-buy-some\">Alphonso\u003c/a> and \u003ca href=\"https://timesofindia.indiatimes.com/life-style/food-news/how-gujarats-kesar-mangoes-became-a-seasonal-favourite-in-london-heathrow/articleshow/131307607.cms\">Kesar\u003c/a> mangoes will be distributed for free, as volunteers peel and slice the fruit on the spot. (Pre-cutting degrades quality.) \u003c/p>\n\n\n\n\u003cp>At last year’s edition, some attendees brought mango desserts, like mango sticky rice and \u003ca href=\"https://www.instagram.com/reel/DJ5GkB7BSXO/?utm_source=ig_web_button_share_sheet\">mango sablée tartlets\u003c/a>, to share with the group. Partygoers picked up free \u003ca href=\"https://x.com/AndrewYatzkan/status/1923855295144657073?s=20\">“Mango Tango”\u003c/a> T-shirts and joined spikeball games while a DJ performed. \u003c/p>\n\n\n\n\u003cp>Sunday’s party should be another wholesome event. Last year, a toddler tried her very first mango.\u003c/p>\n\n\n\n\u003cfigure class=\"wp-block-image size-full\">\u003cimg loading=\"lazy\" decoding=\"async\" width=\"2000\" height=\"1333\" src=\"https://cdn.kqed.org/wp-content/uploads/sites/2/2026/05/mango-toddler.jpg\" alt=\"A father holding a young toddler feeds the child a piece of mango.\" class=\"wp-image-13990230\" srcset=\"https://cdn.kqed.org/wp-content/uploads/sites/2/2026/05/mango-toddler.jpg 2000w, https://cdn.kqed.org/wp-content/uploads/sites/2/2026/05/mango-toddler-160x107.jpg 160w, https://cdn.kqed.org/wp-content/uploads/sites/2/2026/05/mango-toddler-768x512.jpg 768w, https://cdn.kqed.org/wp-content/uploads/sites/2/2026/05/mango-toddler-1536x1024.jpg 1536w\" sizes=\"auto, (max-width: 2000px) 100vw, 2000px\">\u003cfigcaption class=\"wp-element-caption\">Some attendees of the 2025 party had been enjoying mangoes their whole lives. For others, it was their very first. (Courtesy of Deep Mehta)\u003c/figcaption>\u003c/figure>\n\n\n\n\u003cp>What began as a casual meeting of eight friends sharing a box of mangoes in 2023 has ballooned into an hours-long extravaganza backed by silent sponsors, who help cover the cost of the mangoes. Roughly 250 people are expected to attend this year. \u003c/p>\n\n\n\n\u003cp>\u003c/p>\u003c/div>",
"attributes": {
"named": {},
"numeric": []
}
},
{
"type": "component",
"content": "",
"name": "ad",
"attributes": {
"named": {
"label": "fullwidth"
},
"numeric": [
"fullwidth"
]
}
},
{
"type": "contentString",
"content": "\u003cdiv class=\"post-body\">\u003cp>\u003c/p>\n\u003cp>It started in 2024, when Patel \u003ca href=\"https://x.com/darshil/status/1802748248949670386?s=20\">tweeted\u003c/a> about throwing a mango party to gauge public interest. The response was overwhelming, as dozens of mango lovers replied, expressing their curiosity about Indian varieties or, in many cases, their longing for a taste of home.\u003c/p>\n\n\n\n\u003cp>Like Patel, many of the people who were most excited about the party have roots in India, where the mango is the national fruit. There, the fruit is so beloved it’s woven into cultural traditions, from hanging mango leaves during weddings and housewarmings for good luck to stories in Hindu mythology: Ganesha wins a divine mango of knowledge, while mango blossoms tip the arrows of the love god Kama.\u003c/p>\n\n\n\n\u003cp>For Indians today, particularly those living abroad, the Indian mango is a nostalgic reminder of childhood and family. \u003c/p>\n\n\n\n\u003cfigure class=\"wp-block-image size-full\">\u003cimg loading=\"lazy\" decoding=\"async\" width=\"2000\" height=\"1326\" src=\"https://cdn.kqed.org/wp-content/uploads/sites/2/2026/05/sliced-mangoes.jpg\" alt=\"A spread of sliced mangoes on a picnic table.\" class=\"wp-image-13990243\" srcset=\"https://cdn.kqed.org/wp-content/uploads/sites/2/2026/05/sliced-mangoes.jpg 2000w, https://cdn.kqed.org/wp-content/uploads/sites/2/2026/05/sliced-mangoes-160x106.jpg 160w, https://cdn.kqed.org/wp-content/uploads/sites/2/2026/05/sliced-mangoes-768x509.jpg 768w, https://cdn.kqed.org/wp-content/uploads/sites/2/2026/05/sliced-mangoes-1536x1018.jpg 1536w\" sizes=\"auto, (max-width: 2000px) 100vw, 2000px\">\u003cfigcaption class=\"wp-element-caption\">Alphonso and Kesar mangoes, sliced fresh so the fruit doesn’t deteriorate. (Courtesy of Deep Mehta)\u003c/figcaption>\u003c/figure>\n\n\n\n\u003cp>Co-organizer Deep Mehta has visceral memories of his grandmother hand-feeding him pulped mango at home in Mumbai, in the state Maharashtra, where \u003ca href=\"https://www.scmp.com/week-asia/economics/article/3082471/indians-know-alphonso-king-mangoes-if-only-they-could-buy-some\">Alphonso\u003c/a> mangoes — “objectively the best,” Mehta says — are native.\u003c/p>\n\n\n\n\u003cp>“When I see a mango [in the U.S.], my brain is thinking, ‘This is going to be super sweet and juicy,’ and then it just doesn’t meet those expectations,” he says.\u003c/p>\n\n\n\n\u003cp>Sarv Kulpati, who left India at 9, vividly remembers his grandmother cutting mangoes “hedgehog style” (crisscrossing the fruit and turning it inside out) while the family gathered around the table, hands sticky with juice. “A mango means a bunch of people sitting together,” says Kulpati, who attended last year’s event. “Honestly, I do not have any memories of eating mango by myself.”\u003c/p>\n\n\n\n\u003cfigure class=\"wp-block-image size-full\">\u003cimg loading=\"lazy\" decoding=\"async\" width=\"2000\" height=\"1326\" src=\"https://cdn.kqed.org/wp-content/uploads/sites/2/2026/05/mango-abundance.jpg\" alt=\"A man slices mangoes outdoors while a smiling woman looks on.\" class=\"wp-image-13990245\" srcset=\"https://cdn.kqed.org/wp-content/uploads/sites/2/2026/05/mango-abundance.jpg 2000w, https://cdn.kqed.org/wp-content/uploads/sites/2/2026/05/mango-abundance-160x106.jpg 160w, https://cdn.kqed.org/wp-content/uploads/sites/2/2026/05/mango-abundance-768x509.jpg 768w, https://cdn.kqed.org/wp-content/uploads/sites/2/2026/05/mango-abundance-1536x1018.jpg 1536w\" sizes=\"auto, (max-width: 2000px) 100vw, 2000px\">\u003cfigcaption class=\"wp-element-caption\">New to San Francisco at the time, Sarv Kulpati (right) spent most of the 2025 event cutting the mangoes. (Courtesy of Deep Mehta)\u003c/figcaption>\u003c/figure>\n\n\n\n\u003cp>Patel recalls eating mango ras (blended ripe mangoes) with his cousin every day after school in India, where he lived until he was 8. “It would just put us to sleep because there’s so much sugar,” he says. \u003c/p>\n\n\n\n\u003cp>Ultimately, Patel and Mehta argue, most Americans \u003ca href=\"https://www.theguardian.com/lifeandstyle/wordofmouth/2012/apr/27/do-you-know-alphonso-mango\">don’t know what they’re missing\u003c/a>. “It’s like a different fruit,” they both say, citing the sweetness, flavor and sheer aroma. Mehta can’t bring himself to eat an American mango. “It just doesn’t hit the same.”\u003c/p>\n\n\n\n\u003cp>Mehta’s a purist, but he might have a point. \u003c/p>\n\n\n\n\n\n\u003cp>The mangoes most commonly found in U.S. grocery stores are the \u003ca href=\"https://www.mango.org/wp-content/uploads/PDF/Mango_Crop_Forecast.pdf\">Tommy Atkins variety\u003c/a>, sourced almost exclusively from Latin America, which \u003ca href=\"https://www.mango.org/wp-content/uploads/2026/03/3-Year-trend-2025_mango_imports_eng-1.pdf\">accounts for roughly 98% of mango imports\u003c/a>. Originally cultivated by a farmer named Thomas Atkins from Broward County, Florida, Tommy Atkins mangoes are known for their unremarkable flavor, dense fibrousness and extreme durability — the last of which ultimately led to commercial success. But from the outset, the mango had critics: In the 1950s, the \u003ca href=\"https://drive.google.com/file/d/1dLDxi1V1ry58n6JYPKmK9f8mw3GBPefu/view?usp=sharing\">Florida Mango Forum\u003c/a> rejected the Atkins mango multiple times because of its disappointing flavor profile.\u003c/p>\n\n\n\n\u003cp>That’s the mango most Americans grew up eating. For many South Asians, then, President George W. Bush is remembered not only for 9/11 and the War on Terror, but for the 2006 “\u003ca href=\"https://www.thejuggernaut.com/indian-mangos\">nuclear mango deal\u003c/a>,” which ended a 17-year U.S. ban on Indian mango imports.\u003c/p>\n\n\n\n\u003cp>Which isn’t to say that it’s easy to find Indian mangoes here in the Bay Area. \u003c/p>\n\n\n\n\u003cp>Dealing mangoes can be something of an extreme sport. The \u003ca href=\"https://www.wsj.com/us-news/americans-will-do-anything-to-get-indian-mangoes-3a711ce8\">\u003cem>Wall Street Journal\u003c/em>\u003c/a> recently covered hustlers powering the Indian mango supply in the U.S., including a senior tech manager in the D.C. area who moonlights as a mango dealer during the fruit’s short season, picking up hundreds of boxes of mangoes at Virginia’s Dulles International Airport multiple times a week. \u003c/p>\n\n\n\n\u003cp>These days, you can buy Indian mangoes by joining WhatsApp groups and monitoring the chat for shipment details and \u003ca href=\"https://x.com/liminalsnake/status/2053209580440793184?s=20\">updates from a particular dealer\u003c/a>. A few websites offering hyperlocal mango delivery, often powered by small teams of fruit vendors, have also sprung up. Today, a six-pound box of Indian mangoes — roughly nine to 12 fruits — costs $50 to $60, inflated this year by tariff uncertainty and increased fuel prices from the Iran war. \u003c/p>\n\n\n\n\u003cp>For previous mango parties, Patel would \u003ca href=\"https://x.com/darshil/status/1916991896544817335?s=20\">call a local Indian grocery store\u003c/a> every day. When the mango shipment finally arrived, it’d be a race to the store to buy the boxes he needed before they ran out. This year, he’s providing mangoes through \u003ca href=\"https://aumpi.com/pages/copy-of-contact\">AumPi\u003c/a>, a Bay Area–based grassroots mango distributor that donates its profits toward tackling malnutrition in India.\u003c/p>\n\n\n\n\u003cfigure class=\"wp-block-image size-full\">\u003cimg loading=\"lazy\" decoding=\"async\" width=\"2000\" height=\"1326\" src=\"https://cdn.kqed.org/wp-content/uploads/sites/2/2026/05/mango-drink.jpg\" alt='Man and woman pose in front of a mango drink dispenser labeled \"hot.\"' class=\"wp-image-13990248\" srcset=\"https://cdn.kqed.org/wp-content/uploads/sites/2/2026/05/mango-drink.jpg 2000w, https://cdn.kqed.org/wp-content/uploads/sites/2/2026/05/mango-drink-160x106.jpg 160w, https://cdn.kqed.org/wp-content/uploads/sites/2/2026/05/mango-drink-768x509.jpg 768w, https://cdn.kqed.org/wp-content/uploads/sites/2/2026/05/mango-drink-1536x1018.jpg 1536w\" sizes=\"auto, (max-width: 2000px) 100vw, 2000px\">\u003cfigcaption class=\"wp-element-caption\">Deep Mehta (left) poses in front of a mango drink with Raina Doshi, who co-organized the 2025 mango party. (Courtesy of Deep Mehta)\u003c/figcaption>\u003c/figure>\n\n\n\n\u003cp>If getting the fruit takes persistence, enjoying it on Sunday will not. For Mehta, the party at the park is a way of “spreading the love” of a tasty fruit. Indian mangoes are a “largely undiscovered” treasure “that should be shared,” he says.\u003c/p>\n\n\n\n\u003cp>This year’s mango party will be held at a park in the Mission — the organizers aren’t publicizing the exact location for fear that \u003cem>too \u003c/em>many people will show up, and they want to make sure there are enough mangoes for everyone. Those interested in attending can send a brief love letter to mangoes via \u003ca href=\"mailto:darshil4133@gmail.com\">email\u003c/a> to Patel, who’s working with his co-organizers to curate the guest list. Space is limited.\u003c/p>\n\n\n\n\u003cp>So far, Patel says, three different people have sent him photos of their cats named Mango. They’re in. \u003c/p>\n\n\n\n\u003chr class=\"wp-block-separator has-alpha-channel-opacity\">\n\n\n\n\u003cp>\u003c/p>\u003c/div>",
"attributes": {
"named": {},
"numeric": []
}
},
{
"type": "component",
"content": "",
"name": "ad",
"attributes": {
"named": {
"label": "floatright"
},
"numeric": [
"floatright"
]
}
},
{
"type": "contentString",
"content": "\u003cdiv class=\"post-body\">\u003cp>\u003c/p>\n\u003cp>\u003cem>The mango party will take place on Sunday, May 31, 1–4 p.m., in San Francisco’s Mission District. \u003ca href=\"mailto:darshil4133@gmail.com\">Email the organizers\u003c/a> to get on the guest list and to receive the exact location.\u003c/em> \u003cem>\u003cstrong>Editor’s note:\u003c/strong> As of May 30, the organizers say the event has reached capacity.\u003c/em>\u003c/p>\n\n\u003c/div>\u003c/p>",
"attributes": {
"named": {},
"numeric": []
}
}
],
"link": "/arts/13990218/indian-mango-party-san-francisco-mission",
"authors": [
"byline_arts_13990218"
],
"programs": [
"arts_140"
],
"categories": [
"arts_1",
"arts_12276",
"arts_235"
],
"tags": [
"arts_10278",
"arts_1297",
"arts_16154",
"arts_1257",
"arts_1146",
"arts_585"
],
"featImg": "arts_13990237",
"label": "source_arts_13990218"
},
"arts_13990167": {
"type": "posts",
"id": "arts_13990167",
"meta": {
"index": "posts_1716263798",
"site": "arts",
"id": "13990167",
"score": null,
"sort": [
1779894000000
]
},
"guestAuthors": [],
"slug": "goldpie-pizza-pop-up-richmond-weed-dispensary-east-bay-7-stars",
"title": "The East Bay’s Most Exciting New Pizza Pop-up Is at a Richmond Weed Dispensary",
"publishDate": 1779894000,
"format": "standard",
"headTitle": "The East Bay’s Most Exciting New Pizza Pop-up Is at a Richmond Weed Dispensary | KQED",
"labelTerm": {},
"content": "\u003cp>In the hierarchy of foods that pair perfectly with a hit of \u003ca href=\"https://www.kqed.org/arts/tag/marijuana\">weed\u003c/a>, a cheesy, hot slice of pizza has to rank among the most iconic — right up there with other stoner faves like \u003ca href=\"https://www.youtube.com/watch?v=fzRvMylDVi8\">White Castle\u003c/a>, ice cream and Flamin’ Hot Cheetos.\u003c/p>\n\n\n\n\u003cp>It shouldn’t come as any surprise, then, that one of the Bay Area’s most promising new pizza pop-ups would be stationed in front of a Richmond cannabis shop. Every Sunday and Monday, \u003ca href=\"https://www.instagram.com/7starshhc_/\">7 Stars Holistic Healing Center\u003c/a> regulars line up at the little tented food stand right outside the dispensary to snag a piping-hot, oil-slicked pepperoni or whipped ricotta pizza. It’s some of the tastiest East Coast–style you can find in this stretch of the East Bay.\u003c/p>\n\n\n\n\u003cp>The pop-up is called \u003ca href=\"https://www.instagram.com/goldpieig/\">Goldpie\u003c/a>, and it’s the brainchild of Scott Hataye, whose day job is as a “budtender” at 7 Stars. For the past seven years, though, he’s also dabbled in the pizza world, moonlighting as the doughmaker at Emeryville’s Rotten City Pizza, a New York–inspired pizza restaurant that closed last summer after an impressive 17-year run. (When I first moved to the East Bay in the late aughts, Rotten City was the closest thing I could find to a proper New York slice shop.)\u003c/p>\n\n\n\n\u003cp>“I love that pizza and actually really, really miss it,” Hataye says of his time at the restaurant. \u003c/p>\n\n\n\n\u003cfigure class=\"wp-block-image size-full\">\u003cimg loading=\"lazy\" decoding=\"async\" width=\"2000\" height=\"1334\" src=\"https://cdn.kqed.org/wp-content/uploads/sites/2/2026/05/goldpie-tent.jpg\" alt=\"A food tent set up in front of a marijuana dispensary.\" class=\"wp-image-13990182\" srcset=\"https://cdn.kqed.org/wp-content/uploads/sites/2/2026/05/goldpie-tent.jpg 2000w, https://cdn.kqed.org/wp-content/uploads/sites/2/2026/05/goldpie-tent-160x107.jpg 160w, https://cdn.kqed.org/wp-content/uploads/sites/2/2026/05/goldpie-tent-768x512.jpg 768w, https://cdn.kqed.org/wp-content/uploads/sites/2/2026/05/goldpie-tent-1536x1025.jpg 1536w\" sizes=\"auto, (max-width: 2000px) 100vw, 2000px\">\u003cfigcaption class=\"wp-element-caption\">Goldpie proprietor Scott Hataye’s day job is as a “budtender” at 7 Stars. (Luke Tsai/KQED)\u003c/figcaption>\u003c/figure>\n\n\n\n\u003cp>When Rotten City closed last June, he took it as a sign that maybe it was time for him to launch his own pizza business. There’s a bit of Rotten City Pizza in the bones of Hataye’s pies, mostly in terms of the dough, which he says is \u003cem>very \u003c/em>similar to Rotten City’s, made with a blend of Central Milling 00 flour and bread flour and cold-fermented for up to 72 hours. The biggest difference, Hataye says, is that he makes a denser, richer red sauce, by cooking down Bianco DiNapoli brand crushed tomatoes (Rotten City was a \u003ca href=\"https://eastbayexpress.com/rotten-city-pizzas-bicoastal-tendencies-1/\">raw sauce\u003c/a> pizzeria). And because he bakes the pizzas in portable Gozney mini pizza ovens, which get as hot as 1,000 degrees, they’re smaller and less floppy than your classic foldable New York pizza. They’re about 12 to 13 inches in diameter, the perfect size for one hungry pizza eater (or two slightly daintier ones). \u003c/p>\n\n\n\n\u003cp>[ad fullwidth]\u003c/p>\n\u003cp>The finished product is a stylistic hybrid, Hataye says — sort of a cross between Neapolitan, New York, New Haven and Chicago-style tavern pizzas. \u003c/p>\n\n\n\n\u003cp>The important thing is that Goldpie’s pizza is legitimately tasty. The top of each pie is slicked with oil, and the crust is quite thin and crunchy-bottomed, with dark blistered spots verging on burnt toward the edges — in a really delicious way, if you’re a fan of that charred flavor, as I am. \u003c/p>\n\n\n\n\u003cfigure class=\"wp-block-image size-full\">\u003cimg loading=\"lazy\" decoding=\"async\" width=\"2000\" height=\"1333\" src=\"https://cdn.kqed.org/wp-content/uploads/sites/2/2026/05/goldpie-heaven.jpg\" alt=\"A whole pepperoni pizza inside a foil-lined cardboard pizza box.\" class=\"wp-image-13990183\" srcset=\"https://cdn.kqed.org/wp-content/uploads/sites/2/2026/05/goldpie-heaven.jpg 2000w, https://cdn.kqed.org/wp-content/uploads/sites/2/2026/05/goldpie-heaven-160x107.jpg 160w, https://cdn.kqed.org/wp-content/uploads/sites/2/2026/05/goldpie-heaven-768x512.jpg 768w, https://cdn.kqed.org/wp-content/uploads/sites/2/2026/05/goldpie-heaven-1536x1024.jpg 1536w\" sizes=\"auto, (max-width: 2000px) 100vw, 2000px\">\u003cfigcaption class=\"wp-element-caption\">The “Heaven on Earth” features pesto, cupping pepperoni, hot honey and crsipy fried garlic. (Luke Tsai/KQED)\u003c/figcaption>\u003c/figure>\n\n\n\n\u003cp>I loved the “Heaven on Earth,” with its salty-sweet palette of pepperoni, pesto, hot honey and fried garlic. The sausage pie, meanwhile, was a more straightforward East Coast–style pizza — an ideal union of oozy cheese, zesty tomato sauce and a flavorful, crispy-chewy crust.\u003c/p>\n\n\n\n\u003cp>Other top sellers include the classic pepperoni and the “Brooklyn” (garlic, olive oil, whipped ricotta), which is Hataye’s take on a New York–style white pie. \u003ca href=\"https://www.7starshhc.com/blog/goldpie-pizza\">Whichever pizza you order\u003c/a>, make sure to ask for a little tub of the housemade candied jalapeños — a truly excellent pizza condiment.\u003c/p>\n\n\n\n\u003cp>Hataye says a few customers have asked whether he ever infuses marijuana into his food (he doesn’t), but in general, he doesn’t have any intention of veering toward gimmicky “pothead pizza.” \u003c/p>\n\n\n\n\u003cp>“I think they’re pretty satisfied with the pizzas as they are,” he says.\u003c/p>\n\n\n\n\u003cfigure class=\"wp-block-image size-full\">\u003cimg loading=\"lazy\" decoding=\"async\" width=\"2000\" height=\"1333\" src=\"https://cdn.kqed.org/wp-content/uploads/sites/2/2026/05/goldpie-table.jpg\" alt=\"A painting of a cartoon horse and dog propped up on an outdoor table.\" class=\"wp-image-13990184\" srcset=\"https://cdn.kqed.org/wp-content/uploads/sites/2/2026/05/goldpie-table.jpg 2000w, https://cdn.kqed.org/wp-content/uploads/sites/2/2026/05/goldpie-table-160x107.jpg 160w, https://cdn.kqed.org/wp-content/uploads/sites/2/2026/05/goldpie-table-768x512.jpg 768w, https://cdn.kqed.org/wp-content/uploads/sites/2/2026/05/goldpie-table-1536x1024.jpg 1536w\" sizes=\"auto, (max-width: 2000px) 100vw, 2000px\">\u003cfigcaption class=\"wp-element-caption\">There’s a table set up next to the Goldpie tent where pizza eaters can “dine in” if they like. (Luke Tsai/KQED)\u003c/figcaption>\u003c/figure>\n\n\n\n\u003cp>In the end, the best part of the experience is the fact that Hataye and Mike Bennally (a former Rotten City general manager who helps out on pop-up days) make every pizza to order right in front of you, tossing and stretching the dough, and then lovingly tending to each pie the entire time it’s in the oven. \u003c/p>\n\n\n\n\n\n\u003cp>That level of personal care has started to pay off. Slowly but surely, a nice little community has formed around Goldpie, as more and more customers who aren’t even affiliated with the dispensary now go out of their way to visit the pop-up. Some wind up staying to eat at the table that Hataye has set up outside, watching one of the \u003ca href=\"https://www.instagram.com/p/DX5wmSOhE8r/\">’80s and ’90s cult classic movies\u003c/a> they have playing at all times.\u003c/p>\n\n\n\n\u003cp>Eventually, Hataye says he would love to turn that community into a full-blown restaurant, though for now he’s mostly focused on just getting the word out about the pop-up. But he and Bennally have already talked about the prospect of opening a brick-and-mortar pizzeria of their own — maybe in Pinole — some time in the next year.\u003c/p>\n\n\n\n\u003cp>“I would love to be able to do that,” he says.\u003c/p>\n\n\n\n\u003chr class=\"wp-block-separator has-alpha-channel-opacity\">\n\n\n\n\u003cp>\u003ca href=\"https://www.instagram.com/goldpieig/\">\u003cem>Goldpie\u003c/em>\u003c/a>\u003cem> pops up outside 7 Stars Holistic Healing Center, at 3219 Pierce St. in Richmond (across the street from the 99 Ranch Market plaza) on Sundays and Mondays, 11:30 a.m.–7:30 p.m. They currently sell \u003c/em>\u003ca href=\"https://www.7starshhc.com/blog/goldpie-pizza\">\u003cem>whole pizzas only\u003c/em>\u003c/a>\u003cem>, for $15–$20 a pie. Customers can call or text 510-529-5007 if they want to place their orders ahead of time.\u003c/em>\u003c/p>\n\n\n\n\u003cp>\u003c/p>\n\u003cp>\u003c/p>\n\n",
"blocks": [
{
"blockName": "core/paragraph",
"attrs": [],
"innerHTML": "\n\u003cp>In the hierarchy of foods that pair perfectly with a hit of \u003ca href=\"https://www.kqed.org/arts/tag/marijuana\">weed\u003c/a>, a cheesy, hot slice of pizza has to rank among the most iconic — right up there with other stoner faves like \u003ca href=\"https://www.youtube.com/watch?v=fzRvMylDVi8\">White Castle\u003c/a>, ice cream and Flamin’ Hot Cheetos.\u003c/p>\n",
"innerContent": [
"\n\u003cp>In the hierarchy of foods that pair perfectly with a hit of \u003ca href=\"https://www.kqed.org/arts/tag/marijuana\">weed\u003c/a>, a cheesy, hot slice of pizza has to rank among the most iconic — right up there with other stoner faves like \u003ca href=\"https://www.youtube.com/watch?v=fzRvMylDVi8\">White Castle\u003c/a>, ice cream and Flamin’ Hot Cheetos.\u003c/p>\n"
],
"innerBlocks": []
},
{
"blockName": "core/paragraph",
"attrs": [],
"innerHTML": "\n\u003cp>It shouldn’t come as any surprise, then, that one of the Bay Area’s most promising new pizza pop-ups would be stationed in front of a Richmond cannabis shop. Every Sunday and Monday, \u003ca href=\"https://www.instagram.com/7starshhc_/\">7 Stars Holistic Healing Center\u003c/a> regulars line up at the little tented food stand right outside the dispensary to snag a piping-hot, oil-slicked pepperoni or whipped ricotta pizza. It’s some of the tastiest East Coast–style you can find in this stretch of the East Bay.\u003c/p>\n",
"innerContent": [
"\n\u003cp>It shouldn’t come as any surprise, then, that one of the Bay Area’s most promising new pizza pop-ups would be stationed in front of a Richmond cannabis shop. Every Sunday and Monday, \u003ca href=\"https://www.instagram.com/7starshhc_/\">7 Stars Holistic Healing Center\u003c/a> regulars line up at the little tented food stand right outside the dispensary to snag a piping-hot, oil-slicked pepperoni or whipped ricotta pizza. It’s some of the tastiest East Coast–style you can find in this stretch of the East Bay.\u003c/p>\n"
],
"innerBlocks": []
},
{
"blockName": "core/paragraph",
"attrs": [],
"innerHTML": "\n\u003cp>The pop-up is called \u003ca href=\"https://www.instagram.com/goldpieig/\">Goldpie\u003c/a>, and it’s the brainchild of Scott Hataye, whose day job is as a “budtender” at 7 Stars. For the past seven years, though, he’s also dabbled in the pizza world, moonlighting as the doughmaker at Emeryville’s Rotten City Pizza, a New York–inspired pizza restaurant that closed last summer after an impressive 17-year run. (When I first moved to the East Bay in the late aughts, Rotten City was the closest thing I could find to a proper New York slice shop.)\u003c/p>\n",
"innerContent": [
"\n\u003cp>The pop-up is called \u003ca href=\"https://www.instagram.com/goldpieig/\">Goldpie\u003c/a>, and it’s the brainchild of Scott Hataye, whose day job is as a “budtender” at 7 Stars. For the past seven years, though, he’s also dabbled in the pizza world, moonlighting as the doughmaker at Emeryville’s Rotten City Pizza, a New York–inspired pizza restaurant that closed last summer after an impressive 17-year run. (When I first moved to the East Bay in the late aughts, Rotten City was the closest thing I could find to a proper New York slice shop.)\u003c/p>\n"
],
"innerBlocks": []
},
{
"blockName": "core/paragraph",
"attrs": [],
"innerHTML": "\n\u003cp>“I love that pizza and actually really, really miss it,” Hataye says of his time at the restaurant. \u003c/p>\n",
"innerContent": [
"\n\u003cp>“I love that pizza and actually really, really miss it,” Hataye says of his time at the restaurant. \u003c/p>\n"
],
"innerBlocks": []
},
{
"blockName": "core/image",
"attrs": {
"id": 13990182,
"sizeSlug": "full",
"linkDestination": "none",
"imageCredit": "Luke Tsai/KQED",
"srcset": "https://cdn.kqed.org/wp-content/uploads/sites/2/2026/05/goldpie-tent.jpg 2000w, https://cdn.kqed.org/wp-content/uploads/sites/2/2026/05/goldpie-tent-160x107.jpg 160w, https://cdn.kqed.org/wp-content/uploads/sites/2/2026/05/goldpie-tent-768x512.jpg 768w, https://cdn.kqed.org/wp-content/uploads/sites/2/2026/05/goldpie-tent-1536x1025.jpg 1536w",
"sizes": "(min-width: 992px) min(100vw, 1536px), (min-width: 768px) min(100vw, 1280px), min(100vw, 1020px)"
},
"innerHTML": "\n\u003cfigure class=\"wp-block-image size-full\">\u003cimg src=\"https://cdn.kqed.org/wp-content/uploads/sites/2/2026/05/goldpie-tent.jpg\" alt=\"A food tent set up in front of a marijuana dispensary.\" class=\"wp-image-13990182\" srcset=\"https://cdn.kqed.org/wp-content/uploads/sites/2/2026/05/goldpie-tent.jpg 2000w, https://cdn.kqed.org/wp-content/uploads/sites/2/2026/05/goldpie-tent-160x107.jpg 160w, https://cdn.kqed.org/wp-content/uploads/sites/2/2026/05/goldpie-tent-768x512.jpg 768w, https://cdn.kqed.org/wp-content/uploads/sites/2/2026/05/goldpie-tent-1536x1025.jpg 1536w\" sizes=\"(min-width: 992px) min(100vw, 1536px), (min-width: 768px) min(100vw, 1280px), min(100vw, 1020px)\" />\u003cfigcaption class=\"wp-element-caption\">Goldpie proprietor Scott Hataye’s day job is as a “budtender” at 7 Stars.\u003c/figcaption>\u003c/figure>\n",
"innerContent": [
"\n\u003cfigure class=\"wp-block-image size-full\">\u003cimg src=\"https://cdn.kqed.org/wp-content/uploads/sites/2/2026/05/goldpie-tent.jpg\" alt=\"A food tent set up in front of a marijuana dispensary.\" class=\"wp-image-13990182\" />\u003cfigcaption class=\"wp-element-caption\">Goldpie proprietor Scott Hataye’s day job is as a “budtender” at 7 Stars.\u003c/figcaption>\u003c/figure>\n"
],
"innerBlocks": []
},
{
"blockName": "core/paragraph",
"attrs": [],
"innerHTML": "\n\u003cp>When Rotten City closed last June, he took it as a sign that maybe it was time for him to launch his own pizza business. There’s a bit of Rotten City Pizza in the bones of Hataye’s pies, mostly in terms of the dough, which he says is \u003cem>very \u003c/em>similar to Rotten City’s, made with a blend of Central Milling 00 flour and bread flour and cold-fermented for up to 72 hours. The biggest difference, Hataye says, is that he makes a denser, richer red sauce, by cooking down Bianco DiNapoli brand crushed tomatoes (Rotten City was a \u003ca href=\"https://eastbayexpress.com/rotten-city-pizzas-bicoastal-tendencies-1/\">raw sauce\u003c/a> pizzeria). And because he bakes the pizzas in portable Gozney mini pizza ovens, which get as hot as 1,000 degrees, they’re smaller and less floppy than your classic foldable New York pizza. They’re about 12 to 13 inches in diameter, the perfect size for one hungry pizza eater (or two slightly daintier ones). \u003c/p>\n",
"innerContent": [
"\n\u003cp>When Rotten City closed last June, he took it as a sign that maybe it was time for him to launch his own pizza business. There’s a bit of Rotten City Pizza in the bones of Hataye’s pies, mostly in terms of the dough, which he says is \u003cem>very \u003c/em>similar to Rotten City’s, made with a blend of Central Milling 00 flour and bread flour and cold-fermented for up to 72 hours. The biggest difference, Hataye says, is that he makes a denser, richer red sauce, by cooking down Bianco DiNapoli brand crushed tomatoes (Rotten City was a \u003ca href=\"https://eastbayexpress.com/rotten-city-pizzas-bicoastal-tendencies-1/\">raw sauce\u003c/a> pizzeria). And because he bakes the pizzas in portable Gozney mini pizza ovens, which get as hot as 1,000 degrees, they’re smaller and less floppy than your classic foldable New York pizza. They’re about 12 to 13 inches in diameter, the perfect size for one hungry pizza eater (or two slightly daintier ones). \u003c/p>\n"
],
"innerBlocks": []
},
{
"blockName": "kqed/ad",
"attrs": {
"format": "fullwidth"
},
"innerBlocks": [],
"innerHTML": "",
"innerContent": []
},
{
"blockName": "core/paragraph",
"attrs": [],
"innerHTML": "\n\u003cp>The finished product is a stylistic hybrid, Hataye says — sort of a cross between Neapolitan, New York, New Haven and Chicago-style tavern pizzas. \u003c/p>\n",
"innerContent": [
"\n\u003cp>The finished product is a stylistic hybrid, Hataye says — sort of a cross between Neapolitan, New York, New Haven and Chicago-style tavern pizzas. \u003c/p>\n"
],
"innerBlocks": []
},
{
"blockName": "core/paragraph",
"attrs": [],
"innerHTML": "\n\u003cp>The important thing is that Goldpie’s pizza is legitimately tasty. The top of each pie is slicked with oil, and the crust is quite thin and crunchy-bottomed, with dark blistered spots verging on burnt toward the edges — in a really delicious way, if you’re a fan of that charred flavor, as I am. \u003c/p>\n",
"innerContent": [
"\n\u003cp>The important thing is that Goldpie’s pizza is legitimately tasty. The top of each pie is slicked with oil, and the crust is quite thin and crunchy-bottomed, with dark blistered spots verging on burnt toward the edges — in a really delicious way, if you’re a fan of that charred flavor, as I am. \u003c/p>\n"
],
"innerBlocks": []
},
{
"blockName": "core/image",
"attrs": {
"id": 13990183,
"sizeSlug": "full",
"linkDestination": "none",
"imageCredit": "Luke Tsai/KQED",
"srcset": "https://cdn.kqed.org/wp-content/uploads/sites/2/2026/05/goldpie-heaven.jpg 2000w, https://cdn.kqed.org/wp-content/uploads/sites/2/2026/05/goldpie-heaven-160x107.jpg 160w, https://cdn.kqed.org/wp-content/uploads/sites/2/2026/05/goldpie-heaven-768x512.jpg 768w, https://cdn.kqed.org/wp-content/uploads/sites/2/2026/05/goldpie-heaven-1536x1024.jpg 1536w",
"sizes": "(min-width: 992px) min(100vw, 1536px), (min-width: 768px) min(100vw, 1280px), min(100vw, 1020px)"
},
"innerHTML": "\n\u003cfigure class=\"wp-block-image size-full\">\u003cimg src=\"https://cdn.kqed.org/wp-content/uploads/sites/2/2026/05/goldpie-heaven.jpg\" alt=\"A whole pepperoni pizza inside a foil-lined cardboard pizza box.\" class=\"wp-image-13990183\" srcset=\"https://cdn.kqed.org/wp-content/uploads/sites/2/2026/05/goldpie-heaven.jpg 2000w, https://cdn.kqed.org/wp-content/uploads/sites/2/2026/05/goldpie-heaven-160x107.jpg 160w, https://cdn.kqed.org/wp-content/uploads/sites/2/2026/05/goldpie-heaven-768x512.jpg 768w, https://cdn.kqed.org/wp-content/uploads/sites/2/2026/05/goldpie-heaven-1536x1024.jpg 1536w\" sizes=\"(min-width: 992px) min(100vw, 1536px), (min-width: 768px) min(100vw, 1280px), min(100vw, 1020px)\" />\u003cfigcaption class=\"wp-element-caption\">The “Heaven on Earth” features pesto, cupping pepperoni, hot honey and crsipy fried garlic.\u003c/figcaption>\u003c/figure>\n",
"innerContent": [
"\n\u003cfigure class=\"wp-block-image size-full\">\u003cimg src=\"https://cdn.kqed.org/wp-content/uploads/sites/2/2026/05/goldpie-heaven.jpg\" alt=\"A whole pepperoni pizza inside a foil-lined cardboard pizza box.\" class=\"wp-image-13990183\" />\u003cfigcaption class=\"wp-element-caption\">The “Heaven on Earth” features pesto, cupping pepperoni, hot honey and crsipy fried garlic.\u003c/figcaption>\u003c/figure>\n"
],
"innerBlocks": []
},
{
"blockName": "core/paragraph",
"attrs": [],
"innerHTML": "\n\u003cp>I loved the “Heaven on Earth,” with its salty-sweet palette of pepperoni, pesto, hot honey and fried garlic. The sausage pie, meanwhile, was a more straightforward East Coast–style pizza — an ideal union of oozy cheese, zesty tomato sauce and a flavorful, crispy-chewy crust.\u003c/p>\n",
"innerContent": [
"\n\u003cp>I loved the “Heaven on Earth,” with its salty-sweet palette of pepperoni, pesto, hot honey and fried garlic. The sausage pie, meanwhile, was a more straightforward East Coast–style pizza — an ideal union of oozy cheese, zesty tomato sauce and a flavorful, crispy-chewy crust.\u003c/p>\n"
],
"innerBlocks": []
},
{
"blockName": "core/paragraph",
"attrs": [],
"innerHTML": "\n\u003cp>Other top sellers include the classic pepperoni and the “Brooklyn” (garlic, olive oil, whipped ricotta), which is Hataye’s take on a New York–style white pie. \u003ca href=\"https://www.7starshhc.com/blog/goldpie-pizza\">Whichever pizza you order\u003c/a>, make sure to ask for a little tub of the housemade candied jalapeños — a truly excellent pizza condiment.\u003c/p>\n",
"innerContent": [
"\n\u003cp>Other top sellers include the classic pepperoni and the “Brooklyn” (garlic, olive oil, whipped ricotta), which is Hataye’s take on a New York–style white pie. \u003ca href=\"https://www.7starshhc.com/blog/goldpie-pizza\">Whichever pizza you order\u003c/a>, make sure to ask for a little tub of the housemade candied jalapeños — a truly excellent pizza condiment.\u003c/p>\n"
],
"innerBlocks": []
},
{
"blockName": "core/paragraph",
"attrs": [],
"innerHTML": "\n\u003cp>Hataye says a few customers have asked whether he ever infuses marijuana into his food (he doesn’t), but in general, he doesn’t have any intention of veering toward gimmicky “pothead pizza.” \u003c/p>\n",
"innerContent": [
"\n\u003cp>Hataye says a few customers have asked whether he ever infuses marijuana into his food (he doesn’t), but in general, he doesn’t have any intention of veering toward gimmicky “pothead pizza.” \u003c/p>\n"
],
"innerBlocks": []
},
{
"blockName": "core/paragraph",
"attrs": [],
"innerHTML": "\n\u003cp>“I think they’re pretty satisfied with the pizzas as they are,” he says.\u003c/p>\n",
"innerContent": [
"\n\u003cp>“I think they’re pretty satisfied with the pizzas as they are,” he says.\u003c/p>\n"
],
"innerBlocks": []
},
{
"blockName": "core/image",
"attrs": {
"id": 13990184,
"sizeSlug": "full",
"linkDestination": "none",
"imageCredit": "Luke Tsai/KQED",
"srcset": "https://cdn.kqed.org/wp-content/uploads/sites/2/2026/05/goldpie-table.jpg 2000w, https://cdn.kqed.org/wp-content/uploads/sites/2/2026/05/goldpie-table-160x107.jpg 160w, https://cdn.kqed.org/wp-content/uploads/sites/2/2026/05/goldpie-table-768x512.jpg 768w, https://cdn.kqed.org/wp-content/uploads/sites/2/2026/05/goldpie-table-1536x1024.jpg 1536w",
"sizes": "(min-width: 992px) min(100vw, 1536px), (min-width: 768px) min(100vw, 1280px), min(100vw, 1020px)"
},
"innerHTML": "\n\u003cfigure class=\"wp-block-image size-full\">\u003cimg src=\"https://cdn.kqed.org/wp-content/uploads/sites/2/2026/05/goldpie-table.jpg\" alt=\"A painting of a cartoon horse and dog propped up on an outdoor table.\" class=\"wp-image-13990184\" srcset=\"https://cdn.kqed.org/wp-content/uploads/sites/2/2026/05/goldpie-table.jpg 2000w, https://cdn.kqed.org/wp-content/uploads/sites/2/2026/05/goldpie-table-160x107.jpg 160w, https://cdn.kqed.org/wp-content/uploads/sites/2/2026/05/goldpie-table-768x512.jpg 768w, https://cdn.kqed.org/wp-content/uploads/sites/2/2026/05/goldpie-table-1536x1024.jpg 1536w\" sizes=\"(min-width: 992px) min(100vw, 1536px), (min-width: 768px) min(100vw, 1280px), min(100vw, 1020px)\" />\u003cfigcaption class=\"wp-element-caption\">There’s a table set up next to the Goldpie tent where pizza eaters can “dine in” if they like.\u003c/figcaption>\u003c/figure>\n",
"innerContent": [
"\n\u003cfigure class=\"wp-block-image size-full\">\u003cimg src=\"https://cdn.kqed.org/wp-content/uploads/sites/2/2026/05/goldpie-table.jpg\" alt=\"A painting of a cartoon horse and dog propped up on an outdoor table.\" class=\"wp-image-13990184\" />\u003cfigcaption class=\"wp-element-caption\">There’s a table set up next to the Goldpie tent where pizza eaters can “dine in” if they like.\u003c/figcaption>\u003c/figure>\n"
],
"innerBlocks": []
},
{
"blockName": "core/paragraph",
"attrs": [],
"innerHTML": "\n\u003cp>In the end, the best part of the experience is the fact that Hataye and Mike Bennally (a former Rotten City general manager who helps out on pop-up days) make every pizza to order right in front of you, tossing and stretching the dough, and then lovingly tending to each pie the entire time it’s in the oven. \u003c/p>\n",
"innerContent": [
"\n\u003cp>In the end, the best part of the experience is the fact that Hataye and Mike Bennally (a former Rotten City general manager who helps out on pop-up days) make every pizza to order right in front of you, tossing and stretching the dough, and then lovingly tending to each pie the entire time it’s in the oven. \u003c/p>\n"
],
"innerBlocks": []
},
{
"blockName": "kqed-v2/related-articles",
"attrs": {
"postIds": [
"arts_13989673",
"arts_13990112"
],
"labelWasCleared": true
},
"innerHTML": "",
"innerContent": [],
"innerBlocks": []
},
{
"blockName": "core/paragraph",
"attrs": [],
"innerHTML": "\n\u003cp>That level of personal care has started to pay off. Slowly but surely, a nice little community has formed around Goldpie, as more and more customers who aren’t even affiliated with the dispensary now go out of their way to visit the pop-up. Some wind up staying to eat at the table that Hataye has set up outside, watching one of the \u003ca href=\"https://www.instagram.com/p/DX5wmSOhE8r/\">’80s and ’90s cult classic movies\u003c/a> they have playing at all times.\u003c/p>\n",
"innerContent": [
"\n\u003cp>That level of personal care has started to pay off. Slowly but surely, a nice little community has formed around Goldpie, as more and more customers who aren’t even affiliated with the dispensary now go out of their way to visit the pop-up. Some wind up staying to eat at the table that Hataye has set up outside, watching one of the \u003ca href=\"https://www.instagram.com/p/DX5wmSOhE8r/\">’80s and ’90s cult classic movies\u003c/a> they have playing at all times.\u003c/p>\n"
],
"innerBlocks": []
},
{
"blockName": "core/paragraph",
"attrs": [],
"innerHTML": "\n\u003cp>Eventually, Hataye says he would love to turn that community into a full-blown restaurant, though for now he’s mostly focused on just getting the word out about the pop-up. But he and Bennally have already talked about the prospect of opening a brick-and-mortar pizzeria of their own — maybe in Pinole — some time in the next year.\u003c/p>\n",
"innerContent": [
"\n\u003cp>Eventually, Hataye says he would love to turn that community into a full-blown restaurant, though for now he’s mostly focused on just getting the word out about the pop-up. But he and Bennally have already talked about the prospect of opening a brick-and-mortar pizzeria of their own — maybe in Pinole — some time in the next year.\u003c/p>\n"
],
"innerBlocks": []
},
{
"blockName": "core/paragraph",
"attrs": [],
"innerHTML": "\n\u003cp>“I would love to be able to do that,” he says.\u003c/p>\n",
"innerContent": [
"\n\u003cp>“I would love to be able to do that,” he says.\u003c/p>\n"
],
"innerBlocks": []
},
{
"blockName": "core/separator",
"attrs": [],
"innerHTML": "\n\u003chr class=\"wp-block-separator has-alpha-channel-opacity\" />\n",
"innerContent": [
"\n\u003chr class=\"wp-block-separator has-alpha-channel-opacity\" />\n"
],
"innerBlocks": []
},
{
"blockName": "core/paragraph",
"attrs": [],
"innerHTML": "\n\u003cp>\u003ca href=\"https://www.instagram.com/goldpieig/\">\u003cem>Goldpie\u003c/em>\u003c/a>\u003cem> pops up outside 7 Stars Holistic Healing Center, at 3219 Pierce St. in Richmond (across the street from the 99 Ranch Market plaza) on Sundays and Mondays, 11:30 a.m.–7:30 p.m. They currently sell \u003c/em>\u003ca href=\"https://www.7starshhc.com/blog/goldpie-pizza\">\u003cem>whole pizzas only\u003c/em>\u003c/a>\u003cem>, for $15–$20 a pie. Customers can call or text 510-529-5007 if they want to place their orders ahead of time.\u003c/em>\u003c/p>\n",
"innerContent": [
"\n\u003cp>\u003ca href=\"https://www.instagram.com/goldpieig/\">\u003cem>Goldpie\u003c/em>\u003c/a>\u003cem> pops up outside 7 Stars Holistic Healing Center, at 3219 Pierce St. in Richmond (across the street from the 99 Ranch Market plaza) on Sundays and Mondays, 11:30 a.m.–7:30 p.m. They currently sell \u003c/em>\u003ca href=\"https://www.7starshhc.com/blog/goldpie-pizza\">\u003cem>whole pizzas only\u003c/em>\u003c/a>\u003cem>, for $15–$20 a pie. Customers can call or text 510-529-5007 if they want to place their orders ahead of time.\u003c/em>\u003c/p>\n"
],
"innerBlocks": []
},
{
"blockName": "kqed/ad",
"attrs": {
"format": "floatright"
},
"innerBlocks": [],
"innerHTML": "",
"innerContent": []
},
{
"blockName": "core/paragraph",
"attrs": [],
"innerHTML": "\n\u003cp>\u003c/p>\n",
"innerContent": [
"\n\u003cp>\u003c/p>\n"
],
"innerBlocks": []
}
],
"excerpt": "Goldpie pops up Sundays and Mondays at the 7 Stars Holistic Healing Center.",
"status": "publish",
"parent": 0,
"modified": 1779833316,
"stats": {
"hasAudio": false,
"hasVideo": false,
"hasChartOrMap": false,
"iframeSrcs": [],
"hasGoogleForm": false,
"hasGallery": false,
"hasHearkenModule": false,
"hasPolis": false,
"paragraphCount": 19,
"wordCount": 1017
},
"headData": {
"title": "A New Pizza Pop-up at an East Bay Weed Dispensary Takes Off | KQED",
"description": "Goldpie pops up Sundays and Mondays at the 7 Stars Holistic Healing Center.",
"ogTitle": "The East Bay’s Most Exciting New Pizza Pop-up Is at a Richmond Weed Dispensary",
"ogDescription": "",
"ogImgId": "",
"twTitle": "The East Bay’s Most Exciting New Pizza Pop-up Is at a Richmond Weed Dispensary",
"twDescription": "",
"twImgId": "",
"socialTitle": "A New Pizza Pop-up at an East Bay Weed Dispensary Takes Off %%page%% %%sep%% KQED",
"schema": {
"@context": "https://schema.org",
"@type": "Article",
"headline": "The East Bay’s Most Exciting New Pizza Pop-up Is at a Richmond Weed Dispensary",
"datePublished": "2026-05-27T08:00:00-07:00",
"dateModified": "2026-05-26T15:08:36-07:00",
"image": "https://cdn.kqed.org/wp-content/uploads/2020/02/KQED-OG-Image@1x.png"
}
},
"primaryCategory": {
"termId": 12276,
"slug": "food",
"name": "Food"
},
"source": "Food",
"sourceUrl": "https://www.kqed.org/food",
"sticky": false,
"templateType": "standard",
"featuredImageType": "standard",
"excludeFromSiteSearch": "Include",
"articleAge": "0",
"path": "/arts/13990167/goldpie-pizza-pop-up-richmond-weed-dispensary-east-bay-7-stars",
"audioTrackLength": null,
"parsedContent": [
{
"type": "contentString",
"content": "\u003cdiv class=\"post-body\">\u003cp>\u003cp>In the hierarchy of foods that pair perfectly with a hit of \u003ca href=\"https://www.kqed.org/arts/tag/marijuana\">weed\u003c/a>, a cheesy, hot slice of pizza has to rank among the most iconic — right up there with other stoner faves like \u003ca href=\"https://www.youtube.com/watch?v=fzRvMylDVi8\">White Castle\u003c/a>, ice cream and Flamin’ Hot Cheetos.\u003c/p>\n\n\n\n\u003cp>It shouldn’t come as any surprise, then, that one of the Bay Area’s most promising new pizza pop-ups would be stationed in front of a Richmond cannabis shop. Every Sunday and Monday, \u003ca href=\"https://www.instagram.com/7starshhc_/\">7 Stars Holistic Healing Center\u003c/a> regulars line up at the little tented food stand right outside the dispensary to snag a piping-hot, oil-slicked pepperoni or whipped ricotta pizza. It’s some of the tastiest East Coast–style you can find in this stretch of the East Bay.\u003c/p>\n\n\n\n\u003cp>The pop-up is called \u003ca href=\"https://www.instagram.com/goldpieig/\">Goldpie\u003c/a>, and it’s the brainchild of Scott Hataye, whose day job is as a “budtender” at 7 Stars. For the past seven years, though, he’s also dabbled in the pizza world, moonlighting as the doughmaker at Emeryville’s Rotten City Pizza, a New York–inspired pizza restaurant that closed last summer after an impressive 17-year run. (When I first moved to the East Bay in the late aughts, Rotten City was the closest thing I could find to a proper New York slice shop.)\u003c/p>\n\n\n\n\u003cp>“I love that pizza and actually really, really miss it,” Hataye says of his time at the restaurant. \u003c/p>\n\n\n\n\u003cfigure class=\"wp-block-image size-full\">\u003cimg loading=\"lazy\" decoding=\"async\" width=\"2000\" height=\"1334\" src=\"https://cdn.kqed.org/wp-content/uploads/sites/2/2026/05/goldpie-tent.jpg\" alt=\"A food tent set up in front of a marijuana dispensary.\" class=\"wp-image-13990182\" srcset=\"https://cdn.kqed.org/wp-content/uploads/sites/2/2026/05/goldpie-tent.jpg 2000w, https://cdn.kqed.org/wp-content/uploads/sites/2/2026/05/goldpie-tent-160x107.jpg 160w, https://cdn.kqed.org/wp-content/uploads/sites/2/2026/05/goldpie-tent-768x512.jpg 768w, https://cdn.kqed.org/wp-content/uploads/sites/2/2026/05/goldpie-tent-1536x1025.jpg 1536w\" sizes=\"auto, (max-width: 2000px) 100vw, 2000px\">\u003cfigcaption class=\"wp-element-caption\">Goldpie proprietor Scott Hataye’s day job is as a “budtender” at 7 Stars. (Luke Tsai/KQED)\u003c/figcaption>\u003c/figure>\n\n\n\n\u003cp>When Rotten City closed last June, he took it as a sign that maybe it was time for him to launch his own pizza business. There’s a bit of Rotten City Pizza in the bones of Hataye’s pies, mostly in terms of the dough, which he says is \u003cem>very \u003c/em>similar to Rotten City’s, made with a blend of Central Milling 00 flour and bread flour and cold-fermented for up to 72 hours. The biggest difference, Hataye says, is that he makes a denser, richer red sauce, by cooking down Bianco DiNapoli brand crushed tomatoes (Rotten City was a \u003ca href=\"https://eastbayexpress.com/rotten-city-pizzas-bicoastal-tendencies-1/\">raw sauce\u003c/a> pizzeria). And because he bakes the pizzas in portable Gozney mini pizza ovens, which get as hot as 1,000 degrees, they’re smaller and less floppy than your classic foldable New York pizza. They’re about 12 to 13 inches in diameter, the perfect size for one hungry pizza eater (or two slightly daintier ones). \u003c/p>\n\n\n\n\u003cp>\u003c/p>\u003c/div>",
"attributes": {
"named": {},
"numeric": []
}
},
{
"type": "component",
"content": "",
"name": "ad",
"attributes": {
"named": {
"label": "fullwidth"
},
"numeric": [
"fullwidth"
]
}
},
{
"type": "contentString",
"content": "\u003cdiv class=\"post-body\">\u003cp>\u003c/p>\n\u003cp>The finished product is a stylistic hybrid, Hataye says — sort of a cross between Neapolitan, New York, New Haven and Chicago-style tavern pizzas. \u003c/p>\n\n\n\n\u003cp>The important thing is that Goldpie’s pizza is legitimately tasty. The top of each pie is slicked with oil, and the crust is quite thin and crunchy-bottomed, with dark blistered spots verging on burnt toward the edges — in a really delicious way, if you’re a fan of that charred flavor, as I am. \u003c/p>\n\n\n\n\u003cfigure class=\"wp-block-image size-full\">\u003cimg loading=\"lazy\" decoding=\"async\" width=\"2000\" height=\"1333\" src=\"https://cdn.kqed.org/wp-content/uploads/sites/2/2026/05/goldpie-heaven.jpg\" alt=\"A whole pepperoni pizza inside a foil-lined cardboard pizza box.\" class=\"wp-image-13990183\" srcset=\"https://cdn.kqed.org/wp-content/uploads/sites/2/2026/05/goldpie-heaven.jpg 2000w, https://cdn.kqed.org/wp-content/uploads/sites/2/2026/05/goldpie-heaven-160x107.jpg 160w, https://cdn.kqed.org/wp-content/uploads/sites/2/2026/05/goldpie-heaven-768x512.jpg 768w, https://cdn.kqed.org/wp-content/uploads/sites/2/2026/05/goldpie-heaven-1536x1024.jpg 1536w\" sizes=\"auto, (max-width: 2000px) 100vw, 2000px\">\u003cfigcaption class=\"wp-element-caption\">The “Heaven on Earth” features pesto, cupping pepperoni, hot honey and crsipy fried garlic. (Luke Tsai/KQED)\u003c/figcaption>\u003c/figure>\n\n\n\n\u003cp>I loved the “Heaven on Earth,” with its salty-sweet palette of pepperoni, pesto, hot honey and fried garlic. The sausage pie, meanwhile, was a more straightforward East Coast–style pizza — an ideal union of oozy cheese, zesty tomato sauce and a flavorful, crispy-chewy crust.\u003c/p>\n\n\n\n\u003cp>Other top sellers include the classic pepperoni and the “Brooklyn” (garlic, olive oil, whipped ricotta), which is Hataye’s take on a New York–style white pie. \u003ca href=\"https://www.7starshhc.com/blog/goldpie-pizza\">Whichever pizza you order\u003c/a>, make sure to ask for a little tub of the housemade candied jalapeños — a truly excellent pizza condiment.\u003c/p>\n\n\n\n\u003cp>Hataye says a few customers have asked whether he ever infuses marijuana into his food (he doesn’t), but in general, he doesn’t have any intention of veering toward gimmicky “pothead pizza.” \u003c/p>\n\n\n\n\u003cp>“I think they’re pretty satisfied with the pizzas as they are,” he says.\u003c/p>\n\n\n\n\u003cfigure class=\"wp-block-image size-full\">\u003cimg loading=\"lazy\" decoding=\"async\" width=\"2000\" height=\"1333\" src=\"https://cdn.kqed.org/wp-content/uploads/sites/2/2026/05/goldpie-table.jpg\" alt=\"A painting of a cartoon horse and dog propped up on an outdoor table.\" class=\"wp-image-13990184\" srcset=\"https://cdn.kqed.org/wp-content/uploads/sites/2/2026/05/goldpie-table.jpg 2000w, https://cdn.kqed.org/wp-content/uploads/sites/2/2026/05/goldpie-table-160x107.jpg 160w, https://cdn.kqed.org/wp-content/uploads/sites/2/2026/05/goldpie-table-768x512.jpg 768w, https://cdn.kqed.org/wp-content/uploads/sites/2/2026/05/goldpie-table-1536x1024.jpg 1536w\" sizes=\"auto, (max-width: 2000px) 100vw, 2000px\">\u003cfigcaption class=\"wp-element-caption\">There’s a table set up next to the Goldpie tent where pizza eaters can “dine in” if they like. (Luke Tsai/KQED)\u003c/figcaption>\u003c/figure>\n\n\n\n\u003cp>In the end, the best part of the experience is the fact that Hataye and Mike Bennally (a former Rotten City general manager who helps out on pop-up days) make every pizza to order right in front of you, tossing and stretching the dough, and then lovingly tending to each pie the entire time it’s in the oven. \u003c/p>\n\n\n\n\n\n\u003cp>That level of personal care has started to pay off. Slowly but surely, a nice little community has formed around Goldpie, as more and more customers who aren’t even affiliated with the dispensary now go out of their way to visit the pop-up. Some wind up staying to eat at the table that Hataye has set up outside, watching one of the \u003ca href=\"https://www.instagram.com/p/DX5wmSOhE8r/\">’80s and ’90s cult classic movies\u003c/a> they have playing at all times.\u003c/p>\n\n\n\n\u003cp>Eventually, Hataye says he would love to turn that community into a full-blown restaurant, though for now he’s mostly focused on just getting the word out about the pop-up. But he and Bennally have already talked about the prospect of opening a brick-and-mortar pizzeria of their own — maybe in Pinole — some time in the next year.\u003c/p>\n\n\n\n\u003cp>“I would love to be able to do that,” he says.\u003c/p>\n\n\n\n\u003chr class=\"wp-block-separator has-alpha-channel-opacity\">\n\n\n\n\u003cp>\u003ca href=\"https://www.instagram.com/goldpieig/\">\u003cem>Goldpie\u003c/em>\u003c/a>\u003cem> pops up outside 7 Stars Holistic Healing Center, at 3219 Pierce St. in Richmond (across the street from the 99 Ranch Market plaza) on Sundays and Mondays, 11:30 a.m.–7:30 p.m. They currently sell \u003c/em>\u003ca href=\"https://www.7starshhc.com/blog/goldpie-pizza\">\u003cem>whole pizzas only\u003c/em>\u003c/a>\u003cem>, for $15–$20 a pie. Customers can call or text 510-529-5007 if they want to place their orders ahead of time.\u003c/em>\u003c/p>\n\n\n\n\u003cp>\u003c/p>\n\u003cp>\u003c/p>\n\n\u003c/div>\u003c/p>",
"attributes": {
"named": {},
"numeric": []
}
}
],
"link": "/arts/13990167/goldpie-pizza-pop-up-richmond-weed-dispensary-east-bay-7-stars",
"authors": [
"11743"
],
"categories": [
"arts_1",
"arts_12276"
],
"tags": [
"arts_5569",
"arts_10278",
"arts_1297",
"arts_3078",
"arts_14730",
"arts_14089",
"arts_2479"
],
"featImg": "arts_13990181",
"label": "source_arts_13990167"
},
"food_1337824": {
"type": "posts",
"id": "food_1337824",
"meta": {
"index": "posts_1716263798",
"site": "food",
"id": "1337824",
"score": null,
"sort": [
1733178627000
]
},
"guestAuthors": [],
"slug": "pretzels",
"title": "How Pretzels Went From Human Sacrifice To Beer Gardens",
"publishDate": 1733178627,
"format": "video",
"headTitle": "How Pretzels Went From Human Sacrifice To Beer Gardens | KQED",
"labelTerm": {},
"content": "\u003cp>Who doesn’t enjoy the unmistakable aroma of warm, buttery pretzels – you know the one – that delicious scent that stops you in your tracks at a mall, airport, or ballpark? But have you ever wondered about its peculiar shape? Or maybe where it came from and who invented it? Well, this twisted piece of delicious dough has been working its magic on humans for centuries and in this episode of Beyond the Menu we unravel the history of this delicious snack. From ancient Celtic fertility rites to Italian monks and prohibition movements here in the U.S., join us as we unravel centuries of pretzel lore that will make you appreciate this staple snack in a whole new way. And let’s just say there is nothing stale about this tale.\u003c/p>\n\u003cp>Subscribe to \u003ca href=\"https://www.youtube.com/@KQEDFood\" target=\"_blank\" rel=\"noopener\">KQED Food’s YouTube channel\u003c/a> to watch more Beyond The Menu videos.\u003c/p>\n\u003cp>Support for this program comes from Krishnan Shah Family Foundation and supporters of the KQED Studios Fund\u003c/p>\n\u003cp>Read More:\u003c/p>\n\u003cp>\u003ca href=\"https://squabisch.com/\">Squabisch\u003c/a>\u003cbr>\n\u003ca href=\"https://www.heinzelcheese.de/lesen/\">Ursula Heinzelmann\u003c/a>\u003cbr>\n\u003ca href=\"https://www.williamwoysweaverepicurewithhoe.com/\">Dr. William Woys Weaver\u003c/a>\u003cbr>\n\u003ca href=\"https://www.heinzhistorycenter.org/blog/western-pennsylvania-history-pretzels-and-prohibition/#_ednref1\">Leslie Przybylek\u003c/a>\u003cbr>\n\u003ca href=\"https://theconversation.com/how-the-pretzel-went-from-soft-to-hard-and-other-little-known-facts-about-one-of-the-worlds-favorite-snacks-95409\">Jeffrey Miller\u003c/a>\u003c/p>\n\u003cp>[ad fullwidth]\u003c/p>\u003cp>\u003c/p>\n",
"blocks": [],
"excerpt": null,
"status": "publish",
"parent": 0,
"modified": 1733189164,
"stats": {
"hasAudio": false,
"hasVideo": false,
"hasChartOrMap": false,
"iframeSrcs": [],
"hasGoogleForm": false,
"hasGallery": false,
"hasHearkenModule": false,
"hasPolis": false,
"paragraphCount": 7,
"wordCount": 182
},
"headData": {
"title": "How Pretzels Went From Human Sacrifice To Beer Gardens | KQED",
"description": "Who doesn’t enjoy the unmistakable aroma of warm, buttery pretzels - you know the one - that delicious scent that stops you in your tracks at a mall, airport, or ballpark? But have you ever wondered about its peculiar shape? Or maybe where it came from and who invented it? Well, this twisted piece of delicious dough has been working its magic on humans for centuries and in this episode of Beyond the Menu we unravel the history of this delicious snack. From ancient Celtic fertility rites to Italian monks and prohibition movements here in the U.S., join us as",
"ogTitle": "",
"ogDescription": "",
"ogImgId": "",
"twTitle": "",
"twDescription": "",
"twImgId": "",
"schema": {
"@context": "https://schema.org",
"@type": "Article",
"headline": "How Pretzels Went From Human Sacrifice To Beer Gardens",
"datePublished": "2024-12-02T14:30:27-08:00",
"dateModified": "2024-12-02T17:26:04-08:00",
"image": "https://cdn.kqed.org/wp-content/uploads/2020/02/KQED-OG-Image@1x.png"
}
},
"videoEmbed": "https://youtu.be/2iJEdUjfOs4?si=TrFETlD6g7Rlog0M",
"source": "Food",
"sourceUrl": "https://www.kqed.org/food",
"sticky": false,
"WpOldSlug": "how-pretzels-went-from-human-sacrifice-to-beer-gardens",
"nprByline": "Manjula Varghese",
"excludeFromSiteSearch": "Include",
"showOnAuthorArchivePages": "Yes",
"articleAge": "0",
"path": "/food/1337824/pretzels",
"audioTrackLength": null,
"parsedContent": [
{
"type": "contentString",
"content": "\u003cdiv class=\"post-body\">\u003cp>\u003cp>Who doesn’t enjoy the unmistakable aroma of warm, buttery pretzels – you know the one – that delicious scent that stops you in your tracks at a mall, airport, or ballpark? But have you ever wondered about its peculiar shape? Or maybe where it came from and who invented it? Well, this twisted piece of delicious dough has been working its magic on humans for centuries and in this episode of Beyond the Menu we unravel the history of this delicious snack. From ancient Celtic fertility rites to Italian monks and prohibition movements here in the U.S., join us as we unravel centuries of pretzel lore that will make you appreciate this staple snack in a whole new way. And let’s just say there is nothing stale about this tale.\u003c/p>\n\u003cp>Subscribe to \u003ca href=\"https://www.youtube.com/@KQEDFood\" target=\"_blank\" rel=\"noopener\">KQED Food’s YouTube channel\u003c/a> to watch more Beyond The Menu videos.\u003c/p>\n\u003cp>Support for this program comes from Krishnan Shah Family Foundation and supporters of the KQED Studios Fund\u003c/p>\n\u003cp>Read More:\u003c/p>\n\u003cp>\u003ca href=\"https://squabisch.com/\">Squabisch\u003c/a>\u003cbr>\n\u003ca href=\"https://www.heinzelcheese.de/lesen/\">Ursula Heinzelmann\u003c/a>\u003cbr>\n\u003ca href=\"https://www.williamwoysweaverepicurewithhoe.com/\">Dr. William Woys Weaver\u003c/a>\u003cbr>\n\u003ca href=\"https://www.heinzhistorycenter.org/blog/western-pennsylvania-history-pretzels-and-prohibition/#_ednref1\">Leslie Przybylek\u003c/a>\u003cbr>\n\u003ca href=\"https://theconversation.com/how-the-pretzel-went-from-soft-to-hard-and-other-little-known-facts-about-one-of-the-worlds-favorite-snacks-95409\">Jeffrey Miller\u003c/a>\u003c/p>\n\u003cp>\u003c/p>\u003c/div>",
"attributes": {
"named": {},
"numeric": []
}
},
{
"type": "component",
"content": "",
"name": "ad",
"attributes": {
"named": {
"label": "fullwidth"
},
"numeric": [
"fullwidth"
]
}
},
{
"type": "contentString",
"content": "\u003cdiv class=\"post-body\">\u003cp>\u003c/p>\u003cp>\u003c/p>\n\u003c/div>\u003c/p>",
"attributes": {
"named": {},
"numeric": []
}
}
],
"link": "/food/1337824/pretzels",
"authors": [
"byline_food_1337824"
],
"series": [
"food_311"
],
"categories": [
"food_1"
],
"tags": [
"food_313",
"food_312",
"food_328",
"food_319"
],
"featImg": "food_1337833",
"label": "source_food_1337824"
},
"food_1337646": {
"type": "posts",
"id": "food_1337646",
"meta": {
"index": "posts_1716263798",
"site": "food",
"id": "1337646",
"score": null,
"sort": [
1719245656000
]
},
"guestAuthors": [],
"slug": "its-mexican-asian-a-candy-a-sauceits-chamoy",
"title": "It’s Mexican, Asian, a Candy, a Sauce…It’s Chamoy",
"publishDate": 1719245656,
"format": "video",
"headTitle": "It’s Mexican, Asian, a Candy, a Sauce…It’s Chamoy | KQED",
"labelTerm": {},
"content": "\u003cp>On a scorching summer day, the quest for the perfect Michelada leads us on an exploration of one of Mexico’s most beloved condiments: chamoy. The irresistible blend of salty, sweet, and spicy flavors found in this sauce has become a star in Mexican cuisine, enhancing everything from fruits and candy to drinks. But where did chamoy come from? Was it introduced by Filipino-Chinese immigrants or the Japanese? And what exactly is its connection to Hawaii? Join us on this delicious journey as we uncover the global roots of this popular Mexican condiment that will leave your taste buds tingling and your mind buzzing with curiosity.\u003c/p>\n\u003cp>Subscribe to \u003ca href=\"https://www.youtube.com/@KQEDFood\" target=\"_blank\" rel=\"noopener\">KQED Food’s YouTube channel\u003c/a> to watch more Beyond The Menu videos.\u003c/p>\n\u003cp>Support for this program comes from Krishnan Shah Family Foundation and supporters of the KQED Studios Fund\u003c/p>\n\u003cp>Read More:\u003c/p>\n\u003cul>\n\u003cli>\u003ca href=\"https://tastecooking.com/spicy-sour-ruby-red-appeal-chamoy/\">The Spicy, Sour, Ruby-Red Appeal of Chamoy\u003c/a>\u003c/li>\n\u003cli>\u003ca href=\"https://www.rachellaudan.com/2016/06/molli-chamoy-sauce-go-figure.html\">Molli Chamoy Sauce: Go Figure\u003c/a>\u003c/li>\n\u003cli> \u003ca href=\"https://masaamerica.com/2021/06/17/chamoy/\">History, The Kitchen – Chamoy\u003c/a>\u003c/li>\n\u003cli>\u003ca href=\"https://www.eater.com/2017/3/6/14809056/chamoy-how-to-use\">Why Chefs Are Turning the Spotlight on Chamoy\u003c/a>\u003c/li>\n\u003cli> \u003ca href=\"https://www.npr.org/sections/thesalt/2017/01/17/508395673/chamoy-is-mexico-s-flavor-fiesta-condiment-courtesy-of-china\">Chamoy Is Mexico’s Flavor Fiesta Condiment, Courtesy Of China\u003c/a>\u003c/li>\n\u003cli>\u003ca href=\"https://heritagesofmigration.wordpress.com/wp-content/uploads/2016/11/icich-buenos-aires-argentina-20171.pdf\">The Intangible Heritage of Migration: Challenges and Possibilities\u003c/a>\u003c/li>\n\u003cli>\u003ca href=\"https://www.expressnews.com/food/article/Chamoy-the-salty-candy-vs-chamoy-the-sauce-16268627.php\">Chamoy the salty candy vs. chamoy the sauce: How it evolved from Asian immigrants in Mexico to total San Antonio condiment domination\u003c/a>\u003c/li>\n\u003cli> \u003ca href=\"https://www.chicanonuevo.com\">Abraham Nuñez\u003c/a>\u003c/li>\n\u003cli> \u003ca href=\"http://www.lesleytellez.com\">Lesley Tellez\u003c/a>\u003c/li>\n\u003cli>\u003ca href=\"https://www.amazon.com/Books-Ellen-Riojas-Clark/s?rh=n%3A283155%2Cp_27%3AEllen+Riojas+Clark\">Ellen Riojas Clark\u003c/a>\u003c/li>\n\u003cli>\u003ca href=\"https://www.rachellaudan.com\">Rachel Lauden\u003c/a>\u003c/li>\n\u003c/ul>\n\u003cp>\u003cstrong>About Beyond The Menu:\u003c/strong>\u003cbr>\nThe story of the food on your plate is more than just the recipe. Each ingredient and every cooking technique goes back hundreds if not thousands of years, traversing the globe on a wildly delicious cross-cultural adventure. In KQED’s new digital food series Beyond The Menu, host Cecilia Phillips interviews chefs, authors, and other experts to dig up surprising facts on the cultural pathways of today’s most popular dishes. It’s a history show, it’s a mystery series, it’s a celebration of multicultural cuisine, sometimes it’s even a science program, all set against the backdrop of mouth-watering food cinematography.\u003c/p>\n\u003cp>[ad fullwidth]\u003c/p>\u003cp>\u003c/p>\n",
"blocks": [],
"excerpt": null,
"status": "publish",
"parent": 0,
"modified": 1727470587,
"stats": {
"hasAudio": false,
"hasVideo": false,
"hasChartOrMap": false,
"iframeSrcs": [],
"hasGoogleForm": false,
"hasGallery": false,
"hasHearkenModule": false,
"hasPolis": false,
"paragraphCount": 7,
"wordCount": 343
},
"headData": {
"title": "It’s Mexican, Asian, a Candy, a Sauce…It’s Chamoy | KQED",
"description": "Sweet, salty, spicy chamoy has become one of Mexico's favorite condiments. But where did it come from? Discover the history behind chamoy.",
"ogTitle": "",
"ogDescription": "",
"ogImgId": "",
"twTitle": "",
"twDescription": "",
"twImgId": "",
"socialDescription": "Sweet, salty, spicy chamoy has become one of Mexico's favorite condiments. But where did it come from? Discover the history behind chamoy.",
"schema": {
"@context": "https://schema.org",
"@type": "Article",
"headline": "It’s Mexican, Asian, a Candy, a Sauce…It’s Chamoy",
"datePublished": "2024-06-24T09:14:16-07:00",
"dateModified": "2024-09-27T13:56:27-07:00",
"image": "https://cdn.kqed.org/wp-content/uploads/2020/02/KQED-OG-Image@1x.png"
}
},
"videoEmbed": "https://youtu.be/KP4-cCVC6yk",
"source": "Food",
"sourceUrl": "https://www.kqed.org/food",
"sticky": false,
"nprByline": "Manjula Varghese",
"excludeFromSiteSearch": "Include",
"showOnAuthorArchivePages": "Yes",
"articleAge": "0",
"path": "/food/1337646/its-mexican-asian-a-candy-a-sauceits-chamoy",
"audioTrackLength": null,
"parsedContent": [
{
"type": "contentString",
"content": "\u003cdiv class=\"post-body\">\u003cp>\u003cp>On a scorching summer day, the quest for the perfect Michelada leads us on an exploration of one of Mexico’s most beloved condiments: chamoy. The irresistible blend of salty, sweet, and spicy flavors found in this sauce has become a star in Mexican cuisine, enhancing everything from fruits and candy to drinks. But where did chamoy come from? Was it introduced by Filipino-Chinese immigrants or the Japanese? And what exactly is its connection to Hawaii? Join us on this delicious journey as we uncover the global roots of this popular Mexican condiment that will leave your taste buds tingling and your mind buzzing with curiosity.\u003c/p>\n\u003cp>Subscribe to \u003ca href=\"https://www.youtube.com/@KQEDFood\" target=\"_blank\" rel=\"noopener\">KQED Food’s YouTube channel\u003c/a> to watch more Beyond The Menu videos.\u003c/p>\n\u003cp>Support for this program comes from Krishnan Shah Family Foundation and supporters of the KQED Studios Fund\u003c/p>\n\u003cp>Read More:\u003c/p>\n\u003cul>\n\u003cli>\u003ca href=\"https://tastecooking.com/spicy-sour-ruby-red-appeal-chamoy/\">The Spicy, Sour, Ruby-Red Appeal of Chamoy\u003c/a>\u003c/li>\n\u003cli>\u003ca href=\"https://www.rachellaudan.com/2016/06/molli-chamoy-sauce-go-figure.html\">Molli Chamoy Sauce: Go Figure\u003c/a>\u003c/li>\n\u003cli> \u003ca href=\"https://masaamerica.com/2021/06/17/chamoy/\">History, The Kitchen – Chamoy\u003c/a>\u003c/li>\n\u003cli>\u003ca href=\"https://www.eater.com/2017/3/6/14809056/chamoy-how-to-use\">Why Chefs Are Turning the Spotlight on Chamoy\u003c/a>\u003c/li>\n\u003cli> \u003ca href=\"https://www.npr.org/sections/thesalt/2017/01/17/508395673/chamoy-is-mexico-s-flavor-fiesta-condiment-courtesy-of-china\">Chamoy Is Mexico’s Flavor Fiesta Condiment, Courtesy Of China\u003c/a>\u003c/li>\n\u003cli>\u003ca href=\"https://heritagesofmigration.wordpress.com/wp-content/uploads/2016/11/icich-buenos-aires-argentina-20171.pdf\">The Intangible Heritage of Migration: Challenges and Possibilities\u003c/a>\u003c/li>\n\u003cli>\u003ca href=\"https://www.expressnews.com/food/article/Chamoy-the-salty-candy-vs-chamoy-the-sauce-16268627.php\">Chamoy the salty candy vs. chamoy the sauce: How it evolved from Asian immigrants in Mexico to total San Antonio condiment domination\u003c/a>\u003c/li>\n\u003cli> \u003ca href=\"https://www.chicanonuevo.com\">Abraham Nuñez\u003c/a>\u003c/li>\n\u003cli> \u003ca href=\"http://www.lesleytellez.com\">Lesley Tellez\u003c/a>\u003c/li>\n\u003cli>\u003ca href=\"https://www.amazon.com/Books-Ellen-Riojas-Clark/s?rh=n%3A283155%2Cp_27%3AEllen+Riojas+Clark\">Ellen Riojas Clark\u003c/a>\u003c/li>\n\u003cli>\u003ca href=\"https://www.rachellaudan.com\">Rachel Lauden\u003c/a>\u003c/li>\n\u003c/ul>\n\u003cp>\u003cstrong>About Beyond The Menu:\u003c/strong>\u003cbr>\nThe story of the food on your plate is more than just the recipe. Each ingredient and every cooking technique goes back hundreds if not thousands of years, traversing the globe on a wildly delicious cross-cultural adventure. In KQED’s new digital food series Beyond The Menu, host Cecilia Phillips interviews chefs, authors, and other experts to dig up surprising facts on the cultural pathways of today’s most popular dishes. It’s a history show, it’s a mystery series, it’s a celebration of multicultural cuisine, sometimes it’s even a science program, all set against the backdrop of mouth-watering food cinematography.\u003c/p>\n\u003cp>\u003c/p>\u003c/div>",
"attributes": {
"named": {},
"numeric": []
}
},
{
"type": "component",
"content": "",
"name": "ad",
"attributes": {
"named": {
"label": "fullwidth"
},
"numeric": [
"fullwidth"
]
}
},
{
"type": "contentString",
"content": "\u003cdiv class=\"post-body\">\u003cp>\u003c/p>\u003cp>\u003c/p>\n\u003c/div>\u003c/p>",
"attributes": {
"named": {},
"numeric": []
}
}
],
"link": "/food/1337646/its-mexican-asian-a-candy-a-sauceits-chamoy",
"authors": [
"byline_food_1337646"
],
"series": [
"food_311"
],
"categories": [
"food_1"
],
"tags": [
"food_313",
"food_312",
"food_354",
"food_328"
],
"featImg": "food_1337651",
"label": "source_food_1337646"
},
"food_1337639": {
"type": "posts",
"id": "food_1337639",
"meta": {
"index": "posts_1716263798",
"site": "food",
"id": "1337639",
"score": null,
"sort": [
1718296860000
]
},
"guestAuthors": [],
"slug": "this-fiery-hot-sauce-uses-a-pepper-lost-to-history",
"title": "This Fiery Hot Sauce Uses a Pepper Lost To History",
"publishDate": 1718296860,
"format": "video",
"headTitle": "This Fiery Hot Sauce Uses a Pepper Lost To History | KQED",
"labelTerm": {},
"content": "\u003cp>There is no “right” way to make sambal. Although there are over 200 different varieties of this spicy hot sauce in Indonesia alone, the chile pepper has been the sole common key ingredient in every recipe for centuries . Or so we thought. There’s evidence of sambal hundreds of years before the chile pepper arrived in Asia. So what the heck did they put in sambal back then? Watch the latest episode of Beyond the Menu to find out.\u003c/p>\n\u003cp>Thanks to Siska Silitonga, owner of ChiliCali, for taking us on a delicious sambal journey.\u003c/p>\n\u003cp>Subscribe to \u003ca href=\"https://www.youtube.com/@KQEDFood\" target=\"_blank\" rel=\"noopener\">KQED Food’s YouTube channel\u003c/a> to watch more Beyond The Menu videos.\u003c/p>\n\u003cp>\u003cstrong>About Beyond The Menu:\u003c/strong>\u003cbr>\nThe story of the food on your plate is more than just the recipe. Each ingredient and every cooking technique goes back hundreds if not thousands of years, traversing the globe on a wildly delicious cross-cultural adventure. In KQED’s new digital food series Beyond The Menu, host Cecilia Phillips interviews chefs, authors, and other experts to dig up surprising facts on the cultural pathways of today’s most popular dishes. It’s a history show, it’s a mystery series, it’s a celebration of multicultural cuisine, sometimes it’s even a science program, all set against the backdrop of mouth-watering food cinematography.\u003c/p>\n\u003cp>[ad fullwidth]\u003c/p>\u003cp>\u003c/p>\n",
"blocks": [],
"excerpt": null,
"status": "publish",
"parent": 0,
"modified": 1760994723,
"stats": {
"hasAudio": false,
"hasVideo": false,
"hasChartOrMap": false,
"iframeSrcs": [],
"hasGoogleForm": false,
"hasGallery": false,
"hasHearkenModule": false,
"hasPolis": false,
"paragraphCount": 6,
"wordCount": 231
},
"headData": {
"title": "This Fiery Hot Sauce Uses a Pepper Lost To History | KQED",
"description": "Cecilia Phillips explores the roots of sambal, a fiery Indonesian hot sauce similar to sriracha. Watch a new episode of Beyond the Menu.",
"ogTitle": "",
"ogDescription": "",
"ogImgId": "",
"twTitle": "",
"twDescription": "",
"twImgId": "",
"socialDescription": "Cecilia Phillips explores the roots of sambal, a fiery Indonesian hot sauce similar to sriracha. Watch a new episode of Beyond the Menu.",
"schema": {
"@context": "https://schema.org",
"@type": "Article",
"headline": "This Fiery Hot Sauce Uses a Pepper Lost To History",
"datePublished": "2024-06-13T09:41:00-07:00",
"dateModified": "2025-10-20T14:12:03-07:00",
"image": "https://cdn.kqed.org/wp-content/uploads/2020/02/KQED-OG-Image@1x.png"
}
},
"primaryCategory": {
"termId": 1,
"slug": "food",
"name": "food"
},
"videoEmbed": "https://youtu.be/yZfFPH803co",
"source": "Food",
"sourceUrl": "https://www.kqed.org/food",
"sticky": false,
"templateType": "standard",
"featuredImageType": "standard",
"excludeFromSiteSearch": "Include",
"showOnAuthorArchivePages": "Yes",
"articleAge": "0",
"path": "/food/1337639/this-fiery-hot-sauce-uses-a-pepper-lost-to-history",
"audioTrackLength": null,
"parsedContent": [
{
"type": "contentString",
"content": "\u003cdiv class=\"post-body\">\u003cp>\u003cp>There is no “right” way to make sambal. Although there are over 200 different varieties of this spicy hot sauce in Indonesia alone, the chile pepper has been the sole common key ingredient in every recipe for centuries . Or so we thought. There’s evidence of sambal hundreds of years before the chile pepper arrived in Asia. So what the heck did they put in sambal back then? Watch the latest episode of Beyond the Menu to find out.\u003c/p>\n\u003cp>Thanks to Siska Silitonga, owner of ChiliCali, for taking us on a delicious sambal journey.\u003c/p>\n\u003cp>Subscribe to \u003ca href=\"https://www.youtube.com/@KQEDFood\" target=\"_blank\" rel=\"noopener\">KQED Food’s YouTube channel\u003c/a> to watch more Beyond The Menu videos.\u003c/p>\n\u003cp>\u003cstrong>About Beyond The Menu:\u003c/strong>\u003cbr>\nThe story of the food on your plate is more than just the recipe. Each ingredient and every cooking technique goes back hundreds if not thousands of years, traversing the globe on a wildly delicious cross-cultural adventure. In KQED’s new digital food series Beyond The Menu, host Cecilia Phillips interviews chefs, authors, and other experts to dig up surprising facts on the cultural pathways of today’s most popular dishes. It’s a history show, it’s a mystery series, it’s a celebration of multicultural cuisine, sometimes it’s even a science program, all set against the backdrop of mouth-watering food cinematography.\u003c/p>\n\u003cp>\u003c/p>\u003c/div>",
"attributes": {
"named": {},
"numeric": []
}
},
{
"type": "component",
"content": "",
"name": "ad",
"attributes": {
"named": {
"label": "fullwidth"
},
"numeric": [
"fullwidth"
]
}
},
{
"type": "contentString",
"content": "\u003cdiv class=\"post-body\">\u003cp>\u003c/p>\u003cp>\u003c/p>\n\u003c/div>\u003c/p>",
"attributes": {
"named": {},
"numeric": []
}
}
],
"link": "/food/1337639/this-fiery-hot-sauce-uses-a-pepper-lost-to-history",
"authors": [
"10621"
],
"series": [
"food_311"
],
"categories": [
"food_1"
],
"tags": [
"food_313",
"food_312",
"food_328",
"food_352"
],
"featImg": "food_1337641",
"label": "source_food_1337639"
},
"food_1337630": {
"type": "posts",
"id": "food_1337630",
"meta": {
"index": "posts_1716263798",
"site": "food",
"id": "1337630",
"score": null,
"sort": [
1716912023000
]
},
"guestAuthors": [],
"slug": "chicken-and-waffles",
"title": "Chicken and Waffles: from Amish Country to Harlem",
"publishDate": 1716912023,
"format": "video",
"headTitle": "Chicken and Waffles: from Amish Country to Harlem | KQED",
"labelTerm": {},
"content": "\u003cp>The delicious duo of crispy, golden fried chicken, perfectly seasoned and nestled atop a fluffy waffle, had to go through quite the journey before it became the iconic Southern comfort food that we all love today. Join us as we trace the roots of this American culinary masterpiece from the arrival of the first Pilgrims in the 1600s to the supper clubs of the Harlem Renaissance to a soul food restaurant chain in Hollywood. Follow along as we learn how this delicious pairing stood the test of time.\u003c/p>\n\u003cp>Thanks to Chef Geoff Davis, James Beard-nominated founder of \u003ca href=\"https://www.burdelloakland.com/\" target=\"_blank\" rel=\"noopener\">Burdell Soul Food\u003c/a> in Oakland, for sharing his story and showing us his take on chicken and waffles.\u003c/p>\n\u003cp>Subscribe to \u003ca href=\"https://www.youtube.com/@KQEDFood\" target=\"_blank\" rel=\"noopener\">KQED Food’s YouTube channel\u003c/a> to watch more Beyond The Menu videos.\u003c/p>\n\u003cp>Read more:\u003cbr>\n\u003ca href=\"https://eccentricculinary.com/chicken-and-waffles-the-most-complete-expression-of-southern-culinary-skill-part-1/\" target=\"_blank\" rel=\"noopener\">Chicken and Waffles: The Most Complete Expression of Southern Culinary Skill, Part 1\u003c/a>\u003cbr>\n\u003ca href=\"https://eccentricculinary.com/chicken-and-waffles-the-most-complete-expression-of-southern-culinary-skills-part-2/\" target=\"_blank\" rel=\"noopener\">Chicken and Waffles: The Most Complete Expression of Southern Culinary Skill, Part 2\u003c/a>\u003cbr>\n\u003ca href=\"https://www.harlemworldmagazine.com/wells-restaurant-in-harlem-the-best-chicken-and-waffles-in-the-world-1938-1982/\" target=\"_blank\" rel=\"noopener\">Well’s Restaurant In Harlem, The Best Chicken And Waffles In The World 1938-1982\u003c/a>\u003cbr>\n\u003ca href=\"https://harlembespoke.blogspot.com/2009/11/remember-home-of-chicken-and-waffles.html\" target=\"_blank\" rel=\"noopener\">REMEMBER: The Home of Chicken and Waffles\u003c/a>\u003cbr>\n\u003ca href=\"https://www.roscoeschickenandwaffles.com/\" target=\"_blank\" rel=\"noopener\">Roscoe’s House of Chicken’ n Waffles\u003c/a>\u003cbr>\n\u003ca href=\"https://www.burdelloakland.com/people-and-partners\" target=\"_blank\" rel=\"noopener\">Chef Geoff Davis\u003c/a>\u003cbr>\n\u003ca href=\"https://www.thefoodgriot.com/\" target=\"_blank\" rel=\"noopener\">Tonya Hopkins\u003c/a>\u003cbr>\n\u003ca href=\"https://eccentricculinary.com/author/hdmiller/\" target=\"_blank\" rel=\"noopener\">Howard Miller\u003c/a>\u003cbr>\n\u003ca href=\"https://www.williamwoysweaverepicurewithhoe.com/\" target=\"_blank\" rel=\"noopener\">William Woy Weaver\u003c/a>\u003cbr>\n\u003ca href=\"https://www.andrewlawler.com/chicken-book/\" target=\"_blank\" rel=\"noopener\">Andrew Lawler\u003c/a>\u003c/p>\n\u003cp>\u003cstrong>About Beyond The Menu:\u003c/strong>\u003cbr>\nThe story of the food on your plate is more than just the recipe. Each ingredient and every cooking technique goes back hundreds if not thousands of years, traversing the globe on a wildly delicious cross-cultural adventure. In KQED’s new digital food series Beyond The Menu, host Cecilia Phillips interviews chefs, authors, and other experts to dig up surprising facts on the cultural pathways of today’s trendiest dishes. It’s a history show, it’s a mystery series, it’s a celebration of multicultural cuisine, sometimes it’s even a science program, all set against the backdrop of mouth-watering food cinematography.\u003c/p>\n\u003cp>[ad fullwidth]\u003c/p>\u003cp>\u003c/p>\n",
"blocks": [],
"excerpt": null,
"status": "publish",
"parent": 0,
"modified": 1727470744,
"stats": {
"hasAudio": false,
"hasVideo": false,
"hasChartOrMap": false,
"iframeSrcs": [],
"hasGoogleForm": false,
"hasGallery": false,
"hasHearkenModule": false,
"hasPolis": false,
"paragraphCount": 7,
"wordCount": 320
},
"headData": {
"title": "Chicken and Waffles: from Amish Country to Harlem | KQED",
"description": "The delicious duo of crispy, golden fried chicken, perfectly seasoned and nestled atop a fluffy waffle, had to go through quite the journey before it became the iconic Southern comfort food that we all love today. Join us as we trace the roots of this American culinary masterpiece from the arrival of the first Pilgrims in the 1600s to the supper clubs of the Harlem Renaissance to a soul food restaurant chain in Hollywood. Follow along as we learn how this delicious pairing stood the test of time. Thanks to Chef Geoff Davis, James Beard-nominated founder of Burdell Soul Food",
"ogTitle": "",
"ogDescription": "",
"ogImgId": "",
"twTitle": "",
"twDescription": "",
"twImgId": "",
"schema": {
"@context": "https://schema.org",
"@type": "Article",
"headline": "Chicken and Waffles: from Amish Country to Harlem",
"datePublished": "2024-05-28T09:00:23-07:00",
"dateModified": "2024-09-27T13:59:04-07:00",
"image": "https://cdn.kqed.org/wp-content/uploads/2020/02/KQED-OG-Image@1x.png"
}
},
"videoEmbed": "https://youtu.be/-rcnjlnQlLU",
"source": "Food",
"sourceUrl": "https://www.kqed.org/food",
"sticky": false,
"nprByline": "Manjula Varghese",
"subhead": "Uncover the savory saga of chicken and waffles, where Pennsylvania Dutch tradition meets Southern soul, tracing its journey from colonial America to Hollywood glamor.",
"excludeFromSiteSearch": "Include",
"showOnAuthorArchivePages": "Yes",
"articleAge": "0",
"path": "/food/1337630/chicken-and-waffles",
"audioTrackLength": null,
"parsedContent": [
{
"type": "contentString",
"content": "\u003cdiv class=\"post-body\">\u003cp>\u003cp>The delicious duo of crispy, golden fried chicken, perfectly seasoned and nestled atop a fluffy waffle, had to go through quite the journey before it became the iconic Southern comfort food that we all love today. Join us as we trace the roots of this American culinary masterpiece from the arrival of the first Pilgrims in the 1600s to the supper clubs of the Harlem Renaissance to a soul food restaurant chain in Hollywood. Follow along as we learn how this delicious pairing stood the test of time.\u003c/p>\n\u003cp>Thanks to Chef Geoff Davis, James Beard-nominated founder of \u003ca href=\"https://www.burdelloakland.com/\" target=\"_blank\" rel=\"noopener\">Burdell Soul Food\u003c/a> in Oakland, for sharing his story and showing us his take on chicken and waffles.\u003c/p>\n\u003cp>Subscribe to \u003ca href=\"https://www.youtube.com/@KQEDFood\" target=\"_blank\" rel=\"noopener\">KQED Food’s YouTube channel\u003c/a> to watch more Beyond The Menu videos.\u003c/p>\n\u003cp>Read more:\u003cbr>\n\u003ca href=\"https://eccentricculinary.com/chicken-and-waffles-the-most-complete-expression-of-southern-culinary-skill-part-1/\" target=\"_blank\" rel=\"noopener\">Chicken and Waffles: The Most Complete Expression of Southern Culinary Skill, Part 1\u003c/a>\u003cbr>\n\u003ca href=\"https://eccentricculinary.com/chicken-and-waffles-the-most-complete-expression-of-southern-culinary-skills-part-2/\" target=\"_blank\" rel=\"noopener\">Chicken and Waffles: The Most Complete Expression of Southern Culinary Skill, Part 2\u003c/a>\u003cbr>\n\u003ca href=\"https://www.harlemworldmagazine.com/wells-restaurant-in-harlem-the-best-chicken-and-waffles-in-the-world-1938-1982/\" target=\"_blank\" rel=\"noopener\">Well’s Restaurant In Harlem, The Best Chicken And Waffles In The World 1938-1982\u003c/a>\u003cbr>\n\u003ca href=\"https://harlembespoke.blogspot.com/2009/11/remember-home-of-chicken-and-waffles.html\" target=\"_blank\" rel=\"noopener\">REMEMBER: The Home of Chicken and Waffles\u003c/a>\u003cbr>\n\u003ca href=\"https://www.roscoeschickenandwaffles.com/\" target=\"_blank\" rel=\"noopener\">Roscoe’s House of Chicken’ n Waffles\u003c/a>\u003cbr>\n\u003ca href=\"https://www.burdelloakland.com/people-and-partners\" target=\"_blank\" rel=\"noopener\">Chef Geoff Davis\u003c/a>\u003cbr>\n\u003ca href=\"https://www.thefoodgriot.com/\" target=\"_blank\" rel=\"noopener\">Tonya Hopkins\u003c/a>\u003cbr>\n\u003ca href=\"https://eccentricculinary.com/author/hdmiller/\" target=\"_blank\" rel=\"noopener\">Howard Miller\u003c/a>\u003cbr>\n\u003ca href=\"https://www.williamwoysweaverepicurewithhoe.com/\" target=\"_blank\" rel=\"noopener\">William Woy Weaver\u003c/a>\u003cbr>\n\u003ca href=\"https://www.andrewlawler.com/chicken-book/\" target=\"_blank\" rel=\"noopener\">Andrew Lawler\u003c/a>\u003c/p>\n\u003cp>\u003cstrong>About Beyond The Menu:\u003c/strong>\u003cbr>\nThe story of the food on your plate is more than just the recipe. Each ingredient and every cooking technique goes back hundreds if not thousands of years, traversing the globe on a wildly delicious cross-cultural adventure. In KQED’s new digital food series Beyond The Menu, host Cecilia Phillips interviews chefs, authors, and other experts to dig up surprising facts on the cultural pathways of today’s trendiest dishes. It’s a history show, it’s a mystery series, it’s a celebration of multicultural cuisine, sometimes it’s even a science program, all set against the backdrop of mouth-watering food cinematography.\u003c/p>\n\u003cp>\u003c/p>\u003c/div>",
"attributes": {
"named": {},
"numeric": []
}
},
{
"type": "component",
"content": "",
"name": "ad",
"attributes": {
"named": {
"label": "fullwidth"
},
"numeric": [
"fullwidth"
]
}
},
{
"type": "contentString",
"content": "\u003cdiv class=\"post-body\">\u003cp>\u003c/p>\u003cp>\u003c/p>\n\u003c/div>\u003c/p>",
"attributes": {
"named": {},
"numeric": []
}
}
],
"link": "/food/1337630/chicken-and-waffles",
"authors": [
"byline_food_1337630"
],
"series": [
"food_311"
],
"categories": [
"food_1"
],
"tags": [
"food_114",
"food_313",
"food_312",
"food_328",
"food_150"
],
"featImg": "food_1337636",
"label": "source_food_1337630"
},
"food_1337599": {
"type": "posts",
"id": "food_1337599",
"meta": {
"index": "posts_1716263798",
"site": "food",
"id": "1337599",
"score": null,
"sort": [
1715643778000
]
},
"parent": 0,
"labelTerm": {},
"blocks": [],
"publishDate": 1715643778,
"format": "video",
"title": "The Chilling History of Ice Cream",
"headTitle": "The Chilling History of Ice Cream | KQED",
"content": "\u003cp>Uncover the sweet saga behind Rocky Road ice cream. We dive into this iconic treat’s roots and discover how the tumultuous 1920s, Prohibition, and World War II all played a pivotal role in transforming ice cream into the ultimate American comfort food. From humble beginnings to becoming a nationwide sensation, explore how Rocky Road became not just a flavor, but a symbol of resilience and indulgence in the face of adversity.\u003c/p>\n\u003cp>Thank you to Juliet Pries, owner of \u003ca href=\"https://www.theicecreambarsf.com/\" target=\"_blank\" rel=\"noopener\">The Ice Cream Bar\u003c/a>, for sharing her rocky road ice cream with marshmallow fluff.\u003c/p>\n\u003cp>Subscribe to \u003ca href=\"https://www.youtube.com/@KQEDFood\" target=\"_blank\" rel=\"noopener\">KQED Food’s YouTube channel\u003c/a> to watch more Beyond The Menu videos.\u003c/p>\n\u003cp>Read more:\u003cbr>\n\u003ca href=\"https://qz.com/quartzy/1376713/who-invented-rocky-road-ice-cream-its-complicated\" target=\"_blank\" rel=\"noopener\">Who Invented Rocky Road ice cream? It’s complicated.\u003c/a>\u003cbr>\n\u003ca href=\"https://www.theatlantic.com/health/archive/2017/08/ice-cream-military/535980/\" target=\"_blank\" rel=\"noopener\">How Ice Cream Helped America at War\u003c/a>\u003cbr>\n\u003ca href=\"https://www.loc.gov/resource/mtj1.056_0146_0146/\" target=\"_blank\" rel=\"noopener\">Thomas Jefferson’s Original Ice Cream Recipe\u003c/a>\u003c/p>\n\u003cp>\u003cstrong>About Beyond The Menu:\u003c/strong>\u003cbr>\nThe story of the food on your plate is more than just the recipe. Each ingredient and every cooking technique goes back hundreds if not thousands of years, traversing the globe on a wildly delicious cross-cultural adventure. In KQED’s new digital food series Beyond The Menu, host Cecilia Phillips interviews chefs, authors, and other experts to dig up surprising facts on the cultural pathways of today’s trendiest dishes. It’s a history show, it’s a mystery series, it’s a celebration of multicultural cuisine, sometimes it’s even a science program, all set against the backdrop of mouth-watering food cinematography.\u003c/p>\n\u003cp>[ad fullwidth]\u003c/p>\u003cp>\u003c/p>\n",
"stats": {
"hasVideo": false,
"hasChartOrMap": false,
"hasAudio": false,
"hasPolis": false,
"wordCount": 253,
"hasGoogleForm": false,
"hasGallery": false,
"hasHearkenModule": false,
"iframeSrcs": [],
"paragraphCount": 7
},
"modified": 1715707072,
"excerpt": null,
"headData": {
"twImgId": "",
"twTitle": "",
"ogTitle": "",
"ogImgId": "",
"twDescription": "",
"description": "Uncover the sweet saga behind Rocky Road ice cream. We dive into this iconic treat’s roots and discover how the tumultuous 1920s, Prohibition, and World War II all played a pivotal role in transforming ice cream into the ultimate American comfort food. From humble beginnings to becoming a nationwide sensation, explore how Rocky Road became not just a flavor, but a symbol of resilience and indulgence in the face of adversity. Thank you to Juliet Pries, owner of The Ice Cream Bar, for sharing her rocky road ice cream with marshmallow fluff. Subscribe to KQED Food’s YouTube channel to watch",
"title": "The Chilling History of Ice Cream | KQED",
"ogDescription": "",
"schema": {
"@context": "https://schema.org",
"@type": "Article",
"headline": "The Chilling History of Ice Cream",
"datePublished": "2024-05-13T16:42:58-07:00",
"dateModified": "2024-05-14T10:17:52-07:00",
"image": "https://cdn.kqed.org/wp-content/uploads/2020/02/KQED-OG-Image@1x.png"
}
},
"guestAuthors": [],
"slug": "rocky-road-ice-cream",
"status": "publish",
"sourceUrl": "https://www.kqed.org/food",
"videoEmbed": "https://youtu.be/We53t1xfCSU?si=g9xTxquLDrbUujd9",
"nprByline": "Myles Bess",
"excludeFromSiteSearch": "Include",
"sticky": false,
"subhead": "The delicious origins of Rocky Road ice cream involve The Great Depression and Prohibition.",
"source": "Food",
"showOnAuthorArchivePages": "Yes",
"articleAge": "0",
"path": "/food/1337599/rocky-road-ice-cream",
"audioTrackLength": null,
"parsedContent": [
{
"type": "contentString",
"content": "\u003cdiv class=\"post-body\">\u003cp>\u003cp>Uncover the sweet saga behind Rocky Road ice cream. We dive into this iconic treat’s roots and discover how the tumultuous 1920s, Prohibition, and World War II all played a pivotal role in transforming ice cream into the ultimate American comfort food. From humble beginnings to becoming a nationwide sensation, explore how Rocky Road became not just a flavor, but a symbol of resilience and indulgence in the face of adversity.\u003c/p>\n\u003cp>Thank you to Juliet Pries, owner of \u003ca href=\"https://www.theicecreambarsf.com/\" target=\"_blank\" rel=\"noopener\">The Ice Cream Bar\u003c/a>, for sharing her rocky road ice cream with marshmallow fluff.\u003c/p>\n\u003cp>Subscribe to \u003ca href=\"https://www.youtube.com/@KQEDFood\" target=\"_blank\" rel=\"noopener\">KQED Food’s YouTube channel\u003c/a> to watch more Beyond The Menu videos.\u003c/p>\n\u003cp>Read more:\u003cbr>\n\u003ca href=\"https://qz.com/quartzy/1376713/who-invented-rocky-road-ice-cream-its-complicated\" target=\"_blank\" rel=\"noopener\">Who Invented Rocky Road ice cream? It’s complicated.\u003c/a>\u003cbr>\n\u003ca href=\"https://www.theatlantic.com/health/archive/2017/08/ice-cream-military/535980/\" target=\"_blank\" rel=\"noopener\">How Ice Cream Helped America at War\u003c/a>\u003cbr>\n\u003ca href=\"https://www.loc.gov/resource/mtj1.056_0146_0146/\" target=\"_blank\" rel=\"noopener\">Thomas Jefferson’s Original Ice Cream Recipe\u003c/a>\u003c/p>\n\u003cp>\u003cstrong>About Beyond The Menu:\u003c/strong>\u003cbr>\nThe story of the food on your plate is more than just the recipe. Each ingredient and every cooking technique goes back hundreds if not thousands of years, traversing the globe on a wildly delicious cross-cultural adventure. In KQED’s new digital food series Beyond The Menu, host Cecilia Phillips interviews chefs, authors, and other experts to dig up surprising facts on the cultural pathways of today’s trendiest dishes. It’s a history show, it’s a mystery series, it’s a celebration of multicultural cuisine, sometimes it’s even a science program, all set against the backdrop of mouth-watering food cinematography.\u003c/p>\n\u003cp>\u003c/p>\u003c/div>",
"attributes": {
"named": {},
"numeric": []
}
},
{
"type": "component",
"content": "",
"name": "ad",
"attributes": {
"named": {
"label": "fullwidth"
},
"numeric": [
"fullwidth"
]
}
},
{
"type": "contentString",
"content": "\u003cdiv class=\"post-body\">\u003cp>\u003c/p>\u003cp>\u003c/p>\n\u003c/div>\u003c/p>",
"attributes": {
"named": {},
"numeric": []
}
}
],
"link": "/food/1337599/rocky-road-ice-cream",
"authors": [
"byline_food_1337599"
],
"series": [
"food_311"
],
"categories": [
"food_1"
],
"tags": [
"food_114",
"food_313",
"food_312",
"food_328",
"food_176"
],
"featImg": "food_1337603",
"label": "source_food_1337599"
},
"food_1337589": {
"type": "posts",
"id": "food_1337589",
"meta": {
"index": "posts_1716263798",
"site": "food",
"id": "1337589",
"score": null,
"sort": [
1714406452000
]
},
"guestAuthors": [],
"slug": "corn-tortilla",
"title": "Your Corn Tortilla Sucks…Science Can Fix It",
"publishDate": 1714406452,
"format": "video",
"headTitle": "Your Corn Tortilla Sucks…Science Can Fix It | KQED",
"labelTerm": {},
"content": "\u003cp>You might think that corn tortilla from your favorite Mexican restaurant is as good as it gets, but chances are it’s made from a mass-produced corn powder. But fear not! A better corn tortilla exists and has existed for thousands of years. All you need is fresh corn and an ancient science that’s almost as old as civilization itself!\u003c/p>\n\u003cp>Thanks to Emmanuel Galvan, owner of \u003ca href=\"https://www.bolitamasa.com/\" target=\"_blank\" rel=\"noopener\">Bolita Masa\u003c/a>, for unlocking the magic of corn tortillas.\u003c/p>\n\u003cp>Subscribe to \u003ca href=\"https://www.youtube.com/@KQEDFood\" target=\"_blank\" rel=\"noopener\">KQED Food’s YouTube channel\u003c/a> to watch more Beyond The Menu videos.\u003c/p>\n\u003cp>Read more:\u003cbr>\n\u003ca href=\"https://masienda.com/products/masa-book\" target=\"_blank\" rel=\"noopener\">Masa by Jorge Gaviria\u003c/a>\u003cbr>\n\u003ca href=\"https://www.epicurious.com/ingredients/what-is-nixtamal-article\" target=\"_blank\" rel=\"noopener\">What is nixtamal?\u003c/a>\u003cbr>\n\u003ca href=\"https://www.biorxiv.org/content/10.1101/2023.01.31.526540v1.full\" target=\"_blank\" rel=\"noopener\">How corn became corn\u003c/a>\u003cbr>\n\u003ca href=\"https://grist.org/technology/masa/\" target=\"_blank\" rel=\"noopener\">How the corn tortilla went corporate\u003c/a>\u003cbr>\n\u003ca href=\"https://www.texasmonthly.com/food/masa-masters-texas/\" target=\"_blank\" rel=\"noopener\">The masters of masa\u003c/a>\u003c/p>\n\u003cp>\u003cstrong>About Beyond The Menu:\u003c/strong>\u003cbr>\nThe story of the food on your plate is more than just the recipe. Each ingredient and every cooking technique goes back hundreds if not thousands of years, traversing the globe on a wildly delicious cross-cultural adventure. In KQED’s new digital food series Beyond The Menu, host Cecilia Phillips interviews chefs, authors, and other experts to dig up surprising facts on the cultural pathways of today’s trendiest dishes. It’s a history show, it’s a mystery series, it’s a celebration of multicultural cuisine, sometimes it’s even a science program, all set against the backdrop of mouth-watering food cinematography.\u003c/p>\n\u003cp>[ad fullwidth]\u003c/p>\u003cp>\u003c/p>\n",
"blocks": [],
"excerpt": null,
"status": "publish",
"parent": 0,
"modified": 1760995690,
"stats": {
"hasAudio": false,
"hasVideo": false,
"hasChartOrMap": false,
"iframeSrcs": [],
"hasGoogleForm": false,
"hasGallery": false,
"hasHearkenModule": false,
"hasPolis": false,
"paragraphCount": 7,
"wordCount": 234
},
"headData": {
"title": "Your Corn Tortilla Sucks…Science Can Fix It | KQED",
"description": "You might think that corn tortilla from your favorite Mexican restaurant is as good as it gets, but chances are it’s made from a mass-produced corn powder. But fear not! A better corn tortilla exists and has existed for thousands of years. All you need is fresh corn and an ancient science that’s almost as old as civilization itself! Thanks to Emmanuel Galvan, owner of Bolita Masa, for unlocking the magic of corn tortillas. Subscribe to KQED Food’s YouTube channel to watch more Beyond The Menu videos. Read more: Masa by Jorge Gaviria What is nixtamal? How corn became corn",
"ogTitle": "",
"ogDescription": "",
"ogImgId": "",
"twTitle": "",
"twDescription": "",
"twImgId": "",
"schema": {
"@context": "https://schema.org",
"@type": "Article",
"headline": "Your Corn Tortilla Sucks…Science Can Fix It",
"datePublished": "2024-04-29T09:00:52-07:00",
"dateModified": "2025-10-20T14:28:10-07:00",
"image": "https://cdn.kqed.org/wp-content/uploads/2020/02/KQED-OG-Image@1x.png"
}
},
"primaryCategory": {
"termId": 1,
"slug": "food",
"name": "food"
},
"videoEmbed": "https://youtu.be/Ht1NVEHLgCs",
"source": "Food",
"sourceUrl": "https://www.kqed.org/food",
"sticky": false,
"templateType": "standard",
"featuredImageType": "standard",
"excludeFromSiteSearch": "Include",
"showOnAuthorArchivePages": "Yes",
"articleAge": "0",
"path": "/food/1337589/corn-tortilla",
"audioTrackLength": null,
"parsedContent": [
{
"type": "contentString",
"content": "\u003cdiv class=\"post-body\">\u003cp>\u003cp>You might think that corn tortilla from your favorite Mexican restaurant is as good as it gets, but chances are it’s made from a mass-produced corn powder. But fear not! A better corn tortilla exists and has existed for thousands of years. All you need is fresh corn and an ancient science that’s almost as old as civilization itself!\u003c/p>\n\u003cp>Thanks to Emmanuel Galvan, owner of \u003ca href=\"https://www.bolitamasa.com/\" target=\"_blank\" rel=\"noopener\">Bolita Masa\u003c/a>, for unlocking the magic of corn tortillas.\u003c/p>\n\u003cp>Subscribe to \u003ca href=\"https://www.youtube.com/@KQEDFood\" target=\"_blank\" rel=\"noopener\">KQED Food’s YouTube channel\u003c/a> to watch more Beyond The Menu videos.\u003c/p>\n\u003cp>Read more:\u003cbr>\n\u003ca href=\"https://masienda.com/products/masa-book\" target=\"_blank\" rel=\"noopener\">Masa by Jorge Gaviria\u003c/a>\u003cbr>\n\u003ca href=\"https://www.epicurious.com/ingredients/what-is-nixtamal-article\" target=\"_blank\" rel=\"noopener\">What is nixtamal?\u003c/a>\u003cbr>\n\u003ca href=\"https://www.biorxiv.org/content/10.1101/2023.01.31.526540v1.full\" target=\"_blank\" rel=\"noopener\">How corn became corn\u003c/a>\u003cbr>\n\u003ca href=\"https://grist.org/technology/masa/\" target=\"_blank\" rel=\"noopener\">How the corn tortilla went corporate\u003c/a>\u003cbr>\n\u003ca href=\"https://www.texasmonthly.com/food/masa-masters-texas/\" target=\"_blank\" rel=\"noopener\">The masters of masa\u003c/a>\u003c/p>\n\u003cp>\u003cstrong>About Beyond The Menu:\u003c/strong>\u003cbr>\nThe story of the food on your plate is more than just the recipe. Each ingredient and every cooking technique goes back hundreds if not thousands of years, traversing the globe on a wildly delicious cross-cultural adventure. In KQED’s new digital food series Beyond The Menu, host Cecilia Phillips interviews chefs, authors, and other experts to dig up surprising facts on the cultural pathways of today’s trendiest dishes. It’s a history show, it’s a mystery series, it’s a celebration of multicultural cuisine, sometimes it’s even a science program, all set against the backdrop of mouth-watering food cinematography.\u003c/p>\n\u003cp>\u003c/p>\u003c/div>",
"attributes": {
"named": {},
"numeric": []
}
},
{
"type": "component",
"content": "",
"name": "ad",
"attributes": {
"named": {
"label": "fullwidth"
},
"numeric": [
"fullwidth"
]
}
},
{
"type": "contentString",
"content": "\u003cdiv class=\"post-body\">\u003cp>\u003c/p>\u003cp>\u003c/p>\n\u003c/div>\u003c/p>",
"attributes": {
"named": {},
"numeric": []
}
}
],
"link": "/food/1337589/corn-tortilla",
"authors": [
"10621"
],
"series": [
"food_311"
],
"categories": [
"food_1"
],
"tags": [
"food_114",
"food_313",
"food_312",
"food_143",
"food_328"
],
"featImg": "food_1337594",
"label": "source_food_1337589"
},
"food_1337576": {
"type": "posts",
"id": "food_1337576",
"meta": {
"index": "posts_1716263798",
"site": "food",
"id": "1337576",
"score": null,
"sort": [
1713200788000
]
},
"guestAuthors": [],
"slug": "samosa",
"title": "Samosas aren’t from India…Wait, what?",
"publishDate": 1713200788,
"format": "video",
"headTitle": "Samosas aren’t from India…Wait, what? | KQED",
"labelTerm": {},
"content": "\u003cp>Have you ever wondered about the delicious samosa – the perfect starter to any Indian meal? We discovered that this bite-size street food has an epic history and it starts, not in India, but actually beyond the subcontinent. The samosas became such a crowd pleaser that even a famous Sultan/Emperor was enamored by them. The amazing thing about the samosa you enjoy today – is that it is only one of the many iterations that exists around the world.\u003c/p>\n\u003cp>Thanks to \u003ca href=\"https://milkandcardamom.com/\" target=\"_blank\" rel=\"noopener\">Hetal Vasavada\u003c/a>, author of the cook book ‘Milk and Cardamom’ for sharing her story and showing us how to make Gujarati style samosas.\u003c/p>\n\u003cp>Subscribe to \u003ca href=\"https://www.youtube.com/@KQEDFood\" target=\"_blank\" rel=\"noopener\">KQED Food’s YouTube channel\u003c/a> to watch more Beyond The Menu videos.\u003c/p>\n\u003cp>Read more:\u003cbr>\n\u003ca href=\"https://www.baytalfann.com/post/the-story-of-the-samosa\" target=\"_blank\" rel=\"noopener\">The Story of the Samosa\u003c/a>\u003cbr>\n\u003ca href=\"https://recipes.timesofindia.com/articles/food-facts/this-story-about-samosas-origin-will-break-your-heart/pThe%20Story%20of%20the%20Samosahotostory/62220155.cms?picid=62220231\" target=\"_blank\" rel=\"noopener\">This story about samosa’s origin will break your heart\u003c/a>\u003cbr>\n\u003ca href=\"https://www.bbc.com/news/magazine-36548445\" target=\"_blank\" rel=\"noopener\">The story of India as told by a humble street snack\u003c/a>\u003cbr>\n\u003ca href=\"https://www.thebetterindia.com/80824/samosa-history-india/\" target=\"_blank\" rel=\"noopener\">TBI Food Secrets: Unravelling the Fascinating History of the Samosa, India’s Favourite Street Snack\u003c/a>\u003cbr>\n\u003ca href=\"https://milkandcardamom.com/\" target=\"_blank\" rel=\"noopener\">Hetal Vasavada\u003c/a>\u003cbr>\n\u003ca href=\"https://www.sheffield.ac.uk/history/people/research/neha-vermani\" target=\"_blank\" rel=\"noopener\">Dr. Neha Vermani\u003c/a>\u003cbr>\n\u003ca href=\"https://milkandcardamom.com/2020/05/14/samosa/\" target=\"_blank\" rel=\"noopener\">Hetal Vasavada’s samosa recipe\u003c/a>\u003c/p>\n\u003cp>\u003cstrong>About Beyond The Menu:\u003c/strong>\u003cbr>\nThe story of the food on your plate is more than just the recipe. Each ingredient and every cooking technique goes back hundreds if not thousands of years, traversing the globe on a wildly delicious cross-cultural adventure. In KQED’s new digital food series Beyond The Menu, host Cecilia Phillips interviews chefs, authors, and other experts to dig up surprising facts on the cultural pathways of today’s trendiest dishes. It’s a history show, it’s a mystery series, it’s a celebration of multicultural cuisine, sometimes it’s even a science program, all set against the backdrop of mouth-watering food cinematography.\u003c/p>\n\u003cp>[ad fullwidth]\u003c/p>\u003cp>\u003c/p>\n",
"blocks": [],
"excerpt": null,
"status": "publish",
"parent": 0,
"modified": 1727470795,
"stats": {
"hasAudio": false,
"hasVideo": false,
"hasChartOrMap": false,
"iframeSrcs": [],
"hasGoogleForm": false,
"hasGallery": false,
"hasHearkenModule": false,
"hasPolis": false,
"paragraphCount": 7,
"wordCount": 296
},
"headData": {
"title": "Samosas aren’t from India…Wait, what? | KQED",
"description": "Have you ever wondered about the delicious samosa – the perfect starter to any Indian meal? We discovered that this bite-size street food has an epic history and it starts, not in India, but actually beyond the subcontinent. The samosas became such a crowd pleaser that even a famous Sultan/Emperor was enamored by them. The amazing thing about the samosa you enjoy today - is that it is only one of the many iterations that exists around the world. Thanks to Hetal Vasavada, author of the cook book ‘Milk and Cardamom’ for sharing her story and showing us how to",
"ogTitle": "",
"ogDescription": "",
"ogImgId": "",
"twTitle": "",
"twDescription": "",
"twImgId": "",
"schema": {
"@context": "https://schema.org",
"@type": "Article",
"headline": "Samosas aren’t from India…Wait, what?",
"datePublished": "2024-04-15T10:06:28-07:00",
"dateModified": "2024-09-27T13:59:55-07:00",
"image": "https://cdn.kqed.org/wp-content/uploads/2020/02/KQED-OG-Image@1x.png"
}
},
"videoEmbed": "https://youtu.be/Hzye3hGNulQ?si=-GwUfo48P7IopX5C",
"source": "Food",
"sourceUrl": "https://www.kqed.org/food",
"sticky": false,
"WpOldSlug": "samosas-arent-from-indiawait-what",
"nprByline": "Manjula Varghese",
"subhead": "The samosa, the bite-size Indian street food, is actually not from India",
"excludeFromSiteSearch": "Include",
"showOnAuthorArchivePages": "Yes",
"articleAge": "0",
"path": "/food/1337576/samosa",
"audioTrackLength": null,
"parsedContent": [
{
"type": "contentString",
"content": "\u003cdiv class=\"post-body\">\u003cp>\u003cp>Have you ever wondered about the delicious samosa – the perfect starter to any Indian meal? We discovered that this bite-size street food has an epic history and it starts, not in India, but actually beyond the subcontinent. The samosas became such a crowd pleaser that even a famous Sultan/Emperor was enamored by them. The amazing thing about the samosa you enjoy today – is that it is only one of the many iterations that exists around the world.\u003c/p>\n\u003cp>Thanks to \u003ca href=\"https://milkandcardamom.com/\" target=\"_blank\" rel=\"noopener\">Hetal Vasavada\u003c/a>, author of the cook book ‘Milk and Cardamom’ for sharing her story and showing us how to make Gujarati style samosas.\u003c/p>\n\u003cp>Subscribe to \u003ca href=\"https://www.youtube.com/@KQEDFood\" target=\"_blank\" rel=\"noopener\">KQED Food’s YouTube channel\u003c/a> to watch more Beyond The Menu videos.\u003c/p>\n\u003cp>Read more:\u003cbr>\n\u003ca href=\"https://www.baytalfann.com/post/the-story-of-the-samosa\" target=\"_blank\" rel=\"noopener\">The Story of the Samosa\u003c/a>\u003cbr>\n\u003ca href=\"https://recipes.timesofindia.com/articles/food-facts/this-story-about-samosas-origin-will-break-your-heart/pThe%20Story%20of%20the%20Samosahotostory/62220155.cms?picid=62220231\" target=\"_blank\" rel=\"noopener\">This story about samosa’s origin will break your heart\u003c/a>\u003cbr>\n\u003ca href=\"https://www.bbc.com/news/magazine-36548445\" target=\"_blank\" rel=\"noopener\">The story of India as told by a humble street snack\u003c/a>\u003cbr>\n\u003ca href=\"https://www.thebetterindia.com/80824/samosa-history-india/\" target=\"_blank\" rel=\"noopener\">TBI Food Secrets: Unravelling the Fascinating History of the Samosa, India’s Favourite Street Snack\u003c/a>\u003cbr>\n\u003ca href=\"https://milkandcardamom.com/\" target=\"_blank\" rel=\"noopener\">Hetal Vasavada\u003c/a>\u003cbr>\n\u003ca href=\"https://www.sheffield.ac.uk/history/people/research/neha-vermani\" target=\"_blank\" rel=\"noopener\">Dr. Neha Vermani\u003c/a>\u003cbr>\n\u003ca href=\"https://milkandcardamom.com/2020/05/14/samosa/\" target=\"_blank\" rel=\"noopener\">Hetal Vasavada’s samosa recipe\u003c/a>\u003c/p>\n\u003cp>\u003cstrong>About Beyond The Menu:\u003c/strong>\u003cbr>\nThe story of the food on your plate is more than just the recipe. Each ingredient and every cooking technique goes back hundreds if not thousands of years, traversing the globe on a wildly delicious cross-cultural adventure. In KQED’s new digital food series Beyond The Menu, host Cecilia Phillips interviews chefs, authors, and other experts to dig up surprising facts on the cultural pathways of today’s trendiest dishes. It’s a history show, it’s a mystery series, it’s a celebration of multicultural cuisine, sometimes it’s even a science program, all set against the backdrop of mouth-watering food cinematography.\u003c/p>\n\u003cp>\u003c/p>\u003c/div>",
"attributes": {
"named": {},
"numeric": []
}
},
{
"type": "component",
"content": "",
"name": "ad",
"attributes": {
"named": {
"label": "fullwidth"
},
"numeric": [
"fullwidth"
]
}
},
{
"type": "contentString",
"content": "\u003cdiv class=\"post-body\">\u003cp>\u003c/p>\u003cp>\u003c/p>\n\u003c/div>\u003c/p>",
"attributes": {
"named": {},
"numeric": []
}
}
],
"link": "/food/1337576/samosa",
"authors": [
"byline_food_1337576"
],
"series": [
"food_311"
],
"categories": [
"food_1"
],
"tags": [
"food_114",
"food_313",
"food_312",
"food_143",
"food_328"
],
"featImg": "food_1337580",
"label": "source_food_1337576"
},
"food_1337534": {
"type": "posts",
"id": "food_1337534",
"meta": {
"index": "posts_1716263798",
"site": "food",
"id": "1337534",
"score": null,
"sort": [
1712161417000
]
},
"parent": 0,
"labelTerm": {},
"blocks": [],
"publishDate": 1712161417,
"format": "video",
"title": "Your Birria Taco Is Ancient History—Here’s Why",
"headTitle": "Your Birria Taco Is Ancient History—Here’s Why | KQED",
"content": "\u003cp>We’re in peak birria these days, where every taqueria in town seems to have its own version. But this newish food trend is actually very old. In fact, birria is a perfect collection of some of humanity’s oldest cooking techniques and ingredients merged together into one perfect hand-held treat. It’s a food only capable of existing by holding onto ancient traditions that span thousands of years across both sides of the planet.\u003c/p>\n\u003cp>Thanks to \u003ca href=\"https://www.instagram.com/el_gaaarage/?hl=en\" rel=\"noopener\" target=\"_blank\">El Garage\u003c/a> in Richmond, California for showing us how to make their family’s version of birria tacos.\u003c/p>\n\u003cp>Subscribe to \u003ca href=\"https://www.youtube.com/@KQEDFood\" target=\"_blank\" rel=\"noopener\">KQED Food’s YouTube channel\u003c/a> to watch more Beyond The Menu videos.\u003c/p>\n\u003cp>Read more:\u003cbr>\n\u003ca href=\"https://www.eater.com/22215718/how-birria-tacos-conquered-america\" target=\"_blank\" rel=\"noopener\">The Great Birria Boom, by Bill Esparza\u003c/a>\u003cbr>\n\u003ca href=\"https://www.researchgate.net/publication/263685698_The_Food_System_during_the_Formative_Period_in_West_Mesoamerica1\" target=\"_blank\" rel=\"noopener\">The Food System During The Formative Period in West Mesoamerica\u003c/a>\u003cbr>\n\u003ca href=\"https://www.nytimes.com/2021/02/08/dining/birria-recipes.html\" target=\"_blank\" rel=\"noopener\">The Birria Boom Is Complicated, but Simply Delicious \u003c/a>\u003c/p>\n\u003cp>\u003cstrong>About Beyond The Menu:\u003c/strong>\u003cbr>\nThe story of the food on your plate is more than just the recipe. Each ingredient and every cooking technique goes back hundreds if not thousands of years, traversing the globe on a wildly delicious cross-cultural adventure. In KQED’s new digital food series Beyond The Menu, host Cecilia Phillips interviews chefs, authors, and other experts to dig up surprising facts on the cultural pathways of today’s trendiest dishes. It’s a history show, it’s a mystery series, it’s a celebration of multicultural cuisine, sometimes it’s even a science program, all set against the backdrop of mouth-watering food cinematography.\u003c/p>\n\u003cp>[ad fullwidth]\u003c/p>\u003cp>\u003c/p>\n",
"stats": {
"hasVideo": false,
"hasChartOrMap": false,
"hasAudio": false,
"hasPolis": false,
"wordCount": 259,
"hasGoogleForm": false,
"hasGallery": false,
"hasHearkenModule": false,
"iframeSrcs": [],
"paragraphCount": 7
},
"modified": 1715644010,
"excerpt": null,
"headData": {
"twImgId": "",
"twTitle": "",
"ogTitle": "",
"ogImgId": "",
"twDescription": "",
"description": "We’re in peak birria these days, where every taqueria in town seems to have its own version. But this newish food trend is actually very old. In fact, birria is a perfect collection of some of humanity’s oldest cooking techniques and ingredients merged together into one perfect hand-held treat. It’s a food only capable of existing by holding onto ancient traditions that span thousands of years across both sides of the planet. Thanks to El Garage in Richmond, California for showing us how to make their family’s version of birria tacos. Subscribe to KQED Food’s YouTube channel to watch more",
"title": "Your Birria Taco Is Ancient History—Here’s Why | KQED",
"ogDescription": "",
"schema": {
"@context": "https://schema.org",
"@type": "Article",
"headline": "Your Birria Taco Is Ancient History—Here’s Why",
"datePublished": "2024-04-03T09:23:37-07:00",
"dateModified": "2024-05-13T16:46:50-07:00",
"image": "https://cdn.kqed.org/wp-content/uploads/2020/02/KQED-OG-Image@1x.png"
}
},
"guestAuthors": [],
"slug": "birria-taco",
"status": "publish",
"sourceUrl": "https://www.kqed.org/food",
"videoEmbed": "https://youtu.be/jhIDKr9PR2M?si=h-oxaYVJJ9uuYZwS",
"nprByline": "Matt Morales",
"excludeFromSiteSearch": "Include",
"sticky": false,
"subhead": "A recent food craze might just be the world’s oldest recipe.",
"source": "Food",
"showOnAuthorArchivePages": "Yes",
"articleAge": "0",
"path": "/food/1337534/birria-taco",
"audioTrackLength": null,
"parsedContent": [
{
"type": "contentString",
"content": "\u003cdiv class=\"post-body\">\u003cp>\u003cp>We’re in peak birria these days, where every taqueria in town seems to have its own version. But this newish food trend is actually very old. In fact, birria is a perfect collection of some of humanity’s oldest cooking techniques and ingredients merged together into one perfect hand-held treat. It’s a food only capable of existing by holding onto ancient traditions that span thousands of years across both sides of the planet.\u003c/p>\n\u003cp>Thanks to \u003ca href=\"https://www.instagram.com/el_gaaarage/?hl=en\" rel=\"noopener\" target=\"_blank\">El Garage\u003c/a> in Richmond, California for showing us how to make their family’s version of birria tacos.\u003c/p>\n\u003cp>Subscribe to \u003ca href=\"https://www.youtube.com/@KQEDFood\" target=\"_blank\" rel=\"noopener\">KQED Food’s YouTube channel\u003c/a> to watch more Beyond The Menu videos.\u003c/p>\n\u003cp>Read more:\u003cbr>\n\u003ca href=\"https://www.eater.com/22215718/how-birria-tacos-conquered-america\" target=\"_blank\" rel=\"noopener\">The Great Birria Boom, by Bill Esparza\u003c/a>\u003cbr>\n\u003ca href=\"https://www.researchgate.net/publication/263685698_The_Food_System_during_the_Formative_Period_in_West_Mesoamerica1\" target=\"_blank\" rel=\"noopener\">The Food System During The Formative Period in West Mesoamerica\u003c/a>\u003cbr>\n\u003ca href=\"https://www.nytimes.com/2021/02/08/dining/birria-recipes.html\" target=\"_blank\" rel=\"noopener\">The Birria Boom Is Complicated, but Simply Delicious \u003c/a>\u003c/p>\n\u003cp>\u003cstrong>About Beyond The Menu:\u003c/strong>\u003cbr>\nThe story of the food on your plate is more than just the recipe. Each ingredient and every cooking technique goes back hundreds if not thousands of years, traversing the globe on a wildly delicious cross-cultural adventure. In KQED’s new digital food series Beyond The Menu, host Cecilia Phillips interviews chefs, authors, and other experts to dig up surprising facts on the cultural pathways of today’s trendiest dishes. It’s a history show, it’s a mystery series, it’s a celebration of multicultural cuisine, sometimes it’s even a science program, all set against the backdrop of mouth-watering food cinematography.\u003c/p>\n\u003cp>\u003c/p>\u003c/div>",
"attributes": {
"named": {},
"numeric": []
}
},
{
"type": "component",
"content": "",
"name": "ad",
"attributes": {
"named": {
"label": "fullwidth"
},
"numeric": [
"fullwidth"
]
}
},
{
"type": "contentString",
"content": "\u003cdiv class=\"post-body\">\u003cp>\u003c/p>\u003cp>\u003c/p>\n\u003c/div>\u003c/p>",
"attributes": {
"named": {},
"numeric": []
}
}
],
"link": "/food/1337534/birria-taco",
"authors": [
"byline_food_1337534"
],
"series": [
"food_311"
],
"categories": [
"food_1"
],
"tags": [
"food_114",
"food_313",
"food_312",
"food_143",
"food_328"
],
"featImg": "food_1337543",
"label": "source_food_1337534"
},
"food_1337517": {
"type": "posts",
"id": "food_1337517",
"meta": {
"index": "posts_1716263798",
"site": "food",
"id": "1337517",
"score": null,
"sort": [
1711132262000
]
},
"guestAuthors": [],
"slug": "pineapple-buns",
"title": "Hong Kong’s Most Popular Treat Has A Surprising Backstory",
"publishDate": 1711132262,
"format": "video",
"headTitle": "Hong Kong’s Most Popular Treat Has A Surprising Backstory | KQED",
"labelTerm": {},
"content": "\u003cp>You can’t tell the full story of Hong Kong without the iconic pineapple bun, yet how it appeared on the scene in the first place remains a mystery. One of the city’s oldest bakeries has been serving it since 1943, but before that, the story gets murky. Some say it all began in the 1920s with an Armenian pastry chef working at the Imperial Hotel in Tokyo. Others say it originated with a family deported from Mexico in the 1930s. Watch the video for a delicious, cross-continental journey to get to the bottom of everything.\u003c/p>\n\u003cp>Thanks to \u003ca href=\"https://eatchofood.com/\" target=\"_blank\" rel=\"noopener\">Kristina Cho\u003c/a>, James Beard award-winning author of ‘Mooncakes & Milk Bread’, for sharing her story and showing us how to make pineapple buns from scratch.\u003c/p>\n\u003cp>Subscribe to \u003ca href=\"https://www.youtube.com/@KQEDFood\" target=\"_blank\" rel=\"noopener\">KQED Food’s YouTube channel\u003c/a> to watch more Beyond The Menu videos.\u003c/p>\n\u003cp>Read more:\u003cbr>\n\u003ca href=\"https://www.tastingtable.com/998515/what-hong-kong-style-pineapple-buns-are-really-made-of/\" target=\"_blank\" rel=\"noopener\">Pineapple bun basics\u003c/a>\u003cbr>\n\u003ca href=\"https://www.tokyoweekender.com/food-and-drink/melon-pan/\" target=\"_blank\" rel=\"noopener\">History of Japanese melonpan\u003c/a>\u003cbr>\n\u003ca href=\"https://zolimacitymag.com/the-origin-of-hong-kongs-mexico-bun-a-story-of-exile-and-return/\" target=\"_blank\" rel=\"noopener\">Origin of the Hong Kong Mexico bun\u003c/a>\u003cbr>\n\u003ca href=\"https://www.eater.com/2016/2/19/11054298/conchas-mexico-pastry\" target=\"_blank\" rel=\"noopener\">Everything you need to know about Mexican conchas\u003c/a>\u003c/p>\n\u003cp>\u003cstrong>About Beyond The Menu:\u003c/strong>\u003cbr>\nThe story of the food on your plate is more than just the recipe. Each ingredient and every cooking technique goes back hundreds if not thousands of years, traversing the globe on a wildly delicious cross-cultural adventure. In KQED’s new digital food series Beyond The Menu, host Cecilia Phillips interviews chefs, authors, and other experts to dig up surprising facts on the cultural pathways of today’s trendiest dishes. It’s a history show, it’s a mystery series, it’s a celebration of multicultural cuisine, sometimes it’s even a science program, all set against the backdrop of mouth-watering food cinematography.\u003c/p>\n\u003cp>[ad fullwidth]\u003c/p>\u003cp>\u003c/p>\n",
"blocks": [],
"excerpt": null,
"status": "publish",
"parent": 0,
"modified": 1760994808,
"stats": {
"hasAudio": false,
"hasVideo": false,
"hasChartOrMap": false,
"iframeSrcs": [],
"hasGoogleForm": false,
"hasGallery": false,
"hasHearkenModule": false,
"hasPolis": false,
"paragraphCount": 7,
"wordCount": 288
},
"headData": {
"title": "Hong Kong’s Most Popular Treat Has A Surprising Backstory | KQED",
"description": "You can’t tell the full story of Hong Kong without the iconic pineapple bun, yet how it appeared on the scene in the first place remains a mystery. One of the city’s oldest bakeries has been serving it since 1943, but before that, the story gets murky. Some say it all began in the 1920s with an Armenian pastry chef working at the Imperial Hotel in Tokyo. Others say it originated with a family deported from Mexico in the 1930s. Watch the video for a delicious, cross-continental journey to get to the bottom of everything. Thanks to Kristina Cho, James",
"ogTitle": "",
"ogDescription": "",
"ogImgId": "",
"twTitle": "",
"twDescription": "",
"twImgId": "",
"schema": {
"@context": "https://schema.org",
"@type": "Article",
"headline": "Hong Kong’s Most Popular Treat Has A Surprising Backstory",
"datePublished": "2024-03-22T11:31:02-07:00",
"dateModified": "2025-10-20T14:13:28-07:00",
"image": "https://cdn.kqed.org/wp-content/uploads/2020/02/KQED-OG-Image@1x.png"
}
},
"primaryCategory": {
"termId": 1,
"slug": "food",
"name": "food"
},
"videoEmbed": "https://www.youtube.com/watch?v=pHMkrB6TXnw",
"source": "Food",
"sourceUrl": "https://www.kqed.org/food",
"sticky": false,
"templateType": "standard",
"featuredImageType": "standard",
"excludeFromSiteSearch": "Include",
"showOnAuthorArchivePages": "Yes",
"articleAge": "0",
"path": "/food/1337517/pineapple-buns",
"audioTrackLength": null,
"parsedContent": [
{
"type": "contentString",
"content": "\u003cdiv class=\"post-body\">\u003cp>\u003cp>You can’t tell the full story of Hong Kong without the iconic pineapple bun, yet how it appeared on the scene in the first place remains a mystery. One of the city’s oldest bakeries has been serving it since 1943, but before that, the story gets murky. Some say it all began in the 1920s with an Armenian pastry chef working at the Imperial Hotel in Tokyo. Others say it originated with a family deported from Mexico in the 1930s. Watch the video for a delicious, cross-continental journey to get to the bottom of everything.\u003c/p>\n\u003cp>Thanks to \u003ca href=\"https://eatchofood.com/\" target=\"_blank\" rel=\"noopener\">Kristina Cho\u003c/a>, James Beard award-winning author of ‘Mooncakes & Milk Bread’, for sharing her story and showing us how to make pineapple buns from scratch.\u003c/p>\n\u003cp>Subscribe to \u003ca href=\"https://www.youtube.com/@KQEDFood\" target=\"_blank\" rel=\"noopener\">KQED Food’s YouTube channel\u003c/a> to watch more Beyond The Menu videos.\u003c/p>\n\u003cp>Read more:\u003cbr>\n\u003ca href=\"https://www.tastingtable.com/998515/what-hong-kong-style-pineapple-buns-are-really-made-of/\" target=\"_blank\" rel=\"noopener\">Pineapple bun basics\u003c/a>\u003cbr>\n\u003ca href=\"https://www.tokyoweekender.com/food-and-drink/melon-pan/\" target=\"_blank\" rel=\"noopener\">History of Japanese melonpan\u003c/a>\u003cbr>\n\u003ca href=\"https://zolimacitymag.com/the-origin-of-hong-kongs-mexico-bun-a-story-of-exile-and-return/\" target=\"_blank\" rel=\"noopener\">Origin of the Hong Kong Mexico bun\u003c/a>\u003cbr>\n\u003ca href=\"https://www.eater.com/2016/2/19/11054298/conchas-mexico-pastry\" target=\"_blank\" rel=\"noopener\">Everything you need to know about Mexican conchas\u003c/a>\u003c/p>\n\u003cp>\u003cstrong>About Beyond The Menu:\u003c/strong>\u003cbr>\nThe story of the food on your plate is more than just the recipe. Each ingredient and every cooking technique goes back hundreds if not thousands of years, traversing the globe on a wildly delicious cross-cultural adventure. In KQED’s new digital food series Beyond The Menu, host Cecilia Phillips interviews chefs, authors, and other experts to dig up surprising facts on the cultural pathways of today’s trendiest dishes. It’s a history show, it’s a mystery series, it’s a celebration of multicultural cuisine, sometimes it’s even a science program, all set against the backdrop of mouth-watering food cinematography.\u003c/p>\n\u003cp>\u003c/p>\u003c/div>",
"attributes": {
"named": {},
"numeric": []
}
},
{
"type": "component",
"content": "",
"name": "ad",
"attributes": {
"named": {
"label": "fullwidth"
},
"numeric": [
"fullwidth"
]
}
},
{
"type": "contentString",
"content": "\u003cdiv class=\"post-body\">\u003cp>\u003c/p>\u003cp>\u003c/p>\n\u003c/div>\u003c/p>",
"attributes": {
"named": {},
"numeric": []
}
}
],
"link": "/food/1337517/pineapple-buns",
"authors": [
"10621"
],
"series": [
"food_311"
],
"categories": [
"food_1"
],
"tags": [
"food_114",
"food_313",
"food_312",
"food_143",
"food_138"
],
"featImg": "food_1337521",
"label": "source_food_1337517"
},
"checkplease_23756": {
"type": "posts",
"id": "checkplease_23756",
"meta": {
"index": "posts_1716263798",
"site": "checkplease",
"id": "23756",
"score": null,
"sort": [
1778812123000
]
},
"guestAuthors": [],
"slug": "check-please-bay-area-reviews-oles-waffle-shop-korean-superette-pazzo",
"title": "Check, Please! Bay Area reviews: Ole's Waffle Shop, Korean Superette, Pazzo",
"publishDate": 1778812123,
"format": "video",
"headTitle": "Check, Please! Bay Area reviews: Ole’s Waffle Shop, Korean Superette, Pazzo | KQED",
"labelTerm": {
"term": 9339,
"site": "checkplease"
},
"content": "\u003cp>\u003cem>Check, Please! Bay Area, \u003c/em>season 21, episode 4, airs Thursday, May 14, at 7:30 pm, on KQED 9. See other \u003ca href=\"http://www.kqed.org/tv/programs/index.jsp?pgmid=14084\" target=\"_blank\" rel=\"noopener noreferrer\">television airtimes\u003c/a>.\u003c/p>\n\u003cp>\u003cspan style=\"font-weight: 400\">In Alameda, \u003c/span>\u003cb>Ole’s Waffle Shop\u003c/b>\u003cspan style=\"font-weight: 400\"> has been keeping breakfast traditions alive since 1927 in a retro diner setting, where locals start the day with walnut and pecan waffles, crispy bacon and eggs, fresh-squeezed orange juice, and hearty plates like Southern fried chicken with mashed potatoes and gravy. Over In Berkeley at \u003c/span>\u003cb>Korean Superette\u003c/b>\u003cspan style=\"font-weight: 400\">, a stylish Korean eatery serving bold flavors in dishes like rose rice cakes, spicy beef doenjang stew, dupp bop with spicy pork belly, all complemented by banchan, roasted corn silk tea, and Korean iced lattes. The journey wraps up in San Carlos, where \u003c/span>\u003cb>Pazzo\u003c/b>\u003cspan style=\"font-weight: 400\"> delivers Italian comfort with a modern touch, serving dishes like cavatelli with slow-braised pork ragu, crispy cauliflower with currants, and potato pizza topped with smoked mozzarella and rosemary. Reporter Cecilia Phillips wraps up the episode with “Cecilia Tries It” at the \u003c/span>\u003cb>West Oakland Farmers Market\u003c/b>\u003cspan style=\"font-weight: 400\">, soaking up the neighborhood energy before heading next door to check out the Oakland Ballers, where she asks fans what foods they’d love to see at a baseball game while sampling some classic ballpark-style barbecue.\u003c/span>\u003c/p>\n\u003cfigure id=\"attachment_23812\" class=\"wp-caption alignnone\" style=\"max-width: 1920px\">\u003cimg loading=\"lazy\" decoding=\"async\" class=\"wp-image-23812 size-full\" src=\"https://cdn.kqed.org/wp-content/uploads/sites/40/2026/04/2104_f.png\" alt=\"\" width=\"1920\" height=\"1080\" srcset=\"https://cdn.kqed.org/wp-content/uploads/sites/40/2026/04/2104_f.png 1920w, https://cdn.kqed.org/wp-content/uploads/sites/40/2026/04/2104_f-160x90.png 160w, https://cdn.kqed.org/wp-content/uploads/sites/40/2026/04/2104_f-768x432.png 768w, https://cdn.kqed.org/wp-content/uploads/sites/40/2026/04/2104_f-1536x864.png 1536w\" sizes=\"auto, (max-width: 1920px) 100vw, 1920px\">\u003cfigcaption class=\"wp-caption-text\">Host Leslie Sbrocco joins guests Shreya Adiraju, Alina Wong and Dave Brannigan from KQED in San Francisco.\u003c/figcaption>\u003c/figure>\n\u003cp>\u003cspan style=\"color: #2b2b2b\">Get Restaurant Information:\u003c/span>\u003c/p>\n\u003cul>\n\u003cli>\u003ca href=\"https://www.instagram.com/oleswaffleshop/\">\u003cstrong>Ole’s Waffle Shop\u003c/strong> (Alameda)\u003c/a>\u003c/li>\n\u003cli>\u003ca href=\"https://korean-superette.com/\">\u003cstrong>Korean Superette\u003c/strong> (Berkeley)\u003c/a>\u003c/li>\n\u003cli>\u003ca href=\"https://pazzosancarlos.com/\">\u003cstrong>Pazzo \u003c/strong>(San Carlos)\u003c/a>\u003c/li>\n\u003c/ul>\n\u003cfigure id=\"attachment_20123\" class=\"wp-caption alignnone\" style=\"max-width: 800px\">\u003cimg loading=\"lazy\" decoding=\"async\" class=\"size-medium wp-image-20123\" src=\"https://cdn.kqed.org/wp-content/uploads/sites/40/2019/04/Leslie-Headshot-Smokey-copy-800x540.jpg\" alt=\"Host Leslie Sbrocco sipping wine\" width=\"800\" height=\"540\">\u003cfigcaption class=\"wp-caption-text\">Host Leslie Sbrocco sipping wine \u003ccite>(Courtesy of Leslie Sbrocco)\u003c/cite>\u003c/figcaption>\u003c/figure>\n\u003cp>My name is Leslie Sbrocco, and I’m the \u003ca href=\"http://ww2.kqed.org/checkplease/host-biography/\" target=\"_blank\" rel=\"noopener noreferrer\">host\u003c/a> of \u003cem>Check, Please! Bay Area\u003c/em>. Each week, I’ll share my tasting notes about the wine, beer and spirits the guests and I drank on set during the taping of the show.\u003c/p>\n\u003cp>\u003cimg loading=\"lazy\" decoding=\"async\" class=\"alignnone size-medium wp-image-23813\" src=\"https://cdn.kqed.org/wp-content/uploads/sites/40/2026/04/2104Wines-2000x2449.jpeg\" alt=\"\" width=\"2000\" height=\"2449\" srcset=\"https://cdn.kqed.org/wp-content/uploads/sites/40/2026/04/2104Wines-2000x2449.jpeg 2000w, https://cdn.kqed.org/wp-content/uploads/sites/40/2026/04/2104Wines-160x196.jpeg 160w, https://cdn.kqed.org/wp-content/uploads/sites/40/2026/04/2104Wines-768x940.jpeg 768w, https://cdn.kqed.org/wp-content/uploads/sites/40/2026/04/2104Wines-1255x1536.jpeg 1255w, https://cdn.kqed.org/wp-content/uploads/sites/40/2026/04/2104Wines-1673x2048.jpeg 1673w\" sizes=\"auto, (max-width: 2000px) 100vw, 2000px\">\u003c/p>\n\u003cp>[ad fullwidth]\u003c/p>\n\u003cp>\u003ca href=\"https://www.davisestates.com/\">\u003cspan style=\"color: #339966\">\u003cstrong>Davis Estates 2024 “Private Reserve” Sauvignon Blanc\u003c/strong>\u003c/span>\u003c/a>\u003cbr>\n\u003cem>Napa Valley, California, $58\u003c/em>\u003cbr>\nThere are a handful of Napa Valley wineries now getting lauded for not just red Cabernet Sauvignon, but its related white grape, Sauvignon Blanc. These expressions focus on bright, intense citrus notes and lush texture without an overt herbal character. This bottling from Davis Estates captures a zesty freshness complemented by an edge of taut minerality. With a rounded mouthfeel from a touch of neutral oak barrel usage, it’s a palate pleaser.\u003c/p>\n\u003cp>Davis Estates is one of Napa’s in-the-know treasures. Founded by Mike and Sandy Davis as a personal passion project, the estate combines majestic views with a rustically elegant winery that feels like entering a family home. It’s a destination for special experiences and stylish wines.\u003c/p>\n\u003cp>\u003ca href=\"https://www.frankfamilyvineyards.com/\">\u003cspan style=\"color: #339966\">\u003cstrong>Frank Family Vineyards 2020 Brut Rosé\u003c/strong>\u003c/span>\u003c/a>\u003cbr>\n\u003cem>Carneros, Napa Valley, California, $60\u003c/em>\u003cbr>\nWhen it comes to California sparkling wine, Frank Family Vineyards has inherited a legacy. In the late 1950s, esteemed winemaker Hanns Kornell began making high-quality sparkling wine at the historic Larkmead property. Then, in 1992, Rich Frank — formerly president of Disney Studios and Paramount Television — acquired the estate.\u003c/p>\n\u003cp>Frank Family’s sparkling rosé is crafted primarily from Pinot Noir grapes grown in its Lewis Vineyard in the cool Carneros area at the southern end of Napa Valley. A kiss of Chardonnay grapes lends depth to its pink bubbly, which is aged on its lees for nearly four years. This aging process adds creaminess and texture while still maintaining its vibrantly floral character.\u003c/p>\n\u003cp>\u003ca href=\"https://www.quintadovesuvio.com/wine-cat/douro-doc-wines/1\">\u003cspan style=\"color: #339966\">\u003cstrong>Quinta do Vesuvio 2022 “Pombal do Vesuvio”\u003c/strong>\u003c/span>\u003c/a>\u003cbr>\n\u003cem>Douro, Portugal, $32\u003c/em>\u003cbr>\nIf you’re ever lucky enough to visit the majestic Douro Valley, home to Portugal’s famous Port wines, you will remember it as a place filled with awe-inspiring vineyard and river views lined with historic properties. One of the most iconic estates in the Douro is Quinta do Vesuvio. I’ve had the fortune of visiting this stunning estate, which dates to 1827 and produces world-class Vintage Port. But the Douro Valley is not only home to powerful sweet wines; it’s become a magnet for those looking to sip unique dry wines from Portugal.\u003c/p>\n\u003cp>Vineyards are planted on ancient, terraced hillsides with varieties such as Touriga Nacional and Touriga Franca, which thrive in the rugged, sunbaked landscape. Pombal do Vesuvio is crafted from those grapes, with a dash of Tinta Amarela, into a dry red that captures the deep, earthy flavors and intense dark fruit notes that are hallmarks of the Douro. Pombal refers to the terraced vineyards that surround the estate’s historic towerlike structure called a dovecote, or pombal.\u003c/p>\n\u003cp>Take a virtual visit to the Douro by uncorking this amazingly affordable beauty.\u003c/p>\n\u003ch2>Episode Transcript\u003c/h2>\n\u003cp class=\"p1\">\u003cb>Sbrocco:\u003c/b> New Haven-style pizzas in San Carlos…\u003c/p>\n\u003cp class=\"p1\">\u003cb>Adiraju:\u003c/b> The char — It’s all about the char.\u003c/p>\n\u003cp class=\"p1\">\u003cb>Sbrocco:\u003c/b> …old-school diner fare in Alameda…\u003c/p>\n\u003cp class=\"p1\">\u003cb>Brannigan:\u003c/b> Everybody loves the waffles.\u003c/p>\n\u003cp class=\"p1\">\u003cb>Sbrocco:\u003c/b> …and Korean comforts in Berkeley.\u003c/p>\n\u003cp class=\"p1\">\u003cb>Wong:\u003c/b> It’s just melt in your mouth.\u003c/p>\n\u003cp class=\"p1\">\u003cb>Phillips:\u003c/b> It’s baller.\u003c/p>\n\u003cp class=\"p1\">\u003cb>Williams:\u003c/b> Oh, yeah.\u003c/p>\n\u003cp class=\"p1\">\u003cb>Sbrocco:\u003c/b> Just ahead on “Check, Please! Bay Area.” And are you a spice guy? Do you like it hot?\u003c/p>\n\u003cp class=\"p1\">\u003cb>Brannigan:\u003c/b> No. I do not.\u003c/p>\n\u003cp class=\"p1\">[ Indistinct conversations ]\u003c/p>\n\u003cp class=\"p1\">\u003cb>Sbrocco:\u003c/b> Hi. I’m Leslie Sbrocco. Welcome to “Check, Please! Bay Area,” the show where Bay Area residents review and talk about their favorite restaurants. Now, we have three guests, and each one recommends one of their favorite spots, and the other two go check ’em out to see what they think. Joining me at the “Check, Please” table today are financial services policy leader Shreya Adiraju, fire chief Dave Brannigan, and brand manager Alina Wong. Welcome, everyone. Are you ready?\u003c/p>\n\u003cp class=\"p1\">\u003cb>Wong:\u003c/b> Yes.\u003c/p>\n\u003cp class=\"p1\">\u003cb>Adiraju:\u003c/b> Oh, yeah.\u003c/p>\n\u003cp class=\"p1\">\u003cb>Sbrocco:\u003c/b> Gonna be fun.\u003c/p>\n\u003cp class=\"p1\">\u003cb>Brannigan:\u003c/b> Oh, yeah.\u003c/p>\n\u003cp class=\"p1\">\u003cb>Sbrocco:\u003c/b> Dave’s pick is a legendary diner where the breakfasts are hearty, the waffles are perfectly crisp, and the recipes haven’t changed for generations. Serving the community in the heart of Alameda since 1927, this is Ole’s Waffle Shop.\u003c/p>\n\u003cp class=\"p1\">\u003cb>Man:\u003c/b> I have a small table for two. Welcome to Ole’s.\u003c/p>\n\u003cp class=\"p1\">\u003cb>Woman:\u003c/b> Thank you.\u003c/p>\n\u003cp class=\"p1\">♪♪\u003c/p>\n\u003cp class=\"p1\">\u003cb>Ken:\u003c/b> Ole’s Waffle Shop to me is a meeting place. It’s a place to go where you feel comfortable. Here you go. We’re building relationships here and friendships. How’s it going? Been good? Excellent. Ole’s has a phenomenal history going back to 1927. A Swedish couple started the business.\u003c/p>\n\u003cp class=\"p1\">\u003cb>Vickie:\u003c/b> My parents bought it in 1972. When I was in high school, I came here to work as a bus girl and I just kept on doing it. I love what I do here.\u003c/p>\n\u003cp class=\"p1\">♪♪\u003c/p>\n\u003cp class=\"p1\">On the menu is, like,\u003c/p>\n\u003cp class=\"p1\">classic diner food.\u003c/p>\n\u003cp class=\"p1\">\u003cb>Ken:\u003c/b> We probably have one of the best hamburgers anywhere around.\u003c/p>\n\u003cp class=\"p1\">\u003cb>Vickie:\u003c/b> For dinner, I really like the fried chicken.\u003c/p>\n\u003cp class=\"p1\">\u003cb>Ken:\u003c/b> On a weekend, it could be anywhere from 300 to 600 waffles and pancakes that we move every day.\u003c/p>\n\u003cp class=\"p1\">\u003cb>Vickie:\u003c/b> Our waffles are so special because of the secret ingredients that we put in it. It’s been the same recipe since…\u003c/p>\n\u003cp class=\"p1\">\u003cb>Ken:\u003c/b> 1927.\u003c/p>\n\u003cp class=\"p1\">\u003cb>Vickie:\u003c/b> …1927.\u003c/p>\n\u003cp class=\"p1\">\u003cb>Ken:\u003c/b> If it isn’t broke, why fix it?\u003c/p>\n\u003cp class=\"p1\">\u003cb>Vickie:\u003c/b> Yeah.\u003c/p>\n\u003cp class=\"p1\">\u003cb>Woman:\u003c/b> Would you like any whipped cream on that?\u003c/p>\n\u003cp class=\"p1\">\u003cb>Ken:\u003c/b> Our staff is very important to us.\u003c/p>\n\u003cp class=\"p1\">\u003cb>Vickie:\u003c/b> They have a lot of compassion, and they love the customers.\u003c/p>\n\u003cp class=\"p1\">\u003cb>Ken:\u003c/b> We have paintings of our staff members because it took an amazing staff for almost a hundred years to keep this business going. It takes a community that supports you.\u003c/p>\n\u003cp class=\"p1\">\u003cb>Vickie:\u003c/b> When people leave, it feels very satisfying to see them leave happy. If my dad could see Ole’s now, he would be very proud.\u003c/p>\n\u003cp class=\"p1\">\u003cb>Woman:\u003c/b> Cheers.\u003c/p>\n\u003cp class=\"p1\">\u003cb>All:\u003c/b> Ole’s!\u003c/p>\n\u003cp class=\"p1\">\u003cb>Sbrocco:\u003c/b> Now, I think it’s interesting, Dave, that Ole’s has been around since 1927. 99 years it’s been around.\u003c/p>\n\u003cp class=\"p1\">\u003cb>Brannigan:\u003c/b> Yeah.\u003c/p>\n\u003cp class=\"p1\">\u003cb>Sbrocco:\u003c/b> How long have you been going? Certainly not 99 years.\u003c/p>\n\u003cp class=\"p1\">\u003cb>Brannigan:\u003c/b> Not 99 years. I’ve been going since the late ’90s.\u003c/p>\n\u003cp class=\"p1\">\u003cb>Sbrocco:\u003c/b> Wow. Okay.\u003c/p>\n\u003cp class=\"p1\">\u003cb>Brannigan:\u003c/b> Yeah.\u003c/p>\n\u003cp class=\"p1\">\u003cb>Sbrocco:\u003c/b> And has the menu or what you’ve ordered changed over the years?\u003c/p>\n\u003cp class=\"p1\">\u003cb>Brannigan:\u003c/b> I don’t think anything has changed over the years. One of my favorite features is you can get fresh-squeezed orange juice.\u003c/p>\n\u003cp class=\"p1\">\u003cb>Sbrocco:\u003c/b> Right.\u003c/p>\n\u003cp class=\"p1\">\u003cb>Brannigan:\u003c/b> And there’s actually a machine that has the oranges in a hopper, and it comes down, and they give you a pint of orange juice.\u003c/p>\n\u003cp class=\"p1\">\u003cb>Sbrocco:\u003c/b> Instead of a pint of beer.\u003c/p>\n\u003cp class=\"p1\">\u003cb>Brannigan:\u003c/b> Exactly, yeah.\u003c/p>\n\u003cp class=\"p1\">\u003cb>Sbrocco:\u003c/b> And what did you order?\u003c/p>\n\u003cp class=\"p1\">\u003cb>Brannigan:\u003c/b> Everybody loves the waffles.\u003c/p>\n\u003cp class=\"p1\">\u003cb>Sbrocco:\u003c/b> Yeah.\u003c/p>\n\u003cp class=\"p1\">\u003cb>Brannigan:\u003c/b> They’re crisp and they hold anything you put on it. So I would usually get the Bobby Max Special with the ham steak and a fried egg. So the steak itself is a lot.\u003c/p>\n\u003cp class=\"p1\">\u003cb>Sbrocco:\u003c/b> Yeah.\u003c/p>\n\u003cp class=\"p1\">\u003cb>Brannigan:\u003c/b> But it’s delicious. And I put the egg on top of the waffle. So you get sort of that blend of flavors.\u003c/p>\n\u003cp class=\"p1\">\u003cb>Sbrocco:\u003c/b> Right.\u003c/p>\n\u003cp class=\"p1\">\u003cb>Brannigan:\u003c/b> The kids would get, you know, the whipped cream and strawberries and things like that.\u003c/p>\n\u003cp class=\"p1\">\u003cb>Wong:\u003c/b> Oh, yeah.\u003c/p>\n\u003cp class=\"p1\">\u003cb>Sbrocco:\u003c/b> Alright, Alina, what was your experience there?\u003c/p>\n\u003cp class=\"p1\">\u003cb>Wong:\u003c/b> It was a great experience.\u003c/p>\n\u003cp class=\"p1\">\u003cb>Sbrocco:\u003c/b> Yeah.\u003c/p>\n\u003cp class=\"p1\">\u003cb>Wong:\u003c/b> I had the waffle combo with a scrambled egg…\u003c/p>\n\u003cp class=\"p1\">\u003cb>Sbrocco:\u003c/b> Okay.\u003c/p>\n\u003cp class=\"p1\">\u003cb>Wong:\u003c/b> …the bacon, and the waffle. And it comes with butter and hot maple syrup, which I loved pouring that over. The waffle is so crispy and soft inside.\u003c/p>\n\u003cp class=\"p1\">\u003cb>Sbrocco:\u003c/b> And that bacon gives a nice little salty touch to the sweetness.\u003c/p>\n\u003cp class=\"p1\">\u003cb>Wong:\u003c/b> Exactly. Yeah. Sweet and savory.\u003c/p>\n\u003cp class=\"p1\">\u003cb>Sbrocco:\u003c/b> Alright, Shreya.\u003c/p>\n\u003cp class=\"p1\">\u003cb>Adiraju:\u003c/b> I’m a big breakfast food fan, so I was in my happy place the minute we walked in for sure. I got the walnut waffle with the two large eggs. And then, like, the way to my heart is, like, a big dollop of salted butter right in the middle, which totally hit the spot.\u003c/p>\n\u003cp class=\"p1\">\u003cb>Wong:\u003c/b> So good. Yeah.\u003c/p>\n\u003cp class=\"p1\">\u003cb>Adiraju:\u003c/b> And I have to say, the waffle was surprisingly thin but also very fulfilling. I loved that it had, like you described, the crisp on the outside. It still retained the softness on the inside. And then I forced my husband to get the pecan waffle, and he got the waffle combo —\u003c/p>\n\u003cp class=\"p1\">\u003cb>Sbrocco:\u003c/b> So you can share.\u003c/p>\n\u003cp class=\"p1\">\u003cb>Adiraju:\u003c/b> Of course, right, ’cause we’re sharing. The nut crumble was like the perfect amount of nuts and the perfect size of crumble. We had the hash browns on the side, and those were delicious, like, light, just a little bit of crisp. You got just the right amount of potato but not big and chunky. So that complemented the waffle really well, as well.\u003c/p>\n\u003cp class=\"p1\">\u003cb>Sbrocco:\u003c/b> And is there any other kind of items that you would draw attention to if people are going there?\u003c/p>\n\u003cp class=\"p1\">\u003cb>Brannigan:\u003c/b> Well, there’s a whole other menu for lunch and dinner, which we don’t go to as often, but the burgers are always great.\u003c/p>\n\u003cp class=\"p1\">\u003cb>Wong:\u003c/b> We ordered the Southern fried chicken, actually.\u003c/p>\n\u003cp class=\"p1\">\u003cb>Sbrocco:\u003c/b> Okay.\u003c/p>\n\u003cp class=\"p1\">\u003cb>Wong:\u003c/b> Comes with mashed potatoes, gravy, and steamed vegetables. It was super crispy and had this, like, cornflake crust on it and kept the moisture inside. We ordered two dark-meat pieces and then one breast, and it was so good.\u003c/p>\n\u003cp class=\"p1\">\u003cb>Sbrocco:\u003c/b> Yeah.\u003c/p>\n\u003cp class=\"p1\">\u003cb>Wong:\u003c/b> It was delicious.\u003c/p>\n\u003cp class=\"p1\">\u003cb>Sbrocco:\u003c/b> What do you think of the service there?\u003c/p>\n\u003cp class=\"p1\">\u003cb>Wong:\u003c/b> Service was great, yeah.\u003c/p>\n\u003cp class=\"p1\">\u003cb>Sbrocco:\u003c/b> Yeah.\u003c/p>\n\u003cp class=\"p1\">\u003cb>Wong:\u003c/b> They welcomed us in and sat us immediately and kept on checking in on us and seeing how things were. Great service.\u003c/p>\n\u003cp class=\"p1\">\u003cb>Sbrocco:\u003c/b> That’s good. Well, they’ve had almost 100 years to figure it out, right?\u003c/p>\n\u003cp class=\"p1\">\u003cb>Wong:\u003c/b> Yes.\u003c/p>\n\u003cp class=\"p1\">\u003cb>Sbrocco:\u003c/b> [ Laughs ] Alright. So you’d go back?\u003c/p>\n\u003cp class=\"p1\">\u003cb>Wong:\u003c/b> Yes, I would. Yes.\u003c/p>\n\u003cp class=\"p1\">\u003cb>Brannigan:\u003c/b> It’s old-school diner food. You’re going to, you know, walk in with those expectations and you’re going to be delighted.\u003c/p>\n\u003cp class=\"p1\">\u003cb>Sbrocco:\u003c/b> Alright, if you would like to try Ole’s Waffle Shop, it’s located on Park Street in Alameda. And the average multi-course tab per person without drinks is around $25. From sizzling soups to street-style snacks, Alina’s spot dishes out all the Korean comforts she craves. And if that wasn’t enough, the in-house market is stocked with plenty of pantry favorites to go. Tucked away in Berkeley, it’s more than a meal. It’s Korean Superette.\u003c/p>\n\u003cp class=\"p1\">♪♪\u003c/p>\n\u003cp class=\"p1\">\u003cb>Cody:\u003c/b> Korean Superette is restaurant and market. We serve homestyle Korean dishes to bring the Busan-style original flavor in Berkeley. I came here from Busan to study interior design. But eating Korean food is biggest passion. The Busan-style food has kick, like the people.\u003c/p>\n\u003cp class=\"p1\">[ Laughs ]\u003c/p>\n\u003cp class=\"p1\">Stronger flavor profile.\u003c/p>\n\u003cp class=\"p1\">For example, like,\u003c/p>\n\u003cp class=\"p1\">doenjang stew,\u003c/p>\n\u003cp class=\"p1\">I mix with gochujang.\u003c/p>\n\u003cp class=\"p1\">And my mom’s recipe is spicy\u003c/p>\n\u003cp class=\"p1\">[laughs] but not too spicy.\u003c/p>\n\u003cp class=\"p1\">One of most proud dish\u003c/p>\n\u003cp class=\"p1\">that I made is bapsang,\u003c/p>\n\u003cp class=\"p1\">and I do for lunch special\u003c/p>\n\u003cp class=\"p1\">because it gives you energy.\u003c/p>\n\u003cp class=\"p1\">You can survive\u003c/p>\n\u003cp class=\"p1\">until the end of the day.\u003c/p>\n\u003cp class=\"p1\">It brings together rice, soup,\u003c/p>\n\u003cp class=\"p1\">protein, and banchan.\u003c/p>\n\u003cp class=\"p1\">Banchan is not just a side dish.\u003c/p>\n\u003cp class=\"p1\">Banchan is essential\u003c/p>\n\u003cp class=\"p1\">to be a complete Korean meal.\u003c/p>\n\u003cp class=\"p1\">[ Speaks Korean ]\u003c/p>\n\u003cp class=\"p1\">Koreans love snacking.\u003c/p>\n\u003cp class=\"p1\">When you go to Korea, there’s\u003c/p>\n\u003cp class=\"p1\">a lot of convenience stores.\u003c/p>\n\u003cp class=\"p1\">You can eat quick, satisfy,\u003c/p>\n\u003cp class=\"p1\">leave.\u003c/p>\n\u003cp class=\"p1\">That concept is here.\u003c/p>\n\u003cp class=\"p1\">Here we go.\u003c/p>\n\u003cp class=\"p1\">I’m so passionate\u003c/p>\n\u003cp class=\"p1\">about sharing Korean food\u003c/p>\n\u003cp class=\"p1\">with American family.\u003c/p>\n\u003cp class=\"p1\">And when that kind of person\u003c/p>\n\u003cp class=\"p1\">comes, eats and is satisfied\u003c/p>\n\u003cp class=\"p1\">and say thank you,\u003c/p>\n\u003cp class=\"p1\">that makes me not stop.\u003c/p>\n\u003cp class=\"p1\">[ Laughs ]\u003c/p>\n\u003cp class=\"p1\">\u003cb>Sbrocco:\u003c/b> Alright, Alina, you got to love this spot, right? You can get food to go. You can get all these great dishes. Tell us about kind of the space, because it is very inviting, isn’t it?\u003c/p>\n\u003cp class=\"p1\">\u003cb>Wong:\u003c/b> Yes, it is. It’s really nice to go in and see the market at first, and then they’ll bring you outside if you want to sit outside in the patio, and inside is great, too. You’re surrounded by all this delicious Korean food and snacks.\u003c/p>\n\u003cp class=\"p1\">\u003cb>Sbrocco:\u003c/b> It’s lining the walls, right? It lines the walls.\u003c/p>\n\u003cp class=\"p1\">\u003cb>Wong:\u003c/b> It does.\u003c/p>\n\u003cp class=\"p1\">\u003cb>Sbrocco:\u003c/b> And is there a first bite that you go to?\u003c/p>\n\u003cp class=\"p1\">\u003cb>Wong:\u003c/b> Yes, I always will share the rosé rice cakes with whoever I’m going with.\u003c/p>\n\u003cp class=\"p1\">\u003cb>Sbrocco:\u003c/b> Shreya’s over there going, “Yes.”\u003c/p>\n\u003cp class=\"p1\">\u003cb>Wong:\u003c/b> Delicious thick rice cakes covered in this, like, creamy gochujang sauce. So it’s a little spicy, a little sweet, very creamy, and mozzarella cheese melted on top with green onions. It’s just melt in your mouth and —\u003c/p>\n\u003cp class=\"p1\">\u003cb>Sbrocco:\u003c/b> And I can see you agree.\u003c/p>\n\u003cp class=\"p1\">\u003cb>Adiraju:\u003c/b> Oh, yes. Yes, 100%. I will say, I was a little skeptical of the cheese on the rice.\u003c/p>\n\u003cp class=\"p1\">\u003cb>Sbrocco:\u003c/b> It does seem a little strange, doesn’t it?\u003c/p>\n\u003cp class=\"p1\">\u003cb>Adiraju:\u003c/b> Yeah, yeah, I was like, “Okay, savory, spicy tomato curry, and, you know, mozzarella cheese. I’m not sure,” and I have to give credit, you know, on this one occasion to my husband for pushing us to get this dish to start with. It blew my mind. It was so delicious, so perfect. I could, like, bathe in that sauce. It was so good.\u003c/p>\n\u003cp class=\"p1\">\u003cb>Wong:\u003c/b> Me too.\u003c/p>\n\u003cp class=\"p1\">\u003cb>Sbrocco:\u003c/b> Did you have this? Are we going to —\u003c/p>\n\u003cp class=\"p1\">\u003cb>Brannigan:\u003c/b> No, I did not have this. I went with two friends, and none of us ordered it. Now I got to go back.\u003c/p>\n\u003cp class=\"p1\">\u003cb>Sbrocco:\u003c/b> Okay. Alright. What did you start with?\u003c/p>\n\u003cp class=\"p1\">\u003cb>Brannigan:\u003c/b> We started with the fried chicken bits, and they were unbelievably good. I mean, the batter was almost tempura-like. It was really light and kind of fluffy. And then the sauce that they included with it, we had two. We had kind of a sweeter soy-based sauce and then a very spicy pepper sauce. And the combination of those, you could go back and forth on either one.\u003c/p>\n\u003cp class=\"p1\">\u003cb>Adiraju:\u003c/b> Right.\u003c/p>\n\u003cp class=\"p1\">\u003cb>Sbrocco:\u003c/b> Yeah. And do you eat a lot of Korean food? Is this kind of a newer experience?\u003c/p>\n\u003cp class=\"p1\">\u003cb>Brannigan:\u003c/b> I eat very little Korean food. This was my first time to a Korean restaurant.\u003c/p>\n\u003cp class=\"p1\">\u003cb>Sbrocco:\u003c/b> Okay, and are you a spice guy? Do you like it —\u003c/p>\n\u003cp class=\"p1\">\u003cb>Brannigan:\u003c/b> I am not a spice guy.\u003c/p>\n\u003cp class=\"p1\">\u003cb>Sbrocco:\u003c/b> Do you like it hot?\u003c/p>\n\u003cp class=\"p1\">\u003cb>Brannigan:\u003c/b> No. I do not. Yeah. I’ve been working up to it.\u003c/p>\n\u003cp class=\"p1\">\u003cb>Adiraju:\u003c/b> Yeah.\u003c/p>\n\u003cp class=\"p1\">\u003cb>Brannigan:\u003c/b> There were a few things that were very hot for me, but a lot of it was manageable.\u003c/p>\n\u003cp class=\"p1\">\u003cb>Sbrocco:\u003c/b> Yeah.\u003c/p>\n\u003cp class=\"p1\">\u003cb>Wong:\u003c/b> I for main sometimes get the naengmyeon, which is a cold buckwheat noodle dish in a beef consommé with some veggies on it. And you add, like, vinegar and mustard. It’s a little spicy, got a kick, but it’s delicious, especially in hot weather.\u003c/p>\n\u003cp class=\"p1\">\u003cb>Sbrocco:\u003c/b> Yeah.\u003c/p>\n\u003cp class=\"p1\">\u003cb>Wong:\u003c/b> We always, always share the dupp bop, as well. It’s like this rice bowl with any meat topping that you want. And my husband always gets the spicy pork belly because it’s a heaping portion of this, like, delicious melt-in-your-mouth pork belly.\u003c/p>\n\u003cp class=\"p1\">\u003cb>Sbrocco:\u003c/b> Talk about umami right there.\u003c/p>\n\u003cp class=\"p1\">\u003cb>Wong:\u003c/b> Yeah. And with the banchan pickles on the side, it just, like, adds that crunch. And there’s always just four or five little dishes to pair with the meal.\u003c/p>\n\u003cp class=\"p1\">\u003cb>Brannigan:\u003c/b> For the main, I got the bulgogi comfort pot, which was incredible. The number of ingredients that were packed into that little pot — I mean, it had a topping of these tiny little mushrooms. They almost looked like sprouts. They were just gorgeous. And then the broth itself was spicy, but it was very rich, really delicious.\u003c/p>\n\u003cp class=\"p1\">\u003cb>Wong:\u003c/b> I usually get one of their soups, and it’s always so warming when it’s a little chilly outside. I, this time around, got the beef doenjang stew, which is — doenjang is like a Korean fermented soybean paste. So it’s a lot of umami flavor and it’s really savory. But pieces of beef, vegetable, tofu in the stew, and there’s actual shreds of saffron in the soup, as well, which add this, like, nuttiness as you’re eating into it. That is always my go-to. Yeah.\u003c/p>\n\u003cp class=\"p1\">\u003cb>Adiraju:\u003c/b> I had the seafood tofu stew. It’s a big chunk of really smooth, luxurious, silky tofu in the middle. And the broth was very light. The little shrimps complemented the little veggies, and the tofu kind of brought it all together really nicely, so…\u003c/p>\n\u003cp class=\"p1\">\u003cb>Brannigan:\u003c/b> My friend ordered the jang pasta with pork belly, and this really stole the show. It was very different than anything else we ordered. The sauce was creamy, and, I mean, pork belly — What doesn’t taste good with pork belly in it?\u003c/p>\n\u003cp class=\"p1\">\u003cb>Sbrocco:\u003c/b> Right. Everything’s better with pork belly.\u003c/p>\n\u003cp class=\"p1\">\u003cb>Brannigan:\u003c/b> Yeah, we all kind of fought over it. It was the one thing we didn’t have any leftovers of at the end.\u003c/p>\n\u003cp class=\"p1\">\u003cb>Sbrocco:\u003c/b> Who got the last bite?\u003c/p>\n\u003cp class=\"p1\">\u003cb>Brannigan:\u003c/b> Oh, I got the last bite. It’s for research for this.\u003c/p>\n\u003cp class=\"p1\">\u003cb>Sbrocco:\u003c/b> Of course.\u003c/p>\n\u003cp class=\"p1\">\u003cb>Brannigan:\u003c/b> Yeah, and the flavor just came through amazingly. And the noodles were just such a great texture.\u003c/p>\n\u003cp class=\"p1\">\u003cb>Sbrocco:\u003c/b> Yeah.\u003c/p>\n\u003cp class=\"p1\">\u003cb>Cody:\u003c/b> Medium spicy? Okay.\u003c/p>\n\u003cp class=\"p1\">\u003cb>Sbrocco:\u003c/b> What did you find, Shreya, in terms of service?\u003c/p>\n\u003cp class=\"p1\">\u003cb>Adiraju:\u003c/b> Service was exceptional. They were really, really kind and came and asked us if we had questions and told us a little bit about, like, “Oh, it’s going to be a lot of food. Like, you know, here’s how you pair things together.” So I can’t say enough good things.\u003c/p>\n\u003cp class=\"p1\">\u003cb>Sbrocco:\u003c/b> So they kind of course it out for you.\u003c/p>\n\u003cp class=\"p1\">\u003cb>Adiraju:\u003c/b> Yeah.\u003c/p>\n\u003cp class=\"p1\">\u003cb>Brannigan:\u003c/b> They also had an instructional video playing of all kinds of different food and how it’s cooked, which was really fun to watch.\u003c/p>\n\u003cp class=\"p1\">\u003cb>Sbrocco:\u003c/b> That’s great. That’s fantastic. Yeah. Alright, so you’d go back?\u003c/p>\n\u003cp class=\"p1\">\u003cb>Adiraju:\u003c/b> 100%.\u003c/p>\n\u003cp class=\"p1\">\u003cb>Sbrocco:\u003c/b> Yeah.\u003c/p>\n\u003cp class=\"p1\">\u003cb>Wong:\u003c/b> I always go back.\u003c/p>\n\u003cp class=\"p1\">\u003cb>Sbrocco:\u003c/b> Now you’re a Korean food fan.\u003c/p>\n\u003cp class=\"p1\">\u003cb>Brannigan:\u003c/b> Exactly.\u003c/p>\n\u003cp class=\"p1\">\u003cb>Sbrocco:\u003c/b> There we go. If you would like to try Korean Superette, it’s located on Solano Avenue in Berkeley. The average multi-course tab per person without drinks is around $40. As a former East Coast resident, Shreya sets the bar high when it comes to pizza. Whenever she’s craving the classic Neapolitan-style pies of her childhood, she heads to San Carlos, home to Pazzo.\u003c/p>\n\u003cp class=\"p1\">♪♪\u003c/p>\n\u003cp class=\"p1\">\u003cb>Gambardella:\u003c/b> “Pazzo” means “crazy” in Italian. It usually takes like one Friday night for people to kind of understand why I chose Pazzo to name it. The food here is a blend of East Coast Italian.\u003c/p>\n\u003cp class=\"p1\">\u003cb>Man:\u003c/b> This is our pasta chili crab.\u003c/p>\n\u003cp class=\"p1\">\u003cb>Gambardella:\u003c/b> My parents have had restaurants in the Bay Area Peninsula for 40-plus years, so I was born right into the game. I work with my dad every day. It’s his recipes, his cooking, his heart and pride and soul that he puts into everything around here. One of our most popular appetizers is the crispy cauliflower. My dad invented that. It’s a bit of agrodolce. It’s got a little bit of sweet, a little bit of sour, with the champagne vinaigrette and the currants. Every pasta that we serve here we make in-house. My family roots come from southern Italy, specifically Amalfi. They then immigrated here to New Haven, like a lot of immigrants from Amalfi. In New Haven, pizza’s kind of like church. Everybody kind of meets up there. In New Haven, they actually don’t eat pizza. They eat apizza. It’s pretty much the most rustic form of a pizza — thin, crispy, charred, and chewy. In the beginning, I’m trying to get, like, a nice puff from throwing the dough into a really hot spot. It kind of lets the whole pizza kind of form. The next goal is to get the bottom as cooked as possible. We also cook at a slightly slower and lower temperature than like a typical Neapolitan pizza would do. Pretty much everything that we add, if it’s not a fresh ingredient, we make in-house, so our sausage, our bacon, pancettas, any of that stuff. We don’t make uniform pizzas whatsoever. I think there’s a real beauty to kind of just slapping together pies and throwing them in and out of the oven. We’re going to be doing this all night. Best way to eat the pizza is in-house. You want to be right here when it comes out. Maybe wait a second so it doesn’t burn your mouth. Knives and forks are not allowed. You just grab it and go for hot pies on the table, and there’s no way to bring a family closer than just all sharing. Pazzo is for the people. We’re going to try our best to wow you or just leave you happy.\u003c/p>\n\u003cp class=\"p1\">\u003cb>Sbrocco:\u003c/b> Alright, so we’re talking pizza. Who doesn’t love pizza, right? What is it about that sort of New Haven style — New Haven, Connecticut, of course — that really appeals to you?\u003c/p>\n\u003cp class=\"p1\">\u003cb>Adiraju:\u003c/b> So it’s got the Neapolitan thin crust, but the char — It’s all about the char. And you’d think, like, “Ah, a burnt crisp, like, a burnt edge of a crust, like, how can that be tasty?” But if the toppings are right, it goes perfectly, ’cause the bit of char adds almost like a smokiness to the pizza. For me, I’m a tomato pie person, ’cause nothing can hide in a tomato pie Like, the sauce has to be on point. The crust has to be on point. There’s always a little bit of, like, a light coating of Parmesan on top.\u003c/p>\n\u003cp class=\"p1\">\u003cb>Sbrocco:\u003c/b> Right.\u003c/p>\n\u003cp class=\"p1\">\u003cb>Adiraju:\u003c/b> Authentic, pure, true to form is definitely the way to go with the New Haven tomato pie.\u003c/p>\n\u003cp class=\"p1\">\u003cb>Wong:\u003c/b> I am a huge pizza lover. It’s my favorite food, especially thin-crust pizza. And this was the thinnest crust I’ve ever seen and experienced. And it was so good. I had the potato pizza, and so it was a white-sauce pizza. It had mozzarella, very thinly sliced potatoes, rosemary, and herbs on it. And it was so good all together.\u003c/p>\n\u003cp class=\"p1\">\u003cb>Adiraju:\u003c/b> I got the roasted shiitake mushroom salad most recently. You’d think if they’re going to do roasted shiitake mushrooms, you’d get these sort of big chunks of mushroom on the salad.\u003c/p>\n\u003cp class=\"p1\">\u003cb>Sbrocco:\u003c/b> Right.\u003c/p>\n\u003cp class=\"p1\">\u003cb>Adiraju:\u003c/b> But it’s not like that. It almost feels like they could be Parmesan crisps. And then they put these little, like, wedges of ricotta salata around the plate of it. So salad is definitely a go-to. The only other thing I love, which is decadent to eat before pizza, is the arancini — perfectly fried, very gooey, had the perfect cheese pull, and it comes with almost like a blue cheesy aioli on the side, which is really delicious.\u003c/p>\n\u003cp class=\"p1\">\u003cb>Brannigan:\u003c/b> We started with the crispy fried cauliflower. It’s got a honey glaze to it, and to have the crispy outside of the cauliflower with a nice soft, hot inside, I mean, we ate those…\u003c/p>\n\u003cp class=\"p1\">\u003cb>Sbrocco:\u003c/b> You loved them.\u003c/p>\n\u003cp class=\"p1\">\u003cb>Brannigan:\u003c/b> …quick.\u003c/p>\n\u003cp class=\"p1\">\u003cb>Sbrocco:\u003c/b> Any other dish for you?\u003c/p>\n\u003cp class=\"p1\">\u003cb>Wong:\u003c/b> Yes, I had the cavatelli, which is one of their homemade pastas. It’s these rich pillows of pasta enveloped in this tomato sauce with a slow-roasted pork ragù, Parmesan cheese on top, and it just melts in your mouth. Each bite was so good, just a great little mid appetizer.\u003c/p>\n\u003cp class=\"p1\">\u003cb>Brannigan:\u003c/b> So I had the bucatini. It was a special that night.\u003c/p>\n\u003cp class=\"p1\">\u003cb>Sbrocco:\u003c/b> So you said, “Forget the pizza, baby. I’m going for the pasta.”\u003c/p>\n\u003cp class=\"p1\">\u003cb>Brannigan:\u003c/b> I went straight in. Well, it was described as having crab meat, crab fat butter. Oh, my God. What is that?\u003c/p>\n\u003cp class=\"p1\">\u003cb>Sbrocco:\u003c/b> Right.\u003c/p>\n\u003cp class=\"p1\">\u003cb>Brannigan:\u003c/b> But I want more of it.\u003c/p>\n\u003cp class=\"p1\">\u003cb>Sbrocco:\u003c/b> Yeah.\u003c/p>\n\u003cp class=\"p1\">\u003cb>Brannigan:\u003c/b> And a garlic sauce. And the pasta itself was just perfectly cooked. And it was all I could do not to just wolf it down.\u003c/p>\n\u003cp class=\"p1\">\u003cb>Sbrocco:\u003c/b> [ Laughs ] And did you have anything to drink alongside your food?\u003c/p>\n\u003cp class=\"p1\">\u003cb>Brannigan:\u003c/b> I did. They had a line of sodas, the Foxon Park from New Haven. And so I tried their cream soda, which, you know, is a simple cream soda, but it was delicious. Yeah, and my wife got a Hazy IPA.\u003c/p>\n\u003cp class=\"p1\">\u003cb>Sbrocco:\u003c/b> Did anybody have room for dessert?\u003c/p>\n\u003cp class=\"p1\">\u003cb>Wong:\u003c/b> I was too full for dessert. But I will go back for the tiramisu. It looked incredible.\u003c/p>\n\u003cp class=\"p1\">\u003cb>Sbrocco:\u003c/b> Yeah.\u003c/p>\n\u003cp class=\"p1\">\u003cb>Adiraju:\u003c/b> One thing I will say is it’s not a classic tiramisu. I actually love tiramisus, typically, that have a little more coffee soak and, like, are a little more dredged in the overall coffee flavor. And I like the cream a little thinner, but as a really delicious fresh dessert to have after pizza, especially ’cause it’s, like, nice and cold, it’s a perfect slice. They put an ample amount of cocoa powder on top, which you have to have on a tiramisu. It’s very delicious and worth eating there or taking home.\u003c/p>\n\u003cp class=\"p1\">\u003cb>Brannigan:\u003c/b> I lived in Philly for a while, and cannoli is a go-to dessert, so it was delicious, the crust. It was small. Sometimes they’re big and packed, but this was really small, fried really nicely. It was really delicious. That with a cappuccino — It was a good classic cappuccino, nice foamy top, nice strong espresso.\u003c/p>\n\u003cp class=\"p1\">\u003cb>Sbrocco:\u003c/b> So save room for dessert is what you two are saying.\u003c/p>\n\u003cp class=\"p1\">\u003cb>Adiraju:\u003c/b> Yes.\u003c/p>\n\u003cp class=\"p1\">\u003cb>Sbrocco:\u003c/b> [ Laughs ] Absolutely. And service — What did you think about that?\u003c/p>\n\u003cp class=\"p1\">\u003cb>Wong:\u003c/b> Service was great. I actually did sit at the back bar with my husband and, you know, saw the pizzas being baked in the oven. It was beautiful.\u003c/p>\n\u003cp class=\"p1\">\u003cb>Adiraju:\u003c/b> Service is typically great. Actually, the only thing that I’ve ever experienced is sometimes if you go on the weekend, it can get pretty busy, and it’s a small place. You can wait a little bit. So if you’re trying to get in and get out quickly, time it, like, right\u003c/p>\n\u003cp class=\"p1\">\u003cb>when they open at 4:\u003c/b> 00 or something like that.\u003c/p>\n\u003cp class=\"p1\">\u003cb>Sbrocco:\u003c/b> Alright. If you would like to try Pazzo, it’s located on Laurel Street in San Carlos. And the average multi-course tab per person without drinks is around $45.\u003c/p>\n\u003cp class=\"p1\">\u003cb>Phillips:\u003c/b> That’s so beautiful.\u003c/p>\n\u003cp class=\"p1\">\u003cb>Sbrocco:\u003c/b> And now reporter Cecilia Phillips has more Bay Area bites you’ve just got to try. She’s headed to West Oakland for a market that’s bringing life to a former food desert.\u003c/p>\n\u003cp class=\"p1\">♪♪\u003c/p>\n\u003cp class=\"p1\">\u003cb>Phillips:\u003c/b> The West Oakland Farmers Market, this is one of the newest markets in Oakland. Why is it so crucial to do things like this in a place like West Oakland?\u003c/p>\n\u003cp class=\"p1\">\u003cb>Singh:\u003c/b> You know, West Oakland Farmers Market serves the immediate community. We want people to feel the Oakland love and pride — locally grown fruits and vegetables, fresh baked goods, pasture-raised meats, a really community-centered farmers market.\u003c/p>\n\u003cp class=\"p1\">♪♪\u003c/p>\n\u003cp class=\"p1\">\u003cb>Phillips:\u003c/b> This is beautiful, and I love chilaquiles. So what’s in it?\u003c/p>\n\u003cp class=\"p1\">\u003cb>Guerrero:\u003c/b> So, this one is scrambled eggs with chorizo, green tomatillo salsa, red onions, sour cream, and queso fresco.\u003c/p>\n\u003cp class=\"p1\">\u003cb>Phillips:\u003c/b> I got to tell you, with a name like Delicioso, okay, it’s pretty high standard.\u003c/p>\n\u003cp class=\"p1\">\u003cb>Guerrero:\u003c/b> Yes.\u003c/p>\n\u003cp class=\"p1\">\u003cb>Woman:\u003c/b> Here you go.\u003c/p>\n\u003cp class=\"p1\">\u003cb>Man:\u003c/b> Thank you very much.\u003c/p>\n\u003cp class=\"p1\">\u003cb>Guerrero:\u003c/b> But a lot of people that taste my food, they say, “Oh, yeah, that’s delicioso.”\u003c/p>\n\u003cp class=\"p1\">\u003cb>Phillips:\u003c/b> Okay.\u003c/p>\n\u003cp class=\"p1\">\u003cb>Guerrero:\u003c/b> So I hope you say the same word at the end of your trying.\u003c/p>\n\u003cp class=\"p1\">\u003cb>Phillips:\u003c/b> I know, I know. I’m like, “Let’s get ready to do this.” Oh, it looks hot.\u003c/p>\n\u003cp class=\"p1\">\u003cb>Guerrero:\u003c/b> Mm-hmm. Delicioso?\u003c/p>\n\u003cp class=\"p1\">[ Laughs ]\u003c/p>\n\u003cp class=\"p1\">\u003cb>Phillips:\u003c/b> It’s delicioso. So, Pho Vy, it’s Vietnamese cuisine. What do you specialize in?\u003c/p>\n\u003cp class=\"p1\">\u003cb>Nguyen:\u003c/b> So one of the specialized dishes we do is actually these beef stew tacos.\u003c/p>\n\u003cp class=\"p1\">\u003cb>Phillips:\u003c/b> Beef stew tacos.\u003c/p>\n\u003cp class=\"p1\">\u003cb>Nguyen:\u003c/b> Yeah. So the beef stew is five generations of recipes. And then nowadays, you know, everything with fusion, why not, you know, put our food and other cultures together and have, like, one crispy Vietnamese taco kind of like on the go, like “pho on the go” taco.\u003c/p>\n\u003cp class=\"p1\">\u003cb>Phillips:\u003c/b> “Pho on the go,” I love that.\u003c/p>\n\u003cp class=\"p1\">\u003cb>Nguyen:\u003c/b> We cook it with brisket, we do cheese, and then we garnish it with the traditional toppings on the pho. There’s like the basil, onion, cilantro, green onions. Go, dip it in. Get all that.\u003c/p>\n\u003cp class=\"p1\">\u003cb>Phillips:\u003c/b> [ Laughs ] We got to do the lean, right?\u003c/p>\n\u003cp class=\"p1\">\u003cb>Nguyen:\u003c/b> Yes, ma’am.\u003c/p>\n\u003cp class=\"p1\">\u003cb>Phillips:\u003c/b> It tastes like pho in a taco.\u003c/p>\n\u003cp class=\"p1\">\u003cb>Nguyen:\u003c/b> Pretty much pho on the go.\u003c/p>\n\u003cp class=\"p1\">\u003cb>Phillips:\u003c/b> Pho on the go.\u003c/p>\n\u003cp class=\"p1\">\u003cb>Nguyen:\u003c/b> Yeah.\u003c/p>\n\u003cp class=\"p1\">[ Crowd cheering ]\u003c/p>\n\u003cp class=\"p1\">\u003cb>Singh:\u003c/b> Sundays are super fun here. The Oakland Ballers playing down the street. Hang out here, listen to some music, and then hit the ballgame.\u003c/p>\n\u003cp class=\"p1\">\u003cb>Phillips:\u003c/b> The Oakland Ballers, what does this organization mean for the community?\u003c/p>\n\u003cp class=\"p1\">\u003cb>Pratt:\u003c/b> Yeah, when the Oakland A’s were leaving town, a lot of people were heartbroken. And so the Oakland Ballers stepped up to give people a reason to get back together again as a community. There’s great food, there’s great beer, there’s great baseball. We’re the best team in all of professional baseball by win percentage at any level.\u003c/p>\n\u003cp class=\"p1\">\u003cb>Williams:\u003c/b> This truck is called Scrappy’s Test Kitchen, and the concept was allow small local businesses an opportunity to test out their concept.\u003c/p>\n\u003cp class=\"p1\">\u003cb>Phillips:\u003c/b> Alright, so Triple T, I’m going to go ahead and take a guess. Is it tasty, tantalizing, and tempting?\u003c/p>\n\u003cp class=\"p1\">\u003cb>Williams:\u003c/b> No, Triple T is taste, texture, and tenderness.\u003c/p>\n\u003cp class=\"p1\">\u003cb>Phillips:\u003c/b> I was not far off.\u003c/p>\n\u003cp class=\"p1\">\u003cb>Williams:\u003c/b> You were far off.\u003c/p>\n\u003cp class=\"p1\">[ Both laugh ]\u003c/p>\n\u003cp class=\"p1\">Today our special’s\u003c/p>\n\u003cp class=\"p1\">mac and meat.\u003c/p>\n\u003cp class=\"p1\">Got mac with brisket.\u003c/p>\n\u003cp class=\"p1\">You can see the marbling.\u003c/p>\n\u003cp class=\"p1\">I’m from Alabama.\u003c/p>\n\u003cp class=\"p1\">I cook with real wood.\u003c/p>\n\u003cp class=\"p1\">I don’t cook\u003c/p>\n\u003cp class=\"p1\">with a propane oven.\u003c/p>\n\u003cp class=\"p1\">You know, we call that an\u003c/p>\n\u003cp class=\"p1\">Easy-Bake Oven where I’m from.\u003c/p>\n\u003cp class=\"p1\">\u003cb>Phillips:\u003c/b> This piece here. This is the fatty piece. This is my favorite.\u003c/p>\n\u003cp class=\"p1\">\u003cb>Williams:\u003c/b> I knew, I knew. Something told me.\u003c/p>\n\u003cp class=\"p1\">\u003cb>Phillips:\u003c/b> You could tell. It’s so good. Alright, here we go.\u003c/p>\n\u003cp class=\"p1\">\u003cb>Williams:\u003c/b> Alright, here we go.\u003c/p>\n\u003cp class=\"p1\">\u003cb>Phillips:\u003c/b> Oh, my gosh. It is so tender. You might know how to cook some brisket in Alabama.\u003c/p>\n\u003cp class=\"p1\">\u003cb>Williams:\u003c/b> We do okay.\u003c/p>\n\u003cp class=\"p1\">\u003cb>Phillips:\u003c/b> It’s baller.\u003c/p>\n\u003cp class=\"p1\">\u003cb>Williams:\u003c/b> Oh, yeah.\u003c/p>\n\u003cp class=\"p1\">\u003cb>Man:\u003c/b> Let’s go, man. Let’s go.\u003c/p>\n\u003cp class=\"p1\">\u003cb>Singh:\u003c/b> Oakland love, Oakland pride, Oakland baseball, baby. Let’s go!\u003c/p>\n\u003cp class=\"p1\">\u003cb>Sbrocco:\u003c/b> I have to thank my fantastic guests on this week’s show — Shreya Adiraju, who always saves room for the tiramisu at Pazzo in San Carlos, Dave Brannigan, who took us back in time to Ole’s Waffle Shop in Alameda, and Alina Wong, who raved about the rosé rice cakes at Berkeley’s Korean Superette. Join us next time, when three more guests will recommend their favorite spots right here on “Check, Please! Bay Area.” I’m Leslie Sbrocco, and I’ll see you then. Cheers. Cheers to you.\u003c/p>\n\u003cp class=\"p1\">\u003cb>Wong:\u003c/b> Cheers!\u003c/p>\n\u003cp class=\"p1\">\u003cb>Sbrocco:\u003c/b> Did you have fun?\u003c/p>\n\u003cp class=\"p1\">\u003cb>Adiraju:\u003c/b> Yes, so much fun.\u003c/p>\n\u003cp class=\"p1\">\u003cb>Sbrocco:\u003c/b> Oh, that’s great. You guys were fantastic.\u003c/p>\n\u003cp class=\"p1\">\u003cb>Wong:\u003c/b> Cheers.\u003c/p>\n\u003cp class=\"p1\">\u003cb>Phillips:\u003c/b> If you could have any food at the ballpark brought in that’s not, like, the traditional food found at a stadium, what would you want?\u003c/p>\n\u003cp class=\"p1\">\u003cb>Woman:\u003c/b> A gluten-free burger or hot dog.\u003c/p>\n\u003cp class=\"p1\">\u003cb>Woman:\u003c/b> Filipino food is always great. I feel like a Filipino corn dog.\u003c/p>\n\u003cp class=\"p1\">\u003cb>Phillips:\u003c/b> That would be amazing.\u003c/p>\n\u003cp class=\"p1\">\u003cb>Williams:\u003c/b> I want to make brisket the new ballpark food.\u003c/p>\n\u003cp class=\"p1\">\u003cb>Man:\u003c/b> Sushi. No question. No question. No question.\u003c/p>\n\u003cp class=\"p1\">\u003cb>Phillips:\u003c/b> That’s mine, too.\u003c/p>\n\u003cp class=\"p1\">\u003cb>Man:\u003c/b> So, yeah.\u003c/p>\n\u003cp class=\"p1\">\u003cb>Girl:\u003c/b> Veggie straws.\u003c/p>\n\u003cp class=\"p1\">\u003cb>Man:\u003c/b> Veggie straws.\u003c/p>\n\u003cp>[ad floatright]\u003c/p>\n\u003cp class=\"p1\">\u003cb>Phillips:\u003c/b> Veggie straws. That’s — That’s a really healthy option.\u003c/p>\n\n",
"blocks": [],
"excerpt": null,
"status": "publish",
"parent": 0,
"modified": 1778802139,
"stats": {
"hasAudio": false,
"hasVideo": false,
"hasChartOrMap": false,
"iframeSrcs": [],
"hasGoogleForm": false,
"hasGallery": false,
"hasHearkenModule": false,
"hasPolis": false,
"paragraphCount": 14,
"wordCount": 5847
},
"headData": {
"title": "Check, Please! Bay Area reviews: Ole's Waffle Shop, Korean Superette, Pazzo | KQED",
"description": "Bay Area locals try retro breakfasts in Alameda, spicy Korean dishes in Berkeley and New Haven-style wood-fired pizzas in San Carlos.",
"ogTitle": "",
"ogDescription": "",
"ogImgId": "",
"twTitle": "",
"twDescription": "",
"twImgId": "",
"socialDescription": "Bay Area locals try retro breakfasts in Alameda, spicy Korean dishes in Berkeley and New Haven-style wood-fired pizzas in San Carlos.",
"schema": {
"@context": "https://schema.org",
"@type": "Article",
"headline": "Check, Please! Bay Area reviews: Ole's Waffle Shop, Korean Superette, Pazzo",
"datePublished": "2026-05-14T19:28:43-07:00",
"dateModified": "2026-05-14T16:42:19-07:00",
"image": "https://cdn.kqed.org/wp-content/uploads/2020/02/KQED-OG-Image@1x.png"
}
},
"primaryCategory": {
"termId": 3731,
"slug": "episodes",
"name": "episodes"
},
"videoEmbed": "https://www.youtube.com/watch?v=cwDC-O5uDTQ",
"sticky": false,
"templateType": "standard",
"featuredImageType": "standard",
"excludeFromSiteSearch": "Include",
"articleAge": "0",
"path": "/checkplease/23756/check-please-bay-area-reviews-oles-waffle-shop-korean-superette-pazzo",
"audioTrackLength": null,
"parsedContent": [
{
"type": "contentString",
"content": "\u003cdiv class=\"post-body\">\u003cp>\u003cp>\u003cem>Check, Please! Bay Area, \u003c/em>season 21, episode 4, airs Thursday, May 14, at 7:30 pm, on KQED 9. See other \u003ca href=\"http://www.kqed.org/tv/programs/index.jsp?pgmid=14084\" target=\"_blank\" rel=\"noopener noreferrer\">television airtimes\u003c/a>.\u003c/p>\n\u003cp>\u003cspan style=\"font-weight: 400\">In Alameda, \u003c/span>\u003cb>Ole’s Waffle Shop\u003c/b>\u003cspan style=\"font-weight: 400\"> has been keeping breakfast traditions alive since 1927 in a retro diner setting, where locals start the day with walnut and pecan waffles, crispy bacon and eggs, fresh-squeezed orange juice, and hearty plates like Southern fried chicken with mashed potatoes and gravy. Over In Berkeley at \u003c/span>\u003cb>Korean Superette\u003c/b>\u003cspan style=\"font-weight: 400\">, a stylish Korean eatery serving bold flavors in dishes like rose rice cakes, spicy beef doenjang stew, dupp bop with spicy pork belly, all complemented by banchan, roasted corn silk tea, and Korean iced lattes. The journey wraps up in San Carlos, where \u003c/span>\u003cb>Pazzo\u003c/b>\u003cspan style=\"font-weight: 400\"> delivers Italian comfort with a modern touch, serving dishes like cavatelli with slow-braised pork ragu, crispy cauliflower with currants, and potato pizza topped with smoked mozzarella and rosemary. Reporter Cecilia Phillips wraps up the episode with “Cecilia Tries It” at the \u003c/span>\u003cb>West Oakland Farmers Market\u003c/b>\u003cspan style=\"font-weight: 400\">, soaking up the neighborhood energy before heading next door to check out the Oakland Ballers, where she asks fans what foods they’d love to see at a baseball game while sampling some classic ballpark-style barbecue.\u003c/span>\u003c/p>\n\u003cfigure id=\"attachment_23812\" class=\"wp-caption alignnone\" style=\"max-width: 1920px\">\u003cimg loading=\"lazy\" decoding=\"async\" class=\"wp-image-23812 size-full\" src=\"https://cdn.kqed.org/wp-content/uploads/sites/40/2026/04/2104_f.png\" alt=\"\" width=\"1920\" height=\"1080\" srcset=\"https://cdn.kqed.org/wp-content/uploads/sites/40/2026/04/2104_f.png 1920w, https://cdn.kqed.org/wp-content/uploads/sites/40/2026/04/2104_f-160x90.png 160w, https://cdn.kqed.org/wp-content/uploads/sites/40/2026/04/2104_f-768x432.png 768w, https://cdn.kqed.org/wp-content/uploads/sites/40/2026/04/2104_f-1536x864.png 1536w\" sizes=\"auto, (max-width: 1920px) 100vw, 1920px\">\u003cfigcaption class=\"wp-caption-text\">Host Leslie Sbrocco joins guests Shreya Adiraju, Alina Wong and Dave Brannigan from KQED in San Francisco.\u003c/figcaption>\u003c/figure>\n\u003cp>\u003cspan style=\"color: #2b2b2b\">Get Restaurant Information:\u003c/span>\u003c/p>\n\u003cul>\n\u003cli>\u003ca href=\"https://www.instagram.com/oleswaffleshop/\">\u003cstrong>Ole’s Waffle Shop\u003c/strong> (Alameda)\u003c/a>\u003c/li>\n\u003cli>\u003ca href=\"https://korean-superette.com/\">\u003cstrong>Korean Superette\u003c/strong> (Berkeley)\u003c/a>\u003c/li>\n\u003cli>\u003ca href=\"https://pazzosancarlos.com/\">\u003cstrong>Pazzo \u003c/strong>(San Carlos)\u003c/a>\u003c/li>\n\u003c/ul>\n\u003cfigure id=\"attachment_20123\" class=\"wp-caption alignnone\" style=\"max-width: 800px\">\u003cimg loading=\"lazy\" decoding=\"async\" class=\"size-medium wp-image-20123\" src=\"https://cdn.kqed.org/wp-content/uploads/sites/40/2019/04/Leslie-Headshot-Smokey-copy-800x540.jpg\" alt=\"Host Leslie Sbrocco sipping wine\" width=\"800\" height=\"540\">\u003cfigcaption class=\"wp-caption-text\">Host Leslie Sbrocco sipping wine \u003ccite>(Courtesy of Leslie Sbrocco)\u003c/cite>\u003c/figcaption>\u003c/figure>\n\u003cp>My name is Leslie Sbrocco, and I’m the \u003ca href=\"http://ww2.kqed.org/checkplease/host-biography/\" target=\"_blank\" rel=\"noopener noreferrer\">host\u003c/a> of \u003cem>Check, Please! Bay Area\u003c/em>. Each week, I’ll share my tasting notes about the wine, beer and spirits the guests and I drank on set during the taping of the show.\u003c/p>\n\u003cp>\u003cimg loading=\"lazy\" decoding=\"async\" class=\"alignnone size-medium wp-image-23813\" src=\"https://cdn.kqed.org/wp-content/uploads/sites/40/2026/04/2104Wines-2000x2449.jpeg\" alt=\"\" width=\"2000\" height=\"2449\" srcset=\"https://cdn.kqed.org/wp-content/uploads/sites/40/2026/04/2104Wines-2000x2449.jpeg 2000w, https://cdn.kqed.org/wp-content/uploads/sites/40/2026/04/2104Wines-160x196.jpeg 160w, https://cdn.kqed.org/wp-content/uploads/sites/40/2026/04/2104Wines-768x940.jpeg 768w, https://cdn.kqed.org/wp-content/uploads/sites/40/2026/04/2104Wines-1255x1536.jpeg 1255w, https://cdn.kqed.org/wp-content/uploads/sites/40/2026/04/2104Wines-1673x2048.jpeg 1673w\" sizes=\"auto, (max-width: 2000px) 100vw, 2000px\">\u003c/p>\n\u003cp>\u003c/p>\u003c/div>",
"attributes": {
"named": {},
"numeric": []
}
},
{
"type": "component",
"content": "",
"name": "ad",
"attributes": {
"named": {
"label": "fullwidth"
},
"numeric": [
"fullwidth"
]
}
},
{
"type": "contentString",
"content": "\u003cdiv class=\"post-body\">\u003cp>\u003c/p>\n\u003cp>\u003ca href=\"https://www.davisestates.com/\">\u003cspan style=\"color: #339966\">\u003cstrong>Davis Estates 2024 “Private Reserve” Sauvignon Blanc\u003c/strong>\u003c/span>\u003c/a>\u003cbr>\n\u003cem>Napa Valley, California, $58\u003c/em>\u003cbr>\nThere are a handful of Napa Valley wineries now getting lauded for not just red Cabernet Sauvignon, but its related white grape, Sauvignon Blanc. These expressions focus on bright, intense citrus notes and lush texture without an overt herbal character. This bottling from Davis Estates captures a zesty freshness complemented by an edge of taut minerality. With a rounded mouthfeel from a touch of neutral oak barrel usage, it’s a palate pleaser.\u003c/p>\n\u003cp>Davis Estates is one of Napa’s in-the-know treasures. Founded by Mike and Sandy Davis as a personal passion project, the estate combines majestic views with a rustically elegant winery that feels like entering a family home. It’s a destination for special experiences and stylish wines.\u003c/p>\n\u003cp>\u003ca href=\"https://www.frankfamilyvineyards.com/\">\u003cspan style=\"color: #339966\">\u003cstrong>Frank Family Vineyards 2020 Brut Rosé\u003c/strong>\u003c/span>\u003c/a>\u003cbr>\n\u003cem>Carneros, Napa Valley, California, $60\u003c/em>\u003cbr>\nWhen it comes to California sparkling wine, Frank Family Vineyards has inherited a legacy. In the late 1950s, esteemed winemaker Hanns Kornell began making high-quality sparkling wine at the historic Larkmead property. Then, in 1992, Rich Frank — formerly president of Disney Studios and Paramount Television — acquired the estate.\u003c/p>\n\u003cp>Frank Family’s sparkling rosé is crafted primarily from Pinot Noir grapes grown in its Lewis Vineyard in the cool Carneros area at the southern end of Napa Valley. A kiss of Chardonnay grapes lends depth to its pink bubbly, which is aged on its lees for nearly four years. This aging process adds creaminess and texture while still maintaining its vibrantly floral character.\u003c/p>\n\u003cp>\u003ca href=\"https://www.quintadovesuvio.com/wine-cat/douro-doc-wines/1\">\u003cspan style=\"color: #339966\">\u003cstrong>Quinta do Vesuvio 2022 “Pombal do Vesuvio”\u003c/strong>\u003c/span>\u003c/a>\u003cbr>\n\u003cem>Douro, Portugal, $32\u003c/em>\u003cbr>\nIf you’re ever lucky enough to visit the majestic Douro Valley, home to Portugal’s famous Port wines, you will remember it as a place filled with awe-inspiring vineyard and river views lined with historic properties. One of the most iconic estates in the Douro is Quinta do Vesuvio. I’ve had the fortune of visiting this stunning estate, which dates to 1827 and produces world-class Vintage Port. But the Douro Valley is not only home to powerful sweet wines; it’s become a magnet for those looking to sip unique dry wines from Portugal.\u003c/p>\n\u003cp>Vineyards are planted on ancient, terraced hillsides with varieties such as Touriga Nacional and Touriga Franca, which thrive in the rugged, sunbaked landscape. Pombal do Vesuvio is crafted from those grapes, with a dash of Tinta Amarela, into a dry red that captures the deep, earthy flavors and intense dark fruit notes that are hallmarks of the Douro. Pombal refers to the terraced vineyards that surround the estate’s historic towerlike structure called a dovecote, or pombal.\u003c/p>\n\u003cp>Take a virtual visit to the Douro by uncorking this amazingly affordable beauty.\u003c/p>\n\u003ch2>Episode Transcript\u003c/h2>\n\u003cp class=\"p1\">\u003cb>Sbrocco:\u003c/b> New Haven-style pizzas in San Carlos…\u003c/p>\n\u003cp class=\"p1\">\u003cb>Adiraju:\u003c/b> The char — It’s all about the char.\u003c/p>\n\u003cp class=\"p1\">\u003cb>Sbrocco:\u003c/b> …old-school diner fare in Alameda…\u003c/p>\n\u003cp class=\"p1\">\u003cb>Brannigan:\u003c/b> Everybody loves the waffles.\u003c/p>\n\u003cp class=\"p1\">\u003cb>Sbrocco:\u003c/b> …and Korean comforts in Berkeley.\u003c/p>\n\u003cp class=\"p1\">\u003cb>Wong:\u003c/b> It’s just melt in your mouth.\u003c/p>\n\u003cp class=\"p1\">\u003cb>Phillips:\u003c/b> It’s baller.\u003c/p>\n\u003cp class=\"p1\">\u003cb>Williams:\u003c/b> Oh, yeah.\u003c/p>\n\u003cp class=\"p1\">\u003cb>Sbrocco:\u003c/b> Just ahead on “Check, Please! Bay Area.” And are you a spice guy? Do you like it hot?\u003c/p>\n\u003cp class=\"p1\">\u003cb>Brannigan:\u003c/b> No. I do not.\u003c/p>\n\u003cp class=\"p1\">[ Indistinct conversations ]\u003c/p>\n\u003cp class=\"p1\">\u003cb>Sbrocco:\u003c/b> Hi. I’m Leslie Sbrocco. Welcome to “Check, Please! Bay Area,” the show where Bay Area residents review and talk about their favorite restaurants. Now, we have three guests, and each one recommends one of their favorite spots, and the other two go check ’em out to see what they think. Joining me at the “Check, Please” table today are financial services policy leader Shreya Adiraju, fire chief Dave Brannigan, and brand manager Alina Wong. Welcome, everyone. Are you ready?\u003c/p>\n\u003cp class=\"p1\">\u003cb>Wong:\u003c/b> Yes.\u003c/p>\n\u003cp class=\"p1\">\u003cb>Adiraju:\u003c/b> Oh, yeah.\u003c/p>\n\u003cp class=\"p1\">\u003cb>Sbrocco:\u003c/b> Gonna be fun.\u003c/p>\n\u003cp class=\"p1\">\u003cb>Brannigan:\u003c/b> Oh, yeah.\u003c/p>\n\u003cp class=\"p1\">\u003cb>Sbrocco:\u003c/b> Dave’s pick is a legendary diner where the breakfasts are hearty, the waffles are perfectly crisp, and the recipes haven’t changed for generations. Serving the community in the heart of Alameda since 1927, this is Ole’s Waffle Shop.\u003c/p>\n\u003cp class=\"p1\">\u003cb>Man:\u003c/b> I have a small table for two. Welcome to Ole’s.\u003c/p>\n\u003cp class=\"p1\">\u003cb>Woman:\u003c/b> Thank you.\u003c/p>\n\u003cp class=\"p1\">♪♪\u003c/p>\n\u003cp class=\"p1\">\u003cb>Ken:\u003c/b> Ole’s Waffle Shop to me is a meeting place. It’s a place to go where you feel comfortable. Here you go. We’re building relationships here and friendships. How’s it going? Been good? Excellent. Ole’s has a phenomenal history going back to 1927. A Swedish couple started the business.\u003c/p>\n\u003cp class=\"p1\">\u003cb>Vickie:\u003c/b> My parents bought it in 1972. When I was in high school, I came here to work as a bus girl and I just kept on doing it. I love what I do here.\u003c/p>\n\u003cp class=\"p1\">♪♪\u003c/p>\n\u003cp class=\"p1\">On the menu is, like,\u003c/p>\n\u003cp class=\"p1\">classic diner food.\u003c/p>\n\u003cp class=\"p1\">\u003cb>Ken:\u003c/b> We probably have one of the best hamburgers anywhere around.\u003c/p>\n\u003cp class=\"p1\">\u003cb>Vickie:\u003c/b> For dinner, I really like the fried chicken.\u003c/p>\n\u003cp class=\"p1\">\u003cb>Ken:\u003c/b> On a weekend, it could be anywhere from 300 to 600 waffles and pancakes that we move every day.\u003c/p>\n\u003cp class=\"p1\">\u003cb>Vickie:\u003c/b> Our waffles are so special because of the secret ingredients that we put in it. It’s been the same recipe since…\u003c/p>\n\u003cp class=\"p1\">\u003cb>Ken:\u003c/b> 1927.\u003c/p>\n\u003cp class=\"p1\">\u003cb>Vickie:\u003c/b> …1927.\u003c/p>\n\u003cp class=\"p1\">\u003cb>Ken:\u003c/b> If it isn’t broke, why fix it?\u003c/p>\n\u003cp class=\"p1\">\u003cb>Vickie:\u003c/b> Yeah.\u003c/p>\n\u003cp class=\"p1\">\u003cb>Woman:\u003c/b> Would you like any whipped cream on that?\u003c/p>\n\u003cp class=\"p1\">\u003cb>Ken:\u003c/b> Our staff is very important to us.\u003c/p>\n\u003cp class=\"p1\">\u003cb>Vickie:\u003c/b> They have a lot of compassion, and they love the customers.\u003c/p>\n\u003cp class=\"p1\">\u003cb>Ken:\u003c/b> We have paintings of our staff members because it took an amazing staff for almost a hundred years to keep this business going. It takes a community that supports you.\u003c/p>\n\u003cp class=\"p1\">\u003cb>Vickie:\u003c/b> When people leave, it feels very satisfying to see them leave happy. If my dad could see Ole’s now, he would be very proud.\u003c/p>\n\u003cp class=\"p1\">\u003cb>Woman:\u003c/b> Cheers.\u003c/p>\n\u003cp class=\"p1\">\u003cb>All:\u003c/b> Ole’s!\u003c/p>\n\u003cp class=\"p1\">\u003cb>Sbrocco:\u003c/b> Now, I think it’s interesting, Dave, that Ole’s has been around since 1927. 99 years it’s been around.\u003c/p>\n\u003cp class=\"p1\">\u003cb>Brannigan:\u003c/b> Yeah.\u003c/p>\n\u003cp class=\"p1\">\u003cb>Sbrocco:\u003c/b> How long have you been going? Certainly not 99 years.\u003c/p>\n\u003cp class=\"p1\">\u003cb>Brannigan:\u003c/b> Not 99 years. I’ve been going since the late ’90s.\u003c/p>\n\u003cp class=\"p1\">\u003cb>Sbrocco:\u003c/b> Wow. Okay.\u003c/p>\n\u003cp class=\"p1\">\u003cb>Brannigan:\u003c/b> Yeah.\u003c/p>\n\u003cp class=\"p1\">\u003cb>Sbrocco:\u003c/b> And has the menu or what you’ve ordered changed over the years?\u003c/p>\n\u003cp class=\"p1\">\u003cb>Brannigan:\u003c/b> I don’t think anything has changed over the years. One of my favorite features is you can get fresh-squeezed orange juice.\u003c/p>\n\u003cp class=\"p1\">\u003cb>Sbrocco:\u003c/b> Right.\u003c/p>\n\u003cp class=\"p1\">\u003cb>Brannigan:\u003c/b> And there’s actually a machine that has the oranges in a hopper, and it comes down, and they give you a pint of orange juice.\u003c/p>\n\u003cp class=\"p1\">\u003cb>Sbrocco:\u003c/b> Instead of a pint of beer.\u003c/p>\n\u003cp class=\"p1\">\u003cb>Brannigan:\u003c/b> Exactly, yeah.\u003c/p>\n\u003cp class=\"p1\">\u003cb>Sbrocco:\u003c/b> And what did you order?\u003c/p>\n\u003cp class=\"p1\">\u003cb>Brannigan:\u003c/b> Everybody loves the waffles.\u003c/p>\n\u003cp class=\"p1\">\u003cb>Sbrocco:\u003c/b> Yeah.\u003c/p>\n\u003cp class=\"p1\">\u003cb>Brannigan:\u003c/b> They’re crisp and they hold anything you put on it. So I would usually get the Bobby Max Special with the ham steak and a fried egg. So the steak itself is a lot.\u003c/p>\n\u003cp class=\"p1\">\u003cb>Sbrocco:\u003c/b> Yeah.\u003c/p>\n\u003cp class=\"p1\">\u003cb>Brannigan:\u003c/b> But it’s delicious. And I put the egg on top of the waffle. So you get sort of that blend of flavors.\u003c/p>\n\u003cp class=\"p1\">\u003cb>Sbrocco:\u003c/b> Right.\u003c/p>\n\u003cp class=\"p1\">\u003cb>Brannigan:\u003c/b> The kids would get, you know, the whipped cream and strawberries and things like that.\u003c/p>\n\u003cp class=\"p1\">\u003cb>Wong:\u003c/b> Oh, yeah.\u003c/p>\n\u003cp class=\"p1\">\u003cb>Sbrocco:\u003c/b> Alright, Alina, what was your experience there?\u003c/p>\n\u003cp class=\"p1\">\u003cb>Wong:\u003c/b> It was a great experience.\u003c/p>\n\u003cp class=\"p1\">\u003cb>Sbrocco:\u003c/b> Yeah.\u003c/p>\n\u003cp class=\"p1\">\u003cb>Wong:\u003c/b> I had the waffle combo with a scrambled egg…\u003c/p>\n\u003cp class=\"p1\">\u003cb>Sbrocco:\u003c/b> Okay.\u003c/p>\n\u003cp class=\"p1\">\u003cb>Wong:\u003c/b> …the bacon, and the waffle. And it comes with butter and hot maple syrup, which I loved pouring that over. The waffle is so crispy and soft inside.\u003c/p>\n\u003cp class=\"p1\">\u003cb>Sbrocco:\u003c/b> And that bacon gives a nice little salty touch to the sweetness.\u003c/p>\n\u003cp class=\"p1\">\u003cb>Wong:\u003c/b> Exactly. Yeah. Sweet and savory.\u003c/p>\n\u003cp class=\"p1\">\u003cb>Sbrocco:\u003c/b> Alright, Shreya.\u003c/p>\n\u003cp class=\"p1\">\u003cb>Adiraju:\u003c/b> I’m a big breakfast food fan, so I was in my happy place the minute we walked in for sure. I got the walnut waffle with the two large eggs. And then, like, the way to my heart is, like, a big dollop of salted butter right in the middle, which totally hit the spot.\u003c/p>\n\u003cp class=\"p1\">\u003cb>Wong:\u003c/b> So good. Yeah.\u003c/p>\n\u003cp class=\"p1\">\u003cb>Adiraju:\u003c/b> And I have to say, the waffle was surprisingly thin but also very fulfilling. I loved that it had, like you described, the crisp on the outside. It still retained the softness on the inside. And then I forced my husband to get the pecan waffle, and he got the waffle combo —\u003c/p>\n\u003cp class=\"p1\">\u003cb>Sbrocco:\u003c/b> So you can share.\u003c/p>\n\u003cp class=\"p1\">\u003cb>Adiraju:\u003c/b> Of course, right, ’cause we’re sharing. The nut crumble was like the perfect amount of nuts and the perfect size of crumble. We had the hash browns on the side, and those were delicious, like, light, just a little bit of crisp. You got just the right amount of potato but not big and chunky. So that complemented the waffle really well, as well.\u003c/p>\n\u003cp class=\"p1\">\u003cb>Sbrocco:\u003c/b> And is there any other kind of items that you would draw attention to if people are going there?\u003c/p>\n\u003cp class=\"p1\">\u003cb>Brannigan:\u003c/b> Well, there’s a whole other menu for lunch and dinner, which we don’t go to as often, but the burgers are always great.\u003c/p>\n\u003cp class=\"p1\">\u003cb>Wong:\u003c/b> We ordered the Southern fried chicken, actually.\u003c/p>\n\u003cp class=\"p1\">\u003cb>Sbrocco:\u003c/b> Okay.\u003c/p>\n\u003cp class=\"p1\">\u003cb>Wong:\u003c/b> Comes with mashed potatoes, gravy, and steamed vegetables. It was super crispy and had this, like, cornflake crust on it and kept the moisture inside. We ordered two dark-meat pieces and then one breast, and it was so good.\u003c/p>\n\u003cp class=\"p1\">\u003cb>Sbrocco:\u003c/b> Yeah.\u003c/p>\n\u003cp class=\"p1\">\u003cb>Wong:\u003c/b> It was delicious.\u003c/p>\n\u003cp class=\"p1\">\u003cb>Sbrocco:\u003c/b> What do you think of the service there?\u003c/p>\n\u003cp class=\"p1\">\u003cb>Wong:\u003c/b> Service was great, yeah.\u003c/p>\n\u003cp class=\"p1\">\u003cb>Sbrocco:\u003c/b> Yeah.\u003c/p>\n\u003cp class=\"p1\">\u003cb>Wong:\u003c/b> They welcomed us in and sat us immediately and kept on checking in on us and seeing how things were. Great service.\u003c/p>\n\u003cp class=\"p1\">\u003cb>Sbrocco:\u003c/b> That’s good. Well, they’ve had almost 100 years to figure it out, right?\u003c/p>\n\u003cp class=\"p1\">\u003cb>Wong:\u003c/b> Yes.\u003c/p>\n\u003cp class=\"p1\">\u003cb>Sbrocco:\u003c/b> [ Laughs ] Alright. So you’d go back?\u003c/p>\n\u003cp class=\"p1\">\u003cb>Wong:\u003c/b> Yes, I would. Yes.\u003c/p>\n\u003cp class=\"p1\">\u003cb>Brannigan:\u003c/b> It’s old-school diner food. You’re going to, you know, walk in with those expectations and you’re going to be delighted.\u003c/p>\n\u003cp class=\"p1\">\u003cb>Sbrocco:\u003c/b> Alright, if you would like to try Ole’s Waffle Shop, it’s located on Park Street in Alameda. And the average multi-course tab per person without drinks is around $25. From sizzling soups to street-style snacks, Alina’s spot dishes out all the Korean comforts she craves. And if that wasn’t enough, the in-house market is stocked with plenty of pantry favorites to go. Tucked away in Berkeley, it’s more than a meal. It’s Korean Superette.\u003c/p>\n\u003cp class=\"p1\">♪♪\u003c/p>\n\u003cp class=\"p1\">\u003cb>Cody:\u003c/b> Korean Superette is restaurant and market. We serve homestyle Korean dishes to bring the Busan-style original flavor in Berkeley. I came here from Busan to study interior design. But eating Korean food is biggest passion. The Busan-style food has kick, like the people.\u003c/p>\n\u003cp class=\"p1\">[ Laughs ]\u003c/p>\n\u003cp class=\"p1\">Stronger flavor profile.\u003c/p>\n\u003cp class=\"p1\">For example, like,\u003c/p>\n\u003cp class=\"p1\">doenjang stew,\u003c/p>\n\u003cp class=\"p1\">I mix with gochujang.\u003c/p>\n\u003cp class=\"p1\">And my mom’s recipe is spicy\u003c/p>\n\u003cp class=\"p1\">[laughs] but not too spicy.\u003c/p>\n\u003cp class=\"p1\">One of most proud dish\u003c/p>\n\u003cp class=\"p1\">that I made is bapsang,\u003c/p>\n\u003cp class=\"p1\">and I do for lunch special\u003c/p>\n\u003cp class=\"p1\">because it gives you energy.\u003c/p>\n\u003cp class=\"p1\">You can survive\u003c/p>\n\u003cp class=\"p1\">until the end of the day.\u003c/p>\n\u003cp class=\"p1\">It brings together rice, soup,\u003c/p>\n\u003cp class=\"p1\">protein, and banchan.\u003c/p>\n\u003cp class=\"p1\">Banchan is not just a side dish.\u003c/p>\n\u003cp class=\"p1\">Banchan is essential\u003c/p>\n\u003cp class=\"p1\">to be a complete Korean meal.\u003c/p>\n\u003cp class=\"p1\">[ Speaks Korean ]\u003c/p>\n\u003cp class=\"p1\">Koreans love snacking.\u003c/p>\n\u003cp class=\"p1\">When you go to Korea, there’s\u003c/p>\n\u003cp class=\"p1\">a lot of convenience stores.\u003c/p>\n\u003cp class=\"p1\">You can eat quick, satisfy,\u003c/p>\n\u003cp class=\"p1\">leave.\u003c/p>\n\u003cp class=\"p1\">That concept is here.\u003c/p>\n\u003cp class=\"p1\">Here we go.\u003c/p>\n\u003cp class=\"p1\">I’m so passionate\u003c/p>\n\u003cp class=\"p1\">about sharing Korean food\u003c/p>\n\u003cp class=\"p1\">with American family.\u003c/p>\n\u003cp class=\"p1\">And when that kind of person\u003c/p>\n\u003cp class=\"p1\">comes, eats and is satisfied\u003c/p>\n\u003cp class=\"p1\">and say thank you,\u003c/p>\n\u003cp class=\"p1\">that makes me not stop.\u003c/p>\n\u003cp class=\"p1\">[ Laughs ]\u003c/p>\n\u003cp class=\"p1\">\u003cb>Sbrocco:\u003c/b> Alright, Alina, you got to love this spot, right? You can get food to go. You can get all these great dishes. Tell us about kind of the space, because it is very inviting, isn’t it?\u003c/p>\n\u003cp class=\"p1\">\u003cb>Wong:\u003c/b> Yes, it is. It’s really nice to go in and see the market at first, and then they’ll bring you outside if you want to sit outside in the patio, and inside is great, too. You’re surrounded by all this delicious Korean food and snacks.\u003c/p>\n\u003cp class=\"p1\">\u003cb>Sbrocco:\u003c/b> It’s lining the walls, right? It lines the walls.\u003c/p>\n\u003cp class=\"p1\">\u003cb>Wong:\u003c/b> It does.\u003c/p>\n\u003cp class=\"p1\">\u003cb>Sbrocco:\u003c/b> And is there a first bite that you go to?\u003c/p>\n\u003cp class=\"p1\">\u003cb>Wong:\u003c/b> Yes, I always will share the rosé rice cakes with whoever I’m going with.\u003c/p>\n\u003cp class=\"p1\">\u003cb>Sbrocco:\u003c/b> Shreya’s over there going, “Yes.”\u003c/p>\n\u003cp class=\"p1\">\u003cb>Wong:\u003c/b> Delicious thick rice cakes covered in this, like, creamy gochujang sauce. So it’s a little spicy, a little sweet, very creamy, and mozzarella cheese melted on top with green onions. It’s just melt in your mouth and —\u003c/p>\n\u003cp class=\"p1\">\u003cb>Sbrocco:\u003c/b> And I can see you agree.\u003c/p>\n\u003cp class=\"p1\">\u003cb>Adiraju:\u003c/b> Oh, yes. Yes, 100%. I will say, I was a little skeptical of the cheese on the rice.\u003c/p>\n\u003cp class=\"p1\">\u003cb>Sbrocco:\u003c/b> It does seem a little strange, doesn’t it?\u003c/p>\n\u003cp class=\"p1\">\u003cb>Adiraju:\u003c/b> Yeah, yeah, I was like, “Okay, savory, spicy tomato curry, and, you know, mozzarella cheese. I’m not sure,” and I have to give credit, you know, on this one occasion to my husband for pushing us to get this dish to start with. It blew my mind. It was so delicious, so perfect. I could, like, bathe in that sauce. It was so good.\u003c/p>\n\u003cp class=\"p1\">\u003cb>Wong:\u003c/b> Me too.\u003c/p>\n\u003cp class=\"p1\">\u003cb>Sbrocco:\u003c/b> Did you have this? Are we going to —\u003c/p>\n\u003cp class=\"p1\">\u003cb>Brannigan:\u003c/b> No, I did not have this. I went with two friends, and none of us ordered it. Now I got to go back.\u003c/p>\n\u003cp class=\"p1\">\u003cb>Sbrocco:\u003c/b> Okay. Alright. What did you start with?\u003c/p>\n\u003cp class=\"p1\">\u003cb>Brannigan:\u003c/b> We started with the fried chicken bits, and they were unbelievably good. I mean, the batter was almost tempura-like. It was really light and kind of fluffy. And then the sauce that they included with it, we had two. We had kind of a sweeter soy-based sauce and then a very spicy pepper sauce. And the combination of those, you could go back and forth on either one.\u003c/p>\n\u003cp class=\"p1\">\u003cb>Adiraju:\u003c/b> Right.\u003c/p>\n\u003cp class=\"p1\">\u003cb>Sbrocco:\u003c/b> Yeah. And do you eat a lot of Korean food? Is this kind of a newer experience?\u003c/p>\n\u003cp class=\"p1\">\u003cb>Brannigan:\u003c/b> I eat very little Korean food. This was my first time to a Korean restaurant.\u003c/p>\n\u003cp class=\"p1\">\u003cb>Sbrocco:\u003c/b> Okay, and are you a spice guy? Do you like it —\u003c/p>\n\u003cp class=\"p1\">\u003cb>Brannigan:\u003c/b> I am not a spice guy.\u003c/p>\n\u003cp class=\"p1\">\u003cb>Sbrocco:\u003c/b> Do you like it hot?\u003c/p>\n\u003cp class=\"p1\">\u003cb>Brannigan:\u003c/b> No. I do not. Yeah. I’ve been working up to it.\u003c/p>\n\u003cp class=\"p1\">\u003cb>Adiraju:\u003c/b> Yeah.\u003c/p>\n\u003cp class=\"p1\">\u003cb>Brannigan:\u003c/b> There were a few things that were very hot for me, but a lot of it was manageable.\u003c/p>\n\u003cp class=\"p1\">\u003cb>Sbrocco:\u003c/b> Yeah.\u003c/p>\n\u003cp class=\"p1\">\u003cb>Wong:\u003c/b> I for main sometimes get the naengmyeon, which is a cold buckwheat noodle dish in a beef consommé with some veggies on it. And you add, like, vinegar and mustard. It’s a little spicy, got a kick, but it’s delicious, especially in hot weather.\u003c/p>\n\u003cp class=\"p1\">\u003cb>Sbrocco:\u003c/b> Yeah.\u003c/p>\n\u003cp class=\"p1\">\u003cb>Wong:\u003c/b> We always, always share the dupp bop, as well. It’s like this rice bowl with any meat topping that you want. And my husband always gets the spicy pork belly because it’s a heaping portion of this, like, delicious melt-in-your-mouth pork belly.\u003c/p>\n\u003cp class=\"p1\">\u003cb>Sbrocco:\u003c/b> Talk about umami right there.\u003c/p>\n\u003cp class=\"p1\">\u003cb>Wong:\u003c/b> Yeah. And with the banchan pickles on the side, it just, like, adds that crunch. And there’s always just four or five little dishes to pair with the meal.\u003c/p>\n\u003cp class=\"p1\">\u003cb>Brannigan:\u003c/b> For the main, I got the bulgogi comfort pot, which was incredible. The number of ingredients that were packed into that little pot — I mean, it had a topping of these tiny little mushrooms. They almost looked like sprouts. They were just gorgeous. And then the broth itself was spicy, but it was very rich, really delicious.\u003c/p>\n\u003cp class=\"p1\">\u003cb>Wong:\u003c/b> I usually get one of their soups, and it’s always so warming when it’s a little chilly outside. I, this time around, got the beef doenjang stew, which is — doenjang is like a Korean fermented soybean paste. So it’s a lot of umami flavor and it’s really savory. But pieces of beef, vegetable, tofu in the stew, and there’s actual shreds of saffron in the soup, as well, which add this, like, nuttiness as you’re eating into it. That is always my go-to. Yeah.\u003c/p>\n\u003cp class=\"p1\">\u003cb>Adiraju:\u003c/b> I had the seafood tofu stew. It’s a big chunk of really smooth, luxurious, silky tofu in the middle. And the broth was very light. The little shrimps complemented the little veggies, and the tofu kind of brought it all together really nicely, so…\u003c/p>\n\u003cp class=\"p1\">\u003cb>Brannigan:\u003c/b> My friend ordered the jang pasta with pork belly, and this really stole the show. It was very different than anything else we ordered. The sauce was creamy, and, I mean, pork belly — What doesn’t taste good with pork belly in it?\u003c/p>\n\u003cp class=\"p1\">\u003cb>Sbrocco:\u003c/b> Right. Everything’s better with pork belly.\u003c/p>\n\u003cp class=\"p1\">\u003cb>Brannigan:\u003c/b> Yeah, we all kind of fought over it. It was the one thing we didn’t have any leftovers of at the end.\u003c/p>\n\u003cp class=\"p1\">\u003cb>Sbrocco:\u003c/b> Who got the last bite?\u003c/p>\n\u003cp class=\"p1\">\u003cb>Brannigan:\u003c/b> Oh, I got the last bite. It’s for research for this.\u003c/p>\n\u003cp class=\"p1\">\u003cb>Sbrocco:\u003c/b> Of course.\u003c/p>\n\u003cp class=\"p1\">\u003cb>Brannigan:\u003c/b> Yeah, and the flavor just came through amazingly. And the noodles were just such a great texture.\u003c/p>\n\u003cp class=\"p1\">\u003cb>Sbrocco:\u003c/b> Yeah.\u003c/p>\n\u003cp class=\"p1\">\u003cb>Cody:\u003c/b> Medium spicy? Okay.\u003c/p>\n\u003cp class=\"p1\">\u003cb>Sbrocco:\u003c/b> What did you find, Shreya, in terms of service?\u003c/p>\n\u003cp class=\"p1\">\u003cb>Adiraju:\u003c/b> Service was exceptional. They were really, really kind and came and asked us if we had questions and told us a little bit about, like, “Oh, it’s going to be a lot of food. Like, you know, here’s how you pair things together.” So I can’t say enough good things.\u003c/p>\n\u003cp class=\"p1\">\u003cb>Sbrocco:\u003c/b> So they kind of course it out for you.\u003c/p>\n\u003cp class=\"p1\">\u003cb>Adiraju:\u003c/b> Yeah.\u003c/p>\n\u003cp class=\"p1\">\u003cb>Brannigan:\u003c/b> They also had an instructional video playing of all kinds of different food and how it’s cooked, which was really fun to watch.\u003c/p>\n\u003cp class=\"p1\">\u003cb>Sbrocco:\u003c/b> That’s great. That’s fantastic. Yeah. Alright, so you’d go back?\u003c/p>\n\u003cp class=\"p1\">\u003cb>Adiraju:\u003c/b> 100%.\u003c/p>\n\u003cp class=\"p1\">\u003cb>Sbrocco:\u003c/b> Yeah.\u003c/p>\n\u003cp class=\"p1\">\u003cb>Wong:\u003c/b> I always go back.\u003c/p>\n\u003cp class=\"p1\">\u003cb>Sbrocco:\u003c/b> Now you’re a Korean food fan.\u003c/p>\n\u003cp class=\"p1\">\u003cb>Brannigan:\u003c/b> Exactly.\u003c/p>\n\u003cp class=\"p1\">\u003cb>Sbrocco:\u003c/b> There we go. If you would like to try Korean Superette, it’s located on Solano Avenue in Berkeley. The average multi-course tab per person without drinks is around $40. As a former East Coast resident, Shreya sets the bar high when it comes to pizza. Whenever she’s craving the classic Neapolitan-style pies of her childhood, she heads to San Carlos, home to Pazzo.\u003c/p>\n\u003cp class=\"p1\">♪♪\u003c/p>\n\u003cp class=\"p1\">\u003cb>Gambardella:\u003c/b> “Pazzo” means “crazy” in Italian. It usually takes like one Friday night for people to kind of understand why I chose Pazzo to name it. The food here is a blend of East Coast Italian.\u003c/p>\n\u003cp class=\"p1\">\u003cb>Man:\u003c/b> This is our pasta chili crab.\u003c/p>\n\u003cp class=\"p1\">\u003cb>Gambardella:\u003c/b> My parents have had restaurants in the Bay Area Peninsula for 40-plus years, so I was born right into the game. I work with my dad every day. It’s his recipes, his cooking, his heart and pride and soul that he puts into everything around here. One of our most popular appetizers is the crispy cauliflower. My dad invented that. It’s a bit of agrodolce. It’s got a little bit of sweet, a little bit of sour, with the champagne vinaigrette and the currants. Every pasta that we serve here we make in-house. My family roots come from southern Italy, specifically Amalfi. They then immigrated here to New Haven, like a lot of immigrants from Amalfi. In New Haven, pizza’s kind of like church. Everybody kind of meets up there. In New Haven, they actually don’t eat pizza. They eat apizza. It’s pretty much the most rustic form of a pizza — thin, crispy, charred, and chewy. In the beginning, I’m trying to get, like, a nice puff from throwing the dough into a really hot spot. It kind of lets the whole pizza kind of form. The next goal is to get the bottom as cooked as possible. We also cook at a slightly slower and lower temperature than like a typical Neapolitan pizza would do. Pretty much everything that we add, if it’s not a fresh ingredient, we make in-house, so our sausage, our bacon, pancettas, any of that stuff. We don’t make uniform pizzas whatsoever. I think there’s a real beauty to kind of just slapping together pies and throwing them in and out of the oven. We’re going to be doing this all night. Best way to eat the pizza is in-house. You want to be right here when it comes out. Maybe wait a second so it doesn’t burn your mouth. Knives and forks are not allowed. You just grab it and go for hot pies on the table, and there’s no way to bring a family closer than just all sharing. Pazzo is for the people. We’re going to try our best to wow you or just leave you happy.\u003c/p>\n\u003cp class=\"p1\">\u003cb>Sbrocco:\u003c/b> Alright, so we’re talking pizza. Who doesn’t love pizza, right? What is it about that sort of New Haven style — New Haven, Connecticut, of course — that really appeals to you?\u003c/p>\n\u003cp class=\"p1\">\u003cb>Adiraju:\u003c/b> So it’s got the Neapolitan thin crust, but the char — It’s all about the char. And you’d think, like, “Ah, a burnt crisp, like, a burnt edge of a crust, like, how can that be tasty?” But if the toppings are right, it goes perfectly, ’cause the bit of char adds almost like a smokiness to the pizza. For me, I’m a tomato pie person, ’cause nothing can hide in a tomato pie Like, the sauce has to be on point. The crust has to be on point. There’s always a little bit of, like, a light coating of Parmesan on top.\u003c/p>\n\u003cp class=\"p1\">\u003cb>Sbrocco:\u003c/b> Right.\u003c/p>\n\u003cp class=\"p1\">\u003cb>Adiraju:\u003c/b> Authentic, pure, true to form is definitely the way to go with the New Haven tomato pie.\u003c/p>\n\u003cp class=\"p1\">\u003cb>Wong:\u003c/b> I am a huge pizza lover. It’s my favorite food, especially thin-crust pizza. And this was the thinnest crust I’ve ever seen and experienced. And it was so good. I had the potato pizza, and so it was a white-sauce pizza. It had mozzarella, very thinly sliced potatoes, rosemary, and herbs on it. And it was so good all together.\u003c/p>\n\u003cp class=\"p1\">\u003cb>Adiraju:\u003c/b> I got the roasted shiitake mushroom salad most recently. You’d think if they’re going to do roasted shiitake mushrooms, you’d get these sort of big chunks of mushroom on the salad.\u003c/p>\n\u003cp class=\"p1\">\u003cb>Sbrocco:\u003c/b> Right.\u003c/p>\n\u003cp class=\"p1\">\u003cb>Adiraju:\u003c/b> But it’s not like that. It almost feels like they could be Parmesan crisps. And then they put these little, like, wedges of ricotta salata around the plate of it. So salad is definitely a go-to. The only other thing I love, which is decadent to eat before pizza, is the arancini — perfectly fried, very gooey, had the perfect cheese pull, and it comes with almost like a blue cheesy aioli on the side, which is really delicious.\u003c/p>\n\u003cp class=\"p1\">\u003cb>Brannigan:\u003c/b> We started with the crispy fried cauliflower. It’s got a honey glaze to it, and to have the crispy outside of the cauliflower with a nice soft, hot inside, I mean, we ate those…\u003c/p>\n\u003cp class=\"p1\">\u003cb>Sbrocco:\u003c/b> You loved them.\u003c/p>\n\u003cp class=\"p1\">\u003cb>Brannigan:\u003c/b> …quick.\u003c/p>\n\u003cp class=\"p1\">\u003cb>Sbrocco:\u003c/b> Any other dish for you?\u003c/p>\n\u003cp class=\"p1\">\u003cb>Wong:\u003c/b> Yes, I had the cavatelli, which is one of their homemade pastas. It’s these rich pillows of pasta enveloped in this tomato sauce with a slow-roasted pork ragù, Parmesan cheese on top, and it just melts in your mouth. Each bite was so good, just a great little mid appetizer.\u003c/p>\n\u003cp class=\"p1\">\u003cb>Brannigan:\u003c/b> So I had the bucatini. It was a special that night.\u003c/p>\n\u003cp class=\"p1\">\u003cb>Sbrocco:\u003c/b> So you said, “Forget the pizza, baby. I’m going for the pasta.”\u003c/p>\n\u003cp class=\"p1\">\u003cb>Brannigan:\u003c/b> I went straight in. Well, it was described as having crab meat, crab fat butter. Oh, my God. What is that?\u003c/p>\n\u003cp class=\"p1\">\u003cb>Sbrocco:\u003c/b> Right.\u003c/p>\n\u003cp class=\"p1\">\u003cb>Brannigan:\u003c/b> But I want more of it.\u003c/p>\n\u003cp class=\"p1\">\u003cb>Sbrocco:\u003c/b> Yeah.\u003c/p>\n\u003cp class=\"p1\">\u003cb>Brannigan:\u003c/b> And a garlic sauce. And the pasta itself was just perfectly cooked. And it was all I could do not to just wolf it down.\u003c/p>\n\u003cp class=\"p1\">\u003cb>Sbrocco:\u003c/b> [ Laughs ] And did you have anything to drink alongside your food?\u003c/p>\n\u003cp class=\"p1\">\u003cb>Brannigan:\u003c/b> I did. They had a line of sodas, the Foxon Park from New Haven. And so I tried their cream soda, which, you know, is a simple cream soda, but it was delicious. Yeah, and my wife got a Hazy IPA.\u003c/p>\n\u003cp class=\"p1\">\u003cb>Sbrocco:\u003c/b> Did anybody have room for dessert?\u003c/p>\n\u003cp class=\"p1\">\u003cb>Wong:\u003c/b> I was too full for dessert. But I will go back for the tiramisu. It looked incredible.\u003c/p>\n\u003cp class=\"p1\">\u003cb>Sbrocco:\u003c/b> Yeah.\u003c/p>\n\u003cp class=\"p1\">\u003cb>Adiraju:\u003c/b> One thing I will say is it’s not a classic tiramisu. I actually love tiramisus, typically, that have a little more coffee soak and, like, are a little more dredged in the overall coffee flavor. And I like the cream a little thinner, but as a really delicious fresh dessert to have after pizza, especially ’cause it’s, like, nice and cold, it’s a perfect slice. They put an ample amount of cocoa powder on top, which you have to have on a tiramisu. It’s very delicious and worth eating there or taking home.\u003c/p>\n\u003cp class=\"p1\">\u003cb>Brannigan:\u003c/b> I lived in Philly for a while, and cannoli is a go-to dessert, so it was delicious, the crust. It was small. Sometimes they’re big and packed, but this was really small, fried really nicely. It was really delicious. That with a cappuccino — It was a good classic cappuccino, nice foamy top, nice strong espresso.\u003c/p>\n\u003cp class=\"p1\">\u003cb>Sbrocco:\u003c/b> So save room for dessert is what you two are saying.\u003c/p>\n\u003cp class=\"p1\">\u003cb>Adiraju:\u003c/b> Yes.\u003c/p>\n\u003cp class=\"p1\">\u003cb>Sbrocco:\u003c/b> [ Laughs ] Absolutely. And service — What did you think about that?\u003c/p>\n\u003cp class=\"p1\">\u003cb>Wong:\u003c/b> Service was great. I actually did sit at the back bar with my husband and, you know, saw the pizzas being baked in the oven. It was beautiful.\u003c/p>\n\u003cp class=\"p1\">\u003cb>Adiraju:\u003c/b> Service is typically great. Actually, the only thing that I’ve ever experienced is sometimes if you go on the weekend, it can get pretty busy, and it’s a small place. You can wait a little bit. So if you’re trying to get in and get out quickly, time it, like, right\u003c/p>\n\u003cp class=\"p1\">\u003cb>when they open at 4:\u003c/b> 00 or something like that.\u003c/p>\n\u003cp class=\"p1\">\u003cb>Sbrocco:\u003c/b> Alright. If you would like to try Pazzo, it’s located on Laurel Street in San Carlos. And the average multi-course tab per person without drinks is around $45.\u003c/p>\n\u003cp class=\"p1\">\u003cb>Phillips:\u003c/b> That’s so beautiful.\u003c/p>\n\u003cp class=\"p1\">\u003cb>Sbrocco:\u003c/b> And now reporter Cecilia Phillips has more Bay Area bites you’ve just got to try. She’s headed to West Oakland for a market that’s bringing life to a former food desert.\u003c/p>\n\u003cp class=\"p1\">♪♪\u003c/p>\n\u003cp class=\"p1\">\u003cb>Phillips:\u003c/b> The West Oakland Farmers Market, this is one of the newest markets in Oakland. Why is it so crucial to do things like this in a place like West Oakland?\u003c/p>\n\u003cp class=\"p1\">\u003cb>Singh:\u003c/b> You know, West Oakland Farmers Market serves the immediate community. We want people to feel the Oakland love and pride — locally grown fruits and vegetables, fresh baked goods, pasture-raised meats, a really community-centered farmers market.\u003c/p>\n\u003cp class=\"p1\">♪♪\u003c/p>\n\u003cp class=\"p1\">\u003cb>Phillips:\u003c/b> This is beautiful, and I love chilaquiles. So what’s in it?\u003c/p>\n\u003cp class=\"p1\">\u003cb>Guerrero:\u003c/b> So, this one is scrambled eggs with chorizo, green tomatillo salsa, red onions, sour cream, and queso fresco.\u003c/p>\n\u003cp class=\"p1\">\u003cb>Phillips:\u003c/b> I got to tell you, with a name like Delicioso, okay, it’s pretty high standard.\u003c/p>\n\u003cp class=\"p1\">\u003cb>Guerrero:\u003c/b> Yes.\u003c/p>\n\u003cp class=\"p1\">\u003cb>Woman:\u003c/b> Here you go.\u003c/p>\n\u003cp class=\"p1\">\u003cb>Man:\u003c/b> Thank you very much.\u003c/p>\n\u003cp class=\"p1\">\u003cb>Guerrero:\u003c/b> But a lot of people that taste my food, they say, “Oh, yeah, that’s delicioso.”\u003c/p>\n\u003cp class=\"p1\">\u003cb>Phillips:\u003c/b> Okay.\u003c/p>\n\u003cp class=\"p1\">\u003cb>Guerrero:\u003c/b> So I hope you say the same word at the end of your trying.\u003c/p>\n\u003cp class=\"p1\">\u003cb>Phillips:\u003c/b> I know, I know. I’m like, “Let’s get ready to do this.” Oh, it looks hot.\u003c/p>\n\u003cp class=\"p1\">\u003cb>Guerrero:\u003c/b> Mm-hmm. Delicioso?\u003c/p>\n\u003cp class=\"p1\">[ Laughs ]\u003c/p>\n\u003cp class=\"p1\">\u003cb>Phillips:\u003c/b> It’s delicioso. So, Pho Vy, it’s Vietnamese cuisine. What do you specialize in?\u003c/p>\n\u003cp class=\"p1\">\u003cb>Nguyen:\u003c/b> So one of the specialized dishes we do is actually these beef stew tacos.\u003c/p>\n\u003cp class=\"p1\">\u003cb>Phillips:\u003c/b> Beef stew tacos.\u003c/p>\n\u003cp class=\"p1\">\u003cb>Nguyen:\u003c/b> Yeah. So the beef stew is five generations of recipes. And then nowadays, you know, everything with fusion, why not, you know, put our food and other cultures together and have, like, one crispy Vietnamese taco kind of like on the go, like “pho on the go” taco.\u003c/p>\n\u003cp class=\"p1\">\u003cb>Phillips:\u003c/b> “Pho on the go,” I love that.\u003c/p>\n\u003cp class=\"p1\">\u003cb>Nguyen:\u003c/b> We cook it with brisket, we do cheese, and then we garnish it with the traditional toppings on the pho. There’s like the basil, onion, cilantro, green onions. Go, dip it in. Get all that.\u003c/p>\n\u003cp class=\"p1\">\u003cb>Phillips:\u003c/b> [ Laughs ] We got to do the lean, right?\u003c/p>\n\u003cp class=\"p1\">\u003cb>Nguyen:\u003c/b> Yes, ma’am.\u003c/p>\n\u003cp class=\"p1\">\u003cb>Phillips:\u003c/b> It tastes like pho in a taco.\u003c/p>\n\u003cp class=\"p1\">\u003cb>Nguyen:\u003c/b> Pretty much pho on the go.\u003c/p>\n\u003cp class=\"p1\">\u003cb>Phillips:\u003c/b> Pho on the go.\u003c/p>\n\u003cp class=\"p1\">\u003cb>Nguyen:\u003c/b> Yeah.\u003c/p>\n\u003cp class=\"p1\">[ Crowd cheering ]\u003c/p>\n\u003cp class=\"p1\">\u003cb>Singh:\u003c/b> Sundays are super fun here. The Oakland Ballers playing down the street. Hang out here, listen to some music, and then hit the ballgame.\u003c/p>\n\u003cp class=\"p1\">\u003cb>Phillips:\u003c/b> The Oakland Ballers, what does this organization mean for the community?\u003c/p>\n\u003cp class=\"p1\">\u003cb>Pratt:\u003c/b> Yeah, when the Oakland A’s were leaving town, a lot of people were heartbroken. And so the Oakland Ballers stepped up to give people a reason to get back together again as a community. There’s great food, there’s great beer, there’s great baseball. We’re the best team in all of professional baseball by win percentage at any level.\u003c/p>\n\u003cp class=\"p1\">\u003cb>Williams:\u003c/b> This truck is called Scrappy’s Test Kitchen, and the concept was allow small local businesses an opportunity to test out their concept.\u003c/p>\n\u003cp class=\"p1\">\u003cb>Phillips:\u003c/b> Alright, so Triple T, I’m going to go ahead and take a guess. Is it tasty, tantalizing, and tempting?\u003c/p>\n\u003cp class=\"p1\">\u003cb>Williams:\u003c/b> No, Triple T is taste, texture, and tenderness.\u003c/p>\n\u003cp class=\"p1\">\u003cb>Phillips:\u003c/b> I was not far off.\u003c/p>\n\u003cp class=\"p1\">\u003cb>Williams:\u003c/b> You were far off.\u003c/p>\n\u003cp class=\"p1\">[ Both laugh ]\u003c/p>\n\u003cp class=\"p1\">Today our special’s\u003c/p>\n\u003cp class=\"p1\">mac and meat.\u003c/p>\n\u003cp class=\"p1\">Got mac with brisket.\u003c/p>\n\u003cp class=\"p1\">You can see the marbling.\u003c/p>\n\u003cp class=\"p1\">I’m from Alabama.\u003c/p>\n\u003cp class=\"p1\">I cook with real wood.\u003c/p>\n\u003cp class=\"p1\">I don’t cook\u003c/p>\n\u003cp class=\"p1\">with a propane oven.\u003c/p>\n\u003cp class=\"p1\">You know, we call that an\u003c/p>\n\u003cp class=\"p1\">Easy-Bake Oven where I’m from.\u003c/p>\n\u003cp class=\"p1\">\u003cb>Phillips:\u003c/b> This piece here. This is the fatty piece. This is my favorite.\u003c/p>\n\u003cp class=\"p1\">\u003cb>Williams:\u003c/b> I knew, I knew. Something told me.\u003c/p>\n\u003cp class=\"p1\">\u003cb>Phillips:\u003c/b> You could tell. It’s so good. Alright, here we go.\u003c/p>\n\u003cp class=\"p1\">\u003cb>Williams:\u003c/b> Alright, here we go.\u003c/p>\n\u003cp class=\"p1\">\u003cb>Phillips:\u003c/b> Oh, my gosh. It is so tender. You might know how to cook some brisket in Alabama.\u003c/p>\n\u003cp class=\"p1\">\u003cb>Williams:\u003c/b> We do okay.\u003c/p>\n\u003cp class=\"p1\">\u003cb>Phillips:\u003c/b> It’s baller.\u003c/p>\n\u003cp class=\"p1\">\u003cb>Williams:\u003c/b> Oh, yeah.\u003c/p>\n\u003cp class=\"p1\">\u003cb>Man:\u003c/b> Let’s go, man. Let’s go.\u003c/p>\n\u003cp class=\"p1\">\u003cb>Singh:\u003c/b> Oakland love, Oakland pride, Oakland baseball, baby. Let’s go!\u003c/p>\n\u003cp class=\"p1\">\u003cb>Sbrocco:\u003c/b> I have to thank my fantastic guests on this week’s show — Shreya Adiraju, who always saves room for the tiramisu at Pazzo in San Carlos, Dave Brannigan, who took us back in time to Ole’s Waffle Shop in Alameda, and Alina Wong, who raved about the rosé rice cakes at Berkeley’s Korean Superette. Join us next time, when three more guests will recommend their favorite spots right here on “Check, Please! Bay Area.” I’m Leslie Sbrocco, and I’ll see you then. Cheers. Cheers to you.\u003c/p>\n\u003cp class=\"p1\">\u003cb>Wong:\u003c/b> Cheers!\u003c/p>\n\u003cp class=\"p1\">\u003cb>Sbrocco:\u003c/b> Did you have fun?\u003c/p>\n\u003cp class=\"p1\">\u003cb>Adiraju:\u003c/b> Yes, so much fun.\u003c/p>\n\u003cp class=\"p1\">\u003cb>Sbrocco:\u003c/b> Oh, that’s great. You guys were fantastic.\u003c/p>\n\u003cp class=\"p1\">\u003cb>Wong:\u003c/b> Cheers.\u003c/p>\n\u003cp class=\"p1\">\u003cb>Phillips:\u003c/b> If you could have any food at the ballpark brought in that’s not, like, the traditional food found at a stadium, what would you want?\u003c/p>\n\u003cp class=\"p1\">\u003cb>Woman:\u003c/b> A gluten-free burger or hot dog.\u003c/p>\n\u003cp class=\"p1\">\u003cb>Woman:\u003c/b> Filipino food is always great. I feel like a Filipino corn dog.\u003c/p>\n\u003cp class=\"p1\">\u003cb>Phillips:\u003c/b> That would be amazing.\u003c/p>\n\u003cp class=\"p1\">\u003cb>Williams:\u003c/b> I want to make brisket the new ballpark food.\u003c/p>\n\u003cp class=\"p1\">\u003cb>Man:\u003c/b> Sushi. No question. No question. No question.\u003c/p>\n\u003cp class=\"p1\">\u003cb>Phillips:\u003c/b> That’s mine, too.\u003c/p>\n\u003cp class=\"p1\">\u003cb>Man:\u003c/b> So, yeah.\u003c/p>\n\u003cp class=\"p1\">\u003cb>Girl:\u003c/b> Veggie straws.\u003c/p>\n\u003cp class=\"p1\">\u003cb>Man:\u003c/b> Veggie straws.\u003c/p>\n\u003cp>\u003c/p>\u003c/div>",
"attributes": {
"named": {},
"numeric": []
}
},
{
"type": "component",
"content": "",
"name": "ad",
"attributes": {
"named": {
"label": "floatright"
},
"numeric": [
"floatright"
]
}
},
{
"type": "contentString",
"content": "\u003cdiv class=\"post-body\">\u003cp>\u003c/p>\n\u003cp class=\"p1\">\u003cb>Phillips:\u003c/b> Veggie straws. That’s — That’s a really healthy option.\u003c/p>\n\n\u003c/div>\u003c/p>",
"attributes": {
"named": {},
"numeric": []
}
}
],
"link": "/checkplease/23756/check-please-bay-area-reviews-oles-waffle-shop-korean-superette-pazzo",
"authors": [
"11084"
],
"programs": [
"checkplease_9339"
],
"categories": [
"checkplease_7989",
"checkplease_3758",
"checkplease_3845",
"checkplease_3392",
"checkplease_3763",
"checkplease_3873",
"checkplease_3750",
"checkplease_3730",
"checkplease_3740",
"checkplease_9210",
"checkplease_3731",
"checkplease_9200",
"checkplease_3751",
"checkplease_494",
"checkplease_3871",
"checkplease_9212",
"checkplease_9211",
"checkplease_3741",
"checkplease_443",
"checkplease_3738",
"checkplease_10",
"checkplease_7954",
"checkplease_9453"
],
"tags": [
"checkplease_8715",
"checkplease_8957",
"checkplease_8574",
"checkplease_8508",
"checkplease_8633",
"checkplease_1368",
"checkplease_9162",
"checkplease_8566",
"checkplease_9382",
"checkplease_8821",
"checkplease_8587"
],
"featImg": "checkplease_23814",
"label": "checkplease_9339"
},
"checkplease_23755": {
"type": "posts",
"id": "checkplease_23755",
"meta": {
"index": "posts_1716263798",
"site": "checkplease",
"id": "23755",
"score": null,
"sort": [
1778207125000
]
},
"guestAuthors": [],
"slug": "check-please-bay-area-reviews-merchant-roots-tchaka-creekside-bakery",
"title": "Check, Please! Bay Area reviews: Merchant Roots, T’Chaka, Creekside Bakery",
"publishDate": 1778207125,
"format": "video",
"headTitle": "Check, Please! Bay Area reviews: Merchant Roots, T’Chaka, Creekside Bakery | KQED",
"labelTerm": {
"term": 9339,
"site": "checkplease"
},
"content": "\u003cp>\u003cem>Check, Please! Bay Area, \u003c/em>season 21, episode 3, airs Thursday, May 7, at 7:30 pm, on KQED 9. See other \u003ca href=\"http://www.kqed.org/tv/programs/index.jsp?pgmid=14084\" target=\"_blank\" rel=\"noopener noreferrer\">television airtimes\u003c/a>.\u003c/p>\n\u003cp>\u003cspan style=\"font-weight: 400\">In San Francisco’s SoMa district, \u003c/span>\u003cb>Merchant Roots\u003c/b>\u003cspan style=\"font-weight: 400\"> invites diners into an intimate, theatrical and seasonally rotating tasting experience. Our guests where guests “foraged” for playful bites like the Shiitaco, savored dishes like the porcini amaranth tamal with mole negro, and uncovered candy cap canelés. Over in Old Oakland’s Swan’s Market, \u003c/span>\u003cb>T’Chaka\u003c/b>\u003cspan style=\"font-weight: 400\"> celebrates Haitian cuisine in a bright, communal space, serving deeply comforting plates like braised oxtail stew, crispy citrus-marinated griot with crispy tostones, jerk shrimp, and akra, all best enjoyed with Haitian beer. The episode wraps up in Novato at \u003c/span>\u003cb>Creekside Bakery\u003c/b>\u003cspan style=\"font-weight: 400\">, a longtime neighborhood favorite overlooking Novato Creek, where locals line up for buttery ham-and-cheese croissants, smoked salmon toast on house-baked bread, princess cake slices crowned with marzipan roses, and impeccably gooey chocolate dot cookies.\u003c/span>\u003c/p>\n\u003cfigure id=\"attachment_23772\" class=\"wp-caption alignnone\" style=\"max-width: 1920px\">\u003cimg loading=\"lazy\" decoding=\"async\" class=\"wp-image-23772 size-full\" src=\"https://cdn.kqed.org/wp-content/uploads/sites/40/2026/03/2103_f.png\" alt=\"\" width=\"1920\" height=\"1080\" srcset=\"https://cdn.kqed.org/wp-content/uploads/sites/40/2026/03/2103_f.png 1920w, https://cdn.kqed.org/wp-content/uploads/sites/40/2026/03/2103_f-160x90.png 160w, https://cdn.kqed.org/wp-content/uploads/sites/40/2026/03/2103_f-768x432.png 768w, https://cdn.kqed.org/wp-content/uploads/sites/40/2026/03/2103_f-1536x864.png 1536w\" sizes=\"auto, (max-width: 1920px) 100vw, 1920px\">\u003cfigcaption class=\"wp-caption-text\">Host Leslie Sbrocco joins guests Jean Star, Yev Pusin and Ciarra Barron from KQED in San Francisco.\u003c/figcaption>\u003c/figure>\n\u003cp>\u003cspan style=\"color: #2b2b2b\">Get Restaurant Information:\u003c/span>\u003c/p>\n\u003cul>\n\u003cli>\u003ca href=\"https://www.merchantroots.com/\">\u003cstrong>Merchant Roots\u003c/strong> (San Francisco)\u003c/a>\u003c/li>\n\u003cli>\u003ca href=\"https://www.tchakaoak.online/\">\u003cstrong>T’Chaka\u003c/strong> (Oakland)\u003c/a>\u003c/li>\n\u003cli>\u003ca href=\"https://www.creeksidebakery.com/\">\u003cstrong>Creekside Bakery \u003c/strong>(Novato)\u003c/a>\u003c/li>\n\u003c/ul>\n\u003cfigure id=\"attachment_20123\" class=\"wp-caption alignnone\" style=\"max-width: 800px\">\u003cimg loading=\"lazy\" decoding=\"async\" class=\"size-medium wp-image-20123\" src=\"https://cdn.kqed.org/wp-content/uploads/sites/40/2019/04/Leslie-Headshot-Smokey-copy-800x540.jpg\" alt=\"Host Leslie Sbrocco sipping wine\" width=\"800\" height=\"540\">\u003cfigcaption class=\"wp-caption-text\">Host Leslie Sbrocco sipping wine \u003ccite>(Courtesy of Leslie Sbrocco)\u003c/cite>\u003c/figcaption>\u003c/figure>\n\u003cp>My name is Leslie Sbrocco, and I’m the \u003ca href=\"http://ww2.kqed.org/checkplease/host-biography/\" target=\"_blank\" rel=\"noopener noreferrer\">host\u003c/a> of \u003cem>Check, Please! Bay Area\u003c/em>. Each week, I’ll share my tasting notes about the wine, beer and spirits the guests and I drank on set during the taping of the show.\u003c/p>\n\u003cp>\u003cimg loading=\"lazy\" decoding=\"async\" class=\"alignnone size-medium wp-image-23804\" src=\"https://cdn.kqed.org/wp-content/uploads/sites/40/2026/05/2103Wines-2000x2641.jpeg\" alt=\"\" width=\"2000\" height=\"2641\" srcset=\"https://cdn.kqed.org/wp-content/uploads/sites/40/2026/05/2103Wines-2000x2641.jpeg 2000w, https://cdn.kqed.org/wp-content/uploads/sites/40/2026/05/2103Wines-160x211.jpeg 160w, https://cdn.kqed.org/wp-content/uploads/sites/40/2026/05/2103Wines-768x1014.jpeg 768w, https://cdn.kqed.org/wp-content/uploads/sites/40/2026/05/2103Wines-1163x1536.jpeg 1163w, https://cdn.kqed.org/wp-content/uploads/sites/40/2026/05/2103Wines-1551x2048.jpeg 1551w, https://cdn.kqed.org/wp-content/uploads/sites/40/2026/05/2103Wines-scaled.jpeg 1938w\" sizes=\"auto, (max-width: 2000px) 100vw, 2000px\">\u003c/p>\n\u003cp>[ad fullwidth]\u003c/p>\n\u003cp>\u003ca href=\"https://www.winebow.com/our-brands/lini-910/lini-910-labrusca-rosso/nv\">\u003cspan style=\"color: #339966\">\u003cstrong>Lini 910 “Labrusca” Lambrusco Rosso\u003c/strong>\u003c/span>\u003c/a>\u003cbr>\n\u003cem>Italy, $19\u003c/em>\u003cbr>\nLini 910 Lambrusco is simply one of the best deals on the wine market today. It’s a versatile sparkling to discover and buy by the case for year-round sipping.\u003c/p>\n\u003cp>The Lini family has been producing artisanal Lambrusco in the Italian region of Emilia since 1910. Currently run by the fourth generation of the family, it’s a female-led producer to know. The wine carries the name “Labrusca,” which refers to the ancient Roman name for indigenous grapes used to make the sunny sparkling red (Rosso) known today as Lambrusco. This ruby-hued, gently fizzy bottling overflows with red berry freshness followed by a crisp, dry finish. It’s an ideal pairing for everything from aged cheeses to spicy Thai curries and smoky barbecue.\u003c/p>\n\u003cp>\u003ca href=\"https://lynmarestate.com\">\u003cspan style=\"color: #339966\">\u003cstrong>Lynmar Estate 2022 “Summit Block” Pinot Noir\u003c/strong>\u003c/span>\u003c/a>\u003cbr>\n\u003cem>Russian River Valley, Sonoma County, California, $93\u003c/em>\u003cbr>\nLooking to splurge on a world-class Pinot Noir? This wine is one to seek out. Described by the winery as a place where “bliss begins,” a perfect way to experience the bliss of Lynmar is by sipping this silky-smooth, elegant Pinot Noir. Crafted from vines planted in a unique spot of their Quail Hill Vineyard, it’s a complex yet approachable red with spicy, dark-berry fruit intensity.\u003c/p>\n\u003cp>Lynmar Estate is a quiet classic. A Northern California producer with a conscience, founders Lynn and Anisya Fritz have cultivated an agricultural destination in the heart of the Russian River Valley. Organically farmed vineyards, acres of vegetable gardens, orchards and olive trees are a treasure trove of delights for their two full-time chefs. Built over a four-decade tenure, Lynmar is a beloved producer with a devoted following of wine and food lovers.\u003c/p>\n\u003cp>\u003ca href=\"https://roblarwinery.com/\">\u003cspan style=\"color: #339966\">\u003cstrong>Roblar 2023 “Gold Collection” Cabernet Franc\u003c/strong>\u003c/span>\u003c/a>\u003cbr>\n\u003cem>Santa Ynez Valley, California $80\u003c/em>\u003cbr>\nThis wine excites me for two reasons: It’s made from Cabernet Franc grapes, and it hails from a producer devoted to making wine, food and art a part of everyday life.\u003c/p>\n\u003cp>Roblar Winery is a family-owned and family-run property situated in the stunning Santa Barbara County wine appellation — the Santa Ynez Valley. Focused on wines from Bordeaux grape varieties, it’s also home to a working farm, art gallery and restaurant.\u003c/p>\n\u003cp>As a fan of the grape variety Cabernet Franc, their opulent bottling is rich and lush with a streak of savory notes and layered dark fruit flavors. It blends the majority of Cabernet Franc with a dollop of Cabernet Sauvignon, its Bordeaux partner. The result is a special, small-production gem to decant and enjoy with a grilled steak, or to stash in your cellar for years to come.\u003c/p>\n\u003ch2>Episode Transcript\u003c/h2>\n\u003cp class=\"p1\">\u003cb>Sbrocco:\u003c/b> Immersive fine dining in San Francisco.\u003c/p>\n\u003cp class=\"p1\">\u003cb>Pusin:\u003c/b> You don’t know what’s going to inspire these folks from menu to menu.\u003c/p>\n\u003cp class=\"p1\">\u003cb>Sbrocco:\u003c/b> Classic bakeshop creations in Novato.\u003c/p>\n\u003cp class=\"p1\">\u003cb>Barron:\u003c/b> I think I got like 20 items. [ Laughter ]\u003c/p>\n\u003cp class=\"p1\">\u003cb>Sbrocco:\u003c/b> And Haitian hospitality in Oakland.\u003c/p>\n\u003cp class=\"p1\">\u003cb>Star:\u003c/b> Big chunks of pork that are really crispy.\u003c/p>\n\u003cp class=\"p1\">\u003cb>Sbrocco:\u003c/b> Just ahead on “Check Please! Bay Area.”\u003c/p>\n\u003cp class=\"p1\">\u003cb>Pusin:\u003c/b> The Shiitaco was great.\u003c/p>\n\u003cp class=\"p1\">\u003cb>Sbrocco:\u003c/b> And it’s a great name, too — the Shiitaco. [ Laughter ] [ Indistinct conversations ]\u003c/p>\n\u003cp class=\"p1\">\u003cb>Sbrocco:\u003c/b> Hi, I’m Leslie Sbrocco. Welcome to “Check, Please! Bay Area,” the show where Bay Area residents review and talk about their favorite restaurants. Now, we have three guests, and each one recommends one of their favorite spots, and the other two go check them out to see what they think. Joining me at the “Check, Please!” table today are pediatric dentist Jean Star; calm, clarity and purpose strategist Ciarra Barron; and head of communications Yev Pusin. Welcome, everyone! Are you ready for a fun show?\u003c/p>\n\u003cp class=\"p1\">\u003cb>Barron:\u003c/b> Absolutely.\u003c/p>\n\u003cp class=\"p1\">\u003cb>Star:\u003c/b> Yeah.\u003c/p>\n\u003cp class=\"p1\">\u003cb>Sbrocco:\u003c/b> Okay. Yev’s restaurant offers a true culinary adventure where every meal tells a story and every course is part of the theme. From fantastical flavors to playful presentations, diners are taken on an immersive journey that changes according to season. Located in San Francisco’s SoMa neighborhood, it’s Merchant Roots. \u003cspan class=\"s1\">♪♪\u003c/span>\u003c/p>\n\u003cp class=\"p1\">\u003cb>Shelton:\u003c/b> Merchant Roots is a multicourse fine-dining restaurant. We want, within each of those courses, to create as much opportunity for surprise, drama, magic, laughter, the fireworks that are possible within a dining experience. We definitely try to incorporate a lot of whimsy into what we do.\u003c/p>\n\u003cp class=\"p1\">\u003cb>Woman:\u003c/b> This is so cute!\u003c/p>\n\u003cp class=\"p1\">\u003cb>Shelton:\u003c/b> A lot of it is drawn from childhood stories and fantasy.\u003c/p>\n\u003cp class=\"p1\">\u003cb>Woman:\u003c/b> That’s a little fairy house.\u003c/p>\n\u003cp class=\"p1\">\u003cb>Shelton:\u003c/b> I actually got my culinary degree from an art school, and we have a workshop on-site that we can use to not only make some of our tablescapes, we do make a lot of our plateware as well, when what we want just doesn’t exist out there. First up, in these seashells, we have our nod to the sea fairies. It’s a very participatory environment here.\u003c/p>\n\u003cp class=\"p1\">\u003cb>Chef:\u003c/b> Plate them this way so they’re more like a crown.\u003c/p>\n\u003cp class=\"p1\">\u003cb>Shelton:\u003c/b> All of the staff gets to weigh in on what’s the experience like, how do we serve it, what the food is. And that’s three months of work, followed up with three months of recipe testing. And that’s where the menus come from. Tonight, we’re super excited to present the Feast of Moss Woods. The original inspiration for this theme was the idea of coming upon a secret feast in the forest, left behind by sprites and other forest creatures. And what magical treasures of the woods would they have been feasting on but mushrooms? It’s based on the idea of foraging for your food. We have to hide 84 plates of food within the tablescape before people sit down. There’s actually a secret bite that they don’t discover until considerably later in the menu, and they have to actually use a compass to find it.\u003c/p>\n\u003cp class=\"p1\">\u003cb>Woman:\u003c/b> [ Gasps ] Ah! [ Laughs ]\u003c/p>\n\u003cp class=\"p1\">\u003cb>Shelton:\u003c/b> These are royal trumpet mushrooms. This is the lion’s mane mushroom. These are oyster mushrooms. Mushrooms are so diverse. We’re trying to take each mushroom and showcase it to the best of our ability for its look, its flavor, its texture — the qualities that it has that make it unique. You have so much opportunity, even in, like, a specific bite of food, because not only do you get to kind of create, like, a special firework, but there’s sort of the law of diminishing returns. Like, once you eat it, it’s gone.\u003c/p>\n\u003cp class=\"p1\">\u003cb>Man:\u003c/b> Wow. Yeah.\u003c/p>\n\u003cp class=\"p1\">\u003cb>Woman:\u003c/b> Yeah, that’s really good.\u003c/p>\n\u003cp class=\"p1\">\u003cb>Shelton:\u003c/b> People go, “Oh, I wish I had six more of those.” And that’s why sometimes a single bite of food can be the most fun. There is a lot of trust. You don’t know what’s coming. You have to just kind of go for it. We appreciate the trust our guests put in us, and we try to, in exchange, give them something really unique and really special.\u003c/p>\n\u003cp class=\"p1\">\u003cb>Diner:\u003c/b> Cheers!\u003c/p>\n\u003cp class=\"p1\">\u003cb>Sbrocco:\u003c/b> Before we get into the food and the atmosphere of this very unique spot, right…\u003c/p>\n\u003cp class=\"p1\">\u003cb>Pusin:\u003c/b> Yes. Yes.\u003c/p>\n\u003cp class=\"p1\">\u003cb>Sbrocco:\u003c/b> …I want to talk to you a little bit about — you are into it so much, right, you change your wardrobe?\u003c/p>\n\u003cp class=\"p1\">\u003cb>Pusin:\u003c/b> Yes. Absolutely.\u003c/p>\n\u003cp class=\"p1\">\u003cb>Sbrocco:\u003c/b> According to the theme.\u003c/p>\n\u003cp class=\"p1\">\u003cb>Pusin:\u003c/b> Absolutely. Depending on the theme, I try to dress up in whatever the theme is.\u003c/p>\n\u003cp class=\"p1\">\u003cb>Sbrocco:\u003c/b> Right.\u003c/p>\n\u003cp class=\"p1\">\u003cb>Pusin:\u003c/b> So, for example, when it was, like, eggshells and broken things, we got a little egg hat.\u003c/p>\n\u003cp class=\"p1\">\u003cb>Sbrocco:\u003c/b> [ Laughing ] Is that, you know, over hard or over easy?\u003c/p>\n\u003cp class=\"p1\">\u003cb>Pusin:\u003c/b> I’m an over-medium guy.\u003c/p>\n\u003cp class=\"p1\">\u003cb>Sbrocco:\u003c/b> Okay. Okay. And the theme for… What’s the theme that you went to?\u003c/p>\n\u003cp class=\"p1\">\u003cb>Pusin:\u003c/b> It was Feast of the Moss Woods.\u003c/p>\n\u003cp class=\"p1\">\u003cb>Barron:\u003c/b> Yeah, I did that one, too.\u003c/p>\n\u003cp class=\"p1\">\u003cb>Pusin:\u003c/b> So it was all, like, mushroom-based, right?\u003c/p>\n\u003cp class=\"p1\">\u003cb>Star:\u003c/b> Yep, and fairies.\u003c/p>\n\u003cp class=\"p1\">\u003cb>Pusin:\u003c/b> Yeah, fairies. And I think every dish had some form of mushroom in it, including the desserts.\u003c/p>\n\u003cp class=\"p1\">\u003cb>Barron:\u003c/b> Mm-hmm.\u003c/p>\n\u003cp class=\"p1\">\u003cb>Sbrocco:\u003c/b> It really is an experience, isn’t it, Ciarra?\u003c/p>\n\u003cp class=\"p1\">\u003cb>Barron:\u003c/b> Absolutely.\u003c/p>\n\u003cp class=\"p1\">\u003cb>Sbrocco:\u003c/b> I mean, this is not just about going out and eating a few courses. This is what, 16 courses?\u003c/p>\n\u003cp class=\"p1\">\u003cb>Barron:\u003c/b> 16.\u003c/p>\n\u003cp class=\"p1\">\u003cb>Pusin:\u003c/b> Yeah, it varies, but it’s always a lot.\u003c/p>\n\u003cp class=\"p1\">\u003cb>Sbrocco:\u003c/b> Alright. Tell me about your experience at this experience.\u003c/p>\n\u003cp class=\"p1\">\u003cb>Barron:\u003c/b> Okay, so it was very cute, very tucked away, so I liked that a lot. It was very intimate. What I really enjoyed is how we started out with the welcome tea. It reminded me a lot of miso soup, so that was really nice.\u003c/p>\n\u003cp class=\"p1\">\u003cb>Star:\u003c/b> I also loved the mushroom tea. It had the taste of, like, cream of mushroom soup. It was delicious. One of my favorite parts of the restaurant was that everybody there gets to work cooking the dishes, the front of house and back of house. So you get to see creativity from so many different chefs and people that work there.\u003c/p>\n\u003cp class=\"p1\">\u003cb>Sbrocco:\u003c/b> And what are other dishes then, after the consommé?\u003c/p>\n\u003cp class=\"p1\">\u003cb>Pusin:\u003c/b> One of my favorite ones — there was a Two Rivers trout.\u003c/p>\n\u003cp class=\"p1\">\u003cb>Barron:\u003c/b> That’s my favorite.\u003c/p>\n\u003cp class=\"p1\">\u003cb>Pusin:\u003c/b> That was your favorite?\u003c/p>\n\u003cp class=\"p1\">\u003cb>Barron:\u003c/b> Sierra Trail. Yeah.\u003c/p>\n\u003cp class=\"p1\">\u003cb>Pusin:\u003c/b> It had, like, bubbles? Foam?\u003c/p>\n\u003cp class=\"p1\">\u003cb>Star:\u003c/b> Yeah, foam.\u003c/p>\n\u003cp class=\"p1\">\u003cb>Pusin:\u003c/b> Would you call it foam?\u003c/p>\n\u003cp class=\"p1\">\u003cb>Barron:\u003c/b> Foam. Foam.\u003c/p>\n\u003cp class=\"p1\">\u003cb>Pusin:\u003c/b> It was like foam in the middle of it. It looked just like a river. It had the trout on one side.\u003c/p>\n\u003cp class=\"p1\">\u003cb>Barron:\u003c/b> Yeah, trout two ways.\u003c/p>\n\u003cp class=\"p1\">\u003cb>Pusin:\u003c/b> Trout two ways. That’s right.\u003c/p>\n\u003cp class=\"p1\">\u003cb>Barron:\u003c/b> One trout was smoked with skin on top. It was cooked perfectly. Very, very tender. And then next to it was the trout mousse. And so that’s where you had your trout roe, and you can dip your cracker in there. It was just very cute.\u003c/p>\n\u003cp class=\"p1\">\u003cb>Star:\u003c/b> My favorite dish was the chanterelle toast. It was like this little mini grilled cheese, and then it had a mushroom chanterelle sauce on top. And it was small, but it was just so rich and delicious.\u003c/p>\n\u003cp class=\"p1\">\u003cb>Barron:\u003c/b> Yeah.\u003c/p>\n\u003cp class=\"p1\">\u003cb>Sbrocco:\u003c/b> Where was that placed in the, you know…?\u003c/p>\n\u003cp class=\"p1\">\u003cb>Star:\u003c/b> You know, halfway through.\u003c/p>\n\u003cp class=\"p1\">\u003cb>Pusin:\u003c/b> Yeah, it was somewhere between the tea, the amuse-bouche, and, like, the wild boar sausage.\u003c/p>\n\u003cp class=\"p1\">\u003cb>Barron:\u003c/b> Yeah.\u003c/p>\n\u003cp class=\"p1\">\u003cb>Star:\u003c/b> Right before the wild boar, I think, yeah.\u003c/p>\n\u003cp class=\"p1\">\u003cb>Barron:\u003c/b> Oh, that was one of my favorites.\u003c/p>\n\u003cp class=\"p1\">\u003cb>Pusin:\u003c/b> That was my favorite.\u003c/p>\n\u003cp class=\"p1\">\u003cb>Star:\u003c/b> Yeah, it was really good.\u003c/p>\n\u003cp class=\"p1\">\u003cb>Pusin:\u003c/b> That one was my… That one was one of my favorites.\u003c/p>\n\u003cp class=\"p1\">\u003cb>Barron:\u003c/b> Anything wild.\u003c/p>\n\u003cp class=\"p1\">\u003cb>Sbrocco:\u003c/b> Alright. You go, Jean. We’ll go around the table with the wild boar.\u003c/p>\n\u003cp class=\"p1\">\u003cb>Star:\u003c/b> It was a wild boar sausage. And I’m not, like, someone who eats wild boar all the time. But I thought that the sausage was, like, a little bit spicy, but not too spicy. And it just went really well with some of the little mushroom accoutrements they had.\u003c/p>\n\u003cp class=\"p1\">\u003cb>Barron:\u003c/b> Another one that was an immediate favorite — it was towards the beginning — was the shiitake taco.\u003c/p>\n\u003cp class=\"p1\">\u003cb>Pusin:\u003c/b> Yeah.\u003c/p>\n\u003cp class=\"p1\">\u003cb>Barron:\u003c/b> It was basically a shiitake mushroom taco. It was, like, the size of your pinkie.\u003c/p>\n\u003cp class=\"p1\">\u003cb>Sbrocco:\u003c/b> A tiny taco.\u003c/p>\n\u003cp class=\"p1\">\u003cb>Barron:\u003c/b> Yeah, a tiny taco. I don’t know if you guys can tell me — was it cold? Because I feel like when I…\u003c/p>\n\u003cp class=\"p1\">\u003cb>Pusin:\u003c/b> Mm-hmm.\u003c/p>\n\u003cp class=\"p1\">\u003cb>Barron:\u003c/b> Okay. It was invigorating. It just turned my senses up. I loved it. It kind of gave off like an oyster or like a shrimp type of texture. And you will definitely want more than one.\u003c/p>\n\u003cp class=\"p1\">\u003cb>Pusin:\u003c/b> Yeah. You want like a 12-pack.\u003c/p>\n\u003cp class=\"p1\">\u003cb>Barron:\u003c/b> Yes, I need a 12-pack.\u003c/p>\n\u003cp class=\"p1\">\u003cb>Sbrocco:\u003c/b> Was this a favorite of yours, too?\u003c/p>\n\u003cp class=\"p1\">\u003cb>Barron:\u003c/b> 14.\u003c/p>\n\u003cp class=\"p1\">\u003cb>Pusin:\u003c/b> I loved the Shiitaco.\u003c/p>\n\u003cp class=\"p1\">\u003cb>Star:\u003c/b> One of my other favorite dishes that we had was the chawanmushi. So, it is a steamed custard, comes in a little cup with a black trumpet mushroom. Really smooth custard, served warm. Every little bite is just very delicate.\u003c/p>\n\u003cp class=\"p1\">\u003cb>Pusin:\u003c/b> That’s another nice thing about the Merchant Roots, is, like, you don’t know what’s going to inspire these folks from menu to menu, and so you’ll get, like, these little pops of other cultures.\u003c/p>\n\u003cp class=\"p1\">\u003cb>Star:\u003c/b> Probably the only dinner I’ve had a taco and a chawanmushi at the same time.\u003c/p>\n\u003cp class=\"p1\">\u003cb>Pusin:\u003c/b> There you go. [ Laughter ]\u003c/p>\n\u003cp class=\"p1\">\u003cb>Sbrocco:\u003c/b> What was another favorite?\u003c/p>\n\u003cp class=\"p1\">\u003cb>Pusin:\u003c/b> Yeah, there was a mole dish with a porcini mushroom. It was wrapped in a leaf. It was delightful. All the flavors are great, but that one was a standout.\u003c/p>\n\u003cp class=\"p1\">\u003cb>Barron:\u003c/b> Yeah.\u003c/p>\n\u003cp class=\"p1\">\u003cb>Star:\u003c/b> From the whole meal, I was thinking, what are they going to do for dessert? How are we going to have a mushroom dessert?\u003c/p>\n\u003cp class=\"p1\">\u003cb>Pusin:\u003c/b> Mm-hmm.\u003c/p>\n\u003cp class=\"p1\">\u003cb>Star:\u003c/b> So, we were drinking this small milkshake and I was like, what is this? This is so delicious, this mini milkshake, and it sort of tastes like maple. And then we come to find out that this is a milkshake that’s made with a candy cap mushroom, which I learned about that evening. So, the dinner ended with a mushroom milkshake, which was unexpected.\u003c/p>\n\u003cp class=\"p1\">\u003cb>Barron:\u003c/b> Yes. By the end of dinner, I was very, very full, but I enjoyed the fairy mound. So, the fairy mound is dusted to look like a mound, but inside is coconut. So, who doesn’t like coconut? I love coconut. Very chewy, not too sweet. And then the candy cap cannele — you have to forage it out of the little fairy house. And so that was really fun to find. It had a, like, French toast, bread pudding almost kind of texture, and also very fragrant.\u003c/p>\n\u003cp class=\"p1\">\u003cb>Sbrocco:\u003c/b> And did anybody get the wine pairings?\u003c/p>\n\u003cp class=\"p1\">\u003cb>Pusin:\u003c/b> I did get the wine pairing. They had a wine from Greece that is aged on the bottom of the ocean.\u003c/p>\n\u003cp class=\"p1\">\u003cb>Barron:\u003c/b> Yes!\u003c/p>\n\u003cp class=\"p1\">\u003cb>Pusin:\u003c/b> Like, it was super cool. It came in an amphora.\u003c/p>\n\u003cp class=\"p1\">\u003cb>Star:\u003c/b> Wow.\u003c/p>\n\u003cp class=\"p1\">\u003cb>Pusin:\u003c/b> So, it’s always, like, just weird stuff, which is why I come back every single time.\u003c/p>\n\u003cp class=\"p1\">\u003cb>Sbrocco:\u003c/b> Well, it isn’t an inexpensive place. Did you feel like, for the experience, you got value from that?\u003c/p>\n\u003cp class=\"p1\">\u003cb>Barron:\u003c/b> Absolutely. I couldn’t wait to see the person who suggested the restaurant. I was like, oh, let’s see. It’s probably, yeah, over the top. But I am so grateful that you suggested this place. The experience was very immersive, and it was nice to have someone that’s just cooking from their passion and sharing that dish with you. So I really appreciate you for inviting us there.\u003c/p>\n\u003cp class=\"p1\">\u003cb>Sbrocco:\u003c/b> Love it. Alright. If you would like to try Merchant Roots, it’s located on Mission Street in San Francisco, and the average multicourse tab per person without drinks is around $300. Ciarra has uncovered another rare find — Oakland’s very first Haitian restaurant. It’s a vibrant spot offering crackling griot, hearty stews, and other traditional dishes that are tough to come by in the Bay. Tucked into Swan’s Market in Oakland, it’s T’chaka. \u003cspan class=\"s1\">♪♪\u003c/span> \u003cspan class=\"s1\">♪♪\u003c/span>\u003c/p>\n\u003cp class=\"p1\">\u003cb>Felix:\u003c/b> I was born in Haiti, but when I came here, I missed something — the culture, the food. So I said to myself, “I have to become an ambassador for my country.” So I have to create something where Haitian people are going to come and sit, drink, eat, and having fun. T’chaka was my mom’s favorite dish. So I said to myself, “I think I’m going to call the restaurant T’chaka.” T’chaka is made with corn, beans, and pumpkin soup, and you can add either turkey neck or salted pork. So, this is a dish people used to make back home when we were colonized by the French and Spanish people. So, when they go to work early in the morning, they spend the whole day at work, and when they get back at night, they had to cook something very healthy that will give them the energy to get back to work the next day. Whenever you have a bowl of it, it’s like you’re full of energy. [ All cheering ] Whenever you have, like, a party, like a festival back home, the first dish Haitian people are going to have at the table is going to be griot. You get, like, a pork shoulder to marinate. And you always have to have the green onions, the garlic, and the thyme. They got to be there. That will give you the taste that you’re looking for. The next day, you boil it and fry it. So you’re going to have that crispiness on the outside, and the inside is going to be so moist. You cannot have any Haitian dishes without pikliz. It’s shredded cabbage, carrots, and a lot of Scotch bonnets, because pikliz got to be spicy. And the best way to eat it is with the plantain. Every time I put a piece in my mouth, it just tastes — boom! So good. At T’chaka, people that come to the restaurant, they have an experience. Feels like they are in the Caribbean. I’m happy to see so many faces at night enjoying the food, enjoying the drinks. And when they’re leaving, they say, “Hey, you know what? We’ll be back soon because that food is just amazing.” [ All cheering ]\u003c/p>\n\u003cp class=\"p1\">\u003cb>Man:\u003c/b> That’s crazy.\u003c/p>\n\u003cp class=\"p1\">\u003cb>Sbrocco:\u003c/b> Alright, Ciarra, now, this is really unique, isn’t it? We talked about the uniqueness of Merchant Roots, but Oakland’s first Haitian restaurant.\u003c/p>\n\u003cp class=\"p1\">\u003cb>Barron:\u003c/b> Yes, Oakland’s first Haitian Caribbean restaurant.\u003c/p>\n\u003cp class=\"p1\">\u003cb>Sbrocco:\u003c/b> Okay. Okay.\u003c/p>\n\u003cp class=\"p1\">\u003cb>Barron:\u003c/b> So, when it comes to culture, I’m just so open to trying different foods.\u003c/p>\n\u003cp class=\"p1\">\u003cb>Sbrocco:\u003c/b> Absolutely.\u003c/p>\n\u003cp class=\"p1\">\u003cb>Barron:\u003c/b> But I also love spice. So I hope you guys love that spice as well.\u003c/p>\n\u003cp class=\"p1\">\u003cb>Sbrocco:\u003c/b> Bring on the spice! Right?\u003c/p>\n\u003cp class=\"p1\">\u003cb>Pusin:\u003c/b> Oh, it’s good. We started with empanadas.\u003c/p>\n\u003cp class=\"p1\">\u003cb>Barron:\u003c/b> Yes.\u003c/p>\n\u003cp class=\"p1\">\u003cb>Pusin:\u003c/b> And we also had the… name who I will butcher, but it was the taro root that was deep fried.\u003c/p>\n\u003cp class=\"p1\">\u003cb>Star:\u003c/b> Akra.\u003c/p>\n\u003cp class=\"p1\">\u003cb>Pusin:\u003c/b> The akra. Thank you.\u003c/p>\n\u003cp class=\"p1\">\u003cb>Star:\u003c/b> Akra.\u003c/p>\n\u003cp class=\"p1\">\u003cb>Barron:\u003c/b> Yeah, you got it.\u003c/p>\n\u003cp class=\"p1\">\u003cb>Star:\u003c/b> Also one of my favorites.\u003c/p>\n\u003cp class=\"p1\">\u003cb>Pusin:\u003c/b> Thank you. I loved that one. Fried taro root, right, which was new to me. I haven’t had that texture before, but it was like a very nice, kind of, like, melty, gooey, but also kept together by the frying. And then it had pikliz on the side. And that was also new to me, but it’s like a spicy coleslaw.\u003c/p>\n\u003cp class=\"p1\">\u003cb>Barron:\u003c/b> Yeah.\u003c/p>\n\u003cp class=\"p1\">\u003cb>Pusin:\u003c/b> So, for folks that are going there, know that it is not coleslaw. It is spicy. So, like, that’s an important… That’s an important caveat.\u003c/p>\n\u003cp class=\"p1\">\u003cb>Star:\u003c/b> Yes.\u003c/p>\n\u003cp class=\"p1\">\u003cb>Sbrocco:\u003c/b> And when you go, what do you start with?\u003c/p>\n\u003cp class=\"p1\">\u003cb>Barron:\u003c/b> Well, first I start with the drinks and… [ Laughter ] Nonalcoholic, but I start with the passion fruit or the ginger sorrel. So, I believe in the benefits. It’s very refreshing. It feels very tropical. It gets me really excited and just ready to try all the next, like, hot flavors. And then we start off with the jerk chicken wings. So, these are smoked, very, very spicy. And the skin is crispy, but it has, like, a little sweet texture from the jerk. And you can’t just have one order. So we left with about two extra orders for the way home. So, I also had the chicken and beef patties as well. So, I call them patties, but they call them empanadas because the place also has, like, I think Spanish and Haitian because, like, Creole, right? And so those are very, very good, and so I really love starting with those dishes.\u003c/p>\n\u003cp class=\"p1\">\u003cb>Sbrocco:\u003c/b> Yeah.\u003c/p>\n\u003cp class=\"p1\">\u003cb>Star:\u003c/b> My favorite thing was the loaded tostones.\u003c/p>\n\u003cp class=\"p1\">\u003cb>Barron:\u003c/b> Ooh!\u003c/p>\n\u003cp class=\"p1\">\u003cb>Star:\u003c/b> So, that was one of the appetizers. So, a tostone is, like, a little, round, twice-fried green plantain.\u003c/p>\n\u003cp class=\"p1\">\u003cb>Sbrocco:\u003c/b> Mm-hmm.\u003c/p>\n\u003cp class=\"p1\">\u003cb>Star:\u003c/b> And then it has some shredded pork on top, and then a little bit of that pikliz on top, and then some pickled onions as well. So, it was like a delicious, like, one bite where you get the tostone and the pork and the cabbage all together.\u003c/p>\n\u003cp class=\"p1\">\u003cb>Sbrocco:\u003c/b> Fantastic.\u003c/p>\n\u003cp class=\"p1\">\u003cb>Star:\u003c/b> I also had the passion fruit, and it went well with the spicy meal, because I got the spicy shrimp, and they were so spicy that I needed the passion fruit juice to cool it down.\u003c/p>\n\u003cp class=\"p1\">\u003cb>Sbrocco:\u003c/b> And it’s fruity and lovely and sweet, but it has such a nice core of acid.\u003c/p>\n\u003cp class=\"p1\">\u003cb>Star:\u003c/b> Yeah, they worked well together.\u003c/p>\n\u003cp class=\"p1\">\u003cb>Sbrocco:\u003c/b> Yeah.\u003c/p>\n\u003cp class=\"p1\">\u003cb>Pusin:\u003c/b> So, for mains, we had the oxtail stew and we got the curry goat. And so we were trying both of them, and I ordered the oxtail stew. My friend Hillary ordered the curry goat. We ended up switching after a bite because I love goat, right? And so, like, to get a goat dish that’s, like, that deep and flavorful… And it’s almost like the stew in a way, but, like, the flavors are so pronounced inside of the goat themselves. Fantastic.\u003c/p>\n\u003cp class=\"p1\">\u003cb>Sbrocco:\u003c/b> And what was it about the oxtail stew that sort of made you say, “Let me switch”?\u003c/p>\n\u003cp class=\"p1\">\u003cb>Pusin:\u003c/b> Well, nothing. [ Laughter ] No shade against the oxtail stew. I was just, you know… I was with somebody and they’re like, “It’s too goaty or, like, too grassy.” I’m like, “I love it.”\u003c/p>\n\u003cp class=\"p1\">\u003cb>Sbrocco:\u003c/b> Herbaceous.\u003c/p>\n\u003cp class=\"p1\">\u003cb>Pusin:\u003c/b> Exactly. So, we switched for that reason. But we were both helping each other towards the end.\u003c/p>\n\u003cp class=\"p1\">\u003cb>Sbrocco:\u003c/b> Have you had the oxtail?\u003c/p>\n\u003cp class=\"p1\">\u003cb>Barron:\u003c/b> Absolutely. That is a staple. That is something that you have to get. You can’t share. I mean, I tried to share as well. I literally was sitting there like, I need to bring this by myself.\u003c/p>\n\u003cp class=\"p1\">\u003cb>Sbrocco:\u003c/b> Yeah.\u003c/p>\n\u003cp class=\"p1\">\u003cb>Barron:\u003c/b> So, in this dish, you get very big, chunky pieces of oxtails, but it’s also served with a very aromatic, fluffy rice and beans. And because I love spicy, I get the habanero hot sauce and I top it off in my oxtails.\u003c/p>\n\u003cp class=\"p1\">\u003cb>Star:\u003c/b> My husband got the griot. So, that’s like the fried pork, kind of similar to chicharrones. Delicious. Big chunks of pork that are really crispy, and then some parts are a little more tender.\u003c/p>\n\u003cp class=\"p1\">\u003cb>Barron:\u003c/b> Yes.\u003c/p>\n\u003cp class=\"p1\">\u003cb>Star:\u003c/b> Super savory. So, we loved the griot as well.\u003c/p>\n\u003cp class=\"p1\">\u003cb>Pusin:\u003c/b> The place itself, like, tropical is a good way to frame it. Like a tropical diner, almost, is like how I would describe it.\u003c/p>\n\u003cp class=\"p1\">\u003cb>Barron:\u003c/b> Or, like, tiki.\u003c/p>\n\u003cp class=\"p1\">\u003cb>Pusin:\u003c/b> Yeah, that could fit.\u003c/p>\n\u003cp class=\"p1\">\u003cb>Star:\u003c/b> It was very family-friendly, too. I invited my friend who has a 4-year-old, and they don’t have a kids menu that I saw, but the kid that I was with thought it was really great.\u003c/p>\n\u003cp class=\"p1\">\u003cb>Pusin:\u003c/b> Yeah, my nephew would like this place because it doesn’t have a lot of green stuff in it.\u003c/p>\n\u003cp class=\"p1\">\u003cb>Sbrocco:\u003c/b> Right.\u003c/p>\n\u003cp class=\"p1\">\u003cb>Star:\u003c/b> Actually, that’s very true. Nobody forced us to eat too many vegetables, except for some of the pikliz.\u003c/p>\n\u003cp class=\"p1\">\u003cb>Pusin:\u003c/b> Yeah, exactly.\u003c/p>\n\u003cp class=\"p1\">\u003cb>Pusin:\u003c/b> Yeah, yeah. Also reasonably priced. Like, I would go, like, if I’m in that area — Old Oakland, I think, right?\u003c/p>\n\u003cp class=\"p1\">\u003cb>Barron:\u003c/b> Yes, it’s called Old Oakland.\u003c/p>\n\u003cp class=\"p1\">\u003cb>Pusin:\u003c/b> It’s so good. Yeah. I want to go back.\u003c/p>\n\u003cp class=\"p1\">\u003cb>Sbrocco:\u003c/b> Alright, if you’d like to try T’chaka, it’s located on Washington Street inside Swan’s Market in Oakland. The average multicourse tab per person without drinks is around $50. Jean’s hometown favorite has held a special place in her heart ever since she was a child. A mouthwatering assortment of pastries, croissants, and breakfast dishes have kept locals lining up for over 40 years. Nestled in a quiet corner of Novato since 1983, it’s Creekside Bakery. \u003cspan class=\"s1\">♪♪\u003c/span>\u003c/p>\n\u003cp class=\"p1\">\u003cb>Danny:\u003c/b> The interesting thing about Creekside is that there’s a lot of tradition and lineage here. We really care about what we’re doing. It’s a huge passion for us. Hospitality is probably more important than the food. How you doing?\u003c/p>\n\u003cp class=\"p1\">\u003cb>Woman:\u003c/b> Good, good.\u003c/p>\n\u003cp class=\"p1\">\u003cb>Danny:\u003c/b> Yeah? Fam’s good? ¿Cómo están, chicas?\u003c/p>\n\u003cp class=\"p1\">\u003cb>Woman:\u003c/b> We’re good.\u003c/p>\n\u003cp class=\"p1\">\u003cb>Danny:\u003c/b> Hey, babe. [ Laughing ] Oh, my gosh! The bakery’s been open for 43 years continuously.\u003c/p>\n\u003cp class=\"p1\">\u003cb>Cindy:\u003c/b> Tony Albini was the first baker here, and owner. And then one of his bakers, Glen Sullivan, had it for seven years. And then we bought it in 2005. We love to have variety. We just love the cases to be brimming full.\u003c/p>\n\u003cp class=\"p1\">\u003cb>Danny:\u003c/b> We try to stay rooted in tradition, but also expanding where we can and really trying to push the boundary on flavor and technique.\u003c/p>\n\u003cp class=\"p1\">\u003cb>Baker:\u003c/b> I’m just laminating the croissant dough. It starts with three layers and it ends up being 24.\u003c/p>\n\u003cp class=\"p1\">\u003cb>Danny:\u003c/b> We have an incredible Viennoiserie program. You’ll see a lot of classic French pastries, like Paris-Brest, classic sort of American Danish that you don’t see anymore. Things like butter horns, bear claws, and then a lot of cool savory items. We have certain recipes we’ve been using for 43 years because they’re not broken.\u003c/p>\n\u003cp class=\"p1\">\u003cb>Cindy:\u003c/b> These are a lot of Tony’s handwritten recipes. My favorite, I think, of all is the Swedish Dream. When I bake it, every time I bake it and I can smell it in the oven, it’s just…\u003c/p>\n\u003cp class=\"p1\">\u003cb>Danny:\u003c/b> We have a sprinkle cookie that kids have been getting here since forever, and now they’re not kids anymore, and they’re getting them for their kids. We keep them in the same place in the case. It’s at eye level for the kids. It’s a good sell. The Princess cake is a classic Swedish cake. Maybe I’m biased, but I think ours is really, really, really special.\u003c/p>\n\u003cp class=\"p1\">\u003cb>Cindy:\u003c/b> I think it’s just the sleek look of the marzipan. It’s just a light dusting of powdered sugar with a marzipan rose, and it’s just pristine.\u003c/p>\n\u003cp class=\"p1\">\u003cb>Woman:\u003c/b> Mmm! Oh, my God, it’s delicious.\u003c/p>\n\u003cp class=\"p1\">\u003cb>Danny:\u003c/b> My mother is the hardest-working person in the food industry that I’ve ever met. She’s an incredible chef to be mentored under. She’s always here. I’m always here. My sister’s always here. It’s pretty amazing to have someone who’s been making it for 40 years still make your cakes. And you can really taste that difference in quality in the cake. We have every generation here. I have people that are literally just born, a couple days old, to people that are over 100 years old, picking up their birthday cake. Obviously, we cook to nourish people and to take care of people. That’s why we cook and bake, and to make sure people are having a great time and enjoying it is the best thing for us.\u003c/p>\n\u003cp class=\"p1\">\u003cb>Sbrocco:\u003c/b> Alright, Jean, this is kind of one of those places — if you know, you know, right? I mean, it’s a hidden gem.\u003c/p>\n\u003cp class=\"p1\">\u003cb>Star:\u003c/b> A hidden gem, for sure.\u003c/p>\n\u003cp class=\"p1\">\u003cb>Barron:\u003c/b> Yeah, it is.\u003c/p>\n\u003cp class=\"p1\">\u003cb>Star:\u003c/b> I grew up in Novato, so I have been going to this bakery since I was in second grade.\u003c/p>\n\u003cp class=\"p1\">\u003cb>Sbrocco:\u003c/b> Yeah.\u003c/p>\n\u003cp class=\"p1\">\u003cb>Star:\u003c/b> It’s in the back of this shopping center, right on the Novato Creek, right by this beautiful bridge that you could walk across to go to the library. So, I actually feel like I may have eaten every single thing on the Creekside menu. But one of the best things, I think, is the breakfast sandwich. They make their own brioche bun in-house, so the bun is, like, super, super soft. And then it has a really soft-cooked scrambled egg and it has a little bit of a spicy aioli. I also like to get bacon and avocado on it. And I just think it’s a wonderful breakfast sandwich.\u003c/p>\n\u003cp class=\"p1\">\u003cb>Sbrocco:\u003c/b> Yeah.\u003c/p>\n\u003cp class=\"p1\">\u003cb>Star:\u003c/b> And my husband and I always talk about how good the ham & cheese croissant is there. And we kind of go different places all across the world, and we’ll compare the ham & cheese croissant at Creekside to other places.\u003c/p>\n\u003cp class=\"p1\">\u003cb>Barron:\u003c/b> It’s a plethora of things. When you go in there, it’s a feast for your eyes. I ended up getting the apple pecan chicken salad, and it was very delicious. It was served on two milk buns, very fluffy. And you know how they kind of say, like, they have “slap your mama” sauce? Well, this is kind of like “slap your mama” chicken salad. [ Laughter ] So it was really, really good. Like, you wouldn’t want to share. And so, we also ended up getting the vegetarian sandwich, and it was a nine-grain and loads of veggies. So, cucumbers, avocados. But one of my favorite aspects of that dish was the Toma cheese.\u003c/p>\n\u003cp class=\"p1\">\u003cb>Star:\u003c/b> Mm-hmm.\u003c/p>\n\u003cp class=\"p1\">\u003cb>Barron:\u003c/b> But, yeah, it was so smooth and soft. I enjoyed it so much.\u003c/p>\n\u003cp class=\"p1\">\u003cb>Pusin:\u003c/b> I got the salmon toast.\u003c/p>\n\u003cp class=\"p1\">\u003cb>Star:\u003c/b> Mm-hmm.\u003c/p>\n\u003cp class=\"p1\">\u003cb>Pusin:\u003c/b> The bread was a showstopper. I wanted to take some home with me, but, like, I’m not allowed to have bread in my house. Otherwise I will eat all the bread in my house. But it was so good. It has little dill on it, herbed chive cream cheese.\u003c/p>\n\u003cp class=\"p1\">\u003cb>Barron:\u003c/b> Ooh!\u003c/p>\n\u003cp class=\"p1\">\u003cb>Pusin:\u003c/b> It’s very sumptuous.\u003c/p>\n\u003cp class=\"p1\">\u003cb>Barron:\u003c/b> It was huge. I seen someone order one, so it was a decent size.\u003c/p>\n\u003cp class=\"p1\">\u003cb>Sbrocco:\u003c/b> Right.\u003c/p>\n\u003cp class=\"p1\">\u003cb>Barron:\u003c/b> Yeah.\u003c/p>\n\u003cp class=\"p1\">\u003cb>Sbrocco:\u003c/b> And what about the pastries?\u003c/p>\n\u003cp class=\"p1\">\u003cb>Barron:\u003c/b> Oh! Princess cake! [ Laughter ]\u003c/p>\n\u003cp class=\"p1\">\u003cb>Both:\u003c/b> Oh, you got the princess cake!\u003c/p>\n\u003cp class=\"p1\">\u003cb>Barron:\u003c/b> Yes.\u003c/p>\n\u003cp class=\"p1\">\u003cb>Star:\u003c/b> Okay.\u003c/p>\n\u003cp class=\"p1\">\u003cb>Barron:\u003c/b> That princess cake caught my eye as soon as I walked in the door. It’s just beautiful. They have a green and pink, and it has marzipan.\u003c/p>\n\u003cp class=\"p1\">\u003cb>Star:\u003c/b> Yeah.\u003c/p>\n\u003cp class=\"p1\">\u003cb>Barron:\u003c/b> And so, on top, there is a rose as well. And then it’s chewy. And so, it was really nice. I also had the raspberry almond shortbread cookie.\u003c/p>\n\u003cp class=\"p1\">\u003cb>Star:\u003c/b> The cookie? Cookie. Yeah.\u003c/p>\n\u003cp class=\"p1\">\u003cb>Barron:\u003c/b> Ah! And so, in the middle was a tacky almond drop.\u003c/p>\n\u003cp class=\"p1\">\u003cb>Sbrocco:\u003c/b> Mm!\u003c/p>\n\u003cp class=\"p1\">\u003cb>Barron:\u003c/b> And it paired very well with the raspberry.\u003c/p>\n\u003cp class=\"p1\">\u003cb>Star:\u003c/b> They have so many good cookies. And you buy them by the pound, and so every year at Christmas, we go and get a big box of cookies that we keep at our house and eat on Christmas morning. And there has actually been an incident in our family once where we ate all the cookies before Christmas, and so my mom had to go back and get another box of cookies.\u003c/p>\n\u003cp class=\"p1\">\u003cb>Sbrocco:\u003c/b> I was gonna say, Santa was pretty mad he didn’t get a cookie, right?\u003c/p>\n\u003cp class=\"p1\">\u003cb>Pusin:\u003c/b> I did notice, like, they were weighing the cookie that I bought.\u003c/p>\n\u003cp class=\"p1\">\u003cb>Star:\u003c/b> Yeah.\u003c/p>\n\u003cp class=\"p1\">\u003cb>Pusin:\u003c/b> I bought two of them and I was like, I don’t think I’ve ever seen a cookie weighed before.\u003c/p>\n\u003cp class=\"p1\">\u003cb>Star:\u003c/b> Yeah.\u003c/p>\n\u003cp class=\"p1\">\u003cb>Pusin:\u003c/b> Like, it was such an interesting experience.\u003c/p>\n\u003cp class=\"p1\">\u003cb>Sbrocco:\u003c/b> Cookie by the pound.\u003c/p>\n\u003cp class=\"p1\">\u003cb>Star:\u003c/b> It’s a cookie by the pound. My personal favorite is the chocolate dot cookie.\u003c/p>\n\u003cp class=\"p1\">\u003cb>Barron:\u003c/b> Ooh!\u003c/p>\n\u003cp class=\"p1\">\u003cb>Star:\u003c/b> So, it’s a shortbread cookie that has a really good chocolate dot in the middle. The chocolate is tempered perfectly, so it’s like the perfect gooey chocolate center.\u003c/p>\n\u003cp class=\"p1\">\u003cb>Pusin:\u003c/b> The cookies were great. We also got the seasonal tarts. I just like fruit tarts — my mom’s favorite. So I always order one just to like, okay, let’s see how this one goes. Super tasty. They had blackberries and I think one had some raspberries on there. All the things there were absolutely top-tier. And a pro tip is if you do get a black coffee, they will just refill it for free, so that was really nice.\u003c/p>\n\u003cp class=\"p1\">\u003cb>Sbrocco:\u003c/b> Oh, there you go.\u003c/p>\n\u003cp class=\"p1\">\u003cb>Barron:\u003c/b> Great tip.\u003c/p>\n\u003cp class=\"p1\">\u003cb>Pusin:\u003c/b> I learned that.\u003c/p>\n\u003cp class=\"p1\">\u003cb>Barron:\u003c/b> I also had the Japanese milk bread cinnamon roll. And so, that’s very different. So, in the Bay Area, a cinnamon roll is a staple. I love cinnamon rolls for the greasy and all that type of jazz. But at this place, I really appreciated all of the homemade ingredients that went into all of the dishes. Actually, a local recommended it. He — I could tell he was there for two days in a row because he said, “Yesterday it was so packed,” and he was there again with his son. And so we just had to try the cinnamon roll, and it was amazing.\u003c/p>\n\u003cp class=\"p1\">\u003cb>Sbrocco:\u003c/b> What did you drink alongside? You know, when you have…\u003c/p>\n\u003cp class=\"p1\">\u003cb>Barron:\u003c/b> Yeah. We went through the menu.\u003c/p>\n\u003cp class=\"p1\">\u003cb>Pusin:\u003c/b> Mm-hmm.\u003c/p>\n\u003cp class=\"p1\">\u003cb>Barron:\u003c/b> I had the pumpkin pie latte.\u003c/p>\n\u003cp class=\"p1\">\u003cb>Star:\u003c/b> Wow.\u003c/p>\n\u003cp class=\"p1\">\u003cb>Sbrocco:\u003c/b> Mm.\u003c/p>\n\u003cp class=\"p1\">\u003cb>Barron:\u003c/b> You know, I’m against violence, but another “slap your mama” drink. [ Laughter ] That drink was really nice. And then the espresso — that was actually my highlight. I really like royal treatment, and so the cup was, like…\u003c/p>\n\u003cp class=\"p1\">\u003cb>Sbrocco:\u003c/b> The princess treatment.\u003c/p>\n\u003cp class=\"p1\">\u003cb>Barron:\u003c/b> Yes.\u003c/p>\n\u003cp class=\"p1\">\u003cb>Sbrocco:\u003c/b> Okay.\u003c/p>\n\u003cp class=\"p1\">\u003cb>Barron:\u003c/b> The cup was, like, Tiffany blue, and it had a heap of brown sugar on the side with a gold stirring spoon, so…\u003c/p>\n\u003cp class=\"p1\">\u003cb>Pusin:\u003c/b> I feel like I just got a black coffee and, like, now I — now I gotta…\u003c/p>\n\u003cp class=\"p1\">\u003cb>Sbrocco:\u003c/b> Now you’re jealous, aren’t you?\u003c/p>\n\u003cp class=\"p1\">\u003cb>Pusin:\u003c/b> I’m like, I’m usually not in Novato, but now I have an excuse to go back.\u003c/p>\n\u003cp class=\"p1\">\u003cb>Barron:\u003c/b> Oh, definitely have an excuse. Yeah.\u003c/p>\n\u003cp class=\"p1\">\u003cb>Pusin:\u003c/b> 100%.\u003c/p>\n\u003cp class=\"p1\">\u003cb>Sbrocco:\u003c/b> And did you feel like it was affordable?\u003c/p>\n\u003cp class=\"p1\">\u003cb>Barron:\u003c/b> It was extremely affordable. I think I got like 20 items, though. [ Laughter ]\u003c/p>\n\u003cp class=\"p1\">\u003cb>Pusin:\u003c/b> Yeah, I mean, like for me, coming…\u003c/p>\n\u003cp class=\"p1\">\u003cb>Sbrocco:\u003c/b> You took your assignment seriously. I like that. I like that.\u003c/p>\n\u003cp class=\"p1\">\u003cb>Barron:\u003c/b> I took my assignment seriously.\u003c/p>\n\u003cp class=\"p1\">\u003cb>Pusin:\u003c/b> Very affordable.\u003c/p>\n\u003cp class=\"p1\">\u003cb>Sbrocco:\u003c/b> Alright. Now they can create their own memories, Jean.\u003c/p>\n\u003cp class=\"p1\">\u003cb>Star:\u003c/b> Yeah. Glad you guys went.\u003c/p>\n\u003cp class=\"p1\">\u003cb>Barron:\u003c/b> Absolutely.\u003c/p>\n\u003cp class=\"p1\">\u003cb>Pusin:\u003c/b> Thank you. Yeah, thank you. Thank you for recommending it.\u003c/p>\n\u003cp class=\"p1\">\u003cb>Sbrocco:\u003c/b> Alright. If you would like to try Creekside Bakery, it’s located on Grant Avenue in Novato, and the average multicourse tab per person without drinks is around $25. Looking for more Bay Area bites you’ve just got to try?\u003c/p>\n\u003cp class=\"p1\">\u003cb>Phillips:\u003c/b> [ Laughs ]\u003c/p>\n\u003cp class=\"p1\">\u003cb>Sbrocco:\u003c/b> Check out “Cecilia Tries It” online at kqed.org/checkplease. I have to thank my amazing guests on this week’s show. Jean Star, who shared her nostalgia for Novato’s Creekside Bakery. Ciarra Barron, who introduced us to Haitian delights at T’chaka in Oakland. And Yev Pusin, who enjoys each and every culinary adventure at Merchant Roots in San Francisco. Join us next time when three more guests will recommend their favorite spots on “Check, Please! Bay Area.” I’m Leslie Sbrocco, and I’ll see you then. Cheers, everyone. Cheers! Whoo-hoo! [ Glasses clinking ]\u003c/p>\n\u003cp>[ad floatright]\u003c/p>\n\u003cp class=\"p1\">\u003cb>Shelton:\u003c/b> The welcome tea — it’s a really fun setup. It gives people a little opportunity to sort of build suspense before the menu begins. People get a little dose of our outdoor patio while they watch the mushroom tea literally anti-gravity infuse in these really cool coffee machines that we have. When that gets served, we bring a little truffle-buttered crumpet along the side. So it’s really just a very warming, delicate, but at the same time, rich mushroom experience to kick-start the menu.\u003c/p>\n\n",
"blocks": [],
"excerpt": null,
"status": "publish",
"parent": 0,
"modified": 1778197935,
"stats": {
"hasAudio": false,
"hasVideo": false,
"hasChartOrMap": false,
"iframeSrcs": [],
"hasGoogleForm": false,
"hasGallery": false,
"hasHearkenModule": false,
"hasPolis": false,
"paragraphCount": 14,
"wordCount": 6408
},
"headData": {
"title": "Check, Please! Bay Area reviews: Merchant Roots, T’Chaka, Creekside Bakery | KQED",
"description": "Bay Area locals try immersive fine dining in San Francisco, comforting Haitian food in Oakland and a neighborhood-favorite bakery in Novato.",
"ogTitle": "",
"ogDescription": "",
"ogImgId": "",
"twTitle": "",
"twDescription": "",
"twImgId": "",
"socialDescription": "Bay Area locals try immersive fine dining in San Francisco, comforting Haitian food in Oakland and a neighborhood-favorite bakery in Novato.",
"schema": {
"@context": "https://schema.org",
"@type": "Article",
"headline": "Check, Please! Bay Area reviews: Merchant Roots, T’Chaka, Creekside Bakery",
"datePublished": "2026-05-07T19:25:25-07:00",
"dateModified": "2026-05-07T16:52:15-07:00",
"image": "https://cdn.kqed.org/wp-content/uploads/2020/02/KQED-OG-Image@1x.png"
}
},
"primaryCategory": {
"termId": 3731,
"slug": "episodes",
"name": "episodes"
},
"videoEmbed": "https://www.youtube.com/watch?v=3OcvRf1d0Vw",
"sticky": false,
"templateType": "standard",
"featuredImageType": "standard",
"excludeFromSiteSearch": "Include",
"articleAge": "0",
"path": "/checkplease/23755/check-please-bay-area-reviews-merchant-roots-tchaka-creekside-bakery",
"audioTrackLength": null,
"parsedContent": [
{
"type": "contentString",
"content": "\u003cdiv class=\"post-body\">\u003cp>\u003cp>\u003cem>Check, Please! Bay Area, \u003c/em>season 21, episode 3, airs Thursday, May 7, at 7:30 pm, on KQED 9. See other \u003ca href=\"http://www.kqed.org/tv/programs/index.jsp?pgmid=14084\" target=\"_blank\" rel=\"noopener noreferrer\">television airtimes\u003c/a>.\u003c/p>\n\u003cp>\u003cspan style=\"font-weight: 400\">In San Francisco’s SoMa district, \u003c/span>\u003cb>Merchant Roots\u003c/b>\u003cspan style=\"font-weight: 400\"> invites diners into an intimate, theatrical and seasonally rotating tasting experience. Our guests where guests “foraged” for playful bites like the Shiitaco, savored dishes like the porcini amaranth tamal with mole negro, and uncovered candy cap canelés. Over in Old Oakland’s Swan’s Market, \u003c/span>\u003cb>T’Chaka\u003c/b>\u003cspan style=\"font-weight: 400\"> celebrates Haitian cuisine in a bright, communal space, serving deeply comforting plates like braised oxtail stew, crispy citrus-marinated griot with crispy tostones, jerk shrimp, and akra, all best enjoyed with Haitian beer. The episode wraps up in Novato at \u003c/span>\u003cb>Creekside Bakery\u003c/b>\u003cspan style=\"font-weight: 400\">, a longtime neighborhood favorite overlooking Novato Creek, where locals line up for buttery ham-and-cheese croissants, smoked salmon toast on house-baked bread, princess cake slices crowned with marzipan roses, and impeccably gooey chocolate dot cookies.\u003c/span>\u003c/p>\n\u003cfigure id=\"attachment_23772\" class=\"wp-caption alignnone\" style=\"max-width: 1920px\">\u003cimg loading=\"lazy\" decoding=\"async\" class=\"wp-image-23772 size-full\" src=\"https://cdn.kqed.org/wp-content/uploads/sites/40/2026/03/2103_f.png\" alt=\"\" width=\"1920\" height=\"1080\" srcset=\"https://cdn.kqed.org/wp-content/uploads/sites/40/2026/03/2103_f.png 1920w, https://cdn.kqed.org/wp-content/uploads/sites/40/2026/03/2103_f-160x90.png 160w, https://cdn.kqed.org/wp-content/uploads/sites/40/2026/03/2103_f-768x432.png 768w, https://cdn.kqed.org/wp-content/uploads/sites/40/2026/03/2103_f-1536x864.png 1536w\" sizes=\"auto, (max-width: 1920px) 100vw, 1920px\">\u003cfigcaption class=\"wp-caption-text\">Host Leslie Sbrocco joins guests Jean Star, Yev Pusin and Ciarra Barron from KQED in San Francisco.\u003c/figcaption>\u003c/figure>\n\u003cp>\u003cspan style=\"color: #2b2b2b\">Get Restaurant Information:\u003c/span>\u003c/p>\n\u003cul>\n\u003cli>\u003ca href=\"https://www.merchantroots.com/\">\u003cstrong>Merchant Roots\u003c/strong> (San Francisco)\u003c/a>\u003c/li>\n\u003cli>\u003ca href=\"https://www.tchakaoak.online/\">\u003cstrong>T’Chaka\u003c/strong> (Oakland)\u003c/a>\u003c/li>\n\u003cli>\u003ca href=\"https://www.creeksidebakery.com/\">\u003cstrong>Creekside Bakery \u003c/strong>(Novato)\u003c/a>\u003c/li>\n\u003c/ul>\n\u003cfigure id=\"attachment_20123\" class=\"wp-caption alignnone\" style=\"max-width: 800px\">\u003cimg loading=\"lazy\" decoding=\"async\" class=\"size-medium wp-image-20123\" src=\"https://cdn.kqed.org/wp-content/uploads/sites/40/2019/04/Leslie-Headshot-Smokey-copy-800x540.jpg\" alt=\"Host Leslie Sbrocco sipping wine\" width=\"800\" height=\"540\">\u003cfigcaption class=\"wp-caption-text\">Host Leslie Sbrocco sipping wine \u003ccite>(Courtesy of Leslie Sbrocco)\u003c/cite>\u003c/figcaption>\u003c/figure>\n\u003cp>My name is Leslie Sbrocco, and I’m the \u003ca href=\"http://ww2.kqed.org/checkplease/host-biography/\" target=\"_blank\" rel=\"noopener noreferrer\">host\u003c/a> of \u003cem>Check, Please! Bay Area\u003c/em>. Each week, I’ll share my tasting notes about the wine, beer and spirits the guests and I drank on set during the taping of the show.\u003c/p>\n\u003cp>\u003cimg loading=\"lazy\" decoding=\"async\" class=\"alignnone size-medium wp-image-23804\" src=\"https://cdn.kqed.org/wp-content/uploads/sites/40/2026/05/2103Wines-2000x2641.jpeg\" alt=\"\" width=\"2000\" height=\"2641\" srcset=\"https://cdn.kqed.org/wp-content/uploads/sites/40/2026/05/2103Wines-2000x2641.jpeg 2000w, https://cdn.kqed.org/wp-content/uploads/sites/40/2026/05/2103Wines-160x211.jpeg 160w, https://cdn.kqed.org/wp-content/uploads/sites/40/2026/05/2103Wines-768x1014.jpeg 768w, https://cdn.kqed.org/wp-content/uploads/sites/40/2026/05/2103Wines-1163x1536.jpeg 1163w, https://cdn.kqed.org/wp-content/uploads/sites/40/2026/05/2103Wines-1551x2048.jpeg 1551w, https://cdn.kqed.org/wp-content/uploads/sites/40/2026/05/2103Wines-scaled.jpeg 1938w\" sizes=\"auto, (max-width: 2000px) 100vw, 2000px\">\u003c/p>\n\u003cp>\u003c/p>\u003c/div>",
"attributes": {
"named": {},
"numeric": []
}
},
{
"type": "component",
"content": "",
"name": "ad",
"attributes": {
"named": {
"label": "fullwidth"
},
"numeric": [
"fullwidth"
]
}
},
{
"type": "contentString",
"content": "\u003cdiv class=\"post-body\">\u003cp>\u003c/p>\n\u003cp>\u003ca href=\"https://www.winebow.com/our-brands/lini-910/lini-910-labrusca-rosso/nv\">\u003cspan style=\"color: #339966\">\u003cstrong>Lini 910 “Labrusca” Lambrusco Rosso\u003c/strong>\u003c/span>\u003c/a>\u003cbr>\n\u003cem>Italy, $19\u003c/em>\u003cbr>\nLini 910 Lambrusco is simply one of the best deals on the wine market today. It’s a versatile sparkling to discover and buy by the case for year-round sipping.\u003c/p>\n\u003cp>The Lini family has been producing artisanal Lambrusco in the Italian region of Emilia since 1910. Currently run by the fourth generation of the family, it’s a female-led producer to know. The wine carries the name “Labrusca,” which refers to the ancient Roman name for indigenous grapes used to make the sunny sparkling red (Rosso) known today as Lambrusco. This ruby-hued, gently fizzy bottling overflows with red berry freshness followed by a crisp, dry finish. It’s an ideal pairing for everything from aged cheeses to spicy Thai curries and smoky barbecue.\u003c/p>\n\u003cp>\u003ca href=\"https://lynmarestate.com\">\u003cspan style=\"color: #339966\">\u003cstrong>Lynmar Estate 2022 “Summit Block” Pinot Noir\u003c/strong>\u003c/span>\u003c/a>\u003cbr>\n\u003cem>Russian River Valley, Sonoma County, California, $93\u003c/em>\u003cbr>\nLooking to splurge on a world-class Pinot Noir? This wine is one to seek out. Described by the winery as a place where “bliss begins,” a perfect way to experience the bliss of Lynmar is by sipping this silky-smooth, elegant Pinot Noir. Crafted from vines planted in a unique spot of their Quail Hill Vineyard, it’s a complex yet approachable red with spicy, dark-berry fruit intensity.\u003c/p>\n\u003cp>Lynmar Estate is a quiet classic. A Northern California producer with a conscience, founders Lynn and Anisya Fritz have cultivated an agricultural destination in the heart of the Russian River Valley. Organically farmed vineyards, acres of vegetable gardens, orchards and olive trees are a treasure trove of delights for their two full-time chefs. Built over a four-decade tenure, Lynmar is a beloved producer with a devoted following of wine and food lovers.\u003c/p>\n\u003cp>\u003ca href=\"https://roblarwinery.com/\">\u003cspan style=\"color: #339966\">\u003cstrong>Roblar 2023 “Gold Collection” Cabernet Franc\u003c/strong>\u003c/span>\u003c/a>\u003cbr>\n\u003cem>Santa Ynez Valley, California $80\u003c/em>\u003cbr>\nThis wine excites me for two reasons: It’s made from Cabernet Franc grapes, and it hails from a producer devoted to making wine, food and art a part of everyday life.\u003c/p>\n\u003cp>Roblar Winery is a family-owned and family-run property situated in the stunning Santa Barbara County wine appellation — the Santa Ynez Valley. Focused on wines from Bordeaux grape varieties, it’s also home to a working farm, art gallery and restaurant.\u003c/p>\n\u003cp>As a fan of the grape variety Cabernet Franc, their opulent bottling is rich and lush with a streak of savory notes and layered dark fruit flavors. It blends the majority of Cabernet Franc with a dollop of Cabernet Sauvignon, its Bordeaux partner. The result is a special, small-production gem to decant and enjoy with a grilled steak, or to stash in your cellar for years to come.\u003c/p>\n\u003ch2>Episode Transcript\u003c/h2>\n\u003cp class=\"p1\">\u003cb>Sbrocco:\u003c/b> Immersive fine dining in San Francisco.\u003c/p>\n\u003cp class=\"p1\">\u003cb>Pusin:\u003c/b> You don’t know what’s going to inspire these folks from menu to menu.\u003c/p>\n\u003cp class=\"p1\">\u003cb>Sbrocco:\u003c/b> Classic bakeshop creations in Novato.\u003c/p>\n\u003cp class=\"p1\">\u003cb>Barron:\u003c/b> I think I got like 20 items. [ Laughter ]\u003c/p>\n\u003cp class=\"p1\">\u003cb>Sbrocco:\u003c/b> And Haitian hospitality in Oakland.\u003c/p>\n\u003cp class=\"p1\">\u003cb>Star:\u003c/b> Big chunks of pork that are really crispy.\u003c/p>\n\u003cp class=\"p1\">\u003cb>Sbrocco:\u003c/b> Just ahead on “Check Please! Bay Area.”\u003c/p>\n\u003cp class=\"p1\">\u003cb>Pusin:\u003c/b> The Shiitaco was great.\u003c/p>\n\u003cp class=\"p1\">\u003cb>Sbrocco:\u003c/b> And it’s a great name, too — the Shiitaco. [ Laughter ] [ Indistinct conversations ]\u003c/p>\n\u003cp class=\"p1\">\u003cb>Sbrocco:\u003c/b> Hi, I’m Leslie Sbrocco. Welcome to “Check, Please! Bay Area,” the show where Bay Area residents review and talk about their favorite restaurants. Now, we have three guests, and each one recommends one of their favorite spots, and the other two go check them out to see what they think. Joining me at the “Check, Please!” table today are pediatric dentist Jean Star; calm, clarity and purpose strategist Ciarra Barron; and head of communications Yev Pusin. Welcome, everyone! Are you ready for a fun show?\u003c/p>\n\u003cp class=\"p1\">\u003cb>Barron:\u003c/b> Absolutely.\u003c/p>\n\u003cp class=\"p1\">\u003cb>Star:\u003c/b> Yeah.\u003c/p>\n\u003cp class=\"p1\">\u003cb>Sbrocco:\u003c/b> Okay. Yev’s restaurant offers a true culinary adventure where every meal tells a story and every course is part of the theme. From fantastical flavors to playful presentations, diners are taken on an immersive journey that changes according to season. Located in San Francisco’s SoMa neighborhood, it’s Merchant Roots. \u003cspan class=\"s1\">♪♪\u003c/span>\u003c/p>\n\u003cp class=\"p1\">\u003cb>Shelton:\u003c/b> Merchant Roots is a multicourse fine-dining restaurant. We want, within each of those courses, to create as much opportunity for surprise, drama, magic, laughter, the fireworks that are possible within a dining experience. We definitely try to incorporate a lot of whimsy into what we do.\u003c/p>\n\u003cp class=\"p1\">\u003cb>Woman:\u003c/b> This is so cute!\u003c/p>\n\u003cp class=\"p1\">\u003cb>Shelton:\u003c/b> A lot of it is drawn from childhood stories and fantasy.\u003c/p>\n\u003cp class=\"p1\">\u003cb>Woman:\u003c/b> That’s a little fairy house.\u003c/p>\n\u003cp class=\"p1\">\u003cb>Shelton:\u003c/b> I actually got my culinary degree from an art school, and we have a workshop on-site that we can use to not only make some of our tablescapes, we do make a lot of our plateware as well, when what we want just doesn’t exist out there. First up, in these seashells, we have our nod to the sea fairies. It’s a very participatory environment here.\u003c/p>\n\u003cp class=\"p1\">\u003cb>Chef:\u003c/b> Plate them this way so they’re more like a crown.\u003c/p>\n\u003cp class=\"p1\">\u003cb>Shelton:\u003c/b> All of the staff gets to weigh in on what’s the experience like, how do we serve it, what the food is. And that’s three months of work, followed up with three months of recipe testing. And that’s where the menus come from. Tonight, we’re super excited to present the Feast of Moss Woods. The original inspiration for this theme was the idea of coming upon a secret feast in the forest, left behind by sprites and other forest creatures. And what magical treasures of the woods would they have been feasting on but mushrooms? It’s based on the idea of foraging for your food. We have to hide 84 plates of food within the tablescape before people sit down. There’s actually a secret bite that they don’t discover until considerably later in the menu, and they have to actually use a compass to find it.\u003c/p>\n\u003cp class=\"p1\">\u003cb>Woman:\u003c/b> [ Gasps ] Ah! [ Laughs ]\u003c/p>\n\u003cp class=\"p1\">\u003cb>Shelton:\u003c/b> These are royal trumpet mushrooms. This is the lion’s mane mushroom. These are oyster mushrooms. Mushrooms are so diverse. We’re trying to take each mushroom and showcase it to the best of our ability for its look, its flavor, its texture — the qualities that it has that make it unique. You have so much opportunity, even in, like, a specific bite of food, because not only do you get to kind of create, like, a special firework, but there’s sort of the law of diminishing returns. Like, once you eat it, it’s gone.\u003c/p>\n\u003cp class=\"p1\">\u003cb>Man:\u003c/b> Wow. Yeah.\u003c/p>\n\u003cp class=\"p1\">\u003cb>Woman:\u003c/b> Yeah, that’s really good.\u003c/p>\n\u003cp class=\"p1\">\u003cb>Shelton:\u003c/b> People go, “Oh, I wish I had six more of those.” And that’s why sometimes a single bite of food can be the most fun. There is a lot of trust. You don’t know what’s coming. You have to just kind of go for it. We appreciate the trust our guests put in us, and we try to, in exchange, give them something really unique and really special.\u003c/p>\n\u003cp class=\"p1\">\u003cb>Diner:\u003c/b> Cheers!\u003c/p>\n\u003cp class=\"p1\">\u003cb>Sbrocco:\u003c/b> Before we get into the food and the atmosphere of this very unique spot, right…\u003c/p>\n\u003cp class=\"p1\">\u003cb>Pusin:\u003c/b> Yes. Yes.\u003c/p>\n\u003cp class=\"p1\">\u003cb>Sbrocco:\u003c/b> …I want to talk to you a little bit about — you are into it so much, right, you change your wardrobe?\u003c/p>\n\u003cp class=\"p1\">\u003cb>Pusin:\u003c/b> Yes. Absolutely.\u003c/p>\n\u003cp class=\"p1\">\u003cb>Sbrocco:\u003c/b> According to the theme.\u003c/p>\n\u003cp class=\"p1\">\u003cb>Pusin:\u003c/b> Absolutely. Depending on the theme, I try to dress up in whatever the theme is.\u003c/p>\n\u003cp class=\"p1\">\u003cb>Sbrocco:\u003c/b> Right.\u003c/p>\n\u003cp class=\"p1\">\u003cb>Pusin:\u003c/b> So, for example, when it was, like, eggshells and broken things, we got a little egg hat.\u003c/p>\n\u003cp class=\"p1\">\u003cb>Sbrocco:\u003c/b> [ Laughing ] Is that, you know, over hard or over easy?\u003c/p>\n\u003cp class=\"p1\">\u003cb>Pusin:\u003c/b> I’m an over-medium guy.\u003c/p>\n\u003cp class=\"p1\">\u003cb>Sbrocco:\u003c/b> Okay. Okay. And the theme for… What’s the theme that you went to?\u003c/p>\n\u003cp class=\"p1\">\u003cb>Pusin:\u003c/b> It was Feast of the Moss Woods.\u003c/p>\n\u003cp class=\"p1\">\u003cb>Barron:\u003c/b> Yeah, I did that one, too.\u003c/p>\n\u003cp class=\"p1\">\u003cb>Pusin:\u003c/b> So it was all, like, mushroom-based, right?\u003c/p>\n\u003cp class=\"p1\">\u003cb>Star:\u003c/b> Yep, and fairies.\u003c/p>\n\u003cp class=\"p1\">\u003cb>Pusin:\u003c/b> Yeah, fairies. And I think every dish had some form of mushroom in it, including the desserts.\u003c/p>\n\u003cp class=\"p1\">\u003cb>Barron:\u003c/b> Mm-hmm.\u003c/p>\n\u003cp class=\"p1\">\u003cb>Sbrocco:\u003c/b> It really is an experience, isn’t it, Ciarra?\u003c/p>\n\u003cp class=\"p1\">\u003cb>Barron:\u003c/b> Absolutely.\u003c/p>\n\u003cp class=\"p1\">\u003cb>Sbrocco:\u003c/b> I mean, this is not just about going out and eating a few courses. This is what, 16 courses?\u003c/p>\n\u003cp class=\"p1\">\u003cb>Barron:\u003c/b> 16.\u003c/p>\n\u003cp class=\"p1\">\u003cb>Pusin:\u003c/b> Yeah, it varies, but it’s always a lot.\u003c/p>\n\u003cp class=\"p1\">\u003cb>Sbrocco:\u003c/b> Alright. Tell me about your experience at this experience.\u003c/p>\n\u003cp class=\"p1\">\u003cb>Barron:\u003c/b> Okay, so it was very cute, very tucked away, so I liked that a lot. It was very intimate. What I really enjoyed is how we started out with the welcome tea. It reminded me a lot of miso soup, so that was really nice.\u003c/p>\n\u003cp class=\"p1\">\u003cb>Star:\u003c/b> I also loved the mushroom tea. It had the taste of, like, cream of mushroom soup. It was delicious. One of my favorite parts of the restaurant was that everybody there gets to work cooking the dishes, the front of house and back of house. So you get to see creativity from so many different chefs and people that work there.\u003c/p>\n\u003cp class=\"p1\">\u003cb>Sbrocco:\u003c/b> And what are other dishes then, after the consommé?\u003c/p>\n\u003cp class=\"p1\">\u003cb>Pusin:\u003c/b> One of my favorite ones — there was a Two Rivers trout.\u003c/p>\n\u003cp class=\"p1\">\u003cb>Barron:\u003c/b> That’s my favorite.\u003c/p>\n\u003cp class=\"p1\">\u003cb>Pusin:\u003c/b> That was your favorite?\u003c/p>\n\u003cp class=\"p1\">\u003cb>Barron:\u003c/b> Sierra Trail. Yeah.\u003c/p>\n\u003cp class=\"p1\">\u003cb>Pusin:\u003c/b> It had, like, bubbles? Foam?\u003c/p>\n\u003cp class=\"p1\">\u003cb>Star:\u003c/b> Yeah, foam.\u003c/p>\n\u003cp class=\"p1\">\u003cb>Pusin:\u003c/b> Would you call it foam?\u003c/p>\n\u003cp class=\"p1\">\u003cb>Barron:\u003c/b> Foam. Foam.\u003c/p>\n\u003cp class=\"p1\">\u003cb>Pusin:\u003c/b> It was like foam in the middle of it. It looked just like a river. It had the trout on one side.\u003c/p>\n\u003cp class=\"p1\">\u003cb>Barron:\u003c/b> Yeah, trout two ways.\u003c/p>\n\u003cp class=\"p1\">\u003cb>Pusin:\u003c/b> Trout two ways. That’s right.\u003c/p>\n\u003cp class=\"p1\">\u003cb>Barron:\u003c/b> One trout was smoked with skin on top. It was cooked perfectly. Very, very tender. And then next to it was the trout mousse. And so that’s where you had your trout roe, and you can dip your cracker in there. It was just very cute.\u003c/p>\n\u003cp class=\"p1\">\u003cb>Star:\u003c/b> My favorite dish was the chanterelle toast. It was like this little mini grilled cheese, and then it had a mushroom chanterelle sauce on top. And it was small, but it was just so rich and delicious.\u003c/p>\n\u003cp class=\"p1\">\u003cb>Barron:\u003c/b> Yeah.\u003c/p>\n\u003cp class=\"p1\">\u003cb>Sbrocco:\u003c/b> Where was that placed in the, you know…?\u003c/p>\n\u003cp class=\"p1\">\u003cb>Star:\u003c/b> You know, halfway through.\u003c/p>\n\u003cp class=\"p1\">\u003cb>Pusin:\u003c/b> Yeah, it was somewhere between the tea, the amuse-bouche, and, like, the wild boar sausage.\u003c/p>\n\u003cp class=\"p1\">\u003cb>Barron:\u003c/b> Yeah.\u003c/p>\n\u003cp class=\"p1\">\u003cb>Star:\u003c/b> Right before the wild boar, I think, yeah.\u003c/p>\n\u003cp class=\"p1\">\u003cb>Barron:\u003c/b> Oh, that was one of my favorites.\u003c/p>\n\u003cp class=\"p1\">\u003cb>Pusin:\u003c/b> That was my favorite.\u003c/p>\n\u003cp class=\"p1\">\u003cb>Star:\u003c/b> Yeah, it was really good.\u003c/p>\n\u003cp class=\"p1\">\u003cb>Pusin:\u003c/b> That one was my… That one was one of my favorites.\u003c/p>\n\u003cp class=\"p1\">\u003cb>Barron:\u003c/b> Anything wild.\u003c/p>\n\u003cp class=\"p1\">\u003cb>Sbrocco:\u003c/b> Alright. You go, Jean. We’ll go around the table with the wild boar.\u003c/p>\n\u003cp class=\"p1\">\u003cb>Star:\u003c/b> It was a wild boar sausage. And I’m not, like, someone who eats wild boar all the time. But I thought that the sausage was, like, a little bit spicy, but not too spicy. And it just went really well with some of the little mushroom accoutrements they had.\u003c/p>\n\u003cp class=\"p1\">\u003cb>Barron:\u003c/b> Another one that was an immediate favorite — it was towards the beginning — was the shiitake taco.\u003c/p>\n\u003cp class=\"p1\">\u003cb>Pusin:\u003c/b> Yeah.\u003c/p>\n\u003cp class=\"p1\">\u003cb>Barron:\u003c/b> It was basically a shiitake mushroom taco. It was, like, the size of your pinkie.\u003c/p>\n\u003cp class=\"p1\">\u003cb>Sbrocco:\u003c/b> A tiny taco.\u003c/p>\n\u003cp class=\"p1\">\u003cb>Barron:\u003c/b> Yeah, a tiny taco. I don’t know if you guys can tell me — was it cold? Because I feel like when I…\u003c/p>\n\u003cp class=\"p1\">\u003cb>Pusin:\u003c/b> Mm-hmm.\u003c/p>\n\u003cp class=\"p1\">\u003cb>Barron:\u003c/b> Okay. It was invigorating. It just turned my senses up. I loved it. It kind of gave off like an oyster or like a shrimp type of texture. And you will definitely want more than one.\u003c/p>\n\u003cp class=\"p1\">\u003cb>Pusin:\u003c/b> Yeah. You want like a 12-pack.\u003c/p>\n\u003cp class=\"p1\">\u003cb>Barron:\u003c/b> Yes, I need a 12-pack.\u003c/p>\n\u003cp class=\"p1\">\u003cb>Sbrocco:\u003c/b> Was this a favorite of yours, too?\u003c/p>\n\u003cp class=\"p1\">\u003cb>Barron:\u003c/b> 14.\u003c/p>\n\u003cp class=\"p1\">\u003cb>Pusin:\u003c/b> I loved the Shiitaco.\u003c/p>\n\u003cp class=\"p1\">\u003cb>Star:\u003c/b> One of my other favorite dishes that we had was the chawanmushi. So, it is a steamed custard, comes in a little cup with a black trumpet mushroom. Really smooth custard, served warm. Every little bite is just very delicate.\u003c/p>\n\u003cp class=\"p1\">\u003cb>Pusin:\u003c/b> That’s another nice thing about the Merchant Roots, is, like, you don’t know what’s going to inspire these folks from menu to menu, and so you’ll get, like, these little pops of other cultures.\u003c/p>\n\u003cp class=\"p1\">\u003cb>Star:\u003c/b> Probably the only dinner I’ve had a taco and a chawanmushi at the same time.\u003c/p>\n\u003cp class=\"p1\">\u003cb>Pusin:\u003c/b> There you go. [ Laughter ]\u003c/p>\n\u003cp class=\"p1\">\u003cb>Sbrocco:\u003c/b> What was another favorite?\u003c/p>\n\u003cp class=\"p1\">\u003cb>Pusin:\u003c/b> Yeah, there was a mole dish with a porcini mushroom. It was wrapped in a leaf. It was delightful. All the flavors are great, but that one was a standout.\u003c/p>\n\u003cp class=\"p1\">\u003cb>Barron:\u003c/b> Yeah.\u003c/p>\n\u003cp class=\"p1\">\u003cb>Star:\u003c/b> From the whole meal, I was thinking, what are they going to do for dessert? How are we going to have a mushroom dessert?\u003c/p>\n\u003cp class=\"p1\">\u003cb>Pusin:\u003c/b> Mm-hmm.\u003c/p>\n\u003cp class=\"p1\">\u003cb>Star:\u003c/b> So, we were drinking this small milkshake and I was like, what is this? This is so delicious, this mini milkshake, and it sort of tastes like maple. And then we come to find out that this is a milkshake that’s made with a candy cap mushroom, which I learned about that evening. So, the dinner ended with a mushroom milkshake, which was unexpected.\u003c/p>\n\u003cp class=\"p1\">\u003cb>Barron:\u003c/b> Yes. By the end of dinner, I was very, very full, but I enjoyed the fairy mound. So, the fairy mound is dusted to look like a mound, but inside is coconut. So, who doesn’t like coconut? I love coconut. Very chewy, not too sweet. And then the candy cap cannele — you have to forage it out of the little fairy house. And so that was really fun to find. It had a, like, French toast, bread pudding almost kind of texture, and also very fragrant.\u003c/p>\n\u003cp class=\"p1\">\u003cb>Sbrocco:\u003c/b> And did anybody get the wine pairings?\u003c/p>\n\u003cp class=\"p1\">\u003cb>Pusin:\u003c/b> I did get the wine pairing. They had a wine from Greece that is aged on the bottom of the ocean.\u003c/p>\n\u003cp class=\"p1\">\u003cb>Barron:\u003c/b> Yes!\u003c/p>\n\u003cp class=\"p1\">\u003cb>Pusin:\u003c/b> Like, it was super cool. It came in an amphora.\u003c/p>\n\u003cp class=\"p1\">\u003cb>Star:\u003c/b> Wow.\u003c/p>\n\u003cp class=\"p1\">\u003cb>Pusin:\u003c/b> So, it’s always, like, just weird stuff, which is why I come back every single time.\u003c/p>\n\u003cp class=\"p1\">\u003cb>Sbrocco:\u003c/b> Well, it isn’t an inexpensive place. Did you feel like, for the experience, you got value from that?\u003c/p>\n\u003cp class=\"p1\">\u003cb>Barron:\u003c/b> Absolutely. I couldn’t wait to see the person who suggested the restaurant. I was like, oh, let’s see. It’s probably, yeah, over the top. But I am so grateful that you suggested this place. The experience was very immersive, and it was nice to have someone that’s just cooking from their passion and sharing that dish with you. So I really appreciate you for inviting us there.\u003c/p>\n\u003cp class=\"p1\">\u003cb>Sbrocco:\u003c/b> Love it. Alright. If you would like to try Merchant Roots, it’s located on Mission Street in San Francisco, and the average multicourse tab per person without drinks is around $300. Ciarra has uncovered another rare find — Oakland’s very first Haitian restaurant. It’s a vibrant spot offering crackling griot, hearty stews, and other traditional dishes that are tough to come by in the Bay. Tucked into Swan’s Market in Oakland, it’s T’chaka. \u003cspan class=\"s1\">♪♪\u003c/span> \u003cspan class=\"s1\">♪♪\u003c/span>\u003c/p>\n\u003cp class=\"p1\">\u003cb>Felix:\u003c/b> I was born in Haiti, but when I came here, I missed something — the culture, the food. So I said to myself, “I have to become an ambassador for my country.” So I have to create something where Haitian people are going to come and sit, drink, eat, and having fun. T’chaka was my mom’s favorite dish. So I said to myself, “I think I’m going to call the restaurant T’chaka.” T’chaka is made with corn, beans, and pumpkin soup, and you can add either turkey neck or salted pork. So, this is a dish people used to make back home when we were colonized by the French and Spanish people. So, when they go to work early in the morning, they spend the whole day at work, and when they get back at night, they had to cook something very healthy that will give them the energy to get back to work the next day. Whenever you have a bowl of it, it’s like you’re full of energy. [ All cheering ] Whenever you have, like, a party, like a festival back home, the first dish Haitian people are going to have at the table is going to be griot. You get, like, a pork shoulder to marinate. And you always have to have the green onions, the garlic, and the thyme. They got to be there. That will give you the taste that you’re looking for. The next day, you boil it and fry it. So you’re going to have that crispiness on the outside, and the inside is going to be so moist. You cannot have any Haitian dishes without pikliz. It’s shredded cabbage, carrots, and a lot of Scotch bonnets, because pikliz got to be spicy. And the best way to eat it is with the plantain. Every time I put a piece in my mouth, it just tastes — boom! So good. At T’chaka, people that come to the restaurant, they have an experience. Feels like they are in the Caribbean. I’m happy to see so many faces at night enjoying the food, enjoying the drinks. And when they’re leaving, they say, “Hey, you know what? We’ll be back soon because that food is just amazing.” [ All cheering ]\u003c/p>\n\u003cp class=\"p1\">\u003cb>Man:\u003c/b> That’s crazy.\u003c/p>\n\u003cp class=\"p1\">\u003cb>Sbrocco:\u003c/b> Alright, Ciarra, now, this is really unique, isn’t it? We talked about the uniqueness of Merchant Roots, but Oakland’s first Haitian restaurant.\u003c/p>\n\u003cp class=\"p1\">\u003cb>Barron:\u003c/b> Yes, Oakland’s first Haitian Caribbean restaurant.\u003c/p>\n\u003cp class=\"p1\">\u003cb>Sbrocco:\u003c/b> Okay. Okay.\u003c/p>\n\u003cp class=\"p1\">\u003cb>Barron:\u003c/b> So, when it comes to culture, I’m just so open to trying different foods.\u003c/p>\n\u003cp class=\"p1\">\u003cb>Sbrocco:\u003c/b> Absolutely.\u003c/p>\n\u003cp class=\"p1\">\u003cb>Barron:\u003c/b> But I also love spice. So I hope you guys love that spice as well.\u003c/p>\n\u003cp class=\"p1\">\u003cb>Sbrocco:\u003c/b> Bring on the spice! Right?\u003c/p>\n\u003cp class=\"p1\">\u003cb>Pusin:\u003c/b> Oh, it’s good. We started with empanadas.\u003c/p>\n\u003cp class=\"p1\">\u003cb>Barron:\u003c/b> Yes.\u003c/p>\n\u003cp class=\"p1\">\u003cb>Pusin:\u003c/b> And we also had the… name who I will butcher, but it was the taro root that was deep fried.\u003c/p>\n\u003cp class=\"p1\">\u003cb>Star:\u003c/b> Akra.\u003c/p>\n\u003cp class=\"p1\">\u003cb>Pusin:\u003c/b> The akra. Thank you.\u003c/p>\n\u003cp class=\"p1\">\u003cb>Star:\u003c/b> Akra.\u003c/p>\n\u003cp class=\"p1\">\u003cb>Barron:\u003c/b> Yeah, you got it.\u003c/p>\n\u003cp class=\"p1\">\u003cb>Star:\u003c/b> Also one of my favorites.\u003c/p>\n\u003cp class=\"p1\">\u003cb>Pusin:\u003c/b> Thank you. I loved that one. Fried taro root, right, which was new to me. I haven’t had that texture before, but it was like a very nice, kind of, like, melty, gooey, but also kept together by the frying. And then it had pikliz on the side. And that was also new to me, but it’s like a spicy coleslaw.\u003c/p>\n\u003cp class=\"p1\">\u003cb>Barron:\u003c/b> Yeah.\u003c/p>\n\u003cp class=\"p1\">\u003cb>Pusin:\u003c/b> So, for folks that are going there, know that it is not coleslaw. It is spicy. So, like, that’s an important… That’s an important caveat.\u003c/p>\n\u003cp class=\"p1\">\u003cb>Star:\u003c/b> Yes.\u003c/p>\n\u003cp class=\"p1\">\u003cb>Sbrocco:\u003c/b> And when you go, what do you start with?\u003c/p>\n\u003cp class=\"p1\">\u003cb>Barron:\u003c/b> Well, first I start with the drinks and… [ Laughter ] Nonalcoholic, but I start with the passion fruit or the ginger sorrel. So, I believe in the benefits. It’s very refreshing. It feels very tropical. It gets me really excited and just ready to try all the next, like, hot flavors. And then we start off with the jerk chicken wings. So, these are smoked, very, very spicy. And the skin is crispy, but it has, like, a little sweet texture from the jerk. And you can’t just have one order. So we left with about two extra orders for the way home. So, I also had the chicken and beef patties as well. So, I call them patties, but they call them empanadas because the place also has, like, I think Spanish and Haitian because, like, Creole, right? And so those are very, very good, and so I really love starting with those dishes.\u003c/p>\n\u003cp class=\"p1\">\u003cb>Sbrocco:\u003c/b> Yeah.\u003c/p>\n\u003cp class=\"p1\">\u003cb>Star:\u003c/b> My favorite thing was the loaded tostones.\u003c/p>\n\u003cp class=\"p1\">\u003cb>Barron:\u003c/b> Ooh!\u003c/p>\n\u003cp class=\"p1\">\u003cb>Star:\u003c/b> So, that was one of the appetizers. So, a tostone is, like, a little, round, twice-fried green plantain.\u003c/p>\n\u003cp class=\"p1\">\u003cb>Sbrocco:\u003c/b> Mm-hmm.\u003c/p>\n\u003cp class=\"p1\">\u003cb>Star:\u003c/b> And then it has some shredded pork on top, and then a little bit of that pikliz on top, and then some pickled onions as well. So, it was like a delicious, like, one bite where you get the tostone and the pork and the cabbage all together.\u003c/p>\n\u003cp class=\"p1\">\u003cb>Sbrocco:\u003c/b> Fantastic.\u003c/p>\n\u003cp class=\"p1\">\u003cb>Star:\u003c/b> I also had the passion fruit, and it went well with the spicy meal, because I got the spicy shrimp, and they were so spicy that I needed the passion fruit juice to cool it down.\u003c/p>\n\u003cp class=\"p1\">\u003cb>Sbrocco:\u003c/b> And it’s fruity and lovely and sweet, but it has such a nice core of acid.\u003c/p>\n\u003cp class=\"p1\">\u003cb>Star:\u003c/b> Yeah, they worked well together.\u003c/p>\n\u003cp class=\"p1\">\u003cb>Sbrocco:\u003c/b> Yeah.\u003c/p>\n\u003cp class=\"p1\">\u003cb>Pusin:\u003c/b> So, for mains, we had the oxtail stew and we got the curry goat. And so we were trying both of them, and I ordered the oxtail stew. My friend Hillary ordered the curry goat. We ended up switching after a bite because I love goat, right? And so, like, to get a goat dish that’s, like, that deep and flavorful… And it’s almost like the stew in a way, but, like, the flavors are so pronounced inside of the goat themselves. Fantastic.\u003c/p>\n\u003cp class=\"p1\">\u003cb>Sbrocco:\u003c/b> And what was it about the oxtail stew that sort of made you say, “Let me switch”?\u003c/p>\n\u003cp class=\"p1\">\u003cb>Pusin:\u003c/b> Well, nothing. [ Laughter ] No shade against the oxtail stew. I was just, you know… I was with somebody and they’re like, “It’s too goaty or, like, too grassy.” I’m like, “I love it.”\u003c/p>\n\u003cp class=\"p1\">\u003cb>Sbrocco:\u003c/b> Herbaceous.\u003c/p>\n\u003cp class=\"p1\">\u003cb>Pusin:\u003c/b> Exactly. So, we switched for that reason. But we were both helping each other towards the end.\u003c/p>\n\u003cp class=\"p1\">\u003cb>Sbrocco:\u003c/b> Have you had the oxtail?\u003c/p>\n\u003cp class=\"p1\">\u003cb>Barron:\u003c/b> Absolutely. That is a staple. That is something that you have to get. You can’t share. I mean, I tried to share as well. I literally was sitting there like, I need to bring this by myself.\u003c/p>\n\u003cp class=\"p1\">\u003cb>Sbrocco:\u003c/b> Yeah.\u003c/p>\n\u003cp class=\"p1\">\u003cb>Barron:\u003c/b> So, in this dish, you get very big, chunky pieces of oxtails, but it’s also served with a very aromatic, fluffy rice and beans. And because I love spicy, I get the habanero hot sauce and I top it off in my oxtails.\u003c/p>\n\u003cp class=\"p1\">\u003cb>Star:\u003c/b> My husband got the griot. So, that’s like the fried pork, kind of similar to chicharrones. Delicious. Big chunks of pork that are really crispy, and then some parts are a little more tender.\u003c/p>\n\u003cp class=\"p1\">\u003cb>Barron:\u003c/b> Yes.\u003c/p>\n\u003cp class=\"p1\">\u003cb>Star:\u003c/b> Super savory. So, we loved the griot as well.\u003c/p>\n\u003cp class=\"p1\">\u003cb>Pusin:\u003c/b> The place itself, like, tropical is a good way to frame it. Like a tropical diner, almost, is like how I would describe it.\u003c/p>\n\u003cp class=\"p1\">\u003cb>Barron:\u003c/b> Or, like, tiki.\u003c/p>\n\u003cp class=\"p1\">\u003cb>Pusin:\u003c/b> Yeah, that could fit.\u003c/p>\n\u003cp class=\"p1\">\u003cb>Star:\u003c/b> It was very family-friendly, too. I invited my friend who has a 4-year-old, and they don’t have a kids menu that I saw, but the kid that I was with thought it was really great.\u003c/p>\n\u003cp class=\"p1\">\u003cb>Pusin:\u003c/b> Yeah, my nephew would like this place because it doesn’t have a lot of green stuff in it.\u003c/p>\n\u003cp class=\"p1\">\u003cb>Sbrocco:\u003c/b> Right.\u003c/p>\n\u003cp class=\"p1\">\u003cb>Star:\u003c/b> Actually, that’s very true. Nobody forced us to eat too many vegetables, except for some of the pikliz.\u003c/p>\n\u003cp class=\"p1\">\u003cb>Pusin:\u003c/b> Yeah, exactly.\u003c/p>\n\u003cp class=\"p1\">\u003cb>Pusin:\u003c/b> Yeah, yeah. Also reasonably priced. Like, I would go, like, if I’m in that area — Old Oakland, I think, right?\u003c/p>\n\u003cp class=\"p1\">\u003cb>Barron:\u003c/b> Yes, it’s called Old Oakland.\u003c/p>\n\u003cp class=\"p1\">\u003cb>Pusin:\u003c/b> It’s so good. Yeah. I want to go back.\u003c/p>\n\u003cp class=\"p1\">\u003cb>Sbrocco:\u003c/b> Alright, if you’d like to try T’chaka, it’s located on Washington Street inside Swan’s Market in Oakland. The average multicourse tab per person without drinks is around $50. Jean’s hometown favorite has held a special place in her heart ever since she was a child. A mouthwatering assortment of pastries, croissants, and breakfast dishes have kept locals lining up for over 40 years. Nestled in a quiet corner of Novato since 1983, it’s Creekside Bakery. \u003cspan class=\"s1\">♪♪\u003c/span>\u003c/p>\n\u003cp class=\"p1\">\u003cb>Danny:\u003c/b> The interesting thing about Creekside is that there’s a lot of tradition and lineage here. We really care about what we’re doing. It’s a huge passion for us. Hospitality is probably more important than the food. How you doing?\u003c/p>\n\u003cp class=\"p1\">\u003cb>Woman:\u003c/b> Good, good.\u003c/p>\n\u003cp class=\"p1\">\u003cb>Danny:\u003c/b> Yeah? Fam’s good? ¿Cómo están, chicas?\u003c/p>\n\u003cp class=\"p1\">\u003cb>Woman:\u003c/b> We’re good.\u003c/p>\n\u003cp class=\"p1\">\u003cb>Danny:\u003c/b> Hey, babe. [ Laughing ] Oh, my gosh! The bakery’s been open for 43 years continuously.\u003c/p>\n\u003cp class=\"p1\">\u003cb>Cindy:\u003c/b> Tony Albini was the first baker here, and owner. And then one of his bakers, Glen Sullivan, had it for seven years. And then we bought it in 2005. We love to have variety. We just love the cases to be brimming full.\u003c/p>\n\u003cp class=\"p1\">\u003cb>Danny:\u003c/b> We try to stay rooted in tradition, but also expanding where we can and really trying to push the boundary on flavor and technique.\u003c/p>\n\u003cp class=\"p1\">\u003cb>Baker:\u003c/b> I’m just laminating the croissant dough. It starts with three layers and it ends up being 24.\u003c/p>\n\u003cp class=\"p1\">\u003cb>Danny:\u003c/b> We have an incredible Viennoiserie program. You’ll see a lot of classic French pastries, like Paris-Brest, classic sort of American Danish that you don’t see anymore. Things like butter horns, bear claws, and then a lot of cool savory items. We have certain recipes we’ve been using for 43 years because they’re not broken.\u003c/p>\n\u003cp class=\"p1\">\u003cb>Cindy:\u003c/b> These are a lot of Tony’s handwritten recipes. My favorite, I think, of all is the Swedish Dream. When I bake it, every time I bake it and I can smell it in the oven, it’s just…\u003c/p>\n\u003cp class=\"p1\">\u003cb>Danny:\u003c/b> We have a sprinkle cookie that kids have been getting here since forever, and now they’re not kids anymore, and they’re getting them for their kids. We keep them in the same place in the case. It’s at eye level for the kids. It’s a good sell. The Princess cake is a classic Swedish cake. Maybe I’m biased, but I think ours is really, really, really special.\u003c/p>\n\u003cp class=\"p1\">\u003cb>Cindy:\u003c/b> I think it’s just the sleek look of the marzipan. It’s just a light dusting of powdered sugar with a marzipan rose, and it’s just pristine.\u003c/p>\n\u003cp class=\"p1\">\u003cb>Woman:\u003c/b> Mmm! Oh, my God, it’s delicious.\u003c/p>\n\u003cp class=\"p1\">\u003cb>Danny:\u003c/b> My mother is the hardest-working person in the food industry that I’ve ever met. She’s an incredible chef to be mentored under. She’s always here. I’m always here. My sister’s always here. It’s pretty amazing to have someone who’s been making it for 40 years still make your cakes. And you can really taste that difference in quality in the cake. We have every generation here. I have people that are literally just born, a couple days old, to people that are over 100 years old, picking up their birthday cake. Obviously, we cook to nourish people and to take care of people. That’s why we cook and bake, and to make sure people are having a great time and enjoying it is the best thing for us.\u003c/p>\n\u003cp class=\"p1\">\u003cb>Sbrocco:\u003c/b> Alright, Jean, this is kind of one of those places — if you know, you know, right? I mean, it’s a hidden gem.\u003c/p>\n\u003cp class=\"p1\">\u003cb>Star:\u003c/b> A hidden gem, for sure.\u003c/p>\n\u003cp class=\"p1\">\u003cb>Barron:\u003c/b> Yeah, it is.\u003c/p>\n\u003cp class=\"p1\">\u003cb>Star:\u003c/b> I grew up in Novato, so I have been going to this bakery since I was in second grade.\u003c/p>\n\u003cp class=\"p1\">\u003cb>Sbrocco:\u003c/b> Yeah.\u003c/p>\n\u003cp class=\"p1\">\u003cb>Star:\u003c/b> It’s in the back of this shopping center, right on the Novato Creek, right by this beautiful bridge that you could walk across to go to the library. So, I actually feel like I may have eaten every single thing on the Creekside menu. But one of the best things, I think, is the breakfast sandwich. They make their own brioche bun in-house, so the bun is, like, super, super soft. And then it has a really soft-cooked scrambled egg and it has a little bit of a spicy aioli. I also like to get bacon and avocado on it. And I just think it’s a wonderful breakfast sandwich.\u003c/p>\n\u003cp class=\"p1\">\u003cb>Sbrocco:\u003c/b> Yeah.\u003c/p>\n\u003cp class=\"p1\">\u003cb>Star:\u003c/b> And my husband and I always talk about how good the ham & cheese croissant is there. And we kind of go different places all across the world, and we’ll compare the ham & cheese croissant at Creekside to other places.\u003c/p>\n\u003cp class=\"p1\">\u003cb>Barron:\u003c/b> It’s a plethora of things. When you go in there, it’s a feast for your eyes. I ended up getting the apple pecan chicken salad, and it was very delicious. It was served on two milk buns, very fluffy. And you know how they kind of say, like, they have “slap your mama” sauce? Well, this is kind of like “slap your mama” chicken salad. [ Laughter ] So it was really, really good. Like, you wouldn’t want to share. And so, we also ended up getting the vegetarian sandwich, and it was a nine-grain and loads of veggies. So, cucumbers, avocados. But one of my favorite aspects of that dish was the Toma cheese.\u003c/p>\n\u003cp class=\"p1\">\u003cb>Star:\u003c/b> Mm-hmm.\u003c/p>\n\u003cp class=\"p1\">\u003cb>Barron:\u003c/b> But, yeah, it was so smooth and soft. I enjoyed it so much.\u003c/p>\n\u003cp class=\"p1\">\u003cb>Pusin:\u003c/b> I got the salmon toast.\u003c/p>\n\u003cp class=\"p1\">\u003cb>Star:\u003c/b> Mm-hmm.\u003c/p>\n\u003cp class=\"p1\">\u003cb>Pusin:\u003c/b> The bread was a showstopper. I wanted to take some home with me, but, like, I’m not allowed to have bread in my house. Otherwise I will eat all the bread in my house. But it was so good. It has little dill on it, herbed chive cream cheese.\u003c/p>\n\u003cp class=\"p1\">\u003cb>Barron:\u003c/b> Ooh!\u003c/p>\n\u003cp class=\"p1\">\u003cb>Pusin:\u003c/b> It’s very sumptuous.\u003c/p>\n\u003cp class=\"p1\">\u003cb>Barron:\u003c/b> It was huge. I seen someone order one, so it was a decent size.\u003c/p>\n\u003cp class=\"p1\">\u003cb>Sbrocco:\u003c/b> Right.\u003c/p>\n\u003cp class=\"p1\">\u003cb>Barron:\u003c/b> Yeah.\u003c/p>\n\u003cp class=\"p1\">\u003cb>Sbrocco:\u003c/b> And what about the pastries?\u003c/p>\n\u003cp class=\"p1\">\u003cb>Barron:\u003c/b> Oh! Princess cake! [ Laughter ]\u003c/p>\n\u003cp class=\"p1\">\u003cb>Both:\u003c/b> Oh, you got the princess cake!\u003c/p>\n\u003cp class=\"p1\">\u003cb>Barron:\u003c/b> Yes.\u003c/p>\n\u003cp class=\"p1\">\u003cb>Star:\u003c/b> Okay.\u003c/p>\n\u003cp class=\"p1\">\u003cb>Barron:\u003c/b> That princess cake caught my eye as soon as I walked in the door. It’s just beautiful. They have a green and pink, and it has marzipan.\u003c/p>\n\u003cp class=\"p1\">\u003cb>Star:\u003c/b> Yeah.\u003c/p>\n\u003cp class=\"p1\">\u003cb>Barron:\u003c/b> And so, on top, there is a rose as well. And then it’s chewy. And so, it was really nice. I also had the raspberry almond shortbread cookie.\u003c/p>\n\u003cp class=\"p1\">\u003cb>Star:\u003c/b> The cookie? Cookie. Yeah.\u003c/p>\n\u003cp class=\"p1\">\u003cb>Barron:\u003c/b> Ah! And so, in the middle was a tacky almond drop.\u003c/p>\n\u003cp class=\"p1\">\u003cb>Sbrocco:\u003c/b> Mm!\u003c/p>\n\u003cp class=\"p1\">\u003cb>Barron:\u003c/b> And it paired very well with the raspberry.\u003c/p>\n\u003cp class=\"p1\">\u003cb>Star:\u003c/b> They have so many good cookies. And you buy them by the pound, and so every year at Christmas, we go and get a big box of cookies that we keep at our house and eat on Christmas morning. And there has actually been an incident in our family once where we ate all the cookies before Christmas, and so my mom had to go back and get another box of cookies.\u003c/p>\n\u003cp class=\"p1\">\u003cb>Sbrocco:\u003c/b> I was gonna say, Santa was pretty mad he didn’t get a cookie, right?\u003c/p>\n\u003cp class=\"p1\">\u003cb>Pusin:\u003c/b> I did notice, like, they were weighing the cookie that I bought.\u003c/p>\n\u003cp class=\"p1\">\u003cb>Star:\u003c/b> Yeah.\u003c/p>\n\u003cp class=\"p1\">\u003cb>Pusin:\u003c/b> I bought two of them and I was like, I don’t think I’ve ever seen a cookie weighed before.\u003c/p>\n\u003cp class=\"p1\">\u003cb>Star:\u003c/b> Yeah.\u003c/p>\n\u003cp class=\"p1\">\u003cb>Pusin:\u003c/b> Like, it was such an interesting experience.\u003c/p>\n\u003cp class=\"p1\">\u003cb>Sbrocco:\u003c/b> Cookie by the pound.\u003c/p>\n\u003cp class=\"p1\">\u003cb>Star:\u003c/b> It’s a cookie by the pound. My personal favorite is the chocolate dot cookie.\u003c/p>\n\u003cp class=\"p1\">\u003cb>Barron:\u003c/b> Ooh!\u003c/p>\n\u003cp class=\"p1\">\u003cb>Star:\u003c/b> So, it’s a shortbread cookie that has a really good chocolate dot in the middle. The chocolate is tempered perfectly, so it’s like the perfect gooey chocolate center.\u003c/p>\n\u003cp class=\"p1\">\u003cb>Pusin:\u003c/b> The cookies were great. We also got the seasonal tarts. I just like fruit tarts — my mom’s favorite. So I always order one just to like, okay, let’s see how this one goes. Super tasty. They had blackberries and I think one had some raspberries on there. All the things there were absolutely top-tier. And a pro tip is if you do get a black coffee, they will just refill it for free, so that was really nice.\u003c/p>\n\u003cp class=\"p1\">\u003cb>Sbrocco:\u003c/b> Oh, there you go.\u003c/p>\n\u003cp class=\"p1\">\u003cb>Barron:\u003c/b> Great tip.\u003c/p>\n\u003cp class=\"p1\">\u003cb>Pusin:\u003c/b> I learned that.\u003c/p>\n\u003cp class=\"p1\">\u003cb>Barron:\u003c/b> I also had the Japanese milk bread cinnamon roll. And so, that’s very different. So, in the Bay Area, a cinnamon roll is a staple. I love cinnamon rolls for the greasy and all that type of jazz. But at this place, I really appreciated all of the homemade ingredients that went into all of the dishes. Actually, a local recommended it. He — I could tell he was there for two days in a row because he said, “Yesterday it was so packed,” and he was there again with his son. And so we just had to try the cinnamon roll, and it was amazing.\u003c/p>\n\u003cp class=\"p1\">\u003cb>Sbrocco:\u003c/b> What did you drink alongside? You know, when you have…\u003c/p>\n\u003cp class=\"p1\">\u003cb>Barron:\u003c/b> Yeah. We went through the menu.\u003c/p>\n\u003cp class=\"p1\">\u003cb>Pusin:\u003c/b> Mm-hmm.\u003c/p>\n\u003cp class=\"p1\">\u003cb>Barron:\u003c/b> I had the pumpkin pie latte.\u003c/p>\n\u003cp class=\"p1\">\u003cb>Star:\u003c/b> Wow.\u003c/p>\n\u003cp class=\"p1\">\u003cb>Sbrocco:\u003c/b> Mm.\u003c/p>\n\u003cp class=\"p1\">\u003cb>Barron:\u003c/b> You know, I’m against violence, but another “slap your mama” drink. [ Laughter ] That drink was really nice. And then the espresso — that was actually my highlight. I really like royal treatment, and so the cup was, like…\u003c/p>\n\u003cp class=\"p1\">\u003cb>Sbrocco:\u003c/b> The princess treatment.\u003c/p>\n\u003cp class=\"p1\">\u003cb>Barron:\u003c/b> Yes.\u003c/p>\n\u003cp class=\"p1\">\u003cb>Sbrocco:\u003c/b> Okay.\u003c/p>\n\u003cp class=\"p1\">\u003cb>Barron:\u003c/b> The cup was, like, Tiffany blue, and it had a heap of brown sugar on the side with a gold stirring spoon, so…\u003c/p>\n\u003cp class=\"p1\">\u003cb>Pusin:\u003c/b> I feel like I just got a black coffee and, like, now I — now I gotta…\u003c/p>\n\u003cp class=\"p1\">\u003cb>Sbrocco:\u003c/b> Now you’re jealous, aren’t you?\u003c/p>\n\u003cp class=\"p1\">\u003cb>Pusin:\u003c/b> I’m like, I’m usually not in Novato, but now I have an excuse to go back.\u003c/p>\n\u003cp class=\"p1\">\u003cb>Barron:\u003c/b> Oh, definitely have an excuse. Yeah.\u003c/p>\n\u003cp class=\"p1\">\u003cb>Pusin:\u003c/b> 100%.\u003c/p>\n\u003cp class=\"p1\">\u003cb>Sbrocco:\u003c/b> And did you feel like it was affordable?\u003c/p>\n\u003cp class=\"p1\">\u003cb>Barron:\u003c/b> It was extremely affordable. I think I got like 20 items, though. [ Laughter ]\u003c/p>\n\u003cp class=\"p1\">\u003cb>Pusin:\u003c/b> Yeah, I mean, like for me, coming…\u003c/p>\n\u003cp class=\"p1\">\u003cb>Sbrocco:\u003c/b> You took your assignment seriously. I like that. I like that.\u003c/p>\n\u003cp class=\"p1\">\u003cb>Barron:\u003c/b> I took my assignment seriously.\u003c/p>\n\u003cp class=\"p1\">\u003cb>Pusin:\u003c/b> Very affordable.\u003c/p>\n\u003cp class=\"p1\">\u003cb>Sbrocco:\u003c/b> Alright. Now they can create their own memories, Jean.\u003c/p>\n\u003cp class=\"p1\">\u003cb>Star:\u003c/b> Yeah. Glad you guys went.\u003c/p>\n\u003cp class=\"p1\">\u003cb>Barron:\u003c/b> Absolutely.\u003c/p>\n\u003cp class=\"p1\">\u003cb>Pusin:\u003c/b> Thank you. Yeah, thank you. Thank you for recommending it.\u003c/p>\n\u003cp class=\"p1\">\u003cb>Sbrocco:\u003c/b> Alright. If you would like to try Creekside Bakery, it’s located on Grant Avenue in Novato, and the average multicourse tab per person without drinks is around $25. Looking for more Bay Area bites you’ve just got to try?\u003c/p>\n\u003cp class=\"p1\">\u003cb>Phillips:\u003c/b> [ Laughs ]\u003c/p>\n\u003cp class=\"p1\">\u003cb>Sbrocco:\u003c/b> Check out “Cecilia Tries It” online at kqed.org/checkplease. I have to thank my amazing guests on this week’s show. Jean Star, who shared her nostalgia for Novato’s Creekside Bakery. Ciarra Barron, who introduced us to Haitian delights at T’chaka in Oakland. And Yev Pusin, who enjoys each and every culinary adventure at Merchant Roots in San Francisco. Join us next time when three more guests will recommend their favorite spots on “Check, Please! Bay Area.” I’m Leslie Sbrocco, and I’ll see you then. Cheers, everyone. Cheers! Whoo-hoo! [ Glasses clinking ]\u003c/p>\n\u003cp>\u003c/p>\u003c/div>",
"attributes": {
"named": {},
"numeric": []
}
},
{
"type": "component",
"content": "",
"name": "ad",
"attributes": {
"named": {
"label": "floatright"
},
"numeric": [
"floatright"
]
}
},
{
"type": "contentString",
"content": "\u003cdiv class=\"post-body\">\u003cp>\u003c/p>\n\u003cp class=\"p1\">\u003cb>Shelton:\u003c/b> The welcome tea — it’s a really fun setup. It gives people a little opportunity to sort of build suspense before the menu begins. People get a little dose of our outdoor patio while they watch the mushroom tea literally anti-gravity infuse in these really cool coffee machines that we have. When that gets served, we bring a little truffle-buttered crumpet along the side. So it’s really just a very warming, delicate, but at the same time, rich mushroom experience to kick-start the menu.\u003c/p>\n\n\u003c/div>\u003c/p>",
"attributes": {
"named": {},
"numeric": []
}
}
],
"link": "/checkplease/23755/check-please-bay-area-reviews-merchant-roots-tchaka-creekside-bakery",
"authors": [
"11084"
],
"programs": [
"checkplease_9339"
],
"categories": [
"checkplease_3758",
"checkplease_3784",
"checkplease_3750",
"checkplease_3730",
"checkplease_3740",
"checkplease_9210",
"checkplease_3731",
"checkplease_9200",
"checkplease_9451",
"checkplease_3871",
"checkplease_3472",
"checkplease_3742",
"checkplease_9452",
"checkplease_9212",
"checkplease_3764",
"checkplease_3738",
"checkplease_10",
"checkplease_3729",
"checkplease_3739",
"checkplease_9209",
"checkplease_9453"
],
"tags": [
"checkplease_8957",
"checkplease_8574",
"checkplease_8633",
"checkplease_1368",
"checkplease_9455",
"checkplease_9454",
"checkplease_8811",
"checkplease_8509",
"checkplease_8518"
],
"featImg": "checkplease_23802",
"label": "checkplease_9339"
},
"checkplease_23754": {
"type": "posts",
"id": "checkplease_23754",
"meta": {
"index": "posts_1716263798",
"site": "checkplease",
"id": "23754",
"score": null,
"sort": [
1777604177000
]
},
"guestAuthors": [],
"slug": "check-please-bay-area-reviews-funky-elephant-ys-choice-jims-by-mlvs",
"title": "Check, Please! Bay Area reviews: Funky Elephant, Y’s Choice, Jim’s by MLVS",
"publishDate": 1777604177,
"format": "video",
"headTitle": "Check, Please! Bay Area reviews: Funky Elephant, Y’s Choice, Jim’s by MLVS | KQED",
"labelTerm": {
"term": 9339,
"site": "checkplease"
},
"content": "\u003cp>\u003cem>Check, Please! Bay Area, \u003c/em>season 21, episode 2, airs Thursday, April 30, at 7:30 pm, on KQED 9. See other \u003ca href=\"http://www.kqed.org/tv/programs/index.jsp?pgmid=14084\" target=\"_blank\" rel=\"noopener noreferrer\">television airtimes\u003c/a>.\u003c/p>\n\u003cp>\u003cspan style=\"font-weight: 400\">In Berkeley’s Gilman District, \u003c/span>\u003cb>Funky Elephant\u003c/b>\u003cspan style=\"font-weight: 400\"> brings vibrant Thai comfort food to life in a colorful, intimate space, with dishes like Wholesome Noodle in savory broth with crumbly pork meatballs, spicy Super Jungle red curry, and sweet roti with condensed milk and roasted coconut to balance out the heat. In Oakland, \u003c/span>\u003cb>Y’s Choice\u003c/b>\u003cspan style=\"font-weight: 400\"> serves up hearty soul food favorites like crispy fried fish with cornbread, turkey wings alongside mac and cheese and cabbage, and fall-off-the-bone oxtails over silky grits, finishing sweet with peach cobbler or banana pudding. And in San Francisco’s Mission District, \u003c/span>\u003cb>Jim’s by MLVS\u003c/b>\u003cspan style=\"font-weight: 400\"> keeps breakfast classic with corned beef hash topped with eggs over easy and rye toast, chicken-fried steak with golden hash browns, and its beloved green salsa spooned generously over just about everything. To wrap up the episode, reporter Cecilia Phillips dives into “Cecilia Tries It” at San Francisco’s \u003cstrong>BeChinatown Night Market\u003c/strong>, soaking up the lively atmosphere as she samples her way through the vendors and flavors that make this historic neighborhood so special.\u003c/span>\u003c/p>\n\u003cfigure id=\"attachment_23799\" class=\"wp-caption alignnone\" style=\"max-width: 1920px\">\u003cimg loading=\"lazy\" decoding=\"async\" class=\"wp-image-23799 size-full\" src=\"https://cdn.kqed.org/wp-content/uploads/sites/40/2026/04/2102_s.png\" alt=\"\" width=\"1920\" height=\"1080\" srcset=\"https://cdn.kqed.org/wp-content/uploads/sites/40/2026/04/2102_s.png 1920w, https://cdn.kqed.org/wp-content/uploads/sites/40/2026/04/2102_s-160x90.png 160w, https://cdn.kqed.org/wp-content/uploads/sites/40/2026/04/2102_s-768x432.png 768w, https://cdn.kqed.org/wp-content/uploads/sites/40/2026/04/2102_s-1536x864.png 1536w\" sizes=\"auto, (max-width: 1920px) 100vw, 1920px\">\u003cfigcaption class=\"wp-caption-text\">Host Leslie Sbrocco joins guests Peggy Lee, Tavis Kammet and Rachelle Rogers-Ard from KQED in San Francisco.\u003c/figcaption>\u003c/figure>\n\u003cp>\u003cspan style=\"color: #2b2b2b\">Get Restaurant Information:\u003c/span>\u003c/p>\n\u003cul>\n\u003cli>\u003ca href=\"https://www.funkyelephantthai.com/\">\u003cstrong>Funky Elephant\u003c/strong> (Berkeley)\u003c/a>\u003c/li>\n\u003cli>\u003ca href=\"https://www.yschoice.space/\">\u003cstrong>Y’s Choice\u003c/strong> (Oakland)\u003c/a>\u003c/li>\n\u003cli>\u003ca href=\"https://www.mlvssf.org/jims-by-mlvs\">\u003cstrong>Jim’s by MLVS \u003c/strong>(San Francisco)\u003c/a>\u003c/li>\n\u003cli>\u003ca href=\"https://bechinatown.weebly.com/\">\u003cstrong>Chinatown Night Market \u003c/strong>(San Francisco)\u003c/a>\u003c/li>\n\u003c/ul>\n\u003cfigure id=\"attachment_20123\" class=\"wp-caption alignnone\" style=\"max-width: 800px\">\u003cimg loading=\"lazy\" decoding=\"async\" class=\"size-medium wp-image-20123\" src=\"https://cdn.kqed.org/wp-content/uploads/sites/40/2019/04/Leslie-Headshot-Smokey-copy-800x540.jpg\" alt=\"Host Leslie Sbrocco sipping wine\" width=\"800\" height=\"540\">\u003cfigcaption class=\"wp-caption-text\">Host Leslie Sbrocco sipping wine \u003ccite>(Courtesy of Leslie Sbrocco)\u003c/cite>\u003c/figcaption>\u003c/figure>\n\u003cp>My name is Leslie Sbrocco, and I’m the \u003ca href=\"http://ww2.kqed.org/checkplease/host-biography/\" target=\"_blank\" rel=\"noopener noreferrer\">host\u003c/a> of \u003cem>Check, Please! Bay Area\u003c/em>. Each week, I’ll share my tasting notes about the wine, beer and spirits the guests and I drank on set during the taping of the show.\u003c/p>\n\u003cp>\u003cimg loading=\"lazy\" decoding=\"async\" class=\"alignnone size-medium wp-image-23793\" src=\"https://cdn.kqed.org/wp-content/uploads/sites/40/2026/03/2102Wines-2000x2624.jpeg\" alt=\"\" width=\"2000\" height=\"2624\" srcset=\"https://cdn.kqed.org/wp-content/uploads/sites/40/2026/03/2102Wines-2000x2624.jpeg 2000w, https://cdn.kqed.org/wp-content/uploads/sites/40/2026/03/2102Wines-160x210.jpeg 160w, https://cdn.kqed.org/wp-content/uploads/sites/40/2026/03/2102Wines-768x1007.jpeg 768w, https://cdn.kqed.org/wp-content/uploads/sites/40/2026/03/2102Wines-1171x1536.jpeg 1171w, https://cdn.kqed.org/wp-content/uploads/sites/40/2026/03/2102Wines-1561x2048.jpeg 1561w, https://cdn.kqed.org/wp-content/uploads/sites/40/2026/03/2102Wines-scaled.jpeg 1951w\" sizes=\"auto, (max-width: 2000px) 100vw, 2000px\">\u003c/p>\n\u003cp>[ad fullwidth]\u003c/p>\n\u003cp>This trio of refreshing whites is ideal for spring sipping but also works to quench your thirst year-round.\u003c/p>\n\u003cp>\u003ca href=\"https://www.yalumba.com/yalumba/\">\u003cspan style=\"color: #339966\">\u003cstrong>Yalumba 2022 “Samuel’s Collection” Viognier\u003c/strong>\u003c/span>\u003c/a>\u003cbr>\n\u003cem>Eden Valley, Australia, $24\u003cbr>\n\u003c/em>On my first trip to Australia, I was in awe of the rugged landscape, the unique food offerings, and, of course, the wine. One winery — Yalumba — stood above the rest. Pulling up to the historic property took my breath away. Founded in 1849, it’s now in the hands of the sixth generation of ownership by the Hill-Smith family.\u003c/p>\n\u003cp>This Samuel’s Collection wine honors founder Samuel Smith but is crafted by respected winemaker Louisa Rose. She has been with the family for more than three decades, and her talent can be seen in this lusciously crisp Viognier. A grape variety well known in France’s Rhone Valley, it’s only successfully planted in select areas of the world. At Yalumba, it shines. Viognier can be an aromatically showy grape, and this version captures the floral notes and exotic spices of the variety. With a deft hand, Louisa has managed to keep the richness with hints of toasty complexity without sacrificing freshness and succulence. A showstopper, especially for the price.\u003c/p>\n\u003cp>\u003ca href=\"https://www.duckhorn.com/\">\u003cspan style=\"color: #339966\">\u003cstrong>Duckhorn Vineyards 2024 Sauvignon Blanc\u003c/strong>\u003c/span>\u003c/a>\u003cbr>\n\u003cem>North Coast, California, $32\u003cbr>\n\u003c/em>What a legacy Duckhorn Vineyards has brought to not only California but the world. Dan and Margaret Duckhorn began the well-known brand in 1976, and the winery’s consistency and class have endured for 50 years. Known for intensely elegant versions of Merlot and Cabernet Sauvignon, Sauvignon Blanc has become a shining star in their portfolio.\u003c/p>\n\u003cp data-start=\"1761\" data-end=\"2331\">This vintage is classic Duckhorn style — layered and lush with a splash of whimsy. Sauvignon Blanc itself is a grape variety that showcases citrusy fruit notes and a zesty brightness. These qualities form the core of the wine, but due to a healthy 14% of the white grape Sémillon blended in, it expresses a richer, more aromatic character. This pair of grapes forms a uniquely mouthwatering white that’s both serious and seriously fun to sip. It’s also sold in a half-bottle size of 375 mL, which I love. You can have a glass or two without cracking open a whole bottle.\u003c/p>\n\u003cp>\u003ca href=\"https://bouchaine.com\">\u003cspan style=\"color: #339966\">\u003cstrong>Bouchaine 2024 “Alsatian Blend” White\u003c/strong>\u003c/span>\u003c/a>\u003cbr>\n\u003cem>Los Carneros, California $50\u003cbr>\n\u003c/em>If you’re looking for a wonderful outing to wine country, put Bouchaine Vineyards at the top of your list. The property is owned by the dynamic duo Tatiana and Gerret Copeland, whose passion for wine led them to Bouchaine. Their roster of wines expresses a true sense of terroir. This is what I call the “taste of the place in the glass.”\u003c/p>\n\u003cp>The small-production Alsatian blend is a California nod to the Alsace region of France. The snappy yet supple white is a blend of mineral-laden Pinot Gris, aromatic Riesling and Gewurztraminer, and fleshy Pinot Blanc, each made using a variety of vessels, including concrete eggs, clay amphora and neutral oak barrels. All blend seamlessly together in a sultry, full-bodied white that still embraces its zesty fruit flavors.\u003c/p>\n\u003cp>Visiting is a multisensory experience with award-winning vineyard views, myriad tasting and food pairing options, and even a falconry offering! I’ve had the pleasure of filming this rush-of-adrenaline experience.\u003c/p>\n\u003ch2>Episode Transcript\u003c/h2>\n\u003cp class=\"p3\">\u003ci>♪♪\u003c/i>\u003ci>\u003c/i>\u003c/p>\n\u003cp class=\"p5\">\u003cb>Sbrocco:\u003c/b> Fresh Thai flavors in Berkeley.\u003c/p>\n\u003cp class=\"p5\">\u003cb>Lee:\u003c/b> When I go out, I don’t think wholesome — I think decadence.\u003c/p>\n\u003cp class=\"p5\">\u003cb>Sbrocco:\u003c/b> Soul food with a twist in Oakland.\u003c/p>\n\u003cp class=\"p5\">\u003cb>Sbrocco:\u003c/b> Two big fillets.\u003c/p>\n\u003cp class=\"p5\">\u003cb>Rogers-Ard:\u003c/b> The size of a plate.\u003c/p>\n\u003cp class=\"p5\">\u003cb>Sbrocco:\u003c/b> And old-school diner favorites in San Francisco.\u003c/p>\n\u003cp class=\"p5\">\u003cb>Kammet:\u003c/b> The hash browns over there are perfect hash browns.\u003c/p>\n\u003cp class=\"p5\">\u003cb>Sbrocco:\u003c/b> Just ahead on “Check, Please! Bay Area.”\u003c/p>\n\u003cp class=\"p5\">\u003cb>Tam:\u003c/b> Are you ready?\u003c/p>\n\u003cp class=\"p5\">\u003cb>Phillips:\u003c/b> No.\u003c/p>\n\u003cp class=\"p5\">\u003cb>Tam:\u003c/b> Don’t be shy. Come and try.\u003c/p>\n\u003cp class=\"p5\">\u003cb>Phillips:\u003c/b> [ Laughs ]\u003c/p>\n\u003cp class=\"p6\">\u003ci>[ Indistinct conversations ]\u003c/i>\u003c/p>\n\u003cp class=\"p5\">\u003cb>Sbrocco:\u003c/b> Hi, I’m Leslie Sbrocco. Welcome to “Check, Please! Bay Area,” the show where Bay Area residents review and talk about their favorite restaurants. Now, we have three guests, and each one recommends one of their favorite spots, and the other two go check them out to see what they think. Joining me at the “Check, Please!” table today are community arts space director Peggy Lee, educational consultant Rachelle Rogers-Ard, and high school theater teacher Tavis Kammet. Welcome, everyone. Are you ready for a good show?\u003c/p>\n\u003cp class=\"p5\">\u003cb>Lee:\u003c/b> Yay!\u003c/p>\n\u003cp class=\"p5\">\u003cb>Kammet:\u003c/b> We’re excited!\u003c/p>\n\u003cp class=\"p5\">\u003cb>Sbrocco:\u003c/b> Alright! I love it! Tavis’ favorite Thai restaurant doesn’t need a long menu to make a big impression. The flavors pack a serious punch. And yes, the spice level really does go up to 11. Nestled in West Berkeley, it’s Funky Elephant.\u003c/p>\n\u003cp class=\"p3\">\u003ci>♪♪\u003c/i>\u003ci>\u003c/i>\u003c/p>\n\u003cp class=\"p5\">\u003cb>Laptanachai:\u003c/b> Regular spicy? Funky Elephant is a Thai restaurant that represents and honors street vendors in Thailand. They wake up early in the morning, like 1 or 2 a.m. in the morning, just chopping for real, fresh ingredients. We want to give that quality and freshness to the people in the Bay. Funky Elephant is like a taste of our palate. Yellow curry chicken. Pad Thai, add fried egg on top. Fried chicken and roti.\u003c/p>\n\u003cp class=\"p5\">\u003cb>Puttikaew:\u003c/b> Some dishes, we got inspired by north of Thailand, some dishes inspired by southern Thailand, and then mix up together to be the Funky Elephant menu.\u003c/p>\n\u003cp class=\"p5\">\u003cb>Laptanachai:\u003c/b> Everything made from scratch in the house.\u003c/p>\n\u003cp class=\"p5\">\u003cb>Puttikaew:\u003c/b> We make curry paste in house. We have all the sources in house, no store bought. I would say the foundation of Thai cuisine would be Thai aromatics — lemongrass, galangal, kaffir lime leaf, ground pepper.\u003c/p>\n\u003cp class=\"p5\">\u003cb>Laptanachai:\u003c/b> And a lot of garlic, too. My favorite thing on the menu is our pad Thai. We do it with the real tamarind sauce and we do it with the real fried shrimps. And it does come with the heads on, so that’s a great part. The drinks here that I make, I try to do layers just to play with colors.\u003c/p>\n\u003cp class=\"p5\">\u003cb>Woman:\u003c/b> Oh, my God.\u003c/p>\n\u003cp class=\"p5\">\u003cb>Laptanachai:\u003c/b> Butterfly pea limeade. It’s a blue flower. They usually grow in Southeast Asian countries. Once you mix with limeade, it’s gonna turn purple. And it has a lot of health benefits, like it’s packed of antioxidants. The elephant has two sides for me. They’re really strong. They’re really powerful. But in the meantime, they’re a really kind and heartwarming animal.\u003c/p>\n\u003cp class=\"p5\">\u003cb>Puttikaew:\u003c/b> The king of animals in Thailand. So, we mix elephant with the funky that we get from us. We’re super fun. Cheers.\u003c/p>\n\u003cp class=\"p5\">\u003cb>Sbrocco:\u003c/b> So, Tavis, this place has sort of a street-food kind of vibe to it, doesn’t it?\u003c/p>\n\u003cp class=\"p5\">\u003cb>Kammet:\u003c/b> Mm-hmm. I love this place. The first time I went to it was with my family, and the waiter said, “Are you okay with spicy?” My mom was, “Yes, I’m definitely okay with spicy.” She made a mistake that first time. She definitely made a mistake and was sweating beads. But after that first time, I go back probably twice a month.\u003c/p>\n\u003cp class=\"p5\">\u003cb>Sbrocco:\u003c/b> And what is the thing that you start with that you love most?\u003c/p>\n\u003cp class=\"p5\">\u003cb>Kammet:\u003c/b> The roti bread. Big, fluffy, fried pieces of bread with a little dipping sauce of curry. And they give you a knife to stab this fluffy roti.\u003c/p>\n\u003cp class=\"p5\">\u003cb>Sbrocco:\u003c/b> So it does this.\u003c/p>\n\u003cp class=\"p5\">\u003cb>Kammet:\u003c/b> Yeah, it just deflates. And then you’re just picking apart these beautiful, flaky pieces of roti and you’re dipping them in this delicious curry. It is so good.\u003c/p>\n\u003cp class=\"p5\">\u003cb>Sbrocco:\u003c/b> Did you try that, Peggy? I saw you shaking your head when he mentioned it.\u003c/p>\n\u003cp class=\"p5\">\u003cb>Lee:\u003c/b> Oh, I just love roti. I should have gotten that. I got the shrimp chips, which were also very tasty and kind of reminded me of a childhood favorite. That, like, texture, like the little Styrofoam, crispy texture…\u003c/p>\n\u003cp class=\"p5\">\u003cb>Sbrocco:\u003c/b> [ Laughing ] Yeah.\u003c/p>\n\u003cp class=\"p5\">\u003cb>Lee:\u003c/b> …that when we were kids that would come out, like, if you had, like, a big pork butt or something like that. I’m Chinese American, and we would have the little shrimp chips on top of that. So it reminded me of that.\u003c/p>\n\u003cp class=\"p5\">\u003cb>Kammet:\u003c/b> Oh, yeah, yeah.\u003c/p>\n\u003cp class=\"p5\">\u003cb>Sbrocco:\u003c/b> What did you start with, Rachelle?\u003c/p>\n\u003cp class=\"p5\">\u003cb>Rogers-Ard:\u003c/b> I didn’t have a starter, but that’s why I always drag someone with me, and she loved the roti as well.\u003c/p>\n\u003cp class=\"p5\">\u003cb>Kammet:\u003c/b> Mm.\u003c/p>\n\u003cp class=\"p5\">\u003cb>Rogers-Ard:\u003c/b> My friend had the chicken curry, and I could tell that it was really great when she started to wipe the bowl. You know what I mean? Like, this was the hint.\u003c/p>\n\u003cp class=\"p5\">\u003cb>Kammet:\u003c/b> Yeah.\u003c/p>\n\u003cp class=\"p5\">\u003cb>Sbrocco:\u003c/b> Just pick it up and lick it.\u003c/p>\n\u003cp class=\"p5\">\u003cb>Rogers-Ard:\u003c/b> I was like, “You don’t like it at all, obviously.” It looked really decadent. It was the yellow curry with chicken. She felt like the heat was just right where it was supposed to have been. I also had this beautiful fried rice that felt extremely fresh, with fresh veggies in it and this beautiful fried egg. I added chicken breast to the rice dish, and they asked me how I wanted it. It was beautifully sautéed, just absolutely gorgeous, and very, very fresh. I was really impressed.\u003c/p>\n\u003cp class=\"p5\">\u003cb>Sbrocco:\u003c/b> And, Peggy, what did you have?\u003c/p>\n\u003cp class=\"p5\">\u003cb>Lee:\u003c/b> I had the Wholesome Noodles, which was —\u003c/p>\n\u003cp class=\"p5\">\u003cb>Sbrocco:\u003c/b> Which is kind of their signature dish.\u003c/p>\n\u003cp class=\"p5\">\u003cb>Lee:\u003c/b> An incredible surprise.\u003c/p>\n\u003cp class=\"p5\">\u003cb>Sbrocco:\u003c/b> Yeah.\u003c/p>\n\u003cp class=\"p5\">\u003cb>Lee:\u003c/b> Because when I go out, I don’t think wholesome — I think decadence. I think —\u003c/p>\n\u003cp class=\"p5\">\u003cb>Sbrocco:\u003c/b> Bring on the fat! Bring on the sugar!\u003c/p>\n\u003cp class=\"p5\">\u003cb>Lee:\u003c/b> Yes! Let’s go to town! I can be wholesome at home, you know? But it was a beautiful soup noodle, and it was tangy and it was bright. It was herbaceous. It had rice noodles and soft, sort of crumbly pork meatballs. It was a really startlingly good dish. I had never had that before. And it didn’t feel wholesome, which was the best part.\u003c/p>\n\u003cp class=\"p5\">\u003cb>Rogers-Ard:\u003c/b> Nice.\u003c/p>\n\u003cp class=\"p5\">\u003cb>Lee:\u003c/b> Yeah!\u003c/p>\n\u003cp class=\"p5\">\u003cb>Sbrocco:\u003c/b> Tavis, what other dishes did you have?\u003c/p>\n\u003cp class=\"p5\">\u003cb>Kammet:\u003c/b> We also started with the crispy Brussels sprouts. They’re fried in their chili jam, and they’re so juicy with these bursts of chili sauce. Not too spicy for me, but my partner, definitely, she was like, “My mouth is on fire,” but she kept eating them. It’s delicious. It’s to die for.\u003c/p>\n\u003cp class=\"p5\">\u003cb>Sbrocco:\u003c/b> Let’s talk about anything else you had for mains.\u003c/p>\n\u003cp class=\"p5\">\u003cb>Lee:\u003c/b> I also got the K.M.G. #2.\u003c/p>\n\u003cp class=\"p5\">\u003cb>Kammet:\u003c/b> Mm!\u003c/p>\n\u003cp class=\"p5\">\u003cb>Lee:\u003c/b> It was perfect. Like, there was perfectly poached chicken, really lovely rice. The broth was lovely, as well. Very well prepared.\u003c/p>\n\u003cp class=\"p5\">\u003cb>Kammet:\u003c/b> It’s a very popular Thai dish, but it could sound very simple.\u003c/p>\n\u003cp class=\"p5\">\u003cb>Lee:\u003c/b> Yeah.\u003c/p>\n\u003cp class=\"p5\">\u003cb>Kammet:\u003c/b> It’s boiled chicken on rice with some cucumbers and that chili jam again. But the way they do that K.M.G. is so tasty. It’s another one of these dishes for me that just feels so comforting.\u003c/p>\n\u003cp class=\"p5\">\u003cb>Lee:\u003c/b> I got the Jungle Curry. I was excited when I read about it. I thought, “Jungle Curry,” and I saw several asterisks and it said spicy. And I was like, “Yes, let’s go! I’m ready. Let’s do this.” Homemade red curry sauce, dill and basil and snake beans and tofu and kabocha squash, which I love. So I was ready. And then, um, it might have been an off day or an off moment because it wasn’t spicy at all.\u003c/p>\n\u003cp class=\"p5\">\u003cb>Kammet:\u003c/b> Mm!\u003c/p>\n\u003cp class=\"p5\">\u003cb>Lee:\u003c/b> I did think that outside of Jungle Curry, the other dishes had a nice, like, Thai heat, you know, where it’s, like, a little numbing, a little exciting, but not blow your head off, which I thought was really good.\u003c/p>\n\u003cp class=\"p5\">\u003cb>Sbrocco:\u003c/b> Absolutely. Okay. Desserts.\u003c/p>\n\u003cp class=\"p5\">\u003cb>Kammet:\u003c/b> They have a sweet roti, and as the appetizer roti, it’s just as beautiful. It comes out, this big puffy roti with cinnamon and sugar, vanilla ice cream — delicious. And it’s so flaky to dip in the ice cream. Something they do there that I think is a bit uncommon is they have a different soft-serve flavor almost every night. And after you’ve eaten a big meal and you’re like, “Ah, I don’t know if I have room for dessert,” soft serve is so easy to just make a little bit of…\u003c/p>\n\u003cp class=\"p5\">\u003cb>Sbrocco:\u003c/b> A little pocket, little room.\u003c/p>\n\u003cp class=\"p5\">\u003cb>Kammet:\u003c/b> Easily make a little bit of room for some soft serve.\u003c/p>\n\u003cp class=\"p5\">\u003cb>Sbrocco:\u003c/b> Did you have any dessert?\u003c/p>\n\u003cp class=\"p5\">\u003cb>Rogers-Ard:\u003c/b> No. I was so full.\u003c/p>\n\u003cp class=\"p5\">\u003cb>Sbrocco:\u003c/b> Okay. Yeah. You were looking like…\u003c/p>\n\u003cp class=\"p5\">\u003cb>Rogers-Ard:\u003c/b> I was like, you guys had room for dessert?\u003c/p>\n\u003cp class=\"p5\">\u003cb>Kammet:\u003c/b> I know.\u003c/p>\n\u003cp class=\"p5\">\u003cb>Rogers-Ard:\u003c/b> I was so full.\u003c/p>\n\u003cp class=\"p5\">\u003cb>Sbrocco:\u003c/b> It sounded like you enjoyed your experience.\u003c/p>\n\u003cp class=\"p5\">\u003cb>Rogers-Ard:\u003c/b> I did enjoy my experience. It was amazing.\u003c/p>\n\u003cp class=\"p5\">\u003cb>Sbrocco:\u003c/b> So, you would go back?\u003c/p>\n\u003cp class=\"p5\">\u003cb>Lee:\u003c/b> I would go back.\u003c/p>\n\u003cp class=\"p5\">\u003cb>Sbrocco:\u003c/b> Yeah. Alright. If you would like to try Funky Elephant. it’s located on Ninth Street in Berkeley, and the average multi-course tab per person without drinks is around $40. Rachelle is up next with a soul food spot serving comfort by the forkful. Whenever she’s craving the crispiest of catfish this side of the Mississippi, she heads to uptown Oakland, home to Y’s Choice.\u003c/p>\n\u003cp class=\"p3\">\u003ci>♪♪\u003c/i>\u003ci>\u003c/i>\u003c/p>\n\u003cp class=\"p5\">\u003cb>Ahmed:\u003c/b> When someone walks into Y’s Choice, the vibe for me is like, we’re just about to have a party.\u003c/p>\n\u003cp class=\"p5\">\u003cb>Both:\u003c/b> Cheers!\u003c/p>\n\u003cp class=\"p5\">\u003cb>Ahmed:\u003c/b> It’s a vibe. It’s music, the good food, and it smells amazing. Y’s Choice, the name came about — My name is Weyanti. So people couldn’t pronounce it, and they used to call me “Y” growing up. My first memory of cooking was back in Sudan, ’cause that’s where I’m from, and my love for food started watching my mom cook. My mom was absolutely African, so she cooked nothing but African dishes. We didn’t have American dishes. So as I started going to hang out with my friends and started going out, I started tasting different foods because, you know, everybody was frying chicken, everybody was frying fish. And I’m like, “Mom, can you try to make this?” Or, “I want this.” And she’s like, “Figure it out.” And so I said, “Okay, I’ll figure it out.”\u003c/p>\n\u003cp class=\"p3\">\u003ci>♪♪\u003c/i>\u003ci>\u003c/i>\u003c/p>\n\u003cp class=\"p6\">\u003ci>The menu is pretty vast.\u003c/i>\u003c/p>\n\u003cp class=\"p6\">\u003ci>A lot of these dishes\u003c/i>\u003c/p>\n\u003cp class=\"p6\">\u003ci>are soul food,\u003c/i>\u003c/p>\n\u003cp class=\"p6\">\u003ci>like oxtails and grits.\u003c/i>\u003c/p>\n\u003cp class=\"p6\">\u003ci>And some of my favorites\u003c/i>\u003c/p>\n\u003cp class=\"p6\">\u003ci>are the gumbos.\u003c/i>\u003c/p>\n\u003cp class=\"p6\">\u003ci>And the next one would be\u003c/i>\u003c/p>\n\u003cp class=\"p6\">\u003ci>the Art’s Crab,\u003c/i>\u003c/p>\n\u003cp class=\"p6\">\u003ci>and that’s because\u003c/i>\u003c/p>\n\u003cp class=\"p6\">\u003ci>it’s a staple.\u003c/i>\u003c/p>\n\u003cp class=\"p6\">\u003ci>When I was young,\u003c/i>\u003c/p>\n\u003cp class=\"p6\">\u003ci>I used to go to Art’s Crab,\u003c/i>\u003c/p>\n\u003cp class=\"p6\">\u003ci>and so it was a special meal.\u003c/i>\u003c/p>\n\u003cp class=\"p6\">\u003ci>We used to only get it\u003c/i>\u003c/p>\n\u003cp class=\"p6\">\u003ci>during special times,\u003c/i>\u003c/p>\n\u003cp class=\"p6\">\u003ci>and it was an honor\u003c/i>\u003c/p>\n\u003cp class=\"p6\">\u003ci>for me to bring it into my menu\u003c/i>\u003c/p>\n\u003cp class=\"p6\">\u003ci>and name it the Art’s Crab.\u003c/i>\u003c/p>\n\u003cp class=\"p6\">\u003ci>My mother’s tradition\u003c/i>\u003c/p>\n\u003cp class=\"p6\">\u003ci>and culture\u003c/i>\u003c/p>\n\u003cp class=\"p6\">\u003ci>absolutely is a part\u003c/i>\u003c/p>\n\u003cp class=\"p6\">\u003ci>of the menu.\u003c/i>\u003c/p>\n\u003cp class=\"p6\">\u003ci>I have some things that\u003c/i>\u003c/p>\n\u003cp class=\"p6\">\u003ci>I’ve incorporated, like sambusa.\u003c/i>\u003c/p>\n\u003cp class=\"p6\">\u003ci>I grew up on that.\u003c/i>\u003c/p>\n\u003cp class=\"p6\">\u003ci>That was a favorite thing.\u003c/i>\u003c/p>\n\u003cp class=\"p6\">\u003ci>We only had it during holidays,\u003c/i>\u003c/p>\n\u003cp class=\"p6\">\u003ci>and I was just like,\u003c/i>\u003c/p>\n\u003cp class=\"p6\">\u003ci>“Oh, my God,\u003c/i>\u003c/p>\n\u003cp class=\"p6\">\u003ci>I have to put that in there.”\u003c/i>\u003c/p>\n\u003cp class=\"p6\">\u003ci>Some of my spices are used\u003c/i>\u003c/p>\n\u003cp class=\"p6\">\u003ci>and some of my ingredients\u003c/i>\u003c/p>\n\u003cp class=\"p6\">\u003ci>that come from back home.\u003c/i>\u003c/p>\n\u003cp class=\"p6\">\u003ci>The legacy from my mom\u003c/i>\u003c/p>\n\u003cp class=\"p6\">\u003ci>means a lot to me.\u003c/i>\u003c/p>\n\u003cp class=\"p6\">\u003ci>One of the reasons\u003c/i>\u003c/p>\n\u003cp class=\"p6\">\u003ci>why it’s a big portrait —\u003c/i>\u003c/p>\n\u003cp class=\"p6\">\u003ci>it’s really a little joke\u003c/i>\u003c/p>\n\u003cp class=\"p6\">\u003ci>between her and I.\u003c/i>\u003c/p>\n\u003cp class=\"p6\">\u003ci>She used to come to my house and\u003c/i>\u003c/p>\n\u003cp class=\"p6\">\u003ci>she used to always ask, like,\u003c/i>\u003c/p>\n\u003cp class=\"p6\">\u003ci>“Where’s my picture?”\u003c/i>\u003c/p>\n\u003cp class=\"p6\">\u003ci>[ Laughs ]\u003c/i>\u003c/p>\n\u003cp class=\"p6\">\u003ci>After her passing,\u003c/i>\u003c/p>\n\u003cp class=\"p6\">\u003ci>unfortunately,\u003c/i>\u003c/p>\n\u003cp class=\"p6\">\u003ci>I went and got\u003c/i>\u003c/p>\n\u003cp class=\"p6\">\u003ci>a big portrait of her on my arm.\u003c/i>\u003c/p>\n\u003cp class=\"p6\">\u003ci>So there’s a big portrait of her\u003c/i>\u003c/p>\n\u003cp class=\"p6\">\u003ci>that I carry with me\u003c/i>\u003c/p>\n\u003cp class=\"p6\">\u003ci>everywhere I go\u003c/i>\u003c/p>\n\u003cp class=\"p6\">\u003ci>to show her how proud I am.\u003c/i>\u003c/p>\n\u003cp class=\"p6\">\u003ci>So, yeah, it means\u003c/i>\u003c/p>\n\u003cp class=\"p6\">\u003ci>everything to me.\u003c/i>\u003c/p>\n\u003cp class=\"p5\">\u003cb>All:\u003c/b> Y’s Choice!\u003c/p>\n\u003cp class=\"p6\">\u003ci>[ Laughter ]\u003c/i>\u003c/p>\n\u003cp class=\"p5\">\u003cb>Sbrocco:\u003c/b> Now, Rachelle, how did Y’s Choice become your choice?\u003c/p>\n\u003cp class=\"p5\">\u003cb>Rogers-Ard:\u003c/b> Ah, I see what you did there.\u003c/p>\n\u003cp class=\"p5\">\u003cb>Sbrocco:\u003c/b> [ Laughs ]\u003c/p>\n\u003cp class=\"p5\">\u003cb>Rogers-Ard:\u003c/b> What I really, really like is walking into this restaurant owned by a woman of color who is bringing her heritage into the space. The space is a vibe. It’s giving club. It’s giving, um…\u003c/p>\n\u003cp class=\"p5\">\u003cb>Sbrocco:\u003c/b> You guys agree with that?\u003c/p>\n\u003cp class=\"p5\">\u003cb>Lee:\u003c/b> Yeah.\u003c/p>\n\u003cp class=\"p5\">\u003cb>Kammet:\u003c/b> The space is definitely fun.\u003c/p>\n\u003cp class=\"p5\">\u003cb>Sbrocco:\u003c/b> I feel some vibes shaking, yeah.\u003c/p>\n\u003cp class=\"p5\">\u003cb>Rogers-Ard:\u003c/b> Full bar, full party atmosphere. Really, really tall drinks. So, all of those things are really exciting. And so then, the first thing I usually do, a couple of friends started with the crab cake egg rolls. So, I think it’s a really great mixture of her heritage, right, and the fusion therein. And then this dipping sauce.\u003c/p>\n\u003cp class=\"p5\">\u003cb>Sbrocco:\u003c/b> It’s the way to start.\u003c/p>\n\u003cp class=\"p5\">\u003cb>Rogers-Ard:\u003c/b> It was one way.\u003c/p>\n\u003cp class=\"p5\">\u003cb>Sbrocco:\u003c/b> Okay.\u003c/p>\n\u003cp class=\"p5\">\u003cb>Rogers-Ard:\u003c/b> Also could start with the bar.\u003c/p>\n\u003cp class=\"p5\">\u003cb>Sbrocco:\u003c/b> Ah! That’s right! Alright, let’s get over here and dig into your experience.\u003c/p>\n\u003cp class=\"p5\">\u003cb>Kammet:\u003c/b> So, yeah, I mean, the place is — is beautiful when you go inside. It’s very comforting. I also got the meat sambusa, which for me was delicious. It was super tasty, super flavorful, packed full of spices. And you can tell this is real home-cooked food. Like, I take a bite and, you know, grease is coming out. That’s what I want. That’s — that’s like real food.\u003c/p>\n\u003cp class=\"p5\">\u003cb>Sbrocco:\u003c/b> And what about you, Peggy? Now, he said it’s comforting. You said it’s a total party vibe. I’m feeling, like, a thumping music kind of, you know…\u003c/p>\n\u003cp class=\"p5\">\u003cb>Lee:\u003c/b> You know, the music was great.\u003c/p>\n\u003cp class=\"p6\">\u003cspan class=\"s1\">\u003ci>♪\u003c/i>\u003c/span>\u003ci> Try to roll with it, baby \u003c/i>\u003cspan class=\"s1\">\u003ci>♪\u003c/i>\u003ci>\u003c/i>\u003c/span>\u003c/p>\n\u003cp class=\"p5\">\u003cb>Lee:\u003c/b> So, I’m a geriatric millennial, and it was…\u003c/p>\n\u003cp class=\"p5\">\u003cb>Rogers-Ard:\u003c/b> Nice.\u003c/p>\n\u003cp class=\"p5\">\u003cb>Lee:\u003c/b> …delightful. Like, all the hits. I heard some Mos Def, I heard some Blaqstarr. I heard all this delightful music that like…\u003c/p>\n\u003cp class=\"p5\">\u003cb>Rogers-Ard:\u003c/b> Mm, yes!\u003c/p>\n\u003cp class=\"p5\">\u003cb>Lee:\u003c/b> Yes, you know, right? Okay, so maybe similar generation.\u003c/p>\n\u003cp class=\"p5\">\u003cb>Rogers-Ard:\u003c/b> No, no. No, I just hear you.\u003c/p>\n\u003cp class=\"p6\">\u003ci>[ Laughter ]\u003c/i>\u003c/p>\n\u003cp class=\"p5\">\u003cb>Lee:\u003c/b> So, um, I had the turkey wings, which were incredible. And I had imagined something — maybe a braise, dry, maybe with some rice. No, but it was like this soft, beautiful, like, stew. It was incredibly deep and warm. And so, my family is Chinese American from Taiwan. So we love congee, and it was like that. And then it was paired with — we got, for the sides, we got the cabbage, which I highly recommend — delicious. And then the mac and cheese was perfect — so tender, had a little bit of mustard. I was so happy.\u003c/p>\n\u003cp class=\"p5\">\u003cb>Rogers-Ard:\u003c/b> My favorite is always gonna be the fried fish. And what I love is they bring two huge —\u003c/p>\n\u003cp class=\"p5\">\u003cb>Kammet:\u003c/b> Huge!\u003c/p>\n\u003cp class=\"p5\">\u003cb>Rogers-Ard:\u003c/b> I mean, just… Where are they finding it?\u003c/p>\n\u003cp class=\"p5\">\u003cb>Kammet:\u003c/b> They are huge.\u003c/p>\n\u003cp class=\"p5\">\u003cb>Sbrocco:\u003c/b> So, two big fillets.\u003c/p>\n\u003cp class=\"p5\">\u003cb>Rogers-Ard:\u003c/b> Yeah. And they’re the size of the plate, right? But it is so good, so tender, but also flaky on the inside, but also crunchy-crunchy, which is what I love. And I just find that I never finish the fish, but I always finish the sides.\u003c/p>\n\u003cp class=\"p5\">\u003cb>Kammet:\u003c/b> We also got the catfish.\u003c/p>\n\u003cp class=\"p5\">\u003cb>Lee:\u003c/b> Yeah.\u003c/p>\n\u003cp class=\"p5\">\u003cb>Kammet:\u003c/b> My partner is from Mississippi, and so anytime we go anywhere that has fried catfish, that’s where she beelines. These pieces!\u003c/p>\n\u003cp class=\"p6\">\u003ci>[ Laughter ]\u003c/i>\u003c/p>\n\u003cp class=\"p5\">\u003cb>Rogers-Ard:\u003c/b> They’re so big.\u003c/p>\n\u003cp class=\"p5\">\u003cb>Kammet:\u003c/b> Now, this is no joke, audience at home. These pieces are humongous. Two pieces, two sides. Right, the audacity to give you two sides.\u003c/p>\n\u003cp class=\"p5\">\u003cb>Rogers-Ard:\u003c/b> I know!\u003c/p>\n\u003cp class=\"p5\">\u003cb>Kammet:\u003c/b> And the cornbread. She devoured that cornbread. I didn’t even get to try that.\u003c/p>\n\u003cp class=\"p5\">\u003cb>Rogers-Ard:\u003c/b> Yeah.\u003c/p>\n\u003cp class=\"p5\">\u003cb>Kammet:\u003c/b> And I also — We went for brunch, so it was a little too early for me to start drinking for that. But I wound up getting a dish called the Boozie Brunch, which was fried turkey smothered in gravy over this pile of potatoes. And you can tell it’s home-cooked food. Like, the bell peppers and onions are all different shapes and sizes, and the turkey was so delicious. It was just so much food!\u003c/p>\n\u003cp class=\"p6\">\u003ci>[ Laughs ]\u003c/i>\u003c/p>\n\u003cp class=\"p6\">\u003ci>It was a mountain of food.\u003c/i>\u003c/p>\n\u003cp class=\"p5\">\u003cb>Sbrocco:\u003c/b> I guess I don’t have to ask about quantity and quality here.\u003c/p>\n\u003cp class=\"p5\">\u003cb>Rogers-Ard:\u003c/b> No, it’s so much food.\u003c/p>\n\u003cp class=\"p5\">\u003cb>Lee:\u003c/b> I ended up getting the oxtail and the grits.\u003c/p>\n\u003cp class=\"p5\">\u003cb>Sbrocco:\u003c/b> Oh, nice.\u003c/p>\n\u003cp class=\"p5\">\u003cb>Lee:\u003c/b> It was delicious, fall-off-the-bone, on a silky bed of the grits, which I thought was really well done. Maybe like a tiny bit salty for my taste, but I think that’s also part of the dish. Like, it’s supposed to be like a savory, warm, comforting thing.\u003c/p>\n\u003cp class=\"p5\">\u003cb>Sbrocco:\u003c/b> Alright, last thing — dessert.\u003c/p>\n\u003cp class=\"p5\">\u003cb>Kammet:\u003c/b> Well, I got the peach cobbler and I had to take it to go because it was… [ Laughing ] I was so full.\u003c/p>\n\u003cp class=\"p5\">\u003cb>Rogers-Ard:\u003c/b> Right.\u003c/p>\n\u003cp class=\"p5\">\u003cb>Kammet:\u003c/b> It was a little bit sweet for my taste, but it was still such a well-seasoned peach cobbler. Beautiful. Delicious.\u003c/p>\n\u003cp class=\"p5\">\u003cb>Sbrocco:\u003c/b> Good for breakfast with coffee, as a leftover, right?\u003c/p>\n\u003cp class=\"p5\">\u003cb>Kammet:\u003c/b> Oh, yeah.\u003c/p>\n\u003cp class=\"p5\">\u003cb>Sbrocco:\u003c/b> Did you have room? Did you have room?\u003c/p>\n\u003cp class=\"p5\">\u003cb>Lee:\u003c/b> I got the banana pudding.\u003c/p>\n\u003cp class=\"p5\">\u003cb>Sbrocco:\u003c/b> Oh, okay.\u003c/p>\n\u003cp class=\"p5\">\u003cb>Lee:\u003c/b> I did not have room, but I did it.\u003c/p>\n\u003cp class=\"p6\">\u003ci>[ Laughter ]\u003c/i>\u003c/p>\n\u003cp class=\"p6\">\u003ci>It was delicious.\u003c/i>\u003c/p>\n\u003cp class=\"p6\">\u003ci>It had the Chessmen on top,\u003c/i>\u003c/p>\n\u003cp class=\"p6\">\u003ci>which I always love.\u003c/i>\u003c/p>\n\u003cp class=\"p5\">\u003cb>Rogers-Ard:\u003c/b> Oh, uh-huh.\u003c/p>\n\u003cp class=\"p5\">\u003cb>Lee:\u003c/b> And the multi layers. It was a very classic, traditional banana pudding, which just means it’s a good one. It was lovely. Yeah.\u003c/p>\n\u003cp class=\"p5\">\u003cb>Sbrocco:\u003c/b> Sounds like a great experience for all. So, if you would like to try Y’s Choice, it’s located on San Pablo Avenue in uptown Oakland. The average multi-course tab per person without drinks is around $65. Peggy’s pick is a neighborhood diner that offers the quintessential greasy-spoon experience in the best way possible. Dishing up American breakfast classics in the heart of San Francisco’s Mission District for decades, it’s Jim’s By MLVS.\u003c/p>\n\u003cp class=\"p3\">\u003ci>♪♪\u003c/i>\u003ci>\u003c/i>\u003c/p>\n\u003cp class=\"p3\">\u003ci>♪♪\u003c/i>\u003ci>\u003c/i>\u003c/p>\n\u003cp class=\"p5\">\u003cb>Padilla:\u003c/b> Jim’s has been in the Mission District for over 32 years. It has built a very strong clientele that are super loyal to the breakfasts here. It’s just really amazing comfort food. This building has such rich history. It was started by a man named Jim and has been here for several generations, and now we’re very proud to be the owners of Jim’s By MLVS. MLVS is Mission Language and Vocational School. We have a culinary program. And so, through that culinary program, we were able to purchase this restaurant so that we can give the graduates an opportunity to find work. We have the biscuits and gravy.\u003c/p>\n\u003cp class=\"p5\">\u003cb>Guest:\u003c/b> Thank you.\u003c/p>\n\u003cp class=\"p5\">\u003cb>Padilla:\u003c/b> Jim’s By MLVS has been serving very American-style breakfasts that you can find at a diner — pancakes, waffles, eggs, even burgers for lunch. Eggs over easy. We have been incorporating Latino dishes because we want to honor that we’re in the Mission District. So, we have the plátanos fritos. We call this a casamiento. And then we add a delicious fresh cheese and Salvadorean sour cream, so it’s notsosour.\u003c/p>\n\u003cp class=\"p5\">\u003cb>Woman:\u003c/b> Cheers!\u003c/p>\n\u003cp class=\"p5\">\u003cb>Padilla:\u003c/b> Not only do we serve Latinos, but we also work with Latinos. Our staff, they’re all Latinos, and so we allow them to share part of their cultures.\u003c/p>\n\u003cp class=\"p6\">\u003ci>[ Bell dings ]\u003c/i>\u003c/p>\n\u003cp class=\"p6\">\u003ci>Our chef, Beto, started here\u003c/i>\u003c/p>\n\u003cp class=\"p6\">\u003ci>when he was 17 years old,\u003c/i>\u003c/p>\n\u003cp class=\"p6\">\u003ci>as a dishwasher,\u003c/i>\u003c/p>\n\u003cp class=\"p6\">\u003ci>and he’s been here since.\u003c/i>\u003c/p>\n\u003cp class=\"p6\">\u003ci>Chef Beto likes to do\u003c/i>\u003c/p>\n\u003cp class=\"p6\">\u003ci>his — his own designs\u003c/i>\u003c/p>\n\u003cp class=\"p6\">\u003ci>for the food that he serves.\u003c/i>\u003c/p>\n\u003cp class=\"p6\">\u003ci>And so when he wants to make\u003c/i>\u003c/p>\n\u003cp class=\"p6\">\u003ci>the babies happy, or just anyone\u003c/i>\u003c/p>\n\u003cp class=\"p6\">\u003ci>he feels like an extra touch\u003c/i>\u003c/p>\n\u003cp class=\"p6\">\u003ci>of flair would be great…\u003c/i>\u003c/p>\n\u003cp class=\"p5\">\u003cb>Woman:\u003c/b> Look at how cute!\u003c/p>\n\u003cp class=\"p5\">\u003cb>Padilla:\u003c/b> …he’ll change up the look of it. Every time those long-term clients come in, they’re just like, “Oh, my God, he’s still here. I’m gonna order my regular stuff.” Still the same?\u003c/p>\n\u003cp class=\"p5\">\u003cb>Guest:\u003c/b> Same! I told my husband, I said, “It’s the same!”\u003c/p>\n\u003cp class=\"p5\">\u003cb>Padilla:\u003c/b> It’s the same, right?\u003c/p>\n\u003cp class=\"p5\">\u003cb>Woman:\u003c/b> Hey!\u003c/p>\n\u003cp class=\"p5\">\u003cb>Padilla:\u003c/b> The joy that I get working here at Jim’s By MLVS is being able to see the staff grow in their professional life. Being able to see them come from a place where they never worked in a restaurant here in the United States, to seeing them ready for the next step, it makes me feel super grateful.\u003c/p>\n\u003cp class=\"p3\">\u003ci>♪♪\u003c/i>\u003ci>\u003c/i>\u003c/p>\n\u003cp class=\"p5\">\u003cb>Sbrocco:\u003c/b> So, Peggy, when you go to this place, I mean, it’s been there so long.\u003c/p>\n\u003cp class=\"p5\">\u003cb>Lee:\u003c/b> Oh, yeah.\u003c/p>\n\u003cp class=\"p5\">\u003cb>Sbrocco:\u003c/b> It really is a locals’ hangout, isn’t it?\u003c/p>\n\u003cp class=\"p5\">\u003cb>Lee:\u003c/b> It totally is. People have gone there for decades, generations. I get a variety of things, but generally I go for the corned beef hash. It’s a savory, greasy, delicious corned beef, and then they have the crispy hash browns. And it’s all short-order grill, which I think is also really fun ’cause you can actually hear them, like, ching-ching-ching-ching-ching, like, while there preparing it for you. And then I always have it with my over-easy eggs. I like to make a little mix, like hash brown, corned beef hash, soft eggs, and then I put it on my rye toast and I just shovel it in. And I have to have a side of café de olla ’cause it’s a little sweet, but it’s delicious, and the spices. Cinnamon, to me, is the most forward. And then it’s all mixed in this beautiful ceramic mug. So, it’s just my perfect meal.\u003c/p>\n\u003cp class=\"p5\">\u003cb>Sbrocco:\u003c/b> Fantastic. What did you have when you went?\u003c/p>\n\u003cp class=\"p5\">\u003cb>Kammet:\u003c/b> So, I got the chicken fried steak breakfast because I rarely see that on menus. And in fact, I don’t think I’d ever eaten chicken fried steak before.\u003c/p>\n\u003cp class=\"p5\">\u003cb>Sbrocco:\u003c/b> Is it steak? Is it chicken?\u003c/p>\n\u003cp class=\"p5\">\u003cb>Kammet:\u003c/b> Right. It’s definitely not chicken. It’s — It’s more hamburger that’s fried like a chicken. It was a nice, salty piece of fried meat. I will say, the hash browns over there are perfection. They’re the perfect hash browns. They’re thin and crispy. If you’re a hash brown fan, these are perfect hash browns. The French toast we got was kind of like how my mom would make it. Okay, we’ve got sliced bread. Let’s chop them in half, dip them in egg batter, and put them on the skillet. We did also get the sausage patties, which I really enjoyed. They were — I mean, everything at this place is —\u003c/p>\n\u003cp class=\"p5\">\u003cb>Sbrocco:\u003c/b> Were they greasy?\u003c/p>\n\u003cp class=\"p5\">\u003cb>Kammet:\u003c/b> They were. They were greasy. Ooh, nice, greasy, thin, little traditional sausage patties. And they had me. They had me on those sausage patties.\u003c/p>\n\u003cp class=\"p5\">\u003cb>Sbrocco:\u003c/b> And the hash browns.\u003c/p>\n\u003cp class=\"p5\">\u003cb>Kammet:\u003c/b> And those hash browns. Those hash browns were perfect.\u003c/p>\n\u003cp class=\"p5\">\u003cb>Lee:\u003c/b> Yes.\u003c/p>\n\u003cp class=\"p5\">\u003cb>Sbrocco:\u003c/b> Okay. Alright. Rachelle, I have to ask, did you have hash browns?\u003c/p>\n\u003cp class=\"p5\">\u003cb>Rogers-Ard:\u003c/b> I did have hash browns. Um, I felt like this was a diner…\u003c/p>\n\u003cp class=\"p5\">\u003cb>Lee:\u003c/b> Yeah.\u003c/p>\n\u003cp class=\"p5\">\u003cb>Rogers-Ard:\u003c/b> …and it was serving up diner food. I took my sons with me. One had the French toast. I agree with you on the French toast. I wanted maybe some different type of bread, something that would elevate the dish. The other one had the pancake combo, which is why I was able to taste a little bit of everything. I prefer more of a fluffier pancake. It was okay. I really felt like I wanted seasoning.\u003c/p>\n\u003cp class=\"p5\">\u003cb>Lee:\u003c/b> Mm.\u003c/p>\n\u003cp class=\"p5\">\u003cb>Rogers-Ard:\u003c/b> And, um, on the eggs…\u003c/p>\n\u003cp class=\"p5\">\u003cb>Lee:\u003c/b> A little tip is that they have this green salsa. You have to ask for it. And it’s just so bright. ‘Cause everything there is kind of savory, a little sweet. The salsa brightens it all up.\u003c/p>\n\u003cp class=\"p5\">\u003cb>Rogers-Ard:\u003c/b> We also ordered a waffle, and the waffle was really, really thin. I prefer, like, a Belgian.\u003c/p>\n\u003cp class=\"p5\">\u003cb>Sbrocco:\u003c/b> Mm-hmm.\u003c/p>\n\u003cp class=\"p5\">\u003cb>Rogers-Ard:\u003c/b> And so, you know, it was good.\u003c/p>\n\u003cp class=\"p5\">\u003cb>Kammet:\u003c/b> We also got the strawberry milkshake. We split the milkshake. Solid. Good. Nothing I’d write home about, but we finished it. I mean, you know, it’s nice. It’s nice when you get a milkshake and you get the glass with it that’s half-filled with more milkshake. So my partner and I were like, okay, we basically got two milkshakes. Yeah.\u003c/p>\n\u003cp class=\"p5\">\u003cb>Sbrocco:\u003c/b> Have you gotten the milkshakes before?\u003c/p>\n\u003cp class=\"p5\">\u003cb>Lee:\u003c/b> I have not had the milkshake. I should do that next time.\u003c/p>\n\u003cp class=\"p5\">\u003cb>Kammet:\u003c/b> Oh, you should do that.\u003c/p>\n\u003cp class=\"p5\">\u003cb>Lee:\u003c/b> Yeah.\u003c/p>\n\u003cp class=\"p5\">\u003cb>Kammet:\u003c/b> It’s just, it’s such a cool little neighborhood spot and it’s in a cool part of town.\u003c/p>\n\u003cp class=\"p5\">\u003cb>Lee:\u003c/b> Yeah.\u003c/p>\n\u003cp class=\"p5\">\u003cb>Sbrocco:\u003c/b> I love it.\u003c/p>\n\u003cp class=\"p5\">\u003cb>Lee:\u003c/b> It’s a lovely space for me.\u003c/p>\n\u003cp class=\"p5\">\u003cb>Sbrocco:\u003c/b> Alright, well, if you would like to try Jim’s By MLVS, it’s located on Mission Street in San Francisco’s Mission District. The average multi-course tab per person without drinks is around $45. And now, reporter Cecilia Phillips has more Bay Area bites you’ve just got to try. This time, it’s all about the sweets at San Francisco’s Chinatown Night Market.\u003c/p>\n\u003cp class=\"p5\">\u003cb>Phillips:\u003c/b> So, we’re in one of the oldest Chinatowns in the United States. This event brings together so many people.\u003c/p>\n\u003cp class=\"p5\">\u003cb>Lo:\u003c/b> Yes, every month we have approximately about 17,000.\u003c/p>\n\u003cp class=\"p5\">\u003cb>Phillips:\u003c/b> 17,000 people?\u003c/p>\n\u003cp class=\"p5\">\u003cb>Lo:\u003c/b> Yes. And this is really supporting the small businesses in Chinatown. You’ve got all kinds of food. Enjoy boba, tanghulu, fried rice, chicken, you name it.\u003c/p>\n\u003cp class=\"p5\">\u003cb>Phillips:\u003c/b> And it’s cheaper than having to fly to Asia, huh?\u003c/p>\n\u003cp class=\"p5\">\u003cb>Lo:\u003c/b> Yes.\u003c/p>\n\u003cp class=\"p5\">\u003cb>Tam:\u003c/b> This is my family business, and I’m the fifth generation who make this candy in my family. You see this little hair? Actually, it’s all pulling by corn starch and molasses. Stretch it 100 times until this molasses totally shrinks to the little hairs.\u003c/p>\n\u003cp class=\"p5\">\u003cb>Phillips:\u003c/b> Wow.\u003c/p>\n\u003cp class=\"p5\">\u003cb>Tam:\u003c/b> In the past, the dragon was the symbol of the emperor. So these desserts were served to the emperor and the prince only.\u003c/p>\n\u003cp class=\"p5\">\u003cb>Phillips:\u003c/b> So I should feel like royalty right now.\u003c/p>\n\u003cp class=\"p5\">\u003cb>Tam:\u003c/b> Yes, exactly.\u003c/p>\n\u003cp class=\"p6\">\u003ci>[ Both laugh ]\u003c/i>\u003c/p>\n\u003cp class=\"p6\">\u003ci>And when he ate this candy,\u003c/i>\u003c/p>\n\u003cp class=\"p6\">\u003ci>all the little hairs stick\u003c/i>\u003c/p>\n\u003cp class=\"p6\">\u003ci>on his lips and chin,\u003c/i>\u003c/p>\n\u003cp class=\"p6\">\u003ci>which just looked like a beard.\u003c/i>\u003c/p>\n\u003cp class=\"p6\">\u003ci>That’s why we call this\u003c/i>\u003c/p>\n\u003cp class=\"p6\">\u003ci>the dragon beard.\u003c/i>\u003c/p>\n\u003cp class=\"p6\">\u003ci>Are you ready?\u003c/i>\u003c/p>\n\u003cp class=\"p5\">\u003cb>Phillips:\u003c/b> No.\u003c/p>\n\u003cp class=\"p5\">\u003cb>Tam:\u003c/b> No? Oh, don’t be shy. Come and try.\u003c/p>\n\u003cp class=\"p5\">\u003cb>Phillips:\u003c/b> [ Laughs ] Here we go.\u003c/p>\n\u003cp class=\"p5\">\u003cb>Tam:\u003c/b> Okay! Cheers. Mmm! Mmmmm!\u003c/p>\n\u003cp class=\"p5\">\u003cb>Phillips:\u003c/b> [ Laughing ]\u003c/p>\n\u003cp class=\"p5\">\u003cb>Tam:\u003c/b> Now you see why it’s called a beard candy, right? How do you like it?\u003c/p>\n\u003cp class=\"p5\">\u003cb>Phillips:\u003c/b> I love it!\u003c/p>\n\u003cp class=\"p5\">\u003cb>Tam:\u003c/b> [ Laughs ]\u003c/p>\n\u003cp class=\"p3\">\u003ci>♪♪\u003c/i>\u003ci>\u003c/i>\u003c/p>\n\u003cp class=\"p5\">\u003cb>Phillips:\u003c/b> So, I heard you are, like, one of the best bakeries in Chinatown.\u003c/p>\n\u003cp class=\"p5\">\u003cb>Chen:\u003c/b> Yes, I’m in Chinatown over 40 years.\u003c/p>\n\u003cp class=\"p5\">\u003cb>Phillips:\u003c/b> This is a classic Chinese dish, right?\u003c/p>\n\u003cp class=\"p5\">\u003cb>Chen:\u003c/b> Yeah, because, you know, over 100 years and nobody stop it.\u003c/p>\n\u003cp class=\"p6\">\u003ci>[ Both laugh ]\u003c/i>\u003c/p>\n\u003cp class=\"p5\">\u003cb>Phillips:\u003c/b> For 100 years, people have been making egg tarts.\u003c/p>\n\u003cp class=\"p5\">\u003cb>Chen:\u003c/b> Yes.\u003c/p>\n\u003cp class=\"p5\">\u003cb>Phillips:\u003c/b> That cuts so easily.\u003c/p>\n\u003cp class=\"p5\">\u003cb>Chen:\u003c/b> Yes.\u003c/p>\n\u003cp class=\"p5\">\u003cb>Phillips:\u003c/b> It’s so delicate. So, you love to decorate, and you make things like this.\u003c/p>\n\u003cp class=\"p5\">\u003cb>Chen:\u003c/b> Yes.\u003c/p>\n\u003cp class=\"p5\">\u003cb>Phillips:\u003c/b> This is a swan.\u003c/p>\n\u003cp class=\"p5\">\u003cb>Chen:\u003c/b> The swan, I did it maybe 20 years ago.\u003c/p>\n\u003cp class=\"p5\">\u003cb>Phillips:\u003c/b> Whoa!\u003c/p>\n\u003cp class=\"p5\">\u003cb>Chen:\u003c/b> So now I’m eating.\u003c/p>\n\u003cp class=\"p5\">\u003cb>Phillips:\u003c/b> I guess I’m eating this swan, then. Can I just have the wing?\u003c/p>\n\u003cp class=\"p5\">\u003cb>Chen:\u003c/b> Yeah.\u003c/p>\n\u003cp class=\"p5\">\u003cb>Phillips:\u003c/b> Mmm! I love a good wing. I have to tell you, I remember my first memory of having sugar cane as a little kid and chewing and nibbling on some of the stalks.\u003c/p>\n\u003cp class=\"p5\">\u003cb>Efendi:\u003c/b> Yes!\u003c/p>\n\u003cp class=\"p5\">\u003cb>Phillips:\u003c/b> But I didn’t know that there was a way to actually enjoy it much easier.\u003c/p>\n\u003cp class=\"p5\">\u003cb>Efendi:\u003c/b> Absolutely. We have Pure Cane Juice Co. So we press it to order right here with the machine. So, we have Pure Cane and Golden Lime. That’s our most popular drink. We put calamansi in there, which is another citrus that’s also mostly known in Southeast Asia. Besides being delicious, it gives you an energy boost and also gives you gut health.\u003c/p>\n\u003cp class=\"p5\">\u003cb>Phillips:\u003c/b> It’s a healthy drink.\u003c/p>\n\u003cp class=\"p5\">\u003cb>Efendi:\u003c/b> Cheers.\u003c/p>\n\u003cp class=\"p5\">\u003cb>Phillips:\u003c/b> Oh! That is not what I was expecting!\u003c/p>\n\u003cp class=\"p5\">\u003cb>Efendi:\u003c/b> Yeah! There you go.\u003c/p>\n\u003cp class=\"p5\">\u003cb>Phillips:\u003c/b> It’s so flavorful.\u003c/p>\n\u003cp class=\"p5\">\u003cb>Efendi:\u003c/b> Absolutely.\u003c/p>\n\u003cp class=\"p5\">\u003cb>Phillips:\u003c/b> Wow. It’s as fresh as it gets.\u003c/p>\n\u003cp class=\"p5\">\u003cb>Efendi:\u003c/b> Exactly.\u003c/p>\n\u003cp class=\"p3\">\u003ci>♪♪\u003c/i>\u003ci>\u003c/i>\u003c/p>\n\u003cp class=\"p5\">\u003cb>Sbrocco:\u003c/b> I have to thank my great guests on this week’s show. Peggy Lee, who savors the green salsa at Jim’s By MLVS in San Francisco. Rachelle Rogers-Ard, who craves the crispy catfish at Y’s Choice in Oakland. And Tavis Kammet, who noshes on the noodles at Funky Elephant in Berkeley. Join us next time, when three more guests will recommend their favorite spots right here on “Check, Please! Bay Area.” I’m Leslie Sbrocco, and I’ll see you then. Cheers, everyone.\u003c/p>\n\u003cp class=\"p6\">\u003ci>[ All cheering ]\u003c/i>\u003c/p>\n\u003cp class=\"p5\">\u003cb>Sbrocco:\u003c/b> We’re done! Cheers!\u003c/p>\n\u003cp class=\"p3\">\u003ci>♪♪\u003c/i>\u003ci>\u003c/i>\u003c/p>\n\u003cp class=\"p5\">\u003cb>Phillips:\u003c/b> It’s called tanghulu?\u003c/p>\n\u003cp class=\"p5\">\u003cb>Woman:\u003c/b> Yes. It’s a traditional street food from China. It’s sugar-coated fruits, made fresh every day. This is our memory from our childhood in China. So, today we have strawberry and grapes.\u003c/p>\n\u003cp class=\"p5\">\u003cb>Phillips:\u003c/b> Look at how beautiful! It’s almost clear as glass. Here we go.\u003c/p>\n\u003cp class=\"p5\">\u003cb>Woman:\u003c/b> Yes!\u003c/p>\n\u003cp class=\"p6\">\u003ci>[ Crunching ]\u003c/i>\u003c/p>\n\u003cp class=\"p5\">\u003cb>Phillips:\u003c/b> It’s so tasty! That is amazing. I love it. I’m gonna lose a tooth, though. But it’ll be worth it.\u003c/p>\n\u003cp>[ad floatright]\u003c/p>\n\u003cp class=\"p6\">\u003ci>[ Laughs ]\u003c/i>\u003c/p>\n\n",
"blocks": [],
"excerpt": null,
"status": "publish",
"parent": 0,
"modified": 1778192315,
"stats": {
"hasAudio": false,
"hasVideo": false,
"hasChartOrMap": false,
"iframeSrcs": [],
"hasGoogleForm": false,
"hasGallery": false,
"hasHearkenModule": false,
"hasPolis": false,
"paragraphCount": 14,
"wordCount": 6175
},
"headData": {
"title": "Check, Please! Bay Area reviews: Funky Elephant, Y’s Choice, Jim’s by MLVS | KQED",
"description": "Bay Area locals try comfort Thai dishes in Berkeley, fall-off-the-bone oxtails in Oakland and homey breakfast favorites in San Francisco.",
"ogTitle": "",
"ogDescription": "",
"ogImgId": "",
"twTitle": "",
"twDescription": "",
"twImgId": "",
"socialDescription": "Bay Area locals try comfort Thai dishes in Berkeley, fall-off-the-bone oxtails in Oakland and homey breakfast favorites in San Francisco.",
"schema": {
"@context": "https://schema.org",
"@type": "Article",
"headline": "Check, Please! Bay Area reviews: Funky Elephant, Y’s Choice, Jim’s by MLVS",
"datePublished": "2026-04-30T19:56:17-07:00",
"dateModified": "2026-05-07T15:18:35-07:00",
"image": "https://cdn.kqed.org/wp-content/uploads/2020/02/KQED-OG-Image@1x.png"
}
},
"primaryCategory": {
"termId": 3731,
"slug": "episodes",
"name": "episodes"
},
"videoEmbed": "https://www.youtube.com/watch?v=7fgUub4aZMs",
"sticky": false,
"templateType": "standard",
"featuredImageType": "standard",
"excludeFromSiteSearch": "Include",
"articleAge": "0",
"path": "/checkplease/23754/check-please-bay-area-reviews-funky-elephant-ys-choice-jims-by-mlvs",
"audioTrackLength": null,
"parsedContent": [
{
"type": "contentString",
"content": "\u003cdiv class=\"post-body\">\u003cp>\u003cp>\u003cem>Check, Please! Bay Area, \u003c/em>season 21, episode 2, airs Thursday, April 30, at 7:30 pm, on KQED 9. See other \u003ca href=\"http://www.kqed.org/tv/programs/index.jsp?pgmid=14084\" target=\"_blank\" rel=\"noopener noreferrer\">television airtimes\u003c/a>.\u003c/p>\n\u003cp>\u003cspan style=\"font-weight: 400\">In Berkeley’s Gilman District, \u003c/span>\u003cb>Funky Elephant\u003c/b>\u003cspan style=\"font-weight: 400\"> brings vibrant Thai comfort food to life in a colorful, intimate space, with dishes like Wholesome Noodle in savory broth with crumbly pork meatballs, spicy Super Jungle red curry, and sweet roti with condensed milk and roasted coconut to balance out the heat. In Oakland, \u003c/span>\u003cb>Y’s Choice\u003c/b>\u003cspan style=\"font-weight: 400\"> serves up hearty soul food favorites like crispy fried fish with cornbread, turkey wings alongside mac and cheese and cabbage, and fall-off-the-bone oxtails over silky grits, finishing sweet with peach cobbler or banana pudding. And in San Francisco’s Mission District, \u003c/span>\u003cb>Jim’s by MLVS\u003c/b>\u003cspan style=\"font-weight: 400\"> keeps breakfast classic with corned beef hash topped with eggs over easy and rye toast, chicken-fried steak with golden hash browns, and its beloved green salsa spooned generously over just about everything. To wrap up the episode, reporter Cecilia Phillips dives into “Cecilia Tries It” at San Francisco’s \u003cstrong>BeChinatown Night Market\u003c/strong>, soaking up the lively atmosphere as she samples her way through the vendors and flavors that make this historic neighborhood so special.\u003c/span>\u003c/p>\n\u003cfigure id=\"attachment_23799\" class=\"wp-caption alignnone\" style=\"max-width: 1920px\">\u003cimg loading=\"lazy\" decoding=\"async\" class=\"wp-image-23799 size-full\" src=\"https://cdn.kqed.org/wp-content/uploads/sites/40/2026/04/2102_s.png\" alt=\"\" width=\"1920\" height=\"1080\" srcset=\"https://cdn.kqed.org/wp-content/uploads/sites/40/2026/04/2102_s.png 1920w, https://cdn.kqed.org/wp-content/uploads/sites/40/2026/04/2102_s-160x90.png 160w, https://cdn.kqed.org/wp-content/uploads/sites/40/2026/04/2102_s-768x432.png 768w, https://cdn.kqed.org/wp-content/uploads/sites/40/2026/04/2102_s-1536x864.png 1536w\" sizes=\"auto, (max-width: 1920px) 100vw, 1920px\">\u003cfigcaption class=\"wp-caption-text\">Host Leslie Sbrocco joins guests Peggy Lee, Tavis Kammet and Rachelle Rogers-Ard from KQED in San Francisco.\u003c/figcaption>\u003c/figure>\n\u003cp>\u003cspan style=\"color: #2b2b2b\">Get Restaurant Information:\u003c/span>\u003c/p>\n\u003cul>\n\u003cli>\u003ca href=\"https://www.funkyelephantthai.com/\">\u003cstrong>Funky Elephant\u003c/strong> (Berkeley)\u003c/a>\u003c/li>\n\u003cli>\u003ca href=\"https://www.yschoice.space/\">\u003cstrong>Y’s Choice\u003c/strong> (Oakland)\u003c/a>\u003c/li>\n\u003cli>\u003ca href=\"https://www.mlvssf.org/jims-by-mlvs\">\u003cstrong>Jim’s by MLVS \u003c/strong>(San Francisco)\u003c/a>\u003c/li>\n\u003cli>\u003ca href=\"https://bechinatown.weebly.com/\">\u003cstrong>Chinatown Night Market \u003c/strong>(San Francisco)\u003c/a>\u003c/li>\n\u003c/ul>\n\u003cfigure id=\"attachment_20123\" class=\"wp-caption alignnone\" style=\"max-width: 800px\">\u003cimg loading=\"lazy\" decoding=\"async\" class=\"size-medium wp-image-20123\" src=\"https://cdn.kqed.org/wp-content/uploads/sites/40/2019/04/Leslie-Headshot-Smokey-copy-800x540.jpg\" alt=\"Host Leslie Sbrocco sipping wine\" width=\"800\" height=\"540\">\u003cfigcaption class=\"wp-caption-text\">Host Leslie Sbrocco sipping wine \u003ccite>(Courtesy of Leslie Sbrocco)\u003c/cite>\u003c/figcaption>\u003c/figure>\n\u003cp>My name is Leslie Sbrocco, and I’m the \u003ca href=\"http://ww2.kqed.org/checkplease/host-biography/\" target=\"_blank\" rel=\"noopener noreferrer\">host\u003c/a> of \u003cem>Check, Please! Bay Area\u003c/em>. Each week, I’ll share my tasting notes about the wine, beer and spirits the guests and I drank on set during the taping of the show.\u003c/p>\n\u003cp>\u003cimg loading=\"lazy\" decoding=\"async\" class=\"alignnone size-medium wp-image-23793\" src=\"https://cdn.kqed.org/wp-content/uploads/sites/40/2026/03/2102Wines-2000x2624.jpeg\" alt=\"\" width=\"2000\" height=\"2624\" srcset=\"https://cdn.kqed.org/wp-content/uploads/sites/40/2026/03/2102Wines-2000x2624.jpeg 2000w, https://cdn.kqed.org/wp-content/uploads/sites/40/2026/03/2102Wines-160x210.jpeg 160w, https://cdn.kqed.org/wp-content/uploads/sites/40/2026/03/2102Wines-768x1007.jpeg 768w, https://cdn.kqed.org/wp-content/uploads/sites/40/2026/03/2102Wines-1171x1536.jpeg 1171w, https://cdn.kqed.org/wp-content/uploads/sites/40/2026/03/2102Wines-1561x2048.jpeg 1561w, https://cdn.kqed.org/wp-content/uploads/sites/40/2026/03/2102Wines-scaled.jpeg 1951w\" sizes=\"auto, (max-width: 2000px) 100vw, 2000px\">\u003c/p>\n\u003cp>\u003c/p>\u003c/div>",
"attributes": {
"named": {},
"numeric": []
}
},
{
"type": "component",
"content": "",
"name": "ad",
"attributes": {
"named": {
"label": "fullwidth"
},
"numeric": [
"fullwidth"
]
}
},
{
"type": "contentString",
"content": "\u003cdiv class=\"post-body\">\u003cp>\u003c/p>\n\u003cp>This trio of refreshing whites is ideal for spring sipping but also works to quench your thirst year-round.\u003c/p>\n\u003cp>\u003ca href=\"https://www.yalumba.com/yalumba/\">\u003cspan style=\"color: #339966\">\u003cstrong>Yalumba 2022 “Samuel’s Collection” Viognier\u003c/strong>\u003c/span>\u003c/a>\u003cbr>\n\u003cem>Eden Valley, Australia, $24\u003cbr>\n\u003c/em>On my first trip to Australia, I was in awe of the rugged landscape, the unique food offerings, and, of course, the wine. One winery — Yalumba — stood above the rest. Pulling up to the historic property took my breath away. Founded in 1849, it’s now in the hands of the sixth generation of ownership by the Hill-Smith family.\u003c/p>\n\u003cp>This Samuel’s Collection wine honors founder Samuel Smith but is crafted by respected winemaker Louisa Rose. She has been with the family for more than three decades, and her talent can be seen in this lusciously crisp Viognier. A grape variety well known in France’s Rhone Valley, it’s only successfully planted in select areas of the world. At Yalumba, it shines. Viognier can be an aromatically showy grape, and this version captures the floral notes and exotic spices of the variety. With a deft hand, Louisa has managed to keep the richness with hints of toasty complexity without sacrificing freshness and succulence. A showstopper, especially for the price.\u003c/p>\n\u003cp>\u003ca href=\"https://www.duckhorn.com/\">\u003cspan style=\"color: #339966\">\u003cstrong>Duckhorn Vineyards 2024 Sauvignon Blanc\u003c/strong>\u003c/span>\u003c/a>\u003cbr>\n\u003cem>North Coast, California, $32\u003cbr>\n\u003c/em>What a legacy Duckhorn Vineyards has brought to not only California but the world. Dan and Margaret Duckhorn began the well-known brand in 1976, and the winery’s consistency and class have endured for 50 years. Known for intensely elegant versions of Merlot and Cabernet Sauvignon, Sauvignon Blanc has become a shining star in their portfolio.\u003c/p>\n\u003cp data-start=\"1761\" data-end=\"2331\">This vintage is classic Duckhorn style — layered and lush with a splash of whimsy. Sauvignon Blanc itself is a grape variety that showcases citrusy fruit notes and a zesty brightness. These qualities form the core of the wine, but due to a healthy 14% of the white grape Sémillon blended in, it expresses a richer, more aromatic character. This pair of grapes forms a uniquely mouthwatering white that’s both serious and seriously fun to sip. It’s also sold in a half-bottle size of 375 mL, which I love. You can have a glass or two without cracking open a whole bottle.\u003c/p>\n\u003cp>\u003ca href=\"https://bouchaine.com\">\u003cspan style=\"color: #339966\">\u003cstrong>Bouchaine 2024 “Alsatian Blend” White\u003c/strong>\u003c/span>\u003c/a>\u003cbr>\n\u003cem>Los Carneros, California $50\u003cbr>\n\u003c/em>If you’re looking for a wonderful outing to wine country, put Bouchaine Vineyards at the top of your list. The property is owned by the dynamic duo Tatiana and Gerret Copeland, whose passion for wine led them to Bouchaine. Their roster of wines expresses a true sense of terroir. This is what I call the “taste of the place in the glass.”\u003c/p>\n\u003cp>The small-production Alsatian blend is a California nod to the Alsace region of France. The snappy yet supple white is a blend of mineral-laden Pinot Gris, aromatic Riesling and Gewurztraminer, and fleshy Pinot Blanc, each made using a variety of vessels, including concrete eggs, clay amphora and neutral oak barrels. All blend seamlessly together in a sultry, full-bodied white that still embraces its zesty fruit flavors.\u003c/p>\n\u003cp>Visiting is a multisensory experience with award-winning vineyard views, myriad tasting and food pairing options, and even a falconry offering! I’ve had the pleasure of filming this rush-of-adrenaline experience.\u003c/p>\n\u003ch2>Episode Transcript\u003c/h2>\n\u003cp class=\"p3\">\u003ci>♪♪\u003c/i>\u003ci>\u003c/i>\u003c/p>\n\u003cp class=\"p5\">\u003cb>Sbrocco:\u003c/b> Fresh Thai flavors in Berkeley.\u003c/p>\n\u003cp class=\"p5\">\u003cb>Lee:\u003c/b> When I go out, I don’t think wholesome — I think decadence.\u003c/p>\n\u003cp class=\"p5\">\u003cb>Sbrocco:\u003c/b> Soul food with a twist in Oakland.\u003c/p>\n\u003cp class=\"p5\">\u003cb>Sbrocco:\u003c/b> Two big fillets.\u003c/p>\n\u003cp class=\"p5\">\u003cb>Rogers-Ard:\u003c/b> The size of a plate.\u003c/p>\n\u003cp class=\"p5\">\u003cb>Sbrocco:\u003c/b> And old-school diner favorites in San Francisco.\u003c/p>\n\u003cp class=\"p5\">\u003cb>Kammet:\u003c/b> The hash browns over there are perfect hash browns.\u003c/p>\n\u003cp class=\"p5\">\u003cb>Sbrocco:\u003c/b> Just ahead on “Check, Please! Bay Area.”\u003c/p>\n\u003cp class=\"p5\">\u003cb>Tam:\u003c/b> Are you ready?\u003c/p>\n\u003cp class=\"p5\">\u003cb>Phillips:\u003c/b> No.\u003c/p>\n\u003cp class=\"p5\">\u003cb>Tam:\u003c/b> Don’t be shy. Come and try.\u003c/p>\n\u003cp class=\"p5\">\u003cb>Phillips:\u003c/b> [ Laughs ]\u003c/p>\n\u003cp class=\"p6\">\u003ci>[ Indistinct conversations ]\u003c/i>\u003c/p>\n\u003cp class=\"p5\">\u003cb>Sbrocco:\u003c/b> Hi, I’m Leslie Sbrocco. Welcome to “Check, Please! Bay Area,” the show where Bay Area residents review and talk about their favorite restaurants. Now, we have three guests, and each one recommends one of their favorite spots, and the other two go check them out to see what they think. Joining me at the “Check, Please!” table today are community arts space director Peggy Lee, educational consultant Rachelle Rogers-Ard, and high school theater teacher Tavis Kammet. Welcome, everyone. Are you ready for a good show?\u003c/p>\n\u003cp class=\"p5\">\u003cb>Lee:\u003c/b> Yay!\u003c/p>\n\u003cp class=\"p5\">\u003cb>Kammet:\u003c/b> We’re excited!\u003c/p>\n\u003cp class=\"p5\">\u003cb>Sbrocco:\u003c/b> Alright! I love it! Tavis’ favorite Thai restaurant doesn’t need a long menu to make a big impression. The flavors pack a serious punch. And yes, the spice level really does go up to 11. Nestled in West Berkeley, it’s Funky Elephant.\u003c/p>\n\u003cp class=\"p3\">\u003ci>♪♪\u003c/i>\u003ci>\u003c/i>\u003c/p>\n\u003cp class=\"p5\">\u003cb>Laptanachai:\u003c/b> Regular spicy? Funky Elephant is a Thai restaurant that represents and honors street vendors in Thailand. They wake up early in the morning, like 1 or 2 a.m. in the morning, just chopping for real, fresh ingredients. We want to give that quality and freshness to the people in the Bay. Funky Elephant is like a taste of our palate. Yellow curry chicken. Pad Thai, add fried egg on top. Fried chicken and roti.\u003c/p>\n\u003cp class=\"p5\">\u003cb>Puttikaew:\u003c/b> Some dishes, we got inspired by north of Thailand, some dishes inspired by southern Thailand, and then mix up together to be the Funky Elephant menu.\u003c/p>\n\u003cp class=\"p5\">\u003cb>Laptanachai:\u003c/b> Everything made from scratch in the house.\u003c/p>\n\u003cp class=\"p5\">\u003cb>Puttikaew:\u003c/b> We make curry paste in house. We have all the sources in house, no store bought. I would say the foundation of Thai cuisine would be Thai aromatics — lemongrass, galangal, kaffir lime leaf, ground pepper.\u003c/p>\n\u003cp class=\"p5\">\u003cb>Laptanachai:\u003c/b> And a lot of garlic, too. My favorite thing on the menu is our pad Thai. We do it with the real tamarind sauce and we do it with the real fried shrimps. And it does come with the heads on, so that’s a great part. The drinks here that I make, I try to do layers just to play with colors.\u003c/p>\n\u003cp class=\"p5\">\u003cb>Woman:\u003c/b> Oh, my God.\u003c/p>\n\u003cp class=\"p5\">\u003cb>Laptanachai:\u003c/b> Butterfly pea limeade. It’s a blue flower. They usually grow in Southeast Asian countries. Once you mix with limeade, it’s gonna turn purple. And it has a lot of health benefits, like it’s packed of antioxidants. The elephant has two sides for me. They’re really strong. They’re really powerful. But in the meantime, they’re a really kind and heartwarming animal.\u003c/p>\n\u003cp class=\"p5\">\u003cb>Puttikaew:\u003c/b> The king of animals in Thailand. So, we mix elephant with the funky that we get from us. We’re super fun. Cheers.\u003c/p>\n\u003cp class=\"p5\">\u003cb>Sbrocco:\u003c/b> So, Tavis, this place has sort of a street-food kind of vibe to it, doesn’t it?\u003c/p>\n\u003cp class=\"p5\">\u003cb>Kammet:\u003c/b> Mm-hmm. I love this place. The first time I went to it was with my family, and the waiter said, “Are you okay with spicy?” My mom was, “Yes, I’m definitely okay with spicy.” She made a mistake that first time. She definitely made a mistake and was sweating beads. But after that first time, I go back probably twice a month.\u003c/p>\n\u003cp class=\"p5\">\u003cb>Sbrocco:\u003c/b> And what is the thing that you start with that you love most?\u003c/p>\n\u003cp class=\"p5\">\u003cb>Kammet:\u003c/b> The roti bread. Big, fluffy, fried pieces of bread with a little dipping sauce of curry. And they give you a knife to stab this fluffy roti.\u003c/p>\n\u003cp class=\"p5\">\u003cb>Sbrocco:\u003c/b> So it does this.\u003c/p>\n\u003cp class=\"p5\">\u003cb>Kammet:\u003c/b> Yeah, it just deflates. And then you’re just picking apart these beautiful, flaky pieces of roti and you’re dipping them in this delicious curry. It is so good.\u003c/p>\n\u003cp class=\"p5\">\u003cb>Sbrocco:\u003c/b> Did you try that, Peggy? I saw you shaking your head when he mentioned it.\u003c/p>\n\u003cp class=\"p5\">\u003cb>Lee:\u003c/b> Oh, I just love roti. I should have gotten that. I got the shrimp chips, which were also very tasty and kind of reminded me of a childhood favorite. That, like, texture, like the little Styrofoam, crispy texture…\u003c/p>\n\u003cp class=\"p5\">\u003cb>Sbrocco:\u003c/b> [ Laughing ] Yeah.\u003c/p>\n\u003cp class=\"p5\">\u003cb>Lee:\u003c/b> …that when we were kids that would come out, like, if you had, like, a big pork butt or something like that. I’m Chinese American, and we would have the little shrimp chips on top of that. So it reminded me of that.\u003c/p>\n\u003cp class=\"p5\">\u003cb>Kammet:\u003c/b> Oh, yeah, yeah.\u003c/p>\n\u003cp class=\"p5\">\u003cb>Sbrocco:\u003c/b> What did you start with, Rachelle?\u003c/p>\n\u003cp class=\"p5\">\u003cb>Rogers-Ard:\u003c/b> I didn’t have a starter, but that’s why I always drag someone with me, and she loved the roti as well.\u003c/p>\n\u003cp class=\"p5\">\u003cb>Kammet:\u003c/b> Mm.\u003c/p>\n\u003cp class=\"p5\">\u003cb>Rogers-Ard:\u003c/b> My friend had the chicken curry, and I could tell that it was really great when she started to wipe the bowl. You know what I mean? Like, this was the hint.\u003c/p>\n\u003cp class=\"p5\">\u003cb>Kammet:\u003c/b> Yeah.\u003c/p>\n\u003cp class=\"p5\">\u003cb>Sbrocco:\u003c/b> Just pick it up and lick it.\u003c/p>\n\u003cp class=\"p5\">\u003cb>Rogers-Ard:\u003c/b> I was like, “You don’t like it at all, obviously.” It looked really decadent. It was the yellow curry with chicken. She felt like the heat was just right where it was supposed to have been. I also had this beautiful fried rice that felt extremely fresh, with fresh veggies in it and this beautiful fried egg. I added chicken breast to the rice dish, and they asked me how I wanted it. It was beautifully sautéed, just absolutely gorgeous, and very, very fresh. I was really impressed.\u003c/p>\n\u003cp class=\"p5\">\u003cb>Sbrocco:\u003c/b> And, Peggy, what did you have?\u003c/p>\n\u003cp class=\"p5\">\u003cb>Lee:\u003c/b> I had the Wholesome Noodles, which was —\u003c/p>\n\u003cp class=\"p5\">\u003cb>Sbrocco:\u003c/b> Which is kind of their signature dish.\u003c/p>\n\u003cp class=\"p5\">\u003cb>Lee:\u003c/b> An incredible surprise.\u003c/p>\n\u003cp class=\"p5\">\u003cb>Sbrocco:\u003c/b> Yeah.\u003c/p>\n\u003cp class=\"p5\">\u003cb>Lee:\u003c/b> Because when I go out, I don’t think wholesome — I think decadence. I think —\u003c/p>\n\u003cp class=\"p5\">\u003cb>Sbrocco:\u003c/b> Bring on the fat! Bring on the sugar!\u003c/p>\n\u003cp class=\"p5\">\u003cb>Lee:\u003c/b> Yes! Let’s go to town! I can be wholesome at home, you know? But it was a beautiful soup noodle, and it was tangy and it was bright. It was herbaceous. It had rice noodles and soft, sort of crumbly pork meatballs. It was a really startlingly good dish. I had never had that before. And it didn’t feel wholesome, which was the best part.\u003c/p>\n\u003cp class=\"p5\">\u003cb>Rogers-Ard:\u003c/b> Nice.\u003c/p>\n\u003cp class=\"p5\">\u003cb>Lee:\u003c/b> Yeah!\u003c/p>\n\u003cp class=\"p5\">\u003cb>Sbrocco:\u003c/b> Tavis, what other dishes did you have?\u003c/p>\n\u003cp class=\"p5\">\u003cb>Kammet:\u003c/b> We also started with the crispy Brussels sprouts. They’re fried in their chili jam, and they’re so juicy with these bursts of chili sauce. Not too spicy for me, but my partner, definitely, she was like, “My mouth is on fire,” but she kept eating them. It’s delicious. It’s to die for.\u003c/p>\n\u003cp class=\"p5\">\u003cb>Sbrocco:\u003c/b> Let’s talk about anything else you had for mains.\u003c/p>\n\u003cp class=\"p5\">\u003cb>Lee:\u003c/b> I also got the K.M.G. #2.\u003c/p>\n\u003cp class=\"p5\">\u003cb>Kammet:\u003c/b> Mm!\u003c/p>\n\u003cp class=\"p5\">\u003cb>Lee:\u003c/b> It was perfect. Like, there was perfectly poached chicken, really lovely rice. The broth was lovely, as well. Very well prepared.\u003c/p>\n\u003cp class=\"p5\">\u003cb>Kammet:\u003c/b> It’s a very popular Thai dish, but it could sound very simple.\u003c/p>\n\u003cp class=\"p5\">\u003cb>Lee:\u003c/b> Yeah.\u003c/p>\n\u003cp class=\"p5\">\u003cb>Kammet:\u003c/b> It’s boiled chicken on rice with some cucumbers and that chili jam again. But the way they do that K.M.G. is so tasty. It’s another one of these dishes for me that just feels so comforting.\u003c/p>\n\u003cp class=\"p5\">\u003cb>Lee:\u003c/b> I got the Jungle Curry. I was excited when I read about it. I thought, “Jungle Curry,” and I saw several asterisks and it said spicy. And I was like, “Yes, let’s go! I’m ready. Let’s do this.” Homemade red curry sauce, dill and basil and snake beans and tofu and kabocha squash, which I love. So I was ready. And then, um, it might have been an off day or an off moment because it wasn’t spicy at all.\u003c/p>\n\u003cp class=\"p5\">\u003cb>Kammet:\u003c/b> Mm!\u003c/p>\n\u003cp class=\"p5\">\u003cb>Lee:\u003c/b> I did think that outside of Jungle Curry, the other dishes had a nice, like, Thai heat, you know, where it’s, like, a little numbing, a little exciting, but not blow your head off, which I thought was really good.\u003c/p>\n\u003cp class=\"p5\">\u003cb>Sbrocco:\u003c/b> Absolutely. Okay. Desserts.\u003c/p>\n\u003cp class=\"p5\">\u003cb>Kammet:\u003c/b> They have a sweet roti, and as the appetizer roti, it’s just as beautiful. It comes out, this big puffy roti with cinnamon and sugar, vanilla ice cream — delicious. And it’s so flaky to dip in the ice cream. Something they do there that I think is a bit uncommon is they have a different soft-serve flavor almost every night. And after you’ve eaten a big meal and you’re like, “Ah, I don’t know if I have room for dessert,” soft serve is so easy to just make a little bit of…\u003c/p>\n\u003cp class=\"p5\">\u003cb>Sbrocco:\u003c/b> A little pocket, little room.\u003c/p>\n\u003cp class=\"p5\">\u003cb>Kammet:\u003c/b> Easily make a little bit of room for some soft serve.\u003c/p>\n\u003cp class=\"p5\">\u003cb>Sbrocco:\u003c/b> Did you have any dessert?\u003c/p>\n\u003cp class=\"p5\">\u003cb>Rogers-Ard:\u003c/b> No. I was so full.\u003c/p>\n\u003cp class=\"p5\">\u003cb>Sbrocco:\u003c/b> Okay. Yeah. You were looking like…\u003c/p>\n\u003cp class=\"p5\">\u003cb>Rogers-Ard:\u003c/b> I was like, you guys had room for dessert?\u003c/p>\n\u003cp class=\"p5\">\u003cb>Kammet:\u003c/b> I know.\u003c/p>\n\u003cp class=\"p5\">\u003cb>Rogers-Ard:\u003c/b> I was so full.\u003c/p>\n\u003cp class=\"p5\">\u003cb>Sbrocco:\u003c/b> It sounded like you enjoyed your experience.\u003c/p>\n\u003cp class=\"p5\">\u003cb>Rogers-Ard:\u003c/b> I did enjoy my experience. It was amazing.\u003c/p>\n\u003cp class=\"p5\">\u003cb>Sbrocco:\u003c/b> So, you would go back?\u003c/p>\n\u003cp class=\"p5\">\u003cb>Lee:\u003c/b> I would go back.\u003c/p>\n\u003cp class=\"p5\">\u003cb>Sbrocco:\u003c/b> Yeah. Alright. If you would like to try Funky Elephant. it’s located on Ninth Street in Berkeley, and the average multi-course tab per person without drinks is around $40. Rachelle is up next with a soul food spot serving comfort by the forkful. Whenever she’s craving the crispiest of catfish this side of the Mississippi, she heads to uptown Oakland, home to Y’s Choice.\u003c/p>\n\u003cp class=\"p3\">\u003ci>♪♪\u003c/i>\u003ci>\u003c/i>\u003c/p>\n\u003cp class=\"p5\">\u003cb>Ahmed:\u003c/b> When someone walks into Y’s Choice, the vibe for me is like, we’re just about to have a party.\u003c/p>\n\u003cp class=\"p5\">\u003cb>Both:\u003c/b> Cheers!\u003c/p>\n\u003cp class=\"p5\">\u003cb>Ahmed:\u003c/b> It’s a vibe. It’s music, the good food, and it smells amazing. Y’s Choice, the name came about — My name is Weyanti. So people couldn’t pronounce it, and they used to call me “Y” growing up. My first memory of cooking was back in Sudan, ’cause that’s where I’m from, and my love for food started watching my mom cook. My mom was absolutely African, so she cooked nothing but African dishes. We didn’t have American dishes. So as I started going to hang out with my friends and started going out, I started tasting different foods because, you know, everybody was frying chicken, everybody was frying fish. And I’m like, “Mom, can you try to make this?” Or, “I want this.” And she’s like, “Figure it out.” And so I said, “Okay, I’ll figure it out.”\u003c/p>\n\u003cp class=\"p3\">\u003ci>♪♪\u003c/i>\u003ci>\u003c/i>\u003c/p>\n\u003cp class=\"p6\">\u003ci>The menu is pretty vast.\u003c/i>\u003c/p>\n\u003cp class=\"p6\">\u003ci>A lot of these dishes\u003c/i>\u003c/p>\n\u003cp class=\"p6\">\u003ci>are soul food,\u003c/i>\u003c/p>\n\u003cp class=\"p6\">\u003ci>like oxtails and grits.\u003c/i>\u003c/p>\n\u003cp class=\"p6\">\u003ci>And some of my favorites\u003c/i>\u003c/p>\n\u003cp class=\"p6\">\u003ci>are the gumbos.\u003c/i>\u003c/p>\n\u003cp class=\"p6\">\u003ci>And the next one would be\u003c/i>\u003c/p>\n\u003cp class=\"p6\">\u003ci>the Art’s Crab,\u003c/i>\u003c/p>\n\u003cp class=\"p6\">\u003ci>and that’s because\u003c/i>\u003c/p>\n\u003cp class=\"p6\">\u003ci>it’s a staple.\u003c/i>\u003c/p>\n\u003cp class=\"p6\">\u003ci>When I was young,\u003c/i>\u003c/p>\n\u003cp class=\"p6\">\u003ci>I used to go to Art’s Crab,\u003c/i>\u003c/p>\n\u003cp class=\"p6\">\u003ci>and so it was a special meal.\u003c/i>\u003c/p>\n\u003cp class=\"p6\">\u003ci>We used to only get it\u003c/i>\u003c/p>\n\u003cp class=\"p6\">\u003ci>during special times,\u003c/i>\u003c/p>\n\u003cp class=\"p6\">\u003ci>and it was an honor\u003c/i>\u003c/p>\n\u003cp class=\"p6\">\u003ci>for me to bring it into my menu\u003c/i>\u003c/p>\n\u003cp class=\"p6\">\u003ci>and name it the Art’s Crab.\u003c/i>\u003c/p>\n\u003cp class=\"p6\">\u003ci>My mother’s tradition\u003c/i>\u003c/p>\n\u003cp class=\"p6\">\u003ci>and culture\u003c/i>\u003c/p>\n\u003cp class=\"p6\">\u003ci>absolutely is a part\u003c/i>\u003c/p>\n\u003cp class=\"p6\">\u003ci>of the menu.\u003c/i>\u003c/p>\n\u003cp class=\"p6\">\u003ci>I have some things that\u003c/i>\u003c/p>\n\u003cp class=\"p6\">\u003ci>I’ve incorporated, like sambusa.\u003c/i>\u003c/p>\n\u003cp class=\"p6\">\u003ci>I grew up on that.\u003c/i>\u003c/p>\n\u003cp class=\"p6\">\u003ci>That was a favorite thing.\u003c/i>\u003c/p>\n\u003cp class=\"p6\">\u003ci>We only had it during holidays,\u003c/i>\u003c/p>\n\u003cp class=\"p6\">\u003ci>and I was just like,\u003c/i>\u003c/p>\n\u003cp class=\"p6\">\u003ci>“Oh, my God,\u003c/i>\u003c/p>\n\u003cp class=\"p6\">\u003ci>I have to put that in there.”\u003c/i>\u003c/p>\n\u003cp class=\"p6\">\u003ci>Some of my spices are used\u003c/i>\u003c/p>\n\u003cp class=\"p6\">\u003ci>and some of my ingredients\u003c/i>\u003c/p>\n\u003cp class=\"p6\">\u003ci>that come from back home.\u003c/i>\u003c/p>\n\u003cp class=\"p6\">\u003ci>The legacy from my mom\u003c/i>\u003c/p>\n\u003cp class=\"p6\">\u003ci>means a lot to me.\u003c/i>\u003c/p>\n\u003cp class=\"p6\">\u003ci>One of the reasons\u003c/i>\u003c/p>\n\u003cp class=\"p6\">\u003ci>why it’s a big portrait —\u003c/i>\u003c/p>\n\u003cp class=\"p6\">\u003ci>it’s really a little joke\u003c/i>\u003c/p>\n\u003cp class=\"p6\">\u003ci>between her and I.\u003c/i>\u003c/p>\n\u003cp class=\"p6\">\u003ci>She used to come to my house and\u003c/i>\u003c/p>\n\u003cp class=\"p6\">\u003ci>she used to always ask, like,\u003c/i>\u003c/p>\n\u003cp class=\"p6\">\u003ci>“Where’s my picture?”\u003c/i>\u003c/p>\n\u003cp class=\"p6\">\u003ci>[ Laughs ]\u003c/i>\u003c/p>\n\u003cp class=\"p6\">\u003ci>After her passing,\u003c/i>\u003c/p>\n\u003cp class=\"p6\">\u003ci>unfortunately,\u003c/i>\u003c/p>\n\u003cp class=\"p6\">\u003ci>I went and got\u003c/i>\u003c/p>\n\u003cp class=\"p6\">\u003ci>a big portrait of her on my arm.\u003c/i>\u003c/p>\n\u003cp class=\"p6\">\u003ci>So there’s a big portrait of her\u003c/i>\u003c/p>\n\u003cp class=\"p6\">\u003ci>that I carry with me\u003c/i>\u003c/p>\n\u003cp class=\"p6\">\u003ci>everywhere I go\u003c/i>\u003c/p>\n\u003cp class=\"p6\">\u003ci>to show her how proud I am.\u003c/i>\u003c/p>\n\u003cp class=\"p6\">\u003ci>So, yeah, it means\u003c/i>\u003c/p>\n\u003cp class=\"p6\">\u003ci>everything to me.\u003c/i>\u003c/p>\n\u003cp class=\"p5\">\u003cb>All:\u003c/b> Y’s Choice!\u003c/p>\n\u003cp class=\"p6\">\u003ci>[ Laughter ]\u003c/i>\u003c/p>\n\u003cp class=\"p5\">\u003cb>Sbrocco:\u003c/b> Now, Rachelle, how did Y’s Choice become your choice?\u003c/p>\n\u003cp class=\"p5\">\u003cb>Rogers-Ard:\u003c/b> Ah, I see what you did there.\u003c/p>\n\u003cp class=\"p5\">\u003cb>Sbrocco:\u003c/b> [ Laughs ]\u003c/p>\n\u003cp class=\"p5\">\u003cb>Rogers-Ard:\u003c/b> What I really, really like is walking into this restaurant owned by a woman of color who is bringing her heritage into the space. The space is a vibe. It’s giving club. It’s giving, um…\u003c/p>\n\u003cp class=\"p5\">\u003cb>Sbrocco:\u003c/b> You guys agree with that?\u003c/p>\n\u003cp class=\"p5\">\u003cb>Lee:\u003c/b> Yeah.\u003c/p>\n\u003cp class=\"p5\">\u003cb>Kammet:\u003c/b> The space is definitely fun.\u003c/p>\n\u003cp class=\"p5\">\u003cb>Sbrocco:\u003c/b> I feel some vibes shaking, yeah.\u003c/p>\n\u003cp class=\"p5\">\u003cb>Rogers-Ard:\u003c/b> Full bar, full party atmosphere. Really, really tall drinks. So, all of those things are really exciting. And so then, the first thing I usually do, a couple of friends started with the crab cake egg rolls. So, I think it’s a really great mixture of her heritage, right, and the fusion therein. And then this dipping sauce.\u003c/p>\n\u003cp class=\"p5\">\u003cb>Sbrocco:\u003c/b> It’s the way to start.\u003c/p>\n\u003cp class=\"p5\">\u003cb>Rogers-Ard:\u003c/b> It was one way.\u003c/p>\n\u003cp class=\"p5\">\u003cb>Sbrocco:\u003c/b> Okay.\u003c/p>\n\u003cp class=\"p5\">\u003cb>Rogers-Ard:\u003c/b> Also could start with the bar.\u003c/p>\n\u003cp class=\"p5\">\u003cb>Sbrocco:\u003c/b> Ah! That’s right! Alright, let’s get over here and dig into your experience.\u003c/p>\n\u003cp class=\"p5\">\u003cb>Kammet:\u003c/b> So, yeah, I mean, the place is — is beautiful when you go inside. It’s very comforting. I also got the meat sambusa, which for me was delicious. It was super tasty, super flavorful, packed full of spices. And you can tell this is real home-cooked food. Like, I take a bite and, you know, grease is coming out. That’s what I want. That’s — that’s like real food.\u003c/p>\n\u003cp class=\"p5\">\u003cb>Sbrocco:\u003c/b> And what about you, Peggy? Now, he said it’s comforting. You said it’s a total party vibe. I’m feeling, like, a thumping music kind of, you know…\u003c/p>\n\u003cp class=\"p5\">\u003cb>Lee:\u003c/b> You know, the music was great.\u003c/p>\n\u003cp class=\"p6\">\u003cspan class=\"s1\">\u003ci>♪\u003c/i>\u003c/span>\u003ci> Try to roll with it, baby \u003c/i>\u003cspan class=\"s1\">\u003ci>♪\u003c/i>\u003ci>\u003c/i>\u003c/span>\u003c/p>\n\u003cp class=\"p5\">\u003cb>Lee:\u003c/b> So, I’m a geriatric millennial, and it was…\u003c/p>\n\u003cp class=\"p5\">\u003cb>Rogers-Ard:\u003c/b> Nice.\u003c/p>\n\u003cp class=\"p5\">\u003cb>Lee:\u003c/b> …delightful. Like, all the hits. I heard some Mos Def, I heard some Blaqstarr. I heard all this delightful music that like…\u003c/p>\n\u003cp class=\"p5\">\u003cb>Rogers-Ard:\u003c/b> Mm, yes!\u003c/p>\n\u003cp class=\"p5\">\u003cb>Lee:\u003c/b> Yes, you know, right? Okay, so maybe similar generation.\u003c/p>\n\u003cp class=\"p5\">\u003cb>Rogers-Ard:\u003c/b> No, no. No, I just hear you.\u003c/p>\n\u003cp class=\"p6\">\u003ci>[ Laughter ]\u003c/i>\u003c/p>\n\u003cp class=\"p5\">\u003cb>Lee:\u003c/b> So, um, I had the turkey wings, which were incredible. And I had imagined something — maybe a braise, dry, maybe with some rice. No, but it was like this soft, beautiful, like, stew. It was incredibly deep and warm. And so, my family is Chinese American from Taiwan. So we love congee, and it was like that. And then it was paired with — we got, for the sides, we got the cabbage, which I highly recommend — delicious. And then the mac and cheese was perfect — so tender, had a little bit of mustard. I was so happy.\u003c/p>\n\u003cp class=\"p5\">\u003cb>Rogers-Ard:\u003c/b> My favorite is always gonna be the fried fish. And what I love is they bring two huge —\u003c/p>\n\u003cp class=\"p5\">\u003cb>Kammet:\u003c/b> Huge!\u003c/p>\n\u003cp class=\"p5\">\u003cb>Rogers-Ard:\u003c/b> I mean, just… Where are they finding it?\u003c/p>\n\u003cp class=\"p5\">\u003cb>Kammet:\u003c/b> They are huge.\u003c/p>\n\u003cp class=\"p5\">\u003cb>Sbrocco:\u003c/b> So, two big fillets.\u003c/p>\n\u003cp class=\"p5\">\u003cb>Rogers-Ard:\u003c/b> Yeah. And they’re the size of the plate, right? But it is so good, so tender, but also flaky on the inside, but also crunchy-crunchy, which is what I love. And I just find that I never finish the fish, but I always finish the sides.\u003c/p>\n\u003cp class=\"p5\">\u003cb>Kammet:\u003c/b> We also got the catfish.\u003c/p>\n\u003cp class=\"p5\">\u003cb>Lee:\u003c/b> Yeah.\u003c/p>\n\u003cp class=\"p5\">\u003cb>Kammet:\u003c/b> My partner is from Mississippi, and so anytime we go anywhere that has fried catfish, that’s where she beelines. These pieces!\u003c/p>\n\u003cp class=\"p6\">\u003ci>[ Laughter ]\u003c/i>\u003c/p>\n\u003cp class=\"p5\">\u003cb>Rogers-Ard:\u003c/b> They’re so big.\u003c/p>\n\u003cp class=\"p5\">\u003cb>Kammet:\u003c/b> Now, this is no joke, audience at home. These pieces are humongous. Two pieces, two sides. Right, the audacity to give you two sides.\u003c/p>\n\u003cp class=\"p5\">\u003cb>Rogers-Ard:\u003c/b> I know!\u003c/p>\n\u003cp class=\"p5\">\u003cb>Kammet:\u003c/b> And the cornbread. She devoured that cornbread. I didn’t even get to try that.\u003c/p>\n\u003cp class=\"p5\">\u003cb>Rogers-Ard:\u003c/b> Yeah.\u003c/p>\n\u003cp class=\"p5\">\u003cb>Kammet:\u003c/b> And I also — We went for brunch, so it was a little too early for me to start drinking for that. But I wound up getting a dish called the Boozie Brunch, which was fried turkey smothered in gravy over this pile of potatoes. And you can tell it’s home-cooked food. Like, the bell peppers and onions are all different shapes and sizes, and the turkey was so delicious. It was just so much food!\u003c/p>\n\u003cp class=\"p6\">\u003ci>[ Laughs ]\u003c/i>\u003c/p>\n\u003cp class=\"p6\">\u003ci>It was a mountain of food.\u003c/i>\u003c/p>\n\u003cp class=\"p5\">\u003cb>Sbrocco:\u003c/b> I guess I don’t have to ask about quantity and quality here.\u003c/p>\n\u003cp class=\"p5\">\u003cb>Rogers-Ard:\u003c/b> No, it’s so much food.\u003c/p>\n\u003cp class=\"p5\">\u003cb>Lee:\u003c/b> I ended up getting the oxtail and the grits.\u003c/p>\n\u003cp class=\"p5\">\u003cb>Sbrocco:\u003c/b> Oh, nice.\u003c/p>\n\u003cp class=\"p5\">\u003cb>Lee:\u003c/b> It was delicious, fall-off-the-bone, on a silky bed of the grits, which I thought was really well done. Maybe like a tiny bit salty for my taste, but I think that’s also part of the dish. Like, it’s supposed to be like a savory, warm, comforting thing.\u003c/p>\n\u003cp class=\"p5\">\u003cb>Sbrocco:\u003c/b> Alright, last thing — dessert.\u003c/p>\n\u003cp class=\"p5\">\u003cb>Kammet:\u003c/b> Well, I got the peach cobbler and I had to take it to go because it was… [ Laughing ] I was so full.\u003c/p>\n\u003cp class=\"p5\">\u003cb>Rogers-Ard:\u003c/b> Right.\u003c/p>\n\u003cp class=\"p5\">\u003cb>Kammet:\u003c/b> It was a little bit sweet for my taste, but it was still such a well-seasoned peach cobbler. Beautiful. Delicious.\u003c/p>\n\u003cp class=\"p5\">\u003cb>Sbrocco:\u003c/b> Good for breakfast with coffee, as a leftover, right?\u003c/p>\n\u003cp class=\"p5\">\u003cb>Kammet:\u003c/b> Oh, yeah.\u003c/p>\n\u003cp class=\"p5\">\u003cb>Sbrocco:\u003c/b> Did you have room? Did you have room?\u003c/p>\n\u003cp class=\"p5\">\u003cb>Lee:\u003c/b> I got the banana pudding.\u003c/p>\n\u003cp class=\"p5\">\u003cb>Sbrocco:\u003c/b> Oh, okay.\u003c/p>\n\u003cp class=\"p5\">\u003cb>Lee:\u003c/b> I did not have room, but I did it.\u003c/p>\n\u003cp class=\"p6\">\u003ci>[ Laughter ]\u003c/i>\u003c/p>\n\u003cp class=\"p6\">\u003ci>It was delicious.\u003c/i>\u003c/p>\n\u003cp class=\"p6\">\u003ci>It had the Chessmen on top,\u003c/i>\u003c/p>\n\u003cp class=\"p6\">\u003ci>which I always love.\u003c/i>\u003c/p>\n\u003cp class=\"p5\">\u003cb>Rogers-Ard:\u003c/b> Oh, uh-huh.\u003c/p>\n\u003cp class=\"p5\">\u003cb>Lee:\u003c/b> And the multi layers. It was a very classic, traditional banana pudding, which just means it’s a good one. It was lovely. Yeah.\u003c/p>\n\u003cp class=\"p5\">\u003cb>Sbrocco:\u003c/b> Sounds like a great experience for all. So, if you would like to try Y’s Choice, it’s located on San Pablo Avenue in uptown Oakland. The average multi-course tab per person without drinks is around $65. Peggy’s pick is a neighborhood diner that offers the quintessential greasy-spoon experience in the best way possible. Dishing up American breakfast classics in the heart of San Francisco’s Mission District for decades, it’s Jim’s By MLVS.\u003c/p>\n\u003cp class=\"p3\">\u003ci>♪♪\u003c/i>\u003ci>\u003c/i>\u003c/p>\n\u003cp class=\"p3\">\u003ci>♪♪\u003c/i>\u003ci>\u003c/i>\u003c/p>\n\u003cp class=\"p5\">\u003cb>Padilla:\u003c/b> Jim’s has been in the Mission District for over 32 years. It has built a very strong clientele that are super loyal to the breakfasts here. It’s just really amazing comfort food. This building has such rich history. It was started by a man named Jim and has been here for several generations, and now we’re very proud to be the owners of Jim’s By MLVS. MLVS is Mission Language and Vocational School. We have a culinary program. And so, through that culinary program, we were able to purchase this restaurant so that we can give the graduates an opportunity to find work. We have the biscuits and gravy.\u003c/p>\n\u003cp class=\"p5\">\u003cb>Guest:\u003c/b> Thank you.\u003c/p>\n\u003cp class=\"p5\">\u003cb>Padilla:\u003c/b> Jim’s By MLVS has been serving very American-style breakfasts that you can find at a diner — pancakes, waffles, eggs, even burgers for lunch. Eggs over easy. We have been incorporating Latino dishes because we want to honor that we’re in the Mission District. So, we have the plátanos fritos. We call this a casamiento. And then we add a delicious fresh cheese and Salvadorean sour cream, so it’s notsosour.\u003c/p>\n\u003cp class=\"p5\">\u003cb>Woman:\u003c/b> Cheers!\u003c/p>\n\u003cp class=\"p5\">\u003cb>Padilla:\u003c/b> Not only do we serve Latinos, but we also work with Latinos. Our staff, they’re all Latinos, and so we allow them to share part of their cultures.\u003c/p>\n\u003cp class=\"p6\">\u003ci>[ Bell dings ]\u003c/i>\u003c/p>\n\u003cp class=\"p6\">\u003ci>Our chef, Beto, started here\u003c/i>\u003c/p>\n\u003cp class=\"p6\">\u003ci>when he was 17 years old,\u003c/i>\u003c/p>\n\u003cp class=\"p6\">\u003ci>as a dishwasher,\u003c/i>\u003c/p>\n\u003cp class=\"p6\">\u003ci>and he’s been here since.\u003c/i>\u003c/p>\n\u003cp class=\"p6\">\u003ci>Chef Beto likes to do\u003c/i>\u003c/p>\n\u003cp class=\"p6\">\u003ci>his — his own designs\u003c/i>\u003c/p>\n\u003cp class=\"p6\">\u003ci>for the food that he serves.\u003c/i>\u003c/p>\n\u003cp class=\"p6\">\u003ci>And so when he wants to make\u003c/i>\u003c/p>\n\u003cp class=\"p6\">\u003ci>the babies happy, or just anyone\u003c/i>\u003c/p>\n\u003cp class=\"p6\">\u003ci>he feels like an extra touch\u003c/i>\u003c/p>\n\u003cp class=\"p6\">\u003ci>of flair would be great…\u003c/i>\u003c/p>\n\u003cp class=\"p5\">\u003cb>Woman:\u003c/b> Look at how cute!\u003c/p>\n\u003cp class=\"p5\">\u003cb>Padilla:\u003c/b> …he’ll change up the look of it. Every time those long-term clients come in, they’re just like, “Oh, my God, he’s still here. I’m gonna order my regular stuff.” Still the same?\u003c/p>\n\u003cp class=\"p5\">\u003cb>Guest:\u003c/b> Same! I told my husband, I said, “It’s the same!”\u003c/p>\n\u003cp class=\"p5\">\u003cb>Padilla:\u003c/b> It’s the same, right?\u003c/p>\n\u003cp class=\"p5\">\u003cb>Woman:\u003c/b> Hey!\u003c/p>\n\u003cp class=\"p5\">\u003cb>Padilla:\u003c/b> The joy that I get working here at Jim’s By MLVS is being able to see the staff grow in their professional life. Being able to see them come from a place where they never worked in a restaurant here in the United States, to seeing them ready for the next step, it makes me feel super grateful.\u003c/p>\n\u003cp class=\"p3\">\u003ci>♪♪\u003c/i>\u003ci>\u003c/i>\u003c/p>\n\u003cp class=\"p5\">\u003cb>Sbrocco:\u003c/b> So, Peggy, when you go to this place, I mean, it’s been there so long.\u003c/p>\n\u003cp class=\"p5\">\u003cb>Lee:\u003c/b> Oh, yeah.\u003c/p>\n\u003cp class=\"p5\">\u003cb>Sbrocco:\u003c/b> It really is a locals’ hangout, isn’t it?\u003c/p>\n\u003cp class=\"p5\">\u003cb>Lee:\u003c/b> It totally is. People have gone there for decades, generations. I get a variety of things, but generally I go for the corned beef hash. It’s a savory, greasy, delicious corned beef, and then they have the crispy hash browns. And it’s all short-order grill, which I think is also really fun ’cause you can actually hear them, like, ching-ching-ching-ching-ching, like, while there preparing it for you. And then I always have it with my over-easy eggs. I like to make a little mix, like hash brown, corned beef hash, soft eggs, and then I put it on my rye toast and I just shovel it in. And I have to have a side of café de olla ’cause it’s a little sweet, but it’s delicious, and the spices. Cinnamon, to me, is the most forward. And then it’s all mixed in this beautiful ceramic mug. So, it’s just my perfect meal.\u003c/p>\n\u003cp class=\"p5\">\u003cb>Sbrocco:\u003c/b> Fantastic. What did you have when you went?\u003c/p>\n\u003cp class=\"p5\">\u003cb>Kammet:\u003c/b> So, I got the chicken fried steak breakfast because I rarely see that on menus. And in fact, I don’t think I’d ever eaten chicken fried steak before.\u003c/p>\n\u003cp class=\"p5\">\u003cb>Sbrocco:\u003c/b> Is it steak? Is it chicken?\u003c/p>\n\u003cp class=\"p5\">\u003cb>Kammet:\u003c/b> Right. It’s definitely not chicken. It’s — It’s more hamburger that’s fried like a chicken. It was a nice, salty piece of fried meat. I will say, the hash browns over there are perfection. They’re the perfect hash browns. They’re thin and crispy. If you’re a hash brown fan, these are perfect hash browns. The French toast we got was kind of like how my mom would make it. Okay, we’ve got sliced bread. Let’s chop them in half, dip them in egg batter, and put them on the skillet. We did also get the sausage patties, which I really enjoyed. They were — I mean, everything at this place is —\u003c/p>\n\u003cp class=\"p5\">\u003cb>Sbrocco:\u003c/b> Were they greasy?\u003c/p>\n\u003cp class=\"p5\">\u003cb>Kammet:\u003c/b> They were. They were greasy. Ooh, nice, greasy, thin, little traditional sausage patties. And they had me. They had me on those sausage patties.\u003c/p>\n\u003cp class=\"p5\">\u003cb>Sbrocco:\u003c/b> And the hash browns.\u003c/p>\n\u003cp class=\"p5\">\u003cb>Kammet:\u003c/b> And those hash browns. Those hash browns were perfect.\u003c/p>\n\u003cp class=\"p5\">\u003cb>Lee:\u003c/b> Yes.\u003c/p>\n\u003cp class=\"p5\">\u003cb>Sbrocco:\u003c/b> Okay. Alright. Rachelle, I have to ask, did you have hash browns?\u003c/p>\n\u003cp class=\"p5\">\u003cb>Rogers-Ard:\u003c/b> I did have hash browns. Um, I felt like this was a diner…\u003c/p>\n\u003cp class=\"p5\">\u003cb>Lee:\u003c/b> Yeah.\u003c/p>\n\u003cp class=\"p5\">\u003cb>Rogers-Ard:\u003c/b> …and it was serving up diner food. I took my sons with me. One had the French toast. I agree with you on the French toast. I wanted maybe some different type of bread, something that would elevate the dish. The other one had the pancake combo, which is why I was able to taste a little bit of everything. I prefer more of a fluffier pancake. It was okay. I really felt like I wanted seasoning.\u003c/p>\n\u003cp class=\"p5\">\u003cb>Lee:\u003c/b> Mm.\u003c/p>\n\u003cp class=\"p5\">\u003cb>Rogers-Ard:\u003c/b> And, um, on the eggs…\u003c/p>\n\u003cp class=\"p5\">\u003cb>Lee:\u003c/b> A little tip is that they have this green salsa. You have to ask for it. And it’s just so bright. ‘Cause everything there is kind of savory, a little sweet. The salsa brightens it all up.\u003c/p>\n\u003cp class=\"p5\">\u003cb>Rogers-Ard:\u003c/b> We also ordered a waffle, and the waffle was really, really thin. I prefer, like, a Belgian.\u003c/p>\n\u003cp class=\"p5\">\u003cb>Sbrocco:\u003c/b> Mm-hmm.\u003c/p>\n\u003cp class=\"p5\">\u003cb>Rogers-Ard:\u003c/b> And so, you know, it was good.\u003c/p>\n\u003cp class=\"p5\">\u003cb>Kammet:\u003c/b> We also got the strawberry milkshake. We split the milkshake. Solid. Good. Nothing I’d write home about, but we finished it. I mean, you know, it’s nice. It’s nice when you get a milkshake and you get the glass with it that’s half-filled with more milkshake. So my partner and I were like, okay, we basically got two milkshakes. Yeah.\u003c/p>\n\u003cp class=\"p5\">\u003cb>Sbrocco:\u003c/b> Have you gotten the milkshakes before?\u003c/p>\n\u003cp class=\"p5\">\u003cb>Lee:\u003c/b> I have not had the milkshake. I should do that next time.\u003c/p>\n\u003cp class=\"p5\">\u003cb>Kammet:\u003c/b> Oh, you should do that.\u003c/p>\n\u003cp class=\"p5\">\u003cb>Lee:\u003c/b> Yeah.\u003c/p>\n\u003cp class=\"p5\">\u003cb>Kammet:\u003c/b> It’s just, it’s such a cool little neighborhood spot and it’s in a cool part of town.\u003c/p>\n\u003cp class=\"p5\">\u003cb>Lee:\u003c/b> Yeah.\u003c/p>\n\u003cp class=\"p5\">\u003cb>Sbrocco:\u003c/b> I love it.\u003c/p>\n\u003cp class=\"p5\">\u003cb>Lee:\u003c/b> It’s a lovely space for me.\u003c/p>\n\u003cp class=\"p5\">\u003cb>Sbrocco:\u003c/b> Alright, well, if you would like to try Jim’s By MLVS, it’s located on Mission Street in San Francisco’s Mission District. The average multi-course tab per person without drinks is around $45. And now, reporter Cecilia Phillips has more Bay Area bites you’ve just got to try. This time, it’s all about the sweets at San Francisco’s Chinatown Night Market.\u003c/p>\n\u003cp class=\"p5\">\u003cb>Phillips:\u003c/b> So, we’re in one of the oldest Chinatowns in the United States. This event brings together so many people.\u003c/p>\n\u003cp class=\"p5\">\u003cb>Lo:\u003c/b> Yes, every month we have approximately about 17,000.\u003c/p>\n\u003cp class=\"p5\">\u003cb>Phillips:\u003c/b> 17,000 people?\u003c/p>\n\u003cp class=\"p5\">\u003cb>Lo:\u003c/b> Yes. And this is really supporting the small businesses in Chinatown. You’ve got all kinds of food. Enjoy boba, tanghulu, fried rice, chicken, you name it.\u003c/p>\n\u003cp class=\"p5\">\u003cb>Phillips:\u003c/b> And it’s cheaper than having to fly to Asia, huh?\u003c/p>\n\u003cp class=\"p5\">\u003cb>Lo:\u003c/b> Yes.\u003c/p>\n\u003cp class=\"p5\">\u003cb>Tam:\u003c/b> This is my family business, and I’m the fifth generation who make this candy in my family. You see this little hair? Actually, it’s all pulling by corn starch and molasses. Stretch it 100 times until this molasses totally shrinks to the little hairs.\u003c/p>\n\u003cp class=\"p5\">\u003cb>Phillips:\u003c/b> Wow.\u003c/p>\n\u003cp class=\"p5\">\u003cb>Tam:\u003c/b> In the past, the dragon was the symbol of the emperor. So these desserts were served to the emperor and the prince only.\u003c/p>\n\u003cp class=\"p5\">\u003cb>Phillips:\u003c/b> So I should feel like royalty right now.\u003c/p>\n\u003cp class=\"p5\">\u003cb>Tam:\u003c/b> Yes, exactly.\u003c/p>\n\u003cp class=\"p6\">\u003ci>[ Both laugh ]\u003c/i>\u003c/p>\n\u003cp class=\"p6\">\u003ci>And when he ate this candy,\u003c/i>\u003c/p>\n\u003cp class=\"p6\">\u003ci>all the little hairs stick\u003c/i>\u003c/p>\n\u003cp class=\"p6\">\u003ci>on his lips and chin,\u003c/i>\u003c/p>\n\u003cp class=\"p6\">\u003ci>which just looked like a beard.\u003c/i>\u003c/p>\n\u003cp class=\"p6\">\u003ci>That’s why we call this\u003c/i>\u003c/p>\n\u003cp class=\"p6\">\u003ci>the dragon beard.\u003c/i>\u003c/p>\n\u003cp class=\"p6\">\u003ci>Are you ready?\u003c/i>\u003c/p>\n\u003cp class=\"p5\">\u003cb>Phillips:\u003c/b> No.\u003c/p>\n\u003cp class=\"p5\">\u003cb>Tam:\u003c/b> No? Oh, don’t be shy. Come and try.\u003c/p>\n\u003cp class=\"p5\">\u003cb>Phillips:\u003c/b> [ Laughs ] Here we go.\u003c/p>\n\u003cp class=\"p5\">\u003cb>Tam:\u003c/b> Okay! Cheers. Mmm! Mmmmm!\u003c/p>\n\u003cp class=\"p5\">\u003cb>Phillips:\u003c/b> [ Laughing ]\u003c/p>\n\u003cp class=\"p5\">\u003cb>Tam:\u003c/b> Now you see why it’s called a beard candy, right? How do you like it?\u003c/p>\n\u003cp class=\"p5\">\u003cb>Phillips:\u003c/b> I love it!\u003c/p>\n\u003cp class=\"p5\">\u003cb>Tam:\u003c/b> [ Laughs ]\u003c/p>\n\u003cp class=\"p3\">\u003ci>♪♪\u003c/i>\u003ci>\u003c/i>\u003c/p>\n\u003cp class=\"p5\">\u003cb>Phillips:\u003c/b> So, I heard you are, like, one of the best bakeries in Chinatown.\u003c/p>\n\u003cp class=\"p5\">\u003cb>Chen:\u003c/b> Yes, I’m in Chinatown over 40 years.\u003c/p>\n\u003cp class=\"p5\">\u003cb>Phillips:\u003c/b> This is a classic Chinese dish, right?\u003c/p>\n\u003cp class=\"p5\">\u003cb>Chen:\u003c/b> Yeah, because, you know, over 100 years and nobody stop it.\u003c/p>\n\u003cp class=\"p6\">\u003ci>[ Both laugh ]\u003c/i>\u003c/p>\n\u003cp class=\"p5\">\u003cb>Phillips:\u003c/b> For 100 years, people have been making egg tarts.\u003c/p>\n\u003cp class=\"p5\">\u003cb>Chen:\u003c/b> Yes.\u003c/p>\n\u003cp class=\"p5\">\u003cb>Phillips:\u003c/b> That cuts so easily.\u003c/p>\n\u003cp class=\"p5\">\u003cb>Chen:\u003c/b> Yes.\u003c/p>\n\u003cp class=\"p5\">\u003cb>Phillips:\u003c/b> It’s so delicate. So, you love to decorate, and you make things like this.\u003c/p>\n\u003cp class=\"p5\">\u003cb>Chen:\u003c/b> Yes.\u003c/p>\n\u003cp class=\"p5\">\u003cb>Phillips:\u003c/b> This is a swan.\u003c/p>\n\u003cp class=\"p5\">\u003cb>Chen:\u003c/b> The swan, I did it maybe 20 years ago.\u003c/p>\n\u003cp class=\"p5\">\u003cb>Phillips:\u003c/b> Whoa!\u003c/p>\n\u003cp class=\"p5\">\u003cb>Chen:\u003c/b> So now I’m eating.\u003c/p>\n\u003cp class=\"p5\">\u003cb>Phillips:\u003c/b> I guess I’m eating this swan, then. Can I just have the wing?\u003c/p>\n\u003cp class=\"p5\">\u003cb>Chen:\u003c/b> Yeah.\u003c/p>\n\u003cp class=\"p5\">\u003cb>Phillips:\u003c/b> Mmm! I love a good wing. I have to tell you, I remember my first memory of having sugar cane as a little kid and chewing and nibbling on some of the stalks.\u003c/p>\n\u003cp class=\"p5\">\u003cb>Efendi:\u003c/b> Yes!\u003c/p>\n\u003cp class=\"p5\">\u003cb>Phillips:\u003c/b> But I didn’t know that there was a way to actually enjoy it much easier.\u003c/p>\n\u003cp class=\"p5\">\u003cb>Efendi:\u003c/b> Absolutely. We have Pure Cane Juice Co. So we press it to order right here with the machine. So, we have Pure Cane and Golden Lime. That’s our most popular drink. We put calamansi in there, which is another citrus that’s also mostly known in Southeast Asia. Besides being delicious, it gives you an energy boost and also gives you gut health.\u003c/p>\n\u003cp class=\"p5\">\u003cb>Phillips:\u003c/b> It’s a healthy drink.\u003c/p>\n\u003cp class=\"p5\">\u003cb>Efendi:\u003c/b> Cheers.\u003c/p>\n\u003cp class=\"p5\">\u003cb>Phillips:\u003c/b> Oh! That is not what I was expecting!\u003c/p>\n\u003cp class=\"p5\">\u003cb>Efendi:\u003c/b> Yeah! There you go.\u003c/p>\n\u003cp class=\"p5\">\u003cb>Phillips:\u003c/b> It’s so flavorful.\u003c/p>\n\u003cp class=\"p5\">\u003cb>Efendi:\u003c/b> Absolutely.\u003c/p>\n\u003cp class=\"p5\">\u003cb>Phillips:\u003c/b> Wow. It’s as fresh as it gets.\u003c/p>\n\u003cp class=\"p5\">\u003cb>Efendi:\u003c/b> Exactly.\u003c/p>\n\u003cp class=\"p3\">\u003ci>♪♪\u003c/i>\u003ci>\u003c/i>\u003c/p>\n\u003cp class=\"p5\">\u003cb>Sbrocco:\u003c/b> I have to thank my great guests on this week’s show. Peggy Lee, who savors the green salsa at Jim’s By MLVS in San Francisco. Rachelle Rogers-Ard, who craves the crispy catfish at Y’s Choice in Oakland. And Tavis Kammet, who noshes on the noodles at Funky Elephant in Berkeley. Join us next time, when three more guests will recommend their favorite spots right here on “Check, Please! Bay Area.” I’m Leslie Sbrocco, and I’ll see you then. Cheers, everyone.\u003c/p>\n\u003cp class=\"p6\">\u003ci>[ All cheering ]\u003c/i>\u003c/p>\n\u003cp class=\"p5\">\u003cb>Sbrocco:\u003c/b> We’re done! Cheers!\u003c/p>\n\u003cp class=\"p3\">\u003ci>♪♪\u003c/i>\u003ci>\u003c/i>\u003c/p>\n\u003cp class=\"p5\">\u003cb>Phillips:\u003c/b> It’s called tanghulu?\u003c/p>\n\u003cp class=\"p5\">\u003cb>Woman:\u003c/b> Yes. It’s a traditional street food from China. It’s sugar-coated fruits, made fresh every day. This is our memory from our childhood in China. So, today we have strawberry and grapes.\u003c/p>\n\u003cp class=\"p5\">\u003cb>Phillips:\u003c/b> Look at how beautiful! It’s almost clear as glass. Here we go.\u003c/p>\n\u003cp class=\"p5\">\u003cb>Woman:\u003c/b> Yes!\u003c/p>\n\u003cp class=\"p6\">\u003ci>[ Crunching ]\u003c/i>\u003c/p>\n\u003cp class=\"p5\">\u003cb>Phillips:\u003c/b> It’s so tasty! That is amazing. I love it. I’m gonna lose a tooth, though. But it’ll be worth it.\u003c/p>\n\u003cp>\u003c/p>\u003c/div>",
"attributes": {
"named": {},
"numeric": []
}
},
{
"type": "component",
"content": "",
"name": "ad",
"attributes": {
"named": {
"label": "floatright"
},
"numeric": [
"floatright"
]
}
},
{
"type": "contentString",
"content": "\u003cdiv class=\"post-body\">\u003cp>\u003c/p>\n\u003cp class=\"p6\">\u003ci>[ Laughs ]\u003c/i>\u003c/p>\n\n\u003c/div>\u003c/p>",
"attributes": {
"named": {},
"numeric": []
}
}
],
"link": "/checkplease/23754/check-please-bay-area-reviews-funky-elephant-ys-choice-jims-by-mlvs",
"authors": [
"11084"
],
"programs": [
"checkplease_9339"
],
"categories": [
"checkplease_3758",
"checkplease_3845",
"checkplease_3763",
"checkplease_3873",
"checkplease_9105",
"checkplease_3750",
"checkplease_3730",
"checkplease_3740",
"checkplease_9210",
"checkplease_3731",
"checkplease_9200",
"checkplease_3871",
"checkplease_3753",
"checkplease_9212",
"checkplease_3764",
"checkplease_3738",
"checkplease_10",
"checkplease_3729",
"checkplease_3739",
"checkplease_9209",
"checkplease_9453",
"checkplease_8175",
"checkplease_7938"
],
"tags": [
"checkplease_8508",
"checkplease_8633",
"checkplease_1368",
"checkplease_8509",
"checkplease_8518",
"checkplease_8707",
"checkplease_9007",
"checkplease_9005",
"checkplease_9404",
"checkplease_8703"
],
"featImg": "checkplease_23795",
"label": "checkplease_9339"
},
"checkplease_23753": {
"type": "posts",
"id": "checkplease_23753",
"meta": {
"index": "posts_1716263798",
"site": "checkplease",
"id": "23753",
"score": null,
"sort": [
1776997510000
]
},
"guestAuthors": [],
"slug": "check-please-bay-area-reviews-fox-tale-fermentation-project-the-bywater-pyeong-chang-tofu-house",
"title": "Check, Please! Bay Area reviews: Fox Tale Fermentation Project, The Bywater, Pyeong Chang Tofu House",
"publishDate": 1776997510,
"format": "video",
"headTitle": "Check, Please! Bay Area reviews: Fox Tale Fermentation Project, The Bywater, Pyeong Chang Tofu House | KQED",
"labelTerm": {
"term": 9339,
"site": "checkplease"
},
"content": "\u003cp>\u003cem>Check, Please! Bay Area, \u003c/em>season 21, episode 1, airs Thursday, April 23, at 7:30 pm, on KQED 9. See other \u003ca href=\"http://www.kqed.org/tv/programs/index.jsp?pgmid=14084\" target=\"_blank\" rel=\"noopener noreferrer\">television airtimes\u003c/a>.\u003c/p>\n\u003cp>\u003cspan style=\"font-weight: 400\">Check, Please! Bay Area’s 21st season kicks off in downtown San Jose at \u003c/span>\u003cb>Fox Tale Fermentation Project\u003c/b>\u003cspan style=\"font-weight: 400\">, where boundary-pushing fermentation fuels both the beer and the food. Diners dig into Funky Nachos loaded with cashew queso, habañero crema and guacamole, along with The Full Spread served with a selection of house ferments from kimchi to kraut. In Los Gatos, \u003c/span>\u003cb>The Bywater\u003c/b>\u003cspan style=\"font-weight: 400\"> channels the spirit of New Orleans with crispy, well-seasoned fried chicken and Creole fries, hush puppies drizzled with hot honey, and a double-smashed Bywater burger layered with raclette and shallot jam, before finishing on hot, powdered-sugar-dusted beignets. The journey wraps up on Oakland’s Telegraph Avenue at \u003c/span>\u003cb>Pyeong Chang Tofu House\u003c/b>\u003cspan style=\"font-weight: 400\">, where spicy tofu soup arrives alongside crisp kimchi pancakes, BBQ spicy pork, and stone-pot kimchi dolsot bibimbap for almost three decades.\u003c/span>\u003c/p>\n\u003cfigure id=\"attachment_23778\" class=\"wp-caption alignnone\" style=\"max-width: 1920px\">\u003cimg loading=\"lazy\" decoding=\"async\" class=\"size-full wp-image-23778\" src=\"https://cdn.kqed.org/wp-content/uploads/sites/40/2026/03/2101_f.png\" alt=\"\" width=\"1920\" height=\"1080\" srcset=\"https://cdn.kqed.org/wp-content/uploads/sites/40/2026/03/2101_f.png 1920w, https://cdn.kqed.org/wp-content/uploads/sites/40/2026/03/2101_f-160x90.png 160w, https://cdn.kqed.org/wp-content/uploads/sites/40/2026/03/2101_f-768x432.png 768w, https://cdn.kqed.org/wp-content/uploads/sites/40/2026/03/2101_f-1536x864.png 1536w\" sizes=\"auto, (max-width: 1920px) 100vw, 1920px\">\u003cfigcaption class=\"wp-caption-text\">Host Leslie Sbrocco joins guests Cory Randolph, Pamela Gorospe and Eddie Edelson from KQED in San Francisco.\u003c/figcaption>\u003c/figure>\n\u003cp>\u003cspan style=\"color: #2b2b2b\">Get Restaurant Information:\u003c/span>\u003c/p>\n\u003cul>\n\u003cli>\u003ca href=\"https://www.foxtalefermentationproject.com/\">\u003cstrong>Fox Tale Fermentation Project\u003c/strong> (San Jose)\u003c/a>\u003c/li>\n\u003cli>\u003ca href=\"https://www.thebywaterca.com/\">\u003cstrong>The Bywater\u003c/strong> (Los Gatos)\u003c/a>\u003c/li>\n\u003cli>\u003ca href=\"https://www.pctofu.com/\">\u003cstrong>Pyeong Chang Tofu House \u003c/strong>(Oakland)\u003c/a>\u003c/li>\n\u003c/ul>\n\u003ch2>Episode Transcript\u003c/h2>\n\u003cp class=\"p1\">\u003cb>Sbrocco:\u003c/b> Creative brews and other fermented favorites in San Jose.\u003c/p>\n\u003cp class=\"p1\">\u003cb>Gorospe:\u003c/b> I can’t get away from the cashew queso.\u003c/p>\n\u003cp>[ad fullwidth]\u003c/p>\n\u003cp class=\"p1\">\u003cb>Sbrocco:\u003c/b> Authentic Korean cuisine in Oakland.\u003c/p>\n\u003cp class=\"p1\">\u003cb>Edelson:\u003c/b> I have to do their kimchi pancake every time.\u003c/p>\n\u003cp class=\"p1\">\u003cb>Sbrocco:\u003c/b> And Creole comforts in Los Gatos.\u003c/p>\n\u003cp class=\"p1\">\u003cb>Randolph:\u003c/b> The beignet was beignet-ing!\u003c/p>\n\u003cp class=\"p1\">\u003cb>Sbrocco:\u003c/b> Just ahead on “Check, Please! Bay Area.”\u003c/p>\n\u003cp class=\"p1\">\u003cb>Gorospe:\u003c/b> Bi bim bop.\u003c/p>\n\u003cp class=\"p1\">\u003cb>Edelson:\u003c/b> Bi bim bop.\u003c/p>\n\u003cp class=\"p1\">\u003cb>Sbrocco:\u003c/b> Bi bim bop.\u003c/p>\n\u003cp class=\"p1\">\u003cb>Randolph:\u003c/b> Bop, bop, mm-bop.\u003c/p>\n\u003cp class=\"p3\">♪♪♪♪\u003c/p>\n\u003cp class=\"p1\">\u003cb>Sbrocco:\u003c/b> Hi. I’m Leslie Sbrocco. Welcome to “Check, Please! Bay Area”, the show where Bay Area residents review and talk about their favorite restaurants. Now, we have three guests, and each one recommends one of their favorite spots. And the other two go check them out to see what they think.\u003c/p>\n\u003cp class=\"p1\">\u003cb>Sbrocco:\u003c/b> Joining me at the check please table today are deejay Cory Randolph, clinical psychologist Eddie Edelson, and catering manager Pam Gorospe. Welcome, everyone. How you doing?\u003c/p>\n\u003cp class=\"p1\">\u003cb>Gorospe:\u003c/b> Good.\u003c/p>\n\u003cp class=\"p1\">\u003cb>Edelson:\u003c/b> Excited to be here.\u003c/p>\n\u003cp class=\"p1\">\u003cb>Sbrocco:\u003c/b> Pam’s top pick for a night out comes with a deliciously funky twist. Think Kimchis and Krauts, tangy sours and crisp ciders, every bite and sip powered by the art of fermentation. Right in the heart of downtown San Jose, It’s Fox Tale Fermentation Project.\u003c/p>\n\u003cp class=\"p3\">♪♪♪♪\u003c/p>\n\u003cp class=\"p1\">\u003cb>Wendy:\u003c/b> Foxtail Fermentation project is a business that is constantly telling a story with every single thing that we do.\u003c/p>\n\u003cp class=\"p1\">\u003cb>Wendy:\u003c/b> We’ve got fermented pickles, we’ve got beet beer mustard.\u003c/p>\n\u003cp class=\"p1\">\u003cb>Felipe:\u003c/b> Everything is plant based, it’s fresh, it’s fermented, it makes you feel good. And it’s a very exciting place to come and try.\u003c/p>\n\u003cp class=\"p1\">\u003cb>Wendy:\u003c/b> Fermentation is the oldest food technique throughout all of history. Every single culture across the world uses fermentation in various ways. You don’t necessarily have to eat a fork full of sauerkraut all of the time to be eating fermented foods, but you can find ways to incorporate it in your food. And then it’s healing. It’s good for you. It’s invigorating, and it tastes amazing.\u003c/p>\n\u003cp class=\"p1\">\u003cb>Wendy:\u003c/b> We got two hot pretzels.\u003c/p>\n\u003cp class=\"p1\">\u003cb>Wendy:\u003c/b> This is our vegan cashew queso. One of the things I’m the most proud of is a cultured cacao mousse. We source the cacao beans directly from this really incredible organization in Mexico. We ferment them in piloncillo, which is like a Mexican brown sugar. And then we make this insanely rich, beautiful mousse out of it that’s decadent and feels like a dessert, of course, because it is, but it’s not cream and sugar and something that’s going to make you feel like, oh, maybe I didn’t need that.\u003c/p>\n\u003cp class=\"p1\">\u003cb>Felipe:\u003c/b> Having already a lot of background in beer production, we do like to play with ingredients in ways that will give a very familiar flavor to what current beer styles exist. You might see your pale ale, but with freshly picked mountain juniper berries. One of our beers has candy cap mushrooms, and that gives a really beautiful maple syrup flavor without it being sweet. The really beautiful one is You’re Invited. That’s based off of our wedding. We really wanted to create a really floral bouquet of aromas and flavors to represent that memory of love and friendship and family that we had around.\u003c/p>\n\u003cp class=\"p1\">\u003cb>Felipe:\u003c/b> We’ve got the You’re Invited here. We’ve got carbonic macerated fruit in that.\u003c/p>\n\u003cp class=\"p1\">\u003cb>Wendy:\u003c/b> We also have a really huge mocktail program in which we’re using really unique specialty items — fermented syrups, botanicals, roots, leaves, barks, you name it, and we’re turning them into non-alcoholic drinks that still feel extremely special.\u003c/p>\n\u003cp class=\"p1\">\u003cb>Woman:\u003c/b> I got the kombucha.\u003c/p>\n\u003cp class=\"p1\">\u003cb>Wendy:\u003c/b> We’re obviously using cultures, creating cultures with our food and the fermentation and the beers, but we want all culture to continue to grow here. We want people to join together. We want a community space in which people are welcome.\u003c/p>\n\u003cp class=\"p1\">\u003cb>Man:\u003c/b> He wants it.\u003c/p>\n\u003cp class=\"p1\">\u003cb>Woman:\u003c/b> Yay!\u003c/p>\n\u003cp class=\"p1\">\u003cb>Sbrocco:\u003c/b> Now, Pam, everything in this restaurant is all about fermentation.\u003c/p>\n\u003cp class=\"p1\">\u003cb>Gorospe:\u003c/b> Yes.\u003c/p>\n\u003cp class=\"p1\">\u003cb>Sbrocco:\u003c/b> It is very unique, isn’t it?\u003c/p>\n\u003cp class=\"p1\">\u003cb>Gorospe:\u003c/b> Definitely different.\u003c/p>\n\u003cp class=\"p1\">\u003cb>Sbrocco:\u003c/b> When you walk in the door, I’m sure you smell a lot of good things.\u003c/p>\n\u003cp class=\"p1\">\u003cb>Gorospe:\u003c/b> Yes.\u003c/p>\n\u003cp class=\"p1\">\u003cb>Sbrocco:\u003c/b> What is your go to starter dish?\u003c/p>\n\u003cp class=\"p1\">\u003cb>Gorospe:\u003c/b> Whenever I go there, I start with the funky nachos. It’s chips with this creamy cashew queso.\u003c/p>\n\u003cp class=\"p1\">\u003cb>Sbrocco:\u003c/b> Because it’s vegan.\u003c/p>\n\u003cp class=\"p1\">\u003cb>Gorospe:\u003c/b> It’s vegan. The restaurant is vegetarian, vegan. Everything there is fermented. The cashew — ahh — cashew queso.\u003c/p>\n\u003cp class=\"p1\">\u003cb>Sbrocco:\u003c/b> Say that 10 times fast.\u003c/p>\n\u003cp class=\"p1\">\u003cb>All:\u003c/b> [ Laughter ]\u003c/p>\n\u003cp class=\"p1\">\u003cb>Randolph:\u003c/b> Cashew, cash out!\u003c/p>\n\u003cp class=\"p1\">\u003cb>Sbrocco:\u003c/b> Cashew queso!\u003c/p>\n\u003cp class=\"p1\">\u003cb>Gorospe:\u003c/b> It’s so different. You don’t think of melted cheese to be made out of cashews.\u003c/p>\n\u003cp class=\"p1\">\u003cb>Sbrocco:\u003c/b> Right.\u003c/p>\n\u003cp class=\"p1\">\u003cb>Gorospe:\u003c/b> It’s so creamy. So cheesy. It’s delicious.\u003c/p>\n\u003cp class=\"p1\">\u003cb>Edelson:\u003c/b> I also had the funky nachos. Great. I especially like the kraut on top.\u003c/p>\n\u003cp class=\"p1\">\u003cb>Gorospe:\u003c/b> The kraut on top was so good.\u003c/p>\n\u003cp class=\"p1\">\u003cb>Edelson:\u003c/b> The kraut was awesome. It came with these like really thick chips. Usually I don’t like those for nachos. Worked for these ones. Really worked for these ones.\u003c/p>\n\u003cp class=\"p1\">\u003cb>Sbrocco:\u003c/b> What did you have when you went?\u003c/p>\n\u003cp class=\"p1\">\u003cb>Randolph:\u003c/b> All right, so for me, this spot was vastly outside of my wheelhouse, right? Because when I think of vegan, I tend to think of food that is not necessarily going to be as filling. Right? And when I walked into this restaurant, this gave me all the vegan vibes. It was rustic. There was guys with long hair in there, funky mustaches,\u003c/p>\n\u003cp class=\"p1\">\u003cb>Sbrocco:\u003c/b> The vegan vibe.\u003c/p>\n\u003cp class=\"p1\">\u003cb>Randolph:\u003c/b> The vegan vibes. Right? And then, you know, when I think of vegan, like, I think of people that are au naturel, you know what I’m saying? So everybody’s going to be a little bit musty.\u003c/p>\n\u003cp class=\"p1\">\u003cb>Edelson:\u003c/b> A little stinky.\u003c/p>\n\u003cp class=\"p1\">\u003cb>Randolph:\u003c/b> You know what I’m saying? And ironically, I ordered the Funk Bowl.\u003c/p>\n\u003cp class=\"p1\">\u003cb>Sbrocco:\u003c/b> Oh, okay.\u003c/p>\n\u003cp class=\"p1\">\u003cb>Randolph:\u003c/b> But it was good. It was delicious. It was so well seasoned. You know what I mean? It also has some sweet potato in there, some black chickpeas, black rice, seasonal vegetables, and it also had some mixed greens in there.\u003c/p>\n\u003cp class=\"p1\">\u003cb>Sbrocco:\u003c/b> That is a healthy dish.\u003c/p>\n\u003cp class=\"p1\">\u003cb>Randolph:\u003c/b> It was good. It was good. My insides thanked me for it.\u003c/p>\n\u003cp class=\"p1\">\u003cb>Gorospe:\u003c/b> I’m sure they did.\u003c/p>\n\u003cp class=\"p1\">\u003cb>Sbrocco:\u003c/b> Very flavorful.\u003c/p>\n\u003cp class=\"p1\">\u003cb>Edelson:\u003c/b> We started with the full spread. I was overwhelmed by it.\u003c/p>\n\u003cp class=\"p1\">\u003cb>Sbrocco:\u003c/b> Kind of a tasting platter.\u003c/p>\n\u003cp class=\"p1\">\u003cb>Edelsn:\u003c/b> Yeah, it was a tasting platter, but what’s so cool about it, is there’s like 10 or 12 different things you can choose to dip things into. And so we went with a beet beer mustard, a kimchi, and then also another cabbage on the side, too. And it was beautiful. I think what really stood out to me about this restaurant were the colors. Every dish, it was like, whoa, just —\u003c/p>\n\u003cp class=\"p1\">\u003cb>Gorospe:\u003c/b> Fresh, colorful.\u003c/p>\n\u003cp class=\"p1\">\u003cb>Edelson:\u003c/b> There’s a purple, there’s a green, there’s a yellow. It’s just rainbow every time. The spread was amazing. Really, really fresh veggies, crunchy, side of bread that was warm. I couldn’t stop just putting everything on it. I also — my favorite dish, I actually had their soup of the week, so who knows what it is this week. But the week I was there was this honey nut squash soup with like a Thai coconut curry.\u003c/p>\n\u003cp class=\"p1\">\u003cb>Sbrocco:\u003c/b> Wow.\u003c/p>\n\u003cp class=\"p1\">\u003cb>Edelson:\u003c/b> Veggie noodles in it. Felipe told me, I’m going to quote here as best I can, he said, “Wendy goes hard on these soups.” And it was amazing. My wife and I were fighting over it, scooping it up with bread. If I went again, I would be very excited to see what kind of soups.\u003c/p>\n\u003cp class=\"p1\">\u003cb>Sbrocco:\u003c/b> Look at the soups first? Yeah, I would do it every time.\u003c/p>\n\u003cp class=\"p1\">\u003cb>Sbrocco:\u003c/b> What are some of your other favorites when you go?\u003c/p>\n\u003cp class=\"p1\">\u003cb>Gorospe:\u003c/b> There is a tostada. It’s mushrooms. They’re well marinated, and it has like a citrus flavor on top. The tostada is really crunchy, and it’s really good.\u003c/p>\n\u003cp class=\"p1\">\u003cb>Sbrocco:\u003c/b> Because this is about fermentation, anybody have the beers?\u003c/p>\n\u003cp class=\"p1\">\u003cb>Edelson:\u003c/b> Oh, yeah.\u003c/p>\n\u003cp class=\"p1\">\u003cb>Sbrocco:\u003c/b> Let’s talk about that a little bit.\u003c/p>\n\u003cp class=\"p1\">\u003cb>Edelson:\u003c/b> I can go first.\u003c/p>\n\u003cp class=\"p1\">\u003cb>Gorospe:\u003c/b> You can go first.\u003c/p>\n\u003cp class=\"p1\">\u003cb>Sbrocco:\u003c/b> Eddie’s very excited.\u003c/p>\n\u003cp class=\"p1\">\u003cb>Edelson:\u003c/b> I got to be honest, I love sours. I like drinking beer, of course, too. My wife and I tried all six of them.\u003c/p>\n\u003cp class=\"p1\">\u003cb>Gorospe:\u003c/b> Oh, wow!\u003c/p>\n\u003cp class=\"p1\">\u003cb>Randolph:\u003c/b> Whoa!\u003c/p>\n\u003cp class=\"p1\">\u003cb>Sbrocco:\u003c/b> Because there was a tasting.\u003c/p>\n\u003cp class=\"p1\">\u003cb>Edelson:\u003c/b> We did taste. We did small pours. Not a full pour for each one. I just — I couldn’t make a decision. I was like, “I’m here.”\u003c/p>\n\u003cp class=\"p1\">\u003cb>Sbrocco:\u003c/b> I’ll have it all.\u003c/p>\n\u003cp class=\"p1\">\u003cb>Edelson:\u003c/b> This is a farther drive for me. I want to try it all.\u003c/p>\n\u003cp class=\"p1\">\u003cb>Sbrocco:\u003c/b> Yeah.\u003c/p>\n\u003cp class=\"p1\">\u003cb>Edelson:\u003c/b> What I really liked about the beers that they do there is that none of them are too heavy. I’m really over the double IPA hazy.\u003c/p>\n\u003cp class=\"p1\">\u003cb>Randolph:\u003c/b> Right, right, right, right.\u003c/p>\n\u003cp class=\"p1\">\u003cb>Edelson:\u003c/b> Gutbuster thing. And these are all a lot lighter and drinkable. And my favorite one was fluorescent brown. It was a brown ale, but they did it with pomegranate juice. And so there was this brown ale-y feel. But it finished with a sour note from the pomegranate. That was a win for sure.\u003c/p>\n\u003cp class=\"p1\">\u003cb>Sbrocco:\u003c/b> All right. Anybody else have the beers?\u003c/p>\n\u003cp class=\"p1\">\u003cb>Gorospe:\u003c/b> I had a beer. I had the You’re Invited. Really light. It has like a good orange flavor. And I know that they brewed that beer specifically for their wedding,\u003c/p>\n\u003cp class=\"p1\">\u003cb>Edelson:\u003c/b> Oh, no way.\u003c/p>\n\u003cp class=\"p1\">\u003cb>Gorospe:\u003c/b> Felipe and Wendy’s wedding. Yeah, so then they bring it back every year for their anniversary. So that was, it was really good. I also had a mocktail. I had the fung shui cider.\u003c/p>\n\u003cp class=\"p1\">\u003cb>Randolph:\u003c/b> Fung shui cider.\u003c/p>\n\u003cp class=\"p1\">\u003cb>Gorospe:\u003c/b> Yes, and you can get it hot or iced. I got it iced. And that one was really good.\u003c/p>\n\u003cp class=\"p1\">\u003cb>Sbrocco:\u003c/b> Anything else?\u003c/p>\n\u003cp class=\"p1\">\u003cb>Gorospe:\u003c/b> I had the mac and cheese.\u003c/p>\n\u003cp class=\"p1\">\u003cb>Sbrocco:\u003c/b> Okay.\u003c/p>\n\u003cp class=\"p1\">\u003cb>Gorospe:\u003c/b> I can’t get away from the cashew queso. I’m telling you guys, it is so good. And it’s topped with a sesame oil. And it just adds like a really great nutty flavor on top.\u003c/p>\n\u003cp class=\"p1\">\u003cb>Sbrocco:\u003c/b> And did you feel like you got good value? You were talking about the size.\u003c/p>\n\u003cp class=\"p1\">\u003cb>Randolph:\u003c/b> Yeah. Oh, yeah. Yeah. Yes, definitely. Portion wise, like I said, I was full, I was good.\u003c/p>\n\u003cp class=\"p1\">\u003cb>Sbrocco:\u003c/b> Okay so your image of vegan vibes has changed, hasn’t it?\u003c/p>\n\u003cp class=\"p1\">\u003cb>Randolph:\u003c/b> No, not at all.\u003c/p>\n\u003cp class=\"p1\">[ Laughter ]\u003c/p>\n\u003cp class=\"p1\">\u003cb>Randolph:\u003c/b> Like it was exactly what I thought.\u003c/p>\n\u003cp class=\"p1\">[ Laughter ]\u003c/p>\n\u003cp class=\"p1\">\u003cb>Randolph:\u003c/b> But it was still cool, you know?\u003c/p>\n\u003cp class=\"p1\">\u003cb>Sbrocco:\u003c/b> Yeah, that’s great. Well, if you’d like to try Fox Tale Fermentation Project, it’s located on Santa Clara Street in downtown San Jose. The average multi-course tab per person without drinks is around $40.\u003c/p>\n\u003cp class=\"p1\">\u003cb>Sbrocco:\u003c/b> A visit to New Orleans sparked Cory’s passion for Creole food, and he’s been craving those bold, soulful flavors ever since. Thankfully, he’s found a place that captures the true spirit of the Big Easy right here in the Bay. Located in Los Gatos, it’s the Bywater.\u003c/p>\n\u003cp class=\"p3\">♪♪♪♪\u003c/p>\n\u003cp class=\"p3\">♪♪♪♪\u003c/p>\n\u003cp class=\"p1\">\u003cb>Williams:\u003c/b> The Bywater is a neighborhood in New Orleans. It’s a little east of downtown, but it has a lot of cool old school bars. And it’s a good place to experience true New Orleans culture.\u003c/p>\n\u003cp class=\"p1\">\u003cb>Williams:\u003c/b> A lot of the vibe for the restaurant is, we talk about this all the time, high brow, low brow.\u003c/p>\n\u003cp class=\"p1\">\u003cb>LaMantia:\u003c/b> High brow, low brow. I love it. The duality.\u003c/p>\n\u003cp class=\"p1\">\u003cb>Williams:\u003c/b> Yeah. There’s a duality.\u003c/p>\n\u003cp class=\"p1\">\u003cb>LaMantia:\u003c/b> Sacred balance.\u003c/p>\n\u003cp class=\"p1\">\u003cb>Williams:\u003c/b> Yeah. We like to have really nice entrees, but we also like to keep the red beans, the shrimp po’boy, all the classics and kind of keep more of a neighborhood feel rather than like an upscale fine dining feel.\u003c/p>\n\u003cp class=\"p1\">\u003cb>LaMantia:\u003c/b> We do a lot of like rural Cajun cuisines, which is the greater Louisiana, whereas Creole is just New Orleans. So we do a bit of both.\u003c/p>\n\u003cp class=\"p1\">\u003cb>Williams:\u003c/b> These are the Royal Miyagi’s from Tomales Bay.\u003c/p>\n\u003cp class=\"p1\">\u003cb>LaMantia:\u003c/b> Around here, we always have oysters.\u003c/p>\n\u003cp class=\"p1\">\u003cb>Williams:\u003c/b> That’s a dozen, cousin.\u003c/p>\n\u003cp class=\"p1\">\u003cb>LaMantia:\u003c/b> A nice mix of East Coast and West Coast oysters and some southern oysters, as well.\u003c/p>\n\u003cp class=\"p1\">\u003cb>Man:\u003c/b> Fried chicken up.\u003c/p>\n\u003cp class=\"p1\">\u003cb>LaMantia:\u003c/b> We definitely pride ourselves on the fried chicken. It’s been on the menu since day one. It’s always going to be here. Another one’s gumbo. Right now, we do a seafood gumbo filé. Rich. Savory. Fatty. So it’s a dark roux. It’s a little bit of tomato paste. It’s a Creole style gumbo. A big staple in New Orleans is Cafe du Monde beignets. We make them in sort of a similar fashion, but almost more like a biscuit or a croissant. When we fry them, they spring open like an accordion kind of. And we serve them with chocolate sauce and powdered sugar.\u003c/p>\n\u003cp class=\"p1\">\u003cb>Williams:\u003c/b> A lot of powdered sugar.\u003c/p>\n\u003cp class=\"p1\">\u003cb>LaMantia:\u003c/b> A lot of powdered sugar.\u003c/p>\n\u003cp class=\"p1\">\u003cb>Williams:\u003c/b> We always want to do a great cocktail program here. I think that’s part of being a New Orleans restaurant. I’d say most of our regulars are voodoo daiquiri people.\u003c/p>\n\u003cp class=\"p1\">\u003cb>LaMantia:\u003c/b> Voodoo daiquiri with the float.\u003c/p>\n\u003cp class=\"p1\">\u003cb>Williams:\u003c/b> With the float.\u003c/p>\n\u003cp class=\"p1\">\u003cb>LaMantia:\u003c/b> With the float.\u003c/p>\n\u003cp class=\"p1\">\u003cb>Williams:\u003c/b> Got to get the float. We love coming to work every day and seeing the same people. Good to see you all again. New people are great, but the same people are awesome. Oh, yeah, I got an oyster shooter right here. You know, the people who love this restaurant really love it. And, you know, they keep us here, so we love them back.\u003c/p>\n\u003cp class=\"p1\">\u003cb>Williams:\u003c/b> The absolute king of the Bywater right here.\u003c/p>\n\u003cp class=\"p1\">\u003cb>Man:\u003c/b> Absolutely not.\u003c/p>\n\u003cp class=\"p1\">\u003cb>Williams:\u003c/b> My man.\u003c/p>\n\u003cp class=\"p1\">\u003cb>Man:\u003c/b> Love you.\u003c/p>\n\u003cp class=\"p1\">\u003cb>Williams:\u003c/b> Cheers.\u003c/p>\n\u003cp class=\"p1\">\u003cb>Sbrocco:\u003c/b> Okay, we got to first talk about pronunciation of New Orleans.\u003c/p>\n\u003cp class=\"p1\">\u003cb>Randolph:\u003c/b> Yes.\u003c/p>\n\u003cp class=\"p1\">\u003cb>Sbrocco:\u003c/b> Give me yours.\u003c/p>\n\u003cp class=\"p1\">\u003cb>Randolph:\u003c/b> N’awlins.\u003c/p>\n\u003cp class=\"p1\">\u003cb>Sbrocco:\u003c/b> N’awlins.\u003c/p>\n\u003cp class=\"p1\">\u003cb>Randolph:\u003c/b> N’awlins.\u003c/p>\n\u003cp class=\"p1\">\u003cb>Gorospe:\u003c/b> N’awlins.\u003c/p>\n\u003cp class=\"p1\">\u003cb>Sbrocco:\u003c/b> N’awlins.\u003c/p>\n\u003cp class=\"p1\">\u003cb>Edelson:\u003c/b> N’awlins. I got something —\u003c/p>\n\u003cp class=\"p1\">[ Laughter ]\u003c/p>\n\u003cp class=\"p1\">\u003cb>Randolph:\u003c/b> No, you hit it, you hit it.\u003c/p>\n\u003cp class=\"p1\">\u003cb>Edelson:\u003c/b> It’s got to fall off the tongue like you’re on the bayou,\u003c/p>\n\u003cp class=\"p1\">\u003cb>Sbrocco:\u003c/b> Right. Yeah. N’awlins.\u003c/p>\n\u003cp class=\"p1\">\u003cb>Randolph:\u003c/b> You sound like you were standing on the front porch.\u003c/p>\n\u003cp class=\"p1\">\u003cb>Edelson:\u003c/b> I wish I was. It’s so great down there.\u003c/p>\n\u003cp class=\"p1\">\u003cb>Sbrocco:\u003c/b> All right. Why and how did you become such a fan of this place?\u003c/p>\n\u003cp class=\"p1\">\u003cb>Randolph:\u003c/b> One day, I was actually looking for some Creole food, and I just did a quick Google and ended up discovering this gem. And the owner, David.\u003c/p>\n\u003cp class=\"p1\">\u003cb>Sbrocco:\u003c/b> David Kinch.\u003c/p>\n\u003cp class=\"p1\">\u003cb>Randolph:\u003c/b> Kinch.\u003c/p>\n\u003cp class=\"p1\">\u003cb>Sbrocco:\u003c/b> Michelin starred.\u003c/p>\n\u003cp class=\"p1\">\u003cb>Randolph:\u003c/b> Three Michelin stars.\u003c/p>\n\u003cp class=\"p1\">\u003cb>Edelson:\u003c/b> Three Mich?\u003c/p>\n\u003cp class=\"p1\">\u003cb>Randolph:\u003c/b> Three Michelin stars.\u003c/p>\n\u003cp class=\"p1\">\u003cb>Sbrocco:\u003c/b> A real pedigree.\u003c/p>\n\u003cp class=\"p1\">\u003cb>Randolph:\u003c/b> Right. So he actually flies his staff out there to New Orleans to do research for about two weeks. And then they bring those flavors back, and they serve it up to us. The first thing we did was the Sazerac, right? Like you have to get a classic New Orleans —\u003c/p>\n\u003cp class=\"p1\">\u003cb>Sbrocco:\u003c/b> Sazerac, yeah!\u003c/p>\n\u003cp class=\"p1\">\u003cb>Randolph:\u003c/b> Sazerac. Sazerac. Got to get a Sazerac. So you got the Sazerac. And it was very reminiscent of being on Bourbon Street.\u003c/p>\n\u003cp class=\"p1\">\u003cb>Sbrocco:\u003c/b> Do you have a favorite dish to start with?\u003c/p>\n\u003cp class=\"p1\">\u003cb>Randolph:\u003c/b> My go to there whenever I go is the fried chicken.\u003c/p>\n\u003cp class=\"p1\">\u003cb>Edelson:\u003c/b> Yes.\u003c/p>\n\u003cp class=\"p1\">\u003cb>Randolph:\u003c/b> The fried chicken. It’s very well seasoned. Super, super crispy. And it’s just all the way through, down to the bone. Very well cooked, and I enjoy it.\u003c/p>\n\u003cp class=\"p1\">\u003cb>Sbrocco:\u003c/b> Love it.\u003c/p>\n\u003cp class=\"p1\">\u003cb>Edelson:\u003c/b> Fried chicken was amazing. I had that, as well. It was so thick, but it was like juicy all the way through.\u003c/p>\n\u003cp class=\"p1\">\u003cb>Sbrocco:\u003c/b> You cannot miss the fried chicken.\u003c/p>\n\u003cp class=\"p1\">\u003cb>Edelson:\u003c/b> Don’t miss that. The coleslaw on the side, too. Real winner. The hot to cold.\u003c/p>\n\u003cp class=\"p1\">\u003cb>Randolph:\u003c/b> Right.\u003c/p>\n\u003cp class=\"p1\">\u003cb>Sbrocco:\u003c/b> What was your experience when you went, Pam?\u003c/p>\n\u003cp class=\"p1\">\u003cb>Gorospe:\u003c/b> I started with the Huck-a-buck.\u003c/p>\n\u003cp class=\"p1\">\u003cb>Woman:\u003c/b> Such a classic.\u003c/p>\n\u003cp class=\"p1\">\u003cb>Gorospe:\u003c/b> It was lemon and watermelon. And then you could choose vodka or tequila. I went vodka that night, but it tasted like a Jolly Rancher. It was like candy. I was like, “This is dangerous.”\u003c/p>\n\u003cp class=\"p1\">[ Laughs ]\u003c/p>\n\u003cp class=\"p1\">\u003cb>Sbrocco:\u003c/b> Now just think about it.\u003c/p>\n\u003cp class=\"p1\">\u003cb>Gorospe:\u003c/b> This is dangerous.\u003c/p>\n\u003cp class=\"p1\">\u003cb>Sbrocco:\u003c/b> They have “to go” drinks.\u003c/p>\n\u003cp class=\"p1\">\u003cb>Gorospe:\u003c/b> Yes, they do have “to go” drinks, yeah.\u003c/p>\n\u003cp class=\"p1\">\u003cb>Edelson:\u003c/b> I had the Pimm’s Cup.\u003c/p>\n\u003cp class=\"p1\">\u003cb>Woman:\u003c/b> Cheers.\u003c/p>\n\u003cp class=\"p1\">\u003cb>Edelson:\u003c/b> Pimm’s Cup, the classic — classic New Orleans drink. They do it really well there. I love the Pimm flavor coming out. Tastes kind of like a Arnold Palmer iced tea. Just really nice. Easy to drink. My favorite drink, though was I had the Clarified Ramos Gin fizz, which was awesome. I’ll be honest, I don’t love the egg white on the top usually. This didn’t have that, which made me fall in love with it even more. I think what they do with it is they make it clarified by adding lemon and lime into it, to get rid of some of that eggy flavor and milky flavor. And it was so citrusy, so tangy.\u003c/p>\n\u003cp class=\"p1\">\u003cb>Sbrocco:\u003c/b> Wow.\u003c/p>\n\u003cp class=\"p1\">\u003cb>Edelson:\u003c/b> I had the gumbo, too. Good gumbo. Classic good Creole gumbo. Had the crab, shrimp. I think crawfish, as well. Just rich, really nice dark color. Brought me back to N’awlins.\u003c/p>\n\u003cp class=\"p1\">\u003cb>Randolph:\u003c/b> I love that they actually incorporate all the flavors from the crab to… Because a lot of places do not put, like, when you order gumbo, like they’re generally giving you like a chicken stew, as opposed to gumbo.\u003c/p>\n\u003cp class=\"p1\">\u003cb>Gorospe:\u003c/b> Right.\u003c/p>\n\u003cp class=\"p1\">\u003cb>Randolph:\u003c/b> Right, where you’re sitting there.\u003c/p>\n\u003cp class=\"p1\">\u003cb>Gorospe:\u003c/b> Stirring.\u003c/p>\n\u003cp class=\"p1\">\u003cb>Randolph:\u003c/b> Right. You’re stirring it. You know what I mean? Like your shoulder’s tired.\u003c/p>\n\u003cp class=\"p1\">\u003cb>Edelson:\u003c/b> Get some elbow grease in there.\u003c/p>\n\u003cp class=\"p1\">\u003cb>Randolph:\u003c/b> Your shoulder’s tired. I want to see the chef back there.\u003c/p>\n\u003cp class=\"p1\">\u003cb>Gorospe:\u003c/b> Sweating.\u003c/p>\n\u003cp class=\"p1\">\u003cb>Randolph:\u003c/b> With some sweat. You know? I want to go back there.\u003c/p>\n\u003cp class=\"p1\">\u003cb>Sbrocco:\u003c/b> You’re making a roux, baby.\u003c/p>\n\u003cp class=\"p1\">\u003cb>Randolph:\u003c/b> Right. Making a roux!\u003c/p>\n\u003cp class=\"p1\">\u003cb>Sbrocco:\u003c/b> Yeah.\u003c/p>\n\u003cp class=\"p1\">\u003cb>Randolph:\u003c/b> But it’s almost like you cannot go wrong with pretty much everything on the menu.\u003c/p>\n\u003cp class=\"p1\">\u003cb>Sbrocco:\u003c/b> You can’t.\u003c/p>\n\u003cp class=\"p1\">\u003cb>Randolph:\u003c/b> Now they actually serve a burger, right?\u003c/p>\n\u003cp class=\"p1\">\u003cb>Gorospe:\u003c/b> I had the burger.\u003c/p>\n\u003cp class=\"p1\">\u003cb>Randolph:\u003c/b> Oh, you had the —\u003c/p>\n\u003cp class=\"p1\">\u003cb>Gorospe:\u003c/b> I had the burger. Oh, my gosh.\u003c/p>\n\u003cp class=\"p1\">\u003cb>Sbrocco:\u003c/b> Tell us, Pam.\u003c/p>\n\u003cp class=\"p1\">\u003cb>Gorospe:\u003c/b> Star of the show. It was so good. Double smash burger, raclette cheese.\u003c/p>\n\u003cp class=\"p1\">\u003cb>Man:\u003c/b> Do the shallot jam first.\u003c/p>\n\u003cp class=\"p1\">\u003cb>Gorospe:\u003c/b> Had like a shallot jam on it. That was just…chef’s kiss.\u003c/p>\n\u003cp class=\"p1\">\u003cb>Sbrocco:\u003c/b> There’s a three Michelin star chef.\u003c/p>\n\u003cp class=\"p1\">\u003cb>Randolph:\u003c/b> Right, right.,\u003c/p>\n\u003cp class=\"p1\">\u003cb>Gorospe:\u003c/b> The shallot jam.\u003c/p>\n\u003cp class=\"p1\">\u003cb>Sbrocco:\u003c/b> The raclette cheese, too.\u003c/p>\n\u003cp class=\"p1\">\u003cb>Gorospe:\u003c/b> Yeah, but the biggest surprise was that it’s sitting in a plate of jus, yeah.\u003c/p>\n\u003cp class=\"p1\">\u003cb>Sbrocco:\u003c/b> All right. Anybody have any other dish that you want to talk about?\u003c/p>\n\u003cp class=\"p1\">\u003cb>Edelson:\u003c/b> Maybe this sounds basic. I had their mixed green salad. The vinaigrette was really nice. Crunchy, large bowl. They put fennel in it. Usually I’m like, eww, fennel. It’s, like, not my flavor profile. It rocked in this — in this salad. So I was grateful that we ordered that.\u003c/p>\n\u003cp class=\"p1\">\u003cb>Randolph:\u003c/b> When you go, try their fries, their French fries.\u003c/p>\n\u003cp class=\"p1\">\u003cb>Gorospe:\u003c/b> I had the fries.\u003c/p>\n\u003cp class=\"p1\">\u003cb>Randolph:\u003c/b> Yeah, fries are very, very well seasoned, if you think of what your ideal fries would be, you know?\u003c/p>\n\u003cp class=\"p1\">\u003cb>Gorospe:\u003c/b> I feel like they use the same spice as on the fried chicken or like similar spices. Really good. I also had the Hush puppies. I don’t know if you guys saw those or had them. They come in, like, a little cone. They have a hot honey dipping sauce on the side. It’s like ricotta, cheddar, there’s scallions in them.\u003c/p>\n\u003cp class=\"p1\">\u003cb>Sbrocco:\u003c/b> Ah!\u003c/p>\n\u003cp class=\"p1\">\u003cb>Randolph:\u003c/b> Oh! And shout out to the beignets. I want to give a big shout out.\u003c/p>\n\u003cp class=\"p1\">\u003cb>Sbrocco:\u003c/b> The beignets.\u003c/p>\n\u003cp class=\"p1\">\u003cb>Gorospe:\u003c/b> [ Laughs ] I wondered when we were going to talk about the beignets.\u003c/p>\n\u003cp class=\"p1\">\u003cb>Randolph:\u003c/b> Can we talk about beignets? Like, there are a lot of places in the, you know, that try to serve beignets, right? But this was what a beignet is supposed to taste like.\u003c/p>\n\u003cp class=\"p1\">\u003cb>Sbrocco:\u003c/b> It’s truly an art.\u003c/p>\n\u003cp class=\"p1\">\u003cb>Randolph:\u003c/b> The beignet was beignet-ing.\u003c/p>\n\u003cp class=\"p1\">\u003cb>Sbrocco:\u003c/b> And they have to come out hot and covered with powdered sugar, right?\u003c/p>\n\u003cp class=\"p1\">\u003cb>Randolph:\u003c/b> Hot and covered with powdered sugar, steamy. Yes.\u003c/p>\n\u003cp class=\"p1\">\u003cb>Edelson:\u003c/b> It’s got to be.\u003c/p>\n\u003cp class=\"p1\">\u003cb>Sbrocco:\u003c/b> Did you have the beignets?\u003c/p>\n\u003cp class=\"p1\">\u003cb>Edelson:\u003c/b> I didn’t. I had the butterscotch pot de crèème.\u003c/p>\n\u003cp class=\"p1\">\u003cb>All:\u003c/b> Oh!\u003c/p>\n\u003cp class=\"p1\">\u003cb>Edelson:\u003c/b> It was awesome. Super creamy whipped cream on top, house made. And it was like this, like, amazingly rich butterscotch flavor. I really recommend it. It was really good.\u003c/p>\n\u003cp class=\"p1\">\u003cb>Sbrocco:\u003c/b> Okay.\u003c/p>\n\u003cp class=\"p1\">\u003cb>Edelson:\u003c/b> I need to go back for beignets. I knew you all would be hitting that and saying that.\u003c/p>\n\u003cp class=\"p1\">\u003cb>Randolph:\u003c/b> I mean, it’s New Orleans. You got to do it, right?\u003c/p>\n\u003cp class=\"p1\">\u003cb>Edelson:\u003c/b> I know. I wanted to try something else, and I’m really glad I did.\u003c/p>\n\u003cp class=\"p1\">\u003cb>Sbrocco:\u003c/b> All right. And service?\u003c/p>\n\u003cp class=\"p1\">\u003cb>Edelson:\u003c/b> Really good, attentive, not too disruptive, but really helpful when I had questions. I felt well taken care of there.\u003c/p>\n\u003cp class=\"p1\">\u003cb>Sbrocco:\u003c/b> Agree?\u003c/p>\n\u003cp class=\"p1\">\u003cb>Randolph:\u003c/b> Absolutely.\u003c/p>\n\u003cp class=\"p1\">\u003cb>Gorospe:\u003c/b> Very attentive.\u003c/p>\n\u003cp class=\"p1\">\u003cb>Sbrocco:\u003c/b> All right. I think you’re all going back.\u003c/p>\n\u003cp class=\"p1\">\u003cb>Gorospe:\u003c/b> Oh, yes.\u003c/p>\n\u003cp class=\"p1\">\u003cb>Sbrocco:\u003c/b> Especially for the beignets.\u003c/p>\n\u003cp class=\"p1\">\u003cb>Edelson:\u003c/b> I got to. I got to.\u003c/p>\n\u003cp class=\"p1\">[ Laughter ]\u003c/p>\n\u003cp class=\"p1\">\u003cb>Sbrocco:\u003c/b> Okay, if you would like to try the Bywater, It’s located on Santa Cruz Avenue in Los Gatos. And the average multi-course tab per person without drinks is around $55.\u003c/p>\n\u003cp class=\"p1\">\u003cb>Sbrocco:\u003c/b> Whenever the weather turns crisp, Eddie retreats to his ultimate comfort food sanctuary. It’s a warm, inviting Korean eatery offering savory soups that hit the spot every time. Located in Oakland’s Temescal neighborhood, it’s Pyeong Chang Tofu House.\u003c/p>\n\u003cp class=\"p1\">\u003cb>Kim:\u003c/b> Welcome in! We’re open!\u003c/p>\n\u003cp class=\"p1\">[ Cheers and applause ]\u003c/p>\n\u003cp class=\"p1\">\u003cb>Kim:\u003c/b> Pyeong Chang Tofu House is an authentic Korean restaurant. We specialize in making comfort foods that come out bubbling and sizzling and hot. Not only will you love the flavors of our dishes, you also hear them when they come out the kitchen.\u003c/p>\n\u003cp class=\"p1\">[ Food sizzling ]\u003c/p>\n\u003cp class=\"p1\">\u003cb>Kim:\u003c/b> Pyeong Chang Tofu House is named after a city in the countryside of South Korea, and they’re known for their famous yellow soybeans that makes the tofu. The soybean there is very flavorful, and it has its own distinct taste. Sundubu, our soft tofu soup is a staple dish in Korea. We have many different varieties, seafood combination. My personal favorite is the mushroom tofu soup.\u003c/p>\n\u003cp class=\"p1\">\u003cb>Kim:\u003c/b> Sonmeans hand, masmeans flavor. Put those two words together, it refers to the flavors of your hands. You won’t find any measuring cups in our kitchens. Our cooks are trained really well. Because we use our kimchi in so many items in our menu, we make about 500 or 600 pounds of cabbage kimchi every week.\u003c/p>\n\u003cp class=\"p1\">\u003cb>Kim:\u003c/b> I personally love chicken wings and fried chicken in general. We took about a year to perfect the sauces, the batter. Then it became a huge hit. There’s a phrase in Korean calledchimaek, which means chicken and beer. So we had to get a draft beer. Bottled beers are amazing too, but in my opinion, nothing beats draft.\u003c/p>\n\u003cp class=\"p1\">\u003cb>Kim:\u003c/b> Banchan is the glue that holds all the dishes together. It is kind of the foods and small pickled vegetable dishes that you get before your main food comes out. The whole point of you coming here is to share everything. We have a lot of solo diners too, and we love them, but when you come in groups, it just makes the experience so much more better, fun and more authentic.\u003c/p>\n\u003cp class=\"p1\">[ Diners cheering ]\u003c/p>\n\u003cp class=\"p1\">\u003cb>Kim:\u003c/b> Some of these wooden tables are very close to each other, so a lot of diners ask each other, “What did you get?” We want our customers to not only leave happy and full, but also just satisfied with how they spent their night at our restaurant.\u003c/p>\n\u003cp class=\"p1\">\u003cb>Sbrocco:\u003c/b> Now, Eddie, this place is all about sharing food, right?\u003c/p>\n\u003cp class=\"p1\">\u003cb>Edelson:\u003c/b> Oh, yes.\u003c/p>\n\u003cp class=\"p1\">\u003cb>Sbrocco:\u003c/b> Korean food you can really — is shareable.\u003c/p>\n\u003cp class=\"p1\">\u003cb>Edelson:\u003c/b> You got to share. It’s great to go with a big group. My wife actually lived in Korea for a year, and so she really turned me on to Korean food. We spent a year or two going around to, like, pretty much every Korean restaurant in Oakland with a bunch of friends usually, too. We’d go out on Friday nights and really have a lively good time. This one was the one we just kept coming back to. The banchan is amazing. Their banchan is very strong. A bunch of just little starters that you share with the whole table. They have a great kimchi. Very tangy, very sour that I like a lot. And their spicy crispy cucumbers as well. This most recent time I went, they had a pickled sweet daikon that was like candy. My table was, like, chasing after it. I had — I think we had 8 or 10 people there and everyone was like reaching for it, trying to get it back over here.\u003c/p>\n\u003cp class=\"p1\">\u003cb>Sbrocco:\u003c/b> More daikon.\u003c/p>\n\u003cp class=\"p1\">\u003cb>Edelson:\u003c/b> Yeah, so they were — they were fighting over it. So love the banchan. And then of course, for any starter, I have to do their kimchi pancake every time. I think it’s the best kimchi pancake there is.\u003c/p>\n\u003cp class=\"p1\">\u003cb>Sbrocco:\u003c/b> And it’s kind of their signature, isn’t it?\u003c/p>\n\u003cp class=\"p1\">\u003cb>Edelson:\u003c/b> It is one of their signatures, and it’s really good. Super crispy, the kimchi.\u003c/p>\n\u003cp class=\"p1\">\u003cb>Randolph:\u003c/b> Right, right.\u003c/p>\n\u003cp class=\"p1\">\u003cb>Edelson:\u003c/b> I want you two to speak to it.\u003c/p>\n\u003cp class=\"p1\">\u003cb>Gorospe:\u003c/b> I had the kimchi pancake. It’s really good. It came out super piping hot and had a really good, like, soy dipping sauce. It was delicious.\u003c/p>\n\u003cp class=\"p1\">\u003cb>Sbrocco:\u003c/b> You love kimchi.\u003c/p>\n\u003cp class=\"p1\">\u003cb>Gorospe:\u003c/b> I do, I really do.\u003c/p>\n\u003cp class=\"p1\">[ Laughter ]\u003c/p>\n\u003cp class=\"p1\">\u003cb>Randolph:\u003c/b> And I also — I also had the kimchi pancake. And for me, it was a new experience, right? If I were to describe it, it’s kind of like if a latke and a spring roll got together and they did the wild thing.\u003c/p>\n\u003cp class=\"p1\">\u003cb>Gorospe:\u003c/b> Yes.\u003c/p>\n\u003cp class=\"p1\">\u003cb>Randolph:\u003c/b> Nine months later, we would get that.\u003c/p>\n\u003cp class=\"p1\">\u003cb>Sbrocco:\u003c/b> This was born.\u003c/p>\n\u003cp class=\"p1\">\u003cb>Randolph:\u003c/b> This was born. This flavor, it was so good.\u003c/p>\n\u003cp class=\"p1\">\u003cb>Sbrocco:\u003c/b> Yeah, okay. What do you get normally?\u003c/p>\n\u003cp class=\"p1\">\u003cb>Edelson:\u003c/b> I usually get one of their bi bim baps.\u003c/p>\n\u003cp class=\"p1\">\u003cb>Sbrocco:\u003c/b> Everybody say that one, I love it. Bi bim bap.\u003c/p>\n\u003cp class=\"p1\">\u003cb>Edelson:\u003c/b> Bi bim bap.\u003c/p>\n\u003cp class=\"p1\">\u003cb>Gorospe:\u003c/b> Bi bim bap.\u003c/p>\n\u003cp class=\"p1\">\u003cb>Randolph:\u003c/b> \u003cspan class=\"s1\">♪♪\u003c/span> Bi bim bop \u003cspan class=\"s1\">♪♪\u003c/span>\u003c/p>\n\u003cp class=\"p1\">\u003cspan class=\"s1\">♪♪\u003c/span> Bop, bop, bi, bop, bi bim bop \u003cspan class=\"s1\">♪♪\u003c/span>\u003c/p>\n\u003cp class=\"p1\">\u003cspan class=\"s1\">♪♪\u003c/span> Boom, bop, bi bim bop \u003cspan class=\"s1\">♪♪\u003c/span>\u003c/p>\n\u003cp class=\"p1\">\u003cb>Edelson:\u003c/b> \u003cspan class=\"s1\">♪♪\u003c/span> I’m a bop man \u003cspan class=\"s1\">♪♪\u003c/span>\u003c/p>\n\u003cp class=\"p1\">[ Laughter ]\u003c/p>\n\u003cp class=\"p1\">\u003cb>Sbrocco:\u003c/b> I knew this table would embrace that.\u003c/p>\n\u003cp class=\"p1\">\u003cb>Edelson:\u003c/b> Yeah, mm-hmm. Mm-hmm. The one I like to get is their kimchi dol sot bi bim bap. Dol sot means that it comes in a stone pot which comes out piping hot. So it comes with rice. I usually get with beef, and it has a bunch of accoutrements of different types of vegetables, egg on top, you mix it all up, Delicious. But what’s special about a lot of their meals, when you order something like the bi bim bap, you get their tofu soup on the side.\u003c/p>\n\u003cp class=\"p1\">\u003cb>Randolph:\u003c/b> Right.\u003c/p>\n\u003cp class=\"p1\">\u003cb>Edelson:\u003c/b> And their tofu soup is the thing that brings me back every time.\u003c/p>\n\u003cp class=\"p1\">\u003cb>Gorospe:\u003c/b> Amazing.\u003c/p>\n\u003cp class=\"p1\">\u003cb>Edelson:\u003c/b> It is unreal.\u003c/p>\n\u003cp class=\"p1\">\u003cb>Sbrocco:\u003c/b> It was great?\u003c/p>\n\u003cp class=\"p1\">\u003cb>Gorospe:\u003c/b> It was great.\u003c/p>\n\u003cp class=\"p1\">\u003cb>Sbrocco:\u003c/b> Tell me about it.\u003c/p>\n\u003cp class=\"p1\">\u003cb>Gorospe:\u003c/b> Comes out in one of the hot little stone bowls, so it’s bubbling. And they ask you what spice level you want, and I love spice. So I was like, you can make it as spicy as you want.\u003c/p>\n\u003cp class=\"p1\">\u003cb>Edelson:\u003c/b> Ooh.\u003c/p>\n\u003cp class=\"p1\">\u003cb>Gorospe:\u003c/b> And it was ama–\u003c/p>\n\u003cp class=\"p1\">\u003cb>Sbrocco:\u003c/b> Spicy?\u003c/p>\n\u003cp class=\"p1\">\u003cb>Gorospe:\u003c/b> It was spicy, but it was manageable. The tofu was so soft. I love that it was bubbling still when it came out.\u003c/p>\n\u003cp class=\"p1\">\u003cb>Edelson:\u003c/b> One thing I asked for the last time I was there with the soup is they’ll give you this fried rice dish. I think they pour water in — in like a stone pot and they flip the rice over. So it’s just like…\u003c/p>\n\u003cp class=\"p1\">\u003cb>Gorospe:\u003c/b> It’s like a crispy —\u003c/p>\n\u003cp class=\"p1\">\u003cb>Edelson:\u003c/b> …baseball cap, crispy disk of rice that you got to break and then put into the soup. I always ask for that. And I was like, of course. And they always get that for me.\u003c/p>\n\u003cp class=\"p1\">\u003cb>Sbrocco:\u003c/b> Okay. You get a little VIP treatment.\u003c/p>\n\u003cp class=\"p1\">\u003cb>Gorospe:\u003c/b> We got that, they brought it to the table and I quite did not know what to do with it. I was like, “What do I do?” I had to ask. I was like, “What do I do with this?” They were like, put it in your soup. You can eat it plain. It was great.\u003c/p>\n\u003cp class=\"p1\">\u003cb>Sbrocco:\u003c/b> Add a little crunchiness.\u003c/p>\n\u003cp class=\"p1\">\u003cb>Gorospe:\u003c/b> A little crunch, yeah. We ordered the spicy barbecue pork belly, and it comes out on the sizzling plate. The presentation here is amazing. Everything is — It’s like a spectacle.\u003c/p>\n\u003cp class=\"p1\">\u003cb>Sbrocco:\u003c/b> What else do you get when you go? I mean, you’ve been so many times.\u003c/p>\n\u003cp class=\"p1\">\u003cb>Edelson:\u003c/b> I’ve been a lot. I’ve been a lot. I’ve shared a lot. I always get the chicken wings as well. I don’t know if you all are able to get those, too.\u003c/p>\n\u003cp class=\"p1\">\u003cb>Randolph:\u003c/b> We got chicken wings.\u003c/p>\n\u003cp class=\"p1\">\u003cb>Gorospe:\u003c/b> Yes.\u003c/p>\n\u003cp class=\"p1\">\u003cb>Edelson:\u003c/b> They have three different types. I always get the nyum yang. Amazing chicken wings. They’re crispy, but also tender on the inside in that sauce. It’s a sweetness with some sour and spice at the end, too. They were gone very quickly.\u003c/p>\n\u003cp class=\"p1\">\u003cb>Gorospe:\u003c/b> I had the wings as well. We went the soy garlic route. More like traditional, just no spice inside. They were delicious. They came out hot. They’re really crispy.\u003c/p>\n\u003cp class=\"p1\">\u003cb>Edelson:\u003c/b> One thing I love to do when you’re with a big group is you get big pitchers of beer and you get soju on the side. And so what’s really fun is you pour the little shots of soju for your friends across the table, you all cheers. You’re just kind of grabbing everything with chopsticks and pouring things for other people on the table, is just kind of alive.\u003c/p>\n\u003cp class=\"p1\">\u003cb>Sbrocco:\u003c/b> And did you feel like this was a good value?\u003c/p>\n\u003cp class=\"p1\">\u003cb>Gorospe:\u003c/b> I think so, yeah. Yeah, you get a lot of food.\u003c/p>\n\u003cp class=\"p1\">\u003cb>Randolph:\u003c/b> Yeah, it’s super generous.\u003c/p>\n\u003cp class=\"p1\">\u003cb>Sbrocco:\u003c/b> You keep going back for a reason. Do they know you?\u003c/p>\n\u003cp class=\"p1\">\u003cb>Edelson:\u003c/b> They don’t know me. No, no, I’m not — I’m not quite there yet. Maybe if I go a few more times, I can get to that. It’s a great second home.\u003c/p>\n\u003cp class=\"p1\">\u003cb>Randolph:\u003c/b> It was cool. Like, I would definitely go back again.\u003c/p>\n\u003cp class=\"p1\">\u003cb>Sbrocco:\u003c/b> All right, well, if you would like to try Pyeong Chang Tofu House, it’s located on Telegraph Avenue in Oakland, and the average multi-course tab per person without drinks is around $50.\u003c/p>\n\u003cp class=\"p1\">\u003cb>Sbrocco:\u003c/b> Looking for more Bay Area bites you’ve just got to try?\u003c/p>\n\u003cp class=\"p1\">\u003cb>Woman:\u003c/b> [ Laughs ]\u003c/p>\n\u003cp class=\"p1\">\u003cb>Sbrocco:\u003c/b> Check out “Cecilia Tries It” online at kqed.org/checkplease. I have to thank my fun and fabulous guests on this week’s show. Cory Randolph, who shared a taste of the Big Easy at the Bywater in Los Gatos. Eddie Edelson, who enjoys all the Korean comforts at Pyeong Chang Tofu House in Oakland. And Pam Gorospe, who digs into the funky nachos at San Jose’s Foxtail Fermentation Project. Join us next time when three more guests will recommend their favorite spots right here on “Check, Please! Bay Area.” I’m Leslie Sbrocco, and I’ll see you then. Cheers, everyone.\u003c/p>\n\u003cp class=\"p1\">\u003cb>Edelson:\u003c/b> Whoo!\u003c/p>\n\u003cp class=\"p1\">\u003cb>Sbrocco:\u003c/b> We did it! We did it! Bi bim bop, beignets!\u003c/p>\n\u003cp class=\"p1\">\u003cb>Edelson:\u003c/b> You have to fork and knife it some, but it’s not soggy.\u003c/p>\n\u003cp class=\"p1\">\u003cb>Gorospe:\u003c/b> Yea, it’s definitely a fork and knife it type of burger, but no, not soggy. That was my fear. I was like, the bottom is going to be soggy. It’s going to be weird.\u003c/p>\n\u003cp class=\"p1\">\u003cb>Sbrocco:\u003c/b> And you can’t have soggy buns.\u003c/p>\n\u003cp class=\"p1\">\u003cb>Gorospe:\u003c/b> No, no.\u003c/p>\n\u003cp class=\"p1\">\u003cb>Sbrocco:\u003c/b> No soggy buns.\u003c/p>\n\u003cp class=\"p1\">\u003cb>Randolph:\u003c/b> We like buttery soft buns.\u003c/p>\n\u003cp class=\"p1\">\u003cb>Edelson:\u003c/b> Yes.\u003c/p>\n\u003cp class=\"p1\">\u003cb>Randolph:\u003c/b> But not soggy buns.\u003c/p>\n\u003cp class=\"p1\">\u003cb>Gorospe:\u003c/b> No.\u003c/p>\n\u003cp class=\"p1\">\u003cb>Randolph:\u003c/b> Firm buns.\u003c/p>\n\u003cp class=\"p1\">\u003cb>Edelson:\u003c/b> Soggy buns is bad.\u003c/p>\n\u003cp class=\"p1\">\u003cb>Randolph:\u003c/b> Firm buns.\u003c/p>\n\u003cp class=\"p1\">\u003cb>Sbrocco:\u003c/b> I think we’re all in agreement there. Firm buns. You got that?\u003c/p>\n\u003cp class=\"p1\">\u003cb>Randolph:\u003c/b> Firm buns.\u003c/p>\n\u003cp class=\"p1\">\u003cb>Edelson:\u003c/b> Firm buns is great.\u003c/p>\n\u003cp>[ad floatright]\u003c/p>\n\u003cp class=\"p1\">[ Laughter ]\u003c/p>\n\n",
"blocks": [],
"excerpt": null,
"status": "publish",
"parent": 0,
"modified": 1777604154,
"stats": {
"hasAudio": false,
"hasVideo": false,
"hasChartOrMap": false,
"iframeSrcs": [],
"hasGoogleForm": false,
"hasGallery": false,
"hasHearkenModule": false,
"hasPolis": false,
"paragraphCount": 5,
"wordCount": 5919
},
"headData": {
"title": "Check, Please! Bay Area reviews: Fox Tale Fermentation Project, The Bywater, Pyeong Chang Tofu House | KQED",
"description": "Bay Area locals try fermented faves in San Jose, Southern cuisine in Los Gatos and Korean favorites in Oakland.",
"ogTitle": "",
"ogDescription": "",
"ogImgId": "",
"twTitle": "",
"twDescription": "",
"twImgId": "",
"socialDescription": "Bay Area locals try fermented faves in San Jose, Southern cuisine in Los Gatos and Korean favorites in Oakland.",
"schema": {
"@context": "https://schema.org",
"@type": "Article",
"headline": "Check, Please! Bay Area reviews: Fox Tale Fermentation Project, The Bywater, Pyeong Chang Tofu House",
"datePublished": "2026-04-23T19:25:10-07:00",
"dateModified": "2026-04-30T19:55:54-07:00",
"image": "https://cdn.kqed.org/wp-content/uploads/2020/02/KQED-OG-Image@1x.png"
}
},
"primaryCategory": {
"termId": 3731,
"slug": "episodes",
"name": "episodes"
},
"videoEmbed": "https://www.youtube.com/embed/u3i32nHeCp0?si=rEyP9qmZGlOL9Ast",
"sticky": false,
"templateType": "standard",
"featuredImageType": "standard",
"excludeFromSiteSearch": "Include",
"articleAge": "0",
"path": "/checkplease/23753/check-please-bay-area-reviews-fox-tale-fermentation-project-the-bywater-pyeong-chang-tofu-house",
"audioTrackLength": null,
"parsedContent": [
{
"type": "contentString",
"content": "\u003cdiv class=\"post-body\">\u003cp>\u003cp>\u003cem>Check, Please! Bay Area, \u003c/em>season 21, episode 1, airs Thursday, April 23, at 7:30 pm, on KQED 9. See other \u003ca href=\"http://www.kqed.org/tv/programs/index.jsp?pgmid=14084\" target=\"_blank\" rel=\"noopener noreferrer\">television airtimes\u003c/a>.\u003c/p>\n\u003cp>\u003cspan style=\"font-weight: 400\">Check, Please! Bay Area’s 21st season kicks off in downtown San Jose at \u003c/span>\u003cb>Fox Tale Fermentation Project\u003c/b>\u003cspan style=\"font-weight: 400\">, where boundary-pushing fermentation fuels both the beer and the food. Diners dig into Funky Nachos loaded with cashew queso, habañero crema and guacamole, along with The Full Spread served with a selection of house ferments from kimchi to kraut. In Los Gatos, \u003c/span>\u003cb>The Bywater\u003c/b>\u003cspan style=\"font-weight: 400\"> channels the spirit of New Orleans with crispy, well-seasoned fried chicken and Creole fries, hush puppies drizzled with hot honey, and a double-smashed Bywater burger layered with raclette and shallot jam, before finishing on hot, powdered-sugar-dusted beignets. The journey wraps up on Oakland’s Telegraph Avenue at \u003c/span>\u003cb>Pyeong Chang Tofu House\u003c/b>\u003cspan style=\"font-weight: 400\">, where spicy tofu soup arrives alongside crisp kimchi pancakes, BBQ spicy pork, and stone-pot kimchi dolsot bibimbap for almost three decades.\u003c/span>\u003c/p>\n\u003cfigure id=\"attachment_23778\" class=\"wp-caption alignnone\" style=\"max-width: 1920px\">\u003cimg loading=\"lazy\" decoding=\"async\" class=\"size-full wp-image-23778\" src=\"https://cdn.kqed.org/wp-content/uploads/sites/40/2026/03/2101_f.png\" alt=\"\" width=\"1920\" height=\"1080\" srcset=\"https://cdn.kqed.org/wp-content/uploads/sites/40/2026/03/2101_f.png 1920w, https://cdn.kqed.org/wp-content/uploads/sites/40/2026/03/2101_f-160x90.png 160w, https://cdn.kqed.org/wp-content/uploads/sites/40/2026/03/2101_f-768x432.png 768w, https://cdn.kqed.org/wp-content/uploads/sites/40/2026/03/2101_f-1536x864.png 1536w\" sizes=\"auto, (max-width: 1920px) 100vw, 1920px\">\u003cfigcaption class=\"wp-caption-text\">Host Leslie Sbrocco joins guests Cory Randolph, Pamela Gorospe and Eddie Edelson from KQED in San Francisco.\u003c/figcaption>\u003c/figure>\n\u003cp>\u003cspan style=\"color: #2b2b2b\">Get Restaurant Information:\u003c/span>\u003c/p>\n\u003cul>\n\u003cli>\u003ca href=\"https://www.foxtalefermentationproject.com/\">\u003cstrong>Fox Tale Fermentation Project\u003c/strong> (San Jose)\u003c/a>\u003c/li>\n\u003cli>\u003ca href=\"https://www.thebywaterca.com/\">\u003cstrong>The Bywater\u003c/strong> (Los Gatos)\u003c/a>\u003c/li>\n\u003cli>\u003ca href=\"https://www.pctofu.com/\">\u003cstrong>Pyeong Chang Tofu House \u003c/strong>(Oakland)\u003c/a>\u003c/li>\n\u003c/ul>\n\u003ch2>Episode Transcript\u003c/h2>\n\u003cp class=\"p1\">\u003cb>Sbrocco:\u003c/b> Creative brews and other fermented favorites in San Jose.\u003c/p>\n\u003cp class=\"p1\">\u003cb>Gorospe:\u003c/b> I can’t get away from the cashew queso.\u003c/p>\n\u003cp>\u003c/p>\u003c/div>",
"attributes": {
"named": {},
"numeric": []
}
},
{
"type": "component",
"content": "",
"name": "ad",
"attributes": {
"named": {
"label": "fullwidth"
},
"numeric": [
"fullwidth"
]
}
},
{
"type": "contentString",
"content": "\u003cdiv class=\"post-body\">\u003cp>\u003c/p>\n\u003cp class=\"p1\">\u003cb>Sbrocco:\u003c/b> Authentic Korean cuisine in Oakland.\u003c/p>\n\u003cp class=\"p1\">\u003cb>Edelson:\u003c/b> I have to do their kimchi pancake every time.\u003c/p>\n\u003cp class=\"p1\">\u003cb>Sbrocco:\u003c/b> And Creole comforts in Los Gatos.\u003c/p>\n\u003cp class=\"p1\">\u003cb>Randolph:\u003c/b> The beignet was beignet-ing!\u003c/p>\n\u003cp class=\"p1\">\u003cb>Sbrocco:\u003c/b> Just ahead on “Check, Please! Bay Area.”\u003c/p>\n\u003cp class=\"p1\">\u003cb>Gorospe:\u003c/b> Bi bim bop.\u003c/p>\n\u003cp class=\"p1\">\u003cb>Edelson:\u003c/b> Bi bim bop.\u003c/p>\n\u003cp class=\"p1\">\u003cb>Sbrocco:\u003c/b> Bi bim bop.\u003c/p>\n\u003cp class=\"p1\">\u003cb>Randolph:\u003c/b> Bop, bop, mm-bop.\u003c/p>\n\u003cp class=\"p3\">♪♪♪♪\u003c/p>\n\u003cp class=\"p1\">\u003cb>Sbrocco:\u003c/b> Hi. I’m Leslie Sbrocco. Welcome to “Check, Please! Bay Area”, the show where Bay Area residents review and talk about their favorite restaurants. Now, we have three guests, and each one recommends one of their favorite spots. And the other two go check them out to see what they think.\u003c/p>\n\u003cp class=\"p1\">\u003cb>Sbrocco:\u003c/b> Joining me at the check please table today are deejay Cory Randolph, clinical psychologist Eddie Edelson, and catering manager Pam Gorospe. Welcome, everyone. How you doing?\u003c/p>\n\u003cp class=\"p1\">\u003cb>Gorospe:\u003c/b> Good.\u003c/p>\n\u003cp class=\"p1\">\u003cb>Edelson:\u003c/b> Excited to be here.\u003c/p>\n\u003cp class=\"p1\">\u003cb>Sbrocco:\u003c/b> Pam’s top pick for a night out comes with a deliciously funky twist. Think Kimchis and Krauts, tangy sours and crisp ciders, every bite and sip powered by the art of fermentation. Right in the heart of downtown San Jose, It’s Fox Tale Fermentation Project.\u003c/p>\n\u003cp class=\"p3\">♪♪♪♪\u003c/p>\n\u003cp class=\"p1\">\u003cb>Wendy:\u003c/b> Foxtail Fermentation project is a business that is constantly telling a story with every single thing that we do.\u003c/p>\n\u003cp class=\"p1\">\u003cb>Wendy:\u003c/b> We’ve got fermented pickles, we’ve got beet beer mustard.\u003c/p>\n\u003cp class=\"p1\">\u003cb>Felipe:\u003c/b> Everything is plant based, it’s fresh, it’s fermented, it makes you feel good. And it’s a very exciting place to come and try.\u003c/p>\n\u003cp class=\"p1\">\u003cb>Wendy:\u003c/b> Fermentation is the oldest food technique throughout all of history. Every single culture across the world uses fermentation in various ways. You don’t necessarily have to eat a fork full of sauerkraut all of the time to be eating fermented foods, but you can find ways to incorporate it in your food. And then it’s healing. It’s good for you. It’s invigorating, and it tastes amazing.\u003c/p>\n\u003cp class=\"p1\">\u003cb>Wendy:\u003c/b> We got two hot pretzels.\u003c/p>\n\u003cp class=\"p1\">\u003cb>Wendy:\u003c/b> This is our vegan cashew queso. One of the things I’m the most proud of is a cultured cacao mousse. We source the cacao beans directly from this really incredible organization in Mexico. We ferment them in piloncillo, which is like a Mexican brown sugar. And then we make this insanely rich, beautiful mousse out of it that’s decadent and feels like a dessert, of course, because it is, but it’s not cream and sugar and something that’s going to make you feel like, oh, maybe I didn’t need that.\u003c/p>\n\u003cp class=\"p1\">\u003cb>Felipe:\u003c/b> Having already a lot of background in beer production, we do like to play with ingredients in ways that will give a very familiar flavor to what current beer styles exist. You might see your pale ale, but with freshly picked mountain juniper berries. One of our beers has candy cap mushrooms, and that gives a really beautiful maple syrup flavor without it being sweet. The really beautiful one is You’re Invited. That’s based off of our wedding. We really wanted to create a really floral bouquet of aromas and flavors to represent that memory of love and friendship and family that we had around.\u003c/p>\n\u003cp class=\"p1\">\u003cb>Felipe:\u003c/b> We’ve got the You’re Invited here. We’ve got carbonic macerated fruit in that.\u003c/p>\n\u003cp class=\"p1\">\u003cb>Wendy:\u003c/b> We also have a really huge mocktail program in which we’re using really unique specialty items — fermented syrups, botanicals, roots, leaves, barks, you name it, and we’re turning them into non-alcoholic drinks that still feel extremely special.\u003c/p>\n\u003cp class=\"p1\">\u003cb>Woman:\u003c/b> I got the kombucha.\u003c/p>\n\u003cp class=\"p1\">\u003cb>Wendy:\u003c/b> We’re obviously using cultures, creating cultures with our food and the fermentation and the beers, but we want all culture to continue to grow here. We want people to join together. We want a community space in which people are welcome.\u003c/p>\n\u003cp class=\"p1\">\u003cb>Man:\u003c/b> He wants it.\u003c/p>\n\u003cp class=\"p1\">\u003cb>Woman:\u003c/b> Yay!\u003c/p>\n\u003cp class=\"p1\">\u003cb>Sbrocco:\u003c/b> Now, Pam, everything in this restaurant is all about fermentation.\u003c/p>\n\u003cp class=\"p1\">\u003cb>Gorospe:\u003c/b> Yes.\u003c/p>\n\u003cp class=\"p1\">\u003cb>Sbrocco:\u003c/b> It is very unique, isn’t it?\u003c/p>\n\u003cp class=\"p1\">\u003cb>Gorospe:\u003c/b> Definitely different.\u003c/p>\n\u003cp class=\"p1\">\u003cb>Sbrocco:\u003c/b> When you walk in the door, I’m sure you smell a lot of good things.\u003c/p>\n\u003cp class=\"p1\">\u003cb>Gorospe:\u003c/b> Yes.\u003c/p>\n\u003cp class=\"p1\">\u003cb>Sbrocco:\u003c/b> What is your go to starter dish?\u003c/p>\n\u003cp class=\"p1\">\u003cb>Gorospe:\u003c/b> Whenever I go there, I start with the funky nachos. It’s chips with this creamy cashew queso.\u003c/p>\n\u003cp class=\"p1\">\u003cb>Sbrocco:\u003c/b> Because it’s vegan.\u003c/p>\n\u003cp class=\"p1\">\u003cb>Gorospe:\u003c/b> It’s vegan. The restaurant is vegetarian, vegan. Everything there is fermented. The cashew — ahh — cashew queso.\u003c/p>\n\u003cp class=\"p1\">\u003cb>Sbrocco:\u003c/b> Say that 10 times fast.\u003c/p>\n\u003cp class=\"p1\">\u003cb>All:\u003c/b> [ Laughter ]\u003c/p>\n\u003cp class=\"p1\">\u003cb>Randolph:\u003c/b> Cashew, cash out!\u003c/p>\n\u003cp class=\"p1\">\u003cb>Sbrocco:\u003c/b> Cashew queso!\u003c/p>\n\u003cp class=\"p1\">\u003cb>Gorospe:\u003c/b> It’s so different. You don’t think of melted cheese to be made out of cashews.\u003c/p>\n\u003cp class=\"p1\">\u003cb>Sbrocco:\u003c/b> Right.\u003c/p>\n\u003cp class=\"p1\">\u003cb>Gorospe:\u003c/b> It’s so creamy. So cheesy. It’s delicious.\u003c/p>\n\u003cp class=\"p1\">\u003cb>Edelson:\u003c/b> I also had the funky nachos. Great. I especially like the kraut on top.\u003c/p>\n\u003cp class=\"p1\">\u003cb>Gorospe:\u003c/b> The kraut on top was so good.\u003c/p>\n\u003cp class=\"p1\">\u003cb>Edelson:\u003c/b> The kraut was awesome. It came with these like really thick chips. Usually I don’t like those for nachos. Worked for these ones. Really worked for these ones.\u003c/p>\n\u003cp class=\"p1\">\u003cb>Sbrocco:\u003c/b> What did you have when you went?\u003c/p>\n\u003cp class=\"p1\">\u003cb>Randolph:\u003c/b> All right, so for me, this spot was vastly outside of my wheelhouse, right? Because when I think of vegan, I tend to think of food that is not necessarily going to be as filling. Right? And when I walked into this restaurant, this gave me all the vegan vibes. It was rustic. There was guys with long hair in there, funky mustaches,\u003c/p>\n\u003cp class=\"p1\">\u003cb>Sbrocco:\u003c/b> The vegan vibe.\u003c/p>\n\u003cp class=\"p1\">\u003cb>Randolph:\u003c/b> The vegan vibes. Right? And then, you know, when I think of vegan, like, I think of people that are au naturel, you know what I’m saying? So everybody’s going to be a little bit musty.\u003c/p>\n\u003cp class=\"p1\">\u003cb>Edelson:\u003c/b> A little stinky.\u003c/p>\n\u003cp class=\"p1\">\u003cb>Randolph:\u003c/b> You know what I’m saying? And ironically, I ordered the Funk Bowl.\u003c/p>\n\u003cp class=\"p1\">\u003cb>Sbrocco:\u003c/b> Oh, okay.\u003c/p>\n\u003cp class=\"p1\">\u003cb>Randolph:\u003c/b> But it was good. It was delicious. It was so well seasoned. You know what I mean? It also has some sweet potato in there, some black chickpeas, black rice, seasonal vegetables, and it also had some mixed greens in there.\u003c/p>\n\u003cp class=\"p1\">\u003cb>Sbrocco:\u003c/b> That is a healthy dish.\u003c/p>\n\u003cp class=\"p1\">\u003cb>Randolph:\u003c/b> It was good. It was good. My insides thanked me for it.\u003c/p>\n\u003cp class=\"p1\">\u003cb>Gorospe:\u003c/b> I’m sure they did.\u003c/p>\n\u003cp class=\"p1\">\u003cb>Sbrocco:\u003c/b> Very flavorful.\u003c/p>\n\u003cp class=\"p1\">\u003cb>Edelson:\u003c/b> We started with the full spread. I was overwhelmed by it.\u003c/p>\n\u003cp class=\"p1\">\u003cb>Sbrocco:\u003c/b> Kind of a tasting platter.\u003c/p>\n\u003cp class=\"p1\">\u003cb>Edelsn:\u003c/b> Yeah, it was a tasting platter, but what’s so cool about it, is there’s like 10 or 12 different things you can choose to dip things into. And so we went with a beet beer mustard, a kimchi, and then also another cabbage on the side, too. And it was beautiful. I think what really stood out to me about this restaurant were the colors. Every dish, it was like, whoa, just —\u003c/p>\n\u003cp class=\"p1\">\u003cb>Gorospe:\u003c/b> Fresh, colorful.\u003c/p>\n\u003cp class=\"p1\">\u003cb>Edelson:\u003c/b> There’s a purple, there’s a green, there’s a yellow. It’s just rainbow every time. The spread was amazing. Really, really fresh veggies, crunchy, side of bread that was warm. I couldn’t stop just putting everything on it. I also — my favorite dish, I actually had their soup of the week, so who knows what it is this week. But the week I was there was this honey nut squash soup with like a Thai coconut curry.\u003c/p>\n\u003cp class=\"p1\">\u003cb>Sbrocco:\u003c/b> Wow.\u003c/p>\n\u003cp class=\"p1\">\u003cb>Edelson:\u003c/b> Veggie noodles in it. Felipe told me, I’m going to quote here as best I can, he said, “Wendy goes hard on these soups.” And it was amazing. My wife and I were fighting over it, scooping it up with bread. If I went again, I would be very excited to see what kind of soups.\u003c/p>\n\u003cp class=\"p1\">\u003cb>Sbrocco:\u003c/b> Look at the soups first? Yeah, I would do it every time.\u003c/p>\n\u003cp class=\"p1\">\u003cb>Sbrocco:\u003c/b> What are some of your other favorites when you go?\u003c/p>\n\u003cp class=\"p1\">\u003cb>Gorospe:\u003c/b> There is a tostada. It’s mushrooms. They’re well marinated, and it has like a citrus flavor on top. The tostada is really crunchy, and it’s really good.\u003c/p>\n\u003cp class=\"p1\">\u003cb>Sbrocco:\u003c/b> Because this is about fermentation, anybody have the beers?\u003c/p>\n\u003cp class=\"p1\">\u003cb>Edelson:\u003c/b> Oh, yeah.\u003c/p>\n\u003cp class=\"p1\">\u003cb>Sbrocco:\u003c/b> Let’s talk about that a little bit.\u003c/p>\n\u003cp class=\"p1\">\u003cb>Edelson:\u003c/b> I can go first.\u003c/p>\n\u003cp class=\"p1\">\u003cb>Gorospe:\u003c/b> You can go first.\u003c/p>\n\u003cp class=\"p1\">\u003cb>Sbrocco:\u003c/b> Eddie’s very excited.\u003c/p>\n\u003cp class=\"p1\">\u003cb>Edelson:\u003c/b> I got to be honest, I love sours. I like drinking beer, of course, too. My wife and I tried all six of them.\u003c/p>\n\u003cp class=\"p1\">\u003cb>Gorospe:\u003c/b> Oh, wow!\u003c/p>\n\u003cp class=\"p1\">\u003cb>Randolph:\u003c/b> Whoa!\u003c/p>\n\u003cp class=\"p1\">\u003cb>Sbrocco:\u003c/b> Because there was a tasting.\u003c/p>\n\u003cp class=\"p1\">\u003cb>Edelson:\u003c/b> We did taste. We did small pours. Not a full pour for each one. I just — I couldn’t make a decision. I was like, “I’m here.”\u003c/p>\n\u003cp class=\"p1\">\u003cb>Sbrocco:\u003c/b> I’ll have it all.\u003c/p>\n\u003cp class=\"p1\">\u003cb>Edelson:\u003c/b> This is a farther drive for me. I want to try it all.\u003c/p>\n\u003cp class=\"p1\">\u003cb>Sbrocco:\u003c/b> Yeah.\u003c/p>\n\u003cp class=\"p1\">\u003cb>Edelson:\u003c/b> What I really liked about the beers that they do there is that none of them are too heavy. I’m really over the double IPA hazy.\u003c/p>\n\u003cp class=\"p1\">\u003cb>Randolph:\u003c/b> Right, right, right, right.\u003c/p>\n\u003cp class=\"p1\">\u003cb>Edelson:\u003c/b> Gutbuster thing. And these are all a lot lighter and drinkable. And my favorite one was fluorescent brown. It was a brown ale, but they did it with pomegranate juice. And so there was this brown ale-y feel. But it finished with a sour note from the pomegranate. That was a win for sure.\u003c/p>\n\u003cp class=\"p1\">\u003cb>Sbrocco:\u003c/b> All right. Anybody else have the beers?\u003c/p>\n\u003cp class=\"p1\">\u003cb>Gorospe:\u003c/b> I had a beer. I had the You’re Invited. Really light. It has like a good orange flavor. And I know that they brewed that beer specifically for their wedding,\u003c/p>\n\u003cp class=\"p1\">\u003cb>Edelson:\u003c/b> Oh, no way.\u003c/p>\n\u003cp class=\"p1\">\u003cb>Gorospe:\u003c/b> Felipe and Wendy’s wedding. Yeah, so then they bring it back every year for their anniversary. So that was, it was really good. I also had a mocktail. I had the fung shui cider.\u003c/p>\n\u003cp class=\"p1\">\u003cb>Randolph:\u003c/b> Fung shui cider.\u003c/p>\n\u003cp class=\"p1\">\u003cb>Gorospe:\u003c/b> Yes, and you can get it hot or iced. I got it iced. And that one was really good.\u003c/p>\n\u003cp class=\"p1\">\u003cb>Sbrocco:\u003c/b> Anything else?\u003c/p>\n\u003cp class=\"p1\">\u003cb>Gorospe:\u003c/b> I had the mac and cheese.\u003c/p>\n\u003cp class=\"p1\">\u003cb>Sbrocco:\u003c/b> Okay.\u003c/p>\n\u003cp class=\"p1\">\u003cb>Gorospe:\u003c/b> I can’t get away from the cashew queso. I’m telling you guys, it is so good. And it’s topped with a sesame oil. And it just adds like a really great nutty flavor on top.\u003c/p>\n\u003cp class=\"p1\">\u003cb>Sbrocco:\u003c/b> And did you feel like you got good value? You were talking about the size.\u003c/p>\n\u003cp class=\"p1\">\u003cb>Randolph:\u003c/b> Yeah. Oh, yeah. Yeah. Yes, definitely. Portion wise, like I said, I was full, I was good.\u003c/p>\n\u003cp class=\"p1\">\u003cb>Sbrocco:\u003c/b> Okay so your image of vegan vibes has changed, hasn’t it?\u003c/p>\n\u003cp class=\"p1\">\u003cb>Randolph:\u003c/b> No, not at all.\u003c/p>\n\u003cp class=\"p1\">[ Laughter ]\u003c/p>\n\u003cp class=\"p1\">\u003cb>Randolph:\u003c/b> Like it was exactly what I thought.\u003c/p>\n\u003cp class=\"p1\">[ Laughter ]\u003c/p>\n\u003cp class=\"p1\">\u003cb>Randolph:\u003c/b> But it was still cool, you know?\u003c/p>\n\u003cp class=\"p1\">\u003cb>Sbrocco:\u003c/b> Yeah, that’s great. Well, if you’d like to try Fox Tale Fermentation Project, it’s located on Santa Clara Street in downtown San Jose. The average multi-course tab per person without drinks is around $40.\u003c/p>\n\u003cp class=\"p1\">\u003cb>Sbrocco:\u003c/b> A visit to New Orleans sparked Cory’s passion for Creole food, and he’s been craving those bold, soulful flavors ever since. Thankfully, he’s found a place that captures the true spirit of the Big Easy right here in the Bay. Located in Los Gatos, it’s the Bywater.\u003c/p>\n\u003cp class=\"p3\">♪♪♪♪\u003c/p>\n\u003cp class=\"p3\">♪♪♪♪\u003c/p>\n\u003cp class=\"p1\">\u003cb>Williams:\u003c/b> The Bywater is a neighborhood in New Orleans. It’s a little east of downtown, but it has a lot of cool old school bars. And it’s a good place to experience true New Orleans culture.\u003c/p>\n\u003cp class=\"p1\">\u003cb>Williams:\u003c/b> A lot of the vibe for the restaurant is, we talk about this all the time, high brow, low brow.\u003c/p>\n\u003cp class=\"p1\">\u003cb>LaMantia:\u003c/b> High brow, low brow. I love it. The duality.\u003c/p>\n\u003cp class=\"p1\">\u003cb>Williams:\u003c/b> Yeah. There’s a duality.\u003c/p>\n\u003cp class=\"p1\">\u003cb>LaMantia:\u003c/b> Sacred balance.\u003c/p>\n\u003cp class=\"p1\">\u003cb>Williams:\u003c/b> Yeah. We like to have really nice entrees, but we also like to keep the red beans, the shrimp po’boy, all the classics and kind of keep more of a neighborhood feel rather than like an upscale fine dining feel.\u003c/p>\n\u003cp class=\"p1\">\u003cb>LaMantia:\u003c/b> We do a lot of like rural Cajun cuisines, which is the greater Louisiana, whereas Creole is just New Orleans. So we do a bit of both.\u003c/p>\n\u003cp class=\"p1\">\u003cb>Williams:\u003c/b> These are the Royal Miyagi’s from Tomales Bay.\u003c/p>\n\u003cp class=\"p1\">\u003cb>LaMantia:\u003c/b> Around here, we always have oysters.\u003c/p>\n\u003cp class=\"p1\">\u003cb>Williams:\u003c/b> That’s a dozen, cousin.\u003c/p>\n\u003cp class=\"p1\">\u003cb>LaMantia:\u003c/b> A nice mix of East Coast and West Coast oysters and some southern oysters, as well.\u003c/p>\n\u003cp class=\"p1\">\u003cb>Man:\u003c/b> Fried chicken up.\u003c/p>\n\u003cp class=\"p1\">\u003cb>LaMantia:\u003c/b> We definitely pride ourselves on the fried chicken. It’s been on the menu since day one. It’s always going to be here. Another one’s gumbo. Right now, we do a seafood gumbo filé. Rich. Savory. Fatty. So it’s a dark roux. It’s a little bit of tomato paste. It’s a Creole style gumbo. A big staple in New Orleans is Cafe du Monde beignets. We make them in sort of a similar fashion, but almost more like a biscuit or a croissant. When we fry them, they spring open like an accordion kind of. And we serve them with chocolate sauce and powdered sugar.\u003c/p>\n\u003cp class=\"p1\">\u003cb>Williams:\u003c/b> A lot of powdered sugar.\u003c/p>\n\u003cp class=\"p1\">\u003cb>LaMantia:\u003c/b> A lot of powdered sugar.\u003c/p>\n\u003cp class=\"p1\">\u003cb>Williams:\u003c/b> We always want to do a great cocktail program here. I think that’s part of being a New Orleans restaurant. I’d say most of our regulars are voodoo daiquiri people.\u003c/p>\n\u003cp class=\"p1\">\u003cb>LaMantia:\u003c/b> Voodoo daiquiri with the float.\u003c/p>\n\u003cp class=\"p1\">\u003cb>Williams:\u003c/b> With the float.\u003c/p>\n\u003cp class=\"p1\">\u003cb>LaMantia:\u003c/b> With the float.\u003c/p>\n\u003cp class=\"p1\">\u003cb>Williams:\u003c/b> Got to get the float. We love coming to work every day and seeing the same people. Good to see you all again. New people are great, but the same people are awesome. Oh, yeah, I got an oyster shooter right here. You know, the people who love this restaurant really love it. And, you know, they keep us here, so we love them back.\u003c/p>\n\u003cp class=\"p1\">\u003cb>Williams:\u003c/b> The absolute king of the Bywater right here.\u003c/p>\n\u003cp class=\"p1\">\u003cb>Man:\u003c/b> Absolutely not.\u003c/p>\n\u003cp class=\"p1\">\u003cb>Williams:\u003c/b> My man.\u003c/p>\n\u003cp class=\"p1\">\u003cb>Man:\u003c/b> Love you.\u003c/p>\n\u003cp class=\"p1\">\u003cb>Williams:\u003c/b> Cheers.\u003c/p>\n\u003cp class=\"p1\">\u003cb>Sbrocco:\u003c/b> Okay, we got to first talk about pronunciation of New Orleans.\u003c/p>\n\u003cp class=\"p1\">\u003cb>Randolph:\u003c/b> Yes.\u003c/p>\n\u003cp class=\"p1\">\u003cb>Sbrocco:\u003c/b> Give me yours.\u003c/p>\n\u003cp class=\"p1\">\u003cb>Randolph:\u003c/b> N’awlins.\u003c/p>\n\u003cp class=\"p1\">\u003cb>Sbrocco:\u003c/b> N’awlins.\u003c/p>\n\u003cp class=\"p1\">\u003cb>Randolph:\u003c/b> N’awlins.\u003c/p>\n\u003cp class=\"p1\">\u003cb>Gorospe:\u003c/b> N’awlins.\u003c/p>\n\u003cp class=\"p1\">\u003cb>Sbrocco:\u003c/b> N’awlins.\u003c/p>\n\u003cp class=\"p1\">\u003cb>Edelson:\u003c/b> N’awlins. I got something —\u003c/p>\n\u003cp class=\"p1\">[ Laughter ]\u003c/p>\n\u003cp class=\"p1\">\u003cb>Randolph:\u003c/b> No, you hit it, you hit it.\u003c/p>\n\u003cp class=\"p1\">\u003cb>Edelson:\u003c/b> It’s got to fall off the tongue like you’re on the bayou,\u003c/p>\n\u003cp class=\"p1\">\u003cb>Sbrocco:\u003c/b> Right. Yeah. N’awlins.\u003c/p>\n\u003cp class=\"p1\">\u003cb>Randolph:\u003c/b> You sound like you were standing on the front porch.\u003c/p>\n\u003cp class=\"p1\">\u003cb>Edelson:\u003c/b> I wish I was. It’s so great down there.\u003c/p>\n\u003cp class=\"p1\">\u003cb>Sbrocco:\u003c/b> All right. Why and how did you become such a fan of this place?\u003c/p>\n\u003cp class=\"p1\">\u003cb>Randolph:\u003c/b> One day, I was actually looking for some Creole food, and I just did a quick Google and ended up discovering this gem. And the owner, David.\u003c/p>\n\u003cp class=\"p1\">\u003cb>Sbrocco:\u003c/b> David Kinch.\u003c/p>\n\u003cp class=\"p1\">\u003cb>Randolph:\u003c/b> Kinch.\u003c/p>\n\u003cp class=\"p1\">\u003cb>Sbrocco:\u003c/b> Michelin starred.\u003c/p>\n\u003cp class=\"p1\">\u003cb>Randolph:\u003c/b> Three Michelin stars.\u003c/p>\n\u003cp class=\"p1\">\u003cb>Edelson:\u003c/b> Three Mich?\u003c/p>\n\u003cp class=\"p1\">\u003cb>Randolph:\u003c/b> Three Michelin stars.\u003c/p>\n\u003cp class=\"p1\">\u003cb>Sbrocco:\u003c/b> A real pedigree.\u003c/p>\n\u003cp class=\"p1\">\u003cb>Randolph:\u003c/b> Right. So he actually flies his staff out there to New Orleans to do research for about two weeks. And then they bring those flavors back, and they serve it up to us. The first thing we did was the Sazerac, right? Like you have to get a classic New Orleans —\u003c/p>\n\u003cp class=\"p1\">\u003cb>Sbrocco:\u003c/b> Sazerac, yeah!\u003c/p>\n\u003cp class=\"p1\">\u003cb>Randolph:\u003c/b> Sazerac. Sazerac. Got to get a Sazerac. So you got the Sazerac. And it was very reminiscent of being on Bourbon Street.\u003c/p>\n\u003cp class=\"p1\">\u003cb>Sbrocco:\u003c/b> Do you have a favorite dish to start with?\u003c/p>\n\u003cp class=\"p1\">\u003cb>Randolph:\u003c/b> My go to there whenever I go is the fried chicken.\u003c/p>\n\u003cp class=\"p1\">\u003cb>Edelson:\u003c/b> Yes.\u003c/p>\n\u003cp class=\"p1\">\u003cb>Randolph:\u003c/b> The fried chicken. It’s very well seasoned. Super, super crispy. And it’s just all the way through, down to the bone. Very well cooked, and I enjoy it.\u003c/p>\n\u003cp class=\"p1\">\u003cb>Sbrocco:\u003c/b> Love it.\u003c/p>\n\u003cp class=\"p1\">\u003cb>Edelson:\u003c/b> Fried chicken was amazing. I had that, as well. It was so thick, but it was like juicy all the way through.\u003c/p>\n\u003cp class=\"p1\">\u003cb>Sbrocco:\u003c/b> You cannot miss the fried chicken.\u003c/p>\n\u003cp class=\"p1\">\u003cb>Edelson:\u003c/b> Don’t miss that. The coleslaw on the side, too. Real winner. The hot to cold.\u003c/p>\n\u003cp class=\"p1\">\u003cb>Randolph:\u003c/b> Right.\u003c/p>\n\u003cp class=\"p1\">\u003cb>Sbrocco:\u003c/b> What was your experience when you went, Pam?\u003c/p>\n\u003cp class=\"p1\">\u003cb>Gorospe:\u003c/b> I started with the Huck-a-buck.\u003c/p>\n\u003cp class=\"p1\">\u003cb>Woman:\u003c/b> Such a classic.\u003c/p>\n\u003cp class=\"p1\">\u003cb>Gorospe:\u003c/b> It was lemon and watermelon. And then you could choose vodka or tequila. I went vodka that night, but it tasted like a Jolly Rancher. It was like candy. I was like, “This is dangerous.”\u003c/p>\n\u003cp class=\"p1\">[ Laughs ]\u003c/p>\n\u003cp class=\"p1\">\u003cb>Sbrocco:\u003c/b> Now just think about it.\u003c/p>\n\u003cp class=\"p1\">\u003cb>Gorospe:\u003c/b> This is dangerous.\u003c/p>\n\u003cp class=\"p1\">\u003cb>Sbrocco:\u003c/b> They have “to go” drinks.\u003c/p>\n\u003cp class=\"p1\">\u003cb>Gorospe:\u003c/b> Yes, they do have “to go” drinks, yeah.\u003c/p>\n\u003cp class=\"p1\">\u003cb>Edelson:\u003c/b> I had the Pimm’s Cup.\u003c/p>\n\u003cp class=\"p1\">\u003cb>Woman:\u003c/b> Cheers.\u003c/p>\n\u003cp class=\"p1\">\u003cb>Edelson:\u003c/b> Pimm’s Cup, the classic — classic New Orleans drink. They do it really well there. I love the Pimm flavor coming out. Tastes kind of like a Arnold Palmer iced tea. Just really nice. Easy to drink. My favorite drink, though was I had the Clarified Ramos Gin fizz, which was awesome. I’ll be honest, I don’t love the egg white on the top usually. This didn’t have that, which made me fall in love with it even more. I think what they do with it is they make it clarified by adding lemon and lime into it, to get rid of some of that eggy flavor and milky flavor. And it was so citrusy, so tangy.\u003c/p>\n\u003cp class=\"p1\">\u003cb>Sbrocco:\u003c/b> Wow.\u003c/p>\n\u003cp class=\"p1\">\u003cb>Edelson:\u003c/b> I had the gumbo, too. Good gumbo. Classic good Creole gumbo. Had the crab, shrimp. I think crawfish, as well. Just rich, really nice dark color. Brought me back to N’awlins.\u003c/p>\n\u003cp class=\"p1\">\u003cb>Randolph:\u003c/b> I love that they actually incorporate all the flavors from the crab to… Because a lot of places do not put, like, when you order gumbo, like they’re generally giving you like a chicken stew, as opposed to gumbo.\u003c/p>\n\u003cp class=\"p1\">\u003cb>Gorospe:\u003c/b> Right.\u003c/p>\n\u003cp class=\"p1\">\u003cb>Randolph:\u003c/b> Right, where you’re sitting there.\u003c/p>\n\u003cp class=\"p1\">\u003cb>Gorospe:\u003c/b> Stirring.\u003c/p>\n\u003cp class=\"p1\">\u003cb>Randolph:\u003c/b> Right. You’re stirring it. You know what I mean? Like your shoulder’s tired.\u003c/p>\n\u003cp class=\"p1\">\u003cb>Edelson:\u003c/b> Get some elbow grease in there.\u003c/p>\n\u003cp class=\"p1\">\u003cb>Randolph:\u003c/b> Your shoulder’s tired. I want to see the chef back there.\u003c/p>\n\u003cp class=\"p1\">\u003cb>Gorospe:\u003c/b> Sweating.\u003c/p>\n\u003cp class=\"p1\">\u003cb>Randolph:\u003c/b> With some sweat. You know? I want to go back there.\u003c/p>\n\u003cp class=\"p1\">\u003cb>Sbrocco:\u003c/b> You’re making a roux, baby.\u003c/p>\n\u003cp class=\"p1\">\u003cb>Randolph:\u003c/b> Right. Making a roux!\u003c/p>\n\u003cp class=\"p1\">\u003cb>Sbrocco:\u003c/b> Yeah.\u003c/p>\n\u003cp class=\"p1\">\u003cb>Randolph:\u003c/b> But it’s almost like you cannot go wrong with pretty much everything on the menu.\u003c/p>\n\u003cp class=\"p1\">\u003cb>Sbrocco:\u003c/b> You can’t.\u003c/p>\n\u003cp class=\"p1\">\u003cb>Randolph:\u003c/b> Now they actually serve a burger, right?\u003c/p>\n\u003cp class=\"p1\">\u003cb>Gorospe:\u003c/b> I had the burger.\u003c/p>\n\u003cp class=\"p1\">\u003cb>Randolph:\u003c/b> Oh, you had the —\u003c/p>\n\u003cp class=\"p1\">\u003cb>Gorospe:\u003c/b> I had the burger. Oh, my gosh.\u003c/p>\n\u003cp class=\"p1\">\u003cb>Sbrocco:\u003c/b> Tell us, Pam.\u003c/p>\n\u003cp class=\"p1\">\u003cb>Gorospe:\u003c/b> Star of the show. It was so good. Double smash burger, raclette cheese.\u003c/p>\n\u003cp class=\"p1\">\u003cb>Man:\u003c/b> Do the shallot jam first.\u003c/p>\n\u003cp class=\"p1\">\u003cb>Gorospe:\u003c/b> Had like a shallot jam on it. That was just…chef’s kiss.\u003c/p>\n\u003cp class=\"p1\">\u003cb>Sbrocco:\u003c/b> There’s a three Michelin star chef.\u003c/p>\n\u003cp class=\"p1\">\u003cb>Randolph:\u003c/b> Right, right.,\u003c/p>\n\u003cp class=\"p1\">\u003cb>Gorospe:\u003c/b> The shallot jam.\u003c/p>\n\u003cp class=\"p1\">\u003cb>Sbrocco:\u003c/b> The raclette cheese, too.\u003c/p>\n\u003cp class=\"p1\">\u003cb>Gorospe:\u003c/b> Yeah, but the biggest surprise was that it’s sitting in a plate of jus, yeah.\u003c/p>\n\u003cp class=\"p1\">\u003cb>Sbrocco:\u003c/b> All right. Anybody have any other dish that you want to talk about?\u003c/p>\n\u003cp class=\"p1\">\u003cb>Edelson:\u003c/b> Maybe this sounds basic. I had their mixed green salad. The vinaigrette was really nice. Crunchy, large bowl. They put fennel in it. Usually I’m like, eww, fennel. It’s, like, not my flavor profile. It rocked in this — in this salad. So I was grateful that we ordered that.\u003c/p>\n\u003cp class=\"p1\">\u003cb>Randolph:\u003c/b> When you go, try their fries, their French fries.\u003c/p>\n\u003cp class=\"p1\">\u003cb>Gorospe:\u003c/b> I had the fries.\u003c/p>\n\u003cp class=\"p1\">\u003cb>Randolph:\u003c/b> Yeah, fries are very, very well seasoned, if you think of what your ideal fries would be, you know?\u003c/p>\n\u003cp class=\"p1\">\u003cb>Gorospe:\u003c/b> I feel like they use the same spice as on the fried chicken or like similar spices. Really good. I also had the Hush puppies. I don’t know if you guys saw those or had them. They come in, like, a little cone. They have a hot honey dipping sauce on the side. It’s like ricotta, cheddar, there’s scallions in them.\u003c/p>\n\u003cp class=\"p1\">\u003cb>Sbrocco:\u003c/b> Ah!\u003c/p>\n\u003cp class=\"p1\">\u003cb>Randolph:\u003c/b> Oh! And shout out to the beignets. I want to give a big shout out.\u003c/p>\n\u003cp class=\"p1\">\u003cb>Sbrocco:\u003c/b> The beignets.\u003c/p>\n\u003cp class=\"p1\">\u003cb>Gorospe:\u003c/b> [ Laughs ] I wondered when we were going to talk about the beignets.\u003c/p>\n\u003cp class=\"p1\">\u003cb>Randolph:\u003c/b> Can we talk about beignets? Like, there are a lot of places in the, you know, that try to serve beignets, right? But this was what a beignet is supposed to taste like.\u003c/p>\n\u003cp class=\"p1\">\u003cb>Sbrocco:\u003c/b> It’s truly an art.\u003c/p>\n\u003cp class=\"p1\">\u003cb>Randolph:\u003c/b> The beignet was beignet-ing.\u003c/p>\n\u003cp class=\"p1\">\u003cb>Sbrocco:\u003c/b> And they have to come out hot and covered with powdered sugar, right?\u003c/p>\n\u003cp class=\"p1\">\u003cb>Randolph:\u003c/b> Hot and covered with powdered sugar, steamy. Yes.\u003c/p>\n\u003cp class=\"p1\">\u003cb>Edelson:\u003c/b> It’s got to be.\u003c/p>\n\u003cp class=\"p1\">\u003cb>Sbrocco:\u003c/b> Did you have the beignets?\u003c/p>\n\u003cp class=\"p1\">\u003cb>Edelson:\u003c/b> I didn’t. I had the butterscotch pot de crèème.\u003c/p>\n\u003cp class=\"p1\">\u003cb>All:\u003c/b> Oh!\u003c/p>\n\u003cp class=\"p1\">\u003cb>Edelson:\u003c/b> It was awesome. Super creamy whipped cream on top, house made. And it was like this, like, amazingly rich butterscotch flavor. I really recommend it. It was really good.\u003c/p>\n\u003cp class=\"p1\">\u003cb>Sbrocco:\u003c/b> Okay.\u003c/p>\n\u003cp class=\"p1\">\u003cb>Edelson:\u003c/b> I need to go back for beignets. I knew you all would be hitting that and saying that.\u003c/p>\n\u003cp class=\"p1\">\u003cb>Randolph:\u003c/b> I mean, it’s New Orleans. You got to do it, right?\u003c/p>\n\u003cp class=\"p1\">\u003cb>Edelson:\u003c/b> I know. I wanted to try something else, and I’m really glad I did.\u003c/p>\n\u003cp class=\"p1\">\u003cb>Sbrocco:\u003c/b> All right. And service?\u003c/p>\n\u003cp class=\"p1\">\u003cb>Edelson:\u003c/b> Really good, attentive, not too disruptive, but really helpful when I had questions. I felt well taken care of there.\u003c/p>\n\u003cp class=\"p1\">\u003cb>Sbrocco:\u003c/b> Agree?\u003c/p>\n\u003cp class=\"p1\">\u003cb>Randolph:\u003c/b> Absolutely.\u003c/p>\n\u003cp class=\"p1\">\u003cb>Gorospe:\u003c/b> Very attentive.\u003c/p>\n\u003cp class=\"p1\">\u003cb>Sbrocco:\u003c/b> All right. I think you’re all going back.\u003c/p>\n\u003cp class=\"p1\">\u003cb>Gorospe:\u003c/b> Oh, yes.\u003c/p>\n\u003cp class=\"p1\">\u003cb>Sbrocco:\u003c/b> Especially for the beignets.\u003c/p>\n\u003cp class=\"p1\">\u003cb>Edelson:\u003c/b> I got to. I got to.\u003c/p>\n\u003cp class=\"p1\">[ Laughter ]\u003c/p>\n\u003cp class=\"p1\">\u003cb>Sbrocco:\u003c/b> Okay, if you would like to try the Bywater, It’s located on Santa Cruz Avenue in Los Gatos. And the average multi-course tab per person without drinks is around $55.\u003c/p>\n\u003cp class=\"p1\">\u003cb>Sbrocco:\u003c/b> Whenever the weather turns crisp, Eddie retreats to his ultimate comfort food sanctuary. It’s a warm, inviting Korean eatery offering savory soups that hit the spot every time. Located in Oakland’s Temescal neighborhood, it’s Pyeong Chang Tofu House.\u003c/p>\n\u003cp class=\"p1\">\u003cb>Kim:\u003c/b> Welcome in! We’re open!\u003c/p>\n\u003cp class=\"p1\">[ Cheers and applause ]\u003c/p>\n\u003cp class=\"p1\">\u003cb>Kim:\u003c/b> Pyeong Chang Tofu House is an authentic Korean restaurant. We specialize in making comfort foods that come out bubbling and sizzling and hot. Not only will you love the flavors of our dishes, you also hear them when they come out the kitchen.\u003c/p>\n\u003cp class=\"p1\">[ Food sizzling ]\u003c/p>\n\u003cp class=\"p1\">\u003cb>Kim:\u003c/b> Pyeong Chang Tofu House is named after a city in the countryside of South Korea, and they’re known for their famous yellow soybeans that makes the tofu. The soybean there is very flavorful, and it has its own distinct taste. Sundubu, our soft tofu soup is a staple dish in Korea. We have many different varieties, seafood combination. My personal favorite is the mushroom tofu soup.\u003c/p>\n\u003cp class=\"p1\">\u003cb>Kim:\u003c/b> Sonmeans hand, masmeans flavor. Put those two words together, it refers to the flavors of your hands. You won’t find any measuring cups in our kitchens. Our cooks are trained really well. Because we use our kimchi in so many items in our menu, we make about 500 or 600 pounds of cabbage kimchi every week.\u003c/p>\n\u003cp class=\"p1\">\u003cb>Kim:\u003c/b> I personally love chicken wings and fried chicken in general. We took about a year to perfect the sauces, the batter. Then it became a huge hit. There’s a phrase in Korean calledchimaek, which means chicken and beer. So we had to get a draft beer. Bottled beers are amazing too, but in my opinion, nothing beats draft.\u003c/p>\n\u003cp class=\"p1\">\u003cb>Kim:\u003c/b> Banchan is the glue that holds all the dishes together. It is kind of the foods and small pickled vegetable dishes that you get before your main food comes out. The whole point of you coming here is to share everything. We have a lot of solo diners too, and we love them, but when you come in groups, it just makes the experience so much more better, fun and more authentic.\u003c/p>\n\u003cp class=\"p1\">[ Diners cheering ]\u003c/p>\n\u003cp class=\"p1\">\u003cb>Kim:\u003c/b> Some of these wooden tables are very close to each other, so a lot of diners ask each other, “What did you get?” We want our customers to not only leave happy and full, but also just satisfied with how they spent their night at our restaurant.\u003c/p>\n\u003cp class=\"p1\">\u003cb>Sbrocco:\u003c/b> Now, Eddie, this place is all about sharing food, right?\u003c/p>\n\u003cp class=\"p1\">\u003cb>Edelson:\u003c/b> Oh, yes.\u003c/p>\n\u003cp class=\"p1\">\u003cb>Sbrocco:\u003c/b> Korean food you can really — is shareable.\u003c/p>\n\u003cp class=\"p1\">\u003cb>Edelson:\u003c/b> You got to share. It’s great to go with a big group. My wife actually lived in Korea for a year, and so she really turned me on to Korean food. We spent a year or two going around to, like, pretty much every Korean restaurant in Oakland with a bunch of friends usually, too. We’d go out on Friday nights and really have a lively good time. This one was the one we just kept coming back to. The banchan is amazing. Their banchan is very strong. A bunch of just little starters that you share with the whole table. They have a great kimchi. Very tangy, very sour that I like a lot. And their spicy crispy cucumbers as well. This most recent time I went, they had a pickled sweet daikon that was like candy. My table was, like, chasing after it. I had — I think we had 8 or 10 people there and everyone was like reaching for it, trying to get it back over here.\u003c/p>\n\u003cp class=\"p1\">\u003cb>Sbrocco:\u003c/b> More daikon.\u003c/p>\n\u003cp class=\"p1\">\u003cb>Edelson:\u003c/b> Yeah, so they were — they were fighting over it. So love the banchan. And then of course, for any starter, I have to do their kimchi pancake every time. I think it’s the best kimchi pancake there is.\u003c/p>\n\u003cp class=\"p1\">\u003cb>Sbrocco:\u003c/b> And it’s kind of their signature, isn’t it?\u003c/p>\n\u003cp class=\"p1\">\u003cb>Edelson:\u003c/b> It is one of their signatures, and it’s really good. Super crispy, the kimchi.\u003c/p>\n\u003cp class=\"p1\">\u003cb>Randolph:\u003c/b> Right, right.\u003c/p>\n\u003cp class=\"p1\">\u003cb>Edelson:\u003c/b> I want you two to speak to it.\u003c/p>\n\u003cp class=\"p1\">\u003cb>Gorospe:\u003c/b> I had the kimchi pancake. It’s really good. It came out super piping hot and had a really good, like, soy dipping sauce. It was delicious.\u003c/p>\n\u003cp class=\"p1\">\u003cb>Sbrocco:\u003c/b> You love kimchi.\u003c/p>\n\u003cp class=\"p1\">\u003cb>Gorospe:\u003c/b> I do, I really do.\u003c/p>\n\u003cp class=\"p1\">[ Laughter ]\u003c/p>\n\u003cp class=\"p1\">\u003cb>Randolph:\u003c/b> And I also — I also had the kimchi pancake. And for me, it was a new experience, right? If I were to describe it, it’s kind of like if a latke and a spring roll got together and they did the wild thing.\u003c/p>\n\u003cp class=\"p1\">\u003cb>Gorospe:\u003c/b> Yes.\u003c/p>\n\u003cp class=\"p1\">\u003cb>Randolph:\u003c/b> Nine months later, we would get that.\u003c/p>\n\u003cp class=\"p1\">\u003cb>Sbrocco:\u003c/b> This was born.\u003c/p>\n\u003cp class=\"p1\">\u003cb>Randolph:\u003c/b> This was born. This flavor, it was so good.\u003c/p>\n\u003cp class=\"p1\">\u003cb>Sbrocco:\u003c/b> Yeah, okay. What do you get normally?\u003c/p>\n\u003cp class=\"p1\">\u003cb>Edelson:\u003c/b> I usually get one of their bi bim baps.\u003c/p>\n\u003cp class=\"p1\">\u003cb>Sbrocco:\u003c/b> Everybody say that one, I love it. Bi bim bap.\u003c/p>\n\u003cp class=\"p1\">\u003cb>Edelson:\u003c/b> Bi bim bap.\u003c/p>\n\u003cp class=\"p1\">\u003cb>Gorospe:\u003c/b> Bi bim bap.\u003c/p>\n\u003cp class=\"p1\">\u003cb>Randolph:\u003c/b> \u003cspan class=\"s1\">♪♪\u003c/span> Bi bim bop \u003cspan class=\"s1\">♪♪\u003c/span>\u003c/p>\n\u003cp class=\"p1\">\u003cspan class=\"s1\">♪♪\u003c/span> Bop, bop, bi, bop, bi bim bop \u003cspan class=\"s1\">♪♪\u003c/span>\u003c/p>\n\u003cp class=\"p1\">\u003cspan class=\"s1\">♪♪\u003c/span> Boom, bop, bi bim bop \u003cspan class=\"s1\">♪♪\u003c/span>\u003c/p>\n\u003cp class=\"p1\">\u003cb>Edelson:\u003c/b> \u003cspan class=\"s1\">♪♪\u003c/span> I’m a bop man \u003cspan class=\"s1\">♪♪\u003c/span>\u003c/p>\n\u003cp class=\"p1\">[ Laughter ]\u003c/p>\n\u003cp class=\"p1\">\u003cb>Sbrocco:\u003c/b> I knew this table would embrace that.\u003c/p>\n\u003cp class=\"p1\">\u003cb>Edelson:\u003c/b> Yeah, mm-hmm. Mm-hmm. The one I like to get is their kimchi dol sot bi bim bap. Dol sot means that it comes in a stone pot which comes out piping hot. So it comes with rice. I usually get with beef, and it has a bunch of accoutrements of different types of vegetables, egg on top, you mix it all up, Delicious. But what’s special about a lot of their meals, when you order something like the bi bim bap, you get their tofu soup on the side.\u003c/p>\n\u003cp class=\"p1\">\u003cb>Randolph:\u003c/b> Right.\u003c/p>\n\u003cp class=\"p1\">\u003cb>Edelson:\u003c/b> And their tofu soup is the thing that brings me back every time.\u003c/p>\n\u003cp class=\"p1\">\u003cb>Gorospe:\u003c/b> Amazing.\u003c/p>\n\u003cp class=\"p1\">\u003cb>Edelson:\u003c/b> It is unreal.\u003c/p>\n\u003cp class=\"p1\">\u003cb>Sbrocco:\u003c/b> It was great?\u003c/p>\n\u003cp class=\"p1\">\u003cb>Gorospe:\u003c/b> It was great.\u003c/p>\n\u003cp class=\"p1\">\u003cb>Sbrocco:\u003c/b> Tell me about it.\u003c/p>\n\u003cp class=\"p1\">\u003cb>Gorospe:\u003c/b> Comes out in one of the hot little stone bowls, so it’s bubbling. And they ask you what spice level you want, and I love spice. So I was like, you can make it as spicy as you want.\u003c/p>\n\u003cp class=\"p1\">\u003cb>Edelson:\u003c/b> Ooh.\u003c/p>\n\u003cp class=\"p1\">\u003cb>Gorospe:\u003c/b> And it was ama–\u003c/p>\n\u003cp class=\"p1\">\u003cb>Sbrocco:\u003c/b> Spicy?\u003c/p>\n\u003cp class=\"p1\">\u003cb>Gorospe:\u003c/b> It was spicy, but it was manageable. The tofu was so soft. I love that it was bubbling still when it came out.\u003c/p>\n\u003cp class=\"p1\">\u003cb>Edelson:\u003c/b> One thing I asked for the last time I was there with the soup is they’ll give you this fried rice dish. I think they pour water in — in like a stone pot and they flip the rice over. So it’s just like…\u003c/p>\n\u003cp class=\"p1\">\u003cb>Gorospe:\u003c/b> It’s like a crispy —\u003c/p>\n\u003cp class=\"p1\">\u003cb>Edelson:\u003c/b> …baseball cap, crispy disk of rice that you got to break and then put into the soup. I always ask for that. And I was like, of course. And they always get that for me.\u003c/p>\n\u003cp class=\"p1\">\u003cb>Sbrocco:\u003c/b> Okay. You get a little VIP treatment.\u003c/p>\n\u003cp class=\"p1\">\u003cb>Gorospe:\u003c/b> We got that, they brought it to the table and I quite did not know what to do with it. I was like, “What do I do?” I had to ask. I was like, “What do I do with this?” They were like, put it in your soup. You can eat it plain. It was great.\u003c/p>\n\u003cp class=\"p1\">\u003cb>Sbrocco:\u003c/b> Add a little crunchiness.\u003c/p>\n\u003cp class=\"p1\">\u003cb>Gorospe:\u003c/b> A little crunch, yeah. We ordered the spicy barbecue pork belly, and it comes out on the sizzling plate. The presentation here is amazing. Everything is — It’s like a spectacle.\u003c/p>\n\u003cp class=\"p1\">\u003cb>Sbrocco:\u003c/b> What else do you get when you go? I mean, you’ve been so many times.\u003c/p>\n\u003cp class=\"p1\">\u003cb>Edelson:\u003c/b> I’ve been a lot. I’ve been a lot. I’ve shared a lot. I always get the chicken wings as well. I don’t know if you all are able to get those, too.\u003c/p>\n\u003cp class=\"p1\">\u003cb>Randolph:\u003c/b> We got chicken wings.\u003c/p>\n\u003cp class=\"p1\">\u003cb>Gorospe:\u003c/b> Yes.\u003c/p>\n\u003cp class=\"p1\">\u003cb>Edelson:\u003c/b> They have three different types. I always get the nyum yang. Amazing chicken wings. They’re crispy, but also tender on the inside in that sauce. It’s a sweetness with some sour and spice at the end, too. They were gone very quickly.\u003c/p>\n\u003cp class=\"p1\">\u003cb>Gorospe:\u003c/b> I had the wings as well. We went the soy garlic route. More like traditional, just no spice inside. They were delicious. They came out hot. They’re really crispy.\u003c/p>\n\u003cp class=\"p1\">\u003cb>Edelson:\u003c/b> One thing I love to do when you’re with a big group is you get big pitchers of beer and you get soju on the side. And so what’s really fun is you pour the little shots of soju for your friends across the table, you all cheers. You’re just kind of grabbing everything with chopsticks and pouring things for other people on the table, is just kind of alive.\u003c/p>\n\u003cp class=\"p1\">\u003cb>Sbrocco:\u003c/b> And did you feel like this was a good value?\u003c/p>\n\u003cp class=\"p1\">\u003cb>Gorospe:\u003c/b> I think so, yeah. Yeah, you get a lot of food.\u003c/p>\n\u003cp class=\"p1\">\u003cb>Randolph:\u003c/b> Yeah, it’s super generous.\u003c/p>\n\u003cp class=\"p1\">\u003cb>Sbrocco:\u003c/b> You keep going back for a reason. Do they know you?\u003c/p>\n\u003cp class=\"p1\">\u003cb>Edelson:\u003c/b> They don’t know me. No, no, I’m not — I’m not quite there yet. Maybe if I go a few more times, I can get to that. It’s a great second home.\u003c/p>\n\u003cp class=\"p1\">\u003cb>Randolph:\u003c/b> It was cool. Like, I would definitely go back again.\u003c/p>\n\u003cp class=\"p1\">\u003cb>Sbrocco:\u003c/b> All right, well, if you would like to try Pyeong Chang Tofu House, it’s located on Telegraph Avenue in Oakland, and the average multi-course tab per person without drinks is around $50.\u003c/p>\n\u003cp class=\"p1\">\u003cb>Sbrocco:\u003c/b> Looking for more Bay Area bites you’ve just got to try?\u003c/p>\n\u003cp class=\"p1\">\u003cb>Woman:\u003c/b> [ Laughs ]\u003c/p>\n\u003cp class=\"p1\">\u003cb>Sbrocco:\u003c/b> Check out “Cecilia Tries It” online at kqed.org/checkplease. I have to thank my fun and fabulous guests on this week’s show. Cory Randolph, who shared a taste of the Big Easy at the Bywater in Los Gatos. Eddie Edelson, who enjoys all the Korean comforts at Pyeong Chang Tofu House in Oakland. And Pam Gorospe, who digs into the funky nachos at San Jose’s Foxtail Fermentation Project. Join us next time when three more guests will recommend their favorite spots right here on “Check, Please! Bay Area.” I’m Leslie Sbrocco, and I’ll see you then. Cheers, everyone.\u003c/p>\n\u003cp class=\"p1\">\u003cb>Edelson:\u003c/b> Whoo!\u003c/p>\n\u003cp class=\"p1\">\u003cb>Sbrocco:\u003c/b> We did it! We did it! Bi bim bop, beignets!\u003c/p>\n\u003cp class=\"p1\">\u003cb>Edelson:\u003c/b> You have to fork and knife it some, but it’s not soggy.\u003c/p>\n\u003cp class=\"p1\">\u003cb>Gorospe:\u003c/b> Yea, it’s definitely a fork and knife it type of burger, but no, not soggy. That was my fear. I was like, the bottom is going to be soggy. It’s going to be weird.\u003c/p>\n\u003cp class=\"p1\">\u003cb>Sbrocco:\u003c/b> And you can’t have soggy buns.\u003c/p>\n\u003cp class=\"p1\">\u003cb>Gorospe:\u003c/b> No, no.\u003c/p>\n\u003cp class=\"p1\">\u003cb>Sbrocco:\u003c/b> No soggy buns.\u003c/p>\n\u003cp class=\"p1\">\u003cb>Randolph:\u003c/b> We like buttery soft buns.\u003c/p>\n\u003cp class=\"p1\">\u003cb>Edelson:\u003c/b> Yes.\u003c/p>\n\u003cp class=\"p1\">\u003cb>Randolph:\u003c/b> But not soggy buns.\u003c/p>\n\u003cp class=\"p1\">\u003cb>Gorospe:\u003c/b> No.\u003c/p>\n\u003cp class=\"p1\">\u003cb>Randolph:\u003c/b> Firm buns.\u003c/p>\n\u003cp class=\"p1\">\u003cb>Edelson:\u003c/b> Soggy buns is bad.\u003c/p>\n\u003cp class=\"p1\">\u003cb>Randolph:\u003c/b> Firm buns.\u003c/p>\n\u003cp class=\"p1\">\u003cb>Sbrocco:\u003c/b> I think we’re all in agreement there. Firm buns. You got that?\u003c/p>\n\u003cp class=\"p1\">\u003cb>Randolph:\u003c/b> Firm buns.\u003c/p>\n\u003cp class=\"p1\">\u003cb>Edelson:\u003c/b> Firm buns is great.\u003c/p>\n\u003cp>\u003c/p>\u003c/div>",
"attributes": {
"named": {},
"numeric": []
}
},
{
"type": "component",
"content": "",
"name": "ad",
"attributes": {
"named": {
"label": "floatright"
},
"numeric": [
"floatright"
]
}
},
{
"type": "contentString",
"content": "\u003cdiv class=\"post-body\">\u003cp>\u003c/p>\n\u003cp class=\"p1\">[ Laughter ]\u003c/p>\n\n\u003c/div>\u003c/p>",
"attributes": {
"named": {},
"numeric": []
}
}
],
"link": "/checkplease/23753/check-please-bay-area-reviews-fox-tale-fermentation-project-the-bywater-pyeong-chang-tofu-house",
"authors": [
"11084"
],
"programs": [
"checkplease_9339"
],
"categories": [
"checkplease_3758",
"checkplease_3845",
"checkplease_3750",
"checkplease_3730",
"checkplease_3740",
"checkplease_9210",
"checkplease_3731",
"checkplease_9200",
"checkplease_494",
"checkplease_3871",
"checkplease_8600",
"checkplease_9212",
"checkplease_3764",
"checkplease_3741",
"checkplease_3738",
"checkplease_10",
"checkplease_8964",
"checkplease_9453",
"checkplease_3934",
"checkplease_91",
"checkplease_8175",
"checkplease_108"
],
"tags": [
"checkplease_9382",
"checkplease_8821",
"checkplease_8601",
"checkplease_8509",
"checkplease_8568",
"checkplease_8707",
"checkplease_9007",
"checkplease_9005",
"checkplease_9254",
"checkplease_9033",
"checkplease_9429",
"checkplease_9428"
],
"featImg": "checkplease_23779",
"label": "checkplease_9339"
},
"checkplease_23771": {
"type": "posts",
"id": "checkplease_23771",
"meta": {
"index": "posts_1716263798",
"site": "checkplease",
"id": "23771",
"score": null,
"sort": [
1774559329000
]
},
"guestAuthors": [],
"slug": "check-please-bay-area-begins-its-third-decade-with-four-new-episodes",
"title": "Check, Please! Bay Area Begins Its Third Decade With Four New Episodes",
"publishDate": 1774559329,
"format": "image",
"headTitle": "Check, Please! Bay Area Begins Its Third Decade With Four New Episodes | KQED",
"labelTerm": {
"term": 9339,
"site": "checkplease"
},
"content": "\u003cp>\u003ci>\u003cspan style=\"font-weight: 400\">Check, Please! Bay Area\u003c/span>\u003c/i>\u003cspan style=\"font-weight: 400\"> starts its third decade of episodes with four weeks of flavor-packed finds this April! From fermentation-forward bites in San Jose to New Orleans-inspired comfort in Los Gatos and vibrant Thai dishes in Berkeley, the James Beard and Emmy Award-winning series returns with eateries that reflect the region’s dynamic culinary landscape.\u003c/span>\u003c/p>\n\u003cp>\u003cspan style=\"font-weight: 400\">At the table, local diners take the lead, bringing their personal favorites into the spotlight and making the case for why they’re worth the trip. Conversations unfold around what stands out, what surprises and what keeps people coming back. This season spans a wide range of culinary experiences, from soulful Southern comfort food in Oakland to an immersive, theatrical tasting experience in San Francisco and old-school diner breakfasts in Alameda. Plus, reporter Cecilia Phillips heads to San Francisco’s Chinatown Night Market to take in the flavors, energy and community that define this iconic neighborhood.\u003c/span>\u003c/p>\n\u003cp>\u003cspan style=\"font-weight: 400\">Don’t miss four brand-new episodes as season 21 kicks off, \u003cstrong>Thursdays at 7:30 p.m. on KQED 9, starting April 23\u003c/strong>.\u003c/span>\u003c/p>\n\u003cp>\u003cspan style=\"font-weight: 400\">Pull up a chair and bring your appetite — here’s what’s on our plates this season:\u003c/span>\u003c/p>\n\u003cp>https://www.youtube.com/watch?v=gUxA8k-Krhw\u003c/p>\n\u003cp>[ad fullwidth]\u003c/p>\n\u003cp>\u003cb>April 23\u003c/b>\u003c/p>\n\u003cul>\n\u003cli>\u003cspan style=\"font-weight: 400\"> At \u003c/span>\u003cb>Fox Tale Fermentation Project\u003c/b>\u003cspan style=\"font-weight: 400\"> in downtown \u003c/span>\u003cb>San Jose\u003c/b>\u003cspan style=\"font-weight: 400\">, boundary-pushing fermentation fuels both the beer and the food with a selection of plant-based favorites from kraut-topped nachos to cashew queso mac.\u003c/span>\u003c/li>\n\u003cli>\u003cspan style=\"font-weight: 400\"> In \u003c/span>\u003cb>Los Gatos\u003c/b>\u003cspan style=\"font-weight: 400\">, \u003c/span>\u003cb>The Bywater\u003c/b>\u003cspan style=\"font-weight: 400\"> channels the spirit of New Orleans with crispy fried chicken and Creole fries, hush puppies drizzled with hot honey before finishing on warm, powdered-sugar-dusted beignets.\u003c/span>\u003c/li>\n\u003cli>\u003cspan style=\"font-weight: 400\"> On \u003c/span>\u003cb>Oakland\u003c/b>\u003cspan style=\"font-weight: 400\">’s Telegraph Avenue at \u003c/span>\u003cb>Pyeong Chang Tofu House\u003c/b>\u003cspan style=\"font-weight: 400\">, spicy tofu soup arrives alongside crisp kimchi pancakes, BBQ spicy pork, and stone-pot kimchi dolsot bibimbap for almost three decades.\u003c/span>\u003c/li>\n\u003c/ul>\n\u003cp>\u003cb>April 30\u003c/b>\u003c/p>\n\u003cul>\n\u003cli>\u003cspan style=\"font-weight: 400\"> In \u003c/span>\u003cb>Berkeley’\u003c/b>\u003cspan style=\"font-weight: 400\">s Gilman District, \u003c/span>\u003cb>Funky Elephant\u003c/b>\u003cspan style=\"font-weight: 400\"> brings vibrant Thai street food to life in a colorful, intimate space, with dishes like Wholesome Noodle in savory broth and sweet roti with roasted coconut to balance out the heat.\u003c/span>\u003c/li>\n\u003cli>\u003cb>Y’s Choice\u003c/b>\u003cspan style=\"font-weight: 400\"> in \u003c/span>\u003cb>Oakland\u003c/b>\u003cspan style=\"font-weight: 400\"> serves up hearty soul food favorites like crispy fried fish with cornbread, turkey wings alongside mac and cheese, and fall-off-the-bone oxtails over silky grits.\u003c/span>\u003c/li>\n\u003cli>\u003cspan style=\"font-weight: 400\"> In \u003c/span>\u003cb>San Francisco\u003c/b>\u003cspan style=\"font-weight: 400\">’s Mission District, \u003c/span>\u003cb>Jim’s by MLVS\u003c/b>\u003cspan style=\"font-weight: 400\"> keeps breakfast classic with corned beef hash topped with eggs over easy and rye toast, chicken-fried steak with golden hash browns, and its beloved green salsa spooned generously over just about everything.\u003c/span>\u003c/li>\n\u003cli>\u003cspan style=\"font-weight: 400\"> Cecilia Phillips dives into “Cecilia Tries It” at \u003c/span>\u003cb>San Francisco\u003c/b>\u003cspan style=\"font-weight: 400\">’s \u003c/span>\u003cb>BeChinatown Night Market\u003c/b>\u003cspan style=\"font-weight: 400\">, sampling her way through the sweets and treats that make this historic neighborhood so special.\u003c/span>\u003c/li>\n\u003c/ul>\n\u003cp>\u003cb>May 7\u003c/b>\u003c/p>\n\u003cul>\n\u003cli>\u003cspan style=\"font-weight: 400\"> In \u003c/span>\u003cb>San Francisco\u003c/b>\u003cspan style=\"font-weight: 400\">’s SoMa district, \u003c/span>\u003cb>Merchant Roots\u003c/b>\u003cspan style=\"font-weight: 400\"> invites diners into an intimate, theatrical and seasonally rotating tasting experience.\u003c/span>\u003c/li>\n\u003cli>\u003cspan style=\"font-weight: 400\"> In Old \u003c/span>\u003cb>Oakland’\u003c/b>\u003cspan style=\"font-weight: 400\">s Swan’s Market, \u003c/span>\u003cb>T’Chaka\u003c/b>\u003cspan style=\"font-weight: 400\"> celebrates Haitian cuisine in a bright, communal space, serving deeply comforting plates like braised oxtail stew and crispy citrus-marinated griot.\u003c/span>\u003c/li>\n\u003cli>\u003cspan style=\"font-weight: 400\"> At \u003c/span>\u003cb>Creekside Bakery\u003c/b>\u003cspan style=\"font-weight: 400\"> in \u003c/span>\u003cb>Novato\u003c/b>\u003cspan style=\"font-weight: 400\">, locals line up for buttery ham-and-cheese croissants, smoked salmon toast on house-baked bread, and princess cake slices crowned with marzipan roses.\u003c/span>\u003c/li>\n\u003c/ul>\n\u003cp>\u003cb>May 14\u003c/b>\u003c/p>\n\u003cul>\n\u003cli>\u003cspan style=\"font-weight: 400\"> In \u003c/span>\u003cb>Alameda\u003c/b>\u003cspan style=\"font-weight: 400\">, \u003c/span>\u003cb>Ole’s Waffle House\u003c/b>\u003cspan style=\"font-weight: 400\"> has been keeping breakfast traditions alive since 1927 in a retro diner setting, where locals start the day with walnut waffles, crispy bacon and eggs, and hearty Southern fried chicken with mashed potatoes and gravy.\u003c/span>\u003c/li>\n\u003cli>\u003cspan style=\"font-weight: 400\"> In \u003c/span>\u003cb>San Carlos\u003c/b>\u003cspan style=\"font-weight: 400\">, \u003c/span>\u003cb>Pazzo\u003c/b>\u003cspan style=\"font-weight: 400\"> delivers Italian comfort with a modern touch, serving dishes like cavatelli with slow-braised pork ragu and New Haven style wood-fired pizzas.\u003c/span>\u003c/li>\n\u003cli>\u003cspan style=\"font-weight: 400\"> At \u003c/span>\u003cb>Korean Superette\u003c/b>\u003cspan style=\"font-weight: 400\"> in \u003c/span>\u003cb>Berkeley\u003c/b>\u003cspan style=\"font-weight: 400\">, bold flavors shine in dishes like rose rice cakes and spicy beef doenjang stew alongside roasted corn silk tea and Korean iced lattes.\u003c/span>\u003c/li>\n\u003cli>Reporter Cecilia Phillips wraps up the episode at the \u003cb>West Oakland Farmers Market\u003c/b>, visiting the Oakland Ballers and sampling classic ballpark-style barbecue.\u003c/li>\n\u003c/ul>\n\u003cp>\u003c/p>\n\u003cp>\u003cspan style=\"font-weight: 400\">Have a restaurant you think deserves the spotlight? Nominate your favorite spots and apply to be a guest at\u003c/span>\u003ca href=\"http://kqed.org/checkplease/apply\"> \u003cspan style=\"font-weight: 400\">kqed.org/checkplease/apply\u003c/span>\u003cspan style=\"font-weight: 400\">.\u003c/span>\u003c/a>\u003c/p>\n\n",
"blocks": [],
"excerpt": null,
"status": "publish",
"parent": 0,
"modified": 1777604308,
"stats": {
"hasAudio": false,
"hasVideo": true,
"hasChartOrMap": false,
"iframeSrcs": [],
"hasGoogleForm": false,
"hasGallery": false,
"hasHearkenModule": false,
"hasPolis": false,
"paragraphCount": 11,
"wordCount": 694
},
"headData": {
"title": "Check, Please! Bay Area Begins Its Third Decade With Four New Episodes | KQED",
"description": "Check, Please! Bay Area begins its 21st season with four brand-new episodes in April, led by host Leslie Sbrocco.",
"ogTitle": "",
"ogDescription": "",
"ogImgId": "",
"twTitle": "",
"twDescription": "",
"twImgId": "",
"socialDescription": "Check, Please! Bay Area begins its 21st season with four brand-new episodes in April, led by host Leslie Sbrocco.",
"schema": {
"@context": "https://schema.org",
"@type": "Article",
"headline": "Check, Please! Bay Area Begins Its Third Decade With Four New Episodes",
"datePublished": "2026-03-26T14:08:49-07:00",
"dateModified": "2026-04-30T19:58:28-07:00",
"image": "https://cdn.kqed.org/wp-content/uploads/2020/02/KQED-OG-Image@1x.png"
}
},
"primaryCategory": {
"termId": 3750,
"slug": "cuisine",
"name": "cuisine"
},
"sticky": false,
"templateType": "standard",
"featuredImageType": "standard",
"excludeFromSiteSearch": "Include",
"articleAge": "0",
"path": "/checkplease/23771/check-please-bay-area-begins-its-third-decade-with-four-new-episodes",
"audioTrackLength": null,
"parsedContent": [
{
"type": "contentString",
"content": "\u003cdiv class=\"post-body\">\u003cp>\u003cp>\u003ci>\u003cspan style=\"font-weight: 400\">Check, Please! Bay Area\u003c/span>\u003c/i>\u003cspan style=\"font-weight: 400\"> starts its third decade of episodes with four weeks of flavor-packed finds this April! From fermentation-forward bites in San Jose to New Orleans-inspired comfort in Los Gatos and vibrant Thai dishes in Berkeley, the James Beard and Emmy Award-winning series returns with eateries that reflect the region’s dynamic culinary landscape.\u003c/span>\u003c/p>\n\u003cp>\u003cspan style=\"font-weight: 400\">At the table, local diners take the lead, bringing their personal favorites into the spotlight and making the case for why they’re worth the trip. Conversations unfold around what stands out, what surprises and what keeps people coming back. This season spans a wide range of culinary experiences, from soulful Southern comfort food in Oakland to an immersive, theatrical tasting experience in San Francisco and old-school diner breakfasts in Alameda. Plus, reporter Cecilia Phillips heads to San Francisco’s Chinatown Night Market to take in the flavors, energy and community that define this iconic neighborhood.\u003c/span>\u003c/p>\n\u003cp>\u003cspan style=\"font-weight: 400\">Don’t miss four brand-new episodes as season 21 kicks off, \u003cstrong>Thursdays at 7:30 p.m. on KQED 9, starting April 23\u003c/strong>.\u003c/span>\u003c/p>\n\u003cp>\u003cspan style=\"font-weight: 400\">Pull up a chair and bring your appetite — here’s what’s on our plates this season:\u003c/span>\u003c/p>\u003c/p>\u003cp>\u003cspan class='utils-parseShortcode-shortcodes-__youtubeShortcode__embedYoutube'>\n \u003cspan class='utils-parseShortcode-shortcodes-__youtubeShortcode__embedYoutubeInside'>\n \u003ciframe\n loading='lazy'\n class='utils-parseShortcode-shortcodes-__youtubeShortcode__youtubePlayer'\n type='text/html'\n src='//www.youtube.com/embed/gUxA8k-Krhw'\n title='//www.youtube.com/embed/gUxA8k-Krhw'\n allowfullscreen='true'\n style='border:0;'>\u003c/iframe>\n \u003c/span>\n \u003c/span>\u003c/p>\u003cp>\u003cp>\u003c/p>\u003c/div>",
"attributes": {
"named": {},
"numeric": []
}
},
{
"type": "component",
"content": "",
"name": "ad",
"attributes": {
"named": {
"label": "fullwidth"
},
"numeric": [
"fullwidth"
]
}
},
{
"type": "contentString",
"content": "\u003cdiv class=\"post-body\">\u003cp>\u003c/p>\n\u003cp>\u003cb>April 23\u003c/b>\u003c/p>\n\u003cul>\n\u003cli>\u003cspan style=\"font-weight: 400\"> At \u003c/span>\u003cb>Fox Tale Fermentation Project\u003c/b>\u003cspan style=\"font-weight: 400\"> in downtown \u003c/span>\u003cb>San Jose\u003c/b>\u003cspan style=\"font-weight: 400\">, boundary-pushing fermentation fuels both the beer and the food with a selection of plant-based favorites from kraut-topped nachos to cashew queso mac.\u003c/span>\u003c/li>\n\u003cli>\u003cspan style=\"font-weight: 400\"> In \u003c/span>\u003cb>Los Gatos\u003c/b>\u003cspan style=\"font-weight: 400\">, \u003c/span>\u003cb>The Bywater\u003c/b>\u003cspan style=\"font-weight: 400\"> channels the spirit of New Orleans with crispy fried chicken and Creole fries, hush puppies drizzled with hot honey before finishing on warm, powdered-sugar-dusted beignets.\u003c/span>\u003c/li>\n\u003cli>\u003cspan style=\"font-weight: 400\"> On \u003c/span>\u003cb>Oakland\u003c/b>\u003cspan style=\"font-weight: 400\">’s Telegraph Avenue at \u003c/span>\u003cb>Pyeong Chang Tofu House\u003c/b>\u003cspan style=\"font-weight: 400\">, spicy tofu soup arrives alongside crisp kimchi pancakes, BBQ spicy pork, and stone-pot kimchi dolsot bibimbap for almost three decades.\u003c/span>\u003c/li>\n\u003c/ul>\n\u003cp>\u003cb>April 30\u003c/b>\u003c/p>\n\u003cul>\n\u003cli>\u003cspan style=\"font-weight: 400\"> In \u003c/span>\u003cb>Berkeley’\u003c/b>\u003cspan style=\"font-weight: 400\">s Gilman District, \u003c/span>\u003cb>Funky Elephant\u003c/b>\u003cspan style=\"font-weight: 400\"> brings vibrant Thai street food to life in a colorful, intimate space, with dishes like Wholesome Noodle in savory broth and sweet roti with roasted coconut to balance out the heat.\u003c/span>\u003c/li>\n\u003cli>\u003cb>Y’s Choice\u003c/b>\u003cspan style=\"font-weight: 400\"> in \u003c/span>\u003cb>Oakland\u003c/b>\u003cspan style=\"font-weight: 400\"> serves up hearty soul food favorites like crispy fried fish with cornbread, turkey wings alongside mac and cheese, and fall-off-the-bone oxtails over silky grits.\u003c/span>\u003c/li>\n\u003cli>\u003cspan style=\"font-weight: 400\"> In \u003c/span>\u003cb>San Francisco\u003c/b>\u003cspan style=\"font-weight: 400\">’s Mission District, \u003c/span>\u003cb>Jim’s by MLVS\u003c/b>\u003cspan style=\"font-weight: 400\"> keeps breakfast classic with corned beef hash topped with eggs over easy and rye toast, chicken-fried steak with golden hash browns, and its beloved green salsa spooned generously over just about everything.\u003c/span>\u003c/li>\n\u003cli>\u003cspan style=\"font-weight: 400\"> Cecilia Phillips dives into “Cecilia Tries It” at \u003c/span>\u003cb>San Francisco\u003c/b>\u003cspan style=\"font-weight: 400\">’s \u003c/span>\u003cb>BeChinatown Night Market\u003c/b>\u003cspan style=\"font-weight: 400\">, sampling her way through the sweets and treats that make this historic neighborhood so special.\u003c/span>\u003c/li>\n\u003c/ul>\n\u003cp>\u003cb>May 7\u003c/b>\u003c/p>\n\u003cul>\n\u003cli>\u003cspan style=\"font-weight: 400\"> In \u003c/span>\u003cb>San Francisco\u003c/b>\u003cspan style=\"font-weight: 400\">’s SoMa district, \u003c/span>\u003cb>Merchant Roots\u003c/b>\u003cspan style=\"font-weight: 400\"> invites diners into an intimate, theatrical and seasonally rotating tasting experience.\u003c/span>\u003c/li>\n\u003cli>\u003cspan style=\"font-weight: 400\"> In Old \u003c/span>\u003cb>Oakland’\u003c/b>\u003cspan style=\"font-weight: 400\">s Swan’s Market, \u003c/span>\u003cb>T’Chaka\u003c/b>\u003cspan style=\"font-weight: 400\"> celebrates Haitian cuisine in a bright, communal space, serving deeply comforting plates like braised oxtail stew and crispy citrus-marinated griot.\u003c/span>\u003c/li>\n\u003cli>\u003cspan style=\"font-weight: 400\"> At \u003c/span>\u003cb>Creekside Bakery\u003c/b>\u003cspan style=\"font-weight: 400\"> in \u003c/span>\u003cb>Novato\u003c/b>\u003cspan style=\"font-weight: 400\">, locals line up for buttery ham-and-cheese croissants, smoked salmon toast on house-baked bread, and princess cake slices crowned with marzipan roses.\u003c/span>\u003c/li>\n\u003c/ul>\n\u003cp>\u003cb>May 14\u003c/b>\u003c/p>\n\u003cul>\n\u003cli>\u003cspan style=\"font-weight: 400\"> In \u003c/span>\u003cb>Alameda\u003c/b>\u003cspan style=\"font-weight: 400\">, \u003c/span>\u003cb>Ole’s Waffle House\u003c/b>\u003cspan style=\"font-weight: 400\"> has been keeping breakfast traditions alive since 1927 in a retro diner setting, where locals start the day with walnut waffles, crispy bacon and eggs, and hearty Southern fried chicken with mashed potatoes and gravy.\u003c/span>\u003c/li>\n\u003cli>\u003cspan style=\"font-weight: 400\"> In \u003c/span>\u003cb>San Carlos\u003c/b>\u003cspan style=\"font-weight: 400\">, \u003c/span>\u003cb>Pazzo\u003c/b>\u003cspan style=\"font-weight: 400\"> delivers Italian comfort with a modern touch, serving dishes like cavatelli with slow-braised pork ragu and New Haven style wood-fired pizzas.\u003c/span>\u003c/li>\n\u003cli>\u003cspan style=\"font-weight: 400\"> At \u003c/span>\u003cb>Korean Superette\u003c/b>\u003cspan style=\"font-weight: 400\"> in \u003c/span>\u003cb>Berkeley\u003c/b>\u003cspan style=\"font-weight: 400\">, bold flavors shine in dishes like rose rice cakes and spicy beef doenjang stew alongside roasted corn silk tea and Korean iced lattes.\u003c/span>\u003c/li>\n\u003cli>Reporter Cecilia Phillips wraps up the episode at the \u003cb>West Oakland Farmers Market\u003c/b>, visiting the Oakland Ballers and sampling classic ballpark-style barbecue.\u003c/li>\n\u003c/ul>\n\u003cp>\u003c/p>\n\u003cp>\u003cspan style=\"font-weight: 400\">Have a restaurant you think deserves the spotlight? Nominate your favorite spots and apply to be a guest at\u003c/span>\u003ca href=\"http://kqed.org/checkplease/apply\"> \u003cspan style=\"font-weight: 400\">kqed.org/checkplease/apply\u003c/span>\u003cspan style=\"font-weight: 400\">.\u003c/span>\u003c/a>\u003c/p>\n\n\u003c/div>\u003c/p>",
"attributes": {
"named": {},
"numeric": []
}
}
],
"link": "/checkplease/23771/check-please-bay-area-begins-its-third-decade-with-four-new-episodes",
"authors": [
"11084"
],
"programs": [
"checkplease_9339"
],
"categories": [
"checkplease_7989",
"checkplease_3758",
"checkplease_3845",
"checkplease_3763",
"checkplease_3873",
"checkplease_3784",
"checkplease_3750",
"checkplease_3730",
"checkplease_3740",
"checkplease_9210",
"checkplease_3731",
"checkplease_9200",
"checkplease_9451",
"checkplease_3751",
"checkplease_494",
"checkplease_3871",
"checkplease_8600",
"checkplease_3472",
"checkplease_3742",
"checkplease_9452",
"checkplease_9212",
"checkplease_3764",
"checkplease_9211",
"checkplease_3738",
"checkplease_10",
"checkplease_7954",
"checkplease_3729",
"checkplease_3739",
"checkplease_9209",
"checkplease_8964",
"checkplease_9453",
"checkplease_3934",
"checkplease_91",
"checkplease_8175",
"checkplease_1477",
"checkplease_7938",
"checkplease_108"
],
"tags": [
"checkplease_8715",
"checkplease_8574",
"checkplease_8776",
"checkplease_8508",
"checkplease_8633",
"checkplease_1368",
"checkplease_9398",
"checkplease_763",
"checkplease_8566",
"checkplease_8821",
"checkplease_8601",
"checkplease_8811",
"checkplease_8509",
"checkplease_8587",
"checkplease_8518",
"checkplease_8568",
"checkplease_8707",
"checkplease_9005",
"checkplease_8703",
"checkplease_9033"
],
"featImg": "checkplease_23772",
"label": "checkplease_9339"
},
"checkplease_23742": {
"type": "posts",
"id": "checkplease_23742",
"meta": {
"index": "posts_1716263798",
"site": "checkplease",
"id": "23742",
"score": null,
"sort": [
1772163012000
]
},
"guestAuthors": [],
"slug": "check-please-bay-area-reviews-smokin-ds-bbq-rosalind-bakery-taishoken-ramen",
"title": "Check, Please! Bay Area reviews: Smokin' D's BBQ, Rosalind Bakery, Taishoken Ramen",
"publishDate": 1772163012,
"format": "video",
"headTitle": "Check, Please! Bay Area reviews: Smokin’ D’s BBQ, Rosalind Bakery, Taishoken Ramen | KQED",
"labelTerm": {
"term": 9339,
"site": "checkplease"
},
"content": "\u003cp>\u003cem>Check, Please! Bay Area, \u003c/em>season 20, episode 16, airs Thursday, February 26, at 7:30 pm, on KQED 9. See other \u003ca href=\"http://www.kqed.org/tv/programs/index.jsp?pgmid=14084\" target=\"_blank\" rel=\"noopener noreferrer\">television airtimes\u003c/a>.\u003c/p>\n\u003cp>\u003cspan style=\"font-weight: 400\">Smoke and bold flavors kick things off at \u003cstrong>Smokin’ D’s\u003c/strong> in San Francisco’s Sunset, where Texas-style barbecue meets Mexican and Asian flair. Plates land heavy with signature pulled pork, pork spare ribs, and smoked brisket tucked into fluffy bao — and classic sides like potato salad, all capped off with Banana Brulee Bliss for dessert. From there, it’s down the coast to Pacifica’s \u003cstrong>Rosalind Bakery\u003c/strong>, a bread-lover’s paradise known for iconic sesame-seed hoagie rolls, flaky chocolate almond croissants, cinnamon rolls, and breakfast sandos layered with egg, pimiento cheese, and rosemary ham. The episode wraps up in San Mateo at \u003cstrong>Taishoken Ramen\u003c/strong>, where house-made noodles shine in dishes like Tokyo-style aburasoba, spicy tsukemen with rich dipping broth, yuzu shio ramen, and crispy takoyaki, delivering deep umami and hands-on slurping satisfaction.\u003c/span>\u003c/p>\n\u003cfigure id=\"attachment_23743\" class=\"wp-caption alignnone\" style=\"max-width: 1920px\">\u003cimg loading=\"lazy\" decoding=\"async\" class=\"size-full wp-image-23743\" src=\"https://cdn.kqed.org/wp-content/uploads/sites/40/2026/02/2016_02.png\" alt=\"\" width=\"1920\" height=\"1080\" srcset=\"https://cdn.kqed.org/wp-content/uploads/sites/40/2026/02/2016_02.png 1920w, https://cdn.kqed.org/wp-content/uploads/sites/40/2026/02/2016_02-160x90.png 160w, https://cdn.kqed.org/wp-content/uploads/sites/40/2026/02/2016_02-768x432.png 768w, https://cdn.kqed.org/wp-content/uploads/sites/40/2026/02/2016_02-1536x864.png 1536w\" sizes=\"auto, (max-width: 1920px) 100vw, 1920px\">\u003cfigcaption class=\"wp-caption-text\">Host Leslie Sbrocco joins guests Ryan Juan, Alessandra Wood and Candice Meng from KQED in San Francisco.\u003c/figcaption>\u003c/figure>\n\u003cp>\u003cspan style=\"color: #2b2b2b\">Get Restaurant Information:\u003c/span>\u003c/p>\n\u003cul>\n\u003cli>\u003ca href=\"https://smokindsbbqsf.com/\">\u003cstrong>Smokin’ D’s BBQ\u003c/strong> (San Francisco)\u003c/a>\u003c/li>\n\u003cli>\u003ca href=\"https://www.rosalindbakery.com/\">\u003cstrong>Rosalind Bakery\u003c/strong> (Rosalind Bakery)\u003c/a>\u003c/li>\n\u003cli>\u003ca href=\"https://www.taishokenusa.com/san-mateo\">\u003cstrong>Taishoken Ramen \u003c/strong>(San Mateo)\u003c/a>\u003c/li>\n\u003c/ul>\n\u003cfigure id=\"attachment_20123\" class=\"wp-caption alignnone\" style=\"max-width: 800px\">\u003cimg loading=\"lazy\" decoding=\"async\" class=\"size-medium wp-image-20123\" src=\"https://cdn.kqed.org/wp-content/uploads/sites/40/2019/04/Leslie-Headshot-Smokey-copy-800x540.jpg\" alt=\"Host Leslie Sbrocco sipping wine\" width=\"800\" height=\"540\">\u003cfigcaption class=\"wp-caption-text\">Host Leslie Sbrocco sipping wine \u003ccite>(Courtesy of Leslie Sbrocco)\u003c/cite>\u003c/figcaption>\u003c/figure>\n\u003cp>My name is Leslie Sbrocco, and I’m the \u003ca href=\"http://ww2.kqed.org/checkplease/host-biography/\" target=\"_blank\" rel=\"noopener noreferrer\">host\u003c/a> of \u003cem>Check, Please! Bay Area\u003c/em>. Each week, I’ll share my tasting notes about the wine, beer and spirits the guests and I drank on set during the taping of the show.\u003c/p>\n\u003cp>\u003cimg loading=\"lazy\" decoding=\"async\" class=\"alignnone size-medium wp-image-23744\" src=\"https://cdn.kqed.org/wp-content/uploads/sites/40/2026/02/2016_Wines-2000x2445.jpg\" alt=\"\" width=\"2000\" height=\"2445\" srcset=\"https://cdn.kqed.org/wp-content/uploads/sites/40/2026/02/2016_Wines-2000x2445.jpg 2000w, https://cdn.kqed.org/wp-content/uploads/sites/40/2026/02/2016_Wines-160x196.jpg 160w, https://cdn.kqed.org/wp-content/uploads/sites/40/2026/02/2016_Wines-768x939.jpg 768w, https://cdn.kqed.org/wp-content/uploads/sites/40/2026/02/2016_Wines-1256x1536.jpg 1256w, https://cdn.kqed.org/wp-content/uploads/sites/40/2026/02/2016_Wines-1675x2048.jpg 1675w\" sizes=\"auto, (max-width: 2000px) 100vw, 2000px\">\u003c/p>\n\u003cp>[ad fullwidth]\u003c/p>\n\u003cp>\u003ca href=\"https://www.frankfamilyvineyards.com/wine/napa-valley/carneros-chardonnay-2024\">\u003cspan style=\"color: #339966\">\u003cstrong>Frank Family Vineyards 2024 Chardonnay\u003c/strong>\u003c/span>\u003c/a>\u003cbr>\n\u003cem>Carneros, California, $40\u003cbr>\n\u003c/em>This is a winery with a rich legacy. The historic building was home to Larkmead Winery, built in 1884. In the late 1950s, the revered Hanns Kornell began making high-quality sparkling wine on the property, then in 1992, Rich Frank, formerly president of Disney Studios and Paramount Television, acquired the venerable property. Along with his television journalist wife, Leslie, they have taken starring roles in building a brand based on showcasing the best of Napa Valley.\u003c/p>\n\u003cp>Their Chardonnay is consistently one of my top Napa recommendations due to its balance, complexity and elegance. Hailing from the cool-climate Lewis Vineyard in Carneros, it satisfies Chard lovers from those seeking vibrant and fresh versions to those that adore a full-bodied white with ripe fruit, a sultry texture and balanced toasty notes.\u003c/p>\n\u003cp>\u003ca href=\"http://rhysvineyards.com/\">\u003cspan style=\"color: #339966\">\u003cstrong>Rhys 2023 Pinot Noir\u003c/strong>\u003c/span>\u003c/a>\u003cbr>\n\u003cem>Santa Cruz Mountains, California, $54\u003cbr>\n\u003c/em>The guiding principle at Rhys Vineyards is, as they say, to capture a sense of “somewhereness” in their estate-focused bottlings. To me, their wines perfectly express the elusive concept of terroir, which I refer to as the “taste of the place in the glass.” Rhys Vineyards’ various versions of Pinot Noir hail from both Mendocino County and the Santa Cruz Mountains. Though wines from this rugged appellation on California’s Central Coast may seem like a discovery, it has long been the birthplace of world-class wines crafted by respected producers such as Ridge and Mount Eden. Rhys Vineyards is the latest star to shine among those wine luminaries crafting wines with vines grown in the high-elevation, coastal-climate vineyards of these ancient mountains.\u003c/p>\n\u003cp>Their 2023 Santa Cruz Mountains Pinot Noir is a heralded vintage and will age gracefully for years, but it is hard not to immediately enjoy its vibrant purity of red fruit married with notes of wild herbs and a sleek, silky texture. For the price, you will not find a better bottle of California Pinot Noir.\u003c/p>\n\u003cp>\u003ca href=\"https://www.brownefamilyvineyards.com/\">\u003cspan style=\"color: #339966\">\u003cstrong>Browne Family Vineyards 2023 “On Fox Island” Cabernet Sauvignon\u003c/strong>\u003c/span>\u003c/a>\u003cbr>\n\u003cem>Columbia Valley, Washington, $25\u003cbr>\n\u003c/em>Browne Family Vineyards is an innovative and fun family-owned company. They are committed to making great wines at great prices primarily from Washington state. Andrew Browne founded the family-forward company as a tribute to his late grandfather, William Bitner Browne, who was a mentor, veteran and community leader.\u003c/p>\n\u003cp>Their main grape source is the Browne Estate Vineyard in the Spring Valley District of Walla Walla, where the focus is on Bordeaux-style reds and a roster of delicious whites. The wine brands under their umbrella include the whimsical “Do Epic Shit” line celebrating life’s adventurous moments, the charity-led “Forest Project” and numerous more. I’m enamored with their “On Fox Island” Cabernet Sauvignon, which was crafted to highlight the outdoor lifestyle the family leads living on the island. The appealing label depicts a salmon swimming upstream, which is an island highlight. This Cab’s dark-berry fruit flavors are complemented by notes of spice and a velvety texture.\u003c/p>\n\u003ch2>Episode Transcript\u003c/h2>\n\u003cp class=\"p1\">\u003cb>Sbrocco:\u003c/b> Artisanal pastries in Pacifica. You could put anything on that sandwich bread and I will eat it.\u003c/p>\n\u003cp class=\"p1\">\u003cb>Sbrocco:\u003c/b> Tex-Mex fusion in San Francisco. The best smoked barbecue I’ve ever had.\u003c/p>\n\u003cp class=\"p1\">\u003cb>Sbrocco:\u003c/b> And soupless ramen delights in San Mateo. The noodles were literally falling out of my son’s mouth while he was eating it.\u003c/p>\n\u003cp class=\"p1\">\u003cb>Sbrocco:\u003c/b> Just ahead on “Check, Please! Bay Area”. -Giddy up. -Yeah.\u003c/p>\n\u003cp class=\"p2\">♪♪\u003c/p>\n\u003cp class=\"p1\">-Hi, I’m Leslie Sbrocco. Welcome to “Check, Please! Bay Area”, the show where Bay area residents review and talk about their favorite restaurants. Now we have three guests, and each one recommends one of their favorite spots, and the other two go check them out to see what they think. Joining me at the “Check, Please!” table today are design history professor Alessandra Wood, teacher and theater director Ryan Juan, and physical therapist Candice Meng. -Welcome, everyone. -[ All greeting ] Excited to be here. The pitmasters at Ryan’s go-to spot are pushing the limits of classic Texas barbecue, blending it with both Asian and Mexican influences. The payoff? Smoky, fall-off-the-bone meats bursting with cross-cultural flavor. Ooh!\u003c/p>\n\u003cp class=\"p1\">\u003cb>Sbrocco:\u003c/b> Tucked away in San Francisco’s Outer Sunset, it’s Smokin’ D’s BBQ. -Yeah! [ Laughs ] -I’ll take a half pound. Oh, my God, look at this.\u003c/p>\n\u003cp class=\"p1\">\u003cb>Man:\u003c/b> So good. Number 44. I grew up in San Francisco, which has always been known as a great food city. -For me, I grew up eating barbecue since I’m from Texas, and barbecue is just a way of life.\u003c/p>\n\u003cp class=\"p1\">\u003cb>Chu:\u003c/b> When we started this, we just wanted to focus on things that we love to eat.\u003c/p>\n\u003cp class=\"p1\">\u003cb>Ramirez:\u003c/b> Taking a little Mexican, a little Asian, and a whole lot of Texan and mending them together. Mmm!\u003c/p>\n\u003cp class=\"p1\">\u003cb>Ramirez:\u003c/b> So in Texas, we’re known for barbecuing our food low and slow. A lot of salt, a lot of pepper, and a little secret recipe that I can’t divulge. -It’s a little spicy. It’s got a kick. -Fun fact — I don’t even like barbecue, but I sure love a pork bun. -Woman: Oh, my God, look at that. -Woman #2: Yeah.\u003c/p>\n\u003cp class=\"p1\">\u003cb>Chu:\u003c/b> When we first started dating, I was like, let me bring you somewhere that I love and we’re going to have dim sum. And he had a pork bun and he was like, “Damn, this is good. Can we put brisket inside?” We actually smoke our brisket specifically for the bao. We mix it with a traditional barbecue sauce, so it’s sweet and tangy. The bread to meat ratio is a little bit different than what you would normally find in Chinatown, so you’re getting almost a quarter pound of meat inside.\u003c/p>\n\u003cp class=\"p1\">[ Laughter ]\u003c/p>\n\u003cp class=\"p1\">-One of the things that incorporates my Mexican influence is the brisket tamale. We house make our masa as well as our salsa roja. You’re looking at my salsa roja maker right here. -Alright, man. -Thank you. I’ll see you later, bro. Appreciate it. We’re very small, so we don’t have a ton of seating. Even though there may be a little bit of a line, we get through it really quickly. You can also order ahead and it’ll be ready for you when you walk in. Nice to meet you. We’re right next to Golden Gate Park. You can walk there easily and have a picnic. I was born in the Sunset. I’m a native kid. What gives us so much pride and joy in this business is the people. We’ve really grown this community of customers. Really, it’s a family. -Came to get some brisky bao.\u003c/p>\n\u003cp class=\"p1\">\u003cb>Chu:\u003c/b> We love seeing them day in and day out. Does daddy need to get you your own chips and queso? We really, truly have developed a neighborhood spot, which is exactly what we wanted to do.\u003c/p>\n\u003cp class=\"p2\">♪♪\u003c/p>\n\u003cp class=\"p1\">-Alright, Ryan, what is it about this place? I mean, this is a small spot, right? Kind of a lot of takeaway happening. -How did you discover it? -Yeah. So my wife and I, we’ve never seen a Texas barbecue place in the Sunset District. And so we’d gone on a walk by there, and it just smelled fantastic. I’m like, we got to try something from here. So we get there, we get their smoked signature brisket, and the crust on it is amazing. It’s got this amazing spice rub on it. And this is probably the best smoked barbecue I’ve ever had. Did you get the brisket? Did you try the brisket? -Wood: I got a brisket sandwich. -Sbrocco: Okay.\u003c/p>\n\u003cp class=\"p1\">\u003cb>Wood:\u003c/b> Yes.\u003c/p>\n\u003cp class=\"p1\">\u003cb>Sbrocco:\u003c/b> That could be the best of both worlds.\u003c/p>\n\u003cp class=\"p1\">\u003cb>Wood:\u003c/b> It was. It was so good because, you know, I was just kind of thinking like, oh, there’s going to be coleslaw on it, but instead of coleslaw, there were pickled onions. -Pickled red onions. -Juan: Oh, yeah, yeah.\u003c/p>\n\u003cp class=\"p1\">\u003cb>Wood:\u003c/b> And so they had this, like, beautiful tartness to them. Like the acidity that you wanted to cut through the brisket without the heaviness of coleslaw. Like, there wasn’t as heavy as you expected. And then pickles, which were great. It was a really nice sandwich. Candice, what was your experience? We ordered the pulled pork sandwich. I can never turn down a pulled pork sandwich. And it was…that brioche. It — Everything about it was so tasty and flavorful. And I thought whatever sauce they used on it didn’t overwhelm the meat. So you really got a good hit of that smokiness. So good, so good. And did you get anything with it like sides or…? We got the cornbread, which was enormous. It was like the size of my head. Oh, yeah, and I was so excited because the cornbread is baked in, like, muffin tins. So all of the bottom of it has this chewy crispiness, which is my favorite. Like, I’m a corner brownie person. So it was like — -I so am! I so am. I don’t let my kids touch the corners.\u003c/p>\n\u003cp class=\"p1\">\u003cb>Wood:\u003c/b> Yes, and it was like a sweet cornbread with some jalapeños in it. So you had a little bit of spiciness, -and I loved the chewiness of it. -Yeah. And what did you get? I’m sure you got many dishes. -I did, yeah. -Sbrocco: Start with one. Well, I got a rack of ribs, which were delicious and I would say probably the best ribs I’ve had in the Bay area. They were really beautifully seasoned. They were not, like, fall off the bone, but they were really tender. Yeah, we did get the, uh, the potato salad as a side once. -Did you try that one? -It’s so good.\u003c/p>\n\u003cp class=\"p1\">\u003cb>Juan:\u003c/b> Yeah, yeah. [ Laughs ]\u003c/p>\n\u003cp class=\"p1\">\u003cb>Sbrocco:\u003c/b> So is this one more kind of a little vinegary or…?\u003c/p>\n\u003cp class=\"p1\">\u003cb>Juan:\u003c/b> Yeah, yeah, yeah. Yeah. There’s some egg into it.\u003c/p>\n\u003cp class=\"p1\">\u003cb>Wood:\u003c/b> It wasn’t like a mayo-y potato salad. It was a little bit fresher. A really good compliment to the meats. What was your second, third, or fourth dish?\u003c/p>\n\u003cp class=\"p1\">[ Laughter ]\u003c/p>\n\u003cp class=\"p1\">\u003cb>What we also got was the bao… -Sbrocco:\u003c/b> Yeah. -Meng: …with the brisket.\u003c/p>\n\u003cp class=\"p1\">\u003cb>Sbrocco:\u003c/b> Which is really their signature.\u003c/p>\n\u003cp class=\"p1\">\u003cb>Meng:\u003c/b> Correct. And anything that can sort of fit in the palm of my hand easily I am game for. And it was delicious. I really liked the bake on the bao. I thought it had that really nice milk bun flavor that is very common. And so, the combination, it really, really did make sense. And what else did you have? The Korean cowboy bun, which was also really delicious. It was like spicy. You really could taste the gochujang in it. And so it had this — It left a nice flavor in your mouth wanting you to go back for more. But the bun sort of tamed it a little bit. It’s just a good name. Giddy up. -Yeah. -[ Laughter ] Korean cowboy. I love it. -Alright, Ryan, what about you? Any other dishes? The other thing we did have was the hot link. And that one’s really good. They smoke it perfectly, and then when they give it to you, they cut it up into bite sized pieces already. So it’s ready to go. And it’s hard because, like, when I go to pick it up, I have to stop myself from eating it on the way home. When you said that, I knew that that was going to happen. [ Laughter ] Yeah. Now, did you wash it down with anything? Did you have any drinks or…? Oh, no, we didn’t have any drinks. We — I always just end up getting more meat. But I want to ask you guys if there’s — about the banana brulée bliss. Did you guys happen to try it? Because for my thing, for desserts, like, if it’s too sweet, then it kind of ruins it. -I want something that’s just a little bit sweet. -Sbrocco: right.\u003c/p>\n\u003cp class=\"p1\">\u003cb>Juan:\u003c/b> Because if it’s not too sweet, I’m going to get some later. So, [laughs] I wanna make sure. -But I haven’t had it yet. -No, it’s perfect if it’s not too sweet. You’ve had such intense, you know, savoriness. You want something just to — just a change of flavor, but not too much. And so did you guys happen to try the — -Any room? No. -No room. Yeah. No room after all the barbecue. -Just get more meat. -Sbrocco: Yeah, yeah. Well, it sounds like you all had a great time there. Yeah. And would go back. She’s like, “We go back all the time.” I just want to get the brisky bao. -[ Laughter ] -Alright. If you would like to try Smokin’ D’s BBQ, it’s located on Irving Street in San Francisco. And the average multi-course tab per person without drinks is around $30. At Alessandra’s hip modern bakery, sourdough is the star attraction, forming the base for inventive sandwiches stacked with seasonal produce and chef driven flavors. Located just blocks from the beach in Pacifica, it’s Rosalind Bakery.\u003c/p>\n\u003cp class=\"p2\">♪♪\u003c/p>\n\u003cp class=\"p2\">♪♪\u003c/p>\n\u003cp class=\"p1\">-Rosalind Bakery is a community hub here in Pacifica. It’s art, it’s music, it’s delicious artisan food.\u003c/p>\n\u003cp class=\"p2\">♪♪\u003c/p>\n\u003cp class=\"p1\">The first thing that you’re probably going to get hit with is the smell of all of the baked goods coming in and out of the oven, and then you’ll definitely notice the atmosphere and how welcoming it can be.\u003c/p>\n\u003cp class=\"p2\">♪♪\u003c/p>\n\u003cp class=\"p1\">I started the bakery in 2017, and was at great discontent with my career doing software development. I felt compelled to make a product with my hands. Bread is fascinating. It’s this hub of a wheel of life, of agriculture, art, math, and biology. -Check the pH level of the bread. Usually 4.2 is an ideal.\u003c/p>\n\u003cp class=\"p1\">\u003cb>Kosoy:\u003c/b> The item that I’m most proud of is the coastside sourdough. We’re about 1,000 feet from the ocean, and it’s always going to be a little bit more humid here, a little bit cooler. And that helps with our fermentation. And it develops that complex flavor in the bread.\u003c/p>\n\u003cp class=\"p2\">♪♪\u003c/p>\n\u003cp class=\"p1\">I have my hoagie roll, which features semolina and sesame seeds as a flavor combination that I love. -It has such a great texture. -Kosoy: It’s amazing. We’ve developed a separate sourdough culture just for the croissants that has sugar added to it to help with the fermentation in that enriched dough. we’re making savory and sweet danishes, depending upon what ingredients we get from the farmer’s market.\u003c/p>\n\u003cp class=\"p1\">\u003cb>Rave:\u003c/b> We have a full espresso bar. We make our own syrups in-house. And all of our coffees are sourced from local roasters. What I hope most people feel like when they’re leaving is, “Man, that place is really cool. I would really like to go back sometime.” -Yeah. -Kosoy: A lot of love and passion in what we’re doing. I’ve dedicated my life to bread.\u003c/p>\n\u003cp class=\"p1\">\u003cb>Kosoy:\u003c/b> Rosalind is my temple to bread!\u003c/p>\n\u003cp class=\"p1\">\u003cb>Man:\u003c/b> Good job. Nicely done. Alright, Alessandra, this is — It’s not what you expect from a bakery, right? It’s kind of got a party vibe going on. -Absolutely. I go in there and I can’t stop myself from singing whatever songs they have blasting. Or sometimes it’s live music. -It’s just fun. Good energy. -Sbrocco: Yeah. One of my favorite things there is anything made on their hoagie bread. So the Rosalind hoagie, it’s this Italian hoagie. Just amazing. For anybody who’s an East Coaster, you know what a hoagie is. Like a big, long sub sandwich. That bread is so iconic to the East Coast. It’s soft on the inside. It has a light crust. It’s peppered in sesame seeds, but it has this really chewy texture. And then it’s filled with Italian meats, sharp provolone cheese, some nice, like, radicchio or red leaf lettuce to kind of elevate it a little bit. And then this Calabrian chili mayo, which gives it a touch of spice that’s like, you know, you just want to eat the whole thing. You’ve got everything in one spot. -Yes. -Sbrocco: Alright. What about you? What did you order, Ryan? So we got the con patate pizza. And it was baked on this, the most perfect focaccia bread ever. The focaccia was so soft and pillowy. And on the top, they had perfectly seasoned potatoes and the cheese. And they cooked it such that it had, like, a slight char to it at the top. It gives that extra flavor to it. It was just amazing. And it was a big piece, too. And so it’s like my wife and I could split that and like, okay. The only thing was, I wish I could take it home and warm it up so I could have it nice and hot. But I had to eat it right then and there. It was just so perfect. We’d gotten the breakfast sando as well, and in that it has, like, the egg, it has — We actually added mortadella. And what I love about that was they pan fried the mortadella a little bit. So it’s almost like bacon. -Wow. -Put bacon in anything, I’m all game. [ Laughs ] But then with that spicy sauce on it, I’m like, oh, my gosh. -That sandwich bread, that is what I’m most obsessed about at Rosalind Bakery. You could put anything on that sandwich bread and I will eat it. Ironically, my favorite thing there was the turkey sandwich because my son got it, and the turkey was moist and tender.\u003c/p>\n\u003cp class=\"p1\">\u003cb>Sbrocco:\u003c/b> Which doesn’t always happen.\u003c/p>\n\u003cp class=\"p1\">\u003cb>Meng:\u003c/b> Exactly. Right. A lot of turkey deli meat can be very dry, but that with the bread and whatever that dijonnaise that they put on it with the cheese, I mean, it was so good. -Any pastries or things you want to talk about? The cinnamon roll. That is — First of all, it’s huge. It’s like the size of my head. And it has sourdough in it. So you have, like, this sourdough feel to it filled with cinnamon and sugar. So the sugar caramelizes on the bottom. And then it has that classic cream cheese icing. But it’s huge. And it is — -So it’s a shareable item? -It’s shareable. I will eat it for a couple days with my kids. They will cry if they’re out of stock. When we get to the bakery and there are no cinnamon rolls, they literally will cry. They’re 3 and 5, so they’re allowed. They’re allowed. Okay. And then when we eat it all up, there may be tears, too, so… They’re like, “Oh, we wanted more.” -Sbrocco: Did you get any pastries? -We did. We got chocolate chip cookies. Because you can’t really ever go wrong with a chocolate chip cookie. And I think we got two and they were gone within about 30 seconds with eight hands between the family of four digging into the paper bag. And they were flavorful and thick and just so sweet and so delicious.\u003c/p>\n\u003cp class=\"p1\">\u003cb>Sbrocco:\u003c/b> And what else did you get? The olive oil cake. It’s a lemon poppy seed olive oil cake. And it’s vegan, actually. But you wouldn’t know. It is beautifully baked with these very crispy, chewy edges, which I love. People will request, and I’ve heard this. I always request a corner piece. I’ve heard others request a middle piece. But the edges get really brown and chewy, and it’s sweet, but it’s not overly sweet. You eat it and you have yourself wondering, like, how is this vegan? What’s in here? But olive oil cakes are so moist in general. It is so moist. Yeah, it’s moist and it feels a little bit decadent, but it’s just, like, really easy to eat. -Juan: Yeah. -Yeah, yeah.\u003c/p>\n\u003cp class=\"p1\">\u003cb>Juan:\u003c/b> We got the chocolate almond croissant. And I love chocolate, my wife loves almond stuff. -So this was the — -Sbrocco: No brainer.\u003c/p>\n\u003cp class=\"p1\">\u003cb>Juan:\u003c/b> …thing made for us. So… [ Laughs ] But we had it, and we took a bite into it. It has, like, this powdered sugar thing on top of it. They don’t skimp. They have a lot of almonds on it, and there’s a lot of chocolate filling on the inside. And we bit into it, and I was like, oh, this is so good. We split it in half, and I told my wife, I’m like, “You should have gotten two of these and then get a third one for you.”\u003c/p>\n\u003cp class=\"p1\">[ Laughter ]\u003c/p>\n\u003cp class=\"p1\">It was so good. I had a mocha, and I’m very sensitive to caffeine. And so if I have a little, like, I’m ready to go. This was — The mocha was a double shot of espresso. Wow. You must have been flying. Yeah. [ Laughs ] But it actually helped, because we’re having all this bread and all these carbohydrates. And the mocha kept us awake. And so I was ready to go. For me, cappuccino all the way. It’s my favorite thing to order from there, but it’s always, yeah, beautifully crafted, perfect foam. I like a good, strong coffee. So it’s, for me, perfect. Yeah. You know, I really had a nice time. Just, like, looking at all the merch in the store, and, yeah, it was very Pacifica. Like, I definitely got that beach, you know, relaxed beach vibe. My — Actually, my own sourdough baby at home is from Rosalind, so yeah, I got my sourdough starter from them. -Wait, they do that? -Yeah.\u003c/p>\n\u003cp class=\"p1\">\u003cb>Juan:\u003c/b> [ Laughs ] Okay. [ Laughs ]\u003c/p>\n\u003cp class=\"p1\">\u003cb>Sbrocco:\u003c/b> You’ve just given away —\u003c/p>\n\u003cp class=\"p1\">[ Overlapping chatter ]\u003c/p>\n\u003cp class=\"p1\">Rosalind’s going to be cursing you. -[ Laughter ] -Yeah. Alright. I’ve had it for a few years, so I don’t know if they still do it. Alright. If you would like to try Rosalind Bakery, it’s located in the Manor Plaza in Pacifica. The average multicourse tab per person without drinks is around $20. Candice’s pick is the first US location for an iconic Tokyo-based ramen shop. Fresh, house-made noodles, broth simmered for hours, and layers of savory umami keep her whole family happily slurping to the last drop. Located in downtown San Mateo, it’s Taishoken Ramen.\u003c/p>\n\u003cp class=\"p1\">[ Speaking in Japanese ]\u003c/p>\n\u003cp class=\"p1\">\u003cb>Sakaguchi:\u003c/b> Our restaurant is called Taishoken. We serve ramen and we are known as the birthplace of Tsukemen. Tsukemen means dipping noodle in Japanese. We serve noodle and hot broth separately. My grandfather and his cousin started Taishoken in 1951 Tokyo.\u003c/p>\n\u003cp class=\"p1\">[ Speaking in Japanese ]\u003c/p>\n\u003cp class=\"p1\">I really want to make my own noodle because the noodles is very important for texture and flavor. I brought special noodle machine from Japan, and we make noodle every single day in-house. Our main broth is tonkotsu broth. We cook over 24 hours. It makes broth very rich. First bite, just pick up some noodles and eat it to feel the flavor. And next, you just dip into the broth and slurp. It tastes really good. When I see the customer dump the dipping broth to the noodle, I was like, ah! But it’s been seven years, so I think they’re getting to know how to eat tsukemen.\u003c/p>\n\u003cp class=\"p2\">♪♪\u003c/p>\n\u003cp class=\"p1\">I want to make customers happy, so I think the portion is kind of big. [ Chuckles ] My grandfather passed away, but I believe we carry on the legacy for making guests happy.\u003c/p>\n\u003cp class=\"p2\">♪♪\u003c/p>\n\u003cp class=\"p1\">[ Laughter ]\u003c/p>\n\u003cp class=\"p1\">Alright, Candice, this kind of feels like a slice of Tokyo, huh? I have never been to Tokyo, but I’d like to think that by going to Taishoken, I have an opportunity to experience it. -Sbrocco: Yeah. -Meng: And, you know, sometimes I don’t necessarily want a really hot broth of ramen, especially on, like, a summer day. And when I saw the menu and they had a soupless-based ramen, the Tokyo Classic Aburasoba, it is delicious. It comes with this beautiful egg yolk on top. And underneath you have your pork char siu, your bamboo, your green onions, the noodles. But to me, what really brought it to that next level is this little cup of vinegar on the side. And you pour it on and you mix it in and it cuts through that richness. -That was it, I was hooked. -[ Laughs ]\u003c/p>\n\u003cp class=\"p1\">\u003cb>Sbrocco:\u003c/b> What did you have, Alessandra? So we had a few things, but one of my favorites was what my kids ordered, the yuzu shio ramen. And first of all, I have to tell you, when we sat down, they brought special cups for my kids who are 3 and 5, and they brought special utensils and bowls for them. So immediately they invited them to be really prestigious guests at the table, which was so special for them. So they got that ramen. They loved it. It was this vegetable ramen. It had a really beautiful clear, but earthy kind of herby broth. There was a piece of fried tofu that sucked up the broth so perfectly. And then there were herbs on top of it. It was just really nice and light, and like, the noodles were literally falling out of my son’s mouth while he was eating it, like, okay, this is good. I was putting some in my dish. We were all eating it. I was going to say, 3- and 5-year-olds, you know, -I would imagine. -Yes. Yeah, they loved it and they felt like -they were part of the party. -Yeah. Yeah. And what other dish did you have? We had the tsukemen, the spicy tsukemen, which was a soupless ramen. -It has a dipping sauce. -Meng: Dipping ramen. Yes, and so you had this beautiful noodle, and those were buckwheat noodles. So they were, like, a little thicker, chewier, but really delicious and hearty. And then the dipping sauce was almost like a gravy. Like, this spicy gravy that you put the noodles in. There were two types of pork. And everything just melded together to have a really beautiful, hearty dish that was not soup. You know, it’s was, like, different. You’re like, oh, I’m going for ramen, but it’s not soup. You don’t have to dip it if you didn’t want to. You could just go for the noodle.\u003c/p>\n\u003cp class=\"p1\">\u003cb>Sbrocco:\u003c/b> Okay. What about you? So I got to say, when I first heard about this place, my wife and I had actually been there before. -Oh, really? -And it was — We didn’t have our best experience -eating there the first time. -Okay. But then I got to tell you, as a teacher, I always tell my kids, you can’t change what happens to you, but you can always change how you feel about it. -Yeah. -So we went there a second time. So much better. It was so good. I’m glad you recommended it. It was given a second chance. They could redeem themselves. Exactly. Exactly. It was so good. We got the Niku spicy ramen. I love spicy food, I love it. I can tell it’s spicy enough if it looks like I took a shower with my clothes on after. -I was just dripping. -Sbrocco: Sweating a lot.\u003c/p>\n\u003cp class=\"p1\">\u003cb>Juan:\u003c/b> But it was so good. It was a good spice level, a lot of heat to it. And then we got it with also the sand storm calamari appetizer. -Have you had that one yet? -Meng: Yes, that Koji ranch. -Juan: Mmm. Oh, yeah. -Meng: It is — I don’t know what is in it. -And the calamari is thick. -Juan: Yeah.\u003c/p>\n\u003cp class=\"p1\">\u003cb>Meng:\u003c/b> There are big chunks of calamari and the — Oh, the fry is so good. It’s not heavy and greasy.\u003c/p>\n\u003cp class=\"p1\">\u003cb>Juan:\u003c/b> It’s perfect, yeah. There’s, like the pepper to it, too.\u003c/p>\n\u003cp class=\"p1\">\u003cb>Meng:\u003c/b> Yes. And it’s not that spicy.\u003c/p>\n\u003cp class=\"p1\">\u003cb>Juan:\u003c/b> Yeah, yeah, yeah, yeah.\u003c/p>\n\u003cp class=\"p1\">\u003cb>Sbrocco:\u003c/b> Any other dish you want to talk about?\u003c/p>\n\u003cp class=\"p1\">\u003cb>Juan:\u003c/b> One of the other appetizers that we got was the cucumber green chili miso. -Mmm. -Juan: They have the sauce they put it on top of it. Makes it just a little bit spicy. There’s a little heat to it. It has this perfect crunch because they cut it up nice and fresh. It’s the perfect compliment, like, as you’re having all this broth and super spicy stuff. Have a little bite of the crunch there to cool it down. Cleanse the palate. Yeah. I think the takoyaki, it’s like little balls with octopus in them. The fry on the outside of it is not heavy. The inside is so flavorful. I don’t know how you make it, but it tasted like a creamy, savory mashed potato, I think that’s what it is, mixed in with little bits of, like, tender octopus. And then the okonomiyaki sauce really just tie it all together. We had had takoyaki, my wife and I had it in Osaka, and it was the closest we’ve had it. Like having it there, so… -It’s very authentic. -Yeah, yeah, yeah. -Absolutely. -Yeah. I also got the hiyayakko, which is a cold tofu dish. It comes with a huge pile of fried anchovies on top and red onions, with a ponzu sauce. And the tofu is firm and it’s got a great texture to it. It doesn’t, like, fall apart in your mouth like some tofus. -It is so good. -Any drinks to talk about? I didn’t have any drinks. I just drank more broth. -Sbrocco: Yeah. -[ Laughter ] I didn’t have any other drinks. -And I’m driving, so. -Sbrocco: Yeah. I think on a recent cold day, we got the hot sake. And that was really nice. They only have one kind of hot sake on the menu. -Sbrocco: Nice and warming. -Meng: Yeah, it was really good. And, you know, my kids, they always love the Shirley Temple. -Juan: Oh, yeah. [ Laughs ] -[ Overlapping chatter ]\u003c/p>\n\u003cp class=\"p1\">\u003cb>Meng:\u003c/b> They make a little Shirley Temple there, so… -Sbrocco: That’s cute. -Meng: You can get that for your kids.\u003c/p>\n\u003cp class=\"p1\">\u003cb>Wood:\u003c/b> We haven’t graduated to that yet. Want to get them eating without their hands. Alright. Was this affordable? I mean, you’ve gone quite a few times. Yeah, we go to Taishoken… At one point, I think my husband was taking them weekly.\u003c/p>\n\u003cp class=\"p1\">\u003cb>Juan:\u003c/b> Oh. Yeah. Any time there’s talk of ramen, it’s always Taishoken. -Juan: Yeah. -Sbrocco: That’s great. And you guys will be back it sounds like. -Oh, absolutely. -Oh, yeah. Oh, yeah. -Bring me with you. -[ Laughter ]\u003c/p>\n\u003cp class=\"p1\">\u003cb>Sbrocco:\u003c/b> Okay. Nobody ever brings me. If you would like to try Taishoken Ramen, it’s located on East 4th Avenue in San Mateo, and the average multicourse tab per person without drinks is around $30. Looking for more Bay area bites you’ve just got to try? -[ Laughs ] -Check out “Cecilia Tries It” online at kqed.org/checkplease. I have to thank my fantastic guests on this week’s show, Ryan Juan, who raves about the brisky baos at Smokin D’s BBQ in San Francisco, Alessandra Wood, who finds her own slice of carb heaven at Rosalind Bakery in Pacifica, and Candice Meng, who savors the aburasoba at Taishoken Ramen in San Mateo. Join us next time when three more guests will recommend their favorite spots right here on “Check, Please! Bay Area”. I’m Leslie Sbrocco, and I’ll see you then. Cheers, everybody.\u003c/p>\n\u003cp class=\"p1\">[ All cheering ]\u003c/p>\n\u003cp class=\"p1\">You were fabulous, fabulous, fabulous.\u003c/p>\n\u003cp class=\"p1\">\u003cb>Meng:\u003c/b> Whoo! I never know the perfect noodle because we try to make better noodle every single day. We have flour and water, salt. And also, we put the buckwheat. We try to adjust water ratio in different seasons. So it’s been improved over 70 years. But it’s fun.\u003c/p>\n\u003cp>[ad floatright]\u003c/p>\n\u003cp class=\"p1\">[ Speaking in Japanese ]\u003c/p>\n\n",
"blocks": [],
"excerpt": null,
"status": "publish",
"parent": 0,
"modified": 1772161268,
"stats": {
"hasAudio": false,
"hasVideo": false,
"hasChartOrMap": false,
"iframeSrcs": [],
"hasGoogleForm": false,
"hasGallery": false,
"hasHearkenModule": false,
"hasPolis": false,
"paragraphCount": 13,
"wordCount": 5933
},
"headData": {
"title": "Check, Please! Bay Area reviews: Smokin' D's BBQ, Rosalind Bakery, Taishoken Ramen | KQED",
"description": "Bay Area locals try Tex-Mex Asian fusion barbecue in San Francisco, delectable bakes in Pacifica and soupless ramen in San Mateo.",
"ogTitle": "",
"ogDescription": "",
"ogImgId": "",
"twTitle": "",
"twDescription": "",
"twImgId": "",
"socialDescription": "Bay Area locals try Tex-Mex Asian fusion barbecue in San Francisco, delectable bakes in Pacifica and soupless ramen in San Mateo.",
"schema": {
"@context": "https://schema.org",
"@type": "Article",
"headline": "Check, Please! Bay Area reviews: Smokin' D's BBQ, Rosalind Bakery, Taishoken Ramen",
"datePublished": "2026-02-26T19:30:12-08:00",
"dateModified": "2026-02-26T19:01:08-08:00",
"image": "https://cdn.kqed.org/wp-content/uploads/2020/02/KQED-OG-Image@1x.png"
}
},
"primaryCategory": {
"termId": 3750,
"slug": "cuisine",
"name": "cuisine"
},
"videoEmbed": "https://www.youtube.com/watch?v=bWON5UwZrJE",
"sticky": false,
"templateType": "standard",
"featuredImageType": "standard",
"excludeFromSiteSearch": "Include",
"articleAge": "0",
"path": "/checkplease/23742/check-please-bay-area-reviews-smokin-ds-bbq-rosalind-bakery-taishoken-ramen",
"audioTrackLength": null,
"parsedContent": [
{
"type": "contentString",
"content": "\u003cdiv class=\"post-body\">\u003cp>\u003cp>\u003cem>Check, Please! Bay Area, \u003c/em>season 20, episode 16, airs Thursday, February 26, at 7:30 pm, on KQED 9. See other \u003ca href=\"http://www.kqed.org/tv/programs/index.jsp?pgmid=14084\" target=\"_blank\" rel=\"noopener noreferrer\">television airtimes\u003c/a>.\u003c/p>\n\u003cp>\u003cspan style=\"font-weight: 400\">Smoke and bold flavors kick things off at \u003cstrong>Smokin’ D’s\u003c/strong> in San Francisco’s Sunset, where Texas-style barbecue meets Mexican and Asian flair. Plates land heavy with signature pulled pork, pork spare ribs, and smoked brisket tucked into fluffy bao — and classic sides like potato salad, all capped off with Banana Brulee Bliss for dessert. From there, it’s down the coast to Pacifica’s \u003cstrong>Rosalind Bakery\u003c/strong>, a bread-lover’s paradise known for iconic sesame-seed hoagie rolls, flaky chocolate almond croissants, cinnamon rolls, and breakfast sandos layered with egg, pimiento cheese, and rosemary ham. The episode wraps up in San Mateo at \u003cstrong>Taishoken Ramen\u003c/strong>, where house-made noodles shine in dishes like Tokyo-style aburasoba, spicy tsukemen with rich dipping broth, yuzu shio ramen, and crispy takoyaki, delivering deep umami and hands-on slurping satisfaction.\u003c/span>\u003c/p>\n\u003cfigure id=\"attachment_23743\" class=\"wp-caption alignnone\" style=\"max-width: 1920px\">\u003cimg loading=\"lazy\" decoding=\"async\" class=\"size-full wp-image-23743\" src=\"https://cdn.kqed.org/wp-content/uploads/sites/40/2026/02/2016_02.png\" alt=\"\" width=\"1920\" height=\"1080\" srcset=\"https://cdn.kqed.org/wp-content/uploads/sites/40/2026/02/2016_02.png 1920w, https://cdn.kqed.org/wp-content/uploads/sites/40/2026/02/2016_02-160x90.png 160w, https://cdn.kqed.org/wp-content/uploads/sites/40/2026/02/2016_02-768x432.png 768w, https://cdn.kqed.org/wp-content/uploads/sites/40/2026/02/2016_02-1536x864.png 1536w\" sizes=\"auto, (max-width: 1920px) 100vw, 1920px\">\u003cfigcaption class=\"wp-caption-text\">Host Leslie Sbrocco joins guests Ryan Juan, Alessandra Wood and Candice Meng from KQED in San Francisco.\u003c/figcaption>\u003c/figure>\n\u003cp>\u003cspan style=\"color: #2b2b2b\">Get Restaurant Information:\u003c/span>\u003c/p>\n\u003cul>\n\u003cli>\u003ca href=\"https://smokindsbbqsf.com/\">\u003cstrong>Smokin’ D’s BBQ\u003c/strong> (San Francisco)\u003c/a>\u003c/li>\n\u003cli>\u003ca href=\"https://www.rosalindbakery.com/\">\u003cstrong>Rosalind Bakery\u003c/strong> (Rosalind Bakery)\u003c/a>\u003c/li>\n\u003cli>\u003ca href=\"https://www.taishokenusa.com/san-mateo\">\u003cstrong>Taishoken Ramen \u003c/strong>(San Mateo)\u003c/a>\u003c/li>\n\u003c/ul>\n\u003cfigure id=\"attachment_20123\" class=\"wp-caption alignnone\" style=\"max-width: 800px\">\u003cimg loading=\"lazy\" decoding=\"async\" class=\"size-medium wp-image-20123\" src=\"https://cdn.kqed.org/wp-content/uploads/sites/40/2019/04/Leslie-Headshot-Smokey-copy-800x540.jpg\" alt=\"Host Leslie Sbrocco sipping wine\" width=\"800\" height=\"540\">\u003cfigcaption class=\"wp-caption-text\">Host Leslie Sbrocco sipping wine \u003ccite>(Courtesy of Leslie Sbrocco)\u003c/cite>\u003c/figcaption>\u003c/figure>\n\u003cp>My name is Leslie Sbrocco, and I’m the \u003ca href=\"http://ww2.kqed.org/checkplease/host-biography/\" target=\"_blank\" rel=\"noopener noreferrer\">host\u003c/a> of \u003cem>Check, Please! Bay Area\u003c/em>. Each week, I’ll share my tasting notes about the wine, beer and spirits the guests and I drank on set during the taping of the show.\u003c/p>\n\u003cp>\u003cimg loading=\"lazy\" decoding=\"async\" class=\"alignnone size-medium wp-image-23744\" src=\"https://cdn.kqed.org/wp-content/uploads/sites/40/2026/02/2016_Wines-2000x2445.jpg\" alt=\"\" width=\"2000\" height=\"2445\" srcset=\"https://cdn.kqed.org/wp-content/uploads/sites/40/2026/02/2016_Wines-2000x2445.jpg 2000w, https://cdn.kqed.org/wp-content/uploads/sites/40/2026/02/2016_Wines-160x196.jpg 160w, https://cdn.kqed.org/wp-content/uploads/sites/40/2026/02/2016_Wines-768x939.jpg 768w, https://cdn.kqed.org/wp-content/uploads/sites/40/2026/02/2016_Wines-1256x1536.jpg 1256w, https://cdn.kqed.org/wp-content/uploads/sites/40/2026/02/2016_Wines-1675x2048.jpg 1675w\" sizes=\"auto, (max-width: 2000px) 100vw, 2000px\">\u003c/p>\n\u003cp>\u003c/p>\u003c/div>",
"attributes": {
"named": {},
"numeric": []
}
},
{
"type": "component",
"content": "",
"name": "ad",
"attributes": {
"named": {
"label": "fullwidth"
},
"numeric": [
"fullwidth"
]
}
},
{
"type": "contentString",
"content": "\u003cdiv class=\"post-body\">\u003cp>\u003c/p>\n\u003cp>\u003ca href=\"https://www.frankfamilyvineyards.com/wine/napa-valley/carneros-chardonnay-2024\">\u003cspan style=\"color: #339966\">\u003cstrong>Frank Family Vineyards 2024 Chardonnay\u003c/strong>\u003c/span>\u003c/a>\u003cbr>\n\u003cem>Carneros, California, $40\u003cbr>\n\u003c/em>This is a winery with a rich legacy. The historic building was home to Larkmead Winery, built in 1884. In the late 1950s, the revered Hanns Kornell began making high-quality sparkling wine on the property, then in 1992, Rich Frank, formerly president of Disney Studios and Paramount Television, acquired the venerable property. Along with his television journalist wife, Leslie, they have taken starring roles in building a brand based on showcasing the best of Napa Valley.\u003c/p>\n\u003cp>Their Chardonnay is consistently one of my top Napa recommendations due to its balance, complexity and elegance. Hailing from the cool-climate Lewis Vineyard in Carneros, it satisfies Chard lovers from those seeking vibrant and fresh versions to those that adore a full-bodied white with ripe fruit, a sultry texture and balanced toasty notes.\u003c/p>\n\u003cp>\u003ca href=\"http://rhysvineyards.com/\">\u003cspan style=\"color: #339966\">\u003cstrong>Rhys 2023 Pinot Noir\u003c/strong>\u003c/span>\u003c/a>\u003cbr>\n\u003cem>Santa Cruz Mountains, California, $54\u003cbr>\n\u003c/em>The guiding principle at Rhys Vineyards is, as they say, to capture a sense of “somewhereness” in their estate-focused bottlings. To me, their wines perfectly express the elusive concept of terroir, which I refer to as the “taste of the place in the glass.” Rhys Vineyards’ various versions of Pinot Noir hail from both Mendocino County and the Santa Cruz Mountains. Though wines from this rugged appellation on California’s Central Coast may seem like a discovery, it has long been the birthplace of world-class wines crafted by respected producers such as Ridge and Mount Eden. Rhys Vineyards is the latest star to shine among those wine luminaries crafting wines with vines grown in the high-elevation, coastal-climate vineyards of these ancient mountains.\u003c/p>\n\u003cp>Their 2023 Santa Cruz Mountains Pinot Noir is a heralded vintage and will age gracefully for years, but it is hard not to immediately enjoy its vibrant purity of red fruit married with notes of wild herbs and a sleek, silky texture. For the price, you will not find a better bottle of California Pinot Noir.\u003c/p>\n\u003cp>\u003ca href=\"https://www.brownefamilyvineyards.com/\">\u003cspan style=\"color: #339966\">\u003cstrong>Browne Family Vineyards 2023 “On Fox Island” Cabernet Sauvignon\u003c/strong>\u003c/span>\u003c/a>\u003cbr>\n\u003cem>Columbia Valley, Washington, $25\u003cbr>\n\u003c/em>Browne Family Vineyards is an innovative and fun family-owned company. They are committed to making great wines at great prices primarily from Washington state. Andrew Browne founded the family-forward company as a tribute to his late grandfather, William Bitner Browne, who was a mentor, veteran and community leader.\u003c/p>\n\u003cp>Their main grape source is the Browne Estate Vineyard in the Spring Valley District of Walla Walla, where the focus is on Bordeaux-style reds and a roster of delicious whites. The wine brands under their umbrella include the whimsical “Do Epic Shit” line celebrating life’s adventurous moments, the charity-led “Forest Project” and numerous more. I’m enamored with their “On Fox Island” Cabernet Sauvignon, which was crafted to highlight the outdoor lifestyle the family leads living on the island. The appealing label depicts a salmon swimming upstream, which is an island highlight. This Cab’s dark-berry fruit flavors are complemented by notes of spice and a velvety texture.\u003c/p>\n\u003ch2>Episode Transcript\u003c/h2>\n\u003cp class=\"p1\">\u003cb>Sbrocco:\u003c/b> Artisanal pastries in Pacifica. You could put anything on that sandwich bread and I will eat it.\u003c/p>\n\u003cp class=\"p1\">\u003cb>Sbrocco:\u003c/b> Tex-Mex fusion in San Francisco. The best smoked barbecue I’ve ever had.\u003c/p>\n\u003cp class=\"p1\">\u003cb>Sbrocco:\u003c/b> And soupless ramen delights in San Mateo. The noodles were literally falling out of my son’s mouth while he was eating it.\u003c/p>\n\u003cp class=\"p1\">\u003cb>Sbrocco:\u003c/b> Just ahead on “Check, Please! Bay Area”. -Giddy up. -Yeah.\u003c/p>\n\u003cp class=\"p2\">♪♪\u003c/p>\n\u003cp class=\"p1\">-Hi, I’m Leslie Sbrocco. Welcome to “Check, Please! Bay Area”, the show where Bay area residents review and talk about their favorite restaurants. Now we have three guests, and each one recommends one of their favorite spots, and the other two go check them out to see what they think. Joining me at the “Check, Please!” table today are design history professor Alessandra Wood, teacher and theater director Ryan Juan, and physical therapist Candice Meng. -Welcome, everyone. -[ All greeting ] Excited to be here. The pitmasters at Ryan’s go-to spot are pushing the limits of classic Texas barbecue, blending it with both Asian and Mexican influences. The payoff? Smoky, fall-off-the-bone meats bursting with cross-cultural flavor. Ooh!\u003c/p>\n\u003cp class=\"p1\">\u003cb>Sbrocco:\u003c/b> Tucked away in San Francisco’s Outer Sunset, it’s Smokin’ D’s BBQ. -Yeah! [ Laughs ] -I’ll take a half pound. Oh, my God, look at this.\u003c/p>\n\u003cp class=\"p1\">\u003cb>Man:\u003c/b> So good. Number 44. I grew up in San Francisco, which has always been known as a great food city. -For me, I grew up eating barbecue since I’m from Texas, and barbecue is just a way of life.\u003c/p>\n\u003cp class=\"p1\">\u003cb>Chu:\u003c/b> When we started this, we just wanted to focus on things that we love to eat.\u003c/p>\n\u003cp class=\"p1\">\u003cb>Ramirez:\u003c/b> Taking a little Mexican, a little Asian, and a whole lot of Texan and mending them together. Mmm!\u003c/p>\n\u003cp class=\"p1\">\u003cb>Ramirez:\u003c/b> So in Texas, we’re known for barbecuing our food low and slow. A lot of salt, a lot of pepper, and a little secret recipe that I can’t divulge. -It’s a little spicy. It’s got a kick. -Fun fact — I don’t even like barbecue, but I sure love a pork bun. -Woman: Oh, my God, look at that. -Woman #2: Yeah.\u003c/p>\n\u003cp class=\"p1\">\u003cb>Chu:\u003c/b> When we first started dating, I was like, let me bring you somewhere that I love and we’re going to have dim sum. And he had a pork bun and he was like, “Damn, this is good. Can we put brisket inside?” We actually smoke our brisket specifically for the bao. We mix it with a traditional barbecue sauce, so it’s sweet and tangy. The bread to meat ratio is a little bit different than what you would normally find in Chinatown, so you’re getting almost a quarter pound of meat inside.\u003c/p>\n\u003cp class=\"p1\">[ Laughter ]\u003c/p>\n\u003cp class=\"p1\">-One of the things that incorporates my Mexican influence is the brisket tamale. We house make our masa as well as our salsa roja. You’re looking at my salsa roja maker right here. -Alright, man. -Thank you. I’ll see you later, bro. Appreciate it. We’re very small, so we don’t have a ton of seating. Even though there may be a little bit of a line, we get through it really quickly. You can also order ahead and it’ll be ready for you when you walk in. Nice to meet you. We’re right next to Golden Gate Park. You can walk there easily and have a picnic. I was born in the Sunset. I’m a native kid. What gives us so much pride and joy in this business is the people. We’ve really grown this community of customers. Really, it’s a family. -Came to get some brisky bao.\u003c/p>\n\u003cp class=\"p1\">\u003cb>Chu:\u003c/b> We love seeing them day in and day out. Does daddy need to get you your own chips and queso? We really, truly have developed a neighborhood spot, which is exactly what we wanted to do.\u003c/p>\n\u003cp class=\"p2\">♪♪\u003c/p>\n\u003cp class=\"p1\">-Alright, Ryan, what is it about this place? I mean, this is a small spot, right? Kind of a lot of takeaway happening. -How did you discover it? -Yeah. So my wife and I, we’ve never seen a Texas barbecue place in the Sunset District. And so we’d gone on a walk by there, and it just smelled fantastic. I’m like, we got to try something from here. So we get there, we get their smoked signature brisket, and the crust on it is amazing. It’s got this amazing spice rub on it. And this is probably the best smoked barbecue I’ve ever had. Did you get the brisket? Did you try the brisket? -Wood: I got a brisket sandwich. -Sbrocco: Okay.\u003c/p>\n\u003cp class=\"p1\">\u003cb>Wood:\u003c/b> Yes.\u003c/p>\n\u003cp class=\"p1\">\u003cb>Sbrocco:\u003c/b> That could be the best of both worlds.\u003c/p>\n\u003cp class=\"p1\">\u003cb>Wood:\u003c/b> It was. It was so good because, you know, I was just kind of thinking like, oh, there’s going to be coleslaw on it, but instead of coleslaw, there were pickled onions. -Pickled red onions. -Juan: Oh, yeah, yeah.\u003c/p>\n\u003cp class=\"p1\">\u003cb>Wood:\u003c/b> And so they had this, like, beautiful tartness to them. Like the acidity that you wanted to cut through the brisket without the heaviness of coleslaw. Like, there wasn’t as heavy as you expected. And then pickles, which were great. It was a really nice sandwich. Candice, what was your experience? We ordered the pulled pork sandwich. I can never turn down a pulled pork sandwich. And it was…that brioche. It — Everything about it was so tasty and flavorful. And I thought whatever sauce they used on it didn’t overwhelm the meat. So you really got a good hit of that smokiness. So good, so good. And did you get anything with it like sides or…? We got the cornbread, which was enormous. It was like the size of my head. Oh, yeah, and I was so excited because the cornbread is baked in, like, muffin tins. So all of the bottom of it has this chewy crispiness, which is my favorite. Like, I’m a corner brownie person. So it was like — -I so am! I so am. I don’t let my kids touch the corners.\u003c/p>\n\u003cp class=\"p1\">\u003cb>Wood:\u003c/b> Yes, and it was like a sweet cornbread with some jalapeños in it. So you had a little bit of spiciness, -and I loved the chewiness of it. -Yeah. And what did you get? I’m sure you got many dishes. -I did, yeah. -Sbrocco: Start with one. Well, I got a rack of ribs, which were delicious and I would say probably the best ribs I’ve had in the Bay area. They were really beautifully seasoned. They were not, like, fall off the bone, but they were really tender. Yeah, we did get the, uh, the potato salad as a side once. -Did you try that one? -It’s so good.\u003c/p>\n\u003cp class=\"p1\">\u003cb>Juan:\u003c/b> Yeah, yeah. [ Laughs ]\u003c/p>\n\u003cp class=\"p1\">\u003cb>Sbrocco:\u003c/b> So is this one more kind of a little vinegary or…?\u003c/p>\n\u003cp class=\"p1\">\u003cb>Juan:\u003c/b> Yeah, yeah, yeah. Yeah. There’s some egg into it.\u003c/p>\n\u003cp class=\"p1\">\u003cb>Wood:\u003c/b> It wasn’t like a mayo-y potato salad. It was a little bit fresher. A really good compliment to the meats. What was your second, third, or fourth dish?\u003c/p>\n\u003cp class=\"p1\">[ Laughter ]\u003c/p>\n\u003cp class=\"p1\">\u003cb>What we also got was the bao… -Sbrocco:\u003c/b> Yeah. -Meng: …with the brisket.\u003c/p>\n\u003cp class=\"p1\">\u003cb>Sbrocco:\u003c/b> Which is really their signature.\u003c/p>\n\u003cp class=\"p1\">\u003cb>Meng:\u003c/b> Correct. And anything that can sort of fit in the palm of my hand easily I am game for. And it was delicious. I really liked the bake on the bao. I thought it had that really nice milk bun flavor that is very common. And so, the combination, it really, really did make sense. And what else did you have? The Korean cowboy bun, which was also really delicious. It was like spicy. You really could taste the gochujang in it. And so it had this — It left a nice flavor in your mouth wanting you to go back for more. But the bun sort of tamed it a little bit. It’s just a good name. Giddy up. -Yeah. -[ Laughter ] Korean cowboy. I love it. -Alright, Ryan, what about you? Any other dishes? The other thing we did have was the hot link. And that one’s really good. They smoke it perfectly, and then when they give it to you, they cut it up into bite sized pieces already. So it’s ready to go. And it’s hard because, like, when I go to pick it up, I have to stop myself from eating it on the way home. When you said that, I knew that that was going to happen. [ Laughter ] Yeah. Now, did you wash it down with anything? Did you have any drinks or…? Oh, no, we didn’t have any drinks. We — I always just end up getting more meat. But I want to ask you guys if there’s — about the banana brulée bliss. Did you guys happen to try it? Because for my thing, for desserts, like, if it’s too sweet, then it kind of ruins it. -I want something that’s just a little bit sweet. -Sbrocco: right.\u003c/p>\n\u003cp class=\"p1\">\u003cb>Juan:\u003c/b> Because if it’s not too sweet, I’m going to get some later. So, [laughs] I wanna make sure. -But I haven’t had it yet. -No, it’s perfect if it’s not too sweet. You’ve had such intense, you know, savoriness. You want something just to — just a change of flavor, but not too much. And so did you guys happen to try the — -Any room? No. -No room. Yeah. No room after all the barbecue. -Just get more meat. -Sbrocco: Yeah, yeah. Well, it sounds like you all had a great time there. Yeah. And would go back. She’s like, “We go back all the time.” I just want to get the brisky bao. -[ Laughter ] -Alright. If you would like to try Smokin’ D’s BBQ, it’s located on Irving Street in San Francisco. And the average multi-course tab per person without drinks is around $30. At Alessandra’s hip modern bakery, sourdough is the star attraction, forming the base for inventive sandwiches stacked with seasonal produce and chef driven flavors. Located just blocks from the beach in Pacifica, it’s Rosalind Bakery.\u003c/p>\n\u003cp class=\"p2\">♪♪\u003c/p>\n\u003cp class=\"p2\">♪♪\u003c/p>\n\u003cp class=\"p1\">-Rosalind Bakery is a community hub here in Pacifica. It’s art, it’s music, it’s delicious artisan food.\u003c/p>\n\u003cp class=\"p2\">♪♪\u003c/p>\n\u003cp class=\"p1\">The first thing that you’re probably going to get hit with is the smell of all of the baked goods coming in and out of the oven, and then you’ll definitely notice the atmosphere and how welcoming it can be.\u003c/p>\n\u003cp class=\"p2\">♪♪\u003c/p>\n\u003cp class=\"p1\">I started the bakery in 2017, and was at great discontent with my career doing software development. I felt compelled to make a product with my hands. Bread is fascinating. It’s this hub of a wheel of life, of agriculture, art, math, and biology. -Check the pH level of the bread. Usually 4.2 is an ideal.\u003c/p>\n\u003cp class=\"p1\">\u003cb>Kosoy:\u003c/b> The item that I’m most proud of is the coastside sourdough. We’re about 1,000 feet from the ocean, and it’s always going to be a little bit more humid here, a little bit cooler. And that helps with our fermentation. And it develops that complex flavor in the bread.\u003c/p>\n\u003cp class=\"p2\">♪♪\u003c/p>\n\u003cp class=\"p1\">I have my hoagie roll, which features semolina and sesame seeds as a flavor combination that I love. -It has such a great texture. -Kosoy: It’s amazing. We’ve developed a separate sourdough culture just for the croissants that has sugar added to it to help with the fermentation in that enriched dough. we’re making savory and sweet danishes, depending upon what ingredients we get from the farmer’s market.\u003c/p>\n\u003cp class=\"p1\">\u003cb>Rave:\u003c/b> We have a full espresso bar. We make our own syrups in-house. And all of our coffees are sourced from local roasters. What I hope most people feel like when they’re leaving is, “Man, that place is really cool. I would really like to go back sometime.” -Yeah. -Kosoy: A lot of love and passion in what we’re doing. I’ve dedicated my life to bread.\u003c/p>\n\u003cp class=\"p1\">\u003cb>Kosoy:\u003c/b> Rosalind is my temple to bread!\u003c/p>\n\u003cp class=\"p1\">\u003cb>Man:\u003c/b> Good job. Nicely done. Alright, Alessandra, this is — It’s not what you expect from a bakery, right? It’s kind of got a party vibe going on. -Absolutely. I go in there and I can’t stop myself from singing whatever songs they have blasting. Or sometimes it’s live music. -It’s just fun. Good energy. -Sbrocco: Yeah. One of my favorite things there is anything made on their hoagie bread. So the Rosalind hoagie, it’s this Italian hoagie. Just amazing. For anybody who’s an East Coaster, you know what a hoagie is. Like a big, long sub sandwich. That bread is so iconic to the East Coast. It’s soft on the inside. It has a light crust. It’s peppered in sesame seeds, but it has this really chewy texture. And then it’s filled with Italian meats, sharp provolone cheese, some nice, like, radicchio or red leaf lettuce to kind of elevate it a little bit. And then this Calabrian chili mayo, which gives it a touch of spice that’s like, you know, you just want to eat the whole thing. You’ve got everything in one spot. -Yes. -Sbrocco: Alright. What about you? What did you order, Ryan? So we got the con patate pizza. And it was baked on this, the most perfect focaccia bread ever. The focaccia was so soft and pillowy. And on the top, they had perfectly seasoned potatoes and the cheese. And they cooked it such that it had, like, a slight char to it at the top. It gives that extra flavor to it. It was just amazing. And it was a big piece, too. And so it’s like my wife and I could split that and like, okay. The only thing was, I wish I could take it home and warm it up so I could have it nice and hot. But I had to eat it right then and there. It was just so perfect. We’d gotten the breakfast sando as well, and in that it has, like, the egg, it has — We actually added mortadella. And what I love about that was they pan fried the mortadella a little bit. So it’s almost like bacon. -Wow. -Put bacon in anything, I’m all game. [ Laughs ] But then with that spicy sauce on it, I’m like, oh, my gosh. -That sandwich bread, that is what I’m most obsessed about at Rosalind Bakery. You could put anything on that sandwich bread and I will eat it. Ironically, my favorite thing there was the turkey sandwich because my son got it, and the turkey was moist and tender.\u003c/p>\n\u003cp class=\"p1\">\u003cb>Sbrocco:\u003c/b> Which doesn’t always happen.\u003c/p>\n\u003cp class=\"p1\">\u003cb>Meng:\u003c/b> Exactly. Right. A lot of turkey deli meat can be very dry, but that with the bread and whatever that dijonnaise that they put on it with the cheese, I mean, it was so good. -Any pastries or things you want to talk about? The cinnamon roll. That is — First of all, it’s huge. It’s like the size of my head. And it has sourdough in it. So you have, like, this sourdough feel to it filled with cinnamon and sugar. So the sugar caramelizes on the bottom. And then it has that classic cream cheese icing. But it’s huge. And it is — -So it’s a shareable item? -It’s shareable. I will eat it for a couple days with my kids. They will cry if they’re out of stock. When we get to the bakery and there are no cinnamon rolls, they literally will cry. They’re 3 and 5, so they’re allowed. They’re allowed. Okay. And then when we eat it all up, there may be tears, too, so… They’re like, “Oh, we wanted more.” -Sbrocco: Did you get any pastries? -We did. We got chocolate chip cookies. Because you can’t really ever go wrong with a chocolate chip cookie. And I think we got two and they were gone within about 30 seconds with eight hands between the family of four digging into the paper bag. And they were flavorful and thick and just so sweet and so delicious.\u003c/p>\n\u003cp class=\"p1\">\u003cb>Sbrocco:\u003c/b> And what else did you get? The olive oil cake. It’s a lemon poppy seed olive oil cake. And it’s vegan, actually. But you wouldn’t know. It is beautifully baked with these very crispy, chewy edges, which I love. People will request, and I’ve heard this. I always request a corner piece. I’ve heard others request a middle piece. But the edges get really brown and chewy, and it’s sweet, but it’s not overly sweet. You eat it and you have yourself wondering, like, how is this vegan? What’s in here? But olive oil cakes are so moist in general. It is so moist. Yeah, it’s moist and it feels a little bit decadent, but it’s just, like, really easy to eat. -Juan: Yeah. -Yeah, yeah.\u003c/p>\n\u003cp class=\"p1\">\u003cb>Juan:\u003c/b> We got the chocolate almond croissant. And I love chocolate, my wife loves almond stuff. -So this was the — -Sbrocco: No brainer.\u003c/p>\n\u003cp class=\"p1\">\u003cb>Juan:\u003c/b> …thing made for us. So… [ Laughs ] But we had it, and we took a bite into it. It has, like, this powdered sugar thing on top of it. They don’t skimp. They have a lot of almonds on it, and there’s a lot of chocolate filling on the inside. And we bit into it, and I was like, oh, this is so good. We split it in half, and I told my wife, I’m like, “You should have gotten two of these and then get a third one for you.”\u003c/p>\n\u003cp class=\"p1\">[ Laughter ]\u003c/p>\n\u003cp class=\"p1\">It was so good. I had a mocha, and I’m very sensitive to caffeine. And so if I have a little, like, I’m ready to go. This was — The mocha was a double shot of espresso. Wow. You must have been flying. Yeah. [ Laughs ] But it actually helped, because we’re having all this bread and all these carbohydrates. And the mocha kept us awake. And so I was ready to go. For me, cappuccino all the way. It’s my favorite thing to order from there, but it’s always, yeah, beautifully crafted, perfect foam. I like a good, strong coffee. So it’s, for me, perfect. Yeah. You know, I really had a nice time. Just, like, looking at all the merch in the store, and, yeah, it was very Pacifica. Like, I definitely got that beach, you know, relaxed beach vibe. My — Actually, my own sourdough baby at home is from Rosalind, so yeah, I got my sourdough starter from them. -Wait, they do that? -Yeah.\u003c/p>\n\u003cp class=\"p1\">\u003cb>Juan:\u003c/b> [ Laughs ] Okay. [ Laughs ]\u003c/p>\n\u003cp class=\"p1\">\u003cb>Sbrocco:\u003c/b> You’ve just given away —\u003c/p>\n\u003cp class=\"p1\">[ Overlapping chatter ]\u003c/p>\n\u003cp class=\"p1\">Rosalind’s going to be cursing you. -[ Laughter ] -Yeah. Alright. I’ve had it for a few years, so I don’t know if they still do it. Alright. If you would like to try Rosalind Bakery, it’s located in the Manor Plaza in Pacifica. The average multicourse tab per person without drinks is around $20. Candice’s pick is the first US location for an iconic Tokyo-based ramen shop. Fresh, house-made noodles, broth simmered for hours, and layers of savory umami keep her whole family happily slurping to the last drop. Located in downtown San Mateo, it’s Taishoken Ramen.\u003c/p>\n\u003cp class=\"p1\">[ Speaking in Japanese ]\u003c/p>\n\u003cp class=\"p1\">\u003cb>Sakaguchi:\u003c/b> Our restaurant is called Taishoken. We serve ramen and we are known as the birthplace of Tsukemen. Tsukemen means dipping noodle in Japanese. We serve noodle and hot broth separately. My grandfather and his cousin started Taishoken in 1951 Tokyo.\u003c/p>\n\u003cp class=\"p1\">[ Speaking in Japanese ]\u003c/p>\n\u003cp class=\"p1\">I really want to make my own noodle because the noodles is very important for texture and flavor. I brought special noodle machine from Japan, and we make noodle every single day in-house. Our main broth is tonkotsu broth. We cook over 24 hours. It makes broth very rich. First bite, just pick up some noodles and eat it to feel the flavor. And next, you just dip into the broth and slurp. It tastes really good. When I see the customer dump the dipping broth to the noodle, I was like, ah! But it’s been seven years, so I think they’re getting to know how to eat tsukemen.\u003c/p>\n\u003cp class=\"p2\">♪♪\u003c/p>\n\u003cp class=\"p1\">I want to make customers happy, so I think the portion is kind of big. [ Chuckles ] My grandfather passed away, but I believe we carry on the legacy for making guests happy.\u003c/p>\n\u003cp class=\"p2\">♪♪\u003c/p>\n\u003cp class=\"p1\">[ Laughter ]\u003c/p>\n\u003cp class=\"p1\">Alright, Candice, this kind of feels like a slice of Tokyo, huh? I have never been to Tokyo, but I’d like to think that by going to Taishoken, I have an opportunity to experience it. -Sbrocco: Yeah. -Meng: And, you know, sometimes I don’t necessarily want a really hot broth of ramen, especially on, like, a summer day. And when I saw the menu and they had a soupless-based ramen, the Tokyo Classic Aburasoba, it is delicious. It comes with this beautiful egg yolk on top. And underneath you have your pork char siu, your bamboo, your green onions, the noodles. But to me, what really brought it to that next level is this little cup of vinegar on the side. And you pour it on and you mix it in and it cuts through that richness. -That was it, I was hooked. -[ Laughs ]\u003c/p>\n\u003cp class=\"p1\">\u003cb>Sbrocco:\u003c/b> What did you have, Alessandra? So we had a few things, but one of my favorites was what my kids ordered, the yuzu shio ramen. And first of all, I have to tell you, when we sat down, they brought special cups for my kids who are 3 and 5, and they brought special utensils and bowls for them. So immediately they invited them to be really prestigious guests at the table, which was so special for them. So they got that ramen. They loved it. It was this vegetable ramen. It had a really beautiful clear, but earthy kind of herby broth. There was a piece of fried tofu that sucked up the broth so perfectly. And then there were herbs on top of it. It was just really nice and light, and like, the noodles were literally falling out of my son’s mouth while he was eating it, like, okay, this is good. I was putting some in my dish. We were all eating it. I was going to say, 3- and 5-year-olds, you know, -I would imagine. -Yes. Yeah, they loved it and they felt like -they were part of the party. -Yeah. Yeah. And what other dish did you have? We had the tsukemen, the spicy tsukemen, which was a soupless ramen. -It has a dipping sauce. -Meng: Dipping ramen. Yes, and so you had this beautiful noodle, and those were buckwheat noodles. So they were, like, a little thicker, chewier, but really delicious and hearty. And then the dipping sauce was almost like a gravy. Like, this spicy gravy that you put the noodles in. There were two types of pork. And everything just melded together to have a really beautiful, hearty dish that was not soup. You know, it’s was, like, different. You’re like, oh, I’m going for ramen, but it’s not soup. You don’t have to dip it if you didn’t want to. You could just go for the noodle.\u003c/p>\n\u003cp class=\"p1\">\u003cb>Sbrocco:\u003c/b> Okay. What about you? So I got to say, when I first heard about this place, my wife and I had actually been there before. -Oh, really? -And it was — We didn’t have our best experience -eating there the first time. -Okay. But then I got to tell you, as a teacher, I always tell my kids, you can’t change what happens to you, but you can always change how you feel about it. -Yeah. -So we went there a second time. So much better. It was so good. I’m glad you recommended it. It was given a second chance. They could redeem themselves. Exactly. Exactly. It was so good. We got the Niku spicy ramen. I love spicy food, I love it. I can tell it’s spicy enough if it looks like I took a shower with my clothes on after. -I was just dripping. -Sbrocco: Sweating a lot.\u003c/p>\n\u003cp class=\"p1\">\u003cb>Juan:\u003c/b> But it was so good. It was a good spice level, a lot of heat to it. And then we got it with also the sand storm calamari appetizer. -Have you had that one yet? -Meng: Yes, that Koji ranch. -Juan: Mmm. Oh, yeah. -Meng: It is — I don’t know what is in it. -And the calamari is thick. -Juan: Yeah.\u003c/p>\n\u003cp class=\"p1\">\u003cb>Meng:\u003c/b> There are big chunks of calamari and the — Oh, the fry is so good. It’s not heavy and greasy.\u003c/p>\n\u003cp class=\"p1\">\u003cb>Juan:\u003c/b> It’s perfect, yeah. There’s, like the pepper to it, too.\u003c/p>\n\u003cp class=\"p1\">\u003cb>Meng:\u003c/b> Yes. And it’s not that spicy.\u003c/p>\n\u003cp class=\"p1\">\u003cb>Juan:\u003c/b> Yeah, yeah, yeah, yeah.\u003c/p>\n\u003cp class=\"p1\">\u003cb>Sbrocco:\u003c/b> Any other dish you want to talk about?\u003c/p>\n\u003cp class=\"p1\">\u003cb>Juan:\u003c/b> One of the other appetizers that we got was the cucumber green chili miso. -Mmm. -Juan: They have the sauce they put it on top of it. Makes it just a little bit spicy. There’s a little heat to it. It has this perfect crunch because they cut it up nice and fresh. It’s the perfect compliment, like, as you’re having all this broth and super spicy stuff. Have a little bite of the crunch there to cool it down. Cleanse the palate. Yeah. I think the takoyaki, it’s like little balls with octopus in them. The fry on the outside of it is not heavy. The inside is so flavorful. I don’t know how you make it, but it tasted like a creamy, savory mashed potato, I think that’s what it is, mixed in with little bits of, like, tender octopus. And then the okonomiyaki sauce really just tie it all together. We had had takoyaki, my wife and I had it in Osaka, and it was the closest we’ve had it. Like having it there, so… -It’s very authentic. -Yeah, yeah, yeah. -Absolutely. -Yeah. I also got the hiyayakko, which is a cold tofu dish. It comes with a huge pile of fried anchovies on top and red onions, with a ponzu sauce. And the tofu is firm and it’s got a great texture to it. It doesn’t, like, fall apart in your mouth like some tofus. -It is so good. -Any drinks to talk about? I didn’t have any drinks. I just drank more broth. -Sbrocco: Yeah. -[ Laughter ] I didn’t have any other drinks. -And I’m driving, so. -Sbrocco: Yeah. I think on a recent cold day, we got the hot sake. And that was really nice. They only have one kind of hot sake on the menu. -Sbrocco: Nice and warming. -Meng: Yeah, it was really good. And, you know, my kids, they always love the Shirley Temple. -Juan: Oh, yeah. [ Laughs ] -[ Overlapping chatter ]\u003c/p>\n\u003cp class=\"p1\">\u003cb>Meng:\u003c/b> They make a little Shirley Temple there, so… -Sbrocco: That’s cute. -Meng: You can get that for your kids.\u003c/p>\n\u003cp class=\"p1\">\u003cb>Wood:\u003c/b> We haven’t graduated to that yet. Want to get them eating without their hands. Alright. Was this affordable? I mean, you’ve gone quite a few times. Yeah, we go to Taishoken… At one point, I think my husband was taking them weekly.\u003c/p>\n\u003cp class=\"p1\">\u003cb>Juan:\u003c/b> Oh. Yeah. Any time there’s talk of ramen, it’s always Taishoken. -Juan: Yeah. -Sbrocco: That’s great. And you guys will be back it sounds like. -Oh, absolutely. -Oh, yeah. Oh, yeah. -Bring me with you. -[ Laughter ]\u003c/p>\n\u003cp class=\"p1\">\u003cb>Sbrocco:\u003c/b> Okay. Nobody ever brings me. If you would like to try Taishoken Ramen, it’s located on East 4th Avenue in San Mateo, and the average multicourse tab per person without drinks is around $30. Looking for more Bay area bites you’ve just got to try? -[ Laughs ] -Check out “Cecilia Tries It” online at kqed.org/checkplease. I have to thank my fantastic guests on this week’s show, Ryan Juan, who raves about the brisky baos at Smokin D’s BBQ in San Francisco, Alessandra Wood, who finds her own slice of carb heaven at Rosalind Bakery in Pacifica, and Candice Meng, who savors the aburasoba at Taishoken Ramen in San Mateo. Join us next time when three more guests will recommend their favorite spots right here on “Check, Please! Bay Area”. I’m Leslie Sbrocco, and I’ll see you then. Cheers, everybody.\u003c/p>\n\u003cp class=\"p1\">[ All cheering ]\u003c/p>\n\u003cp class=\"p1\">You were fabulous, fabulous, fabulous.\u003c/p>\n\u003cp class=\"p1\">\u003cb>Meng:\u003c/b> Whoo! I never know the perfect noodle because we try to make better noodle every single day. We have flour and water, salt. And also, we put the buckwheat. We try to adjust water ratio in different seasons. So it’s been improved over 70 years. But it’s fun.\u003c/p>\n\u003cp>\u003c/p>\u003c/div>",
"attributes": {
"named": {},
"numeric": []
}
},
{
"type": "component",
"content": "",
"name": "ad",
"attributes": {
"named": {
"label": "floatright"
},
"numeric": [
"floatright"
]
}
},
{
"type": "contentString",
"content": "\u003cdiv class=\"post-body\">\u003cp>\u003c/p>\n\u003cp class=\"p1\">[ Speaking in Japanese ]\u003c/p>\n\n\u003c/div>\u003c/p>",
"attributes": {
"named": {},
"numeric": []
}
}
],
"link": "/checkplease/23742/check-please-bay-area-reviews-smokin-ds-bbq-rosalind-bakery-taishoken-ramen",
"authors": [
"11084"
],
"programs": [
"checkplease_9339"
],
"categories": [
"checkplease_3758",
"checkplease_3845",
"checkplease_3760",
"checkplease_3750",
"checkplease_3731",
"checkplease_9200",
"checkplease_3847",
"checkplease_3871",
"checkplease_9450",
"checkplease_9211",
"checkplease_3741",
"checkplease_3738",
"checkplease_10",
"checkplease_3729",
"checkplease_8061",
"checkplease_9427"
],
"tags": [
"checkplease_8776",
"checkplease_8575",
"checkplease_8988",
"checkplease_8633",
"checkplease_1368",
"checkplease_9245",
"checkplease_8794",
"checkplease_8758",
"checkplease_8518",
"checkplease_8519"
],
"featImg": "checkplease_23747",
"label": "checkplease_9339"
},
"checkplease_23729": {
"type": "posts",
"id": "checkplease_23729",
"meta": {
"index": "posts_1716263798",
"site": "checkplease",
"id": "23729",
"score": null,
"sort": [
1771557927000
]
},
"guestAuthors": [],
"slug": "check-please-bay-area-reviews-sideboard-tacos-oscar-new-eritrea",
"title": "Check, Please! Bay Area reviews: Sideboard, Tacos Oscar, New Eritrea",
"publishDate": 1771557927,
"format": "video",
"headTitle": "Check, Please! Bay Area reviews: Sideboard, Tacos Oscar, New Eritrea | KQED",
"labelTerm": {
"term": 9339,
"site": "checkplease"
},
"content": "\u003cp>\u003cem>Check, Please! Bay Area, \u003c/em>season 20, episode 15, airs Thursday, February 19, at 7:30 pm, on KQED 9. See other \u003ca href=\"http://www.kqed.org/tv/programs/index.jsp?pgmid=14084\" target=\"_blank\" rel=\"noopener noreferrer\">television airtimes\u003c/a>.\u003c/p>\n\u003cp>\u003cspan style=\"font-weight: 400\">Delicious mornings start in Danville at \u003cstrong>Sideboard\u003c/strong>, a laid-back neighborhood spot where breakfasts are both comforting and creative. Plates like asparagus-and-goat-cheese breakfast pudding, a stacked breakfast burger complete with a fried egg, and a hearty vegan breakfast bowl share the table with crisp fried Brussels sprouts and bakery-case favorites like ginger molasses cookies and lemon lavender teacakes. In Oakland, \u003cstrong>Tacos Oscar\u003c/strong> keeps things playful and innovative, turning out charred broccoli tacos slicked with peanut sauce, sweet-and-savory camote tacos, and tostadas piled high with greens, all best enjoyed with chips and smoky salsa morita. Then, guests head to San Francisco’s Inner Sunset at \u003cstrong>New Eritrea\u003c/strong>, where flaky mixed veggie and lentil sambusas give way to a vibrant vegetarian combo platter spread across injera flatbread, alongside bold bites like gored gored beef and the house’s deeply savory chicken-and-mushroom special — a communal, hands-on meal that invites you to tear, scoop, and share. The episode wraps up as reporter Cecilia Phillips brings “Cecilia Tries It” to San Jose’s \u003cstrong>G Spot Happy Tastebuds\u003c/strong>, exploring a hub of Latin-focused food trucks serving bold, crave-worthy dishes in a lively, communal setting.\u003c/span>\u003c/p>\n\u003cfigure id=\"attachment_23730\" class=\"wp-caption alignnone\" style=\"max-width: 1920px\">\u003cimg loading=\"lazy\" decoding=\"async\" class=\"wp-image-23730 size-full\" src=\"https://cdn.kqed.org/wp-content/uploads/sites/40/2026/02/2015_02.png\" alt=\"\" width=\"1920\" height=\"1080\" srcset=\"https://cdn.kqed.org/wp-content/uploads/sites/40/2026/02/2015_02.png 1920w, https://cdn.kqed.org/wp-content/uploads/sites/40/2026/02/2015_02-160x90.png 160w, https://cdn.kqed.org/wp-content/uploads/sites/40/2026/02/2015_02-768x432.png 768w, https://cdn.kqed.org/wp-content/uploads/sites/40/2026/02/2015_02-1536x864.png 1536w\" sizes=\"auto, (max-width: 1920px) 100vw, 1920px\">\u003cfigcaption class=\"wp-caption-text\">Host Leslie Sbrocco joins guests Cathy Asmus, Anand Patel and Erin Cabezas from KQED in San Francisco.\u003c/figcaption>\u003c/figure>\n\u003cp>\u003cspan style=\"color: #2b2b2b\">Get Restaurant Information:\u003c/span>\u003c/p>\n\u003cul>\n\u003cli>\u003ca href=\"https://www.sideboard.co/\">\u003cstrong>Sideboard\u003c/strong> (Danville)\u003c/a>\u003c/li>\n\u003cli>\u003ca href=\"https://www.tacososcar.com/\">\u003cstrong>Tacos Oscar\u003c/strong> (Oakland)\u003c/a>\u003c/li>\n\u003cli>\u003ca href=\"https://neweritrearestaurant.com/index.html\">\u003cstrong>New Eritrea \u003c/strong>(San Francisco)\u003c/a>\u003c/li>\n\u003cli>\u003ca href=\"https://www.sanjose.org/listings/g-spot-happy-tastebuds-food-trucks\">\u003cstrong>G Spot Happy Tastebuds \u003c/strong>(San Jose)\u003c/a>\u003c/li>\n\u003c/ul>\n\u003cfigure id=\"attachment_20123\" class=\"wp-caption alignnone\" style=\"max-width: 800px\">\u003cimg loading=\"lazy\" decoding=\"async\" class=\"size-medium wp-image-20123\" src=\"https://cdn.kqed.org/wp-content/uploads/sites/40/2019/04/Leslie-Headshot-Smokey-copy-800x540.jpg\" alt=\"Host Leslie Sbrocco sipping wine\" width=\"800\" height=\"540\">\u003cfigcaption class=\"wp-caption-text\">Host Leslie Sbrocco sipping wine \u003ccite>(Courtesy of Leslie Sbrocco)\u003c/cite>\u003c/figcaption>\u003c/figure>\n\u003cp>My name is Leslie Sbrocco, and I’m the \u003ca href=\"http://ww2.kqed.org/checkplease/host-biography/\" target=\"_blank\" rel=\"noopener noreferrer\">host\u003c/a> of \u003cem>Check, Please! Bay Area\u003c/em>. Each week, I’ll share my tasting notes about the wine, beer and spirits the guests and I drank on set during the taping of the show.\u003c/p>\n\u003cp>\u003cimg loading=\"lazy\" decoding=\"async\" class=\"alignnone size-full wp-image-23733\" src=\"https://cdn.kqed.org/wp-content/uploads/sites/40/2026/02/2015_Wines.jpg\" alt=\"\" width=\"1590\" height=\"2048\" srcset=\"https://cdn.kqed.org/wp-content/uploads/sites/40/2026/02/2015_Wines.jpg 1590w, https://cdn.kqed.org/wp-content/uploads/sites/40/2026/02/2015_Wines-160x206.jpg 160w, https://cdn.kqed.org/wp-content/uploads/sites/40/2026/02/2015_Wines-768x989.jpg 768w, https://cdn.kqed.org/wp-content/uploads/sites/40/2026/02/2015_Wines-1193x1536.jpg 1193w\" sizes=\"auto, (max-width: 1590px) 100vw, 1590px\">\u003c/p>\n\u003cp>[ad fullwidth]\u003c/p>\n\u003cp>\u003ca href=\"https://www.auteurwines.com/\">\u003cspan style=\"color: #339966\">\u003cstrong>Auteur 2023 Chardonnay, Bacigalupi Vineyard\u003c/strong>\u003c/span>\u003c/a>\u003cbr>\n\u003cem>Russian River Valley, California, $65\u003c/em>\u003cbr>\nWhen it comes to ranking California’s top Chardonnay bottlings, a serious contender for the title is from a winery you may not know. Named Auteur, its tagline reads, “Wine that refuses to behave. Between the Russian River and the redwoods, we follow the land. When the fog rolls sideways and the vines rebel, we don’t fight it. We bottle it.” Owners Kenneth and Laura Juhasz have opened a stunning property in Sonoma’s Russian River area, and its wines match the rugged elegance of the property and the vines.\u003c/p>\n\u003cp>This Chardonnay from the famed Bacigalupi Vineyard is intensely aromatic, with layers of ripe apples and citrus fruit interlaced with a touch of toasty oak. Using wild yeast to ferment the juice, the final wine expresses a lush texture balanced by pleasantly piercing vibrancy. This brightness comes from the lack of malolactic fermentation, which can lend an overwhelming buttery character to whites. This stylish Chardonnay is for lovers of freshness and complexity.\u003c/p>\n\u003cp>\u003ca href=\"https://www.lavalentina.it/en/prodotto/cerasuolo-doc/\">\u003cspan style=\"color: #339966\">\u003cstrong>La Valentina 2024 Cerasuolo d’Abruzzo D.O.C.\u003c/strong>\u003c/span>\u003c/a>\u003cbr>\n\u003cem>Abruzzo, Italy, $15\u003c/em>\u003cbr>\nThis pretty-in-pink wine is a treasure to discover and a pleasure to drink. It’s a deeply garnet-hued rosé crafted from 100% Montepulciano red grapes from the Abruzzo region of Italy. Cerasuolo d’Abruzzo is one of my favorite pink styles, due partially to its long skin-contact time, which gives it a deeper color and more intensity and depth than other rosés. Aged in stainless steel tanks to maintain its zesty freshness, this wine overflows with succulent notes of cherry and red berries, complemented by a kiss of savoriness. It’s a full-bodied, affordable pink that delivers joy sipping poolside or tableside.\u003c/p>\n\u003cp>\u003ca href=\"https://www.groundedwineco.com/\">\u003cspan style=\"color: #339966\">\u003cstrong>GROUNDED by Josh Phelps 2023 Cabernet Sauvignon\u003c/strong>\u003c/span>\u003c/a>\u003cbr>\n\u003cem>California, $18\u003c/em>\u003cbr>\nIt’s rare to find a complex yet approachable California Cabernet for less than $20, but this is it. Grounded Wine Co., founded by Napa native Josh Phelps, offers a roster of well-made and well-priced wines from both California and Washington. Josh wanted to build a personal brand that expressed his experiences growing up in wine country, but with a modern twist. GROUNDED wines are made from top-notch vineyards, with a focus on sustainability and affordability. Loaded with fruit-driven flavors of dark berries and spice, this Cabernet Sauvignon is easy to drink. It kicks up the Cab’s quaffability quotient with a juicy, lush texture but keeps a touch of tannic grip for structure and balance. A wine to buy by the case for all occasions.\u003c/p>\n\u003ch2>Episode Transcript\u003c/h2>\n\u003cp class=\"p1\">\u003cb>Sbrocco:\u003c/b> Rustic breakfast delights in Danville.\u003c/p>\n\u003cp class=\"p1\">\u003cb>Asmus:\u003c/b> I wasn’t sure what to expect, but it totally blew me out of the water.\u003c/p>\n\u003cp class=\"p1\">\u003cb>Sbrocco:\u003c/b> Tacos with a twist in Oakland.\u003c/p>\n\u003cp class=\"p1\">\u003cb>Patel:\u003c/b> It’s just like amazing flavor combinations.\u003c/p>\n\u003cp class=\"p1\">\u003cb>Sbrocco:\u003c/b> And traditional East African cuisine in San Francisco.\u003c/p>\n\u003cp class=\"p1\">\u003cb>Cabezas:\u003c/b> The sauce that came with it was like amazing.\u003c/p>\n\u003cp class=\"p1\">\u003cb>Sbrocco:\u003c/b> Just ahead on “Check, Please! Bay Area.”\u003c/p>\n\u003cp class=\"p1\">\u003cb>Phillips:\u003c/b> Oh, my God! That is so good.\u003c/p>\n\u003cp class=\"p1\">\u003cb>Rodriguez:\u003c/b> That’s really good.\u003c/p>\n\u003cp class=\"p2\">♪♪\u003c/p>\n\u003cp class=\"p1\">\u003cb>Sbrocco:\u003c/b> Hi, I’m Leslie Sbrocco. Welcome to “Check, Please! Bay Area,” the show where Bay Area residents review and talk about their favorite restaurants. Now, we have three guests, and each one recommends one of their favorite spots and the other two go check them out to see what they think. Joining me at the “Check, Please!” table today are nonprofit manager Cathy Asmus, social worker Erin Cabezas, and software engineer Anand Patel. Welcome, everyone. Are you ready for a good time?\u003c/p>\n\u003cp class=\"p1\">\u003cb>Patel:\u003c/b> Yeah. Let’s go.\u003c/p>\n\u003cp class=\"p1\">\u003cb>Sbrocco:\u003c/b> Erin’s rustic breakfast spot truly invites you to slow down and savor the moment. Tucked inside a cozy house decorated with a hodgepodge of farmhouse tables and chairs, it feels more like you’re spending Sunday morning at grandma’s than at a restaurant. Located in Danville, it’s Sideboard.\u003c/p>\n\u003cp class=\"p2\">♪♪\u003c/p>\n\u003cp class=\"p1\">\u003cb>Andrews:\u003c/b> Sideboard is community and neighborhood. When we open the doors, it’s like one big party. When I was little, my grandmother used to have parties, and when she put all the food out, she put it on the sideboard. I said, “Grandma, why do you put it on the sideboard?” She says, “Because it makes everybody get up and talk to each other.” During the weekdays, our breakfast is straightforward simple.\u003c/p>\n\u003cp class=\"p1\">\u003cb>Man:\u003c/b> We have the avocado toast.\u003c/p>\n\u003cp class=\"p1\">\u003cb>Andrews:\u003c/b> The flavors, I think, are really unique and honest.\u003c/p>\n\u003cp class=\"p1\">\u003cb>Man:\u003c/b> Ceviche salad.\u003c/p>\n\u003cp class=\"p1\">\u003cb>Andrews:\u003c/b> Every ingredient is fresh. We make everything from scratch. I mean, the pastries are off the hook.\u003c/p>\n\u003cp class=\"p1\">\u003cb>Woman:\u003c/b> Oh, my gosh.\u003c/p>\n\u003cp class=\"p1\">\u003cb>Andrews:\u003c/b> On the weekends is where we kind of shine. We do like three different kinds of Benedicts. Most people would use a fork and a knife for this, I suppose, but I don’t have to. Now, that’s the way to do it. Mm. Our English muffins — Not a lot of places make them. And I think they’re exquisite. Our fried chicken is amazing. We use a pressure fryer, which is really different. It’s not oily, it’s juicy.\u003c/p>\n\u003cp class=\"p1\">\u003cb>Woman:\u003c/b> Oh, my goodness. I’m ready to dive in.\u003c/p>\n\u003cp class=\"p1\">\u003cb>Andrews:\u003c/b> When you get a bucket of chicken, we also have a little envelope in there that has the wishbone. No cheating. You got to hold it at the bottom, you guys. At the — Oh! Well, you win.\u003c/p>\n\u003cp class=\"p1\">[ Laughs ]\u003c/p>\n\u003cp class=\"p1\">One of my favorite things is when people order, you know, their burger, and they’ll get a piece of cake and they’ll sit there and eat their cake first. And I’m like, “It’s so great to be an adult, isn’t it? You can eat your cake first.”\u003c/p>\n\u003cp class=\"p1\">\u003cb>Man:\u003c/b> The best.\u003c/p>\n\u003cp class=\"p1\">\u003cb>Andrews:\u003c/b> The vibe is cozy, comfortable. How I feel when I walk in the door is home, and I think a lot of other people feel that way too. It’s just a warm, fun, odd little place.\u003c/p>\n\u003cp class=\"p1\">\u003cb>Man:\u003c/b> Yay!\u003c/p>\n\u003cp class=\"p1\">\u003cb>Andrews:\u003c/b> Yay, Sideboard!\u003c/p>\n\u003cp class=\"p1\">\u003cb>Sbrocco:\u003c/b> So, Erin, how did this become one of your favorite spots?\u003c/p>\n\u003cp class=\"p1\">\u003cb>Cabezas:\u003c/b> We discovered Sideboard about nine years ago, right around when my first son was born. And we have been going ever since. I am a vegetarian. The rest of my family is not. So there is a huge selection of vegetarian and vegan options and gluten-free because sometimes I play with that also. My current obsession is their breakfast pudding.\u003c/p>\n\u003cp class=\"p1\">\u003cb>Sbrocco:\u003c/b> Okay. Breakfast pudding?\u003c/p>\n\u003cp class=\"p1\">\u003cb>Cabezas:\u003c/b> Yes. And it’s not a pudding from what you would think of. It’s not a dessert at all. It’s an egg dish with eggs and cream and cheese with seasonal vegetables in it. It does come with a side salad with some goat cheese and tomatoes and a balsamic dressing. It’s absolutely amazing.\u003c/p>\n\u003cp class=\"p1\">\u003cb>Asmus:\u003c/b> I also had the breakfast pudding and I wasn’t sure what to expect. I was thinking maybe like a bread pudding or something like that, but it was really incredible. Like the most fluffy texture. So light and airy somehow, but also, like, sweet and savory and dense. I don’t know how to explain it. I wasn’t sure what to expect, but it totally blew me out of the water. I also got the vegan breakfast bowl. All that’s visible when it first arrives is this mountain of savory ingredients like scrambled tofu and beans and tortilla chip shreds. And then underneath is a base of oatmeal. And I thought, “This is so strange.” But after eating it, it was — It worked.\u003c/p>\n\u003cp class=\"p1\">\u003cb>Sbrocco:\u003c/b> And, Anand, what did you get?\u003c/p>\n\u003cp class=\"p1\">\u003cb>Patel:\u003c/b> I got the shirred eggs. Basically like baked eggs, but they come out in ham cups, so I don’t know what feat of engineering they pulled off, but they made ham into like little cups where they put the eggs inside of and the eggs were like perfectly cooked. It was the perfect flavor of smoky and that was like half the plate. The other half the plate was greens. So, like, you know, you didn’t feel guilty eating both of those cups because there was two of them. Really, really good, I enjoyed it.\u003c/p>\n\u003cp class=\"p1\">\u003cb>Asmus:\u003c/b> My mom had the breakfast burger, which was surprisingly huge, taking up almost the entire plate with like a rim of fries on the outside edge, and it had a big egg on top. And so you could like really — When you kind of pick it up and get in there, the egg kind of like cascades over the patty. So it’s a pretty scrumptious burger.\u003c/p>\n\u003cp class=\"p1\">\u003cb>Sbrocco:\u003c/b> Did you try a fry?\u003c/p>\n\u003cp class=\"p1\">\u003cb>Asmus:\u003c/b> Yeah.\u003c/p>\n\u003cp class=\"p1\">[ Laughter ]\u003c/p>\n\u003cp class=\"p1\">They had a great aioli sauce on the side, so I was just dipping it in there.\u003c/p>\n\u003cp class=\"p1\">\u003cb>Cabezas:\u003c/b> That aioli also comes with their Brussels sprouts that are crisped perfectly and very light and charred and just delicious. One of our go-to orders.\u003c/p>\n\u003cp class=\"p1\">\u003cb>Sbrocco:\u003c/b> Any other dishes you want to talk about?\u003c/p>\n\u003cp class=\"p1\">\u003cb>Cabezas:\u003c/b> They have an amazing case of baked goods that is like — right when you order, it’s staring at you, so you have to get at least a couple of items. I’m a fan of their ginger molasses cookie. It’s large. I mean, it’s bigger than your palm and it’s soft and it has chunks of ginger in it. It’s just amazing. The outrageous brownie has almost a mocha taste to it. It’s very rich in flavor, but not overpowering. I mean, you can absolutely eat the whole thing.\u003c/p>\n\u003cp class=\"p1\">\u003cb>Sbrocco:\u003c/b> I was going to say, do you share any of those? Because I’m not so sure I would share that first one.\u003c/p>\n\u003cp class=\"p1\">\u003cb>Cabezas:\u003c/b> Yes.\u003c/p>\n\u003cp class=\"p1\">\u003cb>Sbrocco:\u003c/b> Did you get any baked goods?\u003c/p>\n\u003cp class=\"p1\">\u003cb>Patel:\u003c/b> I actually did get one muffin. I think it was like cinnamon flavored and yeah, it was — It was really delicious.\u003c/p>\n\u003cp class=\"p1\">\u003cb>Sbrocco:\u003c/b> Did you share it?\u003c/p>\n\u003cp class=\"p1\">\u003cb>Patel:\u003c/b> No, actually. I actually accidentally ate the whole thing. And my wife was like, “You didn’t save a bite for me.”\u003c/p>\n\u003cp class=\"p1\">\u003cb>Sbrocco:\u003c/b> Totally accidentally ate the whole thing. Totally.\u003c/p>\n\u003cp class=\"p1\">\u003cb>Asmus:\u003c/b> Yeah, the baked-good case was overwhelming. I didn’t know what to pick. So we got the lemon lavender teacake. It was so fluffy and you could just tell it was baked fresh. We also got the chocolate chip cookie, and then they had a ton of cakes in the refrigerated case that I just — It was like there was not enough room in my stomach to try it all. But I would love to go back and, like, try all of it.\u003c/p>\n\u003cp class=\"p1\">\u003cb>Cabezas:\u003c/b> And then they have a delicious peach sangria. Again, the flavor changes based on the season.\u003c/p>\n\u003cp class=\"p1\">\u003cb>Sbrocco:\u003c/b> And they have wine on tap.\u003c/p>\n\u003cp class=\"p1\">\u003cb>Cabezas:\u003c/b> They have wine, they have beer, they have amazing coffee also.\u003c/p>\n\u003cp class=\"p1\">\u003cb>Patel:\u003c/b> I love their coffee. It was really good.\u003c/p>\n\u003cp class=\"p1\">\u003cb>Sbrocco:\u003c/b> And what about service?\u003c/p>\n\u003cp class=\"p1\">\u003cb>Patel:\u003c/b> I thought service was really nice. You know, it’s one of those places where you go to the counter to order your food and they bring it out to you. So that was cool. They have their, like, cutlery inside of like a dresser, which is like, you know, basically like you go into your grandma’s house.\u003c/p>\n\u003cp class=\"p1\">\u003cb>Cabezas:\u003c/b> And it’s not a cabinet. It’s a sideboard.\u003c/p>\n\u003cp class=\"p1\">\u003cb>Patel:\u003c/b> Oh a side– Oh, okay! Now it all makes sense. Now it all makes sense.\u003c/p>\n\u003cp class=\"p1\">\u003cb>Sbrocco:\u003c/b> Alright. If you would like to go to Sideboard, it’s located on Railroad Avenue in Danville, and the average multi-course tab per person without drinks is around $30. Anand’s up next with his pick. Part street food stand, part art installation, it’s a colorful spot that’s turning heads and taste buds with creative takes on tacos. Located in Oakland’s Temescal neighborhood, it’s Tacos Oscar.\u003c/p>\n\u003cp class=\"p1\">\u003cb>Michel:\u003c/b> Tacos Oscar is a neighborhood taqueria where you can come and laugh with your friends and feel like you’re somewhere else for a minute. I played music for many, many years and traveled all over the world. I would just get to taste different things in different places, and that’s when my love for food started. My business partner, Jake, and I were both in bands for a long time before we started doing the pop-up. It was very familiar to us loading a bunch of stuff into a vehicle, driving to the location, setting up and then performing. In our case, it was making food and our set list was our menu. There’s something about like a freshly hand-pressed thick tortilla that is just amazing to the palate. We’ve been sourcing our masa from La Finca in East Oakland. They mill it and grind it and so it comes ready to roll. It’s just corn, water, lime, mineral salt. That’s it. My inspiration originally was just doing, like, fried egg tacos and whatever we could make and put on a tortilla. The charred broccoli was a total mistake that turned into probably our most popular taco. I burned broccoli one day at a barbecue, and I still served it because I thought it, you know, had an interesting flavor with the charry-ness. I was working on, like, a peanut salsa, and I kind of just plated it for some friends. And everybody was like, “This is actually, like, a really crazy combination,” and we put it on the menu. It’s been on ever since. I want a table of people who have widely different diets to all be able to sit down together and have a meal together. We have a lot of vegan stuff on the menu. It’s mostly gluten-free. There’s a little bit of something for everyone. One of the most important things is serving our community and giving back. Some portion of your money spent goes to help feed our houseless neighbors. I will come in sometimes, and the first thing I hear when I’m approaching the restaurant is laughter and people talking and catching up, sharing stories. That’s what it’s all about. To have a space where people can, like, loosen up, but their plates are empty when they’re done.\u003c/p>\n\u003cp class=\"p1\">\u003cb>Sbrocco:\u003c/b> Alright, Anand, this is not an easy spot to find. How did you discover it?\u003c/p>\n\u003cp class=\"p1\">\u003cb>Patel:\u003c/b> Yeah. So it was serendipitous. Driving, we always see this line between these two buildings. Like, there’s nothing in between these two buildings. So one day we just decided, “Hey, let’s wait in line and see where see where this goes,” and turned out to be a taco spot, which was delicious. It was like one of the best decisions I made standing in that line.\u003c/p>\n\u003cp class=\"p1\">\u003cb>Sbrocco:\u003c/b> Because it could have been a sex shop.\u003c/p>\n\u003cp class=\"p1\">\u003cb>Patel:\u003c/b> Yeah, that’s true, that’s true. Could have been anything. Usually when we start, we get the chips and salsa.\u003c/p>\n\u003cp class=\"p1\">\u003cb>Sbrocco:\u003c/b> Okay.\u003c/p>\n\u003cp class=\"p1\">\u003cb>Patel:\u003c/b> It’s not your typical salsa. They have this really nice burnt orange colored sauce. It has savory, a little bit of smoky and not too much spice, just like the right amount. And the tortilla chips are crispy and homemade. I couldn’t find a chip that was, like, overdone or anything. They were all great. A great way to start the taco feast.\u003c/p>\n\u003cp class=\"p1\">\u003cb>Sbrocco:\u003c/b> Do you have a go-to taco or tacos? My favorite is the broccoli taco. It has broccoli, some peanut sauce, a little bit of pickled onions, and some cilantro. It’s just like amazing flavor combinations. A little bit of Thai flavor with the peanut. That’s like one of my favorites.\u003c/p>\n\u003cp class=\"p1\">\u003cb>Asmus:\u003c/b> I really loved the taco de papa with the potatoes and it was like home fries style, so they were dry and just delicious crispy. It had this like savory salsa on top and just on top of the most delicious tortilla I’ve ever had in my life.\u003c/p>\n\u003cp class=\"p1\">\u003cb>Sbrocco:\u003c/b> I think that is their signature their tortillas. What about you?\u003c/p>\n\u003cp class=\"p1\">\u003cb>Cabezas:\u003c/b> So, we got one of everything on the menu because I’m the vegetarian, and then everybody else is not, so.\u003c/p>\n\u003cp class=\"p1\">\u003cb>Patel:\u003c/b> And they have tons of veggie options.\u003c/p>\n\u003cp class=\"p1\">\u003cb>Cabezas:\u003c/b> They do. They do. There’s a really wide selection. I didn’t really know what to expect as far as flavor profiles. And so it’s definitely not your traditional taqueria.\u003c/p>\n\u003cp class=\"p1\">\u003cb>Patel:\u003c/b> Yeah.\u003c/p>\n\u003cp class=\"p1\">\u003cb>Cabezas:\u003c/b> And out of them, you know, the broccoli did have that Thai flavor. That’s what I would describe it as also.\u003c/p>\n\u003cp class=\"p1\">\u003cb>Sbrocco:\u003c/b> Any other kind of taco?\u003c/p>\n\u003cp class=\"p1\">\u003cb>Cabezas:\u003c/b> So I had a sweet potato taco. I think it’s the taco de camote. It wasn’t my favorite. The one that I had was really dripping in oil, to the point I actually ended up with oil all over my chin, and nobody told me.\u003c/p>\n\u003cp class=\"p1\">\u003cb>Sbrocco:\u003c/b> Kids think it’s funny. Right?\u003c/p>\n\u003cp class=\"p1\">\u003cb>Patel:\u003c/b> That’s surprising because that was my favorite part. Like, you pick it up, the oily goodness is dripping out, and it’s like, that’s where all the flavor was for me.\u003c/p>\n\u003cp class=\"p1\">\u003cb>Sbrocco:\u003c/b> Mm-hmm.\u003c/p>\n\u003cp class=\"p1\">\u003cb>Cabezas:\u003c/b> Both of my boys really liked the meat ones. I believe it was the barbacoa one until it started getting a little spicy for my younger one. But they definitely enjoyed.\u003c/p>\n\u003cp class=\"p1\">\u003cb>Sbrocco:\u003c/b> They enjoyed it?\u003c/p>\n\u003cp class=\"p1\">\u003cb>Cabezas:\u003c/b> Yes.\u003c/p>\n\u003cp class=\"p1\">\u003cb>Sbrocco:\u003c/b> Okay.\u003c/p>\n\u003cp class=\"p1\">\u003cb>Patel:\u003c/b> So, I’ve gotten the tostada, which is like a mountain of greens on this big tostada, a bunch of nuts and seeds on top. It is hard to eat. Like, you’re, like, there. It’s like falling off, but I go in. I just start digging up everything. So I also had the taco de hongos. It had like three mushrooms on it. They were cooked to perfection. I think they had tomatillo sauce on it, which is like a nice green sauce. And the way they cooked it, it just — the flavors went good together. The mushrooms were perfectly — They had a bite to them as you ate to it and it was like really delicious.\u003c/p>\n\u003cp class=\"p1\">\u003cb>Sbrocco:\u003c/b> What about you, Cathy? Anything else?\u003c/p>\n\u003cp class=\"p1\">\u003cb>Asmus:\u003c/b> Yeah, I got the ham and egg taco, which was also really good and generous portions, I will say, across all the tacos that we got. I’m a huge spice fan, and so I wish there was a salsa I could put on top that would kick it up a notch in the heat department, but otherwise it was really delicious. My friend also got the bean and cheese taco, which was gorgeous. I think they make the beans there. They were so smooth. The best refried beans ever.\u003c/p>\n\u003cp class=\"p1\">\u003cb>Sbrocco:\u003c/b> Ooh!\u003c/p>\n\u003cp class=\"p1\">\u003cb>Asmus:\u003c/b> Yeah, beans and cheese. And you’d think, you know, it’s basic, but it’s so good.\u003c/p>\n\u003cp class=\"p1\">\u003cb>Cabezas:\u003c/b> You must have gone for breakfast because those options were not — Like, a bean and cheese wasn’t available when we were there.\u003c/p>\n\u003cp class=\"p1\">\u003cb>Asmus:\u003c/b> Oh, it was a Sunday at like noon.\u003c/p>\n\u003cp class=\"p1\">\u003cb>Patel:\u003c/b> The brunch menu.\u003c/p>\n\u003cp class=\"p1\">\u003cb>Cabezas:\u003c/b> Okay, yes.\u003c/p>\n\u003cp class=\"p1\">\u003cb>Sbrocco:\u003c/b> They have a brunch menu? So there’s a hidden pro tip right there.\u003c/p>\n\u003cp class=\"p1\">\u003cb>Patel:\u003c/b> Oh, yeah. That’s true.\u003c/p>\n\u003cp class=\"p1\">\u003cb>Sbrocco:\u003c/b> Yeah. Okay. Would you go back to it?\u003c/p>\n\u003cp class=\"p1\">\u003cb>Asmus:\u003c/b> Absolutely. Yeah. Just for the tortillas.\u003c/p>\n\u003cp class=\"p1\">\u003cb>Sbrocco:\u003c/b> Just for the tortillas alone. They’re so good. How about you? Would you go back?\u003c/p>\n\u003cp class=\"p1\">\u003cb>Cabezas:\u003c/b> I don’t know that I would, but my husband might if he was in the area. They are very friendly to dogs, which is important, and kids. Another pro tip is you have to sit in the back because the tables in the front, the slats are so small that we lost three drinks. They kept knocking over. And so then we relocated and they brought us new drinks without even being asked.\u003c/p>\n\u003cp class=\"p1\">\u003cb>Sbrocco:\u003c/b> Service was attentive.\u003c/p>\n\u003cp class=\"p1\">\u003cb>Cabezas:\u003c/b> They were. Yes. They were very kind about all of that.\u003c/p>\n\u003cp class=\"p1\">\u003cb>Sbrocco:\u003c/b> Alright.\u003c/p>\n\u003cp class=\"p1\">\u003cb>Cabezas:\u003c/b> Yes.\u003c/p>\n\u003cp class=\"p1\">\u003cb>Sbrocco:\u003c/b> If you would like to try Tacos Oscar, it’s located on 40th Street in Oakland, and the average multi-course tab per person without drinks is around $25. Cathy’s neighborhood go-to takes her on a flavor-packed journey through the Horn of Africa every time she steps through the doors. A staple in San Francisco’s Sunset District for more than 25 years, it’s New Eritrea restaurant.\u003c/p>\n\u003cp class=\"p2\">♪♪\u003c/p>\n\u003cp class=\"p1\">\u003cb>Manna:\u003c/b> When you dine in at New Eritrea restaurant, you dine with your senses.\u003c/p>\n\u003cp class=\"p1\">\u003cb>Woman:\u003c/b> Is this spicy?\u003c/p>\n\u003cp class=\"p1\">\u003cb>Man:\u003c/b> That’s got a little kick on it, yeah.\u003c/p>\n\u003cp class=\"p1\">\u003cb>Manna:\u003c/b> And the end of the day, you never forget the experience.\u003c/p>\n\u003cp class=\"p1\">\u003cb>Man:\u003c/b> It’s fire, it’s fire.\u003c/p>\n\u003cp class=\"p1\">\u003cb>Manna:\u003c/b> My older brother started the business, and my mom and my aunties and my sister were cooking, so very much I grew up here working with my family, and this is our passion.\u003c/p>\n\u003cp class=\"p1\">[ Bell rings ]\u003c/p>\n\u003cp class=\"p1\">Eritrean food is similar with Ethiopian food. We use the same spices we call berbere. Basically, it’s the kind of jalapeños family and there’s reddish colors. We add a lot of ingredients like ginger, garlic. You ground, you crush them together to make berbere. Everything is fresh. We have so many Vegetables. Split peas, chickpea, collard greens, okra. Tumtumo is made from red lentils. We stir them. We cook them slowly on the fire with spices, garlic, ginger. It’s very delicious. Gored gored is one of the most tender beef. We marinate it with spices and clarified butter. It melts in your mouth. Injera is bread made of teff, which is a grain from East Africa. You can see that the bubble is coming out right now, so we’re going to cover it for a few minutes. We make injera around like 600 to 700 injeras every day. So you can see that one. Okay. When you dine in here, use your hands. Especially in our culture we use our right hand. Our food is meant to share with friends and family. When you eat together, it’s kind of fun. You make a little messy, but this is part of the culture.\u003c/p>\n\u003cp class=\"p1\">\u003cb>Child:\u003c/b> New Eritrea is the best restaurant. Child #2: The best restaurant on Earth.\u003c/p>\n\u003cp class=\"p1\">\u003cb>Manna:\u003c/b> People in the kitchen, they are the backbone of the restaurant. We’ve been working together with them for years. Also, I have a big family, so everybody helping out here. We’ve been here so far 27 years. We have many, many customers. They’ve been here. We know them for a long time.\u003c/p>\n\u003cp class=\"p1\">\u003cb>Woman:\u003c/b> I love it. Yeah. We eat it every single Friday night.\u003c/p>\n\u003cp class=\"p1\">\u003cb>Manna:\u003c/b> When you see people enjoy the food, experience different kind of experience, and leaving happy, that does make me really happy.\u003c/p>\n\u003cp class=\"p1\">\u003cb>Sbrocco:\u003c/b> You know, Cathy, what’s amazing about this restaurant is it’s been in the city for years, which is pretty legendary.\u003c/p>\n\u003cp class=\"p1\">\u003cb>Asmus:\u003c/b> Yeah, I’ve been to every Eritrean and Ethiopian restaurant in the San Francisco area. It’s my favorite cuisine and they just knock it out of the park. I don’t know what they’re doing. It’s magic. It’s my favorite place.\u003c/p>\n\u003cp class=\"p1\">\u003cb>Sbrocco:\u003c/b> What is your first order, let’s say, when you go?\u003c/p>\n\u003cp class=\"p1\">\u003cb>Asmus:\u003c/b> Yeah. So I’m there basically every other week.\u003c/p>\n\u003cp class=\"p1\">\u003cb>Cabezas:\u003c/b> What?\u003c/p>\n\u003cp class=\"p1\">\u003cb>Asmus:\u003c/b> And I always —\u003c/p>\n\u003cp class=\"p1\">\u003cb>Sbrocco:\u003c/b> “Here she is again.”\u003c/p>\n\u003cp class=\"p1\">[ Laughter ]\u003c/p>\n\u003cp class=\"p1\">\u003cb>Asmus:\u003c/b> And I always get their vegetarian combo platter which has kind of a great selection of their vegetarian dishes. They bring it out to you on this beautiful circle platter on top of a injera piece of bread on the bottom of the plate that’s like soaking up all of the goodness while you’re eating. And so it’s like kind of the treat that you save for last. Their spicy lentil dish that comes in The vegetarian combo platter is just so good. The split pea, the lighter yellow dish, is like almost its counterpart. It’s like sweet and savory, spicy.\u003c/p>\n\u003cp class=\"p1\">\u003cb>Cabezas:\u003c/b> So we did the exact same. There was a chickpea dish, and then there was a potato that was almost like a curry. So it was potato and carrots. And then a collard green was amazing. And, like, just so comforting. And then we got some yogurt on the side to add a little dollop. It was all so good. All of them were amazing, and it was really nice to have all of the tastes because you didn’t need to commit to anything.\u003c/p>\n\u003cp class=\"p1\">\u003cb>Sbrocco:\u003c/b> You’ve been shaking your head a lot. Did you like it?\u003c/p>\n\u003cp class=\"p1\">\u003cb>Patel:\u003c/b> I loved it.\u003c/p>\n\u003cp class=\"p1\">\u003cb>Sbrocco:\u003c/b> You loved it?\u003c/p>\n\u003cp class=\"p1\">\u003cb>Patel:\u003c/b> Yeah.\u003c/p>\n\u003cp class=\"p1\">\u003cb>Sbrocco:\u003c/b> Okay.\u003c/p>\n\u003cp class=\"p1\">\u003cb>Patel:\u003c/b> It was really good.\u003c/p>\n\u003cp class=\"p1\">\u003cb>Sbrocco:\u003c/b> Tell me what you had.\u003c/p>\n\u003cp class=\"p1\">\u003cb>Patel:\u003c/b> The only thing I had different was I subbed one of those in for a mushroom dish.\u003c/p>\n\u003cp class=\"p1\">\u003cb>Sbrocco:\u003c/b> Okay.\u003c/p>\n\u003cp class=\"p1\">\u003cb>Patel:\u003c/b> Because I love mushrooms.\u003c/p>\n\u003cp class=\"p1\">\u003cb>Sbrocco:\u003c/b> Yeah.\u003c/p>\n\u003cp class=\"p1\">\u003cb>Patel:\u003c/b> You know, that kind of food is actually very similar to Indian food, which is kind of my own native food. They use the same spices. So it was, like, very comforting. All the dishes reminded me of home. Just the act of, like, tearing the injera bread, picking what you want.\u003c/p>\n\u003cp class=\"p1\">\u003cb>Asmus:\u003c/b> I cannot give enough praise to their injera bread. It’s just so perfect. It’s the perfect thickness, the perfect tartness, the perfect softness. And they’re very generous with it. One piece usually comes with your platter meal, and they’ll keep it coming.\u003c/p>\n\u003cp class=\"p1\">\u003cb>Cabezas:\u003c/b> And the platter was half the size of this table. There were seven of us. We only ordered a vegetarian platter for three plus then two meat options. Gored gored beef and then New Eritrea special that had chicken and mushrooms in it. They loved them. My brother-in-law is a big meat eater though, and he said he could have gone without the meat. He loved the vegetarian option so much.\u003c/p>\n\u003cp class=\"p1\">\u003cb>Sbrocco:\u003c/b> He loved the vegetarian option?\u003c/p>\n\u003cp class=\"p1\">\u003cb>Cabezas:\u003c/b> So it was all devoured and we were all very satisfied when we left.\u003c/p>\n\u003cp class=\"p1\">\u003cb>Asmus:\u003c/b> Another thing I love to get there are the sambusas. They have both meat and vegetarian options. The wrapper is crispy and then the inside is smooth. And there’s a lentil option which I always get. And then they also have a mixed vegetable option, which has all kinds of vegetables inside — Lima beans, corn, peas — and it’s so fresh. It’s not like you’re, you know, frozen mixed vegetable stuff.\u003c/p>\n\u003cp class=\"p1\">\u003cb>Cabezas:\u003c/b> The sauce that came with it was, like, amazing. It was almost like a harissa, paprika. It was — I mean, it was spicy, but you had to keep going back for more.\u003c/p>\n\u003cp class=\"p1\">\u003cb>Sbrocco:\u003c/b> So talk a little bit about the place itself.\u003c/p>\n\u003cp class=\"p1\">\u003cb>Asmus:\u003c/b> It is so comfortable. It’s so lived in. It feels like you’re almost in like a family’s living room. The service is so generous and gracious. I think every time I’ve been there, they’re always hosting this huge event in their little space in the back. And despite it being completely full to capacity, they’ll always come and check on you. Like, “Do you have enough injera bread?” Like, everything is taken care of. And so yeah, service is amazing. And I really like the wrap-around, like, cozy bar. It’s almost like the set of “Cheers” or something.\u003c/p>\n\u003cp class=\"p1\">\u003cb>Cabezas:\u003c/b> Yeah, yes.\u003c/p>\n\u003cp class=\"p1\">[ Laughter ]\u003c/p>\n\u003cp class=\"p1\">\u003cb>Sbrocco:\u003c/b> And what about value? What do you think about the price?\u003c/p>\n\u003cp class=\"p1\">\u003cb>Patel:\u003c/b> Oh, I think it was definitely worth it. You get so much food and, like, pretty much unlimited injera coming through. Definitely worth it.\u003c/p>\n\u003cp class=\"p1\">\u003cb>Sbrocco:\u003c/b> Yeah?\u003c/p>\n\u003cp class=\"p1\">\u003cb>Asmus:\u003c/b> Yeah. Affordable enough to go twice or more a month.\u003c/p>\n\u003cp class=\"p1\">[ Laughter ]\u003c/p>\n\u003cp class=\"p1\">\u003cb>Sbrocco:\u003c/b> Alright. If you would like to try New Eritrea, it’s located on Irving Street in San Francisco, and the average multi-course tab per person without drinks is around $30. And now reporter Cecilia Phillips has more Bay Area bites you’ve just got to try. She’s sampling a world of Latin treats and beats at San Jose’s G Spot Happy Tastebuds.\u003c/p>\n\u003cp class=\"p2\">♪♪\u003c/p>\n\u003cp class=\"p1\">\u003cb>Phillips:\u003c/b> G Spot Happy Tastebuds. What does that mean?\u003c/p>\n\u003cp class=\"p1\">\u003cb>Gonzalez:\u003c/b> It’s fun. It’s a play on words. My last name is Gonzalez, so I named it — It was the Gonzalez Spot — G Spot. But since it has the food trucks and all kinds of things that people can come and enjoy, your taste buds are happy.\u003c/p>\n\u003cp class=\"p2\">♪♪\u003c/p>\n\u003cp class=\"p1\">\u003cb>Phillips:\u003c/b> What kind of food can people find at the G Spot Happy Tastebuds?\u003c/p>\n\u003cp class=\"p1\">\u003cb>Gonzalez:\u003c/b> Oh, wow. You can find all kinds of food. Mexican from different states — Veracruz, Michoacán, Jalisco. And then there’s also Colombian. There’s Guatemalan, Venezuelan. There’s so many trucks that it’s impossible almost to just come in and stick to one.\u003c/p>\n\u003cp class=\"p1\">\u003cb>Phillips:\u003c/b> Sounds great. I can’t wait to try it.\u003c/p>\n\u003cp class=\"p1\">[ Singing in Spanish ]\u003c/p>\n\u003cp class=\"p1\">So why do you call your business Birria El Vaquerito?\u003c/p>\n\u003cp class=\"p1\">\u003cb>Rodriguez:\u003c/b> Because my son is like a little cowboy.\u003c/p>\n\u003cp class=\"p1\">\u003cb>Phillips:\u003c/b> What do you have here? What is this called?\u003c/p>\n\u003cp class=\"p1\">\u003cb>Rodriguez:\u003c/b> Birria Hot Cheetos Bomb. It’s like a mixed birria, onion, cilantro, and rice and cheese.\u003c/p>\n\u003cp class=\"p1\">\u003cb>Phillips:\u003c/b> And what’s on the outside?\u003c/p>\n\u003cp class=\"p1\">\u003cb>Rodriguez:\u003c/b> The Hot Cheeto.\u003c/p>\n\u003cp class=\"p1\">\u003cb>Phillips:\u003c/b> And then the little balls, they’re smiling.\u003c/p>\n\u003cp class=\"p1\">\u003cb>Rodriguez:\u003c/b> [ Laughs ] Yeah.\u003c/p>\n\u003cp class=\"p1\">\u003cb>Phillips:\u003c/b> [ Gasps ] Oh, my gosh! Open it up, dip it in the consommé, and just take a bite. Yeah.\u003c/p>\n\u003cp class=\"p1\">[ Speaking Spanish ]\u003c/p>\n\u003cp class=\"p1\">Oh, my God! That is so good.\u003c/p>\n\u003cp class=\"p1\">\u003cb>Rodriguez:\u003c/b> That’s really good.\u003c/p>\n\u003cp class=\"p2\">♪♪\u003c/p>\n\u003cp class=\"p2\">♪♪\u003c/p>\n\u003cp class=\"p1\">\u003cb>Lopez:\u003c/b> It’s called Shaddai. It means “God almighty.” And we serve Guatemalan cuisine.\u003c/p>\n\u003cp class=\"p1\">\u003cb>Phillips:\u003c/b> Guatemalan food — Very different from anything I’ve ever had. You have a very special dish here.\u003c/p>\n\u003cp class=\"p1\">\u003cb>Lopez:\u003c/b> Yes, it’s the garnachas. It comes with eight small handmade tortillas and pork meat. We cook it, we shred it, and then we add salsa. We add dried cheese and then our escabeche, which is fermented cabbage.\u003c/p>\n\u003cp class=\"p1\">\u003cb>Phillips:\u003c/b> Any sort of, like, special spices that make this garnacha very, like, specific to Guatemala?\u003c/p>\n\u003cp class=\"p1\">\u003cb>Lopez:\u003c/b> It would be our salsa. So, the salsa, we add more things to it, which give it a little kick to it.\u003c/p>\n\u003cp class=\"p2\">♪♪\u003c/p>\n\u003cp class=\"p1\">\u003cb>Phillips:\u003c/b> The salsa is so good. I could eat like four plates of these. They’re so good.\u003c/p>\n\u003cp class=\"p1\">\u003cb>Lopez:\u003c/b> They are. They’re dangerous, I’m telling you.\u003c/p>\n\u003cp class=\"p2\">♪♪\u003c/p>\n\u003cp class=\"p1\">\u003cb>Phillips:\u003c/b> I got to tell you, I was so excited to visit your truck. I had to wear a little bit of pink to go with the truck.\u003c/p>\n\u003cp class=\"p1\">\u003cb>Arambulo:\u003c/b> Thank you so much. We decided to call it Las Cherry’s because I feel like after you have a nice meal, you know, you need a cherry on top. So we have mocktails, we have milkshakes, and we kind of try to go over the top. The s’mores is one of the most popular ones. And then for mocktails, it will be the Colombian hips.\u003c/p>\n\u003cp class=\"p1\">\u003cb>Phillips:\u003c/b> So in the Colombian hips, tell me what’s inside.\u003c/p>\n\u003cp class=\"p1\">\u003cb>Arambulo:\u003c/b> We have orange juice, pineapple juice, pomegranate, a little bit of Red Bull just to give you some energy. And then we topped it off with blue Powerade. Very fruity, very refreshing.\u003c/p>\n\u003cp class=\"p1\">\u003cb>Phillips:\u003c/b> Mmm. So that is a milkshake, a dessert, and an entire like camping trip in one cup.\u003c/p>\n\u003cp class=\"p1\">\u003cb>Arambulo:\u003c/b> Well, yes.\u003c/p>\n\u003cp class=\"p2\">♪♪\u003c/p>\n\u003cp class=\"p1\">\u003cb>Phillips:\u003c/b> I’m assuming that when people come here you want them to leave with their taste buds happy, right?\u003c/p>\n\u003cp class=\"p1\">\u003cb>Gonzalez:\u003c/b> Yeah. I want them to have fun, enjoy their meal. Come and dance and have the kids play around. This is the place to be. Yeah.\u003c/p>\n\u003cp class=\"p2\">♪♪\u003c/p>\n\u003cp class=\"p1\">\u003cb>Sbrocco:\u003c/b> Thanks, Cecilia. And I want to thank my guests on this week’s show — Cathy Asmus, who dreams of the sambusas at New Eritrea in San Francisco. Erin Cabezas, who starts her day with the breakfast pudding at Sideboard in Danville. And Anand Patel, who can’t get enough of the homemade tacos at Tacos Oscar in Oakland. Join us next time when three more guests will recommend their favorite spots right here on “Check, Please! Bay Area.” I’m Leslie Sbrocco and I’ll see you then. Cheers, everyone. Whoo-hoo! Cheers. Cheers. Cheers.\u003c/p>\n\u003cp class=\"p2\">♪♪\u003c/p>\n\u003cp class=\"p1\">\u003cb>Arambulo:\u003c/b> We try to create the craziest milkshakes around. People are going to see it and be like, “Whoa, what is that?”\u003c/p>\n\u003cp class=\"p1\">\u003cb>Phillips:\u003c/b> It’s a giant milkshake. I’ve never seen anything like this.\u003c/p>\n\u003cp class=\"p1\">\u003cb>Arambulo:\u003c/b> This one is our milkshake called s’mores. What we have inside of that is graham crackers. We have marshmallows, chocolate. We have whipped cream.\u003c/p>\n\u003cp>[ad floatright]\u003c/p>\n\u003cp class=\"p1\">\u003cb>Phillips:\u003c/b> That is thick. You can taste graham cracker, marshmallow, chocolate all in one drink. Mmm, mmm. I’m chewing this. This is like another meal.\u003c/p>\n\n",
"blocks": [],
"excerpt": null,
"status": "publish",
"parent": 0,
"modified": 1772160431,
"stats": {
"hasAudio": false,
"hasVideo": false,
"hasChartOrMap": false,
"iframeSrcs": [],
"hasGoogleForm": false,
"hasGallery": false,
"hasHearkenModule": false,
"hasPolis": false,
"paragraphCount": 11,
"wordCount": 6052
},
"headData": {
"title": "Check, Please! Bay Area reviews: Sideboard, Tacos Oscar, New Eritrea | KQED",
"description": "Bay Area locals try comforting breakfasts in Danville, playful and creative tacos in Oakland and bold Eritrean flavors in San Francisco.",
"ogTitle": "",
"ogDescription": "",
"ogImgId": "",
"twTitle": "",
"twDescription": "",
"twImgId": "",
"socialDescription": "Bay Area locals try comforting breakfasts in Danville, playful and creative tacos in Oakland and bold Eritrean flavors in San Francisco.",
"schema": {
"@context": "https://schema.org",
"@type": "Article",
"headline": "Check, Please! Bay Area reviews: Sideboard, Tacos Oscar, New Eritrea",
"datePublished": "2026-02-19T19:25:27-08:00",
"dateModified": "2026-02-26T18:47:11-08:00",
"image": "https://cdn.kqed.org/wp-content/uploads/2020/02/KQED-OG-Image@1x.png"
}
},
"primaryCategory": {
"termId": 3750,
"slug": "cuisine",
"name": "cuisine"
},
"videoEmbed": "https://www.youtube.com/watch?v=JVcHwTzYxYs",
"sticky": false,
"templateType": "standard",
"featuredImageType": "standard",
"excludeFromSiteSearch": "Include",
"articleAge": "0",
"path": "/checkplease/23729/check-please-bay-area-reviews-sideboard-tacos-oscar-new-eritrea",
"audioTrackLength": null,
"parsedContent": [
{
"type": "contentString",
"content": "\u003cdiv class=\"post-body\">\u003cp>\u003cp>\u003cem>Check, Please! Bay Area, \u003c/em>season 20, episode 15, airs Thursday, February 19, at 7:30 pm, on KQED 9. See other \u003ca href=\"http://www.kqed.org/tv/programs/index.jsp?pgmid=14084\" target=\"_blank\" rel=\"noopener noreferrer\">television airtimes\u003c/a>.\u003c/p>\n\u003cp>\u003cspan style=\"font-weight: 400\">Delicious mornings start in Danville at \u003cstrong>Sideboard\u003c/strong>, a laid-back neighborhood spot where breakfasts are both comforting and creative. Plates like asparagus-and-goat-cheese breakfast pudding, a stacked breakfast burger complete with a fried egg, and a hearty vegan breakfast bowl share the table with crisp fried Brussels sprouts and bakery-case favorites like ginger molasses cookies and lemon lavender teacakes. In Oakland, \u003cstrong>Tacos Oscar\u003c/strong> keeps things playful and innovative, turning out charred broccoli tacos slicked with peanut sauce, sweet-and-savory camote tacos, and tostadas piled high with greens, all best enjoyed with chips and smoky salsa morita. Then, guests head to San Francisco’s Inner Sunset at \u003cstrong>New Eritrea\u003c/strong>, where flaky mixed veggie and lentil sambusas give way to a vibrant vegetarian combo platter spread across injera flatbread, alongside bold bites like gored gored beef and the house’s deeply savory chicken-and-mushroom special — a communal, hands-on meal that invites you to tear, scoop, and share. The episode wraps up as reporter Cecilia Phillips brings “Cecilia Tries It” to San Jose’s \u003cstrong>G Spot Happy Tastebuds\u003c/strong>, exploring a hub of Latin-focused food trucks serving bold, crave-worthy dishes in a lively, communal setting.\u003c/span>\u003c/p>\n\u003cfigure id=\"attachment_23730\" class=\"wp-caption alignnone\" style=\"max-width: 1920px\">\u003cimg loading=\"lazy\" decoding=\"async\" class=\"wp-image-23730 size-full\" src=\"https://cdn.kqed.org/wp-content/uploads/sites/40/2026/02/2015_02.png\" alt=\"\" width=\"1920\" height=\"1080\" srcset=\"https://cdn.kqed.org/wp-content/uploads/sites/40/2026/02/2015_02.png 1920w, https://cdn.kqed.org/wp-content/uploads/sites/40/2026/02/2015_02-160x90.png 160w, https://cdn.kqed.org/wp-content/uploads/sites/40/2026/02/2015_02-768x432.png 768w, https://cdn.kqed.org/wp-content/uploads/sites/40/2026/02/2015_02-1536x864.png 1536w\" sizes=\"auto, (max-width: 1920px) 100vw, 1920px\">\u003cfigcaption class=\"wp-caption-text\">Host Leslie Sbrocco joins guests Cathy Asmus, Anand Patel and Erin Cabezas from KQED in San Francisco.\u003c/figcaption>\u003c/figure>\n\u003cp>\u003cspan style=\"color: #2b2b2b\">Get Restaurant Information:\u003c/span>\u003c/p>\n\u003cul>\n\u003cli>\u003ca href=\"https://www.sideboard.co/\">\u003cstrong>Sideboard\u003c/strong> (Danville)\u003c/a>\u003c/li>\n\u003cli>\u003ca href=\"https://www.tacososcar.com/\">\u003cstrong>Tacos Oscar\u003c/strong> (Oakland)\u003c/a>\u003c/li>\n\u003cli>\u003ca href=\"https://neweritrearestaurant.com/index.html\">\u003cstrong>New Eritrea \u003c/strong>(San Francisco)\u003c/a>\u003c/li>\n\u003cli>\u003ca href=\"https://www.sanjose.org/listings/g-spot-happy-tastebuds-food-trucks\">\u003cstrong>G Spot Happy Tastebuds \u003c/strong>(San Jose)\u003c/a>\u003c/li>\n\u003c/ul>\n\u003cfigure id=\"attachment_20123\" class=\"wp-caption alignnone\" style=\"max-width: 800px\">\u003cimg loading=\"lazy\" decoding=\"async\" class=\"size-medium wp-image-20123\" src=\"https://cdn.kqed.org/wp-content/uploads/sites/40/2019/04/Leslie-Headshot-Smokey-copy-800x540.jpg\" alt=\"Host Leslie Sbrocco sipping wine\" width=\"800\" height=\"540\">\u003cfigcaption class=\"wp-caption-text\">Host Leslie Sbrocco sipping wine \u003ccite>(Courtesy of Leslie Sbrocco)\u003c/cite>\u003c/figcaption>\u003c/figure>\n\u003cp>My name is Leslie Sbrocco, and I’m the \u003ca href=\"http://ww2.kqed.org/checkplease/host-biography/\" target=\"_blank\" rel=\"noopener noreferrer\">host\u003c/a> of \u003cem>Check, Please! Bay Area\u003c/em>. Each week, I’ll share my tasting notes about the wine, beer and spirits the guests and I drank on set during the taping of the show.\u003c/p>\n\u003cp>\u003cimg loading=\"lazy\" decoding=\"async\" class=\"alignnone size-full wp-image-23733\" src=\"https://cdn.kqed.org/wp-content/uploads/sites/40/2026/02/2015_Wines.jpg\" alt=\"\" width=\"1590\" height=\"2048\" srcset=\"https://cdn.kqed.org/wp-content/uploads/sites/40/2026/02/2015_Wines.jpg 1590w, https://cdn.kqed.org/wp-content/uploads/sites/40/2026/02/2015_Wines-160x206.jpg 160w, https://cdn.kqed.org/wp-content/uploads/sites/40/2026/02/2015_Wines-768x989.jpg 768w, https://cdn.kqed.org/wp-content/uploads/sites/40/2026/02/2015_Wines-1193x1536.jpg 1193w\" sizes=\"auto, (max-width: 1590px) 100vw, 1590px\">\u003c/p>\n\u003cp>\u003c/p>\u003c/div>",
"attributes": {
"named": {},
"numeric": []
}
},
{
"type": "component",
"content": "",
"name": "ad",
"attributes": {
"named": {
"label": "fullwidth"
},
"numeric": [
"fullwidth"
]
}
},
{
"type": "contentString",
"content": "\u003cdiv class=\"post-body\">\u003cp>\u003c/p>\n\u003cp>\u003ca href=\"https://www.auteurwines.com/\">\u003cspan style=\"color: #339966\">\u003cstrong>Auteur 2023 Chardonnay, Bacigalupi Vineyard\u003c/strong>\u003c/span>\u003c/a>\u003cbr>\n\u003cem>Russian River Valley, California, $65\u003c/em>\u003cbr>\nWhen it comes to ranking California’s top Chardonnay bottlings, a serious contender for the title is from a winery you may not know. Named Auteur, its tagline reads, “Wine that refuses to behave. Between the Russian River and the redwoods, we follow the land. When the fog rolls sideways and the vines rebel, we don’t fight it. We bottle it.” Owners Kenneth and Laura Juhasz have opened a stunning property in Sonoma’s Russian River area, and its wines match the rugged elegance of the property and the vines.\u003c/p>\n\u003cp>This Chardonnay from the famed Bacigalupi Vineyard is intensely aromatic, with layers of ripe apples and citrus fruit interlaced with a touch of toasty oak. Using wild yeast to ferment the juice, the final wine expresses a lush texture balanced by pleasantly piercing vibrancy. This brightness comes from the lack of malolactic fermentation, which can lend an overwhelming buttery character to whites. This stylish Chardonnay is for lovers of freshness and complexity.\u003c/p>\n\u003cp>\u003ca href=\"https://www.lavalentina.it/en/prodotto/cerasuolo-doc/\">\u003cspan style=\"color: #339966\">\u003cstrong>La Valentina 2024 Cerasuolo d’Abruzzo D.O.C.\u003c/strong>\u003c/span>\u003c/a>\u003cbr>\n\u003cem>Abruzzo, Italy, $15\u003c/em>\u003cbr>\nThis pretty-in-pink wine is a treasure to discover and a pleasure to drink. It’s a deeply garnet-hued rosé crafted from 100% Montepulciano red grapes from the Abruzzo region of Italy. Cerasuolo d’Abruzzo is one of my favorite pink styles, due partially to its long skin-contact time, which gives it a deeper color and more intensity and depth than other rosés. Aged in stainless steel tanks to maintain its zesty freshness, this wine overflows with succulent notes of cherry and red berries, complemented by a kiss of savoriness. It’s a full-bodied, affordable pink that delivers joy sipping poolside or tableside.\u003c/p>\n\u003cp>\u003ca href=\"https://www.groundedwineco.com/\">\u003cspan style=\"color: #339966\">\u003cstrong>GROUNDED by Josh Phelps 2023 Cabernet Sauvignon\u003c/strong>\u003c/span>\u003c/a>\u003cbr>\n\u003cem>California, $18\u003c/em>\u003cbr>\nIt’s rare to find a complex yet approachable California Cabernet for less than $20, but this is it. Grounded Wine Co., founded by Napa native Josh Phelps, offers a roster of well-made and well-priced wines from both California and Washington. Josh wanted to build a personal brand that expressed his experiences growing up in wine country, but with a modern twist. GROUNDED wines are made from top-notch vineyards, with a focus on sustainability and affordability. Loaded with fruit-driven flavors of dark berries and spice, this Cabernet Sauvignon is easy to drink. It kicks up the Cab’s quaffability quotient with a juicy, lush texture but keeps a touch of tannic grip for structure and balance. A wine to buy by the case for all occasions.\u003c/p>\n\u003ch2>Episode Transcript\u003c/h2>\n\u003cp class=\"p1\">\u003cb>Sbrocco:\u003c/b> Rustic breakfast delights in Danville.\u003c/p>\n\u003cp class=\"p1\">\u003cb>Asmus:\u003c/b> I wasn’t sure what to expect, but it totally blew me out of the water.\u003c/p>\n\u003cp class=\"p1\">\u003cb>Sbrocco:\u003c/b> Tacos with a twist in Oakland.\u003c/p>\n\u003cp class=\"p1\">\u003cb>Patel:\u003c/b> It’s just like amazing flavor combinations.\u003c/p>\n\u003cp class=\"p1\">\u003cb>Sbrocco:\u003c/b> And traditional East African cuisine in San Francisco.\u003c/p>\n\u003cp class=\"p1\">\u003cb>Cabezas:\u003c/b> The sauce that came with it was like amazing.\u003c/p>\n\u003cp class=\"p1\">\u003cb>Sbrocco:\u003c/b> Just ahead on “Check, Please! Bay Area.”\u003c/p>\n\u003cp class=\"p1\">\u003cb>Phillips:\u003c/b> Oh, my God! That is so good.\u003c/p>\n\u003cp class=\"p1\">\u003cb>Rodriguez:\u003c/b> That’s really good.\u003c/p>\n\u003cp class=\"p2\">♪♪\u003c/p>\n\u003cp class=\"p1\">\u003cb>Sbrocco:\u003c/b> Hi, I’m Leslie Sbrocco. Welcome to “Check, Please! Bay Area,” the show where Bay Area residents review and talk about their favorite restaurants. Now, we have three guests, and each one recommends one of their favorite spots and the other two go check them out to see what they think. Joining me at the “Check, Please!” table today are nonprofit manager Cathy Asmus, social worker Erin Cabezas, and software engineer Anand Patel. Welcome, everyone. Are you ready for a good time?\u003c/p>\n\u003cp class=\"p1\">\u003cb>Patel:\u003c/b> Yeah. Let’s go.\u003c/p>\n\u003cp class=\"p1\">\u003cb>Sbrocco:\u003c/b> Erin’s rustic breakfast spot truly invites you to slow down and savor the moment. Tucked inside a cozy house decorated with a hodgepodge of farmhouse tables and chairs, it feels more like you’re spending Sunday morning at grandma’s than at a restaurant. Located in Danville, it’s Sideboard.\u003c/p>\n\u003cp class=\"p2\">♪♪\u003c/p>\n\u003cp class=\"p1\">\u003cb>Andrews:\u003c/b> Sideboard is community and neighborhood. When we open the doors, it’s like one big party. When I was little, my grandmother used to have parties, and when she put all the food out, she put it on the sideboard. I said, “Grandma, why do you put it on the sideboard?” She says, “Because it makes everybody get up and talk to each other.” During the weekdays, our breakfast is straightforward simple.\u003c/p>\n\u003cp class=\"p1\">\u003cb>Man:\u003c/b> We have the avocado toast.\u003c/p>\n\u003cp class=\"p1\">\u003cb>Andrews:\u003c/b> The flavors, I think, are really unique and honest.\u003c/p>\n\u003cp class=\"p1\">\u003cb>Man:\u003c/b> Ceviche salad.\u003c/p>\n\u003cp class=\"p1\">\u003cb>Andrews:\u003c/b> Every ingredient is fresh. We make everything from scratch. I mean, the pastries are off the hook.\u003c/p>\n\u003cp class=\"p1\">\u003cb>Woman:\u003c/b> Oh, my gosh.\u003c/p>\n\u003cp class=\"p1\">\u003cb>Andrews:\u003c/b> On the weekends is where we kind of shine. We do like three different kinds of Benedicts. Most people would use a fork and a knife for this, I suppose, but I don’t have to. Now, that’s the way to do it. Mm. Our English muffins — Not a lot of places make them. And I think they’re exquisite. Our fried chicken is amazing. We use a pressure fryer, which is really different. It’s not oily, it’s juicy.\u003c/p>\n\u003cp class=\"p1\">\u003cb>Woman:\u003c/b> Oh, my goodness. I’m ready to dive in.\u003c/p>\n\u003cp class=\"p1\">\u003cb>Andrews:\u003c/b> When you get a bucket of chicken, we also have a little envelope in there that has the wishbone. No cheating. You got to hold it at the bottom, you guys. At the — Oh! Well, you win.\u003c/p>\n\u003cp class=\"p1\">[ Laughs ]\u003c/p>\n\u003cp class=\"p1\">One of my favorite things is when people order, you know, their burger, and they’ll get a piece of cake and they’ll sit there and eat their cake first. And I’m like, “It’s so great to be an adult, isn’t it? You can eat your cake first.”\u003c/p>\n\u003cp class=\"p1\">\u003cb>Man:\u003c/b> The best.\u003c/p>\n\u003cp class=\"p1\">\u003cb>Andrews:\u003c/b> The vibe is cozy, comfortable. How I feel when I walk in the door is home, and I think a lot of other people feel that way too. It’s just a warm, fun, odd little place.\u003c/p>\n\u003cp class=\"p1\">\u003cb>Man:\u003c/b> Yay!\u003c/p>\n\u003cp class=\"p1\">\u003cb>Andrews:\u003c/b> Yay, Sideboard!\u003c/p>\n\u003cp class=\"p1\">\u003cb>Sbrocco:\u003c/b> So, Erin, how did this become one of your favorite spots?\u003c/p>\n\u003cp class=\"p1\">\u003cb>Cabezas:\u003c/b> We discovered Sideboard about nine years ago, right around when my first son was born. And we have been going ever since. I am a vegetarian. The rest of my family is not. So there is a huge selection of vegetarian and vegan options and gluten-free because sometimes I play with that also. My current obsession is their breakfast pudding.\u003c/p>\n\u003cp class=\"p1\">\u003cb>Sbrocco:\u003c/b> Okay. Breakfast pudding?\u003c/p>\n\u003cp class=\"p1\">\u003cb>Cabezas:\u003c/b> Yes. And it’s not a pudding from what you would think of. It’s not a dessert at all. It’s an egg dish with eggs and cream and cheese with seasonal vegetables in it. It does come with a side salad with some goat cheese and tomatoes and a balsamic dressing. It’s absolutely amazing.\u003c/p>\n\u003cp class=\"p1\">\u003cb>Asmus:\u003c/b> I also had the breakfast pudding and I wasn’t sure what to expect. I was thinking maybe like a bread pudding or something like that, but it was really incredible. Like the most fluffy texture. So light and airy somehow, but also, like, sweet and savory and dense. I don’t know how to explain it. I wasn’t sure what to expect, but it totally blew me out of the water. I also got the vegan breakfast bowl. All that’s visible when it first arrives is this mountain of savory ingredients like scrambled tofu and beans and tortilla chip shreds. And then underneath is a base of oatmeal. And I thought, “This is so strange.” But after eating it, it was — It worked.\u003c/p>\n\u003cp class=\"p1\">\u003cb>Sbrocco:\u003c/b> And, Anand, what did you get?\u003c/p>\n\u003cp class=\"p1\">\u003cb>Patel:\u003c/b> I got the shirred eggs. Basically like baked eggs, but they come out in ham cups, so I don’t know what feat of engineering they pulled off, but they made ham into like little cups where they put the eggs inside of and the eggs were like perfectly cooked. It was the perfect flavor of smoky and that was like half the plate. The other half the plate was greens. So, like, you know, you didn’t feel guilty eating both of those cups because there was two of them. Really, really good, I enjoyed it.\u003c/p>\n\u003cp class=\"p1\">\u003cb>Asmus:\u003c/b> My mom had the breakfast burger, which was surprisingly huge, taking up almost the entire plate with like a rim of fries on the outside edge, and it had a big egg on top. And so you could like really — When you kind of pick it up and get in there, the egg kind of like cascades over the patty. So it’s a pretty scrumptious burger.\u003c/p>\n\u003cp class=\"p1\">\u003cb>Sbrocco:\u003c/b> Did you try a fry?\u003c/p>\n\u003cp class=\"p1\">\u003cb>Asmus:\u003c/b> Yeah.\u003c/p>\n\u003cp class=\"p1\">[ Laughter ]\u003c/p>\n\u003cp class=\"p1\">They had a great aioli sauce on the side, so I was just dipping it in there.\u003c/p>\n\u003cp class=\"p1\">\u003cb>Cabezas:\u003c/b> That aioli also comes with their Brussels sprouts that are crisped perfectly and very light and charred and just delicious. One of our go-to orders.\u003c/p>\n\u003cp class=\"p1\">\u003cb>Sbrocco:\u003c/b> Any other dishes you want to talk about?\u003c/p>\n\u003cp class=\"p1\">\u003cb>Cabezas:\u003c/b> They have an amazing case of baked goods that is like — right when you order, it’s staring at you, so you have to get at least a couple of items. I’m a fan of their ginger molasses cookie. It’s large. I mean, it’s bigger than your palm and it’s soft and it has chunks of ginger in it. It’s just amazing. The outrageous brownie has almost a mocha taste to it. It’s very rich in flavor, but not overpowering. I mean, you can absolutely eat the whole thing.\u003c/p>\n\u003cp class=\"p1\">\u003cb>Sbrocco:\u003c/b> I was going to say, do you share any of those? Because I’m not so sure I would share that first one.\u003c/p>\n\u003cp class=\"p1\">\u003cb>Cabezas:\u003c/b> Yes.\u003c/p>\n\u003cp class=\"p1\">\u003cb>Sbrocco:\u003c/b> Did you get any baked goods?\u003c/p>\n\u003cp class=\"p1\">\u003cb>Patel:\u003c/b> I actually did get one muffin. I think it was like cinnamon flavored and yeah, it was — It was really delicious.\u003c/p>\n\u003cp class=\"p1\">\u003cb>Sbrocco:\u003c/b> Did you share it?\u003c/p>\n\u003cp class=\"p1\">\u003cb>Patel:\u003c/b> No, actually. I actually accidentally ate the whole thing. And my wife was like, “You didn’t save a bite for me.”\u003c/p>\n\u003cp class=\"p1\">\u003cb>Sbrocco:\u003c/b> Totally accidentally ate the whole thing. Totally.\u003c/p>\n\u003cp class=\"p1\">\u003cb>Asmus:\u003c/b> Yeah, the baked-good case was overwhelming. I didn’t know what to pick. So we got the lemon lavender teacake. It was so fluffy and you could just tell it was baked fresh. We also got the chocolate chip cookie, and then they had a ton of cakes in the refrigerated case that I just — It was like there was not enough room in my stomach to try it all. But I would love to go back and, like, try all of it.\u003c/p>\n\u003cp class=\"p1\">\u003cb>Cabezas:\u003c/b> And then they have a delicious peach sangria. Again, the flavor changes based on the season.\u003c/p>\n\u003cp class=\"p1\">\u003cb>Sbrocco:\u003c/b> And they have wine on tap.\u003c/p>\n\u003cp class=\"p1\">\u003cb>Cabezas:\u003c/b> They have wine, they have beer, they have amazing coffee also.\u003c/p>\n\u003cp class=\"p1\">\u003cb>Patel:\u003c/b> I love their coffee. It was really good.\u003c/p>\n\u003cp class=\"p1\">\u003cb>Sbrocco:\u003c/b> And what about service?\u003c/p>\n\u003cp class=\"p1\">\u003cb>Patel:\u003c/b> I thought service was really nice. You know, it’s one of those places where you go to the counter to order your food and they bring it out to you. So that was cool. They have their, like, cutlery inside of like a dresser, which is like, you know, basically like you go into your grandma’s house.\u003c/p>\n\u003cp class=\"p1\">\u003cb>Cabezas:\u003c/b> And it’s not a cabinet. It’s a sideboard.\u003c/p>\n\u003cp class=\"p1\">\u003cb>Patel:\u003c/b> Oh a side– Oh, okay! Now it all makes sense. Now it all makes sense.\u003c/p>\n\u003cp class=\"p1\">\u003cb>Sbrocco:\u003c/b> Alright. If you would like to go to Sideboard, it’s located on Railroad Avenue in Danville, and the average multi-course tab per person without drinks is around $30. Anand’s up next with his pick. Part street food stand, part art installation, it’s a colorful spot that’s turning heads and taste buds with creative takes on tacos. Located in Oakland’s Temescal neighborhood, it’s Tacos Oscar.\u003c/p>\n\u003cp class=\"p1\">\u003cb>Michel:\u003c/b> Tacos Oscar is a neighborhood taqueria where you can come and laugh with your friends and feel like you’re somewhere else for a minute. I played music for many, many years and traveled all over the world. I would just get to taste different things in different places, and that’s when my love for food started. My business partner, Jake, and I were both in bands for a long time before we started doing the pop-up. It was very familiar to us loading a bunch of stuff into a vehicle, driving to the location, setting up and then performing. In our case, it was making food and our set list was our menu. There’s something about like a freshly hand-pressed thick tortilla that is just amazing to the palate. We’ve been sourcing our masa from La Finca in East Oakland. They mill it and grind it and so it comes ready to roll. It’s just corn, water, lime, mineral salt. That’s it. My inspiration originally was just doing, like, fried egg tacos and whatever we could make and put on a tortilla. The charred broccoli was a total mistake that turned into probably our most popular taco. I burned broccoli one day at a barbecue, and I still served it because I thought it, you know, had an interesting flavor with the charry-ness. I was working on, like, a peanut salsa, and I kind of just plated it for some friends. And everybody was like, “This is actually, like, a really crazy combination,” and we put it on the menu. It’s been on ever since. I want a table of people who have widely different diets to all be able to sit down together and have a meal together. We have a lot of vegan stuff on the menu. It’s mostly gluten-free. There’s a little bit of something for everyone. One of the most important things is serving our community and giving back. Some portion of your money spent goes to help feed our houseless neighbors. I will come in sometimes, and the first thing I hear when I’m approaching the restaurant is laughter and people talking and catching up, sharing stories. That’s what it’s all about. To have a space where people can, like, loosen up, but their plates are empty when they’re done.\u003c/p>\n\u003cp class=\"p1\">\u003cb>Sbrocco:\u003c/b> Alright, Anand, this is not an easy spot to find. How did you discover it?\u003c/p>\n\u003cp class=\"p1\">\u003cb>Patel:\u003c/b> Yeah. So it was serendipitous. Driving, we always see this line between these two buildings. Like, there’s nothing in between these two buildings. So one day we just decided, “Hey, let’s wait in line and see where see where this goes,” and turned out to be a taco spot, which was delicious. It was like one of the best decisions I made standing in that line.\u003c/p>\n\u003cp class=\"p1\">\u003cb>Sbrocco:\u003c/b> Because it could have been a sex shop.\u003c/p>\n\u003cp class=\"p1\">\u003cb>Patel:\u003c/b> Yeah, that’s true, that’s true. Could have been anything. Usually when we start, we get the chips and salsa.\u003c/p>\n\u003cp class=\"p1\">\u003cb>Sbrocco:\u003c/b> Okay.\u003c/p>\n\u003cp class=\"p1\">\u003cb>Patel:\u003c/b> It’s not your typical salsa. They have this really nice burnt orange colored sauce. It has savory, a little bit of smoky and not too much spice, just like the right amount. And the tortilla chips are crispy and homemade. I couldn’t find a chip that was, like, overdone or anything. They were all great. A great way to start the taco feast.\u003c/p>\n\u003cp class=\"p1\">\u003cb>Sbrocco:\u003c/b> Do you have a go-to taco or tacos? My favorite is the broccoli taco. It has broccoli, some peanut sauce, a little bit of pickled onions, and some cilantro. It’s just like amazing flavor combinations. A little bit of Thai flavor with the peanut. That’s like one of my favorites.\u003c/p>\n\u003cp class=\"p1\">\u003cb>Asmus:\u003c/b> I really loved the taco de papa with the potatoes and it was like home fries style, so they were dry and just delicious crispy. It had this like savory salsa on top and just on top of the most delicious tortilla I’ve ever had in my life.\u003c/p>\n\u003cp class=\"p1\">\u003cb>Sbrocco:\u003c/b> I think that is their signature their tortillas. What about you?\u003c/p>\n\u003cp class=\"p1\">\u003cb>Cabezas:\u003c/b> So, we got one of everything on the menu because I’m the vegetarian, and then everybody else is not, so.\u003c/p>\n\u003cp class=\"p1\">\u003cb>Patel:\u003c/b> And they have tons of veggie options.\u003c/p>\n\u003cp class=\"p1\">\u003cb>Cabezas:\u003c/b> They do. They do. There’s a really wide selection. I didn’t really know what to expect as far as flavor profiles. And so it’s definitely not your traditional taqueria.\u003c/p>\n\u003cp class=\"p1\">\u003cb>Patel:\u003c/b> Yeah.\u003c/p>\n\u003cp class=\"p1\">\u003cb>Cabezas:\u003c/b> And out of them, you know, the broccoli did have that Thai flavor. That’s what I would describe it as also.\u003c/p>\n\u003cp class=\"p1\">\u003cb>Sbrocco:\u003c/b> Any other kind of taco?\u003c/p>\n\u003cp class=\"p1\">\u003cb>Cabezas:\u003c/b> So I had a sweet potato taco. I think it’s the taco de camote. It wasn’t my favorite. The one that I had was really dripping in oil, to the point I actually ended up with oil all over my chin, and nobody told me.\u003c/p>\n\u003cp class=\"p1\">\u003cb>Sbrocco:\u003c/b> Kids think it’s funny. Right?\u003c/p>\n\u003cp class=\"p1\">\u003cb>Patel:\u003c/b> That’s surprising because that was my favorite part. Like, you pick it up, the oily goodness is dripping out, and it’s like, that’s where all the flavor was for me.\u003c/p>\n\u003cp class=\"p1\">\u003cb>Sbrocco:\u003c/b> Mm-hmm.\u003c/p>\n\u003cp class=\"p1\">\u003cb>Cabezas:\u003c/b> Both of my boys really liked the meat ones. I believe it was the barbacoa one until it started getting a little spicy for my younger one. But they definitely enjoyed.\u003c/p>\n\u003cp class=\"p1\">\u003cb>Sbrocco:\u003c/b> They enjoyed it?\u003c/p>\n\u003cp class=\"p1\">\u003cb>Cabezas:\u003c/b> Yes.\u003c/p>\n\u003cp class=\"p1\">\u003cb>Sbrocco:\u003c/b> Okay.\u003c/p>\n\u003cp class=\"p1\">\u003cb>Patel:\u003c/b> So, I’ve gotten the tostada, which is like a mountain of greens on this big tostada, a bunch of nuts and seeds on top. It is hard to eat. Like, you’re, like, there. It’s like falling off, but I go in. I just start digging up everything. So I also had the taco de hongos. It had like three mushrooms on it. They were cooked to perfection. I think they had tomatillo sauce on it, which is like a nice green sauce. And the way they cooked it, it just — the flavors went good together. The mushrooms were perfectly — They had a bite to them as you ate to it and it was like really delicious.\u003c/p>\n\u003cp class=\"p1\">\u003cb>Sbrocco:\u003c/b> What about you, Cathy? Anything else?\u003c/p>\n\u003cp class=\"p1\">\u003cb>Asmus:\u003c/b> Yeah, I got the ham and egg taco, which was also really good and generous portions, I will say, across all the tacos that we got. I’m a huge spice fan, and so I wish there was a salsa I could put on top that would kick it up a notch in the heat department, but otherwise it was really delicious. My friend also got the bean and cheese taco, which was gorgeous. I think they make the beans there. They were so smooth. The best refried beans ever.\u003c/p>\n\u003cp class=\"p1\">\u003cb>Sbrocco:\u003c/b> Ooh!\u003c/p>\n\u003cp class=\"p1\">\u003cb>Asmus:\u003c/b> Yeah, beans and cheese. And you’d think, you know, it’s basic, but it’s so good.\u003c/p>\n\u003cp class=\"p1\">\u003cb>Cabezas:\u003c/b> You must have gone for breakfast because those options were not — Like, a bean and cheese wasn’t available when we were there.\u003c/p>\n\u003cp class=\"p1\">\u003cb>Asmus:\u003c/b> Oh, it was a Sunday at like noon.\u003c/p>\n\u003cp class=\"p1\">\u003cb>Patel:\u003c/b> The brunch menu.\u003c/p>\n\u003cp class=\"p1\">\u003cb>Cabezas:\u003c/b> Okay, yes.\u003c/p>\n\u003cp class=\"p1\">\u003cb>Sbrocco:\u003c/b> They have a brunch menu? So there’s a hidden pro tip right there.\u003c/p>\n\u003cp class=\"p1\">\u003cb>Patel:\u003c/b> Oh, yeah. That’s true.\u003c/p>\n\u003cp class=\"p1\">\u003cb>Sbrocco:\u003c/b> Yeah. Okay. Would you go back to it?\u003c/p>\n\u003cp class=\"p1\">\u003cb>Asmus:\u003c/b> Absolutely. Yeah. Just for the tortillas.\u003c/p>\n\u003cp class=\"p1\">\u003cb>Sbrocco:\u003c/b> Just for the tortillas alone. They’re so good. How about you? Would you go back?\u003c/p>\n\u003cp class=\"p1\">\u003cb>Cabezas:\u003c/b> I don’t know that I would, but my husband might if he was in the area. They are very friendly to dogs, which is important, and kids. Another pro tip is you have to sit in the back because the tables in the front, the slats are so small that we lost three drinks. They kept knocking over. And so then we relocated and they brought us new drinks without even being asked.\u003c/p>\n\u003cp class=\"p1\">\u003cb>Sbrocco:\u003c/b> Service was attentive.\u003c/p>\n\u003cp class=\"p1\">\u003cb>Cabezas:\u003c/b> They were. Yes. They were very kind about all of that.\u003c/p>\n\u003cp class=\"p1\">\u003cb>Sbrocco:\u003c/b> Alright.\u003c/p>\n\u003cp class=\"p1\">\u003cb>Cabezas:\u003c/b> Yes.\u003c/p>\n\u003cp class=\"p1\">\u003cb>Sbrocco:\u003c/b> If you would like to try Tacos Oscar, it’s located on 40th Street in Oakland, and the average multi-course tab per person without drinks is around $25. Cathy’s neighborhood go-to takes her on a flavor-packed journey through the Horn of Africa every time she steps through the doors. A staple in San Francisco’s Sunset District for more than 25 years, it’s New Eritrea restaurant.\u003c/p>\n\u003cp class=\"p2\">♪♪\u003c/p>\n\u003cp class=\"p1\">\u003cb>Manna:\u003c/b> When you dine in at New Eritrea restaurant, you dine with your senses.\u003c/p>\n\u003cp class=\"p1\">\u003cb>Woman:\u003c/b> Is this spicy?\u003c/p>\n\u003cp class=\"p1\">\u003cb>Man:\u003c/b> That’s got a little kick on it, yeah.\u003c/p>\n\u003cp class=\"p1\">\u003cb>Manna:\u003c/b> And the end of the day, you never forget the experience.\u003c/p>\n\u003cp class=\"p1\">\u003cb>Man:\u003c/b> It’s fire, it’s fire.\u003c/p>\n\u003cp class=\"p1\">\u003cb>Manna:\u003c/b> My older brother started the business, and my mom and my aunties and my sister were cooking, so very much I grew up here working with my family, and this is our passion.\u003c/p>\n\u003cp class=\"p1\">[ Bell rings ]\u003c/p>\n\u003cp class=\"p1\">Eritrean food is similar with Ethiopian food. We use the same spices we call berbere. Basically, it’s the kind of jalapeños family and there’s reddish colors. We add a lot of ingredients like ginger, garlic. You ground, you crush them together to make berbere. Everything is fresh. We have so many Vegetables. Split peas, chickpea, collard greens, okra. Tumtumo is made from red lentils. We stir them. We cook them slowly on the fire with spices, garlic, ginger. It’s very delicious. Gored gored is one of the most tender beef. We marinate it with spices and clarified butter. It melts in your mouth. Injera is bread made of teff, which is a grain from East Africa. You can see that the bubble is coming out right now, so we’re going to cover it for a few minutes. We make injera around like 600 to 700 injeras every day. So you can see that one. Okay. When you dine in here, use your hands. Especially in our culture we use our right hand. Our food is meant to share with friends and family. When you eat together, it’s kind of fun. You make a little messy, but this is part of the culture.\u003c/p>\n\u003cp class=\"p1\">\u003cb>Child:\u003c/b> New Eritrea is the best restaurant. Child #2: The best restaurant on Earth.\u003c/p>\n\u003cp class=\"p1\">\u003cb>Manna:\u003c/b> People in the kitchen, they are the backbone of the restaurant. We’ve been working together with them for years. Also, I have a big family, so everybody helping out here. We’ve been here so far 27 years. We have many, many customers. They’ve been here. We know them for a long time.\u003c/p>\n\u003cp class=\"p1\">\u003cb>Woman:\u003c/b> I love it. Yeah. We eat it every single Friday night.\u003c/p>\n\u003cp class=\"p1\">\u003cb>Manna:\u003c/b> When you see people enjoy the food, experience different kind of experience, and leaving happy, that does make me really happy.\u003c/p>\n\u003cp class=\"p1\">\u003cb>Sbrocco:\u003c/b> You know, Cathy, what’s amazing about this restaurant is it’s been in the city for years, which is pretty legendary.\u003c/p>\n\u003cp class=\"p1\">\u003cb>Asmus:\u003c/b> Yeah, I’ve been to every Eritrean and Ethiopian restaurant in the San Francisco area. It’s my favorite cuisine and they just knock it out of the park. I don’t know what they’re doing. It’s magic. It’s my favorite place.\u003c/p>\n\u003cp class=\"p1\">\u003cb>Sbrocco:\u003c/b> What is your first order, let’s say, when you go?\u003c/p>\n\u003cp class=\"p1\">\u003cb>Asmus:\u003c/b> Yeah. So I’m there basically every other week.\u003c/p>\n\u003cp class=\"p1\">\u003cb>Cabezas:\u003c/b> What?\u003c/p>\n\u003cp class=\"p1\">\u003cb>Asmus:\u003c/b> And I always —\u003c/p>\n\u003cp class=\"p1\">\u003cb>Sbrocco:\u003c/b> “Here she is again.”\u003c/p>\n\u003cp class=\"p1\">[ Laughter ]\u003c/p>\n\u003cp class=\"p1\">\u003cb>Asmus:\u003c/b> And I always get their vegetarian combo platter which has kind of a great selection of their vegetarian dishes. They bring it out to you on this beautiful circle platter on top of a injera piece of bread on the bottom of the plate that’s like soaking up all of the goodness while you’re eating. And so it’s like kind of the treat that you save for last. Their spicy lentil dish that comes in The vegetarian combo platter is just so good. The split pea, the lighter yellow dish, is like almost its counterpart. It’s like sweet and savory, spicy.\u003c/p>\n\u003cp class=\"p1\">\u003cb>Cabezas:\u003c/b> So we did the exact same. There was a chickpea dish, and then there was a potato that was almost like a curry. So it was potato and carrots. And then a collard green was amazing. And, like, just so comforting. And then we got some yogurt on the side to add a little dollop. It was all so good. All of them were amazing, and it was really nice to have all of the tastes because you didn’t need to commit to anything.\u003c/p>\n\u003cp class=\"p1\">\u003cb>Sbrocco:\u003c/b> You’ve been shaking your head a lot. Did you like it?\u003c/p>\n\u003cp class=\"p1\">\u003cb>Patel:\u003c/b> I loved it.\u003c/p>\n\u003cp class=\"p1\">\u003cb>Sbrocco:\u003c/b> You loved it?\u003c/p>\n\u003cp class=\"p1\">\u003cb>Patel:\u003c/b> Yeah.\u003c/p>\n\u003cp class=\"p1\">\u003cb>Sbrocco:\u003c/b> Okay.\u003c/p>\n\u003cp class=\"p1\">\u003cb>Patel:\u003c/b> It was really good.\u003c/p>\n\u003cp class=\"p1\">\u003cb>Sbrocco:\u003c/b> Tell me what you had.\u003c/p>\n\u003cp class=\"p1\">\u003cb>Patel:\u003c/b> The only thing I had different was I subbed one of those in for a mushroom dish.\u003c/p>\n\u003cp class=\"p1\">\u003cb>Sbrocco:\u003c/b> Okay.\u003c/p>\n\u003cp class=\"p1\">\u003cb>Patel:\u003c/b> Because I love mushrooms.\u003c/p>\n\u003cp class=\"p1\">\u003cb>Sbrocco:\u003c/b> Yeah.\u003c/p>\n\u003cp class=\"p1\">\u003cb>Patel:\u003c/b> You know, that kind of food is actually very similar to Indian food, which is kind of my own native food. They use the same spices. So it was, like, very comforting. All the dishes reminded me of home. Just the act of, like, tearing the injera bread, picking what you want.\u003c/p>\n\u003cp class=\"p1\">\u003cb>Asmus:\u003c/b> I cannot give enough praise to their injera bread. It’s just so perfect. It’s the perfect thickness, the perfect tartness, the perfect softness. And they’re very generous with it. One piece usually comes with your platter meal, and they’ll keep it coming.\u003c/p>\n\u003cp class=\"p1\">\u003cb>Cabezas:\u003c/b> And the platter was half the size of this table. There were seven of us. We only ordered a vegetarian platter for three plus then two meat options. Gored gored beef and then New Eritrea special that had chicken and mushrooms in it. They loved them. My brother-in-law is a big meat eater though, and he said he could have gone without the meat. He loved the vegetarian option so much.\u003c/p>\n\u003cp class=\"p1\">\u003cb>Sbrocco:\u003c/b> He loved the vegetarian option?\u003c/p>\n\u003cp class=\"p1\">\u003cb>Cabezas:\u003c/b> So it was all devoured and we were all very satisfied when we left.\u003c/p>\n\u003cp class=\"p1\">\u003cb>Asmus:\u003c/b> Another thing I love to get there are the sambusas. They have both meat and vegetarian options. The wrapper is crispy and then the inside is smooth. And there’s a lentil option which I always get. And then they also have a mixed vegetable option, which has all kinds of vegetables inside — Lima beans, corn, peas — and it’s so fresh. It’s not like you’re, you know, frozen mixed vegetable stuff.\u003c/p>\n\u003cp class=\"p1\">\u003cb>Cabezas:\u003c/b> The sauce that came with it was, like, amazing. It was almost like a harissa, paprika. It was — I mean, it was spicy, but you had to keep going back for more.\u003c/p>\n\u003cp class=\"p1\">\u003cb>Sbrocco:\u003c/b> So talk a little bit about the place itself.\u003c/p>\n\u003cp class=\"p1\">\u003cb>Asmus:\u003c/b> It is so comfortable. It’s so lived in. It feels like you’re almost in like a family’s living room. The service is so generous and gracious. I think every time I’ve been there, they’re always hosting this huge event in their little space in the back. And despite it being completely full to capacity, they’ll always come and check on you. Like, “Do you have enough injera bread?” Like, everything is taken care of. And so yeah, service is amazing. And I really like the wrap-around, like, cozy bar. It’s almost like the set of “Cheers” or something.\u003c/p>\n\u003cp class=\"p1\">\u003cb>Cabezas:\u003c/b> Yeah, yes.\u003c/p>\n\u003cp class=\"p1\">[ Laughter ]\u003c/p>\n\u003cp class=\"p1\">\u003cb>Sbrocco:\u003c/b> And what about value? What do you think about the price?\u003c/p>\n\u003cp class=\"p1\">\u003cb>Patel:\u003c/b> Oh, I think it was definitely worth it. You get so much food and, like, pretty much unlimited injera coming through. Definitely worth it.\u003c/p>\n\u003cp class=\"p1\">\u003cb>Sbrocco:\u003c/b> Yeah?\u003c/p>\n\u003cp class=\"p1\">\u003cb>Asmus:\u003c/b> Yeah. Affordable enough to go twice or more a month.\u003c/p>\n\u003cp class=\"p1\">[ Laughter ]\u003c/p>\n\u003cp class=\"p1\">\u003cb>Sbrocco:\u003c/b> Alright. If you would like to try New Eritrea, it’s located on Irving Street in San Francisco, and the average multi-course tab per person without drinks is around $30. And now reporter Cecilia Phillips has more Bay Area bites you’ve just got to try. She’s sampling a world of Latin treats and beats at San Jose’s G Spot Happy Tastebuds.\u003c/p>\n\u003cp class=\"p2\">♪♪\u003c/p>\n\u003cp class=\"p1\">\u003cb>Phillips:\u003c/b> G Spot Happy Tastebuds. What does that mean?\u003c/p>\n\u003cp class=\"p1\">\u003cb>Gonzalez:\u003c/b> It’s fun. It’s a play on words. My last name is Gonzalez, so I named it — It was the Gonzalez Spot — G Spot. But since it has the food trucks and all kinds of things that people can come and enjoy, your taste buds are happy.\u003c/p>\n\u003cp class=\"p2\">♪♪\u003c/p>\n\u003cp class=\"p1\">\u003cb>Phillips:\u003c/b> What kind of food can people find at the G Spot Happy Tastebuds?\u003c/p>\n\u003cp class=\"p1\">\u003cb>Gonzalez:\u003c/b> Oh, wow. You can find all kinds of food. Mexican from different states — Veracruz, Michoacán, Jalisco. And then there’s also Colombian. There’s Guatemalan, Venezuelan. There’s so many trucks that it’s impossible almost to just come in and stick to one.\u003c/p>\n\u003cp class=\"p1\">\u003cb>Phillips:\u003c/b> Sounds great. I can’t wait to try it.\u003c/p>\n\u003cp class=\"p1\">[ Singing in Spanish ]\u003c/p>\n\u003cp class=\"p1\">So why do you call your business Birria El Vaquerito?\u003c/p>\n\u003cp class=\"p1\">\u003cb>Rodriguez:\u003c/b> Because my son is like a little cowboy.\u003c/p>\n\u003cp class=\"p1\">\u003cb>Phillips:\u003c/b> What do you have here? What is this called?\u003c/p>\n\u003cp class=\"p1\">\u003cb>Rodriguez:\u003c/b> Birria Hot Cheetos Bomb. It’s like a mixed birria, onion, cilantro, and rice and cheese.\u003c/p>\n\u003cp class=\"p1\">\u003cb>Phillips:\u003c/b> And what’s on the outside?\u003c/p>\n\u003cp class=\"p1\">\u003cb>Rodriguez:\u003c/b> The Hot Cheeto.\u003c/p>\n\u003cp class=\"p1\">\u003cb>Phillips:\u003c/b> And then the little balls, they’re smiling.\u003c/p>\n\u003cp class=\"p1\">\u003cb>Rodriguez:\u003c/b> [ Laughs ] Yeah.\u003c/p>\n\u003cp class=\"p1\">\u003cb>Phillips:\u003c/b> [ Gasps ] Oh, my gosh! Open it up, dip it in the consommé, and just take a bite. Yeah.\u003c/p>\n\u003cp class=\"p1\">[ Speaking Spanish ]\u003c/p>\n\u003cp class=\"p1\">Oh, my God! That is so good.\u003c/p>\n\u003cp class=\"p1\">\u003cb>Rodriguez:\u003c/b> That’s really good.\u003c/p>\n\u003cp class=\"p2\">♪♪\u003c/p>\n\u003cp class=\"p2\">♪♪\u003c/p>\n\u003cp class=\"p1\">\u003cb>Lopez:\u003c/b> It’s called Shaddai. It means “God almighty.” And we serve Guatemalan cuisine.\u003c/p>\n\u003cp class=\"p1\">\u003cb>Phillips:\u003c/b> Guatemalan food — Very different from anything I’ve ever had. You have a very special dish here.\u003c/p>\n\u003cp class=\"p1\">\u003cb>Lopez:\u003c/b> Yes, it’s the garnachas. It comes with eight small handmade tortillas and pork meat. We cook it, we shred it, and then we add salsa. We add dried cheese and then our escabeche, which is fermented cabbage.\u003c/p>\n\u003cp class=\"p1\">\u003cb>Phillips:\u003c/b> Any sort of, like, special spices that make this garnacha very, like, specific to Guatemala?\u003c/p>\n\u003cp class=\"p1\">\u003cb>Lopez:\u003c/b> It would be our salsa. So, the salsa, we add more things to it, which give it a little kick to it.\u003c/p>\n\u003cp class=\"p2\">♪♪\u003c/p>\n\u003cp class=\"p1\">\u003cb>Phillips:\u003c/b> The salsa is so good. I could eat like four plates of these. They’re so good.\u003c/p>\n\u003cp class=\"p1\">\u003cb>Lopez:\u003c/b> They are. They’re dangerous, I’m telling you.\u003c/p>\n\u003cp class=\"p2\">♪♪\u003c/p>\n\u003cp class=\"p1\">\u003cb>Phillips:\u003c/b> I got to tell you, I was so excited to visit your truck. I had to wear a little bit of pink to go with the truck.\u003c/p>\n\u003cp class=\"p1\">\u003cb>Arambulo:\u003c/b> Thank you so much. We decided to call it Las Cherry’s because I feel like after you have a nice meal, you know, you need a cherry on top. So we have mocktails, we have milkshakes, and we kind of try to go over the top. The s’mores is one of the most popular ones. And then for mocktails, it will be the Colombian hips.\u003c/p>\n\u003cp class=\"p1\">\u003cb>Phillips:\u003c/b> So in the Colombian hips, tell me what’s inside.\u003c/p>\n\u003cp class=\"p1\">\u003cb>Arambulo:\u003c/b> We have orange juice, pineapple juice, pomegranate, a little bit of Red Bull just to give you some energy. And then we topped it off with blue Powerade. Very fruity, very refreshing.\u003c/p>\n\u003cp class=\"p1\">\u003cb>Phillips:\u003c/b> Mmm. So that is a milkshake, a dessert, and an entire like camping trip in one cup.\u003c/p>\n\u003cp class=\"p1\">\u003cb>Arambulo:\u003c/b> Well, yes.\u003c/p>\n\u003cp class=\"p2\">♪♪\u003c/p>\n\u003cp class=\"p1\">\u003cb>Phillips:\u003c/b> I’m assuming that when people come here you want them to leave with their taste buds happy, right?\u003c/p>\n\u003cp class=\"p1\">\u003cb>Gonzalez:\u003c/b> Yeah. I want them to have fun, enjoy their meal. Come and dance and have the kids play around. This is the place to be. Yeah.\u003c/p>\n\u003cp class=\"p2\">♪♪\u003c/p>\n\u003cp class=\"p1\">\u003cb>Sbrocco:\u003c/b> Thanks, Cecilia. And I want to thank my guests on this week’s show — Cathy Asmus, who dreams of the sambusas at New Eritrea in San Francisco. Erin Cabezas, who starts her day with the breakfast pudding at Sideboard in Danville. And Anand Patel, who can’t get enough of the homemade tacos at Tacos Oscar in Oakland. Join us next time when three more guests will recommend their favorite spots right here on “Check, Please! Bay Area.” I’m Leslie Sbrocco and I’ll see you then. Cheers, everyone. Whoo-hoo! Cheers. Cheers. Cheers.\u003c/p>\n\u003cp class=\"p2\">♪♪\u003c/p>\n\u003cp class=\"p1\">\u003cb>Arambulo:\u003c/b> We try to create the craziest milkshakes around. People are going to see it and be like, “Whoa, what is that?”\u003c/p>\n\u003cp class=\"p1\">\u003cb>Phillips:\u003c/b> It’s a giant milkshake. I’ve never seen anything like this.\u003c/p>\n\u003cp class=\"p1\">\u003cb>Arambulo:\u003c/b> This one is our milkshake called s’mores. What we have inside of that is graham crackers. We have marshmallows, chocolate. We have whipped cream.\u003c/p>\n\u003cp>\u003c/p>\u003c/div>",
"attributes": {
"named": {},
"numeric": []
}
},
{
"type": "component",
"content": "",
"name": "ad",
"attributes": {
"named": {
"label": "floatright"
},
"numeric": [
"floatright"
]
}
},
{
"type": "contentString",
"content": "\u003cdiv class=\"post-body\">\u003cp>\u003c/p>\n\u003cp class=\"p1\">\u003cb>Phillips:\u003c/b> That is thick. You can taste graham cracker, marshmallow, chocolate all in one drink. Mmm, mmm. I’m chewing this. This is like another meal.\u003c/p>\n\n\u003c/div>\u003c/p>",
"attributes": {
"named": {},
"numeric": []
}
}
],
"link": "/checkplease/23729/check-please-bay-area-reviews-sideboard-tacos-oscar-new-eritrea",
"authors": [
"11084"
],
"programs": [
"checkplease_9339"
],
"categories": [
"checkplease_3637",
"checkplease_3758",
"checkplease_3873",
"checkplease_8009",
"checkplease_250",
"checkplease_3750",
"checkplease_8017",
"checkplease_3730",
"checkplease_3740",
"checkplease_9210",
"checkplease_3731",
"checkplease_9448",
"checkplease_9200",
"checkplease_3871",
"checkplease_3753",
"checkplease_9212",
"checkplease_3764",
"checkplease_3741",
"checkplease_3738",
"checkplease_10",
"checkplease_3729",
"checkplease_3739",
"checkplease_9209",
"checkplease_8964",
"checkplease_9427",
"checkplease_91",
"checkplease_3936"
],
"tags": [
"checkplease_8633",
"checkplease_1368",
"checkplease_9442",
"checkplease_9445",
"checkplease_9449",
"checkplease_9091",
"checkplease_8573",
"checkplease_8509",
"checkplease_8518",
"checkplease_8568"
],
"featImg": "checkplease_23734",
"label": "checkplease_9339"
},
"checkplease_23721": {
"type": "posts",
"id": "checkplease_23721",
"meta": {
"index": "posts_1716263798",
"site": "checkplease",
"id": "23721",
"score": null,
"sort": [
1770953542000
]
},
"guestAuthors": [],
"slug": "check-please-bay-area-reviews-mykonos-meze-trifecta-montesacro",
"title": "Check, Please! Bay Area reviews: Mykonos Meze, Trifecta, Montesacro",
"publishDate": 1770953542,
"format": "video",
"headTitle": "Check, Please! Bay Area reviews: Mykonos Meze, Trifecta, Montesacro | KQED",
"labelTerm": {
"term": 9339,
"site": "checkplease"
},
"content": "\u003cp>\u003cem>Check, Please! Bay Area, \u003c/em>season 20, episode 14, airs Thursday, February 12, at 7:30 pm, on KQED 9. See other \u003ca href=\"http://www.kqed.org/tv/programs/index.jsp?pgmid=14084\" target=\"_blank\" rel=\"noopener noreferrer\">television airtimes\u003c/a>.\u003c/p>\n\u003cp>\u003cspan style=\"font-weight: 400\">Our guests head to Burlingame at \u003cstrong>Mykonos Meze\u003c/strong>, where Greek small plates are meant for sharing and lingering. Diners scoop up tzatziki with warm pita, savor charred souvlaki, and enjoy keftedes and rich moussaka, finishing with honey-soaked baklava and profiteroles. Next, we head to San Jose’s \u003cstrong>Trifecta\u003c/strong>, an intimate, high-energy spot blending Japanese technique with Filipino influence, where dishes like smoked hamachi tacos, scallop carpaccio with lychee, chawanmushi with longanisa, and pristine nigiri sets showcase the chefs’ precision and playful creativity. Finally, we head to Walnut Creek’s \u003cstrong>Montesacro\u003c/strong>, where the Roman-inspired pinsa takes center stage in a warm, bustling space. Guests enjoy mouthwatering flatbreads topped with soppressata alongside bucatini amatriciana, supplì al telefono, and classic tiramisu. To cap off the episode, reporter Cecilia Phillips heads to \u003cstrong>Dandelion Chocolate’s 16th Street Factory\u003c/strong> for “Cecilia Tries It,” trying her hand at making caramel bonbons and getting a behind-the-scenes look at the chocolate-making process from bean to bar.\u003c/span>\u003c/p>\n\u003cfigure class=\"wp-caption alignnone\" style=\"max-width: 1920px\">\u003cimg loading=\"lazy\" decoding=\"async\" class=\"wp-image-23722 size-full\" src=\"https://cdn.kqed.org/wp-content/uploads/sites/40/2026/02/2014_02.png\" alt=\"\" width=\"1920\" height=\"1080\" srcset=\"https://cdn.kqed.org/wp-content/uploads/sites/40/2026/02/2014_02.png 1920w, https://cdn.kqed.org/wp-content/uploads/sites/40/2026/02/2014_02-160x90.png 160w, https://cdn.kqed.org/wp-content/uploads/sites/40/2026/02/2014_02-768x432.png 768w, https://cdn.kqed.org/wp-content/uploads/sites/40/2026/02/2014_02-1536x864.png 1536w\" sizes=\"auto, (max-width: 1920px) 100vw, 1920px\">\u003cfigcaption class=\"wp-caption-text\">Host Leslie Sbrocco joins guests Jamie Grisar, Josh Baldovino and Tony Martinez from KQED in San Francisco.\u003c/figcaption>\u003c/figure>\n\u003cp>\u003cspan style=\"background-color: transparent\">Get Restaurant Information:\u003c/span>\u003c/p>\n\n\u003cul>\n\u003cli>\u003ca href=\"https://www.mykonosmeze.com/\">\u003cstrong>Mykonos Meze\u003c/strong> (Burlingame)\u003c/a>\u003c/li>\n\u003cli>\u003ca href=\"https://trifectaomakase.com/\">\u003cstrong>Trifecta\u003c/strong> (San Jose)\u003c/a>\u003c/li>\n\u003cli>\u003ca href=\"https://www.montesacro.com/about-walnut-creek\">\u003cstrong>Montesacro \u003c/strong>(Walnut Creek)\u003c/a>\u003c/li>\n\u003c/ul>\n\u003cfigure id=\"attachment_20123\" class=\"wp-caption alignnone\" style=\"max-width: 800px\">\u003cimg loading=\"lazy\" decoding=\"async\" class=\"size-medium wp-image-20123\" src=\"https://cdn.kqed.org/wp-content/uploads/sites/40/2019/04/Leslie-Headshot-Smokey-copy-800x540.jpg\" alt=\"Host Leslie Sbrocco sipping wine\" width=\"800\" height=\"540\">\u003cfigcaption class=\"wp-caption-text\">Host Leslie Sbrocco sipping wine \u003ccite>(Courtesy of Leslie Sbrocco)\u003c/cite>\u003c/figcaption>\u003c/figure>\n\u003cp>My name is Leslie Sbrocco, and I’m the \u003ca href=\"http://ww2.kqed.org/checkplease/host-biography/\" target=\"_blank\" rel=\"noopener noreferrer\">host\u003c/a> of \u003cem>Check, Please! Bay Area\u003c/em>. Each week, I’ll share my tasting notes about the wine, beer and spirits the guests and I drank on set during the taping of the show.\u003c/p>\n\u003cp>\u003cimg loading=\"lazy\" decoding=\"async\" class=\"alignnone size-medium wp-image-23723\" src=\"https://cdn.kqed.org/wp-content/uploads/sites/40/2026/02/2014_Wines-2000x2667.jpg\" alt=\"\" width=\"2000\" height=\"2667\" srcset=\"https://cdn.kqed.org/wp-content/uploads/sites/40/2026/02/2014_Wines-2000x2667.jpg 2000w, https://cdn.kqed.org/wp-content/uploads/sites/40/2026/02/2014_Wines-160x213.jpg 160w, https://cdn.kqed.org/wp-content/uploads/sites/40/2026/02/2014_Wines-768x1024.jpg 768w, https://cdn.kqed.org/wp-content/uploads/sites/40/2026/02/2014_Wines-1152x1536.jpg 1152w, https://cdn.kqed.org/wp-content/uploads/sites/40/2026/02/2014_Wines-1536x2048.jpg 1536w, https://cdn.kqed.org/wp-content/uploads/sites/40/2026/02/2014_Wines-scaled.jpg 1920w\" sizes=\"auto, (max-width: 2000px) 100vw, 2000px\">\u003c/p>\n\u003cp>[ad fullwidth]\u003c/p>\n\u003cp>\u003ca href=\"https://www.anabawines.com/\">Anaba Wines\u003c/a> is not only a family producer of a rich roster of wines; it’s a place for discovery. If you’re in the Sonoma area, make sure to stop by the winery. Named for the cooling influence of the nearby San Pablo Bay and Pacific Ocean breezes, also called anabatic winds, the wines focus on elegance, complexity and vibrancy that comes from grapes allowed to ripen slowly on the vine. Careful crafting of those grapes into wine is Anaba’s signature.\u003c/p>\n\u003cp>A visit to the property evokes a casual vibe that marries a sense of fun and playfulness with seriously delicious wines. Founded by John Sweazey, a businessman turned vintner, the winery was a longtime dream of his from days traveling the wine world. He wanted to capture and share the sense of family and camaraderie that comes from a passion for the culture of wine.\u003c/p>\n\u003cp class=\"x_MsoNormal\">\u003cb>\u003cspan style=\"color: #339966\">Anaba 2024 “Turbine White” Blend\u003c/span>\u003cbr>\n\u003c/b>\u003cem>Sonoma Valley, California, $36\u003c/em>\u003cb>\u003cbr>\n\u003c/b>This Rhone-inspired white is a unique blend of grapes such as Grenache Blanc, Roussanne, Marsanne, Viognier and Picpoul Blanc. A mouth-filling hit of citrus and melon notes led by aromas of honeysuckle, it’s an excellent alternative white to ring in any season of the year.\u003c/p>\n\u003cp class=\"x_MsoNormal\">\u003cb>\u003cspan style=\"color: #339966\">Anaba 2022 Chardonnay, J McK Estate Vineyard\u003c/span>\u003cbr>\n\u003c/b>\u003cem>Carneros, California, $64\u003c/em>\u003cb>\u003cbr>\n\u003c/b>This estate-grown Chardonnay, named after John Sweazey’s two children, John Michael and McKenna, is lush and creamy but balanced by racy acidity that leaves you with a thirst for more. It’s ideal paired alongside grilled fish or with a bite of brie cheese.\u003c/p>\n\u003cp class=\"x_MsoNormal\">\u003cb>\u003cspan style=\"color: #339966\">Anaba 2022 Pinot Noir\u003c/span>\u003cbr>\n\u003c/b>\u003cem>Sonoma Coast, California, $54\u003c/em>\u003cb>\u003cbr>\n\u003c/b>The flagship Pinot of Anaba is a blend of some of the best vineyards planted in the cool Sonoma Coast appellation. Each vintage is a different blend of these vineyards, with the goal of making a stylishly sleek Pinot Noir that’s pure pleasure to sip.\u003c/p>\n\u003cp class=\"x_MsoNormal\">\u003cb>\u003cspan style=\"color: #339966\">Anaba 2022 Grenache, Floria Marie Vineyard\u003c/span>\u003cbr>\n\u003c/b>\u003cem>Russian River Valley, California, $54\u003c/em>\u003cb>\u003cbr>\n\u003c/b>Grenache is one of my favorite red grapes. Traditionally hailing from the southern Rhone Valley of France, it’s planted in select spots globally, including California. Anaba’s single-vineyard bottling is a powerfully spicy red packed with juicy fruit aromas and flavors wrapped in a sultry, smooth texture.\u003c/p>\n\u003ch2>Episode Transcript\u003c/h2>\n\u003cp class=\"p1\">♪♪\u003c/p>\n\u003cp class=\"p2\">\u003cb>Man:\u003c/b> Opa!\u003c/p>\n\u003cp class=\"p2\">\u003cstrong>Man #2\u003c/strong>: Opa!\u003c/p>\n\u003cp class=\"p2\">\u003cb>Sbrocco:\u003c/b> Authentic Greek mezes in Burlingame.\u003c/p>\n\u003cp class=\"p2\">\u003cb>Grisar:\u003c/b> Salted, crispy, fluffy in the middle.\u003c/p>\n\u003cp class=\"p2\">\u003cb>Sbrocco:\u003c/b> Roman pizzas and pasta in Walnut Creek.\u003c/p>\n\u003cp class=\"p2\">\u003cb>Martinez:\u003c/b> Oh, boy, I went nuts there.\u003c/p>\n\u003cp class=\"p2\">\u003cb>Sbrocco:\u003c/b> And contemporary omakase in San Jose.\u003c/p>\n\u003cp class=\"p2\">\u003cb>Baldovino:\u003c/b> The scallops are so soft. It’s almost like you’re eating a cloud.\u003c/p>\n\u003cp class=\"p2\">\u003cb>Sbrocco:\u003c/b> Just ahead on “Check, Please! Bay Area.”\u003c/p>\n\u003cp class=\"p2\">\u003cb>Durfee:\u003c/b> Boom. Boom, boom, boom.\u003c/p>\n\u003cp class=\"p2\">\u003cb>Phillips:\u003c/b> Boom.\u003c/p>\n\u003cp class=\"p1\">♪♪\u003c/p>\n\u003cp class=\"p2\">[ Indistinct conversations ]\u003c/p>\n\u003cp class=\"p2\">\u003cb>Sbrocco:\u003c/b> Hi. I’m Leslie Sbrocco. Welcome to “Check, Please! Bay Area,” the show where Bay Area residents review and talk about their favorite restaurants. Now, we have three guests, and each one recommends one of their favorite spots. And the other two go check them out to see what they think. Joining me at the “Check, Please” table today are investor services representative Jamie Grisar, electrical lineman Tony Martinez, and marketing manager Joshua Baldovino. Welcome, everyone. Ready for fun?\u003c/p>\n\u003cp class=\"p2\">\u003cb>Grisar:\u003c/b> Yes.\u003c/p>\n\u003cp class=\"p2\">\u003cb>Baldovino:\u003c/b> Yes.\u003c/p>\n\u003cp class=\"p2\">\u003cb>Sbrocco:\u003c/b> Tony’s choice specializes in small plates packed with big flavors. From tangy tzatziki, to grilled octopus, to warm flatbreads, the menu is a passport to the Aegean. So pour a little ouzo and get ready to say “opa” as we head to Burlingame, home to Mykonos Meze House.\u003c/p>\n\u003cp class=\"p1\">♪♪\u003c/p>\n\u003cp class=\"p1\">♪♪\u003c/p>\n\u003cp class=\"p2\">\u003cb>Ustel:\u003c/b> Mykonos Meze House is a Greek casual neighborhood eatery.\u003c/p>\n\u003cp class=\"p1\">♪♪\u003c/p>\n\u003cp class=\"p2\">Mykonos is like a party island and then the energies never end. Endless nightlife.\u003c/p>\n\u003cp class=\"p1\">♪♪\u003c/p>\n\u003cp class=\"p2\">I fell in love with the Greek food because of my mom, because moms are always the best. Meatballs — our favorite one. We are always cooking for lamb and meatballs at home. And I like always cooking barbecue. A live grill charbroil, I’m always using for mesquite. Our signature dish is Mykonos souvlaki. The souvlaki, we are using for prime tenderloin with the shallot onion together. The seasoning process is for two days to make them perfect. It’s gonna be melting in your mouth. Meze is the family-style sharing for the small appetizers, hot and cold. Our bar — We have many options. Specially, I like ouzo and tequila. But we have also wine and also other spirits.\u003c/p>\n\u003cp class=\"p2\">\u003cb>Together:\u003c/b> Opa!\u003c/p>\n\u003cp class=\"p2\">\u003cb>Ustel:\u003c/b> What I’m always hearing from the people at the restaurant is, look for something living in there, something’s soul.\u003c/p>\n\u003cp class=\"p2\">\u003cb>Man:\u003c/b> Ohh!\u003c/p>\n\u003cp class=\"p2\">\u003cb>Ustel:\u003c/b> It feels like home.\u003c/p>\n\u003cp class=\"p2\">\u003cb>Man:\u003c/b> Opa!\u003c/p>\n\u003cp class=\"p2\">\u003cb>Woman:\u003c/b> Yeah!\u003c/p>\n\u003cp class=\"p2\">\u003cb>Sbrocco:\u003c/b> All right, Tony. How many times have you been to this place?\u003c/p>\n\u003cp class=\"p2\">\u003cb>Martinez:\u003c/b> It’s gonna be over 500.\u003c/p>\n\u003cp class=\"p2\">\u003cb>Sbrocco:\u003c/b> 500?\u003c/p>\n\u003cp class=\"p2\">\u003cb>Martinez:\u003c/b> At least. I go there almost every day.\u003c/p>\n\u003cp class=\"p2\">\u003cb>Sbrocco:\u003c/b> That is amazing.\u003c/p>\n\u003cp class=\"p2\">\u003cb>Martinez:\u003c/b> Yeah.\u003c/p>\n\u003cp class=\"p2\">\u003cb>Sbrocco:\u003c/b> Oh, I can see some Greekness going on in your tattoos.\u003c/p>\n\u003cp class=\"p2\">\u003cb>Martinez:\u003c/b> Yeah. My wife didn’t agree on this, but, you know, I got the Greek key on both sides, and I got the Parthenon, and I got Athena.\u003c/p>\n\u003cp class=\"p2\">\u003cb>Sbrocco:\u003c/b> So you are Greek through and through?\u003c/p>\n\u003cp class=\"p2\">\u003cb>Martinez:\u003c/b> Yes. I’m infused.\u003c/p>\n\u003cp class=\"p2\">\u003cb>Sbrocco:\u003c/b> So what do you order when you walk in the door, you sit down, they say, “Hey, Tony, come. Here’s your table”?\u003c/p>\n\u003cp class=\"p2\">\u003cb>Martinez:\u003c/b> The spreads. I usually do the spreads with the pita bread and the tzatziki’s in there.\u003c/p>\n\u003cp class=\"p2\">\u003cb>Sbrocco:\u003c/b> Okay.\u003c/p>\n\u003cp class=\"p2\">\u003cb>Martinez:\u003c/b> They have pretty good spreads in there.\u003c/p>\n\u003cp class=\"p2\">\u003cb>Grisar:\u003c/b> It really opens up your palate because there are so many dips. And the bread is nice and warm and fluffy. Yes.\u003c/p>\n\u003cp class=\"p2\">\u003cb>Baldovino:\u003c/b> So I got the keftedes, which I think is a classic dish that you have to get any time you go get Greek. That’s your benchmark. Half beef, half lamb. The way that they cooked it, it had a nice little crisp and char on the outside just from the grill, but on the inside was delicious. How they seasoned it was great.\u003c/p>\n\u003cp class=\"p2\">\u003cb>Sbrocco:\u003c/b> So is there one dish that you just absolutely love and you order every time?\u003c/p>\n\u003cp class=\"p2\">\u003cb>Martinez:\u003c/b> The chicken. It is grilled to perfection. It’s thighs. They’re real thin. So he puts Greek oregano, lemon, salt, and he just grills it over — It’s like a Pourgouri. And then he puts a little bed of tzatziki on it. And then with the pita bread, it’s heaven to me because that’s what I love. I love that, but, you know, that’s one of my favorites that I go for all the time.\u003c/p>\n\u003cp class=\"p2\">\u003cb>Sbrocco:\u003c/b> Okay. Did you have that?\u003c/p>\n\u003cp class=\"p2\">\u003cb>Baldovino:\u003c/b> I did not have the grilled chicken, but I did have a tenderloin.\u003c/p>\n\u003cp class=\"p2\">\u003cb>Sbrocco:\u003c/b> Okay.\u003c/p>\n\u003cp class=\"p2\">\u003cb>Baldovino:\u003c/b> I was debating between the rib eye or the tenderloin when I got there, and I said, “You know what? I actually never order tenderloin. Let me try it.” And so it was these two tenderloin kebabs, grilled again. It was also plated on top of these roasted vegetables, which were delicious.\u003c/p>\n\u003cp class=\"p2\">\u003cb>Sbrocco:\u003c/b> Right.\u003c/p>\n\u003cp class=\"p2\">\u003cb>Baldovino:\u003c/b> I never eat all the vegetables, but actually that was maybe almost as good as the meat itself, ’cause the meat itself was tender, charred perfectly on the outside, and then the sauce that was on the bottom, I just kept scooping it with either the meat or the vegetables over and over.\u003c/p>\n\u003cp class=\"p2\">\u003cb>Sbrocco:\u003c/b> So you got your veggies. I love it.\u003c/p>\n\u003cp class=\"p2\">\u003cb>Baldovino:\u003c/b> I did.\u003c/p>\n\u003cp class=\"p2\">[ Laughter ]\u003c/p>\n\u003cp class=\"p2\">\u003cb>Sbrocco:\u003c/b> And what about you, Jamie?\u003c/p>\n\u003cp class=\"p2\">\u003cb>Grisar:\u003c/b> So you mentioned the rib eye, and I did end up getting the rib eye. And it’s plated beautifully. It’s on a wood cutting board. And then they light it on fire.\u003c/p>\n\u003cp class=\"p2\">\u003cb>Together:\u003c/b> Opa!\u003c/p>\n\u003cp class=\"p2\">\u003cb>Woman:\u003c/b> Opa! Opa!\u003c/p>\n\u003cp class=\"p2\">\u003cb>Martinez:\u003c/b> It’s ouzo.\u003c/p>\n\u003cp class=\"p2\">\u003cb>Sbrocco:\u003c/b> Ah. That’s why you light it on fire.\u003c/p>\n\u003cp class=\"p2\">\u003cb>Grisar:\u003c/b> Got you.\u003c/p>\n\u003cp class=\"p2\">\u003cb>Martinez:\u003c/b> I’m glad she got to experience that, because that’s the whole idea there. And the “opa,” because they…\u003c/p>\n\u003cp class=\"p2\">\u003cb>Sbrocco:\u003c/b> It’s “opa” and ouzo!\u003c/p>\n\u003cp class=\"p2\">\u003cb>Martinez:\u003c/b> Yeah. Yeah.\u003c/p>\n\u003cp class=\"p2\">\u003cb>Grisar:\u003c/b> And it was awesome. The steak was — I got it medium rare. And so it was cooked perfectly. It had a beautiful sear on the outside and it came with these potatoes. Honestly, the potatoes were the star of the show. Better than the rib eye.\u003c/p>\n\u003cp class=\"p2\">\u003cb>Martinez:\u003c/b> Very good.\u003c/p>\n\u003cp class=\"p2\">\u003cb>Grisar:\u003c/b> Salted. Crispy. Pillowy, fluffy in the middle. Could not ask for better potatoes. Honestly.\u003c/p>\n\u003cp class=\"p2\">\u003cb>Martinez:\u003c/b> They’re like steak fries.\u003c/p>\n\u003cp class=\"p2\">\u003cb>Grisar:\u003c/b> They are. They’re thick. Oh, so good. We also got the lamb shank, so… And that was also extremely tender. That sauce — Oh, I could drink it. I could drink it. It was so good. I mean, I would just say it was like a Greek gravy.\u003c/p>\n\u003cp class=\"p2\">\u003cb>Martinez:\u003c/b> The moussaka is very good. It’s eggplant with potatoes and the Béchamel sauce. And it’s piping hot. So you got to wait. You got to let it breathe a little bit. So that gives you a chance to drink a little more.\u003c/p>\n\u003cp class=\"p2\">\u003cb>Sbrocco:\u003c/b> It gives you a chance to drink something. So what did you have to drink?\u003c/p>\n\u003cp class=\"p2\">\u003cb>Martinez:\u003c/b> I’ve always liked the spicy margarita, but then it’s the White Shadow they always brought me because I like piña coladas. But it’s just, the only difference is vodka instead of Bacardi.\u003c/p>\n\u003cp class=\"p2\">\u003cb>Sbrocco:\u003c/b> Instead of rum. Mm-hmm. Okay. Did you have anything to drink alongside?\u003c/p>\n\u003cp class=\"p2\">\u003cb>Baldovino:\u003c/b> Yeah. So I did a Paper Plane. So it’s a bourbon-based cocktail with some Aperol, and it was surprisingly refreshing. Normally you think of a whiskey cocktail as kind of being heavy and not so as refreshing, but this was a little bit of citrus to it with the Aperol. And so it was perfect for a weekend afternoon.\u003c/p>\n\u003cp class=\"p2\">\u003cb>Sbrocco:\u003c/b> Did anybody have dessert? Or in the many times you’ve gone, have you done dessert?\u003c/p>\n\u003cp class=\"p2\">\u003cb>Martinez:\u003c/b> Many times.\u003c/p>\n\u003cp class=\"p2\">[ Laughter ]\u003c/p>\n\u003cp class=\"p2\">Profiteroles. Those are the best because they’re, like, puffy, you know, cream puffs with vanilla ice cream and just with a little chocolate drizzled on top of it.\u003c/p>\n\u003cp class=\"p2\">\u003cb>Sbrocco:\u003c/b> With the little one, did you get to share dessert?\u003c/p>\n\u003cp class=\"p2\">\u003cb>Grisar:\u003c/b> I did. We got baklava because it comes with ice cream. So good. Honey, pistachio. And the phyllo is actually pretty soft because it’s so soaked. Really good.\u003c/p>\n\u003cp class=\"p2\">[ Glasses clink ]\u003c/p>\n\u003cp class=\"p2\">\u003cb>Martinez:\u003c/b> So there’s another thing about Mykonos that when it turns dark, Marco comes out, the lights dim down, and then he gets the light shows going, and then he has a smoker, too. And then the music goes up. So if you’re gonna go there and you want to have a lively time, it’s gonna be after 8:00.\u003c/p>\n\u003cp class=\"p2\">\u003cb>Sbrocco:\u003c/b> You’re capturing the fun of the island.\u003c/p>\n\u003cp class=\"p2\">\u003cb>Martinez:\u003c/b> It’s great. I wish I was there now.\u003c/p>\n\u003cp class=\"p2\">\u003cb>Sbrocco:\u003c/b> Me too. All right. If you would like to try Mykonos Meze House, it’s located on Lorton Avenue in Burlingame, and the average multi-course tab per person without drinks is around $60. Joshua says his sleek little sushi spot is one of Silicon Valley’s true hidden gems. Offering creative takes on Japanese and Filipino favorites, fruit-forward cocktails, and a lively vibe, every meal is a true feast for the senses. Tucked away in southern San Jose’s Silver Creek area, it’s Trifecta.\u003c/p>\n\u003cp class=\"p1\">♪♪\u003c/p>\n\u003cp class=\"p1\">♪♪\u003c/p>\n\u003cp class=\"p2\">\u003cb>Bradley:\u003c/b> Trifecta is a Japanese sushi restaurant with Filipino influence starring me, my brother Ryan, and our mom.\u003c/p>\n\u003cp class=\"p2\">\u003cb>Woman:\u003c/b> Thank you guys. Thank you so much.\u003c/p>\n\u003cp class=\"p2\">\u003cb>Ryan:\u003c/b> Sharing food that we love.\u003c/p>\n\u003cp class=\"p2\">\u003cb>Man:\u003c/b> All right. Enjoy, guys. Woman #2: Thank you.\u003c/p>\n\u003cp class=\"p2\">\u003cb>Bradley:\u003c/b> When people think of sushi, they just think of raw fish, rolls.\u003c/p>\n\u003cp class=\"p2\">\u003cb>Ryan:\u003c/b> We like to try not to be too traditional and bend the rules a little bit.\u003c/p>\n\u003cp class=\"p2\">\u003cb>Bradley:\u003c/b> We like to kind of spice it up and add toppings to our nigiris.\u003c/p>\n\u003cp class=\"p2\">\u003cb>Man:\u003c/b> To the chefs.\u003c/p>\n\u003cp class=\"p2\">\u003cb>Bradley:\u003c/b> We love to use, like, chicharrón and taro and use it as an added texture, depth, and crunch. But a lot of our sauces and flavors come from calamansi. So we do have our signature cold plates, like our yellowtail crudo, and bluefin tuna chili garlic — That’s probably our flagship dish. But a lot of Filipino dishes are hot. So, like, our short rib — a 72-hour braise.\u003c/p>\n\u003cp class=\"p1\">♪♪\u003c/p>\n\u003cp class=\"p2\">\u003cb>Ryan:\u003c/b> The vibe is bustling. It’s cracking, it’s popping. We want to make sure our guests are taken care of, but we try to have fun at the same time and enjoy the moment.\u003c/p>\n\u003cp class=\"p2\">\u003cb>Bradley:\u003c/b> This is a dream come true. This is our hometown. So providing, you know, to our own community the food that we love doing, it just means a lot to us. Out of all the places in the world, they chose to be here with us. And that’s a special moment.\u003c/p>\n\u003cp class=\"p2\">[ Laughter ]\u003c/p>\n\u003cp class=\"p2\">\u003cb>Sbrocco:\u003c/b> All right, Joshua, talk to me about this place, because it’s an interesting blend, isn’t it, of flavors and cultures and cuisines.\u003c/p>\n\u003cp class=\"p2\">\u003cb>Baldovino:\u003c/b> It is. It’s these two Filipino brothers who have this traditional Japanese spot, but now they added a little bit of Filipino twist to it, so they get the best of both worlds now. If you’re going for the real exciting experience, you do omakase.\u003c/p>\n\u003cp class=\"p2\">\u003cb>Sbrocco:\u003c/b> Right. Chef choice.\u003c/p>\n\u003cp class=\"p2\">\u003cb>Baldovino:\u003c/b> Yes. Or you can do à la carte on the menu.\u003c/p>\n\u003cp class=\"p2\">\u003cb>Sbrocco:\u003c/b> Okay.\u003c/p>\n\u003cp class=\"p2\">\u003cb>Baldovino:\u003c/b> I did start with a cocktail at first. It was an espresso sesame sake.\u003c/p>\n\u003cp class=\"p2\">\u003cb>Sbrocco:\u003c/b> Ah.\u003c/p>\n\u003cp class=\"p2\">\u003cb>Martinez:\u003c/b> That was good.\u003c/p>\n\u003cp class=\"p2\">\u003cb>Baldovino:\u003c/b> So you get the hint of coffee, but you still have a nice sake, which brings this lightness to it. And then it has a sesame crisp on it, and it adds a nice little textural element.\u003c/p>\n\u003cp class=\"p2\">\u003cb>Sbrocco:\u003c/b> All right, so you’ve got a cocktail in your glass and what goes with it?\u003c/p>\n\u003cp class=\"p2\">\u003cb>Baldovino:\u003c/b> And then garlic edamame for me. If anyone’s been to Hawaii and has gotten any kind of garlic shrimp scampi, they have replicated that garlic sauce to a T. The edamame is just doused in it. And so you just can’t help but just take the entire bean and just get all the sauce and all the garlic. Maybe not great for the date after, but really good as you taste it through.\u003c/p>\n\u003cp class=\"p2\">\u003cb>Sbrocco:\u003c/b> All right. And, Jamie, what about you?\u003c/p>\n\u003cp class=\"p2\">\u003cb>Grisar:\u003c/b> We did the omakase. And so the first dish they brought out was oysters. And the first oyster was with a yuzu vinaigrette. And the second was with a wasabi vinaigrette. The wasabi was so nice.\u003c/p>\n\u003cp class=\"p2\">\u003cb>Woman:\u003c/b> Cheers!\u003c/p>\n\u003cp class=\"p2\">\u003cb>Man:\u003c/b> Cheers!\u003c/p>\n\u003cp class=\"p2\">\u003cb>Grisar:\u003c/b> Like, it didn’t burn your nose. It was just that right amount of spicy. And that yuzu was refreshing.\u003c/p>\n\u003cp class=\"p2\">\u003cb>Sbrocco:\u003c/b> Right.\u003c/p>\n\u003cp class=\"p2\">\u003cb>Grisar:\u003c/b> And then after that, it was the chawanmushi, which is a Japanese soufflé. And it was beautiful. It was silky and salty and sweet and with a Filipino twist, they put in longganisa. And so it had the crispy bits and it had a beautiful seared scallop on it, so you also had that buttery taste. Really delicious for the first two courses.\u003c/p>\n\u003cp class=\"p2\">\u003cb>Sbrocco:\u003c/b> First two courses. All right. We’ll get back to you with more. What about you now, Tony? How was your experience?\u003c/p>\n\u003cp class=\"p2\">\u003cb>Martinez:\u003c/b> It was great. The little tacos.\u003c/p>\n\u003cp class=\"p2\">\u003cb>Sbrocco:\u003c/b> The hamachi tacos.\u003c/p>\n\u003cp class=\"p2\">\u003cb>Martinez:\u003c/b> They were delicious. Something about it. I’ve never had that flavor before.\u003c/p>\n\u003cp class=\"p2\">\u003cb>Sbrocco:\u003c/b> Have you had those before?\u003c/p>\n\u003cp class=\"p2\">\u003cb>Baldovino:\u003c/b> I did. So the hamachi tacos are really nice ’cause it is. It’s a nice little starter, as well. It’s a wonton crisp taco. And then you’ll have a little bit of avocado within. It’s raw hamachi on top with some sauce and then a sliced jalapeño.\u003c/p>\n\u003cp class=\"p2\">\u003cb>Martinez:\u003c/b> But I never had the raw. The raw fish. And that got me going. And I was like, “wow, that was good.” That’s why the yellowtail came in effect. And my son brought me into that. With the jalapeño oil sauce.\u003c/p>\n\u003cp class=\"p2\">\u003cb>Sbrocco:\u003c/b> Okay. So that’s what you had next.\u003c/p>\n\u003cp class=\"p2\">\u003cb>Martinez:\u003c/b> Ooh, yes. Oh, that was delicious. It just melted in your mouth.\u003c/p>\n\u003cp class=\"p2\">\u003cspan class=\"s1\">♪\u003c/span> Girl, can I talk to you? \u003cspan class=\"s1\">♪\u003c/span>\u003c/p>\n\u003cp class=\"p2\">\u003cb>Martinez:\u003c/b> And with Rex, the deejay, Rex, was there going. He was the best.\u003c/p>\n\u003cp class=\"p2\">[ Laughter ]\u003c/p>\n\u003cp class=\"p2\">He came to us and talked to us.\u003c/p>\n\u003cp class=\"p2\">\u003cb>Sbrocco:\u003c/b> You like party places. I can tell. He likes party spots. All right. And what else did you have?\u003c/p>\n\u003cp class=\"p2\">\u003cb>Grisar:\u003c/b> Yeah. So if you don’t want to go all the way raw, part of the omakase set was seared albacore tuna in a ponzu sauce. Light. Refreshing. With that, you know, hint of lime. And then after that, it was a nigiri plate. And so it was four pieces of nigiri and their in-house-made tamago with an egg omelet. But it was really good. And each piece has toppings. And it did really enhance the flavor of each piece of nigiri that we did get.\u003c/p>\n\u003cp class=\"p2\">\u003cb>Sbrocco:\u003c/b> Okay. And you’re shaking your head, going…\u003c/p>\n\u003cp class=\"p2\">\u003cb>Baldovino:\u003c/b> Oh, I mean, you have to get some sushi, for sure. So whether you’re doing sashimi or nigiri, you have to try it. And two of my other favorites — There’s a scallop carpaccio dish. And so they have scallops. That’s paired with some lychee fruit. And they have some citrus around the plate, too. It looks like a piece of art on the plate itself. And the scallops are so soft. It’s almost like you’re eating a cloud.\u003c/p>\n\u003cp class=\"p2\">\u003cb>Martinez:\u003c/b> We had the tempura roll. You know, the tempura roll was meshed together with the unagi sauce.\u003c/p>\n\u003cp class=\"p2\">\u003cb>Baldovino:\u003c/b> Mm-hmm.\u003c/p>\n\u003cp class=\"p2\">\u003cb>Martinez:\u003c/b> It was so good. So I’m a big fan of chicken. So when they said “fried chicken,” I said, “I got to have some of that.” And she brought it and it was so crispy and flavorful.\u003c/p>\n\u003cp class=\"p2\">\u003cb>Baldovino:\u003c/b> I’ve had the karaage there before, too. Right? Japanese fried chicken. But I think I’m always there for the seafood first. But the chicken is a nice change of pace, too. Did any of you guys get the short rib?\u003c/p>\n\u003cp class=\"p2\">\u003cb>Martinez:\u003c/b> No, I didn’t get the short rib.\u003c/p>\n\u003cp class=\"p2\">\u003cb>Baldovino:\u003c/b> Okay, the short rib, it’s a fun showstopper ’cause it gets plated almost like a tomahawk steak.\u003c/p>\n\u003cp class=\"p2\">\u003cb>Martinez:\u003c/b> Oh, nice.\u003c/p>\n\u003cp class=\"p2\">\u003cb>Baldovino:\u003c/b> It’s super-thick. And then it’s all plated on top of a kare-kare sauce, which is a Filipino kind of peanut-based sauce.\u003c/p>\n\u003cp class=\"p2\">\u003cb>Martinez:\u003c/b> Mmm. So I got to go back for that.\u003c/p>\n\u003cp class=\"p2\">\u003cb>Sbrocco:\u003c/b> And did you feel like you got a good deal? I mean, it can be expensive.\u003c/p>\n\u003cp class=\"p2\">\u003cb>Martinez:\u003c/b> You know what? To me, the price doesn’t matter as long as you have fun. You know, that’s what matters — the experience. Yes.\u003c/p>\n\u003cp class=\"p2\">\u003cb>Baldovino:\u003c/b> And in terms of value, I mean, omakase can get ridiculously expensive. And so if you’re looking for a high-end omakase without the crazy, crazy prices, this is definitely a good way to go.\u003c/p>\n\u003cp class=\"p2\">\u003cb>Sbrocco:\u003c/b> Okay. Excellent. If you would like to try Trifecta, it’s located on Silver Creek Valley Road in San Jose, and the average multi-course tab per person without drinks is around $70. Jamie is bringing us back to the Mediterranean, to a lively trattoria that’s captured her heart. From cloudlike pizzas, to savory supplì, every dish on the menu is rooted in Roman culinary tradition. Located in Walnut Creek, it’s Montesacro.\u003c/p>\n\u003cp class=\"p1\">♪♪\u003c/p>\n\u003cp class=\"p2\">\u003cb>Gianluca:\u003c/b> Montesacro, it’s one of the most beautiful neighborhoods in Rome, outside of where I grew up, packed with life. I wanted to create an environment elegant, upscale, refined, very Italian. Hello.\u003c/p>\n\u003cp class=\"p2\">[ Speaks Italian ]\u003c/p>\n\u003cp class=\"p2\">[ Conversing in Italian ]\u003c/p>\n\u003cp class=\"p2\">Our intention is to bring people together, share as much as possible as a family, as friends. How was everything today?\u003c/p>\n\u003cp class=\"p2\">\u003cb>Man:\u003c/b> Really good.\u003c/p>\n\u003cp class=\"p2\">\u003cb>Gianluca:\u003c/b> Montesacro opened as the first pinsa place in the United States in 2015 in San Francisco. Pinsa is not pizza. It runs in the family of pizza, but it’s made from soy, rice, and wheat, which already makes it completely different than traditional pizza. It proofs for a minimum of 72 hours, and we stretch it à la minute over rice flour to give it a little extra crispiness after it’s cooked. It’s oval in shape. It’s not round or square. And that’s pinsa. Pinsa Romana. We have different appetizers, pastas — all homemade. Our cacio e pepe, I believe, is the closest to what I would expect to eat in Rome. The octopus appetizer is one of our highlights. It’s cooked to tender, simply dressed with the most amazing extra-virgin olive oil, and drizzled with some fresh oregano. With all due respect to Californian wines, which we absolutely love, we decided to feature only Italian wines made from indigenous grape varietals of Italy only. Salute.\u003c/p>\n\u003cp class=\"p2\">\u003cb>Man:\u003c/b> Salute.\u003c/p>\n\u003cp class=\"p2\">[ Speaks Italian ]\u003c/p>\n\u003cp class=\"p2\">\u003cb>Gianluca:\u003c/b> My biggest hope with people experiencing Montesacro, once they go back home, is to say, “You’ve got to try this because it’s not the ordinary Italian restaurant. It’s something unique,” because it’s what we’re trying to achieve more than anything else. Create an experience that is memorable, that is forever.\u003c/p>\n\u003cp class=\"p2\">\u003cb>Sbrocco:\u003c/b> All right, Jamie, talk about how you found this restaurant. I mean, there’s not a lot of Roman-inspired restaurants, and the food in Rome is the best.\u003c/p>\n\u003cp class=\"p2\">\u003cb>Grisar:\u003c/b> Oh, totally the best.\u003c/p>\n\u003cp class=\"p2\">\u003cb>Sbrocco:\u003c/b> Uh-huh.\u003c/p>\n\u003cp class=\"p2\">\u003cb>Grisar:\u003c/b> We were actually on the hunt for gnocchi. We just looked up “gnocchi” on Yelp, and there it was — Montesacro. And it was in a red sauce, which is kind of rare for the Bay Area. And we’re like, “We have to go.”\u003c/p>\n\u003cp class=\"p2\">\u003cb>Sbrocco:\u003c/b> And what is it that you get besides the gnocchi?\u003c/p>\n\u003cp class=\"p2\">\u003cb>Grisar:\u003c/b> We start with the supplì al telefono, which are these beautiful golden balls. They’re fried. They call it supplì al telefono because in the middle, it’s stuffed with mozzarella cheese. And so when you pull it open, you get that nice string of cheese and it looks like a telephone wire.\u003c/p>\n\u003cp class=\"p2\">\u003cb>Sbrocco:\u003c/b> Right.\u003c/p>\n\u003cp class=\"p2\">\u003cb>Grisar:\u003c/b> And it’s so delicious.\u003c/p>\n\u003cp class=\"p2\">\u003cb>Baldovino:\u003c/b> To me, it’s like adult cheese sticks, you know? So you get the nice exterior, which has a nice crust to it, seasoned really well. And then, as you open it up, I mean, I judge the cheese sticks by the cheese pull. And so you can pull it and it does have that classic cheese pull and it was delicious.\u003c/p>\n\u003cp class=\"p2\">\u003cb>Sbrocco:\u003c/b> Okay. How about you?\u003c/p>\n\u003cp class=\"p2\">\u003cb>Martinez:\u003c/b> Oh, boy, I went nuts there.\u003c/p>\n\u003cp class=\"p2\">\u003cb>Sbrocco:\u003c/b> Why does that not surprise me?\u003c/p>\n\u003cp class=\"p2\">\u003cb>Martinez:\u003c/b> Yeah. I mean… Forget the salad. We go to the porchetta.\u003c/p>\n\u003cp class=\"p2\">\u003cb>Woman:\u003c/b> Oh, that looks lovely. Woman #2: Oh, my goodness.\u003c/p>\n\u003cp class=\"p2\">\u003cb>Martinez:\u003c/b> Just savory. I love it. And they mixed it with the orange all day on that one.\u003c/p>\n\u003cp class=\"p2\">\u003cb>Grisar:\u003c/b> The porchetta is really good. It was — I actually haven’t ordered it. The table next to us did, and I think they saw me eyeing their food and they said, “Do you want to try this?”\u003c/p>\n\u003cp class=\"p2\">\u003cb>Sbrocco:\u003c/b> They did not.\u003c/p>\n\u003cp class=\"p2\">\u003cb>Grisar:\u003c/b> I swear they did. No, this place is so friendly ’cause you’re sitting so close to one another. So you can kind of tell, like, “Oh, I like what’s on your plate. Oh, I don’t like what’s on your plate.” I do actually get another pasta dish. I get the Amatriciana, which is a bucatini with a spicy marinara sauce and guanciale. I can eat pounds and pounds of guanciale.\u003c/p>\n\u003cp class=\"p2\">\u003cb>Sbrocco:\u003c/b> I know.\u003c/p>\n\u003cp class=\"p2\">\u003cb>Grisar:\u003c/b> It’s just a funkier pancetta.\u003c/p>\n\u003cp class=\"p2\">\u003cb>Sbrocco:\u003c/b> You have that little more earthy flavor than…\u003c/p>\n\u003cp class=\"p2\">\u003cb>Martinez:\u003c/b> But it melts right in your mouth.\u003c/p>\n\u003cp class=\"p2\">\u003cb>Grisar:\u003c/b> It does ’cause that fat cap is so big. Your mouth is coated in, like, fat, but it’s good.\u003c/p>\n\u003cp class=\"p2\">\u003cb>Sbrocco:\u003c/b> All right. We are gonna talk about pinsas. So that’s really the heart of this place and what sets it apart.\u003c/p>\n\u003cp class=\"p2\">\u003cb>Grisar:\u003c/b> It is, yes. Different flour blend. So it’s almost lighter, chewier. And it gets really crisp. You get that nice char all around. We always, always get the [Haltingly] Tormarancia.\u003c/p>\n\u003cp class=\"p2\">\u003cb>Sbrocco:\u003c/b> Easy for you to say.\u003c/p>\n\u003cp class=\"p2\">\u003cb>Grisar:\u003c/b> Yes. Sure. Yes. It’s basically a souped-up Margherita pizza, but with spicy soppressata.\u003c/p>\n\u003cp class=\"p2\">\u003cb>Sbrocco:\u003c/b> Mm-hmm.\u003c/p>\n\u003cp class=\"p2\">\u003cb>Grisar:\u003c/b> And it’s lovely with the sweet tomato sauce and the spicy, salty meat. It’s just the perfect combination.\u003c/p>\n\u003cp class=\"p2\">\u003cb>Baldovino:\u003c/b> We did the same one as you, but then we also established the baseline with the Margherita, ’cause I feel like you have to establish the baseline. But I agree — The dough was delicious and the Margherita itself, it definitely lands more on the heavier basil side. So if you love basil, then you’re really gonna enjoy this pinsa.\u003c/p>\n\u003cp class=\"p2\">\u003cb>Sbrocco:\u003c/b> Okay, what did you drink?\u003c/p>\n\u003cp class=\"p2\">\u003cb>Martinez:\u003c/b> I went to the martini. It was the spicy G&C martini. It was Calabrese oil with the olive in it. This was the spicy, and one of the best, martinis I’ve ever had.\u003c/p>\n\u003cp class=\"p2\">\u003cb>Grisar:\u003c/b> Oh, that’s awesome.\u003c/p>\n\u003cp class=\"p2\">\u003cb>Martinez:\u003c/b> The best. And it was perfect with my pinsa. Perfect.\u003c/p>\n\u003cp class=\"p2\">\u003cb>Baldovino:\u003c/b> They do have a special cocktail, which is a pistachio espresso martini.\u003c/p>\n\u003cp class=\"p2\">\u003cb>Sbrocco:\u003c/b> Wow.\u003c/p>\n\u003cp class=\"p2\">\u003cb>Baldovino:\u003c/b> And the presentation of this is so pretty. Almost, like, a quarter of the glass had crushed pistachios on the outside.\u003c/p>\n\u003cp class=\"p2\">\u003cb>Martinez:\u003c/b> Did you get a spoon?\u003c/p>\n\u003cp class=\"p2\">\u003cb>Baldovino:\u003c/b> I mean, I did just bite it off afterwards ’cause it was a nice nutty treat to have.\u003c/p>\n\u003cp class=\"p2\">\u003cb>Sbrocco:\u003c/b> Yeah. Anybody have dessert?\u003c/p>\n\u003cp class=\"p2\">\u003cb>Martinez:\u003c/b> I got three of the desserts. And tiramisu — That’s the one I really love. When you bite into it, just don’t breathe in because you get the coffee. [ Breathes sharply] You get the coffee, and you start sneezing.\u003c/p>\n\u003cp class=\"p2\">\u003cb>Grisar:\u003c/b> Yeah, the coffee, the cocoa powder down your throat. Like a beignet almost.\u003c/p>\n\u003cp class=\"p2\">\u003cb>Martinez:\u003c/b> That was like, “Oh, no.” But, you know. Then we had the chocolate torte.\u003c/p>\n\u003cp class=\"p2\">\u003cb>Man:\u003c/b> Oh, man, look at that.\u003c/p>\n\u003cp class=\"p2\">\u003cb>Martinez:\u003c/b> Filled with fresh cream. I’m not a big chocolate guy, but that was pretty good. That was good. The last one was the pinsa filled with — They almost tried to copy a cannoli, but it missed the point to me because the tiramisu had me already.\u003c/p>\n\u003cp class=\"p2\">\u003cb>Sbrocco:\u003c/b> All right, the tiramisu won. If you would like to try Montesacro, it’s located on Locust Street in Walnut Creek, and the average multi-course tab per person without drinks is around $45. And now reporter Cecilia Phillips has more Bay Area bites you’ve just got to try.\u003c/p>\n\u003cp class=\"p1\">♪♪\u003c/p>\n\u003cp class=\"p1\">♪♪\u003c/p>\n\u003cp class=\"p2\">\u003cb>Phillips:\u003c/b> We are so lucky to be able to come to Dandelion Chocolate today. And this place. I could smell it before we even walked in.\u003c/p>\n\u003cp class=\"p2\">\u003cb>Durfee:\u003c/b> Yeah. I ride my bike into work and I’ll be a block away. And even without seeing it, I can [Sniffs] I was like, “Ah, I’m getting close to work.”\u003c/p>\n\u003cp class=\"p2\">[ Both laugh ]\u003c/p>\n\u003cp class=\"p2\">\u003cb>Phillips:\u003c/b> Tell me more about Dandelion Chocolate and the special things that you all do here with single-origin chocolate. Just two ingredients.\u003c/p>\n\u003cp class=\"p2\">\u003cb>Durfee:\u003c/b> That’s right. Cocoa beans and organic cane sugar. And what we call cocoa beans are actually not beans. They’re seeds of a tropical fruit called cacao. And each pod contains about 50 unique fruits.\u003c/p>\n\u003cp class=\"p2\">\u003cb>Phillips:\u003c/b> Mm.\u003c/p>\n\u003cp class=\"p2\">\u003cb>Durfee:\u003c/b> So we source cocoa beans from about 20 or so unique locations around the world. And depending on the actual variety of fruit and where it grows and how it’s processed, there’s just endless possibilities. We roast the bean and we crack them, which creates little broken pieces we call nibs, and we grind those up and add sugar to that and grind the sugar in until that is fully refined, as well. We make chips and we make bars. And then we have a confectionery team that takes our chocolate and turns it into caramels and pralines and chocolate truffles. The fruit is fermented over a period of time. We do factory tours every day. We teach the basics of even tasting and how to appreciate the variations in different origins.\u003c/p>\n\u003cp class=\"p2\">\u003cb>Phillips:\u003c/b> Even someone like me can come in and learn, maybe, like, how to make a bonbon?\u003c/p>\n\u003cp class=\"p2\">\u003cb>Durfee:\u003c/b> Absolutely.\u003c/p>\n\u003cp class=\"p2\">\u003cb>Phillips:\u003c/b> Yeah? All right, let’s do it.\u003c/p>\n\u003cp class=\"p2\">\u003cb>Durfee:\u003c/b> Yeah, let’s do it. And you — Yeah. Yeah. Oh, my gosh. Yeah, like that. Okay.\u003c/p>\n\u003cp class=\"p2\">\u003cb>Phillips:\u003c/b> We’re all prepped up.\u003c/p>\n\u003cp class=\"p2\">\u003cb>Durfee:\u003c/b> Yeah. We’re making chocolate caramels today.\u003c/p>\n\u003cp class=\"p2\">\u003cb>Phillips:\u003c/b> Chocolate caramels. Nice.\u003c/p>\n\u003cp class=\"p2\">\u003cb>Durfee:\u003c/b> This is a Dandelion bonbon mold. And I already prepped it with tempered chocolate. It’s our Camino Verde, Ecuador origin. And I made the caramel filling.\u003c/p>\n\u003cp class=\"p2\">\u003cb>Phillips:\u003c/b> Here we go.\u003c/p>\n\u003cp class=\"p2\">\u003cb>Durfee:\u003c/b> Yeah. Get it right down inside there. Squeeze, squeeze, squeeze, squeeze, squeeze. Whoa! All right.\u003c/p>\n\u003cp class=\"p2\">\u003cb>Phillips:\u003c/b> Whoa!\u003c/p>\n\u003cp class=\"p2\">\u003cb>Phillips:\u003c/b> Oh. What am I gonna do with the extra?\u003c/p>\n\u003cp class=\"p1\">♪♪\u003c/p>\n\u003cp class=\"p2\">Ooh. [ Laughs ] Oh, hello.\u003c/p>\n\u003cp class=\"p2\">[ Laughs ]\u003c/p>\n\u003cp class=\"p2\">\u003cb>Durfee:\u003c/b> Okay, so now the caramel has had some time to settle in, and it’s time to put chocolate on to cap it. Try not to put too much chocolate on. And bring it to the edge of the table. I’m gonna go… So the chocolate flows in and fills all the gaps. Boom. Right off the edge. So now they’re completely sealed.\u003c/p>\n\u003cp class=\"p2\">\u003cb>Phillips:\u003c/b> Nice.\u003c/p>\n\u003cp class=\"p2\">\u003cb>Durfee:\u003c/b> It’s gonna take about 5, 10 minutes for the chocolate to crystallize, to firm up. Here we go. So we’re just gonna flip it upside down onto the table. So like that. And we’ll reveal the… Ah! You didn’t even know this.\u003c/p>\n\u003cp class=\"p2\">\u003cb>Phillips:\u003c/b> What did you do?\u003c/p>\n\u003cp class=\"p2\">\u003cb>Durfee:\u003c/b> So I took what’s called a transfer sheet.\u003c/p>\n\u003cp class=\"p2\">\u003cb>Phillips:\u003c/b> Transfer sheet.\u003c/p>\n\u003cp class=\"p2\">\u003cb>Durfee:\u003c/b> Right. It’s got a cocoa butter pattern on there.\u003c/p>\n\u003cp class=\"p2\">\u003cb>Phillips:\u003c/b> These are so pretty. Yay!\u003c/p>\n\u003cp class=\"p2\">\u003cb>Durfee:\u003c/b> Yay.\u003c/p>\n\u003cp class=\"p2\">\u003cb>Phillips:\u003c/b> All right. There’s a lot of caramel. Mmm. So good. I made bonbons. All right. I don’t think these two are gonna make the cut. So one for me, one for you.\u003c/p>\n\u003cp class=\"p2\">\u003cb>Sbrocco:\u003c/b> I want to thank my great guests on this week’s show — Jamie Grisar, who’s got of passion for pinsas at Montesacro in Walnut Creek; Tony Martinez, who craves the keftedes at Mykonos Meze House in Burlingame; and Joshua Baldovino, who savors the smoked hamachi at Trifecta in San Jose. Join us next time when three more guests will recommend their favorite spots, right here on “Check, Please! Bay Area.” I’m Leslie Sbrocco, and I’ll see you then. Cheers. And cheers to you all.\u003c/p>\n\u003cp class=\"p2\">\u003cb>Martinez:\u003c/b> Cheers.\u003c/p>\n\u003cp class=\"p2\">\u003cb>Sbrocco:\u003c/b> Thank you for being such great guests.\u003c/p>\n\u003cp class=\"p2\">\u003cb>Durfee:\u003c/b> We’re gonna pipe it in. We’re gonna fill the molds up to the tippy top. Boom. Boom, boom, boom, boom.\u003c/p>\n\u003cp class=\"p2\">\u003cb>Phillips:\u003c/b> Boom. Boom. Boom.\u003c/p>\n\u003cp class=\"p2\">\u003cb>Durfee:\u003c/b> And then we’re gonna turn it upside down. And we’re gonna “bam, bam, bam!”\u003c/p>\n\u003cp class=\"p2\">\u003cb>Phillips:\u003c/b> Whoa.\u003c/p>\n\u003cp class=\"p2\">\u003cb>Durfee:\u003c/b> Get the chocolate to come out so we can just leave a thin shell. Beautiful.\u003c/p>\n\u003cp class=\"p2\">\u003cb>Phillips:\u003c/b> Nice. Wow!\u003c/p>\n\u003cp class=\"p2\">\u003cb>Durfee:\u003c/b> Ah, looks amazing.\u003c/p>\n\u003cp>[ad floatright]\u003c/p>\n\u003cp class=\"p2\">\u003cb>Phillips:\u003c/b> Yeah, it looks perfect. Looks great. It’s gonna make a great bonbon.\u003c/p>\n\n",
"blocks": [],
"excerpt": null,
"status": "publish",
"parent": 0,
"modified": 1771537936,
"stats": {
"hasAudio": false,
"hasVideo": false,
"hasChartOrMap": false,
"iframeSrcs": [],
"hasGoogleForm": false,
"hasGallery": false,
"hasHearkenModule": false,
"hasPolis": false,
"paragraphCount": 9,
"wordCount": 5756
},
"headData": {
"title": "Check, Please! Bay Area reviews: Mykonos Meze, Trifecta, Montesacro | KQED",
"description": "Bay Area locals try Greek small plates in Burlingame, Japanese omakase with a Filipino twist in San Jose and Roman pinsas in Walnut Creek.",
"ogTitle": "",
"ogDescription": "",
"ogImgId": "",
"twTitle": "",
"twDescription": "",
"twImgId": "",
"socialDescription": "Bay Area locals try Greek small plates in Burlingame, Japanese omakase with a Filipino twist in San Jose and Roman pinsas in Walnut Creek.",
"schema": {
"@context": "https://schema.org",
"@type": "Article",
"headline": "Check, Please! Bay Area reviews: Mykonos Meze, Trifecta, Montesacro",
"datePublished": "2026-02-12T19:32:22-08:00",
"dateModified": "2026-02-19T13:52:16-08:00",
"image": "https://cdn.kqed.org/wp-content/uploads/2020/02/KQED-OG-Image@1x.png"
}
},
"primaryCategory": {
"termId": 3750,
"slug": "cuisine",
"name": "cuisine"
},
"videoEmbed": "https://www.youtube.com/watch?v=nta3Ag2ve7Y",
"sticky": false,
"templateType": "standard",
"featuredImageType": "standard",
"excludeFromSiteSearch": "Include",
"articleAge": "0",
"path": "/checkplease/23721/check-please-bay-area-reviews-mykonos-meze-trifecta-montesacro",
"audioTrackLength": null,
"parsedContent": [
{
"type": "contentString",
"content": "\u003cdiv class=\"post-body\">\u003cp>\u003cp>\u003cem>Check, Please! Bay Area, \u003c/em>season 20, episode 14, airs Thursday, February 12, at 7:30 pm, on KQED 9. See other \u003ca href=\"http://www.kqed.org/tv/programs/index.jsp?pgmid=14084\" target=\"_blank\" rel=\"noopener noreferrer\">television airtimes\u003c/a>.\u003c/p>\n\u003cp>\u003cspan style=\"font-weight: 400\">Our guests head to Burlingame at \u003cstrong>Mykonos Meze\u003c/strong>, where Greek small plates are meant for sharing and lingering. Diners scoop up tzatziki with warm pita, savor charred souvlaki, and enjoy keftedes and rich moussaka, finishing with honey-soaked baklava and profiteroles. Next, we head to San Jose’s \u003cstrong>Trifecta\u003c/strong>, an intimate, high-energy spot blending Japanese technique with Filipino influence, where dishes like smoked hamachi tacos, scallop carpaccio with lychee, chawanmushi with longanisa, and pristine nigiri sets showcase the chefs’ precision and playful creativity. Finally, we head to Walnut Creek’s \u003cstrong>Montesacro\u003c/strong>, where the Roman-inspired pinsa takes center stage in a warm, bustling space. Guests enjoy mouthwatering flatbreads topped with soppressata alongside bucatini amatriciana, supplì al telefono, and classic tiramisu. To cap off the episode, reporter Cecilia Phillips heads to \u003cstrong>Dandelion Chocolate’s 16th Street Factory\u003c/strong> for “Cecilia Tries It,” trying her hand at making caramel bonbons and getting a behind-the-scenes look at the chocolate-making process from bean to bar.\u003c/span>\u003c/p>\n\u003cfigure class=\"wp-caption alignnone\" style=\"max-width: 1920px\">\u003cimg loading=\"lazy\" decoding=\"async\" class=\"wp-image-23722 size-full\" src=\"https://cdn.kqed.org/wp-content/uploads/sites/40/2026/02/2014_02.png\" alt=\"\" width=\"1920\" height=\"1080\" srcset=\"https://cdn.kqed.org/wp-content/uploads/sites/40/2026/02/2014_02.png 1920w, https://cdn.kqed.org/wp-content/uploads/sites/40/2026/02/2014_02-160x90.png 160w, https://cdn.kqed.org/wp-content/uploads/sites/40/2026/02/2014_02-768x432.png 768w, https://cdn.kqed.org/wp-content/uploads/sites/40/2026/02/2014_02-1536x864.png 1536w\" sizes=\"auto, (max-width: 1920px) 100vw, 1920px\">\u003cfigcaption class=\"wp-caption-text\">Host Leslie Sbrocco joins guests Jamie Grisar, Josh Baldovino and Tony Martinez from KQED in San Francisco.\u003c/figcaption>\u003c/figure>\n\u003cp>\u003cspan style=\"background-color: transparent\">Get Restaurant Information:\u003c/span>\u003c/p>\n\n\u003cul>\n\u003cli>\u003ca href=\"https://www.mykonosmeze.com/\">\u003cstrong>Mykonos Meze\u003c/strong> (Burlingame)\u003c/a>\u003c/li>\n\u003cli>\u003ca href=\"https://trifectaomakase.com/\">\u003cstrong>Trifecta\u003c/strong> (San Jose)\u003c/a>\u003c/li>\n\u003cli>\u003ca href=\"https://www.montesacro.com/about-walnut-creek\">\u003cstrong>Montesacro \u003c/strong>(Walnut Creek)\u003c/a>\u003c/li>\n\u003c/ul>\n\u003cfigure id=\"attachment_20123\" class=\"wp-caption alignnone\" style=\"max-width: 800px\">\u003cimg loading=\"lazy\" decoding=\"async\" class=\"size-medium wp-image-20123\" src=\"https://cdn.kqed.org/wp-content/uploads/sites/40/2019/04/Leslie-Headshot-Smokey-copy-800x540.jpg\" alt=\"Host Leslie Sbrocco sipping wine\" width=\"800\" height=\"540\">\u003cfigcaption class=\"wp-caption-text\">Host Leslie Sbrocco sipping wine \u003ccite>(Courtesy of Leslie Sbrocco)\u003c/cite>\u003c/figcaption>\u003c/figure>\n\u003cp>My name is Leslie Sbrocco, and I’m the \u003ca href=\"http://ww2.kqed.org/checkplease/host-biography/\" target=\"_blank\" rel=\"noopener noreferrer\">host\u003c/a> of \u003cem>Check, Please! Bay Area\u003c/em>. Each week, I’ll share my tasting notes about the wine, beer and spirits the guests and I drank on set during the taping of the show.\u003c/p>\n\u003cp>\u003cimg loading=\"lazy\" decoding=\"async\" class=\"alignnone size-medium wp-image-23723\" src=\"https://cdn.kqed.org/wp-content/uploads/sites/40/2026/02/2014_Wines-2000x2667.jpg\" alt=\"\" width=\"2000\" height=\"2667\" srcset=\"https://cdn.kqed.org/wp-content/uploads/sites/40/2026/02/2014_Wines-2000x2667.jpg 2000w, https://cdn.kqed.org/wp-content/uploads/sites/40/2026/02/2014_Wines-160x213.jpg 160w, https://cdn.kqed.org/wp-content/uploads/sites/40/2026/02/2014_Wines-768x1024.jpg 768w, https://cdn.kqed.org/wp-content/uploads/sites/40/2026/02/2014_Wines-1152x1536.jpg 1152w, https://cdn.kqed.org/wp-content/uploads/sites/40/2026/02/2014_Wines-1536x2048.jpg 1536w, https://cdn.kqed.org/wp-content/uploads/sites/40/2026/02/2014_Wines-scaled.jpg 1920w\" sizes=\"auto, (max-width: 2000px) 100vw, 2000px\">\u003c/p>\n\u003cp>\u003c/p>\u003c/div>",
"attributes": {
"named": {},
"numeric": []
}
},
{
"type": "component",
"content": "",
"name": "ad",
"attributes": {
"named": {
"label": "fullwidth"
},
"numeric": [
"fullwidth"
]
}
},
{
"type": "contentString",
"content": "\u003cdiv class=\"post-body\">\u003cp>\u003c/p>\n\u003cp>\u003ca href=\"https://www.anabawines.com/\">Anaba Wines\u003c/a> is not only a family producer of a rich roster of wines; it’s a place for discovery. If you’re in the Sonoma area, make sure to stop by the winery. Named for the cooling influence of the nearby San Pablo Bay and Pacific Ocean breezes, also called anabatic winds, the wines focus on elegance, complexity and vibrancy that comes from grapes allowed to ripen slowly on the vine. Careful crafting of those grapes into wine is Anaba’s signature.\u003c/p>\n\u003cp>A visit to the property evokes a casual vibe that marries a sense of fun and playfulness with seriously delicious wines. Founded by John Sweazey, a businessman turned vintner, the winery was a longtime dream of his from days traveling the wine world. He wanted to capture and share the sense of family and camaraderie that comes from a passion for the culture of wine.\u003c/p>\n\u003cp class=\"x_MsoNormal\">\u003cb>\u003cspan style=\"color: #339966\">Anaba 2024 “Turbine White” Blend\u003c/span>\u003cbr>\n\u003c/b>\u003cem>Sonoma Valley, California, $36\u003c/em>\u003cb>\u003cbr>\n\u003c/b>This Rhone-inspired white is a unique blend of grapes such as Grenache Blanc, Roussanne, Marsanne, Viognier and Picpoul Blanc. A mouth-filling hit of citrus and melon notes led by aromas of honeysuckle, it’s an excellent alternative white to ring in any season of the year.\u003c/p>\n\u003cp class=\"x_MsoNormal\">\u003cb>\u003cspan style=\"color: #339966\">Anaba 2022 Chardonnay, J McK Estate Vineyard\u003c/span>\u003cbr>\n\u003c/b>\u003cem>Carneros, California, $64\u003c/em>\u003cb>\u003cbr>\n\u003c/b>This estate-grown Chardonnay, named after John Sweazey’s two children, John Michael and McKenna, is lush and creamy but balanced by racy acidity that leaves you with a thirst for more. It’s ideal paired alongside grilled fish or with a bite of brie cheese.\u003c/p>\n\u003cp class=\"x_MsoNormal\">\u003cb>\u003cspan style=\"color: #339966\">Anaba 2022 Pinot Noir\u003c/span>\u003cbr>\n\u003c/b>\u003cem>Sonoma Coast, California, $54\u003c/em>\u003cb>\u003cbr>\n\u003c/b>The flagship Pinot of Anaba is a blend of some of the best vineyards planted in the cool Sonoma Coast appellation. Each vintage is a different blend of these vineyards, with the goal of making a stylishly sleek Pinot Noir that’s pure pleasure to sip.\u003c/p>\n\u003cp class=\"x_MsoNormal\">\u003cb>\u003cspan style=\"color: #339966\">Anaba 2022 Grenache, Floria Marie Vineyard\u003c/span>\u003cbr>\n\u003c/b>\u003cem>Russian River Valley, California, $54\u003c/em>\u003cb>\u003cbr>\n\u003c/b>Grenache is one of my favorite red grapes. Traditionally hailing from the southern Rhone Valley of France, it’s planted in select spots globally, including California. Anaba’s single-vineyard bottling is a powerfully spicy red packed with juicy fruit aromas and flavors wrapped in a sultry, smooth texture.\u003c/p>\n\u003ch2>Episode Transcript\u003c/h2>\n\u003cp class=\"p1\">♪♪\u003c/p>\n\u003cp class=\"p2\">\u003cb>Man:\u003c/b> Opa!\u003c/p>\n\u003cp class=\"p2\">\u003cstrong>Man #2\u003c/strong>: Opa!\u003c/p>\n\u003cp class=\"p2\">\u003cb>Sbrocco:\u003c/b> Authentic Greek mezes in Burlingame.\u003c/p>\n\u003cp class=\"p2\">\u003cb>Grisar:\u003c/b> Salted, crispy, fluffy in the middle.\u003c/p>\n\u003cp class=\"p2\">\u003cb>Sbrocco:\u003c/b> Roman pizzas and pasta in Walnut Creek.\u003c/p>\n\u003cp class=\"p2\">\u003cb>Martinez:\u003c/b> Oh, boy, I went nuts there.\u003c/p>\n\u003cp class=\"p2\">\u003cb>Sbrocco:\u003c/b> And contemporary omakase in San Jose.\u003c/p>\n\u003cp class=\"p2\">\u003cb>Baldovino:\u003c/b> The scallops are so soft. It’s almost like you’re eating a cloud.\u003c/p>\n\u003cp class=\"p2\">\u003cb>Sbrocco:\u003c/b> Just ahead on “Check, Please! Bay Area.”\u003c/p>\n\u003cp class=\"p2\">\u003cb>Durfee:\u003c/b> Boom. Boom, boom, boom.\u003c/p>\n\u003cp class=\"p2\">\u003cb>Phillips:\u003c/b> Boom.\u003c/p>\n\u003cp class=\"p1\">♪♪\u003c/p>\n\u003cp class=\"p2\">[ Indistinct conversations ]\u003c/p>\n\u003cp class=\"p2\">\u003cb>Sbrocco:\u003c/b> Hi. I’m Leslie Sbrocco. Welcome to “Check, Please! Bay Area,” the show where Bay Area residents review and talk about their favorite restaurants. Now, we have three guests, and each one recommends one of their favorite spots. And the other two go check them out to see what they think. Joining me at the “Check, Please” table today are investor services representative Jamie Grisar, electrical lineman Tony Martinez, and marketing manager Joshua Baldovino. Welcome, everyone. Ready for fun?\u003c/p>\n\u003cp class=\"p2\">\u003cb>Grisar:\u003c/b> Yes.\u003c/p>\n\u003cp class=\"p2\">\u003cb>Baldovino:\u003c/b> Yes.\u003c/p>\n\u003cp class=\"p2\">\u003cb>Sbrocco:\u003c/b> Tony’s choice specializes in small plates packed with big flavors. From tangy tzatziki, to grilled octopus, to warm flatbreads, the menu is a passport to the Aegean. So pour a little ouzo and get ready to say “opa” as we head to Burlingame, home to Mykonos Meze House.\u003c/p>\n\u003cp class=\"p1\">♪♪\u003c/p>\n\u003cp class=\"p1\">♪♪\u003c/p>\n\u003cp class=\"p2\">\u003cb>Ustel:\u003c/b> Mykonos Meze House is a Greek casual neighborhood eatery.\u003c/p>\n\u003cp class=\"p1\">♪♪\u003c/p>\n\u003cp class=\"p2\">Mykonos is like a party island and then the energies never end. Endless nightlife.\u003c/p>\n\u003cp class=\"p1\">♪♪\u003c/p>\n\u003cp class=\"p2\">I fell in love with the Greek food because of my mom, because moms are always the best. Meatballs — our favorite one. We are always cooking for lamb and meatballs at home. And I like always cooking barbecue. A live grill charbroil, I’m always using for mesquite. Our signature dish is Mykonos souvlaki. The souvlaki, we are using for prime tenderloin with the shallot onion together. The seasoning process is for two days to make them perfect. It’s gonna be melting in your mouth. Meze is the family-style sharing for the small appetizers, hot and cold. Our bar — We have many options. Specially, I like ouzo and tequila. But we have also wine and also other spirits.\u003c/p>\n\u003cp class=\"p2\">\u003cb>Together:\u003c/b> Opa!\u003c/p>\n\u003cp class=\"p2\">\u003cb>Ustel:\u003c/b> What I’m always hearing from the people at the restaurant is, look for something living in there, something’s soul.\u003c/p>\n\u003cp class=\"p2\">\u003cb>Man:\u003c/b> Ohh!\u003c/p>\n\u003cp class=\"p2\">\u003cb>Ustel:\u003c/b> It feels like home.\u003c/p>\n\u003cp class=\"p2\">\u003cb>Man:\u003c/b> Opa!\u003c/p>\n\u003cp class=\"p2\">\u003cb>Woman:\u003c/b> Yeah!\u003c/p>\n\u003cp class=\"p2\">\u003cb>Sbrocco:\u003c/b> All right, Tony. How many times have you been to this place?\u003c/p>\n\u003cp class=\"p2\">\u003cb>Martinez:\u003c/b> It’s gonna be over 500.\u003c/p>\n\u003cp class=\"p2\">\u003cb>Sbrocco:\u003c/b> 500?\u003c/p>\n\u003cp class=\"p2\">\u003cb>Martinez:\u003c/b> At least. I go there almost every day.\u003c/p>\n\u003cp class=\"p2\">\u003cb>Sbrocco:\u003c/b> That is amazing.\u003c/p>\n\u003cp class=\"p2\">\u003cb>Martinez:\u003c/b> Yeah.\u003c/p>\n\u003cp class=\"p2\">\u003cb>Sbrocco:\u003c/b> Oh, I can see some Greekness going on in your tattoos.\u003c/p>\n\u003cp class=\"p2\">\u003cb>Martinez:\u003c/b> Yeah. My wife didn’t agree on this, but, you know, I got the Greek key on both sides, and I got the Parthenon, and I got Athena.\u003c/p>\n\u003cp class=\"p2\">\u003cb>Sbrocco:\u003c/b> So you are Greek through and through?\u003c/p>\n\u003cp class=\"p2\">\u003cb>Martinez:\u003c/b> Yes. I’m infused.\u003c/p>\n\u003cp class=\"p2\">\u003cb>Sbrocco:\u003c/b> So what do you order when you walk in the door, you sit down, they say, “Hey, Tony, come. Here’s your table”?\u003c/p>\n\u003cp class=\"p2\">\u003cb>Martinez:\u003c/b> The spreads. I usually do the spreads with the pita bread and the tzatziki’s in there.\u003c/p>\n\u003cp class=\"p2\">\u003cb>Sbrocco:\u003c/b> Okay.\u003c/p>\n\u003cp class=\"p2\">\u003cb>Martinez:\u003c/b> They have pretty good spreads in there.\u003c/p>\n\u003cp class=\"p2\">\u003cb>Grisar:\u003c/b> It really opens up your palate because there are so many dips. And the bread is nice and warm and fluffy. Yes.\u003c/p>\n\u003cp class=\"p2\">\u003cb>Baldovino:\u003c/b> So I got the keftedes, which I think is a classic dish that you have to get any time you go get Greek. That’s your benchmark. Half beef, half lamb. The way that they cooked it, it had a nice little crisp and char on the outside just from the grill, but on the inside was delicious. How they seasoned it was great.\u003c/p>\n\u003cp class=\"p2\">\u003cb>Sbrocco:\u003c/b> So is there one dish that you just absolutely love and you order every time?\u003c/p>\n\u003cp class=\"p2\">\u003cb>Martinez:\u003c/b> The chicken. It is grilled to perfection. It’s thighs. They’re real thin. So he puts Greek oregano, lemon, salt, and he just grills it over — It’s like a Pourgouri. And then he puts a little bed of tzatziki on it. And then with the pita bread, it’s heaven to me because that’s what I love. I love that, but, you know, that’s one of my favorites that I go for all the time.\u003c/p>\n\u003cp class=\"p2\">\u003cb>Sbrocco:\u003c/b> Okay. Did you have that?\u003c/p>\n\u003cp class=\"p2\">\u003cb>Baldovino:\u003c/b> I did not have the grilled chicken, but I did have a tenderloin.\u003c/p>\n\u003cp class=\"p2\">\u003cb>Sbrocco:\u003c/b> Okay.\u003c/p>\n\u003cp class=\"p2\">\u003cb>Baldovino:\u003c/b> I was debating between the rib eye or the tenderloin when I got there, and I said, “You know what? I actually never order tenderloin. Let me try it.” And so it was these two tenderloin kebabs, grilled again. It was also plated on top of these roasted vegetables, which were delicious.\u003c/p>\n\u003cp class=\"p2\">\u003cb>Sbrocco:\u003c/b> Right.\u003c/p>\n\u003cp class=\"p2\">\u003cb>Baldovino:\u003c/b> I never eat all the vegetables, but actually that was maybe almost as good as the meat itself, ’cause the meat itself was tender, charred perfectly on the outside, and then the sauce that was on the bottom, I just kept scooping it with either the meat or the vegetables over and over.\u003c/p>\n\u003cp class=\"p2\">\u003cb>Sbrocco:\u003c/b> So you got your veggies. I love it.\u003c/p>\n\u003cp class=\"p2\">\u003cb>Baldovino:\u003c/b> I did.\u003c/p>\n\u003cp class=\"p2\">[ Laughter ]\u003c/p>\n\u003cp class=\"p2\">\u003cb>Sbrocco:\u003c/b> And what about you, Jamie?\u003c/p>\n\u003cp class=\"p2\">\u003cb>Grisar:\u003c/b> So you mentioned the rib eye, and I did end up getting the rib eye. And it’s plated beautifully. It’s on a wood cutting board. And then they light it on fire.\u003c/p>\n\u003cp class=\"p2\">\u003cb>Together:\u003c/b> Opa!\u003c/p>\n\u003cp class=\"p2\">\u003cb>Woman:\u003c/b> Opa! Opa!\u003c/p>\n\u003cp class=\"p2\">\u003cb>Martinez:\u003c/b> It’s ouzo.\u003c/p>\n\u003cp class=\"p2\">\u003cb>Sbrocco:\u003c/b> Ah. That’s why you light it on fire.\u003c/p>\n\u003cp class=\"p2\">\u003cb>Grisar:\u003c/b> Got you.\u003c/p>\n\u003cp class=\"p2\">\u003cb>Martinez:\u003c/b> I’m glad she got to experience that, because that’s the whole idea there. And the “opa,” because they…\u003c/p>\n\u003cp class=\"p2\">\u003cb>Sbrocco:\u003c/b> It’s “opa” and ouzo!\u003c/p>\n\u003cp class=\"p2\">\u003cb>Martinez:\u003c/b> Yeah. Yeah.\u003c/p>\n\u003cp class=\"p2\">\u003cb>Grisar:\u003c/b> And it was awesome. The steak was — I got it medium rare. And so it was cooked perfectly. It had a beautiful sear on the outside and it came with these potatoes. Honestly, the potatoes were the star of the show. Better than the rib eye.\u003c/p>\n\u003cp class=\"p2\">\u003cb>Martinez:\u003c/b> Very good.\u003c/p>\n\u003cp class=\"p2\">\u003cb>Grisar:\u003c/b> Salted. Crispy. Pillowy, fluffy in the middle. Could not ask for better potatoes. Honestly.\u003c/p>\n\u003cp class=\"p2\">\u003cb>Martinez:\u003c/b> They’re like steak fries.\u003c/p>\n\u003cp class=\"p2\">\u003cb>Grisar:\u003c/b> They are. They’re thick. Oh, so good. We also got the lamb shank, so… And that was also extremely tender. That sauce — Oh, I could drink it. I could drink it. It was so good. I mean, I would just say it was like a Greek gravy.\u003c/p>\n\u003cp class=\"p2\">\u003cb>Martinez:\u003c/b> The moussaka is very good. It’s eggplant with potatoes and the Béchamel sauce. And it’s piping hot. So you got to wait. You got to let it breathe a little bit. So that gives you a chance to drink a little more.\u003c/p>\n\u003cp class=\"p2\">\u003cb>Sbrocco:\u003c/b> It gives you a chance to drink something. So what did you have to drink?\u003c/p>\n\u003cp class=\"p2\">\u003cb>Martinez:\u003c/b> I’ve always liked the spicy margarita, but then it’s the White Shadow they always brought me because I like piña coladas. But it’s just, the only difference is vodka instead of Bacardi.\u003c/p>\n\u003cp class=\"p2\">\u003cb>Sbrocco:\u003c/b> Instead of rum. Mm-hmm. Okay. Did you have anything to drink alongside?\u003c/p>\n\u003cp class=\"p2\">\u003cb>Baldovino:\u003c/b> Yeah. So I did a Paper Plane. So it’s a bourbon-based cocktail with some Aperol, and it was surprisingly refreshing. Normally you think of a whiskey cocktail as kind of being heavy and not so as refreshing, but this was a little bit of citrus to it with the Aperol. And so it was perfect for a weekend afternoon.\u003c/p>\n\u003cp class=\"p2\">\u003cb>Sbrocco:\u003c/b> Did anybody have dessert? Or in the many times you’ve gone, have you done dessert?\u003c/p>\n\u003cp class=\"p2\">\u003cb>Martinez:\u003c/b> Many times.\u003c/p>\n\u003cp class=\"p2\">[ Laughter ]\u003c/p>\n\u003cp class=\"p2\">Profiteroles. Those are the best because they’re, like, puffy, you know, cream puffs with vanilla ice cream and just with a little chocolate drizzled on top of it.\u003c/p>\n\u003cp class=\"p2\">\u003cb>Sbrocco:\u003c/b> With the little one, did you get to share dessert?\u003c/p>\n\u003cp class=\"p2\">\u003cb>Grisar:\u003c/b> I did. We got baklava because it comes with ice cream. So good. Honey, pistachio. And the phyllo is actually pretty soft because it’s so soaked. Really good.\u003c/p>\n\u003cp class=\"p2\">[ Glasses clink ]\u003c/p>\n\u003cp class=\"p2\">\u003cb>Martinez:\u003c/b> So there’s another thing about Mykonos that when it turns dark, Marco comes out, the lights dim down, and then he gets the light shows going, and then he has a smoker, too. And then the music goes up. So if you’re gonna go there and you want to have a lively time, it’s gonna be after 8:00.\u003c/p>\n\u003cp class=\"p2\">\u003cb>Sbrocco:\u003c/b> You’re capturing the fun of the island.\u003c/p>\n\u003cp class=\"p2\">\u003cb>Martinez:\u003c/b> It’s great. I wish I was there now.\u003c/p>\n\u003cp class=\"p2\">\u003cb>Sbrocco:\u003c/b> Me too. All right. If you would like to try Mykonos Meze House, it’s located on Lorton Avenue in Burlingame, and the average multi-course tab per person without drinks is around $60. Joshua says his sleek little sushi spot is one of Silicon Valley’s true hidden gems. Offering creative takes on Japanese and Filipino favorites, fruit-forward cocktails, and a lively vibe, every meal is a true feast for the senses. Tucked away in southern San Jose’s Silver Creek area, it’s Trifecta.\u003c/p>\n\u003cp class=\"p1\">♪♪\u003c/p>\n\u003cp class=\"p1\">♪♪\u003c/p>\n\u003cp class=\"p2\">\u003cb>Bradley:\u003c/b> Trifecta is a Japanese sushi restaurant with Filipino influence starring me, my brother Ryan, and our mom.\u003c/p>\n\u003cp class=\"p2\">\u003cb>Woman:\u003c/b> Thank you guys. Thank you so much.\u003c/p>\n\u003cp class=\"p2\">\u003cb>Ryan:\u003c/b> Sharing food that we love.\u003c/p>\n\u003cp class=\"p2\">\u003cb>Man:\u003c/b> All right. Enjoy, guys. Woman #2: Thank you.\u003c/p>\n\u003cp class=\"p2\">\u003cb>Bradley:\u003c/b> When people think of sushi, they just think of raw fish, rolls.\u003c/p>\n\u003cp class=\"p2\">\u003cb>Ryan:\u003c/b> We like to try not to be too traditional and bend the rules a little bit.\u003c/p>\n\u003cp class=\"p2\">\u003cb>Bradley:\u003c/b> We like to kind of spice it up and add toppings to our nigiris.\u003c/p>\n\u003cp class=\"p2\">\u003cb>Man:\u003c/b> To the chefs.\u003c/p>\n\u003cp class=\"p2\">\u003cb>Bradley:\u003c/b> We love to use, like, chicharrón and taro and use it as an added texture, depth, and crunch. But a lot of our sauces and flavors come from calamansi. So we do have our signature cold plates, like our yellowtail crudo, and bluefin tuna chili garlic — That’s probably our flagship dish. But a lot of Filipino dishes are hot. So, like, our short rib — a 72-hour braise.\u003c/p>\n\u003cp class=\"p1\">♪♪\u003c/p>\n\u003cp class=\"p2\">\u003cb>Ryan:\u003c/b> The vibe is bustling. It’s cracking, it’s popping. We want to make sure our guests are taken care of, but we try to have fun at the same time and enjoy the moment.\u003c/p>\n\u003cp class=\"p2\">\u003cb>Bradley:\u003c/b> This is a dream come true. This is our hometown. So providing, you know, to our own community the food that we love doing, it just means a lot to us. Out of all the places in the world, they chose to be here with us. And that’s a special moment.\u003c/p>\n\u003cp class=\"p2\">[ Laughter ]\u003c/p>\n\u003cp class=\"p2\">\u003cb>Sbrocco:\u003c/b> All right, Joshua, talk to me about this place, because it’s an interesting blend, isn’t it, of flavors and cultures and cuisines.\u003c/p>\n\u003cp class=\"p2\">\u003cb>Baldovino:\u003c/b> It is. It’s these two Filipino brothers who have this traditional Japanese spot, but now they added a little bit of Filipino twist to it, so they get the best of both worlds now. If you’re going for the real exciting experience, you do omakase.\u003c/p>\n\u003cp class=\"p2\">\u003cb>Sbrocco:\u003c/b> Right. Chef choice.\u003c/p>\n\u003cp class=\"p2\">\u003cb>Baldovino:\u003c/b> Yes. Or you can do à la carte on the menu.\u003c/p>\n\u003cp class=\"p2\">\u003cb>Sbrocco:\u003c/b> Okay.\u003c/p>\n\u003cp class=\"p2\">\u003cb>Baldovino:\u003c/b> I did start with a cocktail at first. It was an espresso sesame sake.\u003c/p>\n\u003cp class=\"p2\">\u003cb>Sbrocco:\u003c/b> Ah.\u003c/p>\n\u003cp class=\"p2\">\u003cb>Martinez:\u003c/b> That was good.\u003c/p>\n\u003cp class=\"p2\">\u003cb>Baldovino:\u003c/b> So you get the hint of coffee, but you still have a nice sake, which brings this lightness to it. And then it has a sesame crisp on it, and it adds a nice little textural element.\u003c/p>\n\u003cp class=\"p2\">\u003cb>Sbrocco:\u003c/b> All right, so you’ve got a cocktail in your glass and what goes with it?\u003c/p>\n\u003cp class=\"p2\">\u003cb>Baldovino:\u003c/b> And then garlic edamame for me. If anyone’s been to Hawaii and has gotten any kind of garlic shrimp scampi, they have replicated that garlic sauce to a T. The edamame is just doused in it. And so you just can’t help but just take the entire bean and just get all the sauce and all the garlic. Maybe not great for the date after, but really good as you taste it through.\u003c/p>\n\u003cp class=\"p2\">\u003cb>Sbrocco:\u003c/b> All right. And, Jamie, what about you?\u003c/p>\n\u003cp class=\"p2\">\u003cb>Grisar:\u003c/b> We did the omakase. And so the first dish they brought out was oysters. And the first oyster was with a yuzu vinaigrette. And the second was with a wasabi vinaigrette. The wasabi was so nice.\u003c/p>\n\u003cp class=\"p2\">\u003cb>Woman:\u003c/b> Cheers!\u003c/p>\n\u003cp class=\"p2\">\u003cb>Man:\u003c/b> Cheers!\u003c/p>\n\u003cp class=\"p2\">\u003cb>Grisar:\u003c/b> Like, it didn’t burn your nose. It was just that right amount of spicy. And that yuzu was refreshing.\u003c/p>\n\u003cp class=\"p2\">\u003cb>Sbrocco:\u003c/b> Right.\u003c/p>\n\u003cp class=\"p2\">\u003cb>Grisar:\u003c/b> And then after that, it was the chawanmushi, which is a Japanese soufflé. And it was beautiful. It was silky and salty and sweet and with a Filipino twist, they put in longganisa. And so it had the crispy bits and it had a beautiful seared scallop on it, so you also had that buttery taste. Really delicious for the first two courses.\u003c/p>\n\u003cp class=\"p2\">\u003cb>Sbrocco:\u003c/b> First two courses. All right. We’ll get back to you with more. What about you now, Tony? How was your experience?\u003c/p>\n\u003cp class=\"p2\">\u003cb>Martinez:\u003c/b> It was great. The little tacos.\u003c/p>\n\u003cp class=\"p2\">\u003cb>Sbrocco:\u003c/b> The hamachi tacos.\u003c/p>\n\u003cp class=\"p2\">\u003cb>Martinez:\u003c/b> They were delicious. Something about it. I’ve never had that flavor before.\u003c/p>\n\u003cp class=\"p2\">\u003cb>Sbrocco:\u003c/b> Have you had those before?\u003c/p>\n\u003cp class=\"p2\">\u003cb>Baldovino:\u003c/b> I did. So the hamachi tacos are really nice ’cause it is. It’s a nice little starter, as well. It’s a wonton crisp taco. And then you’ll have a little bit of avocado within. It’s raw hamachi on top with some sauce and then a sliced jalapeño.\u003c/p>\n\u003cp class=\"p2\">\u003cb>Martinez:\u003c/b> But I never had the raw. The raw fish. And that got me going. And I was like, “wow, that was good.” That’s why the yellowtail came in effect. And my son brought me into that. With the jalapeño oil sauce.\u003c/p>\n\u003cp class=\"p2\">\u003cb>Sbrocco:\u003c/b> Okay. So that’s what you had next.\u003c/p>\n\u003cp class=\"p2\">\u003cb>Martinez:\u003c/b> Ooh, yes. Oh, that was delicious. It just melted in your mouth.\u003c/p>\n\u003cp class=\"p2\">\u003cspan class=\"s1\">♪\u003c/span> Girl, can I talk to you? \u003cspan class=\"s1\">♪\u003c/span>\u003c/p>\n\u003cp class=\"p2\">\u003cb>Martinez:\u003c/b> And with Rex, the deejay, Rex, was there going. He was the best.\u003c/p>\n\u003cp class=\"p2\">[ Laughter ]\u003c/p>\n\u003cp class=\"p2\">He came to us and talked to us.\u003c/p>\n\u003cp class=\"p2\">\u003cb>Sbrocco:\u003c/b> You like party places. I can tell. He likes party spots. All right. And what else did you have?\u003c/p>\n\u003cp class=\"p2\">\u003cb>Grisar:\u003c/b> Yeah. So if you don’t want to go all the way raw, part of the omakase set was seared albacore tuna in a ponzu sauce. Light. Refreshing. With that, you know, hint of lime. And then after that, it was a nigiri plate. And so it was four pieces of nigiri and their in-house-made tamago with an egg omelet. But it was really good. And each piece has toppings. And it did really enhance the flavor of each piece of nigiri that we did get.\u003c/p>\n\u003cp class=\"p2\">\u003cb>Sbrocco:\u003c/b> Okay. And you’re shaking your head, going…\u003c/p>\n\u003cp class=\"p2\">\u003cb>Baldovino:\u003c/b> Oh, I mean, you have to get some sushi, for sure. So whether you’re doing sashimi or nigiri, you have to try it. And two of my other favorites — There’s a scallop carpaccio dish. And so they have scallops. That’s paired with some lychee fruit. And they have some citrus around the plate, too. It looks like a piece of art on the plate itself. And the scallops are so soft. It’s almost like you’re eating a cloud.\u003c/p>\n\u003cp class=\"p2\">\u003cb>Martinez:\u003c/b> We had the tempura roll. You know, the tempura roll was meshed together with the unagi sauce.\u003c/p>\n\u003cp class=\"p2\">\u003cb>Baldovino:\u003c/b> Mm-hmm.\u003c/p>\n\u003cp class=\"p2\">\u003cb>Martinez:\u003c/b> It was so good. So I’m a big fan of chicken. So when they said “fried chicken,” I said, “I got to have some of that.” And she brought it and it was so crispy and flavorful.\u003c/p>\n\u003cp class=\"p2\">\u003cb>Baldovino:\u003c/b> I’ve had the karaage there before, too. Right? Japanese fried chicken. But I think I’m always there for the seafood first. But the chicken is a nice change of pace, too. Did any of you guys get the short rib?\u003c/p>\n\u003cp class=\"p2\">\u003cb>Martinez:\u003c/b> No, I didn’t get the short rib.\u003c/p>\n\u003cp class=\"p2\">\u003cb>Baldovino:\u003c/b> Okay, the short rib, it’s a fun showstopper ’cause it gets plated almost like a tomahawk steak.\u003c/p>\n\u003cp class=\"p2\">\u003cb>Martinez:\u003c/b> Oh, nice.\u003c/p>\n\u003cp class=\"p2\">\u003cb>Baldovino:\u003c/b> It’s super-thick. And then it’s all plated on top of a kare-kare sauce, which is a Filipino kind of peanut-based sauce.\u003c/p>\n\u003cp class=\"p2\">\u003cb>Martinez:\u003c/b> Mmm. So I got to go back for that.\u003c/p>\n\u003cp class=\"p2\">\u003cb>Sbrocco:\u003c/b> And did you feel like you got a good deal? I mean, it can be expensive.\u003c/p>\n\u003cp class=\"p2\">\u003cb>Martinez:\u003c/b> You know what? To me, the price doesn’t matter as long as you have fun. You know, that’s what matters — the experience. Yes.\u003c/p>\n\u003cp class=\"p2\">\u003cb>Baldovino:\u003c/b> And in terms of value, I mean, omakase can get ridiculously expensive. And so if you’re looking for a high-end omakase without the crazy, crazy prices, this is definitely a good way to go.\u003c/p>\n\u003cp class=\"p2\">\u003cb>Sbrocco:\u003c/b> Okay. Excellent. If you would like to try Trifecta, it’s located on Silver Creek Valley Road in San Jose, and the average multi-course tab per person without drinks is around $70. Jamie is bringing us back to the Mediterranean, to a lively trattoria that’s captured her heart. From cloudlike pizzas, to savory supplì, every dish on the menu is rooted in Roman culinary tradition. Located in Walnut Creek, it’s Montesacro.\u003c/p>\n\u003cp class=\"p1\">♪♪\u003c/p>\n\u003cp class=\"p2\">\u003cb>Gianluca:\u003c/b> Montesacro, it’s one of the most beautiful neighborhoods in Rome, outside of where I grew up, packed with life. I wanted to create an environment elegant, upscale, refined, very Italian. Hello.\u003c/p>\n\u003cp class=\"p2\">[ Speaks Italian ]\u003c/p>\n\u003cp class=\"p2\">[ Conversing in Italian ]\u003c/p>\n\u003cp class=\"p2\">Our intention is to bring people together, share as much as possible as a family, as friends. How was everything today?\u003c/p>\n\u003cp class=\"p2\">\u003cb>Man:\u003c/b> Really good.\u003c/p>\n\u003cp class=\"p2\">\u003cb>Gianluca:\u003c/b> Montesacro opened as the first pinsa place in the United States in 2015 in San Francisco. Pinsa is not pizza. It runs in the family of pizza, but it’s made from soy, rice, and wheat, which already makes it completely different than traditional pizza. It proofs for a minimum of 72 hours, and we stretch it à la minute over rice flour to give it a little extra crispiness after it’s cooked. It’s oval in shape. It’s not round or square. And that’s pinsa. Pinsa Romana. We have different appetizers, pastas — all homemade. Our cacio e pepe, I believe, is the closest to what I would expect to eat in Rome. The octopus appetizer is one of our highlights. It’s cooked to tender, simply dressed with the most amazing extra-virgin olive oil, and drizzled with some fresh oregano. With all due respect to Californian wines, which we absolutely love, we decided to feature only Italian wines made from indigenous grape varietals of Italy only. Salute.\u003c/p>\n\u003cp class=\"p2\">\u003cb>Man:\u003c/b> Salute.\u003c/p>\n\u003cp class=\"p2\">[ Speaks Italian ]\u003c/p>\n\u003cp class=\"p2\">\u003cb>Gianluca:\u003c/b> My biggest hope with people experiencing Montesacro, once they go back home, is to say, “You’ve got to try this because it’s not the ordinary Italian restaurant. It’s something unique,” because it’s what we’re trying to achieve more than anything else. Create an experience that is memorable, that is forever.\u003c/p>\n\u003cp class=\"p2\">\u003cb>Sbrocco:\u003c/b> All right, Jamie, talk about how you found this restaurant. I mean, there’s not a lot of Roman-inspired restaurants, and the food in Rome is the best.\u003c/p>\n\u003cp class=\"p2\">\u003cb>Grisar:\u003c/b> Oh, totally the best.\u003c/p>\n\u003cp class=\"p2\">\u003cb>Sbrocco:\u003c/b> Uh-huh.\u003c/p>\n\u003cp class=\"p2\">\u003cb>Grisar:\u003c/b> We were actually on the hunt for gnocchi. We just looked up “gnocchi” on Yelp, and there it was — Montesacro. And it was in a red sauce, which is kind of rare for the Bay Area. And we’re like, “We have to go.”\u003c/p>\n\u003cp class=\"p2\">\u003cb>Sbrocco:\u003c/b> And what is it that you get besides the gnocchi?\u003c/p>\n\u003cp class=\"p2\">\u003cb>Grisar:\u003c/b> We start with the supplì al telefono, which are these beautiful golden balls. They’re fried. They call it supplì al telefono because in the middle, it’s stuffed with mozzarella cheese. And so when you pull it open, you get that nice string of cheese and it looks like a telephone wire.\u003c/p>\n\u003cp class=\"p2\">\u003cb>Sbrocco:\u003c/b> Right.\u003c/p>\n\u003cp class=\"p2\">\u003cb>Grisar:\u003c/b> And it’s so delicious.\u003c/p>\n\u003cp class=\"p2\">\u003cb>Baldovino:\u003c/b> To me, it’s like adult cheese sticks, you know? So you get the nice exterior, which has a nice crust to it, seasoned really well. And then, as you open it up, I mean, I judge the cheese sticks by the cheese pull. And so you can pull it and it does have that classic cheese pull and it was delicious.\u003c/p>\n\u003cp class=\"p2\">\u003cb>Sbrocco:\u003c/b> Okay. How about you?\u003c/p>\n\u003cp class=\"p2\">\u003cb>Martinez:\u003c/b> Oh, boy, I went nuts there.\u003c/p>\n\u003cp class=\"p2\">\u003cb>Sbrocco:\u003c/b> Why does that not surprise me?\u003c/p>\n\u003cp class=\"p2\">\u003cb>Martinez:\u003c/b> Yeah. I mean… Forget the salad. We go to the porchetta.\u003c/p>\n\u003cp class=\"p2\">\u003cb>Woman:\u003c/b> Oh, that looks lovely. Woman #2: Oh, my goodness.\u003c/p>\n\u003cp class=\"p2\">\u003cb>Martinez:\u003c/b> Just savory. I love it. And they mixed it with the orange all day on that one.\u003c/p>\n\u003cp class=\"p2\">\u003cb>Grisar:\u003c/b> The porchetta is really good. It was — I actually haven’t ordered it. The table next to us did, and I think they saw me eyeing their food and they said, “Do you want to try this?”\u003c/p>\n\u003cp class=\"p2\">\u003cb>Sbrocco:\u003c/b> They did not.\u003c/p>\n\u003cp class=\"p2\">\u003cb>Grisar:\u003c/b> I swear they did. No, this place is so friendly ’cause you’re sitting so close to one another. So you can kind of tell, like, “Oh, I like what’s on your plate. Oh, I don’t like what’s on your plate.” I do actually get another pasta dish. I get the Amatriciana, which is a bucatini with a spicy marinara sauce and guanciale. I can eat pounds and pounds of guanciale.\u003c/p>\n\u003cp class=\"p2\">\u003cb>Sbrocco:\u003c/b> I know.\u003c/p>\n\u003cp class=\"p2\">\u003cb>Grisar:\u003c/b> It’s just a funkier pancetta.\u003c/p>\n\u003cp class=\"p2\">\u003cb>Sbrocco:\u003c/b> You have that little more earthy flavor than…\u003c/p>\n\u003cp class=\"p2\">\u003cb>Martinez:\u003c/b> But it melts right in your mouth.\u003c/p>\n\u003cp class=\"p2\">\u003cb>Grisar:\u003c/b> It does ’cause that fat cap is so big. Your mouth is coated in, like, fat, but it’s good.\u003c/p>\n\u003cp class=\"p2\">\u003cb>Sbrocco:\u003c/b> All right. We are gonna talk about pinsas. So that’s really the heart of this place and what sets it apart.\u003c/p>\n\u003cp class=\"p2\">\u003cb>Grisar:\u003c/b> It is, yes. Different flour blend. So it’s almost lighter, chewier. And it gets really crisp. You get that nice char all around. We always, always get the [Haltingly] Tormarancia.\u003c/p>\n\u003cp class=\"p2\">\u003cb>Sbrocco:\u003c/b> Easy for you to say.\u003c/p>\n\u003cp class=\"p2\">\u003cb>Grisar:\u003c/b> Yes. Sure. Yes. It’s basically a souped-up Margherita pizza, but with spicy soppressata.\u003c/p>\n\u003cp class=\"p2\">\u003cb>Sbrocco:\u003c/b> Mm-hmm.\u003c/p>\n\u003cp class=\"p2\">\u003cb>Grisar:\u003c/b> And it’s lovely with the sweet tomato sauce and the spicy, salty meat. It’s just the perfect combination.\u003c/p>\n\u003cp class=\"p2\">\u003cb>Baldovino:\u003c/b> We did the same one as you, but then we also established the baseline with the Margherita, ’cause I feel like you have to establish the baseline. But I agree — The dough was delicious and the Margherita itself, it definitely lands more on the heavier basil side. So if you love basil, then you’re really gonna enjoy this pinsa.\u003c/p>\n\u003cp class=\"p2\">\u003cb>Sbrocco:\u003c/b> Okay, what did you drink?\u003c/p>\n\u003cp class=\"p2\">\u003cb>Martinez:\u003c/b> I went to the martini. It was the spicy G&C martini. It was Calabrese oil with the olive in it. This was the spicy, and one of the best, martinis I’ve ever had.\u003c/p>\n\u003cp class=\"p2\">\u003cb>Grisar:\u003c/b> Oh, that’s awesome.\u003c/p>\n\u003cp class=\"p2\">\u003cb>Martinez:\u003c/b> The best. And it was perfect with my pinsa. Perfect.\u003c/p>\n\u003cp class=\"p2\">\u003cb>Baldovino:\u003c/b> They do have a special cocktail, which is a pistachio espresso martini.\u003c/p>\n\u003cp class=\"p2\">\u003cb>Sbrocco:\u003c/b> Wow.\u003c/p>\n\u003cp class=\"p2\">\u003cb>Baldovino:\u003c/b> And the presentation of this is so pretty. Almost, like, a quarter of the glass had crushed pistachios on the outside.\u003c/p>\n\u003cp class=\"p2\">\u003cb>Martinez:\u003c/b> Did you get a spoon?\u003c/p>\n\u003cp class=\"p2\">\u003cb>Baldovino:\u003c/b> I mean, I did just bite it off afterwards ’cause it was a nice nutty treat to have.\u003c/p>\n\u003cp class=\"p2\">\u003cb>Sbrocco:\u003c/b> Yeah. Anybody have dessert?\u003c/p>\n\u003cp class=\"p2\">\u003cb>Martinez:\u003c/b> I got three of the desserts. And tiramisu — That’s the one I really love. When you bite into it, just don’t breathe in because you get the coffee. [ Breathes sharply] You get the coffee, and you start sneezing.\u003c/p>\n\u003cp class=\"p2\">\u003cb>Grisar:\u003c/b> Yeah, the coffee, the cocoa powder down your throat. Like a beignet almost.\u003c/p>\n\u003cp class=\"p2\">\u003cb>Martinez:\u003c/b> That was like, “Oh, no.” But, you know. Then we had the chocolate torte.\u003c/p>\n\u003cp class=\"p2\">\u003cb>Man:\u003c/b> Oh, man, look at that.\u003c/p>\n\u003cp class=\"p2\">\u003cb>Martinez:\u003c/b> Filled with fresh cream. I’m not a big chocolate guy, but that was pretty good. That was good. The last one was the pinsa filled with — They almost tried to copy a cannoli, but it missed the point to me because the tiramisu had me already.\u003c/p>\n\u003cp class=\"p2\">\u003cb>Sbrocco:\u003c/b> All right, the tiramisu won. If you would like to try Montesacro, it’s located on Locust Street in Walnut Creek, and the average multi-course tab per person without drinks is around $45. And now reporter Cecilia Phillips has more Bay Area bites you’ve just got to try.\u003c/p>\n\u003cp class=\"p1\">♪♪\u003c/p>\n\u003cp class=\"p1\">♪♪\u003c/p>\n\u003cp class=\"p2\">\u003cb>Phillips:\u003c/b> We are so lucky to be able to come to Dandelion Chocolate today. And this place. I could smell it before we even walked in.\u003c/p>\n\u003cp class=\"p2\">\u003cb>Durfee:\u003c/b> Yeah. I ride my bike into work and I’ll be a block away. And even without seeing it, I can [Sniffs] I was like, “Ah, I’m getting close to work.”\u003c/p>\n\u003cp class=\"p2\">[ Both laugh ]\u003c/p>\n\u003cp class=\"p2\">\u003cb>Phillips:\u003c/b> Tell me more about Dandelion Chocolate and the special things that you all do here with single-origin chocolate. Just two ingredients.\u003c/p>\n\u003cp class=\"p2\">\u003cb>Durfee:\u003c/b> That’s right. Cocoa beans and organic cane sugar. And what we call cocoa beans are actually not beans. They’re seeds of a tropical fruit called cacao. And each pod contains about 50 unique fruits.\u003c/p>\n\u003cp class=\"p2\">\u003cb>Phillips:\u003c/b> Mm.\u003c/p>\n\u003cp class=\"p2\">\u003cb>Durfee:\u003c/b> So we source cocoa beans from about 20 or so unique locations around the world. And depending on the actual variety of fruit and where it grows and how it’s processed, there’s just endless possibilities. We roast the bean and we crack them, which creates little broken pieces we call nibs, and we grind those up and add sugar to that and grind the sugar in until that is fully refined, as well. We make chips and we make bars. And then we have a confectionery team that takes our chocolate and turns it into caramels and pralines and chocolate truffles. The fruit is fermented over a period of time. We do factory tours every day. We teach the basics of even tasting and how to appreciate the variations in different origins.\u003c/p>\n\u003cp class=\"p2\">\u003cb>Phillips:\u003c/b> Even someone like me can come in and learn, maybe, like, how to make a bonbon?\u003c/p>\n\u003cp class=\"p2\">\u003cb>Durfee:\u003c/b> Absolutely.\u003c/p>\n\u003cp class=\"p2\">\u003cb>Phillips:\u003c/b> Yeah? All right, let’s do it.\u003c/p>\n\u003cp class=\"p2\">\u003cb>Durfee:\u003c/b> Yeah, let’s do it. And you — Yeah. Yeah. Oh, my gosh. Yeah, like that. Okay.\u003c/p>\n\u003cp class=\"p2\">\u003cb>Phillips:\u003c/b> We’re all prepped up.\u003c/p>\n\u003cp class=\"p2\">\u003cb>Durfee:\u003c/b> Yeah. We’re making chocolate caramels today.\u003c/p>\n\u003cp class=\"p2\">\u003cb>Phillips:\u003c/b> Chocolate caramels. Nice.\u003c/p>\n\u003cp class=\"p2\">\u003cb>Durfee:\u003c/b> This is a Dandelion bonbon mold. And I already prepped it with tempered chocolate. It’s our Camino Verde, Ecuador origin. And I made the caramel filling.\u003c/p>\n\u003cp class=\"p2\">\u003cb>Phillips:\u003c/b> Here we go.\u003c/p>\n\u003cp class=\"p2\">\u003cb>Durfee:\u003c/b> Yeah. Get it right down inside there. Squeeze, squeeze, squeeze, squeeze, squeeze. Whoa! All right.\u003c/p>\n\u003cp class=\"p2\">\u003cb>Phillips:\u003c/b> Whoa!\u003c/p>\n\u003cp class=\"p2\">\u003cb>Phillips:\u003c/b> Oh. What am I gonna do with the extra?\u003c/p>\n\u003cp class=\"p1\">♪♪\u003c/p>\n\u003cp class=\"p2\">Ooh. [ Laughs ] Oh, hello.\u003c/p>\n\u003cp class=\"p2\">[ Laughs ]\u003c/p>\n\u003cp class=\"p2\">\u003cb>Durfee:\u003c/b> Okay, so now the caramel has had some time to settle in, and it’s time to put chocolate on to cap it. Try not to put too much chocolate on. And bring it to the edge of the table. I’m gonna go… So the chocolate flows in and fills all the gaps. Boom. Right off the edge. So now they’re completely sealed.\u003c/p>\n\u003cp class=\"p2\">\u003cb>Phillips:\u003c/b> Nice.\u003c/p>\n\u003cp class=\"p2\">\u003cb>Durfee:\u003c/b> It’s gonna take about 5, 10 minutes for the chocolate to crystallize, to firm up. Here we go. So we’re just gonna flip it upside down onto the table. So like that. And we’ll reveal the… Ah! You didn’t even know this.\u003c/p>\n\u003cp class=\"p2\">\u003cb>Phillips:\u003c/b> What did you do?\u003c/p>\n\u003cp class=\"p2\">\u003cb>Durfee:\u003c/b> So I took what’s called a transfer sheet.\u003c/p>\n\u003cp class=\"p2\">\u003cb>Phillips:\u003c/b> Transfer sheet.\u003c/p>\n\u003cp class=\"p2\">\u003cb>Durfee:\u003c/b> Right. It’s got a cocoa butter pattern on there.\u003c/p>\n\u003cp class=\"p2\">\u003cb>Phillips:\u003c/b> These are so pretty. Yay!\u003c/p>\n\u003cp class=\"p2\">\u003cb>Durfee:\u003c/b> Yay.\u003c/p>\n\u003cp class=\"p2\">\u003cb>Phillips:\u003c/b> All right. There’s a lot of caramel. Mmm. So good. I made bonbons. All right. I don’t think these two are gonna make the cut. So one for me, one for you.\u003c/p>\n\u003cp class=\"p2\">\u003cb>Sbrocco:\u003c/b> I want to thank my great guests on this week’s show — Jamie Grisar, who’s got of passion for pinsas at Montesacro in Walnut Creek; Tony Martinez, who craves the keftedes at Mykonos Meze House in Burlingame; and Joshua Baldovino, who savors the smoked hamachi at Trifecta in San Jose. Join us next time when three more guests will recommend their favorite spots, right here on “Check, Please! Bay Area.” I’m Leslie Sbrocco, and I’ll see you then. Cheers. And cheers to you all.\u003c/p>\n\u003cp class=\"p2\">\u003cb>Martinez:\u003c/b> Cheers.\u003c/p>\n\u003cp class=\"p2\">\u003cb>Sbrocco:\u003c/b> Thank you for being such great guests.\u003c/p>\n\u003cp class=\"p2\">\u003cb>Durfee:\u003c/b> We’re gonna pipe it in. We’re gonna fill the molds up to the tippy top. Boom. Boom, boom, boom, boom.\u003c/p>\n\u003cp class=\"p2\">\u003cb>Phillips:\u003c/b> Boom. Boom. Boom.\u003c/p>\n\u003cp class=\"p2\">\u003cb>Durfee:\u003c/b> And then we’re gonna turn it upside down. And we’re gonna “bam, bam, bam!”\u003c/p>\n\u003cp class=\"p2\">\u003cb>Phillips:\u003c/b> Whoa.\u003c/p>\n\u003cp class=\"p2\">\u003cb>Durfee:\u003c/b> Get the chocolate to come out so we can just leave a thin shell. Beautiful.\u003c/p>\n\u003cp class=\"p2\">\u003cb>Phillips:\u003c/b> Nice. Wow!\u003c/p>\n\u003cp class=\"p2\">\u003cb>Durfee:\u003c/b> Ah, looks amazing.\u003c/p>\n\u003cp>\u003c/p>\u003c/div>",
"attributes": {
"named": {},
"numeric": []
}
},
{
"type": "component",
"content": "",
"name": "ad",
"attributes": {
"named": {
"label": "floatright"
},
"numeric": [
"floatright"
]
}
},
{
"type": "contentString",
"content": "\u003cdiv class=\"post-body\">\u003cp>\u003c/p>\n\u003cp class=\"p2\">\u003cb>Phillips:\u003c/b> Yeah, it looks perfect. Looks great. It’s gonna make a great bonbon.\u003c/p>\n\n\u003c/div>\u003c/p>",
"attributes": {
"named": {},
"numeric": []
}
}
],
"link": "/checkplease/23721/check-please-bay-area-reviews-mykonos-meze-trifecta-montesacro",
"authors": [
"11084"
],
"programs": [
"checkplease_9339"
],
"categories": [
"checkplease_3845",
"checkplease_8022",
"checkplease_3750",
"checkplease_3740",
"checkplease_9210",
"checkplease_3731",
"checkplease_93",
"checkplease_9200",
"checkplease_3831",
"checkplease_3751",
"checkplease_3847",
"checkplease_3871",
"checkplease_3754",
"checkplease_3741",
"checkplease_443",
"checkplease_3738",
"checkplease_10",
"checkplease_3729",
"checkplease_3739",
"checkplease_9209",
"checkplease_8964",
"checkplease_9427",
"checkplease_91",
"checkplease_7949"
],
"tags": [
"checkplease_8584",
"checkplease_8971",
"checkplease_8565",
"checkplease_9025",
"checkplease_8599",
"checkplease_9162",
"checkplease_8566",
"checkplease_9245",
"checkplease_8794",
"checkplease_8518",
"checkplease_8568",
"checkplease_8569"
],
"featImg": "checkplease_23724",
"label": "checkplease_9339"
},
"checkplease_23706": {
"type": "posts",
"id": "checkplease_23706",
"meta": {
"index": "posts_1716263798",
"site": "checkplease",
"id": "23706",
"score": null,
"sort": [
1770348496000
]
},
"guestAuthors": [],
"slug": "check-please-bay-area-reviews-stateline-road-smokehouse-stockhome-bar-sprezzatura",
"title": "Check, Please! Bay Area reviews: Stateline Road Smokehouse, Stockhome, Bar Sprezzatura",
"publishDate": 1770348496,
"format": "video",
"headTitle": "Check, Please! Bay Area reviews: Stateline Road Smokehouse, Stockhome, Bar Sprezzatura | KQED",
"labelTerm": {
"term": 9339,
"site": "checkplease"
},
"content": "\u003cp>\u003cem>Check, Please! Bay Area, \u003c/em>season 20, episode 13, airs Thursday, February 5, at 7:30 pm, on KQED 9. See other \u003ca href=\"http://www.kqed.org/tv/programs/index.jsp?pgmid=14084\" target=\"_blank\" rel=\"noopener noreferrer\">television airtimes\u003c/a>.\u003c/p>\n\u003cp>\u003cspan style=\"font-weight: 400\">Our culinary journey kicks off in Napa’s Rail Arts District at \u003cstrong>Stateline Road Smokehouse\u003c/strong>, where chef Darryl Bell Jr. brings Kansas City-inspired barbecue to wine country in a bright, welcoming space. Diners line up for tender baby back ribs, Kansas City-invented burnt ends and hickory-smoked brisket, pairing smoky meats with Rancho Gordo beans and greens and other California-forward sides rooted in Bell’s childhood memories and community traditions. From there, we head north to downtown Petaluma, where \u003cstrong>Stockhome\u003c/strong> offers a casual yet deeply personal take on Swedish street food influenced by Middle Eastern flavors. Guests dig into Swedish meatballs with lingonberries, fried Jerusalem artichokes, and delicate Swedish pancakes — comfort food that reflects chef Roberth Sundell’s heritage and the multicultural spirit of modern-day Stockholm. Finally, our journey wraps up in San Francisco’s Financial District at \u003cstrong>Bar Sprezzatura\u003c/strong>, a stylish Italian aperitivo spot inspired by Venice. Diners sip classic Negronis alongside guanciale meatballs with crisp ciabatta, scampi arancini, silky bigoli freschi, and a bright stone fruit and heirloom tomato salad, all set against a glamorous backdrop that celebrates Italian flair and downtown San Francisco’s revival.\u003c/span>\u003c/p>\n\u003cfigure id=\"attachment_23707\" class=\"wp-caption alignnone\" style=\"max-width: 1920px\">\u003cimg loading=\"lazy\" decoding=\"async\" class=\"size-full wp-image-23707\" src=\"https://cdn.kqed.org/wp-content/uploads/sites/40/2026/02/2013_02.png\" alt=\"\" width=\"1920\" height=\"1080\" srcset=\"https://cdn.kqed.org/wp-content/uploads/sites/40/2026/02/2013_02.png 1920w, https://cdn.kqed.org/wp-content/uploads/sites/40/2026/02/2013_02-160x90.png 160w, https://cdn.kqed.org/wp-content/uploads/sites/40/2026/02/2013_02-768x432.png 768w, https://cdn.kqed.org/wp-content/uploads/sites/40/2026/02/2013_02-1536x864.png 1536w\" sizes=\"auto, (max-width: 1920px) 100vw, 1920px\">\u003cfigcaption class=\"wp-caption-text\">Host Leslie Sbrocco joins guests Bennett Bakke, Alexis Joseph Merritt and Paige Mantel from KQED in San Francisco.\u003c/figcaption>\u003c/figure>\n\u003cp>Get Restaurant Information:\u003c/p>\n\u003cul>\n\u003cli>\u003ca href=\"https://www.stateline-road.com/\">\u003cstrong>Stateline Road Smokehouse\u003c/strong> (Napa)\u003c/a>\u003c/li>\n\u003cli>\u003ca href=\"https://www.stockhomepetaluma.com/shop/%20stockhome-restaurant/7\">\u003cstrong>Stockhome\u003c/strong> (Petaluma)\u003c/a>\u003c/li>\n\u003cli>\u003ca href=\"https://www.barsprezzatura.com/\">\u003cstrong>Bar Sprezzatura \u003c/strong>(San Francisco)\u003c/a>\u003c/li>\n\u003c/ul>\n\u003cfigure id=\"attachment_20123\" class=\"wp-caption alignnone\" style=\"max-width: 800px\">\u003cimg loading=\"lazy\" decoding=\"async\" class=\"size-medium wp-image-20123\" src=\"https://cdn.kqed.org/wp-content/uploads/sites/40/2019/04/Leslie-Headshot-Smokey-copy-800x540.jpg\" alt=\"Host Leslie Sbrocco sipping wine\" width=\"800\" height=\"540\">\u003cfigcaption class=\"wp-caption-text\">Host Leslie Sbrocco sipping wine \u003ccite>(Courtesy of Leslie Sbrocco)\u003c/cite>\u003c/figcaption>\u003c/figure>\n\u003cp>My name is Leslie Sbrocco, and I’m the \u003ca href=\"http://ww2.kqed.org/checkplease/host-biography/\" target=\"_blank\" rel=\"noopener noreferrer\">host\u003c/a> of \u003cem>Check, Please! Bay Area\u003c/em>. Each week, I’ll share my tasting notes about the wine, beer and spirits the guests and I drank on set during the taping of the show.\u003c/p>\n\u003cp>\u003cimg loading=\"lazy\" decoding=\"async\" class=\"alignnone size-medium wp-image-23710\" src=\"https://cdn.kqed.org/wp-content/uploads/sites/40/2026/02/2013_Wines-2000x2667.png\" alt=\"\" width=\"2000\" height=\"2667\" srcset=\"https://cdn.kqed.org/wp-content/uploads/sites/40/2026/02/2013_Wines-2000x2667.png 2000w, https://cdn.kqed.org/wp-content/uploads/sites/40/2026/02/2013_Wines-160x213.png 160w, https://cdn.kqed.org/wp-content/uploads/sites/40/2026/02/2013_Wines-768x1024.png 768w, https://cdn.kqed.org/wp-content/uploads/sites/40/2026/02/2013_Wines-1152x1536.png 1152w, https://cdn.kqed.org/wp-content/uploads/sites/40/2026/02/2013_Wines-1536x2048.png 1536w\" sizes=\"auto, (max-width: 2000px) 100vw, 2000px\">\u003c/p>\n\u003cp>[ad fullwidth]\u003c/p>\n\u003cp>\u003ca href=\"http://lucawines.com\">\u003cspan style=\"color: #339966\">\u003cstrong>Nico 2021 Malbec\u003c/strong>\u003c/span>\u003c/a>\u003cbr>\n\u003cem>Uco Valley, Mendoza, Argentina, $90\u003c/em>\u003cbr>\nThis highly rated bottling hails from high-altitude vineyards in the Gualtallary area outside Mendoza. The famed Catena family’s properties — driven by the powerhouse Dr. Laura Catena — are focused on maintaining tradition while cultivating innovation. This unique wine shares both of those traits. With dark berry aromas and intense cocoa and peppery flavors, its polished texture leans toward a modern style. But the vines are a nod to the producer’s rich history. Crafted from old-vine Malbec plants rescued from a 105-year-old pre-phylloxera vineyard, the wine is layered and intense, offering a glorious glimpse of the past in the glass.\u003c/p>\n\u003cp>\u003ca href=\"https://www.ramsgatewinery.com/\">\u003cspan style=\"color: #339966\">\u003cstrong>Ram’s Gate 2023 Chardonnay, Bucher Vineyard\u003c/strong>\u003c/span>\u003c/a>\u003cbr>\n\u003cem>Russian River Valley, California, $74\u003c/em>\u003cbr>\nRam’s Gate is a hidden treasure. A beautiful spot to include on a tasting visit, the winery is located at the crossroads of three famous appellations: the Sonoma Coast, Sonoma Valley and Carneros. This single-vineyard Chardonnay comes from the noted Bucher Vineyard in the Russian River Valley, where the afternoon sun is tempered by a cool ocean fog layer. This creates grapes with finesse and balanced ripeness. This small-production white is packed with aromas of lemon cream and vanilla, kept in check by vibrant acidity and a lush but bright texture.\u003c/p>\n\u003cp>\u003ca href=\"https://www.domainecarneros.com/\">\u003cspan style=\"color: #339966\">\u003cstrong>Domaine Carneros “Cuvée de la Pompadour” Brut Rosé\u003c/strong>\u003c/span>\u003c/a>\u003cbr>\n\u003cem>Carneros, California, $43\u003c/em>\u003cbr>\nTake a mini-trip to “France” when you visit Napa Valley’s stunning Domaine Carneros. It was founded by the family of France’s acclaimed Champagne Taittinger in 1987, when Claude Taittinger discovered the bucolic rolling hills and cool climate of Carneros. The magnificent château perched proudly at the top of a hill blanketed by vines is one of the top destinations in California to immerse yourself in elegance. Visitors can choose from myriad food and wine tasting options that truly sparkle, such as “Scent & Savor” and “The Ultimate Caviar Experience.”\u003c/p>\n\u003cp>To get a taste of the classic estate in your own home, look for their Brut Rosé Cuvée de la Pompadour — one of my ultimate sparkling wine favorites. The dry-styled bubbly draws you in with its alluring light pink hue and effervescent fizz. With notes of peach and red berries, its delicate nose is followed by a crisp yet creamy texture. The wine’s name is a story as joyful as the wine itself.\u003c/p>\n\u003cp>“More than 250 years ago, Louis XV’s great paramour, Madame de la Pompadour, famously introduced sparkling wine to the court at Versailles. She declared it ‘the only wine that a woman can drink and remain beautiful,’ and today Domaine Carneros’ Pompadour Brut Rosé is named in her honor,” the winery says.\u003c/p>\n\u003cp>I’ll raise a glass to that!\u003c/p>\n\u003ch2>Episode Transcript\u003c/h2>\n\u003cp class=\"p1\">\u003cb>Sbrocco:\u003c/b> Kansas City style barbecue in Napa…\u003c/p>\n\u003cp class=\"p1\">\u003cb>Mantel:\u003c/b> They pour a little beef tallow on it.\u003c/p>\n\u003cp class=\"p1\">\u003cb>Sbrocco:\u003c/b> …contemporary Swedish delights in Petaluma…\u003c/p>\n\u003cp class=\"p1\">\u003cb>Bakke:\u003c/b> My go-to is the Swedish meatballs. Super delicious.\u003c/p>\n\u003cp class=\"p1\">\u003cb>Sbrocco:\u003c/b> …and a taste of Venice in San Francisco.\u003c/p>\n\u003cp class=\"p1\">\u003cb>Joseph Merritt:\u003c/b> It’s tender. It’s creamy. It’s cheesy. You can’t really go wrong.\u003c/p>\n\u003cp class=\"p1\">\u003cb>Sbrocco:\u003c/b> Just ahead on “Check, Please! Bay Area.” We need more cowbell! We need more peppers!\u003c/p>\n\u003cp class=\"p1\">\u003cb>Sbrocco:\u003c/b> Hi. I’m Leslie Sbrocco. Welcome to “Check, Please! Bay Area,” the show where Bay Area residents review and talk about their favorite restaurants. Now, we have three guests, and each one recommends one of their favorite spots, and the other two go check them out to see what they think. Joining me at the “Check, Please!” table today are bike enthusiast Bennett Bakke, marketing executive Paige Mantel…\u003c/p>\n\u003cp class=\"p1\">[ Glasses clink ]\u003c/p>\n\u003cp class=\"p1\">…and tech HR executive Alexis Joseph Merritt. Welcome, everyone. You ready for a good time?\u003c/p>\n\u003cp class=\"p1\">\u003cb>Joseph Merritt:\u003c/b> Ready.\u003c/p>\n\u003cp class=\"p1\">\u003cb>Mantel:\u003c/b> Absolutely.\u003c/p>\n\u003cp class=\"p1\">\u003cb>Sbrocco:\u003c/b> When you think of Napa, you probably picture world-class wine, vineyard views, and elegant tasting menus, but at Paige’s spot, the vibe is far more casual. You can pair your bubbly with baby-back ribs, juicy brisket, and other classic Kansas City barbecue delights. Located in Napa’s Rail Arts District, it’s Stateline Road Smokehouse.\u003c/p>\n\u003cp class=\"p2\">♪♪\u003c/p>\n\u003cp class=\"p1\">\u003cb>Woman:\u003c/b> This is gonna be for here?\u003c/p>\n\u003cp class=\"p1\">\u003cb>Man:\u003c/b> Yeah.\u003c/p>\n\u003cp class=\"p2\">♪♪\u003c/p>\n\u003cp class=\"p1\">[ Chatter ]\u003c/p>\n\u003cp class=\"p1\">\u003cb>Bell:\u003c/b> I’m originally from Kansas City. I moved out here about 16 years ago just to work for Chef Keller and do fine dining and Michelin restaurants. I quickly realized the barbecue that I’m personally used to, it wasn’t quite out here. My wife, she essentially told me, “Stop crying about it and just open something.” Stateline Road Smokehouse. The name’s inspired by the road that divides Kansas City, Missouri, and Kansas City, Kansas, it’s called Stateline Road, and it has some of my favorite barbecue places. Every place that I would go to in Kansas City, it was always eating burnt ends and ribs. Those are my two go-to’s every time. Kansas City barbecue is defined by the type of sauce. Our sauce is tomato- and vinegar-based. It has a little bit of heat, but before it gets too hot, the sweetness just kind of comes in and cuts it off. And then afterwards, all these spices just kind of linger on. Our baby-back ribs have a nice meaty bite to them.\u003c/p>\n\u003cp class=\"p1\">\u003cb>Woman:\u003c/b> So good.\u003c/p>\n\u003cp class=\"p1\">\u003cb>Bell:\u003c/b> These briskets take 14, 15 hours to cook. Anytime that I order brisket at a restaurant, I always order it from the point because that’s just fatty and juicy. It’s great. So this is, like, some of the best piece right there.\u003c/p>\n\u003cp class=\"p1\">\u003cb>Man:\u003c/b> Burnt ends.\u003c/p>\n\u003cp class=\"p1\">\u003cb>Bell:\u003c/b> Kansas City invented burnt ends. It’s made from the brisket, and you just get this kind of sweet and tangy, fatty, chewy brisket bite. Yeah. That’s a classic staple that I grew up with.\u003c/p>\n\u003cp class=\"p2\">♪♪\u003c/p>\n\u003cp class=\"p1\">I enjoy cooking in this style because you’re dealing with fire. You’re dealing with the element. You’re taming it. You’re controlling it. You’re able to get it to rise and lower on command. That’s an exciting piece for me because it’s always evolving. I use oak which is native to California. Using this one really as a fuel source because it burns really hot and it burns for a while. And then over on this side, we have the cherry wood. And this one’s added to add those nuances, the sweet notes.\u003c/p>\n\u003cp class=\"p2\">♪♪\u003c/p>\n\u003cp class=\"p1\">\u003cb>Man:\u003c/b> Finger-licking good!\u003c/p>\n\u003cp class=\"p2\">♪♪\u003c/p>\n\u003cp class=\"p1\">\u003cb>Bell:\u003c/b> This is called the Rail Arts District of Napa. It’s this kind of funky warehouse vibe. The best barbecue places in Kansas City are in these kind of grungy places. This building used to be an auto shop, and it has all those really fun characteristics. If you go to any place and you see linen and fine dining for barbecue, you should turn and run the other way. It’s not meant for that. So this environment is joyful. It’s fun. That’s what makes this place really special for us here in Napa.\u003c/p>\n\u003cp class=\"p1\">\u003cb>Man:\u003c/b> Cheers.\u003c/p>\n\u003cp class=\"p1\">\u003cb>Woman:\u003c/b> [ Laughs ]\u003c/p>\n\u003cp class=\"p1\">\u003cb>Sbrocco:\u003c/b> Alright, Paige, now, do you go to Napa normally?\u003c/p>\n\u003cp class=\"p1\">\u003cb>Mantel:\u003c/b> Well, I live in Napa now. So I recently moved there and looking for all different kinds of restaurants. And Napa has amazing restaurants, but when I learned a year ago that a new Kansas City style barbecue place was opening by a Michelin-trained chef, I’m like, “Take me there.” My go-to every time I go is definitely the Kansas City style burnt ends. Have you ever had burnt ends?\u003c/p>\n\u003cp class=\"p1\">\u003cb>Joseph Merritt:\u003c/b> Yes.\u003c/p>\n\u003cp class=\"p1\">\u003cb>Mantel:\u003c/b> Right?\u003c/p>\n\u003cp class=\"p1\">\u003cb>Bakke:\u003c/b> They were spectacular.\u003c/p>\n\u003cp class=\"p1\">\u003cb>Mantel:\u003c/b> I mean, the morsels of, like, bite-sized chunks with crispy ends and the tender meat and a little fat just all together with barbecue sauce.\u003c/p>\n\u003cp class=\"p1\">\u003cb>Bakke:\u003c/b> And their house barbecue sauce is so good. There’s the house sauce. There’s a spicy sauce. I forget what the third sauce is.\u003c/p>\n\u003cp class=\"p1\">\u003cb>Mantel:\u003c/b> A sweet one, as well.\u003c/p>\n\u003cp class=\"p1\">\u003cb>Bakke:\u003c/b> Yeah. They were all great.\u003c/p>\n\u003cp class=\"p1\">\u003cb>Joseph Merritt:\u003c/b> I had the burnt ends, too, and it was my first time having that, so…\u003c/p>\n\u003cp class=\"p1\">\u003cb>Sbrocco:\u003c/b> A burnt-end virgin!\u003c/p>\n\u003cp class=\"p1\">\u003cb>Joseph Merritt:\u003c/b> A burnt-end virgin, yes. So it was delicious. And it was the unanimous crowd favorite with my table.\u003c/p>\n\u003cp class=\"p1\">\u003cb>Mantel:\u003c/b> The brisket is also something I get, and you can tell them exactly how you like it. I prefer it on the lean side, and so right there, the butcher is gonna cut off the fat for me. And right before they serve it, they pour a little beef tallow on it.\u003c/p>\n\u003cp class=\"p1\">\u003cb>Bakke:\u003c/b> Ohh.\u003c/p>\n\u003cp class=\"p1\">\u003cb>Mantel:\u003c/b> Oh, my goodness.\u003c/p>\n\u003cp class=\"p1\">\u003cb>Joseph Merritt:\u003c/b> We saw that. We were like, “What is that?”\u003c/p>\n\u003cp class=\"p1\">\u003cb>Mantel:\u003c/b> Yes, yes. Brings the flavors alive. And that is fork-tender brisket. And you can see the smoke line and the crisp edge. And melts in your mouth.\u003c/p>\n\u003cp class=\"p1\">\u003cb>Sbrocco:\u003c/b> Did you have the brisket?\u003c/p>\n\u003cp class=\"p1\">\u003cb>Joseph Merritt:\u003c/b> Yeah, I had the brisket also. So it’s good to know you can ask for it lean. So, unfortunately, the piece that we got was a little bit fatty.\u003c/p>\n\u003cp class=\"p1\">\u003cb>Mantel:\u003c/b> Ah. Yeah.\u003c/p>\n\u003cp class=\"p1\">\u003cb>Joseph Merritt:\u003c/b> But the flavor of the meat was delicious. We had the pulled pork also, which was a crowd pleaser. It was really juicy. It was cooked really well. And I loved that you got to kind of walk down the line cafeteria-style and kind of see what meats you were getting and what sides you were getting. Outstanding.\u003c/p>\n\u003cp class=\"p1\">\u003cb>Sbrocco:\u003c/b> And what about you?\u003c/p>\n\u003cp class=\"p1\">\u003cb>Bakke:\u003c/b> I kind of tried a lot of things when I first went in.\u003c/p>\n\u003cp class=\"p1\">\u003cb>Sbrocco:\u003c/b> That’s alright. We got time.\u003c/p>\n\u003cp class=\"p1\">[ Laughter ]\u003c/p>\n\u003cp class=\"p1\">Go ahead. Start with one.\u003c/p>\n\u003cp class=\"p1\">\u003cb>Bakke:\u003c/b> The tri-tip sandwich is a Wagyu beef, which was…\u003c/p>\n\u003cp class=\"p1\">\u003cb>Sbrocco:\u003c/b> Of course.\u003c/p>\n\u003cp class=\"p1\">\u003cb>Bakke:\u003c/b> …really good. But the thing that got me, though, is it has pickled onions and red peppers on it, and they gave you a little bit of extra on the side so you could add more pickles or red peppers, which is just something that needs to be normalized. Like, we need more of — We need more of that.\u003c/p>\n\u003cp class=\"p1\">\u003cb>Sbrocco:\u003c/b> We need more cowbell! We need more peppers!\u003c/p>\n\u003cp class=\"p1\">\u003cb>Narrator:\u003c/b> But I had the curly fries, as well, and they were exactly what you want when you want curly fries. But the highlight was, on the side, they gave you bacon chive aioli, which was spectacular.\u003c/p>\n\u003cp class=\"p1\">\u003cb>Mantel:\u003c/b> Isn’t that the best?\u003c/p>\n\u003cp class=\"p1\">\u003cb>Bakke:\u003c/b> Yeah.\u003c/p>\n\u003cp class=\"p1\">\u003cb>Sbrocco:\u003c/b> I’m getting a sense that you’re a sauce guy.\u003c/p>\n\u003cp class=\"p1\">\u003cb>Bakke:\u003c/b> Exactly. Yes.\u003c/p>\n\u003cp class=\"p1\">[ Laughs ]\u003c/p>\n\u003cp class=\"p1\">\u003cb>Sbrocco:\u003c/b> Mm-hmm. Now, what about the sides?\u003c/p>\n\u003cp class=\"p1\">\u003cb>Bakke:\u003c/b> The mac and cheese was an aged cheddar, but the highlight was crispy kale and parsnip on the top, which– That was another one. They could have given you a little side of that to just dump more of that on because it was great. It gave the mac and cheese a little bit of a crunch. Yeah. I’d get all that again.\u003c/p>\n\u003cp class=\"p1\">\u003cb>Joseph Merritt:\u003c/b> I also had the beans and greens. White beans that were creamy and unctuous, and they had the kale greens in there. I think it was kale and collard that day. It was really delicious and just made for a really nice pairing with all of the meat dishes.\u003c/p>\n\u003cp class=\"p1\">\u003cb>Mantel:\u003c/b> So there’s something really special there that I’ve never seen at any other restaurant that is amazing. I’m a salad girl. I love a good salad. They have a cherry wood-smoked maitake mushroom and greens salad.\u003c/p>\n\u003cp class=\"p1\">\u003cb>Sbrocco:\u003c/b> Ooh!\u003c/p>\n\u003cp class=\"p1\">\u003cb>Mantel:\u003c/b> It is phenomenal. And there’s so many textures. They have crispy black rice. They have marinated garbanzo beans and a really nice light lemon vinaigrette. And just all together the textures, the flavors, it’s phenomenal.\u003c/p>\n\u003cp class=\"p1\">\u003cb>Joseph Merritt:\u003c/b> They had a special that day. It was a smoked sea bass, and it was this beautiful piece of fish that was just smoked and charred. I haven’t had just a smoked piece of sea bass before. It was delicious. It was really a nice surprise at a barbecue restaurant.\u003c/p>\n\u003cp class=\"p1\">\u003cb>Sbrocco:\u003c/b> And did you have anything to drink with it?\u003c/p>\n\u003cp class=\"p1\">\u003cb>Joseph Merritt:\u003c/b> Yes. I thought something that was really fun. Right when you walk in the door, they have an old-fashioned sink, and you can get a $5 sink drink, which I thought was really cute. So my husband grabbed a beer while we were perusing the menu. Some people grabbed some spritzers. I got a glass of Chenin Blanc, which was delicious.\u003c/p>\n\u003cp class=\"p1\">\u003cb>Sbrocco:\u003c/b> So they do have upscale and they have casual.\u003c/p>\n\u003cp class=\"p1\">\u003cb>Joseph Merritt:\u003c/b> Yeah. You can go both ways. It was beautiful.\u003c/p>\n\u003cp class=\"p1\">\u003cb>Bakke:\u003c/b> Their lemonade is great, too.\u003c/p>\n\u003cp class=\"p1\">\u003cb>Sbrocco:\u003c/b> Lemonade.\u003c/p>\n\u003cp class=\"p1\">\u003cb>Bakke:\u003c/b> It was a hot day. I was outside. So the lemonade was great. And I got one to go, as well.\u003c/p>\n\u003cp class=\"p1\">\u003cb>Mantel:\u003c/b> Nice. One of the fun things to drink is a boozie slushy. So, they have two different flavors each time you go. When we were there last, there was a gin-and-tonic buzzy– boozie slushy. When you drink too many boozie slushies…\u003c/p>\n\u003cp class=\"p1\">[ Laughter ]\u003c/p>\n\u003cp class=\"p1\">\u003cb>Joseph Merritt:\u003c/b> It must have been good!\u003c/p>\n\u003cp class=\"p1\">\u003cb>Sbrocco:\u003c/b> [Slurring] I had the slushy…\u003c/p>\n\u003cp class=\"p1\">\u003cb>Mantel:\u003c/b> The boozie slushy will get you buzzed.\u003c/p>\n\u003cp class=\"p1\">[ Laughter ]\u003c/p>\n\u003cp class=\"p1\">\u003cb>Joseph Merritt:\u003c/b> Ooh, I missed that.\u003c/p>\n\u003cp class=\"p1\">\u003cb>Sbrocco:\u003c/b> We have not yet, of course, talked about dessert. Dessert. Let’s start with you.\u003c/p>\n\u003cp class=\"p1\">\u003cb>Bakke:\u003c/b> I had the apple crumble, which was good, but I’d probably go with the banana cream pudding next time.\u003c/p>\n\u003cp class=\"p1\">\u003cb>Sbrocco:\u003c/b> Ah. Okay.\u003c/p>\n\u003cp class=\"p1\">\u003cb>Joseph Merritt:\u003c/b> I’m not normally a big dessert person. Wine can be my dessert, and I’m very happy. But we did get the Straus soft serve, which was–\u003c/p>\n\u003cp class=\"p1\">\u003cb>Mantel:\u003c/b> Yes! Yes!\u003c/p>\n\u003cp class=\"p1\">\u003cb>Joseph Merritt:\u003c/b> My favorite California dairy. And it’s just so creamy. And I actually hadn’t had it somehow in the soft-serve form before, so it was an amazing treat. We all loved it. It disappeared in five seconds flat.\u003c/p>\n\u003cp class=\"p1\">\u003cb>Sbrocco:\u003c/b> And the service, you know, though it is, again, sort of– not cafeteria style, but… What did you think about the service?\u003c/p>\n\u003cp class=\"p1\">\u003cb>Bakke:\u003c/b> The service was great, actually.\u003c/p>\n\u003cp class=\"p1\">\u003cb>Joseph Merritt:\u003c/b> We had a couple people come out and speak to us as we were wrapping our meal, just checking in on us, so it was nice.\u003c/p>\n\u003cp class=\"p1\">\u003cb>Sbrocco:\u003c/b> Alright. If you would like to try Stateline Road Smokehouse, it’s located on Vallejo Street in Napa, and the average multi-course tab per person without drinks is around $50.\u003c/p>\n\u003cp class=\"p2\">♪♪\u003c/p>\n\u003cp class=\"p1\">As an avid mountain biker, Bennett’s a big lover of the great outdoors. It’s no wonder his favorite lunch spot features a sunny patio, housemade lemonade, and hearty Swedish fare, all perfect for refueling after a long ride. Located in downtown Petaluma, it’s Stockhome.\u003c/p>\n\u003cp class=\"p2\">♪♪\u003c/p>\n\u003cp class=\"p1\">\u003cb>Roberth:\u003c/b> Stockhome Restaurant is an open casual restaurant serving traditional Swedish food and Middle Eastern food from Stockholm city.\u003c/p>\n\u003cp class=\"p1\">\u003cb>Ashton:\u003c/b> Our point here was to make it feel like home. Warm. inviting.\u003c/p>\n\u003cp class=\"p1\">\u003cb>Roberth:\u003c/b> You’re walking into our house. I was born and raised in Stockholm. It’s such a mixed culture in Sweden today. Every corner has something new and creative. Swedish bistro. Swedish classic also. All the Street food. Kebab places all over. Pizzerias everywhere, as well.\u003c/p>\n\u003cp class=\"p1\">\u003cb>Ashton:\u003c/b> My fondest memories in Stockholm are with my cousins and… 2:00 a.m. — Beer in one hand. Lamb and beef pita in the other. I think my dad’s the greatest chef in the world, so I haven’t had meatballs that have been better than my dad’s. Savory. Tangy. Sweet. And then you get this nice creaminess with the mashed potatoes, as well. I’ve had guests who come in who have only eaten Ikea meatballs, and being able to give them a different experience, I think it’s really beautiful.\u003c/p>\n\u003cp class=\"p1\">\u003cb>Roberth:\u003c/b> Swedish people like to have the sweets, but they also like the tanginess to balance things out, and I think that’s kind of our food is famous for. We have something called tunnbrodsrulle. It’s frankfurters in a thin wrap with mashed potatoes. That’s really Swedish traditional. Something you go off to the bars and eat. The dish I love the most is the beet-cured gravlax. It’s just a cured salmon with salt, sugar, a little white pepper, dill, grated beets, and lemon zest. It’s a beautiful dish. I can eat it for breakfast, lunch, or dinner. Our Middle Eastern dishes that we’re working on. I’m especially proud of our falafel. We do lamb and beef kebab plates. More of the shawarma style. The menu is really created to cater for everybody.\u003c/p>\n\u003cp class=\"p1\">\u003cb>Ashton:\u003c/b> Banana marshmallows are some of my favorites. Candy in Sweden is huge. The average Swede eats around 40 pounds of candy a year. I want people to be full and stuffed. Maybe even have a little bit of room for taking some candy on the road with them, as well. With Petaluma, depending on your weather, you have beautiful, warm, sunny days to enjoy food, and then when you have those rainy days, it’s… We have this warm interior on the inside for you.\u003c/p>\n\u003cp class=\"p1\">\u003cb>Roberth:\u003c/b> There’s always a table or we make sure we make a table for you. It’s a very easy restaurant.\u003c/p>\n\u003cp class=\"p1\">\u003cb>Sbrocco:\u003c/b> Alright, Bennett, you live in Marin, but you make that trek to my hometown, Petaluma.\u003c/p>\n\u003cp class=\"p1\">\u003cb>Bakke:\u003c/b> There we go. Yes. My mom made, um, Swedish meatballs when I was a kid, and so when we noticed that there was a Swedish restaurant within a drivable distance, we made the trek up to Petaluma, and there’s tons of antique shops to walk around and kind of make a whole afternoon out of it with your family. My go-to is the Swedish meatballs. They do it interesting, I think. It’s not tomato-based gravy. It’s a really thin gravy. And the mashed potatoes are really fluffy, as well. The unique part is the lingonberry jam that comes with it. And the cucumber, as well. Super delicious.\u003c/p>\n\u003cp class=\"p1\">\u003cb>Sbrocco:\u003c/b> What did you have when you went?\u003c/p>\n\u003cp class=\"p1\">\u003cb>Joseph Merritt:\u003c/b> Had two things. So had the Swedish meatballs, which I thought were delicious. The meatballs were just really light. It had a lot of really great flavor. It was seasoned well. My dish was a little bit cold when I got it, which was unfortunate because it came out so quickly. The flavor was great. It would be even better if they were super hot, but we would have that again. And then also I got a falafel kebab plate. Our falafel was a little bit over-fried, but the plate was really beautiful. It had really great roasted vegetables that I really enjoyed. And it had this tomato sauce. Not Italian tomato sauce, but kind of a peppery tomato sauce that I wasn’t sure what to put it on, so just put it on everything. That was the idea.\u003c/p>\n\u003cp class=\"p1\">\u003cb>Sbrocco:\u003c/b> There you go. That’s okay.\u003c/p>\n\u003cp class=\"p1\">\u003cb>Joseph Merritt:\u003c/b> Yeah.\u003c/p>\n\u003cp class=\"p1\">\u003cb>Sbrocco:\u003c/b> Okay. And, Paige, what did you have?\u003c/p>\n\u003cp class=\"p1\">\u003cb>Mantel:\u003c/b> Well, I knew I was going to want to try a lot of things on the menu here, so I bought a couple of friends with my husband, so the four of us ordered a whole bunch of things. The first was the mezze plate. The hummus was just super creamy. You could tell there was a lot of tahini and olive oil in it. The tabbouleh was great, super fresh, and the baba ganoush was really perfect. That eggplant flavor just really came out. And it comes with the most beautiful, amazing fresh-baked pita. The other big star was the Jerusalem artichokes. So they’re thinly sliced, fried, and served on a bed of sunchoke purée.\u003c/p>\n\u003cp class=\"p1\">\u003cb>Sbrocco:\u003c/b> Ooh.\u003c/p>\n\u003cp class=\"p1\">\u003cb>Mantel:\u003c/b> Every little bite of this was just crunchy, tangy, delicious. I mean, I’ll go back and just order that. The plate was gone in 30 seconds. It was so delicious.\u003c/p>\n\u003cp class=\"p1\">\u003cb>Sbrocco:\u003c/b> It was inhaled.\u003c/p>\n\u003cp class=\"p1\">\u003cb>Mantel:\u003c/b> So inhaled. Yes.\u003c/p>\n\u003cp class=\"p1\">\u003cb>Bakke:\u003c/b> Yeah, pivoting off of the artichokes, so the grilled artichoke is in the little gem salad, as well. It’s a Manchego cheese on the top. And the dressing is a buttermilk tahini dressing. But the highlight is the crispy garbanzo beans.\u003c/p>\n\u003cp class=\"p1\">\u003cb>Mantel:\u003c/b> Yes!\u003c/p>\n\u003cp class=\"p1\">\u003cb>Bakke:\u003c/b> Oh, my God.\u003c/p>\n\u003cp class=\"p1\">\u003cb>Mantel:\u003c/b> Yes. I love that! The way it added that crunch to it.\u003c/p>\n\u003cp class=\"p1\">\u003cb>Bakke:\u003c/b> It’s so good.\u003c/p>\n\u003cp class=\"p1\">\u003cb>Mantel:\u003c/b> We tried the salmon kebab plate. Very nice filet of salmon with tomato sauce on top. Served with a little salad. Those amazing pickled cucumbers that I could die for. They were amazing.\u003c/p>\n\u003cp class=\"p1\">\u003cb>Bakke:\u003c/b> Yeah.\u003c/p>\n\u003cp class=\"p1\">\u003cb>Mantel:\u003c/b> But the star of that plate was the sweet-potato fries.\u003c/p>\n\u003cp class=\"p1\">\u003cb>Joseph Merritt:\u003c/b> Oh, yes.\u003c/p>\n\u003cp class=\"p1\">\u003cb>Mantel:\u003c/b> Oh my goodness!\u003c/p>\n\u003cp class=\"p1\">\u003cb>All:\u003c/b> So good!\u003c/p>\n\u003cp class=\"p1\">\u003cb>Bakke:\u003c/b> I forgot about that.\u003c/p>\n\u003cp class=\"p1\">\u003cb>Mantel:\u003c/b> Me too. They were delicious. We had the wienerschnitzel. That’s your thin-slice, pounded-out piece of pork loin. Fried. Really nice and crispy. And that came with really nice fresh peas on top and some roasted potatoes. We really enjoyed that.\u003c/p>\n\u003cp class=\"p1\">\u003cb>Sbrocco:\u003c/b> And what else did you have?\u003c/p>\n\u003cp class=\"p1\">\u003cb>Joseph Merritt:\u003c/b> That’s all we had to eat but had something delicious to drink. The Carlsberg beer, which I hadn’t had in years since I was in Denmark, in Sweden last. So I walked in. It’s like, well, if we’re at Stockhome, got to have something from the Scandinavian region. And that was delicious and refreshing.\u003c/p>\n\u003cp class=\"p1\">\u003cb>Bakke:\u003c/b> They also have elderflower soda and lingonberry soda. All of those are great.\u003c/p>\n\u003cp class=\"p1\">\u003cb>Sbrocco:\u003c/b> Did you have anything to drink?\u003c/p>\n\u003cp class=\"p1\">\u003cb>Mantel:\u003c/b> Oh, yes. Between my four friends, we might have had one or two bottles of the rosé.\u003c/p>\n\u003cp class=\"p1\">[ Laughter ]\u003c/p>\n\u003cp class=\"p1\">\u003cb>Sbrocco:\u003c/b> But who’s counting? Maybe.\u003c/p>\n\u003cp class=\"p1\">\u003cb>Mantel:\u003c/b> Well, we were there for a long time. We really coursed it out. We sat outside, which I loved sitting outside.\u003c/p>\n\u003cp class=\"p1\">\u003cb>Joseph Merritt:\u003c/b> It was lovely.\u003c/p>\n\u003cp class=\"p1\">\u003cb>Mantel:\u003c/b> Just really beautiful.\u003c/p>\n\u003cp class=\"p1\">\u003cb>Joseph Merritt:\u003c/b> It’s good people watching.\u003c/p>\n\u003cp class=\"p1\">\u003cb>Sbrocco:\u003c/b> You got to have desserts. You need some calories when you’re biking up there, right?\u003c/p>\n\u003cp class=\"p1\">\u003cb>Bakke:\u003c/b> Right. I hate to say it, but I usually don’t get dessert.\u003c/p>\n\u003cp class=\"p1\">\u003cb>Mantel:\u003c/b> No! No! Bennett! You’re missing out! You’re missing out!\u003c/p>\n\u003cp class=\"p1\">\u003cb>Bakke:\u003c/b> I hate to disappoint.\u003c/p>\n\u003cp class=\"p1\">\u003cb>Mantel:\u003c/b> That Swedish pancake is insane!\u003c/p>\n\u003cp class=\"p1\">\u003cb>Narrator:\u003c/b> …Swedish candy to go.\u003c/p>\n\u003cp class=\"p1\">\u003cb>Joseph Merritt:\u003c/b> There was a nice candy selection. It was cute on the counter.\u003c/p>\n\u003cp class=\"p1\">\u003cb>Bakke:\u003c/b> Yeah.\u003c/p>\n\u003cp class=\"p1\">\u003cb>Sbrocco:\u003c/b> Okay. Tell us about–\u003c/p>\n\u003cp class=\"p1\">\u003cb>Mantel:\u003c/b> Am I the only one that got the Swedish pancake?\u003c/p>\n\u003cp class=\"p1\">\u003cb>Joseph Merritt:\u003c/b> Yeah. Yeah.\u003c/p>\n\u003cp class=\"p1\">\u003cb>Mantel:\u003c/b> You got to go back for it. You got to go back for it.\u003c/p>\n\u003cp class=\"p1\">\u003cb>Sbrocco:\u003c/b> It’s kind of the star of their show.\u003c/p>\n\u003cp class=\"p1\">\u003cb>Mantel:\u003c/b> It really is. Crêpe-like pancake. Crispy edges. They serve it with what’s clearly a homemade, heavy whipped cream with beautiful fresh berries. That was gone in 10 seconds.\u003c/p>\n\u003cp class=\"p1\">\u003cb>Bakke:\u003c/b> You had me at “crêpe-like.”\u003c/p>\n\u003cp class=\"p1\">\u003cb>Mantel:\u003c/b> That was delicious. I know.\u003c/p>\n\u003cp class=\"p1\">\u003cb>Joseph Merritt:\u003c/b> The thinness is what got me.\u003c/p>\n\u003cp class=\"p1\">\u003cb>Mantel:\u003c/b> Oh my goodness.\u003c/p>\n\u003cp class=\"p1\">\u003cb>Sbrocco:\u003c/b> Do you feel like you got value?\u003c/p>\n\u003cp class=\"p1\">\u003cb>Joseph Merritt:\u003c/b> Like I said, if the meal would have been a little bit warmer, I think would have felt fully into the value, but I thought it was really cute. The service was nice. Everyone was really friendly from the beginning. That makes it something that you want to return to. So if we’re in the area, we’d check it out again.\u003c/p>\n\u003cp class=\"p1\">\u003cb>Sbrocco:\u003c/b> And it sounds like you make this a regular thing.\u003c/p>\n\u003cp class=\"p1\">\u003cb>Bakke:\u003c/b> We kind of do. We like to go up and visit Petaluma, and that’s been our routine.\u003c/p>\n\u003cp class=\"p1\">\u003cb>Sbrocco:\u003c/b> And Paige is already dreaming about those Swedish pancakes.\u003c/p>\n\u003cp class=\"p1\">\u003cb>Mantel:\u003c/b> I will go back for those artichokes and the Swedish pancake, for sure.\u003c/p>\n\u003cp class=\"p1\">\u003cb>Sbrocco:\u003c/b> If you would like to try Stockhome, it’s located on Western Avenue in Petaluma, and the average tab per person without drinks is around $50. Offering a chic cocktail-bar vibe and classic Venetian cicchetti, Alexis’ pick brings the true spirit of la dolce vita to the City by the Bay. Located just a few blocks from San Francisco’s Embarcadero, it’s Bar Sprezzatura.\u003c/p>\n\u003cp class=\"p2\">♪♪\u003c/p>\n\u003cp class=\"p1\">[ Rattling ]\u003c/p>\n\u003cp class=\"p2\">♪♪\u003c/p>\n\u003cp class=\"p1\">\u003cb>Mastropierro:\u003c/b> I think when you walk into our space, it kind of feels like lightning in a bottle. There is an elevated feel to it, but it feels effortless.\u003c/p>\n\u003cp class=\"p1\">\u003cb>Man:\u003c/b> Prego!\u003c/p>\n\u003cp class=\"p1\">\u003cb>Splendorini:\u003c/b> Think about “La Dolce Vita.” Fellini. Sophia Loren. Right? So, like, decadent, sexy, but, you know, with character. Cicchetti is specifically for Venetian region. The style of it is a small snack. Like a bite, a nibble.\u003c/p>\n\u003cp class=\"p1\">\u003cb>Offner:\u003c/b> In Venice, because of the lagoon, you’ll see a lot of seafood. We have the bay here, so we kind of are able to replicate that. The baccala mantecato is whipped salt cod. It’s a 400-year-old recipe. It’s something that you see all over in Venice. It’s very, very traditional. As far as decadence goes, our tuna carpaccio. I get the best ahi tuna from Hawaii. It has a spicy olive tapenade that has 13 different ingredients, which are really building the flavor of the sauce. It blows people away. It really does.\u003c/p>\n\u003cp class=\"p1\">\u003cb>Mastropierro:\u003c/b> This is gonna be Alta Langa, which is high-elevation wine coming from Piemonte. Being a Venetian restaurant, of course, we’re going to have a natural focus in the Veneto, Piemonte. But whatever wine you really love in Italy, you should be able to find it here.\u003c/p>\n\u003cp class=\"p2\">♪♪\u003c/p>\n\u003cp class=\"p1\">\u003cb>Splendorini:\u003c/b> As far as cocktail program, classics done very well. Freshness of ingredients. And creativity. A Negroni was the first cocktail that I made when I was 13 years old my first day behind the bar. It’s three things perfectly executed in the same glass. The orange slice has to be put in a glass before. It’s building the glass. Equal parts of gin, Campari, and sweet vermouth. And the orange slice is very important because the pulp of the orange balance the Campari. What I really like about my job is the reaction of the guests.\u003c/p>\n\u003cp class=\"p1\">\u003cb>Offner:\u003c/b> Our goal is when you walk out of this building, you’re like, “Wow. That was a great experience. I can’t wait to tell my friends. I can’t wait to come back.”\u003c/p>\n\u003cp class=\"p1\">\u003cb>Splendorini:\u003c/b> You give us a chance to make it a memory for you in life. So we honored for that. We take it very seriously.\u003c/p>\n\u003cp class=\"p1\">\u003cb>Offner:\u003c/b> Cin-cin.\u003c/p>\n\u003cp class=\"p1\">\u003cb>Splendorini:\u003c/b> Cin-cin.\u003c/p>\n\u003cp class=\"p1\">\u003cb>Offner:\u003c/b> Cin-cin.\u003c/p>\n\u003cp class=\"p1\">\u003cb>Sbrocco:\u003c/b> Alright, Alexis, this spot really does feel like you’re in Venice, doesn’t it? It gives you this elegance, doesn’t it?\u003c/p>\n\u003cp class=\"p1\">\u003cb>Joseph Merritt:\u003c/b> It’s lovely. You walk in. It’s bright and airy. And it has these beautiful– It almost looks like street lamps that should be outside, but they’re indoors, so it’s just– It’s a beautiful setting. It’s great to go after work, on a weekend. Has great small bites. You can taste so many different things. I really love the shrimp arancini. It’s so tender. It’s creamy. It’s cheesy. And it’s fried on the outside, so you can’t really go wrong.\u003c/p>\n\u003cp class=\"p1\">\u003cb>Sbrocco:\u003c/b> A little fried shrimp ball.\u003c/p>\n\u003cp class=\"p1\">\u003cb>Joseph Merritt:\u003c/b> Yeah, a little fried shrimp ball. Also love the meatballs with guanciale. They’re really light and really tender.\u003c/p>\n\u003cp class=\"p1\">\u003cb>Bakke:\u003c/b> The meatballs were great. They asked me if I wanted bread, as well. And, of course, I said, “Yes, I want that.” And that was amazing.\u003c/p>\n\u003cp class=\"p1\">\u003cb>Joseph Merritt:\u003c/b> Delicious.\u003c/p>\n\u003cp class=\"p1\">\u003cb>Bakke:\u003c/b> It was a big piece, but thin-sliced. It had olive oil on it. But the perfect crispiness. It was like those sweet-potato fries. It was, like, perfectly crispy on the outside, but still squishy on the inside. So you just dip that in the tomato sauce with the meatballs.\u003c/p>\n\u003cp class=\"p1\">\u003cb>Joseph Merritt:\u003c/b> Yes, it’s really delicious not too sweet, not too acidic tomato sauce. You don’t want that sauce to go to waste.\u003c/p>\n\u003cp class=\"p1\">\u003cb>Mantel:\u003c/b> I love the cocktail vibe. So we actually sat up at the bar for a drink before we sat down to eat. I started off with an espresso martini. And I’m very caffeine-sensitive, so I asked if they would do a decaf, and they absolutely did.\u003c/p>\n\u003cp class=\"p1\">\u003cb>Joseph Merritt:\u003c/b> That’s great.\u003c/p>\n\u003cp class=\"p1\">\u003cb>Mantel:\u003c/b> It was delicious and perfect and cool and smooth. Like, everything you want in an espresso martini.\u003c/p>\n\u003cp class=\"p1\">\u003cb>Joseph Merritt:\u003c/b> We actually went with cocktails, as well. The wine list you can page through for days. It’s a great, wonderful wine list.\u003c/p>\n\u003cp class=\"p1\">\u003cb>Bakke:\u003c/b> It’s a bigger drink list than the food list.\u003c/p>\n\u003cp class=\"p1\">\u003cb>Joseph Merritt:\u003c/b> Yes. Absolutely. Yeah. More drinks than food, so right up my alley.\u003c/p>\n\u003cp class=\"p1\">[ Laughter ]\u003c/p>\n\u003cp class=\"p1\">Um, but I also had the versilia. It’s a gin-based cocktail with clarified lemon. It made it just really smooth. It was delicious.\u003c/p>\n\u003cp class=\"p1\">\u003cb>Sbrocco:\u003c/b> They have a whole Negroni option.\u003c/p>\n\u003cp class=\"p1\">\u003cb>Joseph Merritt:\u003c/b> Yes.\u003c/p>\n\u003cp class=\"p1\">\u003cb>Sbrocco:\u003c/b> You can really mix and match and kind of make your own.\u003c/p>\n\u003cp class=\"p1\">\u003cb>Bakke:\u003c/b> I tapped into that.\u003c/p>\n\u003cp class=\"p1\">\u003cb>Sbrocco:\u003c/b> Ohh. I’m a Negroni fan.\u003c/p>\n\u003cp class=\"p1\">\u003cb>Bakke:\u003c/b> Delicious.\u003c/p>\n\u003cp class=\"p1\">\u003cb>Sbrocco:\u003c/b> So what Negroni did you get? A classic or…?\u003c/p>\n\u003cp class=\"p1\">\u003cb>Bakke:\u003c/b> I got the classico, and I got a dirty.\u003c/p>\n\u003cp class=\"p1\">\u003cb>Joseph Merritt:\u003c/b> Ooh. I like that.\u003c/p>\n\u003cp class=\"p1\">\u003cb>Mantel:\u003c/b> Someone switched from lemonade.\u003c/p>\n\u003cp class=\"p1\">\u003cb>Sbrocco:\u003c/b> Yeah! Right?\u003c/p>\n\u003cp class=\"p1\">[ Laughter ]\u003c/p>\n\u003cp class=\"p1\">But it is a place like you would– In Venice, where you would just meet and greet and stand at the bar and nibble on things and have a drink.\u003c/p>\n\u003cp class=\"p1\">\u003cb>Bakke:\u003c/b> I had the little gem salad because, like lemonade, I’m a sucker for little gem salads. I will say the peas were just perfect. Like, they’re super fresh, crispy. Just really good veggies across the board.\u003c/p>\n\u003cp class=\"p1\">\u003cb>Mantel:\u003c/b> Yeah. The stracciatella was our favorite dish. I mean, fresh mozzarella drizzled with olive oil. And you know when it’s a really good olive oil you can see the green of it?\u003c/p>\n\u003cp class=\"p1\">\u003cb>Joseph Merritt:\u003c/b> Yes.\u003c/p>\n\u003cp class=\"p1\">\u003cb>Sbrocco:\u003c/b> It’s the creamy part of it.\u003c/p>\n\u003cp class=\"p1\">\u003cb>Mantel:\u003c/b> So creamy. The creamy inside part of the mozzarella. And beautiful focaccia that you put it on. And then they put pistachios on top, so it gives it that crunch. And that was amazing.\u003c/p>\n\u003cp class=\"p1\">\u003cb>Joseph Merritt:\u003c/b> Delicious.\u003c/p>\n\u003cp class=\"p1\">\u003cb>Mantel:\u003c/b> Yes.\u003c/p>\n\u003cp class=\"p1\">\u003cb>Joseph Merritt:\u003c/b> We also got the red shrimp scampi pasta.\u003c/p>\n\u003cp class=\"p1\">\u003cb>Bakke:\u003c/b> Oh, my gosh. Me too.\u003c/p>\n\u003cp class=\"p1\">\u003cb>Joseph Merritt:\u003c/b> Delicious, right?\u003c/p>\n\u003cp class=\"p1\">\u003cb>Bakke:\u003c/b> That was my favorite, as well.\u003c/p>\n\u003cp class=\"p1\">\u003cb>Joseph Merritt:\u003c/b> It was unexpectedly creamy. Unexpectedly a large portion, also. I wasn’t expecting that much pasta. But it was really delicious. And the red shrimp were cooked exceptionally well. They were really tender. They weren’t squeaky. So that’s how you know they did it right. And it was just a beautifully plated pasta.\u003c/p>\n\u003cp class=\"p1\">\u003cb>Bakke:\u003c/b> Yeah, it was exceptional.\u003c/p>\n\u003cp class=\"p1\">\u003cb>Joseph Merritt:\u003c/b> We also had stone fruit salad. Fresh heirloom tomatoes, some grilled peaches. Really yummy champagne vinaigrette. There was a little arugula in there, as well. It was outstanding.\u003c/p>\n\u003cp class=\"p1\">\u003cb>Woman:\u003c/b> So good.\u003c/p>\n\u003cp class=\"p1\">\u003cb>Joseph Merritt:\u003c/b> Something else I enjoyed was the duck ragu. It was really earthy, and you could taste, like, the nutmeg and the cinnamon in it. The noodles were a little bit thick, but they were really tasty. And once you mixed in all of that ragu that was at the bottom of the bowl, it made for a really delicious dish.\u003c/p>\n\u003cp class=\"p1\">\u003cb>Sbrocco:\u003c/b> And did you get good service?\u003c/p>\n\u003cp class=\"p1\">\u003cb>Mantel:\u003c/b> We got pretty good service. It took a while for them to come to our table to start with us, but once you order, the food came out so quickly, which was wonderful.\u003c/p>\n\u003cp class=\"p1\">\u003cb>Joseph Merritt:\u003c/b> I agree with the service. I think your best service is at the bar, but I think they really just lean into… it’s a relaxed environment. They don’t want you to feel rushed.\u003c/p>\n\u003cp class=\"p1\">\u003cb>Sbrocco:\u003c/b> And it gives you time to enjoy dessert.\u003c/p>\n\u003cp class=\"p1\">\u003cb>Joseph Merritt:\u003c/b> That’s right.\u003c/p>\n\u003cp class=\"p1\">\u003cb>Sbrocco:\u003c/b> Did anybody have it?\u003c/p>\n\u003cp class=\"p1\">\u003cb>Mantel:\u003c/b> We had the pistachio cake. It was two little pistachio cakes with a scoop of pistachio gelato. And the gelato was amazing. I would go back for any flavored gelato they might have.\u003c/p>\n\u003cp class=\"p1\">\u003cb>Sbrocco:\u003c/b> Dessert?\u003c/p>\n\u003cp class=\"p1\">\u003cb>Bakke:\u003c/b> No dessert. But I have a confession to make. I actually went last night.\u003c/p>\n\u003cp class=\"p1\">\u003cb>Joseph Merritt:\u003c/b> Did you?! You went back?\u003c/p>\n\u003cp class=\"p1\">\u003cb>Bakke:\u003c/b> And I got that.\u003c/p>\n\u003cp class=\"p1\">[ Laughter ]\u003c/p>\n\u003cp class=\"p1\">\u003cb>Sbrocco:\u003c/b> So it’s seared in your memory right here.\u003c/p>\n\u003cp class=\"p1\">\u003cb>Bakke:\u003c/b> It was so good. Yeah, well, so I flew in last night, and like you said, it’s easily accessible from Embarcadero. So you can just take the BART in or the ferry, and it’s right there, you know, walking distance, less than a mile. Definitely make a reservation, though. If you try to just go, you’ll probably just only get a seat at the bar, which is great in itself, but if you want to–\u003c/p>\n\u003cp class=\"p1\">\u003cb>Sbrocco:\u003c/b> Which is kind of where you want to be, though.\u003c/p>\n\u003cp class=\"p1\">\u003cb>Joseph Merritt:\u003c/b> It is a hot spot. Yeah, absolutely. And the seats are very cozy. It’s very nice. They make it so you can stay for a while.\u003c/p>\n\u003cp class=\"p1\">\u003cb>Mantel:\u003c/b> Very cozy.\u003c/p>\n\u003cp class=\"p1\">\u003cb>Bakke:\u003c/b> Yeah.\u003c/p>\n\u003cp class=\"p1\">\u003cb>Sbrocco:\u003c/b> Well, if you would like to try Bar Sprezzatura, it’s located on Clay Street in San Francisco, and the average multi-course tab per person without drinks is around $100. Looking for more Bay Area bites you’ve just got to try?\u003c/p>\n\u003cp class=\"p1\">[ Laughter ]\u003c/p>\n\u003cp class=\"p1\">Check out “Cecilia Tries It” online at KQED.org/checkplease. I have to thank my fabulous guests on this week’s show. Bennett Bakke, who savors the Swedish meatballs at Stockhome in Petaluma… Paige Mantel, who goes all-in on the brisket and burnt ends at Stateline Road Smokehouse in Napa… and Alexis Joseph Merritt, who adores the arancini at Bar Sprezzatura in San Francisco. Join us next time when three more guests will recommend their spots right here on “Check, Please! Bay Area.” I’m Leslie Sbrocco, and I’ll see you then. Cheers, everyone.\u003c/p>\n\u003cp class=\"p1\">\u003cb>Mantel:\u003c/b> Cheers.\u003c/p>\n\u003cp class=\"p1\">\u003cb>Sbrocco:\u003c/b> Cheers. Cheers. Cheers.\u003c/p>\n\u003cp>[ad floatright]\u003c/p>\n\u003cp class=\"p1\">\u003cb>Bell:\u003c/b> When it comes to desserts at Stateline Road Smokehouse, I like to focus on what is the element that can elevate and give that piece of surprise to the guests? So, for instance, the banana pudding. I trained and learned pastries in France. Orange cookie crumble. The actual crumble that’s on top there is essentially a form of a speculoos dough. I just add a little orange to it and put that on top. It’s a great finish to the end of a meal.\u003c/p>\n\n",
"blocks": [],
"excerpt": null,
"status": "publish",
"parent": 0,
"modified": 1772041669,
"stats": {
"hasAudio": false,
"hasVideo": false,
"hasChartOrMap": false,
"iframeSrcs": [],
"hasGoogleForm": false,
"hasGallery": false,
"hasHearkenModule": false,
"hasPolis": false,
"paragraphCount": 13,
"wordCount": 6337
},
"headData": {
"title": "Check, Please! Bay Area reviews: Stateline Road Smokehouse, Stockhome, Bar Sprezzatura | KQED",
"description": "Bay Area locals try Kansas City-style barbecue in Napa, Swedish street food in Petaluma and Venetian-inspired cicchetti in San Francisco.",
"ogTitle": "",
"ogDescription": "",
"ogImgId": "",
"twTitle": "",
"twDescription": "",
"twImgId": "",
"socialDescription": "Bay Area locals try Kansas City-style barbecue in Napa, Swedish street food in Petaluma and Venetian-inspired cicchetti in San Francisco.",
"schema": {
"@context": "https://schema.org",
"@type": "Article",
"headline": "Check, Please! Bay Area reviews: Stateline Road Smokehouse, Stockhome, Bar Sprezzatura",
"datePublished": "2026-02-05T19:28:16-08:00",
"dateModified": "2026-02-25T09:47:49-08:00",
"image": "https://cdn.kqed.org/wp-content/uploads/2020/02/KQED-OG-Image@1x.png"
}
},
"primaryCategory": {
"termId": 3731,
"slug": "episodes",
"name": "episodes"
},
"videoEmbed": "https://www.youtube.com/watch?v=CHbVDH6EFfc",
"sticky": false,
"templateType": "standard",
"featuredImageType": "standard",
"excludeFromSiteSearch": "Include",
"articleAge": "0",
"path": "/checkplease/23706/check-please-bay-area-reviews-stateline-road-smokehouse-stockhome-bar-sprezzatura",
"audioTrackLength": null,
"parsedContent": [
{
"type": "contentString",
"content": "\u003cdiv class=\"post-body\">\u003cp>\u003cp>\u003cem>Check, Please! Bay Area, \u003c/em>season 20, episode 13, airs Thursday, February 5, at 7:30 pm, on KQED 9. See other \u003ca href=\"http://www.kqed.org/tv/programs/index.jsp?pgmid=14084\" target=\"_blank\" rel=\"noopener noreferrer\">television airtimes\u003c/a>.\u003c/p>\n\u003cp>\u003cspan style=\"font-weight: 400\">Our culinary journey kicks off in Napa’s Rail Arts District at \u003cstrong>Stateline Road Smokehouse\u003c/strong>, where chef Darryl Bell Jr. brings Kansas City-inspired barbecue to wine country in a bright, welcoming space. Diners line up for tender baby back ribs, Kansas City-invented burnt ends and hickory-smoked brisket, pairing smoky meats with Rancho Gordo beans and greens and other California-forward sides rooted in Bell’s childhood memories and community traditions. From there, we head north to downtown Petaluma, where \u003cstrong>Stockhome\u003c/strong> offers a casual yet deeply personal take on Swedish street food influenced by Middle Eastern flavors. Guests dig into Swedish meatballs with lingonberries, fried Jerusalem artichokes, and delicate Swedish pancakes — comfort food that reflects chef Roberth Sundell’s heritage and the multicultural spirit of modern-day Stockholm. Finally, our journey wraps up in San Francisco’s Financial District at \u003cstrong>Bar Sprezzatura\u003c/strong>, a stylish Italian aperitivo spot inspired by Venice. Diners sip classic Negronis alongside guanciale meatballs with crisp ciabatta, scampi arancini, silky bigoli freschi, and a bright stone fruit and heirloom tomato salad, all set against a glamorous backdrop that celebrates Italian flair and downtown San Francisco’s revival.\u003c/span>\u003c/p>\n\u003cfigure id=\"attachment_23707\" class=\"wp-caption alignnone\" style=\"max-width: 1920px\">\u003cimg loading=\"lazy\" decoding=\"async\" class=\"size-full wp-image-23707\" src=\"https://cdn.kqed.org/wp-content/uploads/sites/40/2026/02/2013_02.png\" alt=\"\" width=\"1920\" height=\"1080\" srcset=\"https://cdn.kqed.org/wp-content/uploads/sites/40/2026/02/2013_02.png 1920w, https://cdn.kqed.org/wp-content/uploads/sites/40/2026/02/2013_02-160x90.png 160w, https://cdn.kqed.org/wp-content/uploads/sites/40/2026/02/2013_02-768x432.png 768w, https://cdn.kqed.org/wp-content/uploads/sites/40/2026/02/2013_02-1536x864.png 1536w\" sizes=\"auto, (max-width: 1920px) 100vw, 1920px\">\u003cfigcaption class=\"wp-caption-text\">Host Leslie Sbrocco joins guests Bennett Bakke, Alexis Joseph Merritt and Paige Mantel from KQED in San Francisco.\u003c/figcaption>\u003c/figure>\n\u003cp>Get Restaurant Information:\u003c/p>\n\u003cul>\n\u003cli>\u003ca href=\"https://www.stateline-road.com/\">\u003cstrong>Stateline Road Smokehouse\u003c/strong> (Napa)\u003c/a>\u003c/li>\n\u003cli>\u003ca href=\"https://www.stockhomepetaluma.com/shop/%20stockhome-restaurant/7\">\u003cstrong>Stockhome\u003c/strong> (Petaluma)\u003c/a>\u003c/li>\n\u003cli>\u003ca href=\"https://www.barsprezzatura.com/\">\u003cstrong>Bar Sprezzatura \u003c/strong>(San Francisco)\u003c/a>\u003c/li>\n\u003c/ul>\n\u003cfigure id=\"attachment_20123\" class=\"wp-caption alignnone\" style=\"max-width: 800px\">\u003cimg loading=\"lazy\" decoding=\"async\" class=\"size-medium wp-image-20123\" src=\"https://cdn.kqed.org/wp-content/uploads/sites/40/2019/04/Leslie-Headshot-Smokey-copy-800x540.jpg\" alt=\"Host Leslie Sbrocco sipping wine\" width=\"800\" height=\"540\">\u003cfigcaption class=\"wp-caption-text\">Host Leslie Sbrocco sipping wine \u003ccite>(Courtesy of Leslie Sbrocco)\u003c/cite>\u003c/figcaption>\u003c/figure>\n\u003cp>My name is Leslie Sbrocco, and I’m the \u003ca href=\"http://ww2.kqed.org/checkplease/host-biography/\" target=\"_blank\" rel=\"noopener noreferrer\">host\u003c/a> of \u003cem>Check, Please! Bay Area\u003c/em>. Each week, I’ll share my tasting notes about the wine, beer and spirits the guests and I drank on set during the taping of the show.\u003c/p>\n\u003cp>\u003cimg loading=\"lazy\" decoding=\"async\" class=\"alignnone size-medium wp-image-23710\" src=\"https://cdn.kqed.org/wp-content/uploads/sites/40/2026/02/2013_Wines-2000x2667.png\" alt=\"\" width=\"2000\" height=\"2667\" srcset=\"https://cdn.kqed.org/wp-content/uploads/sites/40/2026/02/2013_Wines-2000x2667.png 2000w, https://cdn.kqed.org/wp-content/uploads/sites/40/2026/02/2013_Wines-160x213.png 160w, https://cdn.kqed.org/wp-content/uploads/sites/40/2026/02/2013_Wines-768x1024.png 768w, https://cdn.kqed.org/wp-content/uploads/sites/40/2026/02/2013_Wines-1152x1536.png 1152w, https://cdn.kqed.org/wp-content/uploads/sites/40/2026/02/2013_Wines-1536x2048.png 1536w\" sizes=\"auto, (max-width: 2000px) 100vw, 2000px\">\u003c/p>\n\u003cp>\u003c/p>\u003c/div>",
"attributes": {
"named": {},
"numeric": []
}
},
{
"type": "component",
"content": "",
"name": "ad",
"attributes": {
"named": {
"label": "fullwidth"
},
"numeric": [
"fullwidth"
]
}
},
{
"type": "contentString",
"content": "\u003cdiv class=\"post-body\">\u003cp>\u003c/p>\n\u003cp>\u003ca href=\"http://lucawines.com\">\u003cspan style=\"color: #339966\">\u003cstrong>Nico 2021 Malbec\u003c/strong>\u003c/span>\u003c/a>\u003cbr>\n\u003cem>Uco Valley, Mendoza, Argentina, $90\u003c/em>\u003cbr>\nThis highly rated bottling hails from high-altitude vineyards in the Gualtallary area outside Mendoza. The famed Catena family’s properties — driven by the powerhouse Dr. Laura Catena — are focused on maintaining tradition while cultivating innovation. This unique wine shares both of those traits. With dark berry aromas and intense cocoa and peppery flavors, its polished texture leans toward a modern style. But the vines are a nod to the producer’s rich history. Crafted from old-vine Malbec plants rescued from a 105-year-old pre-phylloxera vineyard, the wine is layered and intense, offering a glorious glimpse of the past in the glass.\u003c/p>\n\u003cp>\u003ca href=\"https://www.ramsgatewinery.com/\">\u003cspan style=\"color: #339966\">\u003cstrong>Ram’s Gate 2023 Chardonnay, Bucher Vineyard\u003c/strong>\u003c/span>\u003c/a>\u003cbr>\n\u003cem>Russian River Valley, California, $74\u003c/em>\u003cbr>\nRam’s Gate is a hidden treasure. A beautiful spot to include on a tasting visit, the winery is located at the crossroads of three famous appellations: the Sonoma Coast, Sonoma Valley and Carneros. This single-vineyard Chardonnay comes from the noted Bucher Vineyard in the Russian River Valley, where the afternoon sun is tempered by a cool ocean fog layer. This creates grapes with finesse and balanced ripeness. This small-production white is packed with aromas of lemon cream and vanilla, kept in check by vibrant acidity and a lush but bright texture.\u003c/p>\n\u003cp>\u003ca href=\"https://www.domainecarneros.com/\">\u003cspan style=\"color: #339966\">\u003cstrong>Domaine Carneros “Cuvée de la Pompadour” Brut Rosé\u003c/strong>\u003c/span>\u003c/a>\u003cbr>\n\u003cem>Carneros, California, $43\u003c/em>\u003cbr>\nTake a mini-trip to “France” when you visit Napa Valley’s stunning Domaine Carneros. It was founded by the family of France’s acclaimed Champagne Taittinger in 1987, when Claude Taittinger discovered the bucolic rolling hills and cool climate of Carneros. The magnificent château perched proudly at the top of a hill blanketed by vines is one of the top destinations in California to immerse yourself in elegance. Visitors can choose from myriad food and wine tasting options that truly sparkle, such as “Scent & Savor” and “The Ultimate Caviar Experience.”\u003c/p>\n\u003cp>To get a taste of the classic estate in your own home, look for their Brut Rosé Cuvée de la Pompadour — one of my ultimate sparkling wine favorites. The dry-styled bubbly draws you in with its alluring light pink hue and effervescent fizz. With notes of peach and red berries, its delicate nose is followed by a crisp yet creamy texture. The wine’s name is a story as joyful as the wine itself.\u003c/p>\n\u003cp>“More than 250 years ago, Louis XV’s great paramour, Madame de la Pompadour, famously introduced sparkling wine to the court at Versailles. She declared it ‘the only wine that a woman can drink and remain beautiful,’ and today Domaine Carneros’ Pompadour Brut Rosé is named in her honor,” the winery says.\u003c/p>\n\u003cp>I’ll raise a glass to that!\u003c/p>\n\u003ch2>Episode Transcript\u003c/h2>\n\u003cp class=\"p1\">\u003cb>Sbrocco:\u003c/b> Kansas City style barbecue in Napa…\u003c/p>\n\u003cp class=\"p1\">\u003cb>Mantel:\u003c/b> They pour a little beef tallow on it.\u003c/p>\n\u003cp class=\"p1\">\u003cb>Sbrocco:\u003c/b> …contemporary Swedish delights in Petaluma…\u003c/p>\n\u003cp class=\"p1\">\u003cb>Bakke:\u003c/b> My go-to is the Swedish meatballs. Super delicious.\u003c/p>\n\u003cp class=\"p1\">\u003cb>Sbrocco:\u003c/b> …and a taste of Venice in San Francisco.\u003c/p>\n\u003cp class=\"p1\">\u003cb>Joseph Merritt:\u003c/b> It’s tender. It’s creamy. It’s cheesy. You can’t really go wrong.\u003c/p>\n\u003cp class=\"p1\">\u003cb>Sbrocco:\u003c/b> Just ahead on “Check, Please! Bay Area.” We need more cowbell! We need more peppers!\u003c/p>\n\u003cp class=\"p1\">\u003cb>Sbrocco:\u003c/b> Hi. I’m Leslie Sbrocco. Welcome to “Check, Please! Bay Area,” the show where Bay Area residents review and talk about their favorite restaurants. Now, we have three guests, and each one recommends one of their favorite spots, and the other two go check them out to see what they think. Joining me at the “Check, Please!” table today are bike enthusiast Bennett Bakke, marketing executive Paige Mantel…\u003c/p>\n\u003cp class=\"p1\">[ Glasses clink ]\u003c/p>\n\u003cp class=\"p1\">…and tech HR executive Alexis Joseph Merritt. Welcome, everyone. You ready for a good time?\u003c/p>\n\u003cp class=\"p1\">\u003cb>Joseph Merritt:\u003c/b> Ready.\u003c/p>\n\u003cp class=\"p1\">\u003cb>Mantel:\u003c/b> Absolutely.\u003c/p>\n\u003cp class=\"p1\">\u003cb>Sbrocco:\u003c/b> When you think of Napa, you probably picture world-class wine, vineyard views, and elegant tasting menus, but at Paige’s spot, the vibe is far more casual. You can pair your bubbly with baby-back ribs, juicy brisket, and other classic Kansas City barbecue delights. Located in Napa’s Rail Arts District, it’s Stateline Road Smokehouse.\u003c/p>\n\u003cp class=\"p2\">♪♪\u003c/p>\n\u003cp class=\"p1\">\u003cb>Woman:\u003c/b> This is gonna be for here?\u003c/p>\n\u003cp class=\"p1\">\u003cb>Man:\u003c/b> Yeah.\u003c/p>\n\u003cp class=\"p2\">♪♪\u003c/p>\n\u003cp class=\"p1\">[ Chatter ]\u003c/p>\n\u003cp class=\"p1\">\u003cb>Bell:\u003c/b> I’m originally from Kansas City. I moved out here about 16 years ago just to work for Chef Keller and do fine dining and Michelin restaurants. I quickly realized the barbecue that I’m personally used to, it wasn’t quite out here. My wife, she essentially told me, “Stop crying about it and just open something.” Stateline Road Smokehouse. The name’s inspired by the road that divides Kansas City, Missouri, and Kansas City, Kansas, it’s called Stateline Road, and it has some of my favorite barbecue places. Every place that I would go to in Kansas City, it was always eating burnt ends and ribs. Those are my two go-to’s every time. Kansas City barbecue is defined by the type of sauce. Our sauce is tomato- and vinegar-based. It has a little bit of heat, but before it gets too hot, the sweetness just kind of comes in and cuts it off. And then afterwards, all these spices just kind of linger on. Our baby-back ribs have a nice meaty bite to them.\u003c/p>\n\u003cp class=\"p1\">\u003cb>Woman:\u003c/b> So good.\u003c/p>\n\u003cp class=\"p1\">\u003cb>Bell:\u003c/b> These briskets take 14, 15 hours to cook. Anytime that I order brisket at a restaurant, I always order it from the point because that’s just fatty and juicy. It’s great. So this is, like, some of the best piece right there.\u003c/p>\n\u003cp class=\"p1\">\u003cb>Man:\u003c/b> Burnt ends.\u003c/p>\n\u003cp class=\"p1\">\u003cb>Bell:\u003c/b> Kansas City invented burnt ends. It’s made from the brisket, and you just get this kind of sweet and tangy, fatty, chewy brisket bite. Yeah. That’s a classic staple that I grew up with.\u003c/p>\n\u003cp class=\"p2\">♪♪\u003c/p>\n\u003cp class=\"p1\">I enjoy cooking in this style because you’re dealing with fire. You’re dealing with the element. You’re taming it. You’re controlling it. You’re able to get it to rise and lower on command. That’s an exciting piece for me because it’s always evolving. I use oak which is native to California. Using this one really as a fuel source because it burns really hot and it burns for a while. And then over on this side, we have the cherry wood. And this one’s added to add those nuances, the sweet notes.\u003c/p>\n\u003cp class=\"p2\">♪♪\u003c/p>\n\u003cp class=\"p1\">\u003cb>Man:\u003c/b> Finger-licking good!\u003c/p>\n\u003cp class=\"p2\">♪♪\u003c/p>\n\u003cp class=\"p1\">\u003cb>Bell:\u003c/b> This is called the Rail Arts District of Napa. It’s this kind of funky warehouse vibe. The best barbecue places in Kansas City are in these kind of grungy places. This building used to be an auto shop, and it has all those really fun characteristics. If you go to any place and you see linen and fine dining for barbecue, you should turn and run the other way. It’s not meant for that. So this environment is joyful. It’s fun. That’s what makes this place really special for us here in Napa.\u003c/p>\n\u003cp class=\"p1\">\u003cb>Man:\u003c/b> Cheers.\u003c/p>\n\u003cp class=\"p1\">\u003cb>Woman:\u003c/b> [ Laughs ]\u003c/p>\n\u003cp class=\"p1\">\u003cb>Sbrocco:\u003c/b> Alright, Paige, now, do you go to Napa normally?\u003c/p>\n\u003cp class=\"p1\">\u003cb>Mantel:\u003c/b> Well, I live in Napa now. So I recently moved there and looking for all different kinds of restaurants. And Napa has amazing restaurants, but when I learned a year ago that a new Kansas City style barbecue place was opening by a Michelin-trained chef, I’m like, “Take me there.” My go-to every time I go is definitely the Kansas City style burnt ends. Have you ever had burnt ends?\u003c/p>\n\u003cp class=\"p1\">\u003cb>Joseph Merritt:\u003c/b> Yes.\u003c/p>\n\u003cp class=\"p1\">\u003cb>Mantel:\u003c/b> Right?\u003c/p>\n\u003cp class=\"p1\">\u003cb>Bakke:\u003c/b> They were spectacular.\u003c/p>\n\u003cp class=\"p1\">\u003cb>Mantel:\u003c/b> I mean, the morsels of, like, bite-sized chunks with crispy ends and the tender meat and a little fat just all together with barbecue sauce.\u003c/p>\n\u003cp class=\"p1\">\u003cb>Bakke:\u003c/b> And their house barbecue sauce is so good. There’s the house sauce. There’s a spicy sauce. I forget what the third sauce is.\u003c/p>\n\u003cp class=\"p1\">\u003cb>Mantel:\u003c/b> A sweet one, as well.\u003c/p>\n\u003cp class=\"p1\">\u003cb>Bakke:\u003c/b> Yeah. They were all great.\u003c/p>\n\u003cp class=\"p1\">\u003cb>Joseph Merritt:\u003c/b> I had the burnt ends, too, and it was my first time having that, so…\u003c/p>\n\u003cp class=\"p1\">\u003cb>Sbrocco:\u003c/b> A burnt-end virgin!\u003c/p>\n\u003cp class=\"p1\">\u003cb>Joseph Merritt:\u003c/b> A burnt-end virgin, yes. So it was delicious. And it was the unanimous crowd favorite with my table.\u003c/p>\n\u003cp class=\"p1\">\u003cb>Mantel:\u003c/b> The brisket is also something I get, and you can tell them exactly how you like it. I prefer it on the lean side, and so right there, the butcher is gonna cut off the fat for me. And right before they serve it, they pour a little beef tallow on it.\u003c/p>\n\u003cp class=\"p1\">\u003cb>Bakke:\u003c/b> Ohh.\u003c/p>\n\u003cp class=\"p1\">\u003cb>Mantel:\u003c/b> Oh, my goodness.\u003c/p>\n\u003cp class=\"p1\">\u003cb>Joseph Merritt:\u003c/b> We saw that. We were like, “What is that?”\u003c/p>\n\u003cp class=\"p1\">\u003cb>Mantel:\u003c/b> Yes, yes. Brings the flavors alive. And that is fork-tender brisket. And you can see the smoke line and the crisp edge. And melts in your mouth.\u003c/p>\n\u003cp class=\"p1\">\u003cb>Sbrocco:\u003c/b> Did you have the brisket?\u003c/p>\n\u003cp class=\"p1\">\u003cb>Joseph Merritt:\u003c/b> Yeah, I had the brisket also. So it’s good to know you can ask for it lean. So, unfortunately, the piece that we got was a little bit fatty.\u003c/p>\n\u003cp class=\"p1\">\u003cb>Mantel:\u003c/b> Ah. Yeah.\u003c/p>\n\u003cp class=\"p1\">\u003cb>Joseph Merritt:\u003c/b> But the flavor of the meat was delicious. We had the pulled pork also, which was a crowd pleaser. It was really juicy. It was cooked really well. And I loved that you got to kind of walk down the line cafeteria-style and kind of see what meats you were getting and what sides you were getting. Outstanding.\u003c/p>\n\u003cp class=\"p1\">\u003cb>Sbrocco:\u003c/b> And what about you?\u003c/p>\n\u003cp class=\"p1\">\u003cb>Bakke:\u003c/b> I kind of tried a lot of things when I first went in.\u003c/p>\n\u003cp class=\"p1\">\u003cb>Sbrocco:\u003c/b> That’s alright. We got time.\u003c/p>\n\u003cp class=\"p1\">[ Laughter ]\u003c/p>\n\u003cp class=\"p1\">Go ahead. Start with one.\u003c/p>\n\u003cp class=\"p1\">\u003cb>Bakke:\u003c/b> The tri-tip sandwich is a Wagyu beef, which was…\u003c/p>\n\u003cp class=\"p1\">\u003cb>Sbrocco:\u003c/b> Of course.\u003c/p>\n\u003cp class=\"p1\">\u003cb>Bakke:\u003c/b> …really good. But the thing that got me, though, is it has pickled onions and red peppers on it, and they gave you a little bit of extra on the side so you could add more pickles or red peppers, which is just something that needs to be normalized. Like, we need more of — We need more of that.\u003c/p>\n\u003cp class=\"p1\">\u003cb>Sbrocco:\u003c/b> We need more cowbell! We need more peppers!\u003c/p>\n\u003cp class=\"p1\">\u003cb>Narrator:\u003c/b> But I had the curly fries, as well, and they were exactly what you want when you want curly fries. But the highlight was, on the side, they gave you bacon chive aioli, which was spectacular.\u003c/p>\n\u003cp class=\"p1\">\u003cb>Mantel:\u003c/b> Isn’t that the best?\u003c/p>\n\u003cp class=\"p1\">\u003cb>Bakke:\u003c/b> Yeah.\u003c/p>\n\u003cp class=\"p1\">\u003cb>Sbrocco:\u003c/b> I’m getting a sense that you’re a sauce guy.\u003c/p>\n\u003cp class=\"p1\">\u003cb>Bakke:\u003c/b> Exactly. Yes.\u003c/p>\n\u003cp class=\"p1\">[ Laughs ]\u003c/p>\n\u003cp class=\"p1\">\u003cb>Sbrocco:\u003c/b> Mm-hmm. Now, what about the sides?\u003c/p>\n\u003cp class=\"p1\">\u003cb>Bakke:\u003c/b> The mac and cheese was an aged cheddar, but the highlight was crispy kale and parsnip on the top, which– That was another one. They could have given you a little side of that to just dump more of that on because it was great. It gave the mac and cheese a little bit of a crunch. Yeah. I’d get all that again.\u003c/p>\n\u003cp class=\"p1\">\u003cb>Joseph Merritt:\u003c/b> I also had the beans and greens. White beans that were creamy and unctuous, and they had the kale greens in there. I think it was kale and collard that day. It was really delicious and just made for a really nice pairing with all of the meat dishes.\u003c/p>\n\u003cp class=\"p1\">\u003cb>Mantel:\u003c/b> So there’s something really special there that I’ve never seen at any other restaurant that is amazing. I’m a salad girl. I love a good salad. They have a cherry wood-smoked maitake mushroom and greens salad.\u003c/p>\n\u003cp class=\"p1\">\u003cb>Sbrocco:\u003c/b> Ooh!\u003c/p>\n\u003cp class=\"p1\">\u003cb>Mantel:\u003c/b> It is phenomenal. And there’s so many textures. They have crispy black rice. They have marinated garbanzo beans and a really nice light lemon vinaigrette. And just all together the textures, the flavors, it’s phenomenal.\u003c/p>\n\u003cp class=\"p1\">\u003cb>Joseph Merritt:\u003c/b> They had a special that day. It was a smoked sea bass, and it was this beautiful piece of fish that was just smoked and charred. I haven’t had just a smoked piece of sea bass before. It was delicious. It was really a nice surprise at a barbecue restaurant.\u003c/p>\n\u003cp class=\"p1\">\u003cb>Sbrocco:\u003c/b> And did you have anything to drink with it?\u003c/p>\n\u003cp class=\"p1\">\u003cb>Joseph Merritt:\u003c/b> Yes. I thought something that was really fun. Right when you walk in the door, they have an old-fashioned sink, and you can get a $5 sink drink, which I thought was really cute. So my husband grabbed a beer while we were perusing the menu. Some people grabbed some spritzers. I got a glass of Chenin Blanc, which was delicious.\u003c/p>\n\u003cp class=\"p1\">\u003cb>Sbrocco:\u003c/b> So they do have upscale and they have casual.\u003c/p>\n\u003cp class=\"p1\">\u003cb>Joseph Merritt:\u003c/b> Yeah. You can go both ways. It was beautiful.\u003c/p>\n\u003cp class=\"p1\">\u003cb>Bakke:\u003c/b> Their lemonade is great, too.\u003c/p>\n\u003cp class=\"p1\">\u003cb>Sbrocco:\u003c/b> Lemonade.\u003c/p>\n\u003cp class=\"p1\">\u003cb>Bakke:\u003c/b> It was a hot day. I was outside. So the lemonade was great. And I got one to go, as well.\u003c/p>\n\u003cp class=\"p1\">\u003cb>Mantel:\u003c/b> Nice. One of the fun things to drink is a boozie slushy. So, they have two different flavors each time you go. When we were there last, there was a gin-and-tonic buzzy– boozie slushy. When you drink too many boozie slushies…\u003c/p>\n\u003cp class=\"p1\">[ Laughter ]\u003c/p>\n\u003cp class=\"p1\">\u003cb>Joseph Merritt:\u003c/b> It must have been good!\u003c/p>\n\u003cp class=\"p1\">\u003cb>Sbrocco:\u003c/b> [Slurring] I had the slushy…\u003c/p>\n\u003cp class=\"p1\">\u003cb>Mantel:\u003c/b> The boozie slushy will get you buzzed.\u003c/p>\n\u003cp class=\"p1\">[ Laughter ]\u003c/p>\n\u003cp class=\"p1\">\u003cb>Joseph Merritt:\u003c/b> Ooh, I missed that.\u003c/p>\n\u003cp class=\"p1\">\u003cb>Sbrocco:\u003c/b> We have not yet, of course, talked about dessert. Dessert. Let’s start with you.\u003c/p>\n\u003cp class=\"p1\">\u003cb>Bakke:\u003c/b> I had the apple crumble, which was good, but I’d probably go with the banana cream pudding next time.\u003c/p>\n\u003cp class=\"p1\">\u003cb>Sbrocco:\u003c/b> Ah. Okay.\u003c/p>\n\u003cp class=\"p1\">\u003cb>Joseph Merritt:\u003c/b> I’m not normally a big dessert person. Wine can be my dessert, and I’m very happy. But we did get the Straus soft serve, which was–\u003c/p>\n\u003cp class=\"p1\">\u003cb>Mantel:\u003c/b> Yes! Yes!\u003c/p>\n\u003cp class=\"p1\">\u003cb>Joseph Merritt:\u003c/b> My favorite California dairy. And it’s just so creamy. And I actually hadn’t had it somehow in the soft-serve form before, so it was an amazing treat. We all loved it. It disappeared in five seconds flat.\u003c/p>\n\u003cp class=\"p1\">\u003cb>Sbrocco:\u003c/b> And the service, you know, though it is, again, sort of– not cafeteria style, but… What did you think about the service?\u003c/p>\n\u003cp class=\"p1\">\u003cb>Bakke:\u003c/b> The service was great, actually.\u003c/p>\n\u003cp class=\"p1\">\u003cb>Joseph Merritt:\u003c/b> We had a couple people come out and speak to us as we were wrapping our meal, just checking in on us, so it was nice.\u003c/p>\n\u003cp class=\"p1\">\u003cb>Sbrocco:\u003c/b> Alright. If you would like to try Stateline Road Smokehouse, it’s located on Vallejo Street in Napa, and the average multi-course tab per person without drinks is around $50.\u003c/p>\n\u003cp class=\"p2\">♪♪\u003c/p>\n\u003cp class=\"p1\">As an avid mountain biker, Bennett’s a big lover of the great outdoors. It’s no wonder his favorite lunch spot features a sunny patio, housemade lemonade, and hearty Swedish fare, all perfect for refueling after a long ride. Located in downtown Petaluma, it’s Stockhome.\u003c/p>\n\u003cp class=\"p2\">♪♪\u003c/p>\n\u003cp class=\"p1\">\u003cb>Roberth:\u003c/b> Stockhome Restaurant is an open casual restaurant serving traditional Swedish food and Middle Eastern food from Stockholm city.\u003c/p>\n\u003cp class=\"p1\">\u003cb>Ashton:\u003c/b> Our point here was to make it feel like home. Warm. inviting.\u003c/p>\n\u003cp class=\"p1\">\u003cb>Roberth:\u003c/b> You’re walking into our house. I was born and raised in Stockholm. It’s such a mixed culture in Sweden today. Every corner has something new and creative. Swedish bistro. Swedish classic also. All the Street food. Kebab places all over. Pizzerias everywhere, as well.\u003c/p>\n\u003cp class=\"p1\">\u003cb>Ashton:\u003c/b> My fondest memories in Stockholm are with my cousins and… 2:00 a.m. — Beer in one hand. Lamb and beef pita in the other. I think my dad’s the greatest chef in the world, so I haven’t had meatballs that have been better than my dad’s. Savory. Tangy. Sweet. And then you get this nice creaminess with the mashed potatoes, as well. I’ve had guests who come in who have only eaten Ikea meatballs, and being able to give them a different experience, I think it’s really beautiful.\u003c/p>\n\u003cp class=\"p1\">\u003cb>Roberth:\u003c/b> Swedish people like to have the sweets, but they also like the tanginess to balance things out, and I think that’s kind of our food is famous for. We have something called tunnbrodsrulle. It’s frankfurters in a thin wrap with mashed potatoes. That’s really Swedish traditional. Something you go off to the bars and eat. The dish I love the most is the beet-cured gravlax. It’s just a cured salmon with salt, sugar, a little white pepper, dill, grated beets, and lemon zest. It’s a beautiful dish. I can eat it for breakfast, lunch, or dinner. Our Middle Eastern dishes that we’re working on. I’m especially proud of our falafel. We do lamb and beef kebab plates. More of the shawarma style. The menu is really created to cater for everybody.\u003c/p>\n\u003cp class=\"p1\">\u003cb>Ashton:\u003c/b> Banana marshmallows are some of my favorites. Candy in Sweden is huge. The average Swede eats around 40 pounds of candy a year. I want people to be full and stuffed. Maybe even have a little bit of room for taking some candy on the road with them, as well. With Petaluma, depending on your weather, you have beautiful, warm, sunny days to enjoy food, and then when you have those rainy days, it’s… We have this warm interior on the inside for you.\u003c/p>\n\u003cp class=\"p1\">\u003cb>Roberth:\u003c/b> There’s always a table or we make sure we make a table for you. It’s a very easy restaurant.\u003c/p>\n\u003cp class=\"p1\">\u003cb>Sbrocco:\u003c/b> Alright, Bennett, you live in Marin, but you make that trek to my hometown, Petaluma.\u003c/p>\n\u003cp class=\"p1\">\u003cb>Bakke:\u003c/b> There we go. Yes. My mom made, um, Swedish meatballs when I was a kid, and so when we noticed that there was a Swedish restaurant within a drivable distance, we made the trek up to Petaluma, and there’s tons of antique shops to walk around and kind of make a whole afternoon out of it with your family. My go-to is the Swedish meatballs. They do it interesting, I think. It’s not tomato-based gravy. It’s a really thin gravy. And the mashed potatoes are really fluffy, as well. The unique part is the lingonberry jam that comes with it. And the cucumber, as well. Super delicious.\u003c/p>\n\u003cp class=\"p1\">\u003cb>Sbrocco:\u003c/b> What did you have when you went?\u003c/p>\n\u003cp class=\"p1\">\u003cb>Joseph Merritt:\u003c/b> Had two things. So had the Swedish meatballs, which I thought were delicious. The meatballs were just really light. It had a lot of really great flavor. It was seasoned well. My dish was a little bit cold when I got it, which was unfortunate because it came out so quickly. The flavor was great. It would be even better if they were super hot, but we would have that again. And then also I got a falafel kebab plate. Our falafel was a little bit over-fried, but the plate was really beautiful. It had really great roasted vegetables that I really enjoyed. And it had this tomato sauce. Not Italian tomato sauce, but kind of a peppery tomato sauce that I wasn’t sure what to put it on, so just put it on everything. That was the idea.\u003c/p>\n\u003cp class=\"p1\">\u003cb>Sbrocco:\u003c/b> There you go. That’s okay.\u003c/p>\n\u003cp class=\"p1\">\u003cb>Joseph Merritt:\u003c/b> Yeah.\u003c/p>\n\u003cp class=\"p1\">\u003cb>Sbrocco:\u003c/b> Okay. And, Paige, what did you have?\u003c/p>\n\u003cp class=\"p1\">\u003cb>Mantel:\u003c/b> Well, I knew I was going to want to try a lot of things on the menu here, so I bought a couple of friends with my husband, so the four of us ordered a whole bunch of things. The first was the mezze plate. The hummus was just super creamy. You could tell there was a lot of tahini and olive oil in it. The tabbouleh was great, super fresh, and the baba ganoush was really perfect. That eggplant flavor just really came out. And it comes with the most beautiful, amazing fresh-baked pita. The other big star was the Jerusalem artichokes. So they’re thinly sliced, fried, and served on a bed of sunchoke purée.\u003c/p>\n\u003cp class=\"p1\">\u003cb>Sbrocco:\u003c/b> Ooh.\u003c/p>\n\u003cp class=\"p1\">\u003cb>Mantel:\u003c/b> Every little bite of this was just crunchy, tangy, delicious. I mean, I’ll go back and just order that. The plate was gone in 30 seconds. It was so delicious.\u003c/p>\n\u003cp class=\"p1\">\u003cb>Sbrocco:\u003c/b> It was inhaled.\u003c/p>\n\u003cp class=\"p1\">\u003cb>Mantel:\u003c/b> So inhaled. Yes.\u003c/p>\n\u003cp class=\"p1\">\u003cb>Bakke:\u003c/b> Yeah, pivoting off of the artichokes, so the grilled artichoke is in the little gem salad, as well. It’s a Manchego cheese on the top. And the dressing is a buttermilk tahini dressing. But the highlight is the crispy garbanzo beans.\u003c/p>\n\u003cp class=\"p1\">\u003cb>Mantel:\u003c/b> Yes!\u003c/p>\n\u003cp class=\"p1\">\u003cb>Bakke:\u003c/b> Oh, my God.\u003c/p>\n\u003cp class=\"p1\">\u003cb>Mantel:\u003c/b> Yes. I love that! The way it added that crunch to it.\u003c/p>\n\u003cp class=\"p1\">\u003cb>Bakke:\u003c/b> It’s so good.\u003c/p>\n\u003cp class=\"p1\">\u003cb>Mantel:\u003c/b> We tried the salmon kebab plate. Very nice filet of salmon with tomato sauce on top. Served with a little salad. Those amazing pickled cucumbers that I could die for. They were amazing.\u003c/p>\n\u003cp class=\"p1\">\u003cb>Bakke:\u003c/b> Yeah.\u003c/p>\n\u003cp class=\"p1\">\u003cb>Mantel:\u003c/b> But the star of that plate was the sweet-potato fries.\u003c/p>\n\u003cp class=\"p1\">\u003cb>Joseph Merritt:\u003c/b> Oh, yes.\u003c/p>\n\u003cp class=\"p1\">\u003cb>Mantel:\u003c/b> Oh my goodness!\u003c/p>\n\u003cp class=\"p1\">\u003cb>All:\u003c/b> So good!\u003c/p>\n\u003cp class=\"p1\">\u003cb>Bakke:\u003c/b> I forgot about that.\u003c/p>\n\u003cp class=\"p1\">\u003cb>Mantel:\u003c/b> Me too. They were delicious. We had the wienerschnitzel. That’s your thin-slice, pounded-out piece of pork loin. Fried. Really nice and crispy. And that came with really nice fresh peas on top and some roasted potatoes. We really enjoyed that.\u003c/p>\n\u003cp class=\"p1\">\u003cb>Sbrocco:\u003c/b> And what else did you have?\u003c/p>\n\u003cp class=\"p1\">\u003cb>Joseph Merritt:\u003c/b> That’s all we had to eat but had something delicious to drink. The Carlsberg beer, which I hadn’t had in years since I was in Denmark, in Sweden last. So I walked in. It’s like, well, if we’re at Stockhome, got to have something from the Scandinavian region. And that was delicious and refreshing.\u003c/p>\n\u003cp class=\"p1\">\u003cb>Bakke:\u003c/b> They also have elderflower soda and lingonberry soda. All of those are great.\u003c/p>\n\u003cp class=\"p1\">\u003cb>Sbrocco:\u003c/b> Did you have anything to drink?\u003c/p>\n\u003cp class=\"p1\">\u003cb>Mantel:\u003c/b> Oh, yes. Between my four friends, we might have had one or two bottles of the rosé.\u003c/p>\n\u003cp class=\"p1\">[ Laughter ]\u003c/p>\n\u003cp class=\"p1\">\u003cb>Sbrocco:\u003c/b> But who’s counting? Maybe.\u003c/p>\n\u003cp class=\"p1\">\u003cb>Mantel:\u003c/b> Well, we were there for a long time. We really coursed it out. We sat outside, which I loved sitting outside.\u003c/p>\n\u003cp class=\"p1\">\u003cb>Joseph Merritt:\u003c/b> It was lovely.\u003c/p>\n\u003cp class=\"p1\">\u003cb>Mantel:\u003c/b> Just really beautiful.\u003c/p>\n\u003cp class=\"p1\">\u003cb>Joseph Merritt:\u003c/b> It’s good people watching.\u003c/p>\n\u003cp class=\"p1\">\u003cb>Sbrocco:\u003c/b> You got to have desserts. You need some calories when you’re biking up there, right?\u003c/p>\n\u003cp class=\"p1\">\u003cb>Bakke:\u003c/b> Right. I hate to say it, but I usually don’t get dessert.\u003c/p>\n\u003cp class=\"p1\">\u003cb>Mantel:\u003c/b> No! No! Bennett! You’re missing out! You’re missing out!\u003c/p>\n\u003cp class=\"p1\">\u003cb>Bakke:\u003c/b> I hate to disappoint.\u003c/p>\n\u003cp class=\"p1\">\u003cb>Mantel:\u003c/b> That Swedish pancake is insane!\u003c/p>\n\u003cp class=\"p1\">\u003cb>Narrator:\u003c/b> …Swedish candy to go.\u003c/p>\n\u003cp class=\"p1\">\u003cb>Joseph Merritt:\u003c/b> There was a nice candy selection. It was cute on the counter.\u003c/p>\n\u003cp class=\"p1\">\u003cb>Bakke:\u003c/b> Yeah.\u003c/p>\n\u003cp class=\"p1\">\u003cb>Sbrocco:\u003c/b> Okay. Tell us about–\u003c/p>\n\u003cp class=\"p1\">\u003cb>Mantel:\u003c/b> Am I the only one that got the Swedish pancake?\u003c/p>\n\u003cp class=\"p1\">\u003cb>Joseph Merritt:\u003c/b> Yeah. Yeah.\u003c/p>\n\u003cp class=\"p1\">\u003cb>Mantel:\u003c/b> You got to go back for it. You got to go back for it.\u003c/p>\n\u003cp class=\"p1\">\u003cb>Sbrocco:\u003c/b> It’s kind of the star of their show.\u003c/p>\n\u003cp class=\"p1\">\u003cb>Mantel:\u003c/b> It really is. Crêpe-like pancake. Crispy edges. They serve it with what’s clearly a homemade, heavy whipped cream with beautiful fresh berries. That was gone in 10 seconds.\u003c/p>\n\u003cp class=\"p1\">\u003cb>Bakke:\u003c/b> You had me at “crêpe-like.”\u003c/p>\n\u003cp class=\"p1\">\u003cb>Mantel:\u003c/b> That was delicious. I know.\u003c/p>\n\u003cp class=\"p1\">\u003cb>Joseph Merritt:\u003c/b> The thinness is what got me.\u003c/p>\n\u003cp class=\"p1\">\u003cb>Mantel:\u003c/b> Oh my goodness.\u003c/p>\n\u003cp class=\"p1\">\u003cb>Sbrocco:\u003c/b> Do you feel like you got value?\u003c/p>\n\u003cp class=\"p1\">\u003cb>Joseph Merritt:\u003c/b> Like I said, if the meal would have been a little bit warmer, I think would have felt fully into the value, but I thought it was really cute. The service was nice. Everyone was really friendly from the beginning. That makes it something that you want to return to. So if we’re in the area, we’d check it out again.\u003c/p>\n\u003cp class=\"p1\">\u003cb>Sbrocco:\u003c/b> And it sounds like you make this a regular thing.\u003c/p>\n\u003cp class=\"p1\">\u003cb>Bakke:\u003c/b> We kind of do. We like to go up and visit Petaluma, and that’s been our routine.\u003c/p>\n\u003cp class=\"p1\">\u003cb>Sbrocco:\u003c/b> And Paige is already dreaming about those Swedish pancakes.\u003c/p>\n\u003cp class=\"p1\">\u003cb>Mantel:\u003c/b> I will go back for those artichokes and the Swedish pancake, for sure.\u003c/p>\n\u003cp class=\"p1\">\u003cb>Sbrocco:\u003c/b> If you would like to try Stockhome, it’s located on Western Avenue in Petaluma, and the average tab per person without drinks is around $50. Offering a chic cocktail-bar vibe and classic Venetian cicchetti, Alexis’ pick brings the true spirit of la dolce vita to the City by the Bay. Located just a few blocks from San Francisco’s Embarcadero, it’s Bar Sprezzatura.\u003c/p>\n\u003cp class=\"p2\">♪♪\u003c/p>\n\u003cp class=\"p1\">[ Rattling ]\u003c/p>\n\u003cp class=\"p2\">♪♪\u003c/p>\n\u003cp class=\"p1\">\u003cb>Mastropierro:\u003c/b> I think when you walk into our space, it kind of feels like lightning in a bottle. There is an elevated feel to it, but it feels effortless.\u003c/p>\n\u003cp class=\"p1\">\u003cb>Man:\u003c/b> Prego!\u003c/p>\n\u003cp class=\"p1\">\u003cb>Splendorini:\u003c/b> Think about “La Dolce Vita.” Fellini. Sophia Loren. Right? So, like, decadent, sexy, but, you know, with character. Cicchetti is specifically for Venetian region. The style of it is a small snack. Like a bite, a nibble.\u003c/p>\n\u003cp class=\"p1\">\u003cb>Offner:\u003c/b> In Venice, because of the lagoon, you’ll see a lot of seafood. We have the bay here, so we kind of are able to replicate that. The baccala mantecato is whipped salt cod. It’s a 400-year-old recipe. It’s something that you see all over in Venice. It’s very, very traditional. As far as decadence goes, our tuna carpaccio. I get the best ahi tuna from Hawaii. It has a spicy olive tapenade that has 13 different ingredients, which are really building the flavor of the sauce. It blows people away. It really does.\u003c/p>\n\u003cp class=\"p1\">\u003cb>Mastropierro:\u003c/b> This is gonna be Alta Langa, which is high-elevation wine coming from Piemonte. Being a Venetian restaurant, of course, we’re going to have a natural focus in the Veneto, Piemonte. But whatever wine you really love in Italy, you should be able to find it here.\u003c/p>\n\u003cp class=\"p2\">♪♪\u003c/p>\n\u003cp class=\"p1\">\u003cb>Splendorini:\u003c/b> As far as cocktail program, classics done very well. Freshness of ingredients. And creativity. A Negroni was the first cocktail that I made when I was 13 years old my first day behind the bar. It’s three things perfectly executed in the same glass. The orange slice has to be put in a glass before. It’s building the glass. Equal parts of gin, Campari, and sweet vermouth. And the orange slice is very important because the pulp of the orange balance the Campari. What I really like about my job is the reaction of the guests.\u003c/p>\n\u003cp class=\"p1\">\u003cb>Offner:\u003c/b> Our goal is when you walk out of this building, you’re like, “Wow. That was a great experience. I can’t wait to tell my friends. I can’t wait to come back.”\u003c/p>\n\u003cp class=\"p1\">\u003cb>Splendorini:\u003c/b> You give us a chance to make it a memory for you in life. So we honored for that. We take it very seriously.\u003c/p>\n\u003cp class=\"p1\">\u003cb>Offner:\u003c/b> Cin-cin.\u003c/p>\n\u003cp class=\"p1\">\u003cb>Splendorini:\u003c/b> Cin-cin.\u003c/p>\n\u003cp class=\"p1\">\u003cb>Offner:\u003c/b> Cin-cin.\u003c/p>\n\u003cp class=\"p1\">\u003cb>Sbrocco:\u003c/b> Alright, Alexis, this spot really does feel like you’re in Venice, doesn’t it? It gives you this elegance, doesn’t it?\u003c/p>\n\u003cp class=\"p1\">\u003cb>Joseph Merritt:\u003c/b> It’s lovely. You walk in. It’s bright and airy. And it has these beautiful– It almost looks like street lamps that should be outside, but they’re indoors, so it’s just– It’s a beautiful setting. It’s great to go after work, on a weekend. Has great small bites. You can taste so many different things. I really love the shrimp arancini. It’s so tender. It’s creamy. It’s cheesy. And it’s fried on the outside, so you can’t really go wrong.\u003c/p>\n\u003cp class=\"p1\">\u003cb>Sbrocco:\u003c/b> A little fried shrimp ball.\u003c/p>\n\u003cp class=\"p1\">\u003cb>Joseph Merritt:\u003c/b> Yeah, a little fried shrimp ball. Also love the meatballs with guanciale. They’re really light and really tender.\u003c/p>\n\u003cp class=\"p1\">\u003cb>Bakke:\u003c/b> The meatballs were great. They asked me if I wanted bread, as well. And, of course, I said, “Yes, I want that.” And that was amazing.\u003c/p>\n\u003cp class=\"p1\">\u003cb>Joseph Merritt:\u003c/b> Delicious.\u003c/p>\n\u003cp class=\"p1\">\u003cb>Bakke:\u003c/b> It was a big piece, but thin-sliced. It had olive oil on it. But the perfect crispiness. It was like those sweet-potato fries. It was, like, perfectly crispy on the outside, but still squishy on the inside. So you just dip that in the tomato sauce with the meatballs.\u003c/p>\n\u003cp class=\"p1\">\u003cb>Joseph Merritt:\u003c/b> Yes, it’s really delicious not too sweet, not too acidic tomato sauce. You don’t want that sauce to go to waste.\u003c/p>\n\u003cp class=\"p1\">\u003cb>Mantel:\u003c/b> I love the cocktail vibe. So we actually sat up at the bar for a drink before we sat down to eat. I started off with an espresso martini. And I’m very caffeine-sensitive, so I asked if they would do a decaf, and they absolutely did.\u003c/p>\n\u003cp class=\"p1\">\u003cb>Joseph Merritt:\u003c/b> That’s great.\u003c/p>\n\u003cp class=\"p1\">\u003cb>Mantel:\u003c/b> It was delicious and perfect and cool and smooth. Like, everything you want in an espresso martini.\u003c/p>\n\u003cp class=\"p1\">\u003cb>Joseph Merritt:\u003c/b> We actually went with cocktails, as well. The wine list you can page through for days. It’s a great, wonderful wine list.\u003c/p>\n\u003cp class=\"p1\">\u003cb>Bakke:\u003c/b> It’s a bigger drink list than the food list.\u003c/p>\n\u003cp class=\"p1\">\u003cb>Joseph Merritt:\u003c/b> Yes. Absolutely. Yeah. More drinks than food, so right up my alley.\u003c/p>\n\u003cp class=\"p1\">[ Laughter ]\u003c/p>\n\u003cp class=\"p1\">Um, but I also had the versilia. It’s a gin-based cocktail with clarified lemon. It made it just really smooth. It was delicious.\u003c/p>\n\u003cp class=\"p1\">\u003cb>Sbrocco:\u003c/b> They have a whole Negroni option.\u003c/p>\n\u003cp class=\"p1\">\u003cb>Joseph Merritt:\u003c/b> Yes.\u003c/p>\n\u003cp class=\"p1\">\u003cb>Sbrocco:\u003c/b> You can really mix and match and kind of make your own.\u003c/p>\n\u003cp class=\"p1\">\u003cb>Bakke:\u003c/b> I tapped into that.\u003c/p>\n\u003cp class=\"p1\">\u003cb>Sbrocco:\u003c/b> Ohh. I’m a Negroni fan.\u003c/p>\n\u003cp class=\"p1\">\u003cb>Bakke:\u003c/b> Delicious.\u003c/p>\n\u003cp class=\"p1\">\u003cb>Sbrocco:\u003c/b> So what Negroni did you get? A classic or…?\u003c/p>\n\u003cp class=\"p1\">\u003cb>Bakke:\u003c/b> I got the classico, and I got a dirty.\u003c/p>\n\u003cp class=\"p1\">\u003cb>Joseph Merritt:\u003c/b> Ooh. I like that.\u003c/p>\n\u003cp class=\"p1\">\u003cb>Mantel:\u003c/b> Someone switched from lemonade.\u003c/p>\n\u003cp class=\"p1\">\u003cb>Sbrocco:\u003c/b> Yeah! Right?\u003c/p>\n\u003cp class=\"p1\">[ Laughter ]\u003c/p>\n\u003cp class=\"p1\">But it is a place like you would– In Venice, where you would just meet and greet and stand at the bar and nibble on things and have a drink.\u003c/p>\n\u003cp class=\"p1\">\u003cb>Bakke:\u003c/b> I had the little gem salad because, like lemonade, I’m a sucker for little gem salads. I will say the peas were just perfect. Like, they’re super fresh, crispy. Just really good veggies across the board.\u003c/p>\n\u003cp class=\"p1\">\u003cb>Mantel:\u003c/b> Yeah. The stracciatella was our favorite dish. I mean, fresh mozzarella drizzled with olive oil. And you know when it’s a really good olive oil you can see the green of it?\u003c/p>\n\u003cp class=\"p1\">\u003cb>Joseph Merritt:\u003c/b> Yes.\u003c/p>\n\u003cp class=\"p1\">\u003cb>Sbrocco:\u003c/b> It’s the creamy part of it.\u003c/p>\n\u003cp class=\"p1\">\u003cb>Mantel:\u003c/b> So creamy. The creamy inside part of the mozzarella. And beautiful focaccia that you put it on. And then they put pistachios on top, so it gives it that crunch. And that was amazing.\u003c/p>\n\u003cp class=\"p1\">\u003cb>Joseph Merritt:\u003c/b> Delicious.\u003c/p>\n\u003cp class=\"p1\">\u003cb>Mantel:\u003c/b> Yes.\u003c/p>\n\u003cp class=\"p1\">\u003cb>Joseph Merritt:\u003c/b> We also got the red shrimp scampi pasta.\u003c/p>\n\u003cp class=\"p1\">\u003cb>Bakke:\u003c/b> Oh, my gosh. Me too.\u003c/p>\n\u003cp class=\"p1\">\u003cb>Joseph Merritt:\u003c/b> Delicious, right?\u003c/p>\n\u003cp class=\"p1\">\u003cb>Bakke:\u003c/b> That was my favorite, as well.\u003c/p>\n\u003cp class=\"p1\">\u003cb>Joseph Merritt:\u003c/b> It was unexpectedly creamy. Unexpectedly a large portion, also. I wasn’t expecting that much pasta. But it was really delicious. And the red shrimp were cooked exceptionally well. They were really tender. They weren’t squeaky. So that’s how you know they did it right. And it was just a beautifully plated pasta.\u003c/p>\n\u003cp class=\"p1\">\u003cb>Bakke:\u003c/b> Yeah, it was exceptional.\u003c/p>\n\u003cp class=\"p1\">\u003cb>Joseph Merritt:\u003c/b> We also had stone fruit salad. Fresh heirloom tomatoes, some grilled peaches. Really yummy champagne vinaigrette. There was a little arugula in there, as well. It was outstanding.\u003c/p>\n\u003cp class=\"p1\">\u003cb>Woman:\u003c/b> So good.\u003c/p>\n\u003cp class=\"p1\">\u003cb>Joseph Merritt:\u003c/b> Something else I enjoyed was the duck ragu. It was really earthy, and you could taste, like, the nutmeg and the cinnamon in it. The noodles were a little bit thick, but they were really tasty. And once you mixed in all of that ragu that was at the bottom of the bowl, it made for a really delicious dish.\u003c/p>\n\u003cp class=\"p1\">\u003cb>Sbrocco:\u003c/b> And did you get good service?\u003c/p>\n\u003cp class=\"p1\">\u003cb>Mantel:\u003c/b> We got pretty good service. It took a while for them to come to our table to start with us, but once you order, the food came out so quickly, which was wonderful.\u003c/p>\n\u003cp class=\"p1\">\u003cb>Joseph Merritt:\u003c/b> I agree with the service. I think your best service is at the bar, but I think they really just lean into… it’s a relaxed environment. They don’t want you to feel rushed.\u003c/p>\n\u003cp class=\"p1\">\u003cb>Sbrocco:\u003c/b> And it gives you time to enjoy dessert.\u003c/p>\n\u003cp class=\"p1\">\u003cb>Joseph Merritt:\u003c/b> That’s right.\u003c/p>\n\u003cp class=\"p1\">\u003cb>Sbrocco:\u003c/b> Did anybody have it?\u003c/p>\n\u003cp class=\"p1\">\u003cb>Mantel:\u003c/b> We had the pistachio cake. It was two little pistachio cakes with a scoop of pistachio gelato. And the gelato was amazing. I would go back for any flavored gelato they might have.\u003c/p>\n\u003cp class=\"p1\">\u003cb>Sbrocco:\u003c/b> Dessert?\u003c/p>\n\u003cp class=\"p1\">\u003cb>Bakke:\u003c/b> No dessert. But I have a confession to make. I actually went last night.\u003c/p>\n\u003cp class=\"p1\">\u003cb>Joseph Merritt:\u003c/b> Did you?! You went back?\u003c/p>\n\u003cp class=\"p1\">\u003cb>Bakke:\u003c/b> And I got that.\u003c/p>\n\u003cp class=\"p1\">[ Laughter ]\u003c/p>\n\u003cp class=\"p1\">\u003cb>Sbrocco:\u003c/b> So it’s seared in your memory right here.\u003c/p>\n\u003cp class=\"p1\">\u003cb>Bakke:\u003c/b> It was so good. Yeah, well, so I flew in last night, and like you said, it’s easily accessible from Embarcadero. So you can just take the BART in or the ferry, and it’s right there, you know, walking distance, less than a mile. Definitely make a reservation, though. If you try to just go, you’ll probably just only get a seat at the bar, which is great in itself, but if you want to–\u003c/p>\n\u003cp class=\"p1\">\u003cb>Sbrocco:\u003c/b> Which is kind of where you want to be, though.\u003c/p>\n\u003cp class=\"p1\">\u003cb>Joseph Merritt:\u003c/b> It is a hot spot. Yeah, absolutely. And the seats are very cozy. It’s very nice. They make it so you can stay for a while.\u003c/p>\n\u003cp class=\"p1\">\u003cb>Mantel:\u003c/b> Very cozy.\u003c/p>\n\u003cp class=\"p1\">\u003cb>Bakke:\u003c/b> Yeah.\u003c/p>\n\u003cp class=\"p1\">\u003cb>Sbrocco:\u003c/b> Well, if you would like to try Bar Sprezzatura, it’s located on Clay Street in San Francisco, and the average multi-course tab per person without drinks is around $100. Looking for more Bay Area bites you’ve just got to try?\u003c/p>\n\u003cp class=\"p1\">[ Laughter ]\u003c/p>\n\u003cp class=\"p1\">Check out “Cecilia Tries It” online at KQED.org/checkplease. I have to thank my fabulous guests on this week’s show. Bennett Bakke, who savors the Swedish meatballs at Stockhome in Petaluma… Paige Mantel, who goes all-in on the brisket and burnt ends at Stateline Road Smokehouse in Napa… and Alexis Joseph Merritt, who adores the arancini at Bar Sprezzatura in San Francisco. Join us next time when three more guests will recommend their spots right here on “Check, Please! Bay Area.” I’m Leslie Sbrocco, and I’ll see you then. Cheers, everyone.\u003c/p>\n\u003cp class=\"p1\">\u003cb>Mantel:\u003c/b> Cheers.\u003c/p>\n\u003cp class=\"p1\">\u003cb>Sbrocco:\u003c/b> Cheers. Cheers. Cheers.\u003c/p>\n\u003cp>\u003c/p>\u003c/div>",
"attributes": {
"named": {},
"numeric": []
}
},
{
"type": "component",
"content": "",
"name": "ad",
"attributes": {
"named": {
"label": "floatright"
},
"numeric": [
"floatright"
]
}
},
{
"type": "contentString",
"content": "\u003cdiv class=\"post-body\">\u003cp>\u003c/p>\n\u003cp class=\"p1\">\u003cb>Bell:\u003c/b> When it comes to desserts at Stateline Road Smokehouse, I like to focus on what is the element that can elevate and give that piece of surprise to the guests? So, for instance, the banana pudding. I trained and learned pastries in France. Orange cookie crumble. The actual crumble that’s on top there is essentially a form of a speculoos dough. I just add a little orange to it and put that on top. It’s a great finish to the end of a meal.\u003c/p>\n\n\u003c/div>\u003c/p>",
"attributes": {
"named": {},
"numeric": []
}
}
],
"link": "/checkplease/23706/check-please-bay-area-reviews-stateline-road-smokehouse-stockhome-bar-sprezzatura",
"authors": [
"11084"
],
"programs": [
"checkplease_9339"
],
"categories": [
"checkplease_3758",
"checkplease_3760",
"checkplease_3750",
"checkplease_3731",
"checkplease_9200",
"checkplease_3751",
"checkplease_3871",
"checkplease_9186",
"checkplease_9275",
"checkplease_3472",
"checkplease_3742",
"checkplease_7994",
"checkplease_3738",
"checkplease_10",
"checkplease_3729",
"checkplease_3739",
"checkplease_9209",
"checkplease_8156",
"checkplease_9427"
],
"tags": [
"checkplease_8575",
"checkplease_8988",
"checkplease_9162",
"checkplease_8566",
"checkplease_9444",
"checkplease_9447",
"checkplease_8579",
"checkplease_8640",
"checkplease_8518",
"checkplease_9443",
"checkplease_9446"
],
"featImg": "checkplease_23711",
"label": "checkplease_9339"
},
"food_1337955": {
"type": "posts",
"id": "food_1337955",
"meta": {
"index": "posts_1716263798",
"site": "food",
"id": "1337955",
"score": null,
"sort": [
1741368349000
]
},
"guestAuthors": [],
"slug": "we-take-on-rancho-gordos-fussiest-heirloom-bean-with-apologies-to-kelly-clarkson",
"title": "We Take on Rancho Gordo's Fussiest Heirloom Bean (with Apologies to Kelly Clarkson)",
"publishDate": 1741368349,
"format": "video",
"headTitle": "We Take on Rancho Gordo’s Fussiest Heirloom Bean (with Apologies to Kelly Clarkson) | KQED",
"labelTerm": {},
"content": "\u003cp>Heirloom beans are having a moment and perhaps no one understands that better than Steve Sando, founder and CEO of \u003ca href=\"https://www.ranchogordo.com/\">Rancho Gordo\u003c/a>, a company who specializes in preserving and promoting rare and traditional bean varieties. When Steve stopped by KQED Forum recently, we couldn’t pass up the opportunity to ask him: Which bean is the MOST dramatic?\u003c/p>\n\u003cp>He didn’t pause for an instant before answering: The Royal Corona. This massive, creamy heirloom bean has a history as wild as its attitude. It originates from Oaxaca, bred in Italy, grown in Poland, and is now beloved by bean enthusiasts everywhere.\u003c/p>\n\u003cp>But can Josh handle its high-maintenance diva energy? After tracking down a bag, he gave them the royal treatment — soaking, stewing, and baking them into a dish that would hopefully let their personality shine. And because we love a high-risk kitchen move, we paired them with shrimp. Because why not pair something that’s easy to overcook with something that’s easy to undercook?\u003c/p>\n\u003cp>Listen to the \u003ca href=\"https://www.kqed.org/forum/2010101908445/all-hail-the-humble-and-glorious-bean\">KQED Forum interview\u003c/a> with Rancho Gordo founder Steve Sando.\u003c/p>\n\u003cp>Subscribe to KQED Food’s \u003cstrong>\u003ca href=\"http://youtube.com/@KQEDFood?sub_confirmation=1\">YouTube channel\u003c/a> \u003c/strong>and follow us on \u003cstrong>\u003ca href=\"http://instagram.com/KQEDFood\">social\u003c/a>.\u003c/strong>\u003c/p>\n\u003cp>[ad fullwidth]\u003c/p>\n\u003cp>\u003c/p>\n\u003cp>\u003cstrong>About No Crumbs:\u003c/strong> In KQED’s vertical video series No Crumbs, host Josh Decolongon is a foodie field reporter, uncovering histories and celebrating the culture behind the Bay Area’s exciting and diverse culinary landscape. No Crumbs will inspire new perspectives on the Bay Area food scene you thought you knew. No Crumbs is produced by Josh Decolongon and Janelle Hessig for KQED.\u003c/p>\n\n",
"blocks": [],
"excerpt": null,
"status": "publish",
"parent": 0,
"modified": 1741368349,
"stats": {
"hasAudio": false,
"hasVideo": false,
"hasChartOrMap": false,
"iframeSrcs": [],
"hasGoogleForm": false,
"hasGallery": false,
"hasHearkenModule": false,
"hasPolis": false,
"paragraphCount": 8,
"wordCount": 268
},
"headData": {
"title": "We Take on Rancho Gordo's Fussiest Heirloom Bean (with Apologies to Kelly Clarkson) | KQED",
"description": "Heirloom beans are having a moment. After a quick chat with Rancho Gordo founder Steve Sando, we try their fussiest bean, the Royal Corona.",
"ogTitle": "",
"ogDescription": "",
"ogImgId": "",
"twTitle": "",
"twDescription": "",
"twImgId": "",
"socialDescription": "Heirloom beans are having a moment. After a quick chat with Rancho Gordo founder Steve Sando, we try their fussiest bean, the Royal Corona.",
"schema": {
"@context": "https://schema.org",
"@type": "Article",
"headline": "We Take on Rancho Gordo's Fussiest Heirloom Bean (with Apologies to Kelly Clarkson)",
"datePublished": "2025-03-07T09:25:49-08:00",
"dateModified": "2025-03-07T09:25:49-08:00",
"image": "https://cdn.kqed.org/wp-content/uploads/2020/02/KQED-OG-Image@1x.png"
}
},
"videoEmbed": "https://youtu.be/gm4NEroqk8E?feature=shared",
"source": "Food",
"sourceUrl": "https://www.kqed.org/food",
"sticky": false,
"nprByline": "KQED Food Staff",
"templateType": "standard",
"featuredImageType": "standard",
"excludeFromSiteSearch": "Include",
"showOnAuthorArchivePages": "No",
"articleAge": "0",
"path": "/food/1337955/we-take-on-rancho-gordos-fussiest-heirloom-bean-with-apologies-to-kelly-clarkson",
"audioTrackLength": null,
"parsedContent": [
{
"type": "contentString",
"content": "\u003cdiv class=\"post-body\">\u003cp>\u003cp>Heirloom beans are having a moment and perhaps no one understands that better than Steve Sando, founder and CEO of \u003ca href=\"https://www.ranchogordo.com/\">Rancho Gordo\u003c/a>, a company who specializes in preserving and promoting rare and traditional bean varieties. When Steve stopped by KQED Forum recently, we couldn’t pass up the opportunity to ask him: Which bean is the MOST dramatic?\u003c/p>\n\u003cp>He didn’t pause for an instant before answering: The Royal Corona. This massive, creamy heirloom bean has a history as wild as its attitude. It originates from Oaxaca, bred in Italy, grown in Poland, and is now beloved by bean enthusiasts everywhere.\u003c/p>\n\u003cp>But can Josh handle its high-maintenance diva energy? After tracking down a bag, he gave them the royal treatment — soaking, stewing, and baking them into a dish that would hopefully let their personality shine. And because we love a high-risk kitchen move, we paired them with shrimp. Because why not pair something that’s easy to overcook with something that’s easy to undercook?\u003c/p>\n\u003cp>Listen to the \u003ca href=\"https://www.kqed.org/forum/2010101908445/all-hail-the-humble-and-glorious-bean\">KQED Forum interview\u003c/a> with Rancho Gordo founder Steve Sando.\u003c/p>\n\u003cp>Subscribe to KQED Food’s \u003cstrong>\u003ca href=\"http://youtube.com/@KQEDFood?sub_confirmation=1\">YouTube channel\u003c/a> \u003c/strong>and follow us on \u003cstrong>\u003ca href=\"http://instagram.com/KQEDFood\">social\u003c/a>.\u003c/strong>\u003c/p>\n\u003cp>\u003c/p>\u003c/div>",
"attributes": {
"named": {},
"numeric": []
}
},
{
"type": "component",
"content": "",
"name": "ad",
"attributes": {
"named": {
"label": "fullwidth"
},
"numeric": [
"fullwidth"
]
}
},
{
"type": "contentString",
"content": "\u003cdiv class=\"post-body\">\u003cp>\u003c/p>\n\u003cp>\u003c/p>\n\u003cp>\u003cstrong>About No Crumbs:\u003c/strong> In KQED’s vertical video series No Crumbs, host Josh Decolongon is a foodie field reporter, uncovering histories and celebrating the culture behind the Bay Area’s exciting and diverse culinary landscape. No Crumbs will inspire new perspectives on the Bay Area food scene you thought you knew. No Crumbs is produced by Josh Decolongon and Janelle Hessig for KQED.\u003c/p>\n\n\u003c/div>\u003c/p>",
"attributes": {
"named": {},
"numeric": []
}
}
],
"link": "/food/1337955/we-take-on-rancho-gordos-fussiest-heirloom-bean-with-apologies-to-kelly-clarkson",
"authors": [
"byline_food_1337955"
],
"series": [
"food_331"
],
"categories": [
"food_1"
],
"tags": [
"food_136",
"food_261",
"food_397",
"food_138"
],
"featImg": "food_1337956",
"label": "source_food_1337955"
},
"food_1337943": {
"type": "posts",
"id": "food_1337943",
"meta": {
"index": "posts_1716263798",
"site": "food",
"id": "1337943",
"score": null,
"sort": [
1740702526000
]
},
"guestAuthors": [],
"slug": "we-recreate-maya-angelous-magic-lemon-meringue-pie",
"title": "We Recreate Maya Angelou's Magic Lemon Meringue Pie",
"publishDate": 1740702526,
"format": "video",
"headTitle": "We Recreate Maya Angelou’s Magic Lemon Meringue Pie | KQED",
"labelTerm": {},
"content": "\u003cp>Did you know that not only was Maya Angelou a poet, author, and activist, she was also an accomplished baker? We recently discovered her cookbook \u003ca href=\"https://en.wikipedia.org/wiki/Hallelujah!_The_Welcome_Table\">\u003cem>Hallelujah! The Welcome Table: A Lifetime of Memories With Recipe \u003c/em>\u003c/a>and couldn’t wait to dig in. Each chapter is rich with personal essays tied to recipes — including her time spent living in San Francisco. When we reached the chapter about an irresistible lemon meringue pie passed along from Angelou’s grandmother —who claimed it would “make a rabbit hug a hound” and “make a preacher lay his bible down” — how could we not try it?\u003c/p>\n\u003cp>Subscribe to KQED Food’s \u003cstrong>\u003ca href=\"http://youtube.com/@KQEDFood?sub_confirmation=1\">YouTube channel\u003c/a> \u003c/strong>and follow us on \u003cstrong>\u003ca href=\"http://instagram.com/KQEDFood\">social\u003c/a>.\u003c/strong>\u003c/p>\n\u003cp>\u003cstrong>About No Crumbs:\u003c/strong> In KQED’s vertical video series No Crumbs, host Josh Decolongon is a foodie field reporter, uncovering histories and celebrating the culture behind the Bay Area’s exciting and diverse culinary landscape. No Crumbs will inspire new perspectives on the Bay Area food scene you thought you knew. No Crumbs is produced by Josh Decolongon and Janelle Hessig for KQED.\u003c/p>\n\u003cp>[ad fullwidth]\u003c/p>\u003cp>\u003c/p>\n",
"blocks": [],
"excerpt": null,
"status": "publish",
"parent": 0,
"modified": 1740702526,
"stats": {
"hasAudio": false,
"hasVideo": false,
"hasChartOrMap": false,
"iframeSrcs": [],
"hasGoogleForm": false,
"hasGallery": false,
"hasHearkenModule": false,
"hasPolis": false,
"paragraphCount": 5,
"wordCount": 195
},
"headData": {
"title": "We Recreate Maya Angelou's Magic Lemon Meringue Pie | KQED",
"description": "Not only was Maya Angelou a poet, author, and activist, she was also an accomplished baker. We recreate a lemon meringue pie from her cookbook.",
"ogTitle": "",
"ogDescription": "",
"ogImgId": "",
"twTitle": "",
"twDescription": "",
"twImgId": "",
"socialDescription": "Not only was Maya Angelou a poet, author, and activist, she was also an accomplished baker. We recreate a lemon meringue pie from her cookbook.",
"schema": {
"@context": "https://schema.org",
"@type": "Article",
"headline": "We Recreate Maya Angelou's Magic Lemon Meringue Pie",
"datePublished": "2025-02-27T16:28:46-08:00",
"dateModified": "2025-02-27T16:28:46-08:00",
"image": "https://cdn.kqed.org/wp-content/uploads/2020/02/KQED-OG-Image@1x.png"
}
},
"videoEmbed": "https://youtu.be/ruXcU34rnDQ?feature=shared",
"source": "Food",
"sourceUrl": "https://www.kqed.org/food",
"sticky": false,
"nprByline": "KQED Food Staff",
"templateType": "standard",
"featuredImageType": "standard",
"excludeFromSiteSearch": "Include",
"showOnAuthorArchivePages": "No",
"articleAge": "0",
"path": "/food/1337943/we-recreate-maya-angelous-magic-lemon-meringue-pie",
"audioTrackLength": null,
"parsedContent": [
{
"type": "contentString",
"content": "\u003cdiv class=\"post-body\">\u003cp>\u003cp>Did you know that not only was Maya Angelou a poet, author, and activist, she was also an accomplished baker? We recently discovered her cookbook \u003ca href=\"https://en.wikipedia.org/wiki/Hallelujah!_The_Welcome_Table\">\u003cem>Hallelujah! The Welcome Table: A Lifetime of Memories With Recipe \u003c/em>\u003c/a>and couldn’t wait to dig in. Each chapter is rich with personal essays tied to recipes — including her time spent living in San Francisco. When we reached the chapter about an irresistible lemon meringue pie passed along from Angelou’s grandmother —who claimed it would “make a rabbit hug a hound” and “make a preacher lay his bible down” — how could we not try it?\u003c/p>\n\u003cp>Subscribe to KQED Food’s \u003cstrong>\u003ca href=\"http://youtube.com/@KQEDFood?sub_confirmation=1\">YouTube channel\u003c/a> \u003c/strong>and follow us on \u003cstrong>\u003ca href=\"http://instagram.com/KQEDFood\">social\u003c/a>.\u003c/strong>\u003c/p>\n\u003cp>\u003cstrong>About No Crumbs:\u003c/strong> In KQED’s vertical video series No Crumbs, host Josh Decolongon is a foodie field reporter, uncovering histories and celebrating the culture behind the Bay Area’s exciting and diverse culinary landscape. No Crumbs will inspire new perspectives on the Bay Area food scene you thought you knew. No Crumbs is produced by Josh Decolongon and Janelle Hessig for KQED.\u003c/p>\n\u003cp>\u003c/p>\u003c/div>",
"attributes": {
"named": {},
"numeric": []
}
},
{
"type": "component",
"content": "",
"name": "ad",
"attributes": {
"named": {
"label": "fullwidth"
},
"numeric": [
"fullwidth"
]
}
},
{
"type": "contentString",
"content": "\u003cdiv class=\"post-body\">\u003cp>\u003c/p>\u003cp>\u003c/p>\n\u003c/div>\u003c/p>",
"attributes": {
"named": {},
"numeric": []
}
}
],
"link": "/food/1337943/we-recreate-maya-angelous-magic-lemon-meringue-pie",
"authors": [
"byline_food_1337943"
],
"series": [
"food_331"
],
"categories": [
"food_1"
],
"tags": [
"food_387",
"food_393",
"food_261",
"food_394",
"food_138"
],
"featImg": "food_1337944",
"label": "source_food_1337943"
},
"food_1337762": {
"type": "posts",
"id": "food_1337762",
"meta": {
"index": "posts_1716263798",
"site": "food",
"id": "1337762",
"score": null,
"sort": [
1728593685000
]
},
"guestAuthors": [],
"slug": "creep-out-your-halloween-party-guests-with-these-horrors-doeuvres",
"title": "Creep Out Your Halloween Party Guests With These \"Horrors d'oeuvres\"",
"publishDate": 1728593685,
"format": "video",
"headTitle": "Creep Out Your Halloween Party Guests With These “Horrors d’oeuvres” | KQED",
"labelTerm": {},
"content": "\u003cp>October has come around again and that means it’s time for one of the Bay Area’s favorite holidays: Halloween. If you are planning a party this year and want to go beyond just dropping dry ice in a punchbowl, try this fun and easy cold cuts skeleton appetizer. All you’ll need to recreate this party platter is a plastic skull from any crafts store, an array of cold cuts, and a couple of green olives. Because we like being extra, we bought our cold cuts from Molinari’s Delicatessen in North Beach, one of San Francisco’s oldest and most beloved delis. Just because it is adorning a hideous plastic skull, doesn’t mean your snacks can’t be high quality. This spooky twist to charcuterie is sure to make this year’s party spread especially memorable.\u003c/p>\n\u003cp>Subscribe to KQED Food’s \u003cstrong>\u003ca href=\"http://youtube.com/@KQEDFood?sub_confirmation=1\">YouTube channel\u003c/a> \u003c/strong>and follow us on \u003cstrong>\u003ca href=\"http://instagram.com/KQEDFood\">social\u003c/a>.\u003c/strong>\u003c/p>\n\u003cp>\u003cstrong>About No Crumbs:\u003c/strong> In KQED’s No Crumbs, host Josh Decolongon is a foodie field reporter, uncovering histories and celebrating the culture behind the Bay Area’s exciting and diverse culinary landscape. No Crumbs will inspire new perspectives on the Bay Area food scene you thought you knew. No Crumbs is produced by Josh Decolongon and Janelle Hessig for KQED.\u003c/p>\n\u003cp> \u003c/p>\n\u003cp>[ad fullwidth]\u003c/p>\u003cp>\u003c/p>\n",
"blocks": [],
"excerpt": null,
"status": "publish",
"parent": 0,
"modified": 1728593685,
"stats": {
"hasAudio": false,
"hasVideo": false,
"hasChartOrMap": false,
"iframeSrcs": [],
"hasGoogleForm": false,
"hasGallery": false,
"hasHearkenModule": false,
"hasPolis": false,
"paragraphCount": 5,
"wordCount": 230
},
"headData": {
"title": "Creep Out Your Halloween Party Guests With These \"Horrors d'oeuvres\" | KQED",
"description": "If you're planning to go extra hard on your Halloween party hors d'ouevres this year, try this fun and easy cold cuts skeleton platter.",
"ogTitle": "",
"ogDescription": "",
"ogImgId": "",
"twTitle": "",
"twDescription": "",
"twImgId": "",
"socialDescription": "If you're planning to go extra hard on your Halloween party hors d'ouevres this year, try this fun and easy cold cuts skeleton platter.",
"schema": {
"@context": "https://schema.org",
"@type": "Article",
"headline": "Creep Out Your Halloween Party Guests With These \"Horrors d'oeuvres\"",
"datePublished": "2024-10-10T13:54:45-07:00",
"dateModified": "2024-10-10T13:54:45-07:00",
"image": "https://cdn.kqed.org/wp-content/uploads/2020/02/KQED-OG-Image@1x.png"
}
},
"videoEmbed": "https://youtu.be/XSHwuWBi2Wc?feature=shared",
"source": "Food",
"sourceUrl": "https://www.kqed.org/food",
"sticky": false,
"nprByline": "KQED Food Staff",
"excludeFromSiteSearch": "Include",
"showOnAuthorArchivePages": "No",
"articleAge": "0",
"path": "/food/1337762/creep-out-your-halloween-party-guests-with-these-horrors-doeuvres",
"audioTrackLength": null,
"parsedContent": [
{
"type": "contentString",
"content": "\u003cdiv class=\"post-body\">\u003cp>\u003cp>October has come around again and that means it’s time for one of the Bay Area’s favorite holidays: Halloween. If you are planning a party this year and want to go beyond just dropping dry ice in a punchbowl, try this fun and easy cold cuts skeleton appetizer. All you’ll need to recreate this party platter is a plastic skull from any crafts store, an array of cold cuts, and a couple of green olives. Because we like being extra, we bought our cold cuts from Molinari’s Delicatessen in North Beach, one of San Francisco’s oldest and most beloved delis. Just because it is adorning a hideous plastic skull, doesn’t mean your snacks can’t be high quality. This spooky twist to charcuterie is sure to make this year’s party spread especially memorable.\u003c/p>\n\u003cp>Subscribe to KQED Food’s \u003cstrong>\u003ca href=\"http://youtube.com/@KQEDFood?sub_confirmation=1\">YouTube channel\u003c/a> \u003c/strong>and follow us on \u003cstrong>\u003ca href=\"http://instagram.com/KQEDFood\">social\u003c/a>.\u003c/strong>\u003c/p>\n\u003cp>\u003cstrong>About No Crumbs:\u003c/strong> In KQED’s No Crumbs, host Josh Decolongon is a foodie field reporter, uncovering histories and celebrating the culture behind the Bay Area’s exciting and diverse culinary landscape. No Crumbs will inspire new perspectives on the Bay Area food scene you thought you knew. No Crumbs is produced by Josh Decolongon and Janelle Hessig for KQED.\u003c/p>\n\u003cp> \u003c/p>\n\u003cp>\u003c/p>\u003c/div>",
"attributes": {
"named": {},
"numeric": []
}
},
{
"type": "component",
"content": "",
"name": "ad",
"attributes": {
"named": {
"label": "fullwidth"
},
"numeric": [
"fullwidth"
]
}
},
{
"type": "contentString",
"content": "\u003cdiv class=\"post-body\">\u003cp>\u003c/p>\u003cp>\u003c/p>\n\u003c/div>\u003c/p>",
"attributes": {
"named": {},
"numeric": []
}
}
],
"link": "/food/1337762/creep-out-your-halloween-party-guests-with-these-horrors-doeuvres",
"authors": [
"byline_food_1337762"
],
"series": [
"food_331"
],
"categories": [
"food_1"
],
"tags": [
"food_102",
"food_212",
"food_261",
"food_175"
],
"featImg": "food_1337763",
"label": "source_food_1337762"
},
"food_1337484": {
"type": "posts",
"id": "food_1337484",
"meta": {
"index": "posts_1716263798",
"site": "food",
"id": "1337484",
"score": null,
"sort": [
1696611779000
]
},
"parent": 0,
"labelTerm": {},
"blocks": [],
"publishDate": 1696611779,
"format": "video",
"title": "Get Cozy with Jacques Pépin's Pea Pod Soup Recipe",
"headTitle": "Get Cozy with Jacques Pépin’s Pea Pod Soup Recipe | KQED",
"content": "\u003cp>\u003cspan class=\"yt-core-attributed-string--link-inherit-color\">Jacques Pepin’s budget-friendly pea pod soup recipe is perfect for every season. It’s bright and refreshing in the springtime, warm and cozy in the Fall. \u003c/span>\u003c/p>\n\u003cp>\u003cspan class=\"yt-core-attributed-string--link-inherit-color\">\u003cstrong>What you’ll need:\u003c/strong> 4 cups water or chicken stock, 2 tsp chicken bouillon, 1 lb potatoes, 1 lb pea pods, 1 small onion, salt (to taste), 1/3 cup cream, chives \u003c/span>\u003c/p>\n\u003cp>\u003cspan class=\"yt-core-attributed-string--link-inherit-color\"> Subscribe to\u003ca href=\"https://www.youtube.com/kqed?sub_conf....\"> KQED’s YouTube channel\u003c/a> to watch more Jacques Pépin videos.\u003c/span>\u003c/p>\n\u003cp>\u003cstrong>\u003cspan class=\"yt-core-attributed-string--link-inherit-color\">About Jacques Pépin Cooking At Home: \u003c/span>\u003c/strong>\u003c/p>\n\u003cp>\u003cspan class=\"yt-core-attributed-string--link-inherit-color\">Jacques Pépin Cooking At Home features short recipe videos that transform readily-available ingredients into exciting new dishes, perfect for newly-anointed home cooks and seasoned chefs alike. Presented by the Jacques Pépin Foundation, an organization dedicated to enriching lives and strengthening communities through the power of culinary education. \u003c/span>\u003cspan class=\"yt-core-attributed-string--link-inherit-color\">\u003ca class=\"yt-core-attributed-string__link yt-core-attributed-string__link--display-type yt-core-attributed-string__link--call-to-action-color\" href=\"https://www.youtube.com/redirect?event=video_description&redir_token=QUFFLUhqbE9wVUlkUVRJNDZUZ28zazdmNkRWeERFNmROUXxBQ3Jtc0trNnBpRGY5OXBIenMwQTNNTmxkaXBpN2FvcVVNTHdhVG9nVGh2R0d0d2R2dENJcDkzaTh3dkdjdWEtc0FsWUFhLW1DdndWQ21rYTNDbVZiUzJCLWMyUXNISlpXdVNHbWpKbU1tN0ZWc2lqMlNHeHFPOA&q=https%3A%2F%2Fjp.foundation%2F%E2%80%8B%E2%80%8B%E2%80%8B&v=0at3Qqh6JRg\" target=\"_blank\" rel=\"nofollow noopener\">https://jp.foundation/\u003c/a>\u003c/span>\u003c/p>\n\u003cp>[ad fullwidth]\u003c/p>\u003cp>\u003c/p>\n",
"stats": {
"hasVideo": false,
"hasChartOrMap": false,
"hasAudio": false,
"hasPolis": false,
"wordCount": 148,
"hasGoogleForm": false,
"hasGallery": false,
"hasHearkenModule": false,
"iframeSrcs": [],
"paragraphCount": 7
},
"modified": 1696613244,
"excerpt": null,
"headData": {
"twImgId": "",
"twTitle": "",
"ogTitle": "",
"ogImgId": "",
"twDescription": "",
"description": "Jacques Pepin's budget-friendly pea pod soup recipe is perfect for every season. It's bright and refreshing in the springtime, warm and cozy in the Fall. What you'll need: 4 cups water or chicken stock, 2 tsp chicken bouillon, 1 lb potatoes, 1 lb pea pods, 1 small onion, salt (to taste), 1/3 cup cream, chives ",
"title": "Get Cozy with Jacques Pépin's Pea Pod Soup Recipe | KQED",
"ogDescription": "",
"schema": {
"@context": "https://schema.org",
"@type": "Article",
"headline": "Get Cozy with Jacques Pépin's Pea Pod Soup Recipe",
"datePublished": "2023-10-06T10:02:59-07:00",
"dateModified": "2023-10-06T10:27:24-07:00",
"image": "https://cdn.kqed.org/wp-content/uploads/2020/02/KQED-OG-Image@1x.png"
}
},
"guestAuthors": [],
"slug": "get-cozy-with-jacques-pepins-pea-pod-soup-recipe",
"status": "publish",
"sourceUrl": "/food/",
"videoEmbed": "https://youtu.be/0at3Qqh6JRg?si=Ry4H4OGjE7jdiz9i",
"excludeFromSiteSearch": "Include",
"source": "Food",
"articleAge": "0",
"path": "/food/1337484/get-cozy-with-jacques-pepins-pea-pod-soup-recipe",
"audioTrackLength": null,
"parsedContent": [
{
"type": "contentString",
"content": "\u003cdiv class=\"post-body\">\u003cp>\u003cp>\u003cspan class=\"yt-core-attributed-string--link-inherit-color\">Jacques Pepin’s budget-friendly pea pod soup recipe is perfect for every season. It’s bright and refreshing in the springtime, warm and cozy in the Fall. \u003c/span>\u003c/p>\n\u003cp>\u003cspan class=\"yt-core-attributed-string--link-inherit-color\">\u003cstrong>What you’ll need:\u003c/strong> 4 cups water or chicken stock, 2 tsp chicken bouillon, 1 lb potatoes, 1 lb pea pods, 1 small onion, salt (to taste), 1/3 cup cream, chives \u003c/span>\u003c/p>\n\u003cp>\u003cspan class=\"yt-core-attributed-string--link-inherit-color\"> Subscribe to\u003ca href=\"https://www.youtube.com/kqed?sub_conf....\"> KQED’s YouTube channel\u003c/a> to watch more Jacques Pépin videos.\u003c/span>\u003c/p>\n\u003cp>\u003cstrong>\u003cspan class=\"yt-core-attributed-string--link-inherit-color\">About Jacques Pépin Cooking At Home: \u003c/span>\u003c/strong>\u003c/p>\n\u003cp>\u003cspan class=\"yt-core-attributed-string--link-inherit-color\">Jacques Pépin Cooking At Home features short recipe videos that transform readily-available ingredients into exciting new dishes, perfect for newly-anointed home cooks and seasoned chefs alike. Presented by the Jacques Pépin Foundation, an organization dedicated to enriching lives and strengthening communities through the power of culinary education. \u003c/span>\u003cspan class=\"yt-core-attributed-string--link-inherit-color\">\u003ca class=\"yt-core-attributed-string__link yt-core-attributed-string__link--display-type yt-core-attributed-string__link--call-to-action-color\" href=\"https://www.youtube.com/redirect?event=video_description&redir_token=QUFFLUhqbE9wVUlkUVRJNDZUZ28zazdmNkRWeERFNmROUXxBQ3Jtc0trNnBpRGY5OXBIenMwQTNNTmxkaXBpN2FvcVVNTHdhVG9nVGh2R0d0d2R2dENJcDkzaTh3dkdjdWEtc0FsWUFhLW1DdndWQ21rYTNDbVZiUzJCLWMyUXNISlpXdVNHbWpKbU1tN0ZWc2lqMlNHeHFPOA&q=https%3A%2F%2Fjp.foundation%2F%E2%80%8B%E2%80%8B%E2%80%8B&v=0at3Qqh6JRg\" target=\"_blank\" rel=\"nofollow noopener\">https://jp.foundation/\u003c/a>\u003c/span>\u003c/p>\n\u003cp>\u003c/p>\u003c/div>",
"attributes": {
"named": {},
"numeric": []
}
},
{
"type": "component",
"content": "",
"name": "ad",
"attributes": {
"named": {
"label": "fullwidth"
},
"numeric": [
"fullwidth"
]
}
},
{
"type": "contentString",
"content": "\u003cdiv class=\"post-body\">\u003cp>\u003c/p>\u003cp>\u003c/p>\n\u003c/div>\u003c/p>",
"attributes": {
"named": {},
"numeric": []
}
}
],
"link": "/food/1337484/get-cozy-with-jacques-pepins-pea-pod-soup-recipe",
"authors": [
"5083"
],
"series": [
"food_162"
],
"categories": [
"food_1",
"food_165"
],
"tags": [
"food_158",
"food_166",
"food_138",
"food_268"
],
"featImg": "food_1337485",
"label": "source_food_1337484"
},
"food_1337457": {
"type": "posts",
"id": "food_1337457",
"meta": {
"index": "posts_1716263798",
"site": "food",
"id": "1337457",
"score": null,
"sort": [
1691020868000
]
},
"parent": 0,
"labelTerm": {},
"blocks": [],
"publishDate": 1691020868,
"format": "standard",
"title": "We Recreated an It's-It Ice Cream Sandwich at Home — With an Oakland Twist.",
"headTitle": "We Recreated an It’s-It Ice Cream Sandwich at Home — With an Oakland Twist. | KQED",
"content": "\u003cp>https://youtu.be/S4EHUfG3JAo?feature=shared\u003c/p>\n\u003cp> \u003c/p>\n\u003cp>A list of things that are very San Francisco are never complete without the It’s-It ice cream sandwich. Invented by Playland-at-the-Beach amusement park owner George Whitney in 1928, an It’s-It is a scoop of ice cream sandwiched by two oatmeal cookies and then dipped into chocolate. In my opinion, the key components are the oatmeal cookies (where there are raisins: I’ve checked!), which provide a soft snap that somehow lightens the load of a regular cookie while also giving me the comfort and warmth of my grandma’s oatmeal cookies — perhaps a reminder that San Francisco is never as warm as an American summer promises. But I’m okay with that.\u003c/p>\n\u003cp>Any recreation experiment begs the question: why make your own? We’re spoiled with choice and availability in the Bay, so I’d absolutely be able to run blindfolded in any direction for half an hour before bumping into the storied ice cream treat. But, aside from the fact that I like to give myself a challenge, I simply like to create new flavor combinations. It’s-Its come in vanilla, chocolate, mint, and cappuccino, along with seasonal strawberry and pumpkin flavors, but I went off-script to make a version that was even more of an ode to the Bay Area with rocky road ice cream, a flavor that was actually invented in Oakland. In the 1920s, ice cream entrepreneur William Dreyer wanted to raise people’s spirits during the Great Depression and decided the best way to do so was with a combination of chocolate ice cream, nuts, and marshmallows.\u003c/p>\n\u003cp>First of all, I’m not going to stop you from doing your own thing. You can find your own oatmeal cookie recipe (or buy them), your own ice cream recipe (or buy it), and your own chocolate shell recipe (or buy it) and call it a day, but this is what \u003cem>I\u003c/em> did. Many recipes veer fancy in order to get as close to an It’s-It as possible, but again: why recreate it when you can re-interpret it? If the Bay Area has taught me anything, it’s that there’s room for all flavors to exist here.\u003c/p>\n\u003cp>[ad fullwidth]\u003c/p>\n\u003cp>You can go up to a cup for each ingredient for the rocky road ice cream, but sometimes the dual textures of the hard almonds and soft marshmallows throws people off. I am not one of those people, obviously.\u003c/p>\n\u003cfigure id=\"attachment_1337463\" class=\"wp-caption alignnone\" style=\"max-width: 800px\">\u003ca href=\"https://ww2.kqed.org/app/uploads/sites/41/2023/08/NoCrumbs_ItsIt_02.png\">\u003cimg loading=\"lazy\" decoding=\"async\" class=\"size-medium wp-image-1337463\" src=\"https://ww2.kqed.org/app/uploads/sites/41/2023/08/NoCrumbs_ItsIt_02-800x450.png\" alt=\"A triptych image with a close up of rocky road ice cream on the left, a homemade It's-It's ice cream sandwiches on the right, and a a cross-section of both the homemade It's-It and real It's-It in the middle\" width=\"800\" height=\"450\" srcset=\"https://cdn.kqed.org/wp-content/uploads/sites/41/2023/08/NoCrumbs_ItsIt_02-800x450.png 800w, https://cdn.kqed.org/wp-content/uploads/sites/41/2023/08/NoCrumbs_ItsIt_02-1020x574.png 1020w, https://cdn.kqed.org/wp-content/uploads/sites/41/2023/08/NoCrumbs_ItsIt_02-160x90.png 160w, https://cdn.kqed.org/wp-content/uploads/sites/41/2023/08/NoCrumbs_ItsIt_02-768x432.png 768w, https://cdn.kqed.org/wp-content/uploads/sites/41/2023/08/NoCrumbs_ItsIt_02-1536x864.png 1536w, https://cdn.kqed.org/wp-content/uploads/sites/41/2023/08/NoCrumbs_ItsIt_02.png 1920w\" sizes=\"(max-width: 800px) 100vw, 800px\">\u003c/a>\u003cfigcaption class=\"wp-caption-text\">Recreating the storied It’s-It ice cream sandwich from scratch requires several stages: making the ice cream, making the oatmeal cookies, and dipping them in chocolate. \u003ccite>(Josh Decolongon)\u003c/cite>\u003c/figcaption>\u003c/figure>\n\u003cp>Ingredients for the oatmeal cookies:\u003c/p>\n\u003cul>\n\u003cli style=\"font-weight: 400;\">\u003cspan style=\"font-weight: 400;\">¾ cup all-purpose flour\u003c/span>\u003c/li>\n\u003cli style=\"font-weight: 400;\">\u003cspan style=\"font-weight: 400;\">½ teaspoon ground cinnamon (preferably Ceylon)\u003c/span>\u003c/li>\n\u003cli style=\"font-weight: 400;\">\u003cspan style=\"font-weight: 400;\">½ teaspoon baking soda\u003c/span>\u003c/li>\n\u003cli style=\"font-weight: 400;\">\u003cspan style=\"font-weight: 400;\">¼ teaspoon baking powder\u003c/span>\u003c/li>\n\u003cli style=\"font-weight: 400;\">\u003cspan style=\"font-weight: 400;\">¼ teaspoon salt\u003c/span>\u003c/li>\n\u003cli style=\"font-weight: 400;\">\u003cspan style=\"font-weight: 400;\">½ cup unsalted butter\u003c/span>\u003c/li>\n\u003cli style=\"font-weight: 400;\">\u003cspan style=\"font-weight: 400;\">¾ cup brown sugar\u003c/span>\u003c/li>\n\u003cli style=\"font-weight: 400;\">\u003cspan style=\"font-weight: 400;\">¼ cup white sugar\u003c/span>\u003c/li>\n\u003cli style=\"font-weight: 400;\">\u003cspan style=\"font-weight: 400;\">1 egg\u003c/span>\u003c/li>\n\u003cli style=\"font-weight: 400;\">\u003cspan style=\"font-weight: 400;\">½ tsp vanilla extract\u003c/span>\u003c/li>\n\u003cli style=\"font-weight: 400;\">\u003cspan style=\"font-weight: 400;\">1 ½ cups quick cook oats (e.g. Quaker Oats Quick 1-Minute Oats)\u003c/span>\u003c/li>\n\u003cli style=\"font-weight: 400;\">\u003cspan style=\"font-weight: 400;\">¼ cup chopped raisins\u003c/span>\u003c/li>\n\u003c/ul>\n\u003col>\n\u003cli style=\"font-weight: 400;\">\u003cspan style=\"font-weight: 400;\">Preheat oven to 350°F.\u003c/span>\u003c/li>\n\u003cli style=\"font-weight: 400;\">\u003cspan style=\"font-weight: 400;\">In a medium bowl, combine the flour, ground cinnamon, baking soda, baking powder, and salt. Combine well – it always takes longer than you think it does!\u003c/span>\u003c/li>\n\u003cli style=\"font-weight: 400;\">\u003cspan style=\"font-weight: 400;\">In a large bowl, cream together the butter, brown sugar, and white sugar for around 5 minutes. Along with the rising agents, creaming this mixture creates a fluffier and softer cookie — just make sure your butter isn’t too warm, because it’ll be harder to create these micro-pockets of air. Add the egg and vanilla, and continue to beat together until combined. With a spatula, gradually add the flour mixture to the creamed mixture.\u003c/span>\u003c/li>\n\u003cli style=\"font-weight: 400;\">\u003cspan style=\"font-weight: 400;\">Combine the oats and raisins, the latter which, again, are definitely there in the original.\u003c/span>\u003c/li>\n\u003cli style=\"font-weight: 400;\">\u003cspan style=\"font-weight: 400;\">Shape into balls around an inch or so in diameter — you should have roughly enough dough for 22 cookies. Bake for around 12 minutes, and then cool them on wire racks.\u003c/span>\u003c/li>\n\u003cli style=\"font-weight: 400;\">\u003cspan style=\"font-weight: 400;\">Optionally, you can flatten the cookies slightly with a flat kitchen utensil (like a flat spatula), but that’s totally up to you.\u003c/span>\u003c/li>\n\u003c/ol>\n\u003cp>Ingredients for the rocky road ice cream:\u003c/p>\n\u003cul>\n\u003cli style=\"font-weight: 400;\">\u003cspan style=\"font-weight: 400;\">1 pint (16oz / ~480mL) heavy cream, cold\u003c/span>\u003c/li>\n\u003cli style=\"font-weight: 400;\">\u003cspan style=\"font-weight: 400;\">1 can (14oz / ~400g) sweetened condensed Milk\u003c/span>\u003c/li>\n\u003cli style=\"font-weight: 400;\">\u003cspan style=\"font-weight: 400;\">½ cup cocoa powder\u003c/span>\u003c/li>\n\u003cli style=\"font-weight: 400;\">\u003cspan style=\"font-weight: 400;\">½ cup (or up to 1 cup) crushed almonds \u003c/span>\u003c/li>\n\u003cli style=\"font-weight: 400;\">\u003cspan style=\"font-weight: 400;\">½ cup (or up to 1 cup) mini marshmallows (or cut up large marshmallows)\u003c/span>\u003c/li>\n\u003c/ul>\n\u003col>\n\u003cli style=\"font-weight: 400;\">\u003cspan style=\"font-weight: 400;\">Whip heavy cream until there are stiff peaks.\u003c/span>\u003c/li>\n\u003cli style=\"font-weight: 400;\">\u003cspan style=\"font-weight: 400;\">Add sweetened condensed milk and cocoa powder. Beat on low speed until the mixture is homogeneous.\u003c/span>\u003c/li>\n\u003cli style=\"font-weight: 400;\">\u003cspan style=\"font-weight: 400;\">Add the crushed almonds (I like putting them in a ziplock bag and mashing them with the handle of my rolling pin) and mini marshmallows to the mixture. Gentle combine with spatula.\u003c/span>\u003c/li>\n\u003cli style=\"font-weight: 400;\">\u003cspan style=\"font-weight: 400;\">Add the mixture to a container and top with more crushed almonds and mini marshmallows, if you’d like.\u003c/span>\u003c/li>\n\u003cli style=\"font-weight: 400;\">\u003cspan style=\"font-weight: 400;\">Cover and freeze overnight.\u003c/span>\u003c/li>\n\u003cli style=\"font-weight: 400;\">\u003cspan style=\"font-weight: 400;\">Lick spatula.\u003c/span>\u003c/li>\n\u003c/ol>\n\u003cp>Ingredients for the chocolate shell:\u003c/p>\n\u003cul>\n\u003cli style=\"font-weight: 400;\">\u003cspan style=\"font-weight: 400;\">14 oz bittersweet chocolate (but you can vary the ratio with semisweet chocolate, which I did)\u003c/span>\u003c/li>\n\u003cli style=\"font-weight: 400;\">\u003cspan style=\"font-weight: 400;\">¼ cup coconut oil\u003c/span>\u003c/li>\n\u003c/ul>\n\u003col>\n\u003cli style=\"font-weight: 400;\">\u003cspan style=\"font-weight: 400;\">Heat up water in a saucepan or pot.\u003c/span>\u003c/li>\n\u003cli style=\"font-weight: 400;\">\u003cspan style=\"font-weight: 400;\">Place both the chocolate and oil into a metal bowl that can fit on top of a saucepan or pot without being able to fall in completely. The water should have contact with most of the bowl.\u003c/span>\u003c/li>\n\u003cli style=\"font-weight: 400;\">\u003cspan style=\"font-weight: 400;\">Stir the mixture occasionally until it is homogeneous.\u003c/span>\u003c/li>\n\u003cli style=\"font-weight: 400;\">\u003cspan style=\"font-weight: 400;\">Let the mixture cool for 20 minutes or so. We want it to be cool enough to coat our homemade It’s-Its without melting the ice cream, but warm enough so that it can cover them easily.\u003c/span>\u003c/li>\n\u003c/ol>\n\u003cp>To assemble:\u003c/p>\n\u003col>\n\u003cli style=\"font-weight: 400;\">\u003cspan style=\"font-weight: 400;\">Now that you have all your ingredients, remove the ice cream from the fridge and let it warm up for 10 minutes or so to soften it up slightly.\u003c/span>\u003c/li>\n\u003cli style=\"font-weight: 400;\">\u003cspan style=\"font-weight: 400;\">Scoop ice cream and press onto the flat side of the oatmeal cookie until your heart’s desire. You want around an inch of thickness of ice cream. Sandwich the ice cream with another cookie.\u003c/span>\u003c/li>\n\u003cli style=\"font-weight: 400;\">\u003cspan style=\"font-weight: 400;\">Using an ice cream spatula, or a spoon, take more ice cream and fill the sides of the ice cream sandwich, smoothing out bumps and filling the empty spaces as you rotate it. When you’re happy with it, immediately transfer them to the freezer for around an hour.\u003c/span>\u003c/li>\n\u003cli style=\"font-weight: 400;\">\u003cspan style=\"font-weight: 400;\">Using tongs, dip and flip your ice cream sandwich into the melted chocolate shell mixture and let it briefly rest on a wire rack. You can scrape excess chocolate off if you’d like a thinner shell.\u003c/span>\u003c/li>\n\u003cli style=\"font-weight: 400;\">\u003cspan style=\"font-weight: 400;\">When the chocolate has hardened and takes on a more matte texture, transfer immediately to the freezer.\u003c/span>\u003c/li>\n\u003c/ol>\n\u003cp>[ad floatright]\u003c/p>\n\u003cp>\u003cem>Josh Decolongon is a certified sommelier and holds the WSET Level 4 Diploma. He is the host and producer of “No Crumbs,” a new digital video series from KQED. Find it on Instagram \u003ca href=\"https://instagram.com/kqedfood\">@KQEDFood\u003c/a>. Follow Josh on Instagram at \u003ca href=\"https://www.instagram.com/sommeligay/\">@sommeligay\u003c/a>.\u003c/em>\u003c/p>\n\n",
"stats": {
"hasVideo": false,
"hasChartOrMap": false,
"hasAudio": false,
"hasPolis": false,
"wordCount": 1177,
"hasGoogleForm": false,
"hasGallery": false,
"hasHearkenModule": false,
"iframeSrcs": [],
"paragraphCount": 11
},
"modified": 1702666153,
"excerpt": null,
"headData": {
"twImgId": "",
"twTitle": "",
"ogTitle": "",
"ogImgId": "",
"twDescription": "",
"description": "It’s-It ice cream sandwiches: they’re easy to eat and easy to love, but are they easy to make? KQED's Josh Decolongon finds out.",
"socialDescription": "It’s-It ice cream sandwiches: they’re easy to eat and easy to love, but are they easy to make? KQED's Josh Decolongon finds out.",
"title": "We Recreated an It's-It Ice Cream Sandwich at Home — With an Oakland Twist. | KQED",
"ogDescription": "",
"schema": {
"@context": "https://schema.org",
"@type": "Article",
"headline": "We Recreated an It's-It Ice Cream Sandwich at Home — With an Oakland Twist.",
"datePublished": "2023-08-02T17:01:08-07:00",
"dateModified": "2023-12-15T10:49:13-08:00",
"image": "https://cdn.kqed.org/wp-content/uploads/2020/02/KQED-OG-Image@1x.png"
}
},
"guestAuthors": [],
"slug": "we-recreated-an-its-it-ice-cream-sandwich-at-home-with-an-oakland-twist",
"status": "publish",
"excludeFromSiteSearch": "Include",
"sticky": false,
"source": "Food",
"articleAge": "0",
"path": "/food/1337457/we-recreated-an-its-it-ice-cream-sandwich-at-home-with-an-oakland-twist",
"audioTrackLength": null,
"parsedContent": [
{
"type": "contentString",
"content": "\u003cdiv class=\"post-body\">\u003cp>\u003c/p>\u003cp>\u003cspan class='utils-parseShortcode-shortcodes-__youtubeShortcode__embedYoutube'>\n \u003cspan class='utils-parseShortcode-shortcodes-__youtubeShortcode__embedYoutubeInside'>\n \u003ciframe\n loading='lazy'\n class='utils-parseShortcode-shortcodes-__youtubeShortcode__youtubePlayer'\n type='text/html'\n src='//www.youtube.com/embed/S4EHUfG3JAo'\n title='//www.youtube.com/embed/S4EHUfG3JAo'\n allowfullscreen='true'\n style='border:0;'>\u003c/iframe>\n \u003c/span>\n \u003c/span>\u003c/p>\u003cp>\u003cp> \u003c/p>\n\u003cp>A list of things that are very San Francisco are never complete without the It’s-It ice cream sandwich. Invented by Playland-at-the-Beach amusement park owner George Whitney in 1928, an It’s-It is a scoop of ice cream sandwiched by two oatmeal cookies and then dipped into chocolate. In my opinion, the key components are the oatmeal cookies (where there are raisins: I’ve checked!), which provide a soft snap that somehow lightens the load of a regular cookie while also giving me the comfort and warmth of my grandma’s oatmeal cookies — perhaps a reminder that San Francisco is never as warm as an American summer promises. But I’m okay with that.\u003c/p>\n\u003cp>Any recreation experiment begs the question: why make your own? We’re spoiled with choice and availability in the Bay, so I’d absolutely be able to run blindfolded in any direction for half an hour before bumping into the storied ice cream treat. But, aside from the fact that I like to give myself a challenge, I simply like to create new flavor combinations. It’s-Its come in vanilla, chocolate, mint, and cappuccino, along with seasonal strawberry and pumpkin flavors, but I went off-script to make a version that was even more of an ode to the Bay Area with rocky road ice cream, a flavor that was actually invented in Oakland. In the 1920s, ice cream entrepreneur William Dreyer wanted to raise people’s spirits during the Great Depression and decided the best way to do so was with a combination of chocolate ice cream, nuts, and marshmallows.\u003c/p>\n\u003cp>First of all, I’m not going to stop you from doing your own thing. You can find your own oatmeal cookie recipe (or buy them), your own ice cream recipe (or buy it), and your own chocolate shell recipe (or buy it) and call it a day, but this is what \u003cem>I\u003c/em> did. Many recipes veer fancy in order to get as close to an It’s-It as possible, but again: why recreate it when you can re-interpret it? If the Bay Area has taught me anything, it’s that there’s room for all flavors to exist here.\u003c/p>\n\u003cp>\u003c/p>\u003c/div>",
"attributes": {
"named": {},
"numeric": []
}
},
{
"type": "component",
"content": "",
"name": "ad",
"attributes": {
"named": {
"label": "fullwidth"
},
"numeric": [
"fullwidth"
]
}
},
{
"type": "contentString",
"content": "\u003cdiv class=\"post-body\">\u003cp>\u003c/p>\n\u003cp>You can go up to a cup for each ingredient for the rocky road ice cream, but sometimes the dual textures of the hard almonds and soft marshmallows throws people off. I am not one of those people, obviously.\u003c/p>\n\u003cfigure id=\"attachment_1337463\" class=\"wp-caption alignnone\" style=\"max-width: 800px\">\u003ca href=\"https://ww2.kqed.org/app/uploads/sites/41/2023/08/NoCrumbs_ItsIt_02.png\">\u003cimg loading=\"lazy\" decoding=\"async\" class=\"size-medium wp-image-1337463\" src=\"https://ww2.kqed.org/app/uploads/sites/41/2023/08/NoCrumbs_ItsIt_02-800x450.png\" alt=\"A triptych image with a close up of rocky road ice cream on the left, a homemade It's-It's ice cream sandwiches on the right, and a a cross-section of both the homemade It's-It and real It's-It in the middle\" width=\"800\" height=\"450\" srcset=\"https://cdn.kqed.org/wp-content/uploads/sites/41/2023/08/NoCrumbs_ItsIt_02-800x450.png 800w, https://cdn.kqed.org/wp-content/uploads/sites/41/2023/08/NoCrumbs_ItsIt_02-1020x574.png 1020w, https://cdn.kqed.org/wp-content/uploads/sites/41/2023/08/NoCrumbs_ItsIt_02-160x90.png 160w, https://cdn.kqed.org/wp-content/uploads/sites/41/2023/08/NoCrumbs_ItsIt_02-768x432.png 768w, https://cdn.kqed.org/wp-content/uploads/sites/41/2023/08/NoCrumbs_ItsIt_02-1536x864.png 1536w, https://cdn.kqed.org/wp-content/uploads/sites/41/2023/08/NoCrumbs_ItsIt_02.png 1920w\" sizes=\"(max-width: 800px) 100vw, 800px\">\u003c/a>\u003cfigcaption class=\"wp-caption-text\">Recreating the storied It’s-It ice cream sandwich from scratch requires several stages: making the ice cream, making the oatmeal cookies, and dipping them in chocolate. \u003ccite>(Josh Decolongon)\u003c/cite>\u003c/figcaption>\u003c/figure>\n\u003cp>Ingredients for the oatmeal cookies:\u003c/p>\n\u003cul>\n\u003cli style=\"font-weight: 400;\">\u003cspan style=\"font-weight: 400;\">¾ cup all-purpose flour\u003c/span>\u003c/li>\n\u003cli style=\"font-weight: 400;\">\u003cspan style=\"font-weight: 400;\">½ teaspoon ground cinnamon (preferably Ceylon)\u003c/span>\u003c/li>\n\u003cli style=\"font-weight: 400;\">\u003cspan style=\"font-weight: 400;\">½ teaspoon baking soda\u003c/span>\u003c/li>\n\u003cli style=\"font-weight: 400;\">\u003cspan style=\"font-weight: 400;\">¼ teaspoon baking powder\u003c/span>\u003c/li>\n\u003cli style=\"font-weight: 400;\">\u003cspan style=\"font-weight: 400;\">¼ teaspoon salt\u003c/span>\u003c/li>\n\u003cli style=\"font-weight: 400;\">\u003cspan style=\"font-weight: 400;\">½ cup unsalted butter\u003c/span>\u003c/li>\n\u003cli style=\"font-weight: 400;\">\u003cspan style=\"font-weight: 400;\">¾ cup brown sugar\u003c/span>\u003c/li>\n\u003cli style=\"font-weight: 400;\">\u003cspan style=\"font-weight: 400;\">¼ cup white sugar\u003c/span>\u003c/li>\n\u003cli style=\"font-weight: 400;\">\u003cspan style=\"font-weight: 400;\">1 egg\u003c/span>\u003c/li>\n\u003cli style=\"font-weight: 400;\">\u003cspan style=\"font-weight: 400;\">½ tsp vanilla extract\u003c/span>\u003c/li>\n\u003cli style=\"font-weight: 400;\">\u003cspan style=\"font-weight: 400;\">1 ½ cups quick cook oats (e.g. Quaker Oats Quick 1-Minute Oats)\u003c/span>\u003c/li>\n\u003cli style=\"font-weight: 400;\">\u003cspan style=\"font-weight: 400;\">¼ cup chopped raisins\u003c/span>\u003c/li>\n\u003c/ul>\n\u003col>\n\u003cli style=\"font-weight: 400;\">\u003cspan style=\"font-weight: 400;\">Preheat oven to 350°F.\u003c/span>\u003c/li>\n\u003cli style=\"font-weight: 400;\">\u003cspan style=\"font-weight: 400;\">In a medium bowl, combine the flour, ground cinnamon, baking soda, baking powder, and salt. Combine well – it always takes longer than you think it does!\u003c/span>\u003c/li>\n\u003cli style=\"font-weight: 400;\">\u003cspan style=\"font-weight: 400;\">In a large bowl, cream together the butter, brown sugar, and white sugar for around 5 minutes. Along with the rising agents, creaming this mixture creates a fluffier and softer cookie — just make sure your butter isn’t too warm, because it’ll be harder to create these micro-pockets of air. Add the egg and vanilla, and continue to beat together until combined. With a spatula, gradually add the flour mixture to the creamed mixture.\u003c/span>\u003c/li>\n\u003cli style=\"font-weight: 400;\">\u003cspan style=\"font-weight: 400;\">Combine the oats and raisins, the latter which, again, are definitely there in the original.\u003c/span>\u003c/li>\n\u003cli style=\"font-weight: 400;\">\u003cspan style=\"font-weight: 400;\">Shape into balls around an inch or so in diameter — you should have roughly enough dough for 22 cookies. Bake for around 12 minutes, and then cool them on wire racks.\u003c/span>\u003c/li>\n\u003cli style=\"font-weight: 400;\">\u003cspan style=\"font-weight: 400;\">Optionally, you can flatten the cookies slightly with a flat kitchen utensil (like a flat spatula), but that’s totally up to you.\u003c/span>\u003c/li>\n\u003c/ol>\n\u003cp>Ingredients for the rocky road ice cream:\u003c/p>\n\u003cul>\n\u003cli style=\"font-weight: 400;\">\u003cspan style=\"font-weight: 400;\">1 pint (16oz / ~480mL) heavy cream, cold\u003c/span>\u003c/li>\n\u003cli style=\"font-weight: 400;\">\u003cspan style=\"font-weight: 400;\">1 can (14oz / ~400g) sweetened condensed Milk\u003c/span>\u003c/li>\n\u003cli style=\"font-weight: 400;\">\u003cspan style=\"font-weight: 400;\">½ cup cocoa powder\u003c/span>\u003c/li>\n\u003cli style=\"font-weight: 400;\">\u003cspan style=\"font-weight: 400;\">½ cup (or up to 1 cup) crushed almonds \u003c/span>\u003c/li>\n\u003cli style=\"font-weight: 400;\">\u003cspan style=\"font-weight: 400;\">½ cup (or up to 1 cup) mini marshmallows (or cut up large marshmallows)\u003c/span>\u003c/li>\n\u003c/ul>\n\u003col>\n\u003cli style=\"font-weight: 400;\">\u003cspan style=\"font-weight: 400;\">Whip heavy cream until there are stiff peaks.\u003c/span>\u003c/li>\n\u003cli style=\"font-weight: 400;\">\u003cspan style=\"font-weight: 400;\">Add sweetened condensed milk and cocoa powder. Beat on low speed until the mixture is homogeneous.\u003c/span>\u003c/li>\n\u003cli style=\"font-weight: 400;\">\u003cspan style=\"font-weight: 400;\">Add the crushed almonds (I like putting them in a ziplock bag and mashing them with the handle of my rolling pin) and mini marshmallows to the mixture. Gentle combine with spatula.\u003c/span>\u003c/li>\n\u003cli style=\"font-weight: 400;\">\u003cspan style=\"font-weight: 400;\">Add the mixture to a container and top with more crushed almonds and mini marshmallows, if you’d like.\u003c/span>\u003c/li>\n\u003cli style=\"font-weight: 400;\">\u003cspan style=\"font-weight: 400;\">Cover and freeze overnight.\u003c/span>\u003c/li>\n\u003cli style=\"font-weight: 400;\">\u003cspan style=\"font-weight: 400;\">Lick spatula.\u003c/span>\u003c/li>\n\u003c/ol>\n\u003cp>Ingredients for the chocolate shell:\u003c/p>\n\u003cul>\n\u003cli style=\"font-weight: 400;\">\u003cspan style=\"font-weight: 400;\">14 oz bittersweet chocolate (but you can vary the ratio with semisweet chocolate, which I did)\u003c/span>\u003c/li>\n\u003cli style=\"font-weight: 400;\">\u003cspan style=\"font-weight: 400;\">¼ cup coconut oil\u003c/span>\u003c/li>\n\u003c/ul>\n\u003col>\n\u003cli style=\"font-weight: 400;\">\u003cspan style=\"font-weight: 400;\">Heat up water in a saucepan or pot.\u003c/span>\u003c/li>\n\u003cli style=\"font-weight: 400;\">\u003cspan style=\"font-weight: 400;\">Place both the chocolate and oil into a metal bowl that can fit on top of a saucepan or pot without being able to fall in completely. The water should have contact with most of the bowl.\u003c/span>\u003c/li>\n\u003cli style=\"font-weight: 400;\">\u003cspan style=\"font-weight: 400;\">Stir the mixture occasionally until it is homogeneous.\u003c/span>\u003c/li>\n\u003cli style=\"font-weight: 400;\">\u003cspan style=\"font-weight: 400;\">Let the mixture cool for 20 minutes or so. We want it to be cool enough to coat our homemade It’s-Its without melting the ice cream, but warm enough so that it can cover them easily.\u003c/span>\u003c/li>\n\u003c/ol>\n\u003cp>To assemble:\u003c/p>\n\u003col>\n\u003cli style=\"font-weight: 400;\">\u003cspan style=\"font-weight: 400;\">Now that you have all your ingredients, remove the ice cream from the fridge and let it warm up for 10 minutes or so to soften it up slightly.\u003c/span>\u003c/li>\n\u003cli style=\"font-weight: 400;\">\u003cspan style=\"font-weight: 400;\">Scoop ice cream and press onto the flat side of the oatmeal cookie until your heart’s desire. You want around an inch of thickness of ice cream. Sandwich the ice cream with another cookie.\u003c/span>\u003c/li>\n\u003cli style=\"font-weight: 400;\">\u003cspan style=\"font-weight: 400;\">Using an ice cream spatula, or a spoon, take more ice cream and fill the sides of the ice cream sandwich, smoothing out bumps and filling the empty spaces as you rotate it. When you’re happy with it, immediately transfer them to the freezer for around an hour.\u003c/span>\u003c/li>\n\u003cli style=\"font-weight: 400;\">\u003cspan style=\"font-weight: 400;\">Using tongs, dip and flip your ice cream sandwich into the melted chocolate shell mixture and let it briefly rest on a wire rack. You can scrape excess chocolate off if you’d like a thinner shell.\u003c/span>\u003c/li>\n\u003cli style=\"font-weight: 400;\">\u003cspan style=\"font-weight: 400;\">When the chocolate has hardened and takes on a more matte texture, transfer immediately to the freezer.\u003c/span>\u003c/li>\n\u003c/ol>\n\u003cp>\u003c/p>\u003c/div>",
"attributes": {
"named": {},
"numeric": []
}
},
{
"type": "component",
"content": "",
"name": "ad",
"attributes": {
"named": {
"label": "floatright"
},
"numeric": [
"floatright"
]
}
},
{
"type": "contentString",
"content": "\u003cdiv class=\"post-body\">\u003cp>\u003c/p>\n\u003cp>\u003cem>Josh Decolongon is a certified sommelier and holds the WSET Level 4 Diploma. He is the host and producer of “No Crumbs,” a new digital video series from KQED. Find it on Instagram \u003ca href=\"https://instagram.com/kqedfood\">@KQEDFood\u003c/a>. Follow Josh on Instagram at \u003ca href=\"https://www.instagram.com/sommeligay/\">@sommeligay\u003c/a>.\u003c/em>\u003c/p>\n\n\u003c/div>\u003c/p>",
"attributes": {
"named": {},
"numeric": []
}
}
],
"link": "/food/1337457/we-recreated-an-its-it-ice-cream-sandwich-at-home-with-an-oakland-twist",
"authors": [
"11828"
],
"categories": [
"food_1"
],
"tags": [
"food_176",
"food_265",
"food_264",
"food_138",
"food_230"
],
"featImg": "food_1337459",
"label": "source_food_1337457"
},
"food_1337402": {
"type": "posts",
"id": "food_1337402",
"meta": {
"index": "posts_1716263798",
"site": "food",
"id": "1337402",
"score": null,
"sort": [
1680887817000
]
},
"parent": 0,
"labelTerm": {
"site": "food",
"term": 162
},
"blocks": [],
"publishDate": 1680887817,
"format": "video",
"title": "Jacques Pépin's Tips for Perfectly Cooked Eggs",
"headTitle": "Jacques Pépin’s Tips for Perfectly Cooked Eggs | KQED",
"content": "\u003cp>We thought hard boiling eggs was simple until we watched Jacques Pépin’s method and realized we actually had a lot to learn. In this video, you’ll discover clever techniques like how to get rid of the green tinge around a hard boiled yolk, two different ways to make poached eggs, how to cook a one-hour egg, how to make soft cooked eggs, the best way to peel a hard boiled egg, how to tell if an egg is hard boiled or raw, and more. These are cooking techniques you will keep in your bag of tricks every time you step into the kitchen.\u003c/p>\n\u003cp>\u003cstrong>\u003cspan class=\"style-scope yt-formatted-string\" dir=\"auto\">About Jacques Pépin Cooking At Home:\u003c/span>\u003c/strong>\u003c/p>\n\u003cp>\u003cspan class=\"style-scope yt-formatted-string\" dir=\"auto\">\u003cem>Jacques Pépin\u003c/em> \u003cem>Cooking At Home\u003c/em> features short recipe videos that transform readily-available ingredients into exciting new dishes, perfect for newly-anointed home cooks and seasoned chefs alike. Presented by the \u003ca href=\"https://jp.foundation/\">Jacques Pépin Foundation\u003c/a>, an organization dedicated to enriching lives and strengthening communities through the power of culinary education.\u003c/span>\u003c/p>\n\u003cp>[ad fullwidth]\u003c/p>\u003cp>\u003c/p>\n",
"stats": {
"hasVideo": false,
"hasChartOrMap": false,
"hasAudio": false,
"hasPolis": false,
"wordCount": 174,
"hasGoogleForm": false,
"hasGallery": false,
"hasHearkenModule": false,
"iframeSrcs": [],
"paragraphCount": 5
},
"modified": 1696361381,
"excerpt": null,
"headData": {
"twImgId": "",
"twTitle": "",
"ogTitle": "",
"ogImgId": "",
"twDescription": "",
"description": "We thought we knew how to hard boil eggs until we witnessed Jacques Pépin's techniques and realized we actually had a lot to learn.",
"socialDescription": "We thought we knew how to hard boil eggs until we witnessed Jacques Pépin's techniques and realized we actually had a lot to learn.",
"title": "Jacques Pépin's Tips for Perfectly Cooked Eggs | KQED",
"ogDescription": "",
"schema": {
"@context": "https://schema.org",
"@type": "Article",
"headline": "Jacques Pépin's Tips for Perfectly Cooked Eggs",
"datePublished": "2023-04-07T10:16:57-07:00",
"dateModified": "2023-10-03T12:29:41-07:00",
"image": "https://cdn.kqed.org/wp-content/uploads/2020/02/KQED-OG-Image@1x.png"
}
},
"guestAuthors": [],
"slug": "jacques-pepins-tips-for-perfectly-cooked-eggs",
"status": "publish",
"videoEmbed": "https://youtu.be/As6AY_ChJuI",
"excludeFromSiteSearch": "Include",
"articleAge": "0",
"path": "/food/1337402/jacques-pepins-tips-for-perfectly-cooked-eggs",
"audioTrackLength": null,
"parsedContent": [
{
"type": "contentString",
"content": "\u003cdiv class=\"post-body\">\u003cp>\u003cp>We thought hard boiling eggs was simple until we watched Jacques Pépin’s method and realized we actually had a lot to learn. In this video, you’ll discover clever techniques like how to get rid of the green tinge around a hard boiled yolk, two different ways to make poached eggs, how to cook a one-hour egg, how to make soft cooked eggs, the best way to peel a hard boiled egg, how to tell if an egg is hard boiled or raw, and more. These are cooking techniques you will keep in your bag of tricks every time you step into the kitchen.\u003c/p>\n\u003cp>\u003cstrong>\u003cspan class=\"style-scope yt-formatted-string\" dir=\"auto\">About Jacques Pépin Cooking At Home:\u003c/span>\u003c/strong>\u003c/p>\n\u003cp>\u003cspan class=\"style-scope yt-formatted-string\" dir=\"auto\">\u003cem>Jacques Pépin\u003c/em> \u003cem>Cooking At Home\u003c/em> features short recipe videos that transform readily-available ingredients into exciting new dishes, perfect for newly-anointed home cooks and seasoned chefs alike. Presented by the \u003ca href=\"https://jp.foundation/\">Jacques Pépin Foundation\u003c/a>, an organization dedicated to enriching lives and strengthening communities through the power of culinary education.\u003c/span>\u003c/p>\n\u003cp>\u003c/p>\u003c/div>",
"attributes": {
"named": {},
"numeric": []
}
},
{
"type": "component",
"content": "",
"name": "ad",
"attributes": {
"named": {
"label": "fullwidth"
},
"numeric": [
"fullwidth"
]
}
},
{
"type": "contentString",
"content": "\u003cdiv class=\"post-body\">\u003cp>\u003c/p>\u003cp>\u003c/p>\n\u003c/div>\u003c/p>",
"attributes": {
"named": {},
"numeric": []
}
}
],
"link": "/food/1337402/jacques-pepins-tips-for-perfectly-cooked-eggs",
"authors": [
"5083"
],
"series": [
"food_162"
],
"categories": [
"food_165"
],
"tags": [
"food_234",
"food_233",
"food_158",
"food_166",
"food_138"
],
"featImg": "food_1337404",
"label": "food_162"
},
"food_1337385": {
"type": "posts",
"id": "food_1337385",
"meta": {
"index": "posts_1716263798",
"site": "food",
"id": "1337385",
"score": null,
"sort": [
1666109420000
]
},
"parent": 0,
"labelTerm": {},
"blocks": [],
"publishDate": 1666109420,
"format": "standard",
"title": "Spiced Apple Upside Down Cake is a Gorgeous and Delicious Holiday Recipe",
"headTitle": "Spiced Apple Upside Down Cake is a Gorgeous and Delicious Holiday Recipe | KQED",
"content": "\u003cp>Move over, pineapple, apples are taking over. Stefani Renée’s spiced apple upside down cake is perfectly sweet and moist. Best of all, this cake pops out of the pan fully decorated. This comforting recipe is sure to become a new Fall baking tradition.\u003c/p>\n\u003cp>[youtube https://www.youtube.com/watch?v=yd8XLT1xA3I]\u003cbr>\n\u003cstrong>Spiced Apple Upside Down Cake Recipe\u003c/strong>\u003c/p>\n\u003cp>Prep Time: 25 Minutes\u003cbr>\nCook Time: 45 Minutes\u003cbr>\nTotal Time: 1 hour, 20 Minutes\u003cbr>\nServings: 6-8\u003c/p>\n\u003cp>\u003cstrong>Ingredients:\u003c/strong>\u003c/p>\n\u003cp>\u003cstrong>Topping:\u003c/strong>\u003c/p>\n\u003cp>[ad fullwidth]\u003c/p>\n\u003cp>5 tablespoons unsalted butter\u003cbr>\n1 cup packed brown sugar, firmly packed\u003cbr>\n½ teaspoon cinnamon\u003cbr>\n½ teaspoon vanilla\u003cbr>\n2 Apples (Honeycrisp, Braeburn or Granny Smith) sliced thin\u003c/p>\n\u003cp>\u003cstrong>Cake:\u003c/strong>\u003cbr>\n1 ½ cups flour\u003cbr>\n1 ½ teaspoons baking powder\u003cbr>\n¼ teaspoon of salt\u003cbr>\n1 teaspoon cinnamon\u003cbr>\n½ teaspoon nutmeg\u003cbr>\n¼ teaspoon ginger\u003cbr>\n1 stick unsalted butter, room temperature\u003cbr>\n½ cup granulated sugar\u003cbr>\n½ cup brown sugar\u003cbr>\n1 teaspoon vanilla extract\u003cbr>\n2 eggs, room temperature\u003cbr>\n⅓ cup apple butter\u003cbr>\n½ cup half and half\u003c/p>\n\u003cp>\u003cstrong>Method:\u003c/strong>\u003cbr>\n1. Preheat the oven to 350°F. You need a 10-inch cast-iron skillet or 9-inch cake or pie pan. If using a cake or pie pan, butter and line the bottom of the pan with a round of parchment paper.\u003c/p>\n\u003cp>2. In a small pot or cast iron skillet (if using), melt 5 tablespoons butter, sugar and cinnamon. Stir until sugar is dissolved. Spread into pan or skillet. Arrange apples over the brown sugar mixture.\u003c/p>\n\u003cp>3. In a medium bowl, whisk together flour, baking powder, cinnamon, nutmeg, ginger and salt. In a large bowl and using a hand mixer, cream the butter on medium speed, about 2 minutes. Add both sugars and continue to mix until butter and sugars are light and fluffy. Add eggs one until just combined. Add vanilla, apple butter, and mix until combined.\u003c/p>\n\u003cp>4. Alternate folding in half dry ingredients and half and half. End with dry ingredients. Do not over mix. It will only take a few turns to combine.\u003c/p>\n\u003cp>5. Spoon the batter over the apples. Bake for 35-45 minutes or until a toothpick inserted in the center comes out clean. Cool about 10 minutes before inverting onto a serving plate. Serve warm or at room temperature.\u003c/p>\n\u003cp>\u003cstrong>About Stefani Renée:\u003c/strong>\u003c/p>\n\u003cp>Oakland writer, photographer, and recipe developer Stefani Renée inherited her love of cooking and storytelling from her Granny Octavia. While her grandmother’s side of the family hails from the South, Stefani Renée grew up in the Bay Area. You can taste this melding of Southern flavors with California flair in her new video recipe series \u003ci>Smackin’ Kitchen,\u003c/i> streaming this fall on KQED Food’s YouTube and social channels.\u003c/p>\n\u003cp>\u003c/p>\n\u003cp>When Stefani Renée is not developing or photographing recipes, she’s interviewing tastemakers for her blog and podcast \u003ca href=\"https://savorandsage.com/\">\u003ci>Savor & Sage\u003c/i>\u003c/a>. Stefani is passionate about amplifying the work and expertise of BIPOC people in the food space and furthers this mission as a founding member of the Black food blogger hub\u003ca href=\"https://eattheculture.com/\"> Eat the Culture\u003c/a> and as an advisory board member of\u003ca href=\"https://foodculture.org/\"> Food Culture Collective\u003c/a>.\u003c/p>\n\n",
"stats": {
"hasVideo": true,
"hasChartOrMap": false,
"hasAudio": false,
"hasPolis": false,
"wordCount": 526,
"hasGoogleForm": false,
"hasGallery": false,
"hasHearkenModule": false,
"iframeSrcs": [],
"paragraphCount": 17
},
"modified": 1696358342,
"excerpt": null,
"headData": {
"twImgId": "",
"twTitle": "",
"ogTitle": "",
"ogImgId": "",
"twDescription": "",
"description": "Stefani Renée's spiced apple upside down cake is perfectly sweet and moist. Best of all, this cake pops out of the pan fully decorated.",
"socialDescription": "Stefani Renée's spiced apple upside down cake is perfectly sweet and moist. Best of all, this cake pops out of the pan fully decorated.",
"title": "Spiced Apple Upside Down Cake is a Gorgeous and Delicious Holiday Recipe | KQED",
"ogDescription": "",
"schema": {
"@context": "https://schema.org",
"@type": "Article",
"headline": "Spiced Apple Upside Down Cake is a Gorgeous and Delicious Holiday Recipe",
"datePublished": "2022-10-18T09:10:20-07:00",
"dateModified": "2023-10-03T11:39:02-07:00",
"image": "https://cdn.kqed.org/wp-content/uploads/2020/02/KQED-OG-Image@1x.png"
}
},
"guestAuthors": [],
"slug": "spiced-apple-upside-down-cake-is-a-gorgeous-and-delicious-holiday-recipe",
"status": "publish",
"sourceUrl": "/food/",
"excludeFromSiteSearch": "Include",
"subhead": "Add Stefani Renee's homey spiced cake to your Fall baking agenda.",
"source": "Food",
"articleAge": "0",
"path": "/food/1337385/spiced-apple-upside-down-cake-is-a-gorgeous-and-delicious-holiday-recipe",
"audioTrackLength": null,
"parsedContent": [
{
"type": "contentString",
"content": "\u003cdiv class=\"post-body\">\u003cp>\u003cp>Move over, pineapple, apples are taking over. Stefani Renée’s spiced apple upside down cake is perfectly sweet and moist. Best of all, this cake pops out of the pan fully decorated. This comforting recipe is sure to become a new Fall baking tradition.\u003c/p>\n\u003cp>\u003c/p>\u003cp>\u003cspan class='utils-parseShortcode-shortcodes-__youtubeShortcode__embedYoutube'>\n \u003cspan class='utils-parseShortcode-shortcodes-__youtubeShortcode__embedYoutubeInside'>\n \u003ciframe\n loading='lazy'\n class='utils-parseShortcode-shortcodes-__youtubeShortcode__youtubePlayer'\n type='text/html'\n src='//www.youtube.com/embed/yd8XLT1xA3I'\n title='//www.youtube.com/embed/yd8XLT1xA3I'\n allowfullscreen='true'\n style='border:0;'>\u003c/iframe>\n \u003c/span>\n \u003c/span>\u003c/p>\u003cp>\u003cbr>\n\u003cstrong>Spiced Apple Upside Down Cake Recipe\u003c/strong>\u003c/p>\n\u003cp>Prep Time: 25 Minutes\u003cbr>\nCook Time: 45 Minutes\u003cbr>\nTotal Time: 1 hour, 20 Minutes\u003cbr>\nServings: 6-8\u003c/p>\n\u003cp>\u003cstrong>Ingredients:\u003c/strong>\u003c/p>\n\u003cp>\u003cstrong>Topping:\u003c/strong>\u003c/p>\n\u003cp>\u003c/p>\u003c/div>",
"attributes": {
"named": {},
"numeric": []
}
},
{
"type": "component",
"content": "",
"name": "ad",
"attributes": {
"named": {
"label": "fullwidth"
},
"numeric": [
"fullwidth"
]
}
},
{
"type": "contentString",
"content": "\u003cdiv class=\"post-body\">\u003cp>\u003c/p>\n\u003cp>5 tablespoons unsalted butter\u003cbr>\n1 cup packed brown sugar, firmly packed\u003cbr>\n½ teaspoon cinnamon\u003cbr>\n½ teaspoon vanilla\u003cbr>\n2 Apples (Honeycrisp, Braeburn or Granny Smith) sliced thin\u003c/p>\n\u003cp>\u003cstrong>Cake:\u003c/strong>\u003cbr>\n1 ½ cups flour\u003cbr>\n1 ½ teaspoons baking powder\u003cbr>\n¼ teaspoon of salt\u003cbr>\n1 teaspoon cinnamon\u003cbr>\n½ teaspoon nutmeg\u003cbr>\n¼ teaspoon ginger\u003cbr>\n1 stick unsalted butter, room temperature\u003cbr>\n½ cup granulated sugar\u003cbr>\n½ cup brown sugar\u003cbr>\n1 teaspoon vanilla extract\u003cbr>\n2 eggs, room temperature\u003cbr>\n⅓ cup apple butter\u003cbr>\n½ cup half and half\u003c/p>\n\u003cp>\u003cstrong>Method:\u003c/strong>\u003cbr>\n1. Preheat the oven to 350°F. You need a 10-inch cast-iron skillet or 9-inch cake or pie pan. If using a cake or pie pan, butter and line the bottom of the pan with a round of parchment paper.\u003c/p>\n\u003cp>2. In a small pot or cast iron skillet (if using), melt 5 tablespoons butter, sugar and cinnamon. Stir until sugar is dissolved. Spread into pan or skillet. Arrange apples over the brown sugar mixture.\u003c/p>\n\u003cp>3. In a medium bowl, whisk together flour, baking powder, cinnamon, nutmeg, ginger and salt. In a large bowl and using a hand mixer, cream the butter on medium speed, about 2 minutes. Add both sugars and continue to mix until butter and sugars are light and fluffy. Add eggs one until just combined. Add vanilla, apple butter, and mix until combined.\u003c/p>\n\u003cp>4. Alternate folding in half dry ingredients and half and half. End with dry ingredients. Do not over mix. It will only take a few turns to combine.\u003c/p>\n\u003cp>5. Spoon the batter over the apples. Bake for 35-45 minutes or until a toothpick inserted in the center comes out clean. Cool about 10 minutes before inverting onto a serving plate. Serve warm or at room temperature.\u003c/p>\n\u003cp>\u003cstrong>About Stefani Renée:\u003c/strong>\u003c/p>\n\u003cp>Oakland writer, photographer, and recipe developer Stefani Renée inherited her love of cooking and storytelling from her Granny Octavia. While her grandmother’s side of the family hails from the South, Stefani Renée grew up in the Bay Area. You can taste this melding of Southern flavors with California flair in her new video recipe series \u003ci>Smackin’ Kitchen,\u003c/i> streaming this fall on KQED Food’s YouTube and social channels.\u003c/p>\n\u003cp>\u003c/p>\n\u003cp>When Stefani Renée is not developing or photographing recipes, she’s interviewing tastemakers for her blog and podcast \u003ca href=\"https://savorandsage.com/\">\u003ci>Savor & Sage\u003c/i>\u003c/a>. Stefani is passionate about amplifying the work and expertise of BIPOC people in the food space and furthers this mission as a founding member of the Black food blogger hub\u003ca href=\"https://eattheculture.com/\"> Eat the Culture\u003c/a> and as an advisory board member of\u003ca href=\"https://foodculture.org/\"> Food Culture Collective\u003c/a>.\u003c/p>\n\n\u003c/div>\u003c/p>",
"attributes": {
"named": {},
"numeric": []
}
}
],
"link": "/food/1337385/spiced-apple-upside-down-cake-is-a-gorgeous-and-delicious-holiday-recipe",
"authors": [
"5083"
],
"categories": [
"food_1"
],
"tags": [
"food_213",
"food_214",
"food_212",
"food_138",
"food_215",
"food_202"
],
"featImg": "food_1337388",
"label": "source_food_1337385"
},
"food_1337370": {
"type": "posts",
"id": "food_1337370",
"meta": {
"index": "posts_1716263798",
"site": "food",
"id": "1337370",
"score": null,
"sort": [
1665504221000
]
},
"parent": 0,
"labelTerm": {},
"blocks": [],
"publishDate": 1665504221,
"format": "standard",
"title": "This Sweet Potato Galette with Hot Honey is a Cozy Fall Treat",
"headTitle": "This Sweet Potato Galette with Hot Honey is a Cozy Fall Treat | KQED",
"content": "\u003cp>Now that temperatures are getting cooler, add Stefani Renée’s savory tart to your Fall vibes checklist. Hearty seasonal vegetables like collard greens and sweet potatoes are mixed with herbed ricotta and then wrapped in a golden brown crust and drizzled with hot honey to make this versatile pastry. Serve it for breakfast, as a holiday side dish, or even a light dinner. Bundle up in your favorite sweater, grab a mug of tea, and get cozy with this satisfying dish.\u003c/p>\n\u003cp>[youtube https://www.youtube.com/watch?v=CgMFfL1n-y4&w=560&h=315]\u003c/p>\n\u003cp>\u003cstrong>Sweet Potato and Collard Fall Galette\u003c/strong>\u003c/p>\n\u003cp>Prep Time: 20 Minutes\u003cbr>\nCook Time: 40 Minutes\u003cbr>\nTotal Time: 60 Minutes\u003cbr>\nServings: 4-6\u003c/p>\n\u003cp>\u003cstrong>Ingredients:\u003c/strong>\u003c/p>\n\u003cp>[ad fullwidth]\u003c/p>\n\u003cp>\u003cstrong>Galette\u003c/strong>\u003cbr>\n3-4 slices of bacon, chopped\u003cbr>\n1 bunch collard greens, stemmed, washed and cut into 1 inch ribbons\u003cbr>\n1 small sweet potato shaved into ribbons,\u003cbr>\n1 teaspoon salt plus more to taste\u003cbr>\n8 ounces ricotta, whole fat\u003cbr>\n2 teaspoons fresh thyme, chopped and divided\u003cbr>\n1 teaspoon fresh rosemary, chopped and divided\u003cbr>\n1 teaspoon lemon zest\u003cbr>\n1 shallot, diced\u003cbr>\n1 store bought pie crust (follow package instructions for thawing)\u003cbr>\nPepper to taste to taste\u003c/p>\n\u003cp>\u003cstrong>Hot Honey\u003c/strong>\u003cbr>\n3 tablespoons honey\u003cbr>\n3 tablespoons salted butter\u003cbr>\n1 teaspoon apple cider vinegar\u003cbr>\n1 teaspoon red pepper flake\u003cbr>\n½ teaspoon cayenne pepper\u003cbr>\n½ teaspoon paprika\u003c/p>\n\u003cp>\u003c/p>\n\u003cp>\u003cstrong>Method:\u003c/strong>\u003c/p>\n\u003col>\n\u003cli>Preheat oven to 400 degrees Fahrenheit\u003c/li>\n\u003cli>In a skillet, fry bacon until just before it’s completely cooked through. Drain on a paper towel, set to the side, and reserve the fat. In the same skillet, add 1 tablespoon of the bacon fat and saute the shallots until soft and translucent. Set to the side.\u003c/li>\n\u003cli>In a large bowl, add the collard greens, 1 tablespoon of the reserved bacon fat and massage for 1-2 minutes. Add the sweet potatoes, 1 tablespoon of bacon fat, shallots, ½ teaspoon each of the thyme and rosemary, and sprinkle with a pinch of salt and black pepper. Stir to combine and set to the side.\u003c/li>\n\u003cli>In a small bowl, combine the ricotta, lemon zest, and remaining thyme and rosemary. Stir and add salt to taste.\u003c/li>\n\u003cli>Roll out the pie dough on a lightly floured surface until it’s a 12 inches round. It doesn’t have to be perfect. Place the dough on a cookie sheet lined with parchment paper. Spread the ricotta mixture into the center of the dough, leaving a 1½” border. Add the collard green mixture. Bring edges of dough up and over the filling, overlapping as needed. Brush the dough edges with egg wash and sprinkle with cracked black pepper.\u003c/li>\n\u003cli>Place the galette in the oven and bake for 35-40 minutes or until the crust is golden brown.\u003c/li>\n\u003cli>While the galette is baking, combine all ingredients for the hot honey In a small pot and warm over medium-low heat until butter is melted.\u003c/li>\n\u003cli>Serve galette warm drizzled with the hot honey. Enjoy!\u003c/li>\n\u003c/ol>\n\u003carticle class=\"routes-Site-routes-Post-components-Post-components-PostMinisite-___PostMinisite__mpost\">\n\u003cdiv class=\"post-body\">\n\u003cp>\u003cstrong>About Stefani Renée:\u003c/strong>\u003c/p>\n\u003cp>Oakland writer, photographer, and recipe developer Stefani Renée inherited her love of cooking and storytelling from her Granny Octavia. While her grandmother’s side of the family hails from the South, Stefani Renée grew up in the Bay Area. You can taste this melding of Southern flavors with California flair in her new video recipe series \u003ci>Smackin’ Kitchen,\u003c/i> streaming this fall on KQED Food’s YouTube and social channels.\u003c/p>\n\u003cp>When Stefani Renée is not developing or photographing recipes, she’s interviewing tastemakers for her blog and podcast \u003ca href=\"https://savorandsage.com/\">\u003ci>Savor & Sage\u003c/i>\u003c/a>. Stefani is passionate about amplifying the work and expertise of BIPOC people in the food space and furthers this mission as a founding member of the Black food blogger hub\u003ca href=\"https://eattheculture.com/\"> Eat the Culture\u003c/a> and as an advisory board member of\u003ca href=\"https://foodculture.org/\"> Food Culture Collective\u003c/a>.\u003c/p>\n\u003c/div>\n\u003c/article>\n\u003cdiv class=\"routes-Site-routes-Post-components-Post-components-PostEmailSignup-___PostEmailSignup__postEmailSignup\">\n\u003cdiv class=\"components-EmailSignup-components-SignupNew-___SignupNew__signup wp-block-signup-new wp-block components-EmailSignup-components-SignupNew-___SignupNew__signup__precontained\">\n\u003cdiv>\n\u003cdiv class=\"components-EmailSignup-components-SignupNew-___SignupNew__signup_Content\">\n\u003cdiv class=\"components-EmailSignup-components-SignupNew-___SignupNew__signup_Header\">\u003c/div>\n\u003c/div>\n\u003c/div>\n\u003c/div>\n\u003c/div>\n\n",
"stats": {
"hasVideo": true,
"hasChartOrMap": false,
"hasAudio": false,
"hasPolis": false,
"wordCount": 649,
"hasGoogleForm": false,
"hasGallery": false,
"hasHearkenModule": false,
"iframeSrcs": [],
"paragraphCount": 13
},
"modified": 1696358419,
"excerpt": null,
"headData": {
"twImgId": "",
"twTitle": "",
"ogTitle": "",
"ogImgId": "",
"twDescription": "",
"description": "Now that temperatures are getting cooler, add Stefani Renée's savory tart to your Fall vibes checklist. Hearty seasonal vegetables like collard greens and sweet potatoes are mixed with herbed ricotta and then wrapped in a golden brown crust and drizzled with hot honey to make this versatile pastry. Serve it for breakfast, as a holiday",
"title": "This Sweet Potato Galette with Hot Honey is a Cozy Fall Treat | KQED",
"ogDescription": "",
"schema": {
"@context": "https://schema.org",
"@type": "Article",
"headline": "This Sweet Potato Galette with Hot Honey is a Cozy Fall Treat",
"datePublished": "2022-10-11T09:03:41-07:00",
"dateModified": "2023-10-03T11:40:19-07:00",
"image": "https://cdn.kqed.org/wp-content/uploads/2020/02/KQED-OG-Image@1x.png"
}
},
"guestAuthors": [],
"slug": "this-sweet-potato-galette-with-hot-honey-is-a-cozy-fall-treat",
"status": "publish",
"sourceUrl": "/food/",
"excludeFromSiteSearch": "Include",
"subhead": "This savory tart with sweet potato, collard greens, and drizzled hot honey is an Autumnal delight",
"source": "Food",
"articleAge": "0",
"path": "/food/1337370/this-sweet-potato-galette-with-hot-honey-is-a-cozy-fall-treat",
"audioTrackLength": null,
"parsedContent": [
{
"type": "contentString",
"content": "\u003cdiv class=\"post-body\">\u003cp>\u003cp>Now that temperatures are getting cooler, add Stefani Renée’s savory tart to your Fall vibes checklist. Hearty seasonal vegetables like collard greens and sweet potatoes are mixed with herbed ricotta and then wrapped in a golden brown crust and drizzled with hot honey to make this versatile pastry. Serve it for breakfast, as a holiday side dish, or even a light dinner. Bundle up in your favorite sweater, grab a mug of tea, and get cozy with this satisfying dish.\u003c/p>\n\u003cp>\u003c/p>\u003cp>\u003cspan class='utils-parseShortcode-shortcodes-__youtubeShortcode__embedYoutube'>\n \u003cspan class='utils-parseShortcode-shortcodes-__youtubeShortcode__embedYoutubeInside'>\n \u003ciframe\n loading='lazy'\n class='utils-parseShortcode-shortcodes-__youtubeShortcode__youtubePlayer'\n type='text/html'\n src='//www.youtube.com/embed/CgMFfL1n-y4'\n title='//www.youtube.com/embed/CgMFfL1n-y4'\n allowfullscreen='true'\n style='border:0;'>\u003c/iframe>\n \u003c/span>\n \u003c/span>\u003c/p>\u003cp>\u003c/p>\n\u003cp>\u003cstrong>Sweet Potato and Collard Fall Galette\u003c/strong>\u003c/p>\n\u003cp>Prep Time: 20 Minutes\u003cbr>\nCook Time: 40 Minutes\u003cbr>\nTotal Time: 60 Minutes\u003cbr>\nServings: 4-6\u003c/p>\n\u003cp>\u003cstrong>Ingredients:\u003c/strong>\u003c/p>\n\u003cp>\u003c/p>\u003c/div>",
"attributes": {
"named": {},
"numeric": []
}
},
{
"type": "component",
"content": "",
"name": "ad",
"attributes": {
"named": {
"label": "fullwidth"
},
"numeric": [
"fullwidth"
]
}
},
{
"type": "contentString",
"content": "\u003cdiv class=\"post-body\">\u003cp>\u003c/p>\n\u003cp>\u003cstrong>Galette\u003c/strong>\u003cbr>\n3-4 slices of bacon, chopped\u003cbr>\n1 bunch collard greens, stemmed, washed and cut into 1 inch ribbons\u003cbr>\n1 small sweet potato shaved into ribbons,\u003cbr>\n1 teaspoon salt plus more to taste\u003cbr>\n8 ounces ricotta, whole fat\u003cbr>\n2 teaspoons fresh thyme, chopped and divided\u003cbr>\n1 teaspoon fresh rosemary, chopped and divided\u003cbr>\n1 teaspoon lemon zest\u003cbr>\n1 shallot, diced\u003cbr>\n1 store bought pie crust (follow package instructions for thawing)\u003cbr>\nPepper to taste to taste\u003c/p>\n\u003cp>\u003cstrong>Hot Honey\u003c/strong>\u003cbr>\n3 tablespoons honey\u003cbr>\n3 tablespoons salted butter\u003cbr>\n1 teaspoon apple cider vinegar\u003cbr>\n1 teaspoon red pepper flake\u003cbr>\n½ teaspoon cayenne pepper\u003cbr>\n½ teaspoon paprika\u003c/p>\n\u003cp>\u003c/p>\n\u003cp>\u003cstrong>Method:\u003c/strong>\u003c/p>\n\u003col>\n\u003cli>Preheat oven to 400 degrees Fahrenheit\u003c/li>\n\u003cli>In a skillet, fry bacon until just before it’s completely cooked through. Drain on a paper towel, set to the side, and reserve the fat. In the same skillet, add 1 tablespoon of the bacon fat and saute the shallots until soft and translucent. Set to the side.\u003c/li>\n\u003cli>In a large bowl, add the collard greens, 1 tablespoon of the reserved bacon fat and massage for 1-2 minutes. Add the sweet potatoes, 1 tablespoon of bacon fat, shallots, ½ teaspoon each of the thyme and rosemary, and sprinkle with a pinch of salt and black pepper. Stir to combine and set to the side.\u003c/li>\n\u003cli>In a small bowl, combine the ricotta, lemon zest, and remaining thyme and rosemary. Stir and add salt to taste.\u003c/li>\n\u003cli>Roll out the pie dough on a lightly floured surface until it’s a 12 inches round. It doesn’t have to be perfect. Place the dough on a cookie sheet lined with parchment paper. Spread the ricotta mixture into the center of the dough, leaving a 1½” border. Add the collard green mixture. Bring edges of dough up and over the filling, overlapping as needed. Brush the dough edges with egg wash and sprinkle with cracked black pepper.\u003c/li>\n\u003cli>Place the galette in the oven and bake for 35-40 minutes or until the crust is golden brown.\u003c/li>\n\u003cli>While the galette is baking, combine all ingredients for the hot honey In a small pot and warm over medium-low heat until butter is melted.\u003c/li>\n\u003cli>Serve galette warm drizzled with the hot honey. Enjoy!\u003c/li>\n\u003c/ol>\n\u003carticle class=\"routes-Site-routes-Post-components-Post-components-PostMinisite-___PostMinisite__mpost\">\n\u003cdiv class=\"post-body\">\n\u003cp>\u003cstrong>About Stefani Renée:\u003c/strong>\u003c/p>\n\u003cp>Oakland writer, photographer, and recipe developer Stefani Renée inherited her love of cooking and storytelling from her Granny Octavia. While her grandmother’s side of the family hails from the South, Stefani Renée grew up in the Bay Area. You can taste this melding of Southern flavors with California flair in her new video recipe series \u003ci>Smackin’ Kitchen,\u003c/i> streaming this fall on KQED Food’s YouTube and social channels.\u003c/p>\n\u003cp>When Stefani Renée is not developing or photographing recipes, she’s interviewing tastemakers for her blog and podcast \u003ca href=\"https://savorandsage.com/\">\u003ci>Savor & Sage\u003c/i>\u003c/a>. Stefani is passionate about amplifying the work and expertise of BIPOC people in the food space and furthers this mission as a founding member of the Black food blogger hub\u003ca href=\"https://eattheculture.com/\"> Eat the Culture\u003c/a> and as an advisory board member of\u003ca href=\"https://foodculture.org/\"> Food Culture Collective\u003c/a>.\u003c/p>\n\u003c/div>\n\u003c/article>\n\u003cdiv class=\"routes-Site-routes-Post-components-Post-components-PostEmailSignup-___PostEmailSignup__postEmailSignup\">\n\u003cdiv class=\"components-EmailSignup-components-SignupNew-___SignupNew__signup wp-block-signup-new wp-block components-EmailSignup-components-SignupNew-___SignupNew__signup__precontained\">\n\u003cdiv>\n\u003cdiv class=\"components-EmailSignup-components-SignupNew-___SignupNew__signup_Content\">\n\u003cdiv class=\"components-EmailSignup-components-SignupNew-___SignupNew__signup_Header\">\u003c/div>\n\u003c/div>\n\u003c/div>\n\u003c/div>\n\u003c/div>\n\n\u003c/div>\u003c/p>",
"attributes": {
"named": {},
"numeric": []
}
}
],
"link": "/food/1337370/this-sweet-potato-galette-with-hot-honey-is-a-cozy-fall-treat",
"authors": [
"5083"
],
"categories": [
"food_1"
],
"tags": [
"food_209",
"food_211",
"food_210",
"food_138",
"food_202"
],
"featImg": "food_1337372",
"label": "source_food_1337370"
},
"news_11819923": {
"type": "posts",
"id": "news_11819923",
"meta": {
"index": "posts_1716263798",
"site": "news",
"id": "11819923",
"score": null,
"sort": [
1590504325000
]
},
"parent": 0,
"labelTerm": {},
"blocks": [],
"publishDate": 1590504325,
"format": "standard",
"title": "Bay Area Foodie Culture Goes Way Further Back Than California Cuisine",
"headTitle": "Bay Area Foodie Culture Goes Way Further Back Than California Cuisine | KQED",
"content": "\u003cp>You might know the Bay Area for its foodie culture — trendy restaurants, fresh produce and incredible ethnic diversity. But the Bay Area’s culinary history goes further back than the California cuisine it’s known for. The Bay Area is also the birthplace of iconic food and drinks like the fortune cookie, rocky road ice cream, even the tropical Mai Tai. Here are 11 appetizing stories about foods born and popularized right here in the Bay Area to inspire your next culinary adventure.\u003c/p>\n\u003cfigure id=\"attachment_11759000\" class=\"wp-caption alignnone\" style=\"max-width: 800px\">\u003cimg loading=\"lazy\" decoding=\"async\" class=\"size-medium wp-image-11759000\" src=\"https://ww2.kqed.org/app/uploads/sites/10/2019/07/Trader-Vics-Mai-Tai-800x533.jpg\" alt=\"\" width=\"800\" height=\"533\" srcset=\"https://cdn.kqed.org/wp-content/uploads/sites/10/2019/07/Trader-Vics-Mai-Tai-800x533.jpg 800w, https://cdn.kqed.org/wp-content/uploads/sites/10/2019/07/Trader-Vics-Mai-Tai-160x107.jpg 160w, https://cdn.kqed.org/wp-content/uploads/sites/10/2019/07/Trader-Vics-Mai-Tai-1020x679.jpg 1020w, https://cdn.kqed.org/wp-content/uploads/sites/10/2019/07/Trader-Vics-Mai-Tai.jpg 1024w\" sizes=\"(max-width: 800px) 100vw, 800px\">\u003cfigcaption class=\"wp-caption-text\">The Mai Tai may have a tropical sounding name, but it’s origins are right here in the Bay Area. \u003ccite>(Courtesy of Trader Vics.)\u003c/cite>\u003c/figcaption>\u003c/figure>\n\u003ch3>\u003ca href=\"https://www.kqed.org/news/11755932/an-island-drink-with-california-roots-the-mai-tai-turns-75\">1. Yes, Your ‘Tropical’ Mai Tai Was Invented Here in Oakland\u003c/a>\u003c/h3>\n\u003cp>Picture this: You’re sitting on the beach, sand between your toes, sunglasses on. What else could complete the picture? How about a Mai Tai? Many people associate this delicious rum drink with the tropics, but it was actually invented in the East Bay. The first stop on our quest to learn more is Trader Vic’s in Emeryville, known as the “Home of the Original Mai Tai.”\u003c/p>\n\u003cfigure id=\"attachment_11817540\" class=\"wp-caption alignnone\" style=\"max-width: 774px\">\u003cimg loading=\"lazy\" decoding=\"async\" class=\"size-full wp-image-11817540\" src=\"https://ww2.kqed.org/app/uploads/sites/10/2020/05/Rice-A-Roni.jpg\" alt=\"\" width=\"774\" height=\"608\" srcset=\"https://cdn.kqed.org/wp-content/uploads/sites/10/2020/05/Rice-A-Roni.jpg 774w, https://cdn.kqed.org/wp-content/uploads/sites/10/2020/05/Rice-A-Roni-160x126.jpg 160w\" sizes=\"(max-width: 774px) 100vw, 774px\">\u003cfigcaption class=\"wp-caption-text\">Rice-A-Roni is a common household item with a surprising San Francisco origin story. \u003ccite>(Boereck 13:27, 25 September 2006 (UTC) / CC BY-SA )\u003c/cite>\u003c/figcaption>\u003c/figure>\n\u003ch3>\u003ca href=\"https://www.kqed.org/news/11816328/birth-of-rice-a-roni-the-armenian-italian-treat\">2. How Rice-A-Roni Became ‘The San Francisco Treat’\u003c/a>\u003c/h3>\n\u003cp>A Canadian immigrant, an Italian pasta maker and a survivor of the Armenian genocide shared an apartment in San Francisco for four months in 1946, and out of that Rice-A-Roni was born. Originally produced by the Kitchen Sisters in 2008, this story got the KQED treatment when Bay Curious adapted it for a recent episode. Together they tell the multicultural origin story behind “the San Francisco treat.”\u003c/p>\n\u003cfigure id=\"attachment_11819960\" class=\"wp-caption alignnone\" style=\"max-width: 800px\">\u003cimg loading=\"lazy\" decoding=\"async\" class=\"size-medium wp-image-11819960\" src=\"https://ww2.kqed.org/app/uploads/sites/10/2020/05/IMG_2432-800x600-800x502.jpg\" alt=\"\" width=\"800\" height=\"502\" srcset=\"https://cdn.kqed.org/wp-content/uploads/sites/10/2020/05/IMG_2432-800x600.jpg 800w, https://cdn.kqed.org/wp-content/uploads/sites/10/2020/05/IMG_2432-800x600-160x100.jpg 160w\" sizes=\"(max-width: 800px) 100vw, 800px\">\u003cfigcaption class=\"wp-caption-text\">The beloved Dutch crunch roll, made at Semifreddi’s Bakery in Alameda. \u003ccite>(Amanda Font/KQED)\u003c/cite>\u003c/figcaption>\u003c/figure>\n\u003ch3>\u003ca href=\"https://www.kqed.org/news/11761468/dutch-crunch-a-bay-area-favorite-but-not-a-bay-area-original\">3. Dutch Crunch: A Bay Area Favorite, But Not a Bay Area Original\u003c/a>\u003c/h3>\n\u003cp>When you’re ordering a sandwich in the Bay Area, Dutch crunch is a standard bread choice. But get about 10 miles outside the Bay Area and that crunchy, slightly sweet bread option disappears. That’s made many sandwich lovers wonder: What makes Dutch crunch a Bay Area thing? Why can’t you find it anywhere else? We’ve got answers.\u003c/p>\n\u003cfigure id=\"attachment_11743210\" class=\"wp-caption alignnone\" style=\"max-width: 800px\">\u003cimg loading=\"lazy\" decoding=\"async\" class=\"size-medium wp-image-11743210\" src=\"https://ww2.kqed.org/app/uploads/sites/10/2019/04/Making-Fortune-Cookies-800x527.jpg\" alt=\"A worker makes fortune cookies at the Golden Gate Fortune Cookie Factory in San Francisco in 2012.\" width=\"800\" height=\"527\" srcset=\"https://cdn.kqed.org/wp-content/uploads/sites/10/2019/04/Making-Fortune-Cookies-800x527.jpg 800w, https://cdn.kqed.org/wp-content/uploads/sites/10/2019/04/Making-Fortune-Cookies-160x105.jpg 160w, https://cdn.kqed.org/wp-content/uploads/sites/10/2019/04/Making-Fortune-Cookies-1020x672.jpg 1020w, https://cdn.kqed.org/wp-content/uploads/sites/10/2019/04/Making-Fortune-Cookies-1200x791.jpg 1200w, https://cdn.kqed.org/wp-content/uploads/sites/10/2019/04/Making-Fortune-Cookies.jpg 1920w\" sizes=\"(max-width: 800px) 100vw, 800px\">\u003cfigcaption class=\"wp-caption-text\">A worker makes fortune cookies at the Golden Gate Fortune Cookie Factory in San Francisco in 2012. \u003ccite>(Justin Sullivan/Getty Images)\u003c/cite>\u003c/figcaption>\u003c/figure>\n\u003ch3>\u003ca href=\"https://www.kqed.org/news/11742748/unwrapping-the-california-origins-of-the-fortune-cookie\">4. Unwrapping the Bay Area Origins of the Fortune Cookie\u003c/a>\u003c/h3>\n\u003cp>What comes with the check at almost every Chinese restaurant? Fortune cookies. Like orange slices after a blood draw or \u003ca href=\"https://www.kqed.org/news/11731290/how-bill-grahams-nazi-escape-might-explain-his-fillmore-apples\">apples at San Francisco’s Fillmore music venue\u003c/a>, they’re a given. But how did they come to be? Are they really Chinese? And if so, why do they serve them at the Japanese Tea Garden in San Francisco’s Golden Gate Park?\u003c/p>\n\u003cfigure id=\"attachment_11729451\" class=\"wp-caption alignnone\" style=\"max-width: 800px\">\u003cimg loading=\"lazy\" decoding=\"async\" class=\"size-medium wp-image-11729451\" src=\"https://ww2.kqed.org/app/uploads/sites/10/2019/02/RS34810_DSC_1228-qut-1920x1280-800x533.jpg\" alt=\"Pisco punch\" width=\"800\" height=\"533\" srcset=\"https://cdn.kqed.org/wp-content/uploads/sites/10/2019/02/RS34810_DSC_1228-qut-1920x1280-800x533.jpg 800w, https://cdn.kqed.org/wp-content/uploads/sites/10/2019/02/RS34810_DSC_1228-qut-1920x1280-160x107.jpg 160w, https://cdn.kqed.org/wp-content/uploads/sites/10/2019/02/RS34810_DSC_1228-qut-1920x1280-1020x680.jpg 1020w, https://cdn.kqed.org/wp-content/uploads/sites/10/2019/02/RS34810_DSC_1228-qut-1920x1280-1200x800.jpg 1200w, https://cdn.kqed.org/wp-content/uploads/sites/10/2019/02/RS34810_DSC_1228-qut-1920x1280.jpg 1920w\" sizes=\"(max-width: 800px) 100vw, 800px\">\u003cfigcaption class=\"wp-caption-text\">In the late 1800s, Pisco Punch wasn’t just a drink. Ordering a glass was a status symbol. \u003ccite>(Carly Severn/KQED)\u003c/cite>\u003c/figcaption>\u003c/figure>\n\u003ch3>\u003ca href=\"https://www.kqed.org/news/11720617/pisco-punch-the-pricey-san-francisco-cocktail-that-was-a-gold-rush-knock-out\">5. Pisco Punch: The Pricey San Francisco Cocktail That Was a Gold Rush Knockout\u003c/a>\u003c/h3>\n\u003cp>Pisco is a distilled, fermented grape juice from Peru with extreme potency. But many, many years before the 1940s — when pisco sours became popular — San Francisco was gripped by a craze for another pisco concoction. Pisco punch was the “it” drink of the Gold Rush era. A mysterious ingredient may be what makes it so good.\u003c/p>\n\u003cp>[ad fullwidth]\u003c/p>\n\u003cfigure id=\"attachment_11780479\" class=\"wp-caption alignnone\" style=\"max-width: 800px\">\u003cimg loading=\"lazy\" decoding=\"async\" class=\"size-medium wp-image-11780479\" src=\"https://ww2.kqed.org/app/uploads/sites/10/2019/10/iStock-119689230-800x535.jpg\" alt=\"Rocky road ice cream in an edible waffle bowl\" width=\"800\" height=\"535\" srcset=\"https://cdn.kqed.org/wp-content/uploads/sites/10/2019/10/iStock-119689230-800x535.jpg 800w, https://cdn.kqed.org/wp-content/uploads/sites/10/2019/10/iStock-119689230-160x107.jpg 160w, https://cdn.kqed.org/wp-content/uploads/sites/10/2019/10/iStock-119689230-1020x683.jpg 1020w, https://cdn.kqed.org/wp-content/uploads/sites/10/2019/10/iStock-119689230-1200x803.jpg 1200w, https://cdn.kqed.org/wp-content/uploads/sites/10/2019/10/iStock-119689230.jpg 1920w\" sizes=\"(max-width: 800px) 100vw, 800px\">\u003cfigcaption class=\"wp-caption-text\">Rocky road was among the first flavors to incorporate “mix ins.” \u003ccite>(MSPhotographic/iStock)\u003c/cite>\u003c/figcaption>\u003c/figure>\n\u003ch3>\u003ca href=\"https://www.kqed.org/news/11780468/how-rocky-road-ice-cream-got-its-start-in-oakland\">6. How Rocky Road Ice Cream Got Its Start in Oakland\u003c/a>\u003c/h3>\n\u003cp>It’s hard to imagine in this era of salted caramel and matcha tea, but there was a time when the American ice cream palate was limited to chocolate, vanilla and strawberry. The invention of rocky road in the 1920s changed the ice cream game with “mix-ins.” Nearly a century later, there’s still a dispute over who originally created the recipe for rocky road ice cream: \u003ca href=\"https://www.fentonscreamery.com/\">Fentons Creamery\u003c/a> or \u003ca href=\"https://www.dreyers.com/\">Dreyer’s Grand Ice Cream\u003c/a>. The one certain thing is that the flavor was invented in Oakland.\u003c/p>\n\u003cfigure id=\"attachment_11715656\" class=\"wp-caption alignnone\" style=\"max-width: 800px\">\u003cimg loading=\"lazy\" decoding=\"async\" class=\"size-medium wp-image-11715656\" src=\"https://ww2.kqed.org/app/uploads/sites/10/2019/01/4703024901_fd4ecf3ee9_o-800x536.jpg\" alt=\"The origins of the martini all lead back to the Bay Area.\" width=\"800\" height=\"536\" srcset=\"https://cdn.kqed.org/wp-content/uploads/sites/10/2019/01/4703024901_fd4ecf3ee9_o-800x536.jpg 800w, https://cdn.kqed.org/wp-content/uploads/sites/10/2019/01/4703024901_fd4ecf3ee9_o-160x107.jpg 160w, https://cdn.kqed.org/wp-content/uploads/sites/10/2019/01/4703024901_fd4ecf3ee9_o-1020x683.jpg 1020w, https://cdn.kqed.org/wp-content/uploads/sites/10/2019/01/4703024901_fd4ecf3ee9_o-1200x803.jpg 1200w, https://cdn.kqed.org/wp-content/uploads/sites/10/2019/01/4703024901_fd4ecf3ee9_o-1920x1285.jpg 1920w\" sizes=\"(max-width: 800px) 100vw, 800px\">\u003cfigcaption class=\"wp-caption-text\">The origins of the martini all lead back to the Bay Area. \u003ccite>(\u003ca href=\"https://www.flickr.com/photos/wickenden/4703024901/in/photolist-8aAese-iFWUV-8UE9PJ-8BnqPE-4U7wZH-csVP5A-7RQf5C-5TswLM-jqnT6H-E8wzP-21s3hf5-jh9jz-9TQDYy-p1oiop-7mxZUV-5u8QGw-XskH43-5u8PQw-d7yZRU-4F987B-aECPpW-ev2wfx-YJmW34-snJas-bKnLsa-7NYXfX-62vNwx-7JSTjP-d7PP1G-hpFam-eokRxH-d7PPRA-e439CB-5ypL2x-4smsHz-fAzZDv-76Qshu-8aAg8t-EQwA-ciRpXh-z9jE2-8Ld5v5-u8zhY-d7PPq9-byQZcm-4BBEuS-7Zk7FB-oxYjb-AfFzb-d7PMNj\">Don LaVange\u003c/a>/Flickr)\u003c/cite>\u003c/figcaption>\u003c/figure>\n\u003ch3>\u003ca href=\"https://www.kqed.org/news/11703167/golden-state-plate-the-story-of-the-martini-straight-up-with-a-twist\">7. The Story of the Martini, Straight Up, With a Twist\u003c/a>\u003c/h3>\n\u003cp>The martini is iconic. Not just because it is James Bond’s drink of choice, but also because of the martini glass. That V-shaped glass has made its way onto neon signs in front of old-school bars and even has its own emoji. The city of Martinez, in the northeast corner of the Bay Area, lays claim to the drink. The \u003ca href=\"https://www.cityofmartinez.org/our_city/martini.asp\">city’s official website\u003c/a> details the martini’s origin, and there’s a plaque downtown commemorating the \u003ca href=\"http://www.martinezchamber.com/martinis-on-the-plaza-gala\">annual Martini’s on the Plaza Gala\u003c/a>. But, there’s actually a controversy about where — and who — really invented the martini.\u003c/p>\n\u003cfigure id=\"attachment_11691773\" class=\"wp-caption alignnone\" style=\"max-width: 800px\">\u003cimg loading=\"lazy\" decoding=\"async\" class=\"size-medium wp-image-11691773\" src=\"https://ww2.kqed.org/app/uploads/sites/10/2018/09/RS32615_93004DA1-C92F-48DF-8742-F5D599410B79-qut-800x600.jpg\" alt=\"\" width=\"800\" height=\"600\" srcset=\"https://cdn.kqed.org/wp-content/uploads/sites/10/2018/09/RS32615_93004DA1-C92F-48DF-8742-F5D599410B79-qut-800x600.jpg 800w, https://cdn.kqed.org/wp-content/uploads/sites/10/2018/09/RS32615_93004DA1-C92F-48DF-8742-F5D599410B79-qut-160x120.jpg 160w, https://cdn.kqed.org/wp-content/uploads/sites/10/2018/09/RS32615_93004DA1-C92F-48DF-8742-F5D599410B79-qut-1020x765.jpg 1020w, https://cdn.kqed.org/wp-content/uploads/sites/10/2018/09/RS32615_93004DA1-C92F-48DF-8742-F5D599410B79-qut-1200x900.jpg 1200w, https://cdn.kqed.org/wp-content/uploads/sites/10/2018/09/RS32615_93004DA1-C92F-48DF-8742-F5D599410B79-qut.jpg 1920w, https://cdn.kqed.org/wp-content/uploads/sites/10/2018/09/RS32615_93004DA1-C92F-48DF-8742-F5D599410B79-qut-1180x885.jpg 1180w, https://cdn.kqed.org/wp-content/uploads/sites/10/2018/09/RS32615_93004DA1-C92F-48DF-8742-F5D599410B79-qut-960x720.jpg 960w, https://cdn.kqed.org/wp-content/uploads/sites/10/2018/09/RS32615_93004DA1-C92F-48DF-8742-F5D599410B79-qut-240x180.jpg 240w, https://cdn.kqed.org/wp-content/uploads/sites/10/2018/09/RS32615_93004DA1-C92F-48DF-8742-F5D599410B79-qut-375x281.jpg 375w, https://cdn.kqed.org/wp-content/uploads/sites/10/2018/09/RS32615_93004DA1-C92F-48DF-8742-F5D599410B79-qut-520x390.jpg 520w\" sizes=\"(max-width: 800px) 100vw, 800px\">\u003cfigcaption class=\"wp-caption-text\">The Palace Signature Salad comes with crab and Green Goddess Dressing on the side. \u003ccite>(Sasha Khokha/KQED)\u003c/cite>\u003c/figcaption>\u003c/figure>\n\u003ch3>\u003ca href=\"https://www.kqed.org/news/11698960/the-san-francisco-origins-of-green-goddess-dressing\">8. The San Francisco Origins of Green Goddess Dressing\u003c/a>\u003c/h3>\n\u003cp>The Palace Hotel in downtown San Francisco is the birthplace of several famous California recipes, including green goddess dressing. The story goes that the dressing was inspired by George Arliss, lead actor of the 1920s play, “The Green Goddess.” While he was staying at the Palace Hotel for a performance, head chef Phillip Roemer created the special dressing to be served on the starter salad — and the rest is history.\u003c/p>\n\u003cfigure id=\"attachment_11769092\" class=\"wp-caption alignnone\" style=\"max-width: 800px\">\u003cimg loading=\"lazy\" decoding=\"async\" class=\"size-medium wp-image-11769092\" src=\"https://ww2.kqed.org/app/uploads/sites/10/2019/08/0M6A0150_preview-1180x786-800x533.jpeg\" alt=\"\" width=\"800\" height=\"533\" srcset=\"https://cdn.kqed.org/wp-content/uploads/sites/10/2019/08/0M6A0150_preview-1180x786-800x533.jpeg 800w, https://cdn.kqed.org/wp-content/uploads/sites/10/2019/08/0M6A0150_preview-1180x786-160x107.jpeg 160w, https://cdn.kqed.org/wp-content/uploads/sites/10/2019/08/0M6A0150_preview-1180x786-1020x679.jpeg 1020w, https://cdn.kqed.org/wp-content/uploads/sites/10/2019/08/0M6A0150_preview-1180x786.jpeg 1180w\" sizes=\"(max-width: 800px) 100vw, 800px\">\u003cfigcaption class=\"wp-caption-text\">An Irish coffee at the Buena Vista. \u003ccite>(Kelly O'Mara/KQED)\u003c/cite>\u003c/figcaption>\u003c/figure>\n\u003ch3>\u003ca href=\"https://www.kqed.org/news/11621844/the-true-history-of-irish-coffee-and-its-san-francisco-origins\">9. The True History of Irish Coffee and Its San Francisco Origins\u003c/a>\u003c/h3>\n\u003cp>Word on the street is that Irish Coffee was invented at Buena Vista Cafe in San Francisco. On a regular day, Buena Vista serves around 2,000 Irish coffees — up to 2,500 on a busy weekend day. But how could Irish coffee have been invented in San Francisco? Well, it wasn’t. But it was popularized here, and the whole history is fascinating and delicious.\u003c/p>\n\u003cfigure id=\"attachment_11819982\" class=\"wp-caption alignnone\" style=\"max-width: 800px\">\u003cimg loading=\"lazy\" decoding=\"async\" class=\"size-medium wp-image-11819982\" src=\"https://ww2.kqed.org/app/uploads/sites/10/2020/05/4945590922_813a0a546c_o-800x531-800x531.jpg\" alt=\"\" width=\"800\" height=\"531\" srcset=\"https://cdn.kqed.org/wp-content/uploads/sites/10/2020/05/4945590922_813a0a546c_o-800x531.jpg 800w, https://cdn.kqed.org/wp-content/uploads/sites/10/2020/05/4945590922_813a0a546c_o-800x531-160x106.jpg 160w\" sizes=\"(max-width: 800px) 100vw, 800px\">\u003cfigcaption class=\"wp-caption-text\">Boudin Bakery says their decades-old starter is the key to the bread’s flavor. \u003ccite>(Rachel Hathaway/Flickr)\u003c/cite>\u003c/figcaption>\u003c/figure>\n\u003ch3>\u003ca href=\"https://www.kqed.org/news/11401794/what-makes-san-francisco-sourdough-unique\">10. What Makes San Francisco Sourdough Unique?\u003c/a>\u003c/h3>\n\u003cp>If bagels are a New York thing, sourdough is definitely a San Francisco thing. But what exactly makes our sourdough stand out? Well, it turns out that this is as much a science question as it is about the history and local mythology of our “authentic” local sourdough.\u003c/p>\n\u003cfigure id=\"attachment_11819954\" class=\"wp-caption alignnone\" style=\"max-width: 800px\">\u003cimg loading=\"lazy\" decoding=\"async\" class=\"size-medium wp-image-11819954\" src=\"https://ww2.kqed.org/app/uploads/sites/10/2020/05/ItsITcleaner-1440x917-800x509.jpg\" alt=\"\" width=\"800\" height=\"509\" srcset=\"https://cdn.kqed.org/wp-content/uploads/sites/10/2020/05/ItsITcleaner-1440x917-800x509.jpg 800w, https://cdn.kqed.org/wp-content/uploads/sites/10/2020/05/ItsITcleaner-1440x917-160x102.jpg 160w, https://cdn.kqed.org/wp-content/uploads/sites/10/2020/05/ItsITcleaner-1440x917-1020x650.jpg 1020w, https://cdn.kqed.org/wp-content/uploads/sites/10/2020/05/ItsITcleaner-1440x917.jpg 1440w\" sizes=\"(max-width: 800px) 100vw, 800px\">\u003cfigcaption class=\"wp-caption-text\">Its-It has been in the Bay Area for nearly a century. \u003ccite>(Olivia Allen-Price/KQED)\u003c/cite>\u003c/figcaption>\u003c/figure>\n\u003ch3>\u003ca href=\"https://www.kqed.org/news/10710678/its-it-the-san-francisco-treat-that-sparked-a-cult-following\">11. It’s-It! The San Francisco Treat That Sparked a Cult Following\u003c/a>\u003c/h3>\n\u003cp>If you’re not from San Francisco, you may not know It’s-It. This delightful ice cream sandwich is an old-school San Francisco treat. It’s been with the city through devastating earthquakes, three World Series wins, and weathered not one, but two tech booms. Since its amusement park beginnings nearly a century ago, the dessert has endured multiple owners. In the 1970s, the original formula and name were sold to an immigrant with an eye on the American Dream: Mr. Charles Shamieh. He didn’t quite stick to the recipe — he made it his own — but the concept, the name, the title it had earned, that bit of original San Francisco, is still tucked between those cookie walls.\u003c/p>\n\u003ch3 id=\"playlist\">Learn more by listening to these Bay Curious food episodes\u003c/h3>\n\u003cp>\u003c!-- iframe plugin v.4.3 wordpress.org/plugins/iframe/ -->\u003cbr>\n\u003ciframe loading=\"lazy\" src=\"https://open.spotify.com/embed/playlist/5bEt60TfspXuw7jih8AESI\" width=\"800\" height=\"380\" frameborder=\"0\" allowtransparency=\"true\" allow=\"encrypted-media\" scrolling=\"yes\" class=\"iframe-class\">\u003c/iframe>\u003c/p>\n\u003cp>[ad floatright]\u003c/p>\n",
"stats": {
"hasVideo": false,
"hasChartOrMap": false,
"hasAudio": false,
"hasPolis": false,
"wordCount": 1283,
"hasGoogleForm": false,
"hasGallery": false,
"hasHearkenModule": false,
"iframeSrcs": [],
"paragraphCount": 15
},
"modified": 1711753783,
"excerpt": "The Bay Area is the birthplace of iconic food and drinks like the fortune cookie, rocky road ice cream, even the tropical Mai Tai.",
"headData": {
"twImgId": "",
"twTitle": "",
"ogTitle": "",
"ogImgId": "",
"twDescription": "",
"description": "The Bay Area is the birthplace of iconic food and drinks like the fortune cookie, rocky road ice cream, even the tropical Mai Tai.",
"title": "Bay Area Foodie Culture Goes Way Further Back Than California Cuisine | KQED",
"ogDescription": "",
"schema": {
"@context": "https://schema.org",
"@type": "NewsArticle",
"headline": "Bay Area Foodie Culture Goes Way Further Back Than California Cuisine",
"datePublished": "2020-05-26T07:45:25-07:00",
"dateModified": "2024-03-29T16:09:43-07:00",
"image": "https://cdn.kqed.org/wp-content/uploads/2020/02/KQED-OG-Image@1x.png",
"isAccessibleForFree": "True",
"publisher": {
"@type": "NewsMediaOrganization",
"@id": "https://www.kqed.org/#organization",
"name": "KQED",
"logo": "https://cdn.kqed.org/wp-content/uploads/2020/02/KQED-OG-Image@1x.png",
"url": "https://www.kqed.org",
"sameAs": [
"https://www.facebook.com/KQED",
"https://twitter.com/KQED",
"https://www.instagram.com/kqed/",
"https://www.tiktok.com/@kqedofficial",
"https://www.linkedin.com/company/kqed",
"https://www.youtube.com/channel/UCeC0IOo7i1P_61zVUWbJ4nw"
]
}
}
},
"guestAuthors": [],
"slug": "bay-area-foodie-culture-goes-way-further-back-than-california-cuisine",
"status": "publish",
"sourceUrl": "https://www.kqed.org/food",
"templateType": "standard",
"excludeFromSiteSearch": "Include",
"featuredImageType": "standard",
"sticky": false,
"source": "Food",
"articleAge": "0",
"path": "/news/11819923/bay-area-foodie-culture-goes-way-further-back-than-california-cuisine",
"audioTrackLength": null,
"parsedContent": [
{
"type": "contentString",
"content": "\u003cdiv class=\"post-body\">\u003cp>\u003cp>You might know the Bay Area for its foodie culture — trendy restaurants, fresh produce and incredible ethnic diversity. But the Bay Area’s culinary history goes further back than the California cuisine it’s known for. The Bay Area is also the birthplace of iconic food and drinks like the fortune cookie, rocky road ice cream, even the tropical Mai Tai. Here are 11 appetizing stories about foods born and popularized right here in the Bay Area to inspire your next culinary adventure.\u003c/p>\n\u003cfigure id=\"attachment_11759000\" class=\"wp-caption alignnone\" style=\"max-width: 800px\">\u003cimg loading=\"lazy\" decoding=\"async\" class=\"size-medium wp-image-11759000\" src=\"https://ww2.kqed.org/app/uploads/sites/10/2019/07/Trader-Vics-Mai-Tai-800x533.jpg\" alt=\"\" width=\"800\" height=\"533\" srcset=\"https://cdn.kqed.org/wp-content/uploads/sites/10/2019/07/Trader-Vics-Mai-Tai-800x533.jpg 800w, https://cdn.kqed.org/wp-content/uploads/sites/10/2019/07/Trader-Vics-Mai-Tai-160x107.jpg 160w, https://cdn.kqed.org/wp-content/uploads/sites/10/2019/07/Trader-Vics-Mai-Tai-1020x679.jpg 1020w, https://cdn.kqed.org/wp-content/uploads/sites/10/2019/07/Trader-Vics-Mai-Tai.jpg 1024w\" sizes=\"(max-width: 800px) 100vw, 800px\">\u003cfigcaption class=\"wp-caption-text\">The Mai Tai may have a tropical sounding name, but it’s origins are right here in the Bay Area. \u003ccite>(Courtesy of Trader Vics.)\u003c/cite>\u003c/figcaption>\u003c/figure>\n\u003ch3>\u003ca href=\"https://www.kqed.org/news/11755932/an-island-drink-with-california-roots-the-mai-tai-turns-75\">1. Yes, Your ‘Tropical’ Mai Tai Was Invented Here in Oakland\u003c/a>\u003c/h3>\n\u003cp>Picture this: You’re sitting on the beach, sand between your toes, sunglasses on. What else could complete the picture? How about a Mai Tai? Many people associate this delicious rum drink with the tropics, but it was actually invented in the East Bay. The first stop on our quest to learn more is Trader Vic’s in Emeryville, known as the “Home of the Original Mai Tai.”\u003c/p>\n\u003cfigure id=\"attachment_11817540\" class=\"wp-caption alignnone\" style=\"max-width: 774px\">\u003cimg loading=\"lazy\" decoding=\"async\" class=\"size-full wp-image-11817540\" src=\"https://ww2.kqed.org/app/uploads/sites/10/2020/05/Rice-A-Roni.jpg\" alt=\"\" width=\"774\" height=\"608\" srcset=\"https://cdn.kqed.org/wp-content/uploads/sites/10/2020/05/Rice-A-Roni.jpg 774w, https://cdn.kqed.org/wp-content/uploads/sites/10/2020/05/Rice-A-Roni-160x126.jpg 160w\" sizes=\"(max-width: 774px) 100vw, 774px\">\u003cfigcaption class=\"wp-caption-text\">Rice-A-Roni is a common household item with a surprising San Francisco origin story. \u003ccite>(Boereck 13:27, 25 September 2006 (UTC) / CC BY-SA )\u003c/cite>\u003c/figcaption>\u003c/figure>\n\u003ch3>\u003ca href=\"https://www.kqed.org/news/11816328/birth-of-rice-a-roni-the-armenian-italian-treat\">2. How Rice-A-Roni Became ‘The San Francisco Treat’\u003c/a>\u003c/h3>\n\u003cp>A Canadian immigrant, an Italian pasta maker and a survivor of the Armenian genocide shared an apartment in San Francisco for four months in 1946, and out of that Rice-A-Roni was born. Originally produced by the Kitchen Sisters in 2008, this story got the KQED treatment when Bay Curious adapted it for a recent episode. Together they tell the multicultural origin story behind “the San Francisco treat.”\u003c/p>\n\u003cfigure id=\"attachment_11819960\" class=\"wp-caption alignnone\" style=\"max-width: 800px\">\u003cimg loading=\"lazy\" decoding=\"async\" class=\"size-medium wp-image-11819960\" src=\"https://ww2.kqed.org/app/uploads/sites/10/2020/05/IMG_2432-800x600-800x502.jpg\" alt=\"\" width=\"800\" height=\"502\" srcset=\"https://cdn.kqed.org/wp-content/uploads/sites/10/2020/05/IMG_2432-800x600.jpg 800w, https://cdn.kqed.org/wp-content/uploads/sites/10/2020/05/IMG_2432-800x600-160x100.jpg 160w\" sizes=\"(max-width: 800px) 100vw, 800px\">\u003cfigcaption class=\"wp-caption-text\">The beloved Dutch crunch roll, made at Semifreddi’s Bakery in Alameda. \u003ccite>(Amanda Font/KQED)\u003c/cite>\u003c/figcaption>\u003c/figure>\n\u003ch3>\u003ca href=\"https://www.kqed.org/news/11761468/dutch-crunch-a-bay-area-favorite-but-not-a-bay-area-original\">3. Dutch Crunch: A Bay Area Favorite, But Not a Bay Area Original\u003c/a>\u003c/h3>\n\u003cp>When you’re ordering a sandwich in the Bay Area, Dutch crunch is a standard bread choice. But get about 10 miles outside the Bay Area and that crunchy, slightly sweet bread option disappears. That’s made many sandwich lovers wonder: What makes Dutch crunch a Bay Area thing? Why can’t you find it anywhere else? We’ve got answers.\u003c/p>\n\u003cfigure id=\"attachment_11743210\" class=\"wp-caption alignnone\" style=\"max-width: 800px\">\u003cimg loading=\"lazy\" decoding=\"async\" class=\"size-medium wp-image-11743210\" src=\"https://ww2.kqed.org/app/uploads/sites/10/2019/04/Making-Fortune-Cookies-800x527.jpg\" alt=\"A worker makes fortune cookies at the Golden Gate Fortune Cookie Factory in San Francisco in 2012.\" width=\"800\" height=\"527\" srcset=\"https://cdn.kqed.org/wp-content/uploads/sites/10/2019/04/Making-Fortune-Cookies-800x527.jpg 800w, https://cdn.kqed.org/wp-content/uploads/sites/10/2019/04/Making-Fortune-Cookies-160x105.jpg 160w, https://cdn.kqed.org/wp-content/uploads/sites/10/2019/04/Making-Fortune-Cookies-1020x672.jpg 1020w, https://cdn.kqed.org/wp-content/uploads/sites/10/2019/04/Making-Fortune-Cookies-1200x791.jpg 1200w, https://cdn.kqed.org/wp-content/uploads/sites/10/2019/04/Making-Fortune-Cookies.jpg 1920w\" sizes=\"(max-width: 800px) 100vw, 800px\">\u003cfigcaption class=\"wp-caption-text\">A worker makes fortune cookies at the Golden Gate Fortune Cookie Factory in San Francisco in 2012. \u003ccite>(Justin Sullivan/Getty Images)\u003c/cite>\u003c/figcaption>\u003c/figure>\n\u003ch3>\u003ca href=\"https://www.kqed.org/news/11742748/unwrapping-the-california-origins-of-the-fortune-cookie\">4. Unwrapping the Bay Area Origins of the Fortune Cookie\u003c/a>\u003c/h3>\n\u003cp>What comes with the check at almost every Chinese restaurant? Fortune cookies. Like orange slices after a blood draw or \u003ca href=\"https://www.kqed.org/news/11731290/how-bill-grahams-nazi-escape-might-explain-his-fillmore-apples\">apples at San Francisco’s Fillmore music venue\u003c/a>, they’re a given. But how did they come to be? Are they really Chinese? And if so, why do they serve them at the Japanese Tea Garden in San Francisco’s Golden Gate Park?\u003c/p>\n\u003cfigure id=\"attachment_11729451\" class=\"wp-caption alignnone\" style=\"max-width: 800px\">\u003cimg loading=\"lazy\" decoding=\"async\" class=\"size-medium wp-image-11729451\" src=\"https://ww2.kqed.org/app/uploads/sites/10/2019/02/RS34810_DSC_1228-qut-1920x1280-800x533.jpg\" alt=\"Pisco punch\" width=\"800\" height=\"533\" srcset=\"https://cdn.kqed.org/wp-content/uploads/sites/10/2019/02/RS34810_DSC_1228-qut-1920x1280-800x533.jpg 800w, https://cdn.kqed.org/wp-content/uploads/sites/10/2019/02/RS34810_DSC_1228-qut-1920x1280-160x107.jpg 160w, https://cdn.kqed.org/wp-content/uploads/sites/10/2019/02/RS34810_DSC_1228-qut-1920x1280-1020x680.jpg 1020w, https://cdn.kqed.org/wp-content/uploads/sites/10/2019/02/RS34810_DSC_1228-qut-1920x1280-1200x800.jpg 1200w, https://cdn.kqed.org/wp-content/uploads/sites/10/2019/02/RS34810_DSC_1228-qut-1920x1280.jpg 1920w\" sizes=\"(max-width: 800px) 100vw, 800px\">\u003cfigcaption class=\"wp-caption-text\">In the late 1800s, Pisco Punch wasn’t just a drink. Ordering a glass was a status symbol. \u003ccite>(Carly Severn/KQED)\u003c/cite>\u003c/figcaption>\u003c/figure>\n\u003ch3>\u003ca href=\"https://www.kqed.org/news/11720617/pisco-punch-the-pricey-san-francisco-cocktail-that-was-a-gold-rush-knock-out\">5. Pisco Punch: The Pricey San Francisco Cocktail That Was a Gold Rush Knockout\u003c/a>\u003c/h3>\n\u003cp>Pisco is a distilled, fermented grape juice from Peru with extreme potency. But many, many years before the 1940s — when pisco sours became popular — San Francisco was gripped by a craze for another pisco concoction. Pisco punch was the “it” drink of the Gold Rush era. A mysterious ingredient may be what makes it so good.\u003c/p>\n\u003cp>\u003c/p>\u003c/div>",
"attributes": {
"named": {},
"numeric": []
}
},
{
"type": "component",
"content": "",
"name": "ad",
"attributes": {
"named": {
"label": "fullwidth"
},
"numeric": [
"fullwidth"
]
}
},
{
"type": "contentString",
"content": "\u003cdiv class=\"post-body\">\u003cp>\u003c/p>\n\u003cfigure id=\"attachment_11780479\" class=\"wp-caption alignnone\" style=\"max-width: 800px\">\u003cimg loading=\"lazy\" decoding=\"async\" class=\"size-medium wp-image-11780479\" src=\"https://ww2.kqed.org/app/uploads/sites/10/2019/10/iStock-119689230-800x535.jpg\" alt=\"Rocky road ice cream in an edible waffle bowl\" width=\"800\" height=\"535\" srcset=\"https://cdn.kqed.org/wp-content/uploads/sites/10/2019/10/iStock-119689230-800x535.jpg 800w, https://cdn.kqed.org/wp-content/uploads/sites/10/2019/10/iStock-119689230-160x107.jpg 160w, https://cdn.kqed.org/wp-content/uploads/sites/10/2019/10/iStock-119689230-1020x683.jpg 1020w, https://cdn.kqed.org/wp-content/uploads/sites/10/2019/10/iStock-119689230-1200x803.jpg 1200w, https://cdn.kqed.org/wp-content/uploads/sites/10/2019/10/iStock-119689230.jpg 1920w\" sizes=\"(max-width: 800px) 100vw, 800px\">\u003cfigcaption class=\"wp-caption-text\">Rocky road was among the first flavors to incorporate “mix ins.” \u003ccite>(MSPhotographic/iStock)\u003c/cite>\u003c/figcaption>\u003c/figure>\n\u003ch3>\u003ca href=\"https://www.kqed.org/news/11780468/how-rocky-road-ice-cream-got-its-start-in-oakland\">6. How Rocky Road Ice Cream Got Its Start in Oakland\u003c/a>\u003c/h3>\n\u003cp>It’s hard to imagine in this era of salted caramel and matcha tea, but there was a time when the American ice cream palate was limited to chocolate, vanilla and strawberry. The invention of rocky road in the 1920s changed the ice cream game with “mix-ins.” Nearly a century later, there’s still a dispute over who originally created the recipe for rocky road ice cream: \u003ca href=\"https://www.fentonscreamery.com/\">Fentons Creamery\u003c/a> or \u003ca href=\"https://www.dreyers.com/\">Dreyer’s Grand Ice Cream\u003c/a>. The one certain thing is that the flavor was invented in Oakland.\u003c/p>\n\u003cfigure id=\"attachment_11715656\" class=\"wp-caption alignnone\" style=\"max-width: 800px\">\u003cimg loading=\"lazy\" decoding=\"async\" class=\"size-medium wp-image-11715656\" src=\"https://ww2.kqed.org/app/uploads/sites/10/2019/01/4703024901_fd4ecf3ee9_o-800x536.jpg\" alt=\"The origins of the martini all lead back to the Bay Area.\" width=\"800\" height=\"536\" srcset=\"https://cdn.kqed.org/wp-content/uploads/sites/10/2019/01/4703024901_fd4ecf3ee9_o-800x536.jpg 800w, https://cdn.kqed.org/wp-content/uploads/sites/10/2019/01/4703024901_fd4ecf3ee9_o-160x107.jpg 160w, https://cdn.kqed.org/wp-content/uploads/sites/10/2019/01/4703024901_fd4ecf3ee9_o-1020x683.jpg 1020w, https://cdn.kqed.org/wp-content/uploads/sites/10/2019/01/4703024901_fd4ecf3ee9_o-1200x803.jpg 1200w, https://cdn.kqed.org/wp-content/uploads/sites/10/2019/01/4703024901_fd4ecf3ee9_o-1920x1285.jpg 1920w\" sizes=\"(max-width: 800px) 100vw, 800px\">\u003cfigcaption class=\"wp-caption-text\">The origins of the martini all lead back to the Bay Area. \u003ccite>(\u003ca href=\"https://www.flickr.com/photos/wickenden/4703024901/in/photolist-8aAese-iFWUV-8UE9PJ-8BnqPE-4U7wZH-csVP5A-7RQf5C-5TswLM-jqnT6H-E8wzP-21s3hf5-jh9jz-9TQDYy-p1oiop-7mxZUV-5u8QGw-XskH43-5u8PQw-d7yZRU-4F987B-aECPpW-ev2wfx-YJmW34-snJas-bKnLsa-7NYXfX-62vNwx-7JSTjP-d7PP1G-hpFam-eokRxH-d7PPRA-e439CB-5ypL2x-4smsHz-fAzZDv-76Qshu-8aAg8t-EQwA-ciRpXh-z9jE2-8Ld5v5-u8zhY-d7PPq9-byQZcm-4BBEuS-7Zk7FB-oxYjb-AfFzb-d7PMNj\">Don LaVange\u003c/a>/Flickr)\u003c/cite>\u003c/figcaption>\u003c/figure>\n\u003ch3>\u003ca href=\"https://www.kqed.org/news/11703167/golden-state-plate-the-story-of-the-martini-straight-up-with-a-twist\">7. The Story of the Martini, Straight Up, With a Twist\u003c/a>\u003c/h3>\n\u003cp>The martini is iconic. Not just because it is James Bond’s drink of choice, but also because of the martini glass. That V-shaped glass has made its way onto neon signs in front of old-school bars and even has its own emoji. The city of Martinez, in the northeast corner of the Bay Area, lays claim to the drink. The \u003ca href=\"https://www.cityofmartinez.org/our_city/martini.asp\">city’s official website\u003c/a> details the martini’s origin, and there’s a plaque downtown commemorating the \u003ca href=\"http://www.martinezchamber.com/martinis-on-the-plaza-gala\">annual Martini’s on the Plaza Gala\u003c/a>. But, there’s actually a controversy about where — and who — really invented the martini.\u003c/p>\n\u003cfigure id=\"attachment_11691773\" class=\"wp-caption alignnone\" style=\"max-width: 800px\">\u003cimg loading=\"lazy\" decoding=\"async\" class=\"size-medium wp-image-11691773\" src=\"https://ww2.kqed.org/app/uploads/sites/10/2018/09/RS32615_93004DA1-C92F-48DF-8742-F5D599410B79-qut-800x600.jpg\" alt=\"\" width=\"800\" height=\"600\" srcset=\"https://cdn.kqed.org/wp-content/uploads/sites/10/2018/09/RS32615_93004DA1-C92F-48DF-8742-F5D599410B79-qut-800x600.jpg 800w, https://cdn.kqed.org/wp-content/uploads/sites/10/2018/09/RS32615_93004DA1-C92F-48DF-8742-F5D599410B79-qut-160x120.jpg 160w, https://cdn.kqed.org/wp-content/uploads/sites/10/2018/09/RS32615_93004DA1-C92F-48DF-8742-F5D599410B79-qut-1020x765.jpg 1020w, https://cdn.kqed.org/wp-content/uploads/sites/10/2018/09/RS32615_93004DA1-C92F-48DF-8742-F5D599410B79-qut-1200x900.jpg 1200w, https://cdn.kqed.org/wp-content/uploads/sites/10/2018/09/RS32615_93004DA1-C92F-48DF-8742-F5D599410B79-qut.jpg 1920w, https://cdn.kqed.org/wp-content/uploads/sites/10/2018/09/RS32615_93004DA1-C92F-48DF-8742-F5D599410B79-qut-1180x885.jpg 1180w, https://cdn.kqed.org/wp-content/uploads/sites/10/2018/09/RS32615_93004DA1-C92F-48DF-8742-F5D599410B79-qut-960x720.jpg 960w, https://cdn.kqed.org/wp-content/uploads/sites/10/2018/09/RS32615_93004DA1-C92F-48DF-8742-F5D599410B79-qut-240x180.jpg 240w, https://cdn.kqed.org/wp-content/uploads/sites/10/2018/09/RS32615_93004DA1-C92F-48DF-8742-F5D599410B79-qut-375x281.jpg 375w, https://cdn.kqed.org/wp-content/uploads/sites/10/2018/09/RS32615_93004DA1-C92F-48DF-8742-F5D599410B79-qut-520x390.jpg 520w\" sizes=\"(max-width: 800px) 100vw, 800px\">\u003cfigcaption class=\"wp-caption-text\">The Palace Signature Salad comes with crab and Green Goddess Dressing on the side. \u003ccite>(Sasha Khokha/KQED)\u003c/cite>\u003c/figcaption>\u003c/figure>\n\u003ch3>\u003ca href=\"https://www.kqed.org/news/11698960/the-san-francisco-origins-of-green-goddess-dressing\">8. The San Francisco Origins of Green Goddess Dressing\u003c/a>\u003c/h3>\n\u003cp>The Palace Hotel in downtown San Francisco is the birthplace of several famous California recipes, including green goddess dressing. The story goes that the dressing was inspired by George Arliss, lead actor of the 1920s play, “The Green Goddess.” While he was staying at the Palace Hotel for a performance, head chef Phillip Roemer created the special dressing to be served on the starter salad — and the rest is history.\u003c/p>\n\u003cfigure id=\"attachment_11769092\" class=\"wp-caption alignnone\" style=\"max-width: 800px\">\u003cimg loading=\"lazy\" decoding=\"async\" class=\"size-medium wp-image-11769092\" src=\"https://ww2.kqed.org/app/uploads/sites/10/2019/08/0M6A0150_preview-1180x786-800x533.jpeg\" alt=\"\" width=\"800\" height=\"533\" srcset=\"https://cdn.kqed.org/wp-content/uploads/sites/10/2019/08/0M6A0150_preview-1180x786-800x533.jpeg 800w, https://cdn.kqed.org/wp-content/uploads/sites/10/2019/08/0M6A0150_preview-1180x786-160x107.jpeg 160w, https://cdn.kqed.org/wp-content/uploads/sites/10/2019/08/0M6A0150_preview-1180x786-1020x679.jpeg 1020w, https://cdn.kqed.org/wp-content/uploads/sites/10/2019/08/0M6A0150_preview-1180x786.jpeg 1180w\" sizes=\"(max-width: 800px) 100vw, 800px\">\u003cfigcaption class=\"wp-caption-text\">An Irish coffee at the Buena Vista. \u003ccite>(Kelly O'Mara/KQED)\u003c/cite>\u003c/figcaption>\u003c/figure>\n\u003ch3>\u003ca href=\"https://www.kqed.org/news/11621844/the-true-history-of-irish-coffee-and-its-san-francisco-origins\">9. The True History of Irish Coffee and Its San Francisco Origins\u003c/a>\u003c/h3>\n\u003cp>Word on the street is that Irish Coffee was invented at Buena Vista Cafe in San Francisco. On a regular day, Buena Vista serves around 2,000 Irish coffees — up to 2,500 on a busy weekend day. But how could Irish coffee have been invented in San Francisco? Well, it wasn’t. But it was popularized here, and the whole history is fascinating and delicious.\u003c/p>\n\u003cfigure id=\"attachment_11819982\" class=\"wp-caption alignnone\" style=\"max-width: 800px\">\u003cimg loading=\"lazy\" decoding=\"async\" class=\"size-medium wp-image-11819982\" src=\"https://ww2.kqed.org/app/uploads/sites/10/2020/05/4945590922_813a0a546c_o-800x531-800x531.jpg\" alt=\"\" width=\"800\" height=\"531\" srcset=\"https://cdn.kqed.org/wp-content/uploads/sites/10/2020/05/4945590922_813a0a546c_o-800x531.jpg 800w, https://cdn.kqed.org/wp-content/uploads/sites/10/2020/05/4945590922_813a0a546c_o-800x531-160x106.jpg 160w\" sizes=\"(max-width: 800px) 100vw, 800px\">\u003cfigcaption class=\"wp-caption-text\">Boudin Bakery says their decades-old starter is the key to the bread’s flavor. \u003ccite>(Rachel Hathaway/Flickr)\u003c/cite>\u003c/figcaption>\u003c/figure>\n\u003ch3>\u003ca href=\"https://www.kqed.org/news/11401794/what-makes-san-francisco-sourdough-unique\">10. What Makes San Francisco Sourdough Unique?\u003c/a>\u003c/h3>\n\u003cp>If bagels are a New York thing, sourdough is definitely a San Francisco thing. But what exactly makes our sourdough stand out? Well, it turns out that this is as much a science question as it is about the history and local mythology of our “authentic” local sourdough.\u003c/p>\n\u003cfigure id=\"attachment_11819954\" class=\"wp-caption alignnone\" style=\"max-width: 800px\">\u003cimg loading=\"lazy\" decoding=\"async\" class=\"size-medium wp-image-11819954\" src=\"https://ww2.kqed.org/app/uploads/sites/10/2020/05/ItsITcleaner-1440x917-800x509.jpg\" alt=\"\" width=\"800\" height=\"509\" srcset=\"https://cdn.kqed.org/wp-content/uploads/sites/10/2020/05/ItsITcleaner-1440x917-800x509.jpg 800w, https://cdn.kqed.org/wp-content/uploads/sites/10/2020/05/ItsITcleaner-1440x917-160x102.jpg 160w, https://cdn.kqed.org/wp-content/uploads/sites/10/2020/05/ItsITcleaner-1440x917-1020x650.jpg 1020w, https://cdn.kqed.org/wp-content/uploads/sites/10/2020/05/ItsITcleaner-1440x917.jpg 1440w\" sizes=\"(max-width: 800px) 100vw, 800px\">\u003cfigcaption class=\"wp-caption-text\">Its-It has been in the Bay Area for nearly a century. \u003ccite>(Olivia Allen-Price/KQED)\u003c/cite>\u003c/figcaption>\u003c/figure>\n\u003ch3>\u003ca href=\"https://www.kqed.org/news/10710678/its-it-the-san-francisco-treat-that-sparked-a-cult-following\">11. It’s-It! The San Francisco Treat That Sparked a Cult Following\u003c/a>\u003c/h3>\n\u003cp>If you’re not from San Francisco, you may not know It’s-It. This delightful ice cream sandwich is an old-school San Francisco treat. It’s been with the city through devastating earthquakes, three World Series wins, and weathered not one, but two tech booms. Since its amusement park beginnings nearly a century ago, the dessert has endured multiple owners. In the 1970s, the original formula and name were sold to an immigrant with an eye on the American Dream: Mr. Charles Shamieh. He didn’t quite stick to the recipe — he made it his own — but the concept, the name, the title it had earned, that bit of original San Francisco, is still tucked between those cookie walls.\u003c/p>\n\u003ch3 id=\"playlist\">Learn more by listening to these Bay Curious food episodes\u003c/h3>\n\u003cp>\u003c!-- iframe plugin v.4.3 wordpress.org/plugins/iframe/ -->\u003cbr>\n\u003ciframe loading=\"lazy\" src=\"https://open.spotify.com/embed/playlist/5bEt60TfspXuw7jih8AESI\" width=\"800\" height=\"380\" frameborder=\"0\" allowtransparency=\"true\" allow=\"encrypted-media\" scrolling=\"yes\" class=\"iframe-class\">\u003c/iframe>\u003c/p>\n\u003cp>\u003c/p>\u003c/div>",
"attributes": {
"named": {},
"numeric": []
}
},
{
"type": "component",
"content": "",
"name": "ad",
"attributes": {
"named": {
"label": "floatright"
},
"numeric": [
"floatright"
]
}
},
{
"type": "contentString",
"content": "\u003cdiv class=\"post-body\">\u003cp>\u003c/p>\n\u003c/div>\u003c/p>",
"attributes": {
"named": {},
"numeric": []
}
}
],
"link": "/news/11819923/bay-area-foodie-culture-goes-way-further-back-than-california-cuisine",
"authors": [
"11580"
],
"series": [
"news_17986",
"news_24115"
],
"categories": [
"news_24114",
"news_8"
],
"tags": [
"news_24312",
"news_27992",
"news_27993",
"news_24116"
],
"featImg": "news_11431556",
"label": "source_news_11819923"
},
"news_11816328": {
"type": "posts",
"id": "news_11816328",
"meta": {
"index": "posts_1716263798",
"site": "news",
"id": "11816328",
"score": null,
"sort": [
1589450444000
]
},
"parent": 0,
"labelTerm": {},
"blocks": [],
"publishDate": 1589450444,
"format": "image",
"title": "How Rice-A-Roni Became The San Francisco Treat",
"headTitle": "How Rice-A-Roni Became The San Francisco Treat | KQED",
"content": "\u003cp>\u003cem>This story was produced by Nikki Silva and Davia Nelson of The Kitchen Sisters and originally aired on NPR in 2008. Thank you to The Kitchen Sisters for allowing us to adapt that piece for Bay Curious. You can listen to the original \u003ca href=\"https://www.npr.org/2008/07/31/93067862/birth-of-rice-a-roni-the-armenian-italian-treat\">here\u003c/a>.\u003c/em>\u003c/p>\n\u003cp> \u003c/p>\n\u003cp>[dropcap]T[/dropcap]here was a time when you couldn’t go too long watching television without seeing a commercial for Rice-A-Roni. Many featured images of San Francisco and ended with a catchy jingle — “Rice-A-Roni. The San Francisco Treat!”\u003c/p>\n\u003cp>Bay Curious listener Kent Barnes has wondered if that advertising slogan is true. Was Rice-A-Roni actually created here in the Bay Area?\u003c/p>\n\u003cfigure id=\"attachment_11817521\" class=\"wp-caption alignleft\" style=\"max-width: 200px\">\u003cimg decoding=\"async\" loading=\"lazy\" src=\"https://ww2.kqed.org/app/uploads/sites/10/2020/05/ricearoni_TomLois200.jpg\" alt=\"Tom and Lois DeDomenico in San Francisco, shortly after their marriage.\" width=\"200\" height=\"266\" class=\"size-full wp-image-11817521\" srcset=\"https://ww2.kqed.org/app/uploads/sites/10/2020/05/ricearoni_TomLois200.jpg 200w, https://ww2.kqed.org/app/uploads/sites/10/2020/05/ricearoni_TomLois200-160x213.jpg 160w\" sizes=\"(max-width: 200px) 100vw, 200px\">\u003cfigcaption class=\"wp-caption-text\">Tom and Lois DeDomenico in San Francisco, shortly after their marriage. \u003ccite>(Courtesy of Lois DeDomenico)\u003c/cite>\u003c/figcaption>\u003c/figure>\n\u003cp>The short answer: yes. It was a clandestine convergence of cultures that ultimately led to the creation of “The San Francisco Treat.”\u003c/p>\n\u003cp>The story starts just after World War II. Soldiers were pouring into San Francisco, looking for a fresh start. The housing market was crowded as Lois DeDomenico and her husband, Tom, were on the hunt for a place to live. Lois grew up in Edmonton, Canada, and met Tom in San Francisco in 1944. Tom’s father, an immigrant from Italy, owned a pasta company in San Francisco where Tom worked with his brothers.\u003c/p>\n\u003cp>There was very little housing available in San Francisco at the time, as soldiers flooded into the city for a new start after the war. So when Lois and Tom found a room to rent in the home of Pailadzo Captanian, they jumped on it.\u003c/p>\n\u003cp>“Mrs. Captanian. I had a liking for her right away, so we moved in. Tommy would work until about 7 o’clock at the pasta factory and I was alone a lot,” Lois said. “I was only 18 and I was pregnant. And I had kitchen privileges. Well, I really wasn’t much of a cook. And here was this Armenian lady, probably about 70 years [old], making yogurt on the back of the stove, all day, every day. I didn’t even know what the word ‘yogurt’ meant.”\u003c/p>\n\u003cp>Captanian taught Lois how to make paklava (baklava), soups and her specialty, Armenian pilaf.\u003c/p>\n\u003cp>“We would bring her Golden Grain vermicelli from the factory,” Lois said. “She wanted us to break it as small as rice if we could.”\u003c/p>\n\u003cp>[ad fullwidth]\u003c/p>\n\u003cp>During those long afternoons in the kitchen, Lois listened as Captanian told her life story — about the Armenian genocide, her husband’s death and the separation from her two young boys. In 1915, she trekked from Turkey to Syria, while pregnant and with little food and water, along with thousands of other women and children who had been deported. Once in Syria, she gave birth, and was ultimately reunited with her two other sons.\u003c/p>\n\u003cp>Captanian chronicled these events in her 1919 book, “Memoires D’une Deportee.”\u003c/p>\n\u003cp>The family then moved to the United States, where she worked as a seamstress, sewing draperies for President Franklin D. Roosevelt’s Hyde Park home in New York. She put her boys through school, and after World War II, she moved to San Francisco, where one of her sons had settled.\u003c/p>\n\u003cfigure id=\"attachment_11818020\" class=\"wp-caption aligncenter\" style=\"max-width: 540px\">\u003cimg decoding=\"async\" loading=\"lazy\" class=\"wp-image-11818020 size-full\" src=\"https://ww2.kqed.org/app/uploads/sites/10/2020/05/rice_captanian540-86f59186faddc7574ffc62505c8a903e3894ba5e.jpg\" alt=\"\" width=\"540\" height=\"466\" srcset=\"https://ww2.kqed.org/app/uploads/sites/10/2020/05/rice_captanian540-86f59186faddc7574ffc62505c8a903e3894ba5e.jpg 540w, https://ww2.kqed.org/app/uploads/sites/10/2020/05/rice_captanian540-86f59186faddc7574ffc62505c8a903e3894ba5e-160x138.jpg 160w\" sizes=\"(max-width: 540px) 100vw, 540px\">\u003cfigcaption class=\"wp-caption-text\">The Captanian family in New York in 1921: Pailadzo, Gilbert, Aram and Herant. \u003ccite>(Courtesy of Captanian Family)\u003c/cite>\u003c/figcaption>\u003c/figure>\n\u003ch2>‘This Would Be Great in a Box’\u003c/h2>\n\u003cp>When the DeDomenicos moved into a place of their own, Lois often cooked Mrs. Captanian’s Armenian pilaf. At a family dinner one evening, after a long day at the pasta factory, Tom’s brother Vince stared at his dish of pilaf and said, “This would be great in a box.”\u003c/p>\n\u003cp>Golden Grain had a test kitchen at the factory. It took three or four years to adapt the recipe for one-pot cooking.\u003c/p>\n\u003cp>When Rice-A-Roni hit the market in the 1950s, people were desperate to make cooking easier and faster. Rice-A-Roni was a product that was preseasoned and didn’t require boiling water, which made cooking rice and pasta simpler than ever.\u003c/p>\n\u003cp>[baycuriouspodcastinfo]\u003c/p>\n\u003cp>“There were not many packaged side dishes in the market in 1955,” said Dennis DeDomenico, Tom and Lois’ son. “Everything was being geared toward less time in the kitchen. Major appliances like dishwashers and garbage disposals were starting to come in. The convenience factor was everything.”\u003c/p>\n\u003cp>All that was missing was a name.\u003c/p>\n\u003cp>“We said, ‘Well, what is the product? The product is rice and macaroni. Why don’t we call it Rice-A-Roni?’ Didn’t quite sound right. Who’d ever heard of rice and macaroni being together? Still, the name had a ring to it,” Tom DeDomenico said, in an oral history recorded by the Bancroft Library in 1988.\u003c/p>\n\u003ch2>A Culinary Melting Pot\u003c/h2>\n\u003cp>Rice-A-Roni was marketed as “A San Francisco Treat,” but it quickly became one of America’s favorite side dishes. Ted Captanian remembers seeing the commercials on television as a child.\u003c/p>\n\u003cp>“Every time we heard that jingle, my father would say, ‘You know your grandmother gave a rice recipe to the people who started that company. So every time you hear it, think of her,’ ” Ted said. “To be honest, we kind of thought — could that possibly be true? Could this iconic American dish actually be attributed to some recipe my grandmother gave years ago?”\u003c/p>\n\u003cp>https://www.youtube.com/watch?v=yzOR_Fal_SY\u003c/p>\n\u003cp>Lois says she still makes pilaf the way Pailadzo Captanian taught her.\u003c/p>\n\u003cp>“The impact she had on me and my life,” Lois said. “I only lived there for four months, but it was four months that brought all these things together: myself from Canada; Tommy, Italian; Mrs. Captanian, Armenian. All that converging in San Francisco in 1946, and out of that comes Rice-A-Roni.”\u003c/p>\n\u003ch2 id=\"recipe\">Pailadzo Captanian’s Rice Pilaf Recipe\u003c/h2>\n\u003cp>Pailadzo Captanian’s rice pilaf dish has been passed through the family over the years. They aren’t sure if Pailadzo included mushrooms or pine nuts in her version of the recipe, and there may have been adaptations as the recipe moved through the family. But to the best of everyone’s knowledge, this is it.\u003c/p>\n\u003cp>\u003cstrong>Ingredients\u003c/strong>\u003cbr>\n\u003cem>\u003cbr>\nRice Mixture:\u003c/em>\u003c/p>\n\u003cul>\n\u003cli>7/8 cup long grain white rice\u003c/li>\n\u003cli>1/8 cup fideo capellini crushed into small pieces\u003c/li>\n\u003cli>½ cube butter\u003c/li>\n\u003cli>½ large onion, chopped\u003c/li>\n\u003cli>½ 4.5 oz jar sliced “Green Giant” mushrooms packed in water and drained. (mushrooms can be substituted with any other canned mushrooms.)\u003c/li>\n\u003cli>1 tbsp pine nuts\u003c/li>\n\u003c/ul>\n\u003cp>\u003cem>Broth:\u003c/em>\u003c/p>\n\u003cul>\n\u003cli>2 ½ cups boiling water\u003c/li>\n\u003cli>2 ½ chicken bouillon cubes\u003c/li>\n\u003cli>½ tbsp dried parsley flakes\u003c/li>\n\u003cli>Salt and pepper to taste.\u003c/li>\n\u003c/ul>\n\u003cp>(The broth should taste somewhat salty before it is added to rice mixture.)\u003c/p>\n\u003cp>\u003cstrong>Directions:\u003c/strong>\u003c/p>\n\u003col>\n\u003cli>Melt the butter over medium high flame in a medium sauce pan and add rice and fideo cappellini and stir constantly, cooking until it starts to turn golden.\u003c/li>\n\u003cli>Add chopped onion and cook until almost clear.\u003c/li>\n\u003cli>Add mushrooms and pine nuts. Stir constantly over medium high flame, until the mixture is golden brown with dark flecks of fideo capellini.\u003c/li>\n\u003cli>Meanwhile, make broth by heating water to boiling and adding bouillon cubes, parsley flakes, salt and pepper (you can heat this in the microwave or on the stove). Stir to dissolve the bouillon.\u003c/li>\n\u003cli>Add boiling broth to browned rice mixture, (note: broth /rice mixture should taste slightly salty), return to a bowl, stir once, and cover, then turn down the hat to a low simmer. Do not lift the cover for 35 minutes.\u003c/li>\n\u003cli>Remove from the heat, fluff with a fork; let rest until ready to serve.\u003c/li>\n\u003c/ol>\n\u003cp>\u003cem>P.S.: Cover pan with a cloth to keep warm (If I am traveling with the rice over a period of several hours, I wrap the pan in several beach towels and it will stay nice and warm).\u003c/em>\u003c/p>\n\u003cp>\u003cem>P.P.S.: To double the recipe: Use 7/8 cube butter; 4 7/8 cups water and 5 chicken bouillon cubes and cook rice for 37 minutes. (You can double all the other ingredients).\u003c/em>\u003c/p>\n\u003cp>If you follow these directions exactly, you should have a perfect pilaf every time. But avoid the urge to peek at the cooking rice. Lifting the cover during cooking will affect the texture and fluffiness of the dish.\u003c/p>\n\u003cp>[baycuriousquestion]\u003c/p>\n\u003cdiv class=\"fullattribution\">Copyright 2020 NPR. To see more, visit https://www.npr.org.\u003cimg decoding=\"async\" src=\"https://www.google-analytics.com/__utm.gif?utmac=UA-5828686-4&utmdt=Birth+Of+Rice-A-Roni%3A+The+Armenian-Italian+Treat&utme=8(APIKey)9(MDAxOTAwOTE4MDEyMTkxMDAzNjczZDljZA004)\">\u003c/div>\n\u003cp>[ad floatright]\u003c/p>\n",
"stats": {
"hasVideo": true,
"hasChartOrMap": false,
"hasAudio": false,
"hasPolis": false,
"wordCount": 1448,
"hasGoogleForm": false,
"hasGallery": false,
"hasHearkenModule": true,
"iframeSrcs": [],
"paragraphCount": 34
},
"modified": 1700590693,
"excerpt": "The birth of Rice-A-Roni began with a friendship between a Canadian immigrant and a survivor of the Armenian genocide. ",
"headData": {
"twImgId": "",
"twTitle": "",
"ogTitle": "",
"ogImgId": "",
"twDescription": "",
"description": "The birth of Rice-A-Roni began with a friendship between a Canadian immigrant and a survivor of the Armenian genocide. ",
"title": "How Rice-A-Roni Became The San Francisco Treat | KQED",
"ogDescription": "",
"schema": {
"@context": "https://schema.org",
"@type": "NewsArticle",
"headline": "How Rice-A-Roni Became The San Francisco Treat",
"datePublished": "2020-05-14T03:00:44-07:00",
"dateModified": "2023-11-21T10:18:13-08:00",
"image": "https://cdn.kqed.org/wp-content/uploads/2020/02/KQED-OG-Image@1x.png",
"isAccessibleForFree": "True",
"publisher": {
"@type": "NewsMediaOrganization",
"@id": "https://www.kqed.org/#organization",
"name": "KQED",
"logo": "https://cdn.kqed.org/wp-content/uploads/2020/02/KQED-OG-Image@1x.png",
"url": "https://www.kqed.org",
"sameAs": [
"https://www.facebook.com/KQED",
"https://twitter.com/KQED",
"https://www.instagram.com/kqed/",
"https://www.tiktok.com/@kqedofficial",
"https://www.linkedin.com/company/kqed",
"https://www.youtube.com/channel/UCeC0IOo7i1P_61zVUWbJ4nw"
]
}
}
},
"guestAuthors": [],
"slug": "birth-of-rice-a-roni-the-armenian-italian-treat",
"status": "publish",
"nprApiLink": "http://api.npr.org/query?id=93067862&apiKey=MDAxOTAwOTE4MDEyMTkxMDAzNjczZDljZA004",
"templateType": "standard",
"nprStoryDate": "Thu, 31 Jul 2008 12:54:00 -0400",
"nprLastModifiedDate": "Tue, 06 Nov 2012 12:52:28 -0500",
"featuredImageType": "standard",
"nprHtmlLink": "https://www.npr.org/2008/07/31/93067862/birth-of-rice-a-roni-the-armenian-italian-treat?ft=nprml&f=93067862",
"nprAudio": "https://ondemand.npr.org/anon.npr-mp3/npr/me/2008/07/20080731_me_17.mp3?orgId=1&topicId=1053&aggIds=91851784&p=3&story=93067862&ft=nprml&f=93067862",
"source": "Bay Curious",
"nprAudioM3u": "http://api.npr.org/m3u/193111251-29de23.m3u?orgId=1&topicId=1053&aggIds=91851784&p=3&story=93067862&ft=nprml&f=93067862",
"nprStoryId": "93067862",
"sourceUrl": "https://www.kqed.org/podcasts/baycurious",
"audioUrl": "https://traffic.megaphone.fm/KQINC1349518787.mp3",
"nprByline": "The Kitchen Sisters, Asal Ehsanipour",
"nprRetrievedStory": "1",
"nprPubDate": "Tue, 06 Nov 2012 12:52:00 -0500",
"path": "/news/11816328/birth-of-rice-a-roni-the-armenian-italian-treat",
"audioTrackLength": null,
"parsedContent": [
{
"type": "contentString",
"content": "\u003cdiv class=\"post-body\">\u003cp>\u003cp>\u003cem>This story was produced by Nikki Silva and Davia Nelson of The Kitchen Sisters and originally aired on NPR in 2008. Thank you to The Kitchen Sisters for allowing us to adapt that piece for Bay Curious. You can listen to the original \u003ca href=\"https://www.npr.org/2008/07/31/93067862/birth-of-rice-a-roni-the-armenian-italian-treat\">here\u003c/a>.\u003c/em>\u003c/p>\n\u003cp> \u003c/p>\n\u003cp>\u003c/p>\u003cp>\u003cspan class=\"utils-parseShortcode-shortcodes-__dropcapShortcode__dropcap\">T\u003c/span>\u003c/p>\u003cp>here was a time when you couldn’t go too long watching television without seeing a commercial for Rice-A-Roni. Many featured images of San Francisco and ended with a catchy jingle — “Rice-A-Roni. The San Francisco Treat!”\u003c/p>\n\u003cp>Bay Curious listener Kent Barnes has wondered if that advertising slogan is true. Was Rice-A-Roni actually created here in the Bay Area?\u003c/p>\n\u003cfigure id=\"attachment_11817521\" class=\"wp-caption alignleft\" style=\"max-width: 200px\">\u003cimg decoding=\"async\" loading=\"lazy\" src=\"https://ww2.kqed.org/app/uploads/sites/10/2020/05/ricearoni_TomLois200.jpg\" alt=\"Tom and Lois DeDomenico in San Francisco, shortly after their marriage.\" width=\"200\" height=\"266\" class=\"size-full wp-image-11817521\" srcset=\"https://ww2.kqed.org/app/uploads/sites/10/2020/05/ricearoni_TomLois200.jpg 200w, https://ww2.kqed.org/app/uploads/sites/10/2020/05/ricearoni_TomLois200-160x213.jpg 160w\" sizes=\"(max-width: 200px) 100vw, 200px\">\u003cfigcaption class=\"wp-caption-text\">Tom and Lois DeDomenico in San Francisco, shortly after their marriage. \u003ccite>(Courtesy of Lois DeDomenico)\u003c/cite>\u003c/figcaption>\u003c/figure>\n\u003cp>The short answer: yes. It was a clandestine convergence of cultures that ultimately led to the creation of “The San Francisco Treat.”\u003c/p>\n\u003cp>The story starts just after World War II. Soldiers were pouring into San Francisco, looking for a fresh start. The housing market was crowded as Lois DeDomenico and her husband, Tom, were on the hunt for a place to live. Lois grew up in Edmonton, Canada, and met Tom in San Francisco in 1944. Tom’s father, an immigrant from Italy, owned a pasta company in San Francisco where Tom worked with his brothers.\u003c/p>\n\u003cp>There was very little housing available in San Francisco at the time, as soldiers flooded into the city for a new start after the war. So when Lois and Tom found a room to rent in the home of Pailadzo Captanian, they jumped on it.\u003c/p>\n\u003cp>“Mrs. Captanian. I had a liking for her right away, so we moved in. Tommy would work until about 7 o’clock at the pasta factory and I was alone a lot,” Lois said. “I was only 18 and I was pregnant. And I had kitchen privileges. Well, I really wasn’t much of a cook. And here was this Armenian lady, probably about 70 years [old], making yogurt on the back of the stove, all day, every day. I didn’t even know what the word ‘yogurt’ meant.”\u003c/p>\n\u003cp>Captanian taught Lois how to make paklava (baklava), soups and her specialty, Armenian pilaf.\u003c/p>\n\u003cp>“We would bring her Golden Grain vermicelli from the factory,” Lois said. “She wanted us to break it as small as rice if we could.”\u003c/p>\n\u003cp>\u003c/p>\u003c/div>",
"attributes": {
"named": {},
"numeric": []
}
},
{
"type": "component",
"content": "",
"name": "ad",
"attributes": {
"named": {
"label": "fullwidth"
},
"numeric": [
"fullwidth"
]
}
},
{
"type": "contentString",
"content": "\u003cdiv class=\"post-body\">\u003cp>\u003c/p>\n\u003cp>During those long afternoons in the kitchen, Lois listened as Captanian told her life story — about the Armenian genocide, her husband’s death and the separation from her two young boys. In 1915, she trekked from Turkey to Syria, while pregnant and with little food and water, along with thousands of other women and children who had been deported. Once in Syria, she gave birth, and was ultimately reunited with her two other sons.\u003c/p>\n\u003cp>Captanian chronicled these events in her 1919 book, “Memoires D’une Deportee.”\u003c/p>\n\u003cp>The family then moved to the United States, where she worked as a seamstress, sewing draperies for President Franklin D. Roosevelt’s Hyde Park home in New York. She put her boys through school, and after World War II, she moved to San Francisco, where one of her sons had settled.\u003c/p>\n\u003cfigure id=\"attachment_11818020\" class=\"wp-caption aligncenter\" style=\"max-width: 540px\">\u003cimg decoding=\"async\" loading=\"lazy\" class=\"wp-image-11818020 size-full\" src=\"https://ww2.kqed.org/app/uploads/sites/10/2020/05/rice_captanian540-86f59186faddc7574ffc62505c8a903e3894ba5e.jpg\" alt=\"\" width=\"540\" height=\"466\" srcset=\"https://ww2.kqed.org/app/uploads/sites/10/2020/05/rice_captanian540-86f59186faddc7574ffc62505c8a903e3894ba5e.jpg 540w, https://ww2.kqed.org/app/uploads/sites/10/2020/05/rice_captanian540-86f59186faddc7574ffc62505c8a903e3894ba5e-160x138.jpg 160w\" sizes=\"(max-width: 540px) 100vw, 540px\">\u003cfigcaption class=\"wp-caption-text\">The Captanian family in New York in 1921: Pailadzo, Gilbert, Aram and Herant. \u003ccite>(Courtesy of Captanian Family)\u003c/cite>\u003c/figcaption>\u003c/figure>\n\u003ch2>‘This Would Be Great in a Box’\u003c/h2>\n\u003cp>When the DeDomenicos moved into a place of their own, Lois often cooked Mrs. Captanian’s Armenian pilaf. At a family dinner one evening, after a long day at the pasta factory, Tom’s brother Vince stared at his dish of pilaf and said, “This would be great in a box.”\u003c/p>\n\u003cp>Golden Grain had a test kitchen at the factory. It took three or four years to adapt the recipe for one-pot cooking.\u003c/p>\n\u003cp>When Rice-A-Roni hit the market in the 1950s, people were desperate to make cooking easier and faster. Rice-A-Roni was a product that was preseasoned and didn’t require boiling water, which made cooking rice and pasta simpler than ever.\u003c/p>\n\u003cp>\u003c/p>\u003cp>\u003caside class=\"alignleft utils-parseShortcode-shortcodes-__bayCuriousPodcastShortcode__bayCurious\">\u003cimg src=https://cdn.kqed.org/wp-content/uploads/2023/02/bayCuriousLogo.png alt=\"Bay Curious Podcast\" loading=\"lazy\" />\n \u003ca href=\"/news/series/baycurious\">Bay Curious\u003c/a> is a podcast that answers your questions about the Bay Area.\n Subscribe on \u003ca href=\"https://itunes.apple.com/us/podcast/bay-curious/id1172473406\" target=\"_blank\" rel=\"noopener noreferrer\">Apple Podcasts\u003c/a>,\n \u003ca href=\"http://www.npr.org/podcasts/500557090/bay-curious\" target=\"_blank\" rel=\"noopener noreferrer\">NPR One\u003c/a> or your favorite podcast platform.\u003c/aside>\u003c/p>\u003cp>\u003c/p>\n\u003cp>“There were not many packaged side dishes in the market in 1955,” said Dennis DeDomenico, Tom and Lois’ son. “Everything was being geared toward less time in the kitchen. Major appliances like dishwashers and garbage disposals were starting to come in. The convenience factor was everything.”\u003c/p>\n\u003cp>All that was missing was a name.\u003c/p>\n\u003cp>“We said, ‘Well, what is the product? The product is rice and macaroni. Why don’t we call it Rice-A-Roni?’ Didn’t quite sound right. Who’d ever heard of rice and macaroni being together? Still, the name had a ring to it,” Tom DeDomenico said, in an oral history recorded by the Bancroft Library in 1988.\u003c/p>\n\u003ch2>A Culinary Melting Pot\u003c/h2>\n\u003cp>Rice-A-Roni was marketed as “A San Francisco Treat,” but it quickly became one of America’s favorite side dishes. Ted Captanian remembers seeing the commercials on television as a child.\u003c/p>\n\u003cp>“Every time we heard that jingle, my father would say, ‘You know your grandmother gave a rice recipe to the people who started that company. So every time you hear it, think of her,’ ” Ted said. “To be honest, we kind of thought — could that possibly be true? Could this iconic American dish actually be attributed to some recipe my grandmother gave years ago?”\u003c/p>\u003c/p>\u003cp>\u003cspan class='utils-parseShortcode-shortcodes-__youtubeShortcode__embedYoutube'>\n \u003cspan class='utils-parseShortcode-shortcodes-__youtubeShortcode__embedYoutubeInside'>\n \u003ciframe\n loading='lazy'\n class='utils-parseShortcode-shortcodes-__youtubeShortcode__youtubePlayer'\n type='text/html'\n src='//www.youtube.com/embed/yzOR_Fal_SY'\n title='//www.youtube.com/embed/yzOR_Fal_SY'\n allowfullscreen='true'\n style='border:0;'>\u003c/iframe>\n \u003c/span>\n \u003c/span>\u003c/p>\u003cp>\u003cp>Lois says she still makes pilaf the way Pailadzo Captanian taught her.\u003c/p>\n\u003cp>“The impact she had on me and my life,” Lois said. “I only lived there for four months, but it was four months that brought all these things together: myself from Canada; Tommy, Italian; Mrs. Captanian, Armenian. All that converging in San Francisco in 1946, and out of that comes Rice-A-Roni.”\u003c/p>\n\u003ch2 id=\"recipe\">Pailadzo Captanian’s Rice Pilaf Recipe\u003c/h2>\n\u003cp>Pailadzo Captanian’s rice pilaf dish has been passed through the family over the years. They aren’t sure if Pailadzo included mushrooms or pine nuts in her version of the recipe, and there may have been adaptations as the recipe moved through the family. But to the best of everyone’s knowledge, this is it.\u003c/p>\n\u003cp>\u003cstrong>Ingredients\u003c/strong>\u003cbr>\n\u003cem>\u003cbr>\nRice Mixture:\u003c/em>\u003c/p>\n\u003cul>\n\u003cli>7/8 cup long grain white rice\u003c/li>\n\u003cli>1/8 cup fideo capellini crushed into small pieces\u003c/li>\n\u003cli>½ cube butter\u003c/li>\n\u003cli>½ large onion, chopped\u003c/li>\n\u003cli>½ 4.5 oz jar sliced “Green Giant” mushrooms packed in water and drained. (mushrooms can be substituted with any other canned mushrooms.)\u003c/li>\n\u003cli>1 tbsp pine nuts\u003c/li>\n\u003c/ul>\n\u003cp>\u003cem>Broth:\u003c/em>\u003c/p>\n\u003cul>\n\u003cli>2 ½ cups boiling water\u003c/li>\n\u003cli>2 ½ chicken bouillon cubes\u003c/li>\n\u003cli>½ tbsp dried parsley flakes\u003c/li>\n\u003cli>Salt and pepper to taste.\u003c/li>\n\u003c/ul>\n\u003cp>(The broth should taste somewhat salty before it is added to rice mixture.)\u003c/p>\n\u003cp>\u003cstrong>Directions:\u003c/strong>\u003c/p>\n\u003col>\n\u003cli>Melt the butter over medium high flame in a medium sauce pan and add rice and fideo cappellini and stir constantly, cooking until it starts to turn golden.\u003c/li>\n\u003cli>Add chopped onion and cook until almost clear.\u003c/li>\n\u003cli>Add mushrooms and pine nuts. Stir constantly over medium high flame, until the mixture is golden brown with dark flecks of fideo capellini.\u003c/li>\n\u003cli>Meanwhile, make broth by heating water to boiling and adding bouillon cubes, parsley flakes, salt and pepper (you can heat this in the microwave or on the stove). Stir to dissolve the bouillon.\u003c/li>\n\u003cli>Add boiling broth to browned rice mixture, (note: broth /rice mixture should taste slightly salty), return to a bowl, stir once, and cover, then turn down the hat to a low simmer. Do not lift the cover for 35 minutes.\u003c/li>\n\u003cli>Remove from the heat, fluff with a fork; let rest until ready to serve.\u003c/li>\n\u003c/ol>\n\u003cp>\u003cem>P.S.: Cover pan with a cloth to keep warm (If I am traveling with the rice over a period of several hours, I wrap the pan in several beach towels and it will stay nice and warm).\u003c/em>\u003c/p>\n\u003cp>\u003cem>P.P.S.: To double the recipe: Use 7/8 cube butter; 4 7/8 cups water and 5 chicken bouillon cubes and cook rice for 37 minutes. (You can double all the other ingredients).\u003c/em>\u003c/p>\n\u003cp>If you follow these directions exactly, you should have a perfect pilaf every time. But avoid the urge to peek at the cooking rice. Lifting the cover during cooking will affect the texture and fluffiness of the dish.\u003c/p>\n\u003cp>\u003c/p>\u003c/div>",
"attributes": {
"named": {},
"numeric": []
}
},
{
"type": "component",
"content": "",
"name": "baycuriousquestion",
"attributes": {
"named": {
"label": ""
},
"numeric": []
}
},
{
"type": "contentString",
"content": "\u003cdiv class=\"post-body\">\u003cp>\u003c/p>\n\u003cdiv class=\"fullattribution\">Copyright 2020 NPR. To see more, visit https://www.npr.org.\u003cimg decoding=\"async\" src=\"https://www.google-analytics.com/__utm.gif?utmac=UA-5828686-4&utmdt=Birth+Of+Rice-A-Roni%3A+The+Armenian-Italian+Treat&utme=8(APIKey)9(MDAxOTAwOTE4MDEyMTkxMDAzNjczZDljZA004)\">\u003c/div>\n\u003cp>\u003c/p>\u003c/div>",
"attributes": {
"named": {},
"numeric": []
}
},
{
"type": "component",
"content": "",
"name": "ad",
"attributes": {
"named": {
"label": "floatright"
},
"numeric": [
"floatright"
]
}
},
{
"type": "contentString",
"content": "\u003cdiv class=\"post-body\">\u003cp>\u003c/p>\n\u003c/div>\u003c/p>",
"attributes": {
"named": {},
"numeric": []
}
}
],
"link": "/news/11816328/birth-of-rice-a-roni-the-armenian-italian-treat",
"authors": [
"byline_news_11816328"
],
"programs": [
"news_33523"
],
"series": [
"news_17986"
],
"categories": [
"news_8",
"news_33520"
],
"tags": [
"news_333",
"news_24116",
"news_27935",
"news_6627"
],
"featImg": "news_11817540",
"label": "source_news_11816328"
},
"news_11796231": {
"type": "posts",
"id": "news_11796231",
"meta": {
"index": "posts_1716263798",
"site": "news",
"id": "11796231",
"score": null,
"sort": [
1579370745000
]
},
"parent": 0,
"labelTerm": {},
"blocks": [],
"publishDate": 1579370745,
"format": "audio",
"title": "Golden State Plate: Sriracha’s Journey From Southeast Asia to Southern California",
"headTitle": "Golden State Plate: Sriracha’s Journey From Southeast Asia to Southern California | KQED",
"content": "\u003cp>\u003cem>\u003ca href=\"http://itunes.apple.com/us/podcast/the-california-report-magazine/id1314750545?mt=2\" rel=\"noopener noreferrer\" target=\"_blank\">Listen to this and more in-depth storytelling by subscribing to The California Report Magazine podcast.\u003c/a>\u003c/em>\u003c/p>\n\u003cp>Sriracha is everywhere. It’s used to spice up anything from chips and chocolate bars to burgers. Just about every fast food chain has a Sriracha-infused menu option.\u003c/p>\n\u003cp>So how did this sauce go from niche condiment to a beloved mainstream staple?\u003c/p>\n\u003cp>The story begins with a Vietnamese refugee who found a home — and just the right peppers — in Southern California.\u003c/p>\n\u003cp>David Tran is the founder and CEO of Huy Fong Foods, the multi-million dollar company that makes Sriracha. The clear bottle filled with fiery red paste has itself become iconic, with a bright green top and a white rooster on the label. The rooster is there because Tran was born in 1945, and his Zodiac sign is the rooster. It’s also why Sriracha is sometimes referred to as “cock sauce” — and yes, they sell t-shirts with that name on it.\u003c/p>\n\u003cp>Tran got his start in Vietnam, when his brother gave him a chili field. He started making and selling a hot sauce called Pepper Sa-te in 1975. It’s based on a Thai chili sauce named for the coastal town of Si Racha. Tran sold the sauce in glass baby food jars.\u003c/p>\n\u003cfigure id=\"attachment_11796236\" class=\"wp-caption aligncenter\" style=\"max-width: 800px\">\u003cimg loading=\"lazy\" decoding=\"async\" class=\"size-medium wp-image-11796236\" src=\"https://ww2.kqed.org/app/uploads/sites/10/2020/01/RS40735_IMG_8233-qut-800x600.jpg\" alt=\"\" width=\"800\" height=\"600\" srcset=\"https://cdn.kqed.org/wp-content/uploads/sites/10/2020/01/RS40735_IMG_8233-qut-800x600.jpg 800w, https://cdn.kqed.org/wp-content/uploads/sites/10/2020/01/RS40735_IMG_8233-qut-160x120.jpg 160w, https://cdn.kqed.org/wp-content/uploads/sites/10/2020/01/RS40735_IMG_8233-qut-1020x765.jpg 1020w, https://cdn.kqed.org/wp-content/uploads/sites/10/2020/01/RS40735_IMG_8233-qut-1200x900.jpg 1200w, https://cdn.kqed.org/wp-content/uploads/sites/10/2020/01/RS40735_IMG_8233-qut.jpg 1920w, https://cdn.kqed.org/wp-content/uploads/sites/10/2020/01/RS40735_IMG_8233-qut-1832x1374.jpg 1832w, https://cdn.kqed.org/wp-content/uploads/sites/10/2020/01/RS40735_IMG_8233-qut-1376x1032.jpg 1376w, https://cdn.kqed.org/wp-content/uploads/sites/10/2020/01/RS40735_IMG_8233-qut-1044x783.jpg 1044w, https://cdn.kqed.org/wp-content/uploads/sites/10/2020/01/RS40735_IMG_8233-qut-632x474.jpg 632w, https://cdn.kqed.org/wp-content/uploads/sites/10/2020/01/RS40735_IMG_8233-qut-536x402.jpg 536w\" sizes=\"(max-width: 800px) 100vw, 800px\">\u003cfigcaption class=\"wp-caption-text\">The entrance to Huy Fong Foods in Irwindale, about 20 miles northeast of downtown Los Angeles. The factory has allowed guided tours since the company was accused of sickening nearby residents with its spicy odors. \u003ccite>(Avishay Artsy/KQED News)\u003c/cite>\u003c/figcaption>\u003c/figure>\n\u003cp>“They used to sell them actually on bikes. And actually my husband was one of the guys, the boys that helped him sell it to the markets over there. Because in Vietnam everybody makes their own hot sauce,” explained Donna Lam. She’s David Tran’s sister-in-law and the company’s executive operations officer. Many of the company’s officials are related to Tran.\u003c/p>\n\u003cp>[pullquote size=\"medium\" align=\"right\" citation=\"Tien Nguyen, food writer\"]‘He sourced these really fresh peppers. He processed them and they were on your table. That has become the definition of California cuisine. And I really think that he has helped develop this idea of what it means to cook and eat locally and seasonally.’[/pullquote]\u003c/p>\n\u003cp>Tran is ethnically Chinese and was a major in the South Vietnamese army, which made him a target of the Communist regime in Vietnam following the Vietnam War. He fled the country on a Taiwanese freighter called the Huey Fong, which means “gathering prosperity” and inspired the name of his company.\u003c/p>\n\u003cp>Tran sailed to the U.S., arriving first in Boston, but the cold winters and lack of fresh peppers drove him west. He moved to Los Angeles in 1979 and established his business in Chinatown, delivering the product himself in a blue Chevy van.\u003c/p>\n\u003cp>“California is the farmer state. They have a lot of produce. So I start a business in California. Seems like the right choice,” Tran explained matter-of-factly.\u003c/p>\n\u003cp>To make Sriracha, Tran uses red jalapeños. They’re no different from green jalapeños, except they’re left on the vine to mature, so they become spicier and sweeter. That’s how Tran made chili sauce back in Vietnam.\u003c/p>\n\u003cp>“In Asia, in China, chili must be red, not green. From beginning we using red, we’re not using green pepper,” Tran explained.\u003c/p>\n\u003cfigure id=\"attachment_11796307\" class=\"wp-caption alignnone\" style=\"max-width: 800px\">\u003cimg loading=\"lazy\" decoding=\"async\" class=\"wp-image-11796307 size-medium\" src=\"https://ww2.kqed.org/app/uploads/sites/10/2020/01/RS40738_IMG_8241-qut-800x600.jpg\" alt=\"\" width=\"800\" height=\"600\" srcset=\"https://cdn.kqed.org/wp-content/uploads/sites/10/2020/01/RS40738_IMG_8241-qut-800x600.jpg 800w, https://cdn.kqed.org/wp-content/uploads/sites/10/2020/01/RS40738_IMG_8241-qut-160x120.jpg 160w, https://cdn.kqed.org/wp-content/uploads/sites/10/2020/01/RS40738_IMG_8241-qut-1020x765.jpg 1020w, https://cdn.kqed.org/wp-content/uploads/sites/10/2020/01/RS40738_IMG_8241-qut-1200x900.jpg 1200w, https://cdn.kqed.org/wp-content/uploads/sites/10/2020/01/RS40738_IMG_8241-qut.jpg 1920w, https://cdn.kqed.org/wp-content/uploads/sites/10/2020/01/RS40738_IMG_8241-qut-1832x1374.jpg 1832w, https://cdn.kqed.org/wp-content/uploads/sites/10/2020/01/RS40738_IMG_8241-qut-1376x1032.jpg 1376w, https://cdn.kqed.org/wp-content/uploads/sites/10/2020/01/RS40738_IMG_8241-qut-1044x783.jpg 1044w, https://cdn.kqed.org/wp-content/uploads/sites/10/2020/01/RS40738_IMG_8241-qut-632x474.jpg 632w, https://cdn.kqed.org/wp-content/uploads/sites/10/2020/01/RS40738_IMG_8241-qut-536x402.jpg 536w\" sizes=\"(max-width: 800px) 100vw, 800px\">\u003cfigcaption class=\"wp-caption-text\">The waiting room at Huy Fong Foods includes giant inflatable Sriracha bottles and cardboard cutouts of company founder David Tran. \u003ccite>(Avishay Artsy/KQED News)\u003c/cite>\u003c/figcaption>\u003c/figure>\n\u003cp>Because he insisted on using freshly-picked peppers, food writer Tien Nguyen says Tran is quintessentially Californian.\u003c/p>\n\u003cp>“All of this California Food Revolution stuff that was happening in the 1970s, where chefs were sourcing locally and seasonally, or trying to source locally and seasonally, he was doing it,” Nguyen said.\u003c/p>\n\u003cp>“He sourced these really fresh peppers. He processed them and they were on your table. That has become the definition of California cuisine. And I really think that he has helped develop this idea of what it means to cook and eat locally and seasonally,” she added.\u003c/p>\n\u003cfigure id=\"attachment_11796315\" class=\"wp-caption alignright\" style=\"max-width: 800px\">\u003cimg loading=\"lazy\" decoding=\"async\" class=\"wp-image-11796315 size-medium\" src=\"https://ww2.kqed.org/app/uploads/sites/10/2020/01/RS40739_IMG_8346-qut-800x600.jpg\" alt=\"\" width=\"800\" height=\"600\" srcset=\"https://cdn.kqed.org/wp-content/uploads/sites/10/2020/01/RS40739_IMG_8346-qut-800x600.jpg 800w, https://cdn.kqed.org/wp-content/uploads/sites/10/2020/01/RS40739_IMG_8346-qut-160x120.jpg 160w, https://cdn.kqed.org/wp-content/uploads/sites/10/2020/01/RS40739_IMG_8346-qut-1020x765.jpg 1020w, https://cdn.kqed.org/wp-content/uploads/sites/10/2020/01/RS40739_IMG_8346-qut-1200x900.jpg 1200w, https://cdn.kqed.org/wp-content/uploads/sites/10/2020/01/RS40739_IMG_8346-qut.jpg 1920w, https://cdn.kqed.org/wp-content/uploads/sites/10/2020/01/RS40739_IMG_8346-qut-1832x1374.jpg 1832w, https://cdn.kqed.org/wp-content/uploads/sites/10/2020/01/RS40739_IMG_8346-qut-1376x1032.jpg 1376w, https://cdn.kqed.org/wp-content/uploads/sites/10/2020/01/RS40739_IMG_8346-qut-1044x783.jpg 1044w, https://cdn.kqed.org/wp-content/uploads/sites/10/2020/01/RS40739_IMG_8346-qut-632x474.jpg 632w, https://cdn.kqed.org/wp-content/uploads/sites/10/2020/01/RS40739_IMG_8346-qut-536x402.jpg 536w\" sizes=\"(max-width: 800px) 100vw, 800px\">\u003cfigcaption class=\"wp-caption-text\">A variety of t-shirts are for sale at the Huy Fong gift shop. \u003ccite>(Avishay Artsy/KQED News)\u003c/cite>\u003c/figcaption>\u003c/figure>\n\u003cp>So why has the sauce become such a hit? Maybe the sweetness and spiciness played well with the American palate. Maybe it was the exotic look of the rooster logo. Or maybe, according to Huy Fong COO Donna Lam, because it’s cheap.\u003c/p>\n\u003cp>“David’s philosophy is to make a rich man’s sauce at a poor man’s price and everybody can get it,” she said.\u003c/p>\n\u003cp>Lam has another theory though. It’s the feel-good origin story of Sriracha. Tran came to America with nothing and launched a business that makes an estimated $80 million a year — and he happily poses for photos with tour groups.\u003c/p>\n\u003cp>“It’s not just like a guy in a glass office somewhere that’s unapproachable, he’s a very approachable guy,” she said.\u003c/p>\n\u003cp>Nguyen has a different theory: as Vietnamese and Thai food became more popular, chefs and foodies sought out Sriracha as well, and eventually, supermarkets started stocking it.\u003c/p>\n\u003cp>For 28 years, Huy Fong got peppers exclusively from Underwood Ranches in Ventura County. But the partnership fell apart in 2016 over allegations of an overpayment and breach of contract. Dueling lawsuits ended this summer when a jury in Ventura County awarded the grower $23.3 million. Huy Fong plans to fight the decision.\u003c/p>\n\u003cp>After the lawsuit with Underwood Ranches, Huy Fong has had to look elsewhere for fresh jalapeños. It now gets its peppers from farms in California, New Mexico and Mexico. The phrase “made in California” was taken off the label.\u003c/p>\n\u003cp>[aside tag=\"golden-state-plate\" label=\"related coverage\"]\u003c/p>\n\u003cp>But that wasn’t Huy Fong’s first legal battle. Its factory is in Irwindale, about 20 miles northeast of downtown Los Angeles. In 2013, the city filed suit because some neighbors complained about headaches and itchy eyes caused by odors from the plant.\u003c/p>\n\u003cp>“The local resident, they complain that we make the hot sauce and the spicy, toxic gas make them sick,” Tran said.\u003c/p>\n\u003cp>The company countersued, and Tran considered moving the company to Texas. Eventually the suit was dropped, the company installed new filters to reduce the smell and the feared “srirachapocalypse” was averted.\u003c/p>\n\u003cp>Around that time, Tran’s sauce became a full-blown pop culture phenomenon, with Sriracha flavored everything popping up. Suddenly, there were Sriracha cookbooks, a documentary, \u003ca href=\"https://www.youtube.com/watch?v=abf7TueHs1k\" target=\"_blank\" rel=\"noopener noreferrer\">hip hop shoutouts\u003c/a> and a Sriracha-themed food festival in Los Angeles. Merriam-Webster even added “Sriracha” to its dictionary in 2017.\u003c/p>\n\u003cp>After the lawsuits over the odors were dropped, Tran — like a modern-day Willy Wonka — opened his factory for public tours.\u003c/p>\n\u003cp>“And now we keep open because a lot of people interesting to see how we make it. After they take a tour, they trust my product,” Tran said.\u003c/p>\n\u003cfigure id=\"attachment_11796323\" class=\"wp-caption alignnone\" style=\"max-width: 800px\">\u003cimg loading=\"lazy\" decoding=\"async\" class=\"size-medium wp-image-11796323\" src=\"https://ww2.kqed.org/app/uploads/sites/10/2020/01/RS40741_IMG_8284-qut-800x600.jpg\" alt=\"\" width=\"800\" height=\"600\" srcset=\"https://cdn.kqed.org/wp-content/uploads/sites/10/2020/01/RS40741_IMG_8284-qut-800x600.jpg 800w, https://cdn.kqed.org/wp-content/uploads/sites/10/2020/01/RS40741_IMG_8284-qut-160x120.jpg 160w, https://cdn.kqed.org/wp-content/uploads/sites/10/2020/01/RS40741_IMG_8284-qut-1020x765.jpg 1020w, https://cdn.kqed.org/wp-content/uploads/sites/10/2020/01/RS40741_IMG_8284-qut-1200x900.jpg 1200w, https://cdn.kqed.org/wp-content/uploads/sites/10/2020/01/RS40741_IMG_8284-qut.jpg 1920w, https://cdn.kqed.org/wp-content/uploads/sites/10/2020/01/RS40741_IMG_8284-qut-1832x1374.jpg 1832w, https://cdn.kqed.org/wp-content/uploads/sites/10/2020/01/RS40741_IMG_8284-qut-1376x1032.jpg 1376w, https://cdn.kqed.org/wp-content/uploads/sites/10/2020/01/RS40741_IMG_8284-qut-1044x783.jpg 1044w, https://cdn.kqed.org/wp-content/uploads/sites/10/2020/01/RS40741_IMG_8284-qut-632x474.jpg 632w, https://cdn.kqed.org/wp-content/uploads/sites/10/2020/01/RS40741_IMG_8284-qut-536x402.jpg 536w\" sizes=\"(max-width: 800px) 100vw, 800px\">\u003cfigcaption class=\"wp-caption-text\">A Huy Fong employee inspects bottles on the assembly line. \u003ccite>(Avishay Artsy/KQED News)\u003c/cite>\u003c/figcaption>\u003c/figure>\n\u003cp>A recent tour began in a waiting room with walls covered in pictures of Sriracha fans from around the world. There are cardboard cutouts of Tran and the Sriracha bottle. There’s even a picture of astronauts in a space shuttle posing with a bottle.\u003c/p>\n\u003cp>Huy Fong employee Andrea Castillo led the tour group by trolley to the manufacturing facility. The group climbed up a flight of stairs to look down on a conveyor belt. Bright blue fifty-five gallon barrels slid past while workers in white uniforms looked on. The barrels were filled with a mixture of ground chilis, garlic, salt and vinegar.\u003c/p>\n\u003cp>On the tour of the factory I noticed a few of the employees wearing Huy Fong t-shirts. On the back of the shirts it read “No Tear Gas Made Here,” a tongue-in-cheek reference to the 2013 lawsuit.\u003c/p>\n\u003cp>Castillo showed the group how the clear plastic bottles were molded, then filled with the bright red paste, labeled, boxed and placed on pallets to be shipped around the world.\u003c/p>\n\u003cfigure id=\"attachment_11796325\" class=\"wp-caption alignnone\" style=\"max-width: 800px\">\u003cimg loading=\"lazy\" decoding=\"async\" class=\"size-medium wp-image-11796325\" src=\"https://ww2.kqed.org/app/uploads/sites/10/2020/01/RS40742_IMG_8320-qut-800x600.jpg\" alt=\"\" width=\"800\" height=\"600\" srcset=\"https://cdn.kqed.org/wp-content/uploads/sites/10/2020/01/RS40742_IMG_8320-qut-800x600.jpg 800w, https://cdn.kqed.org/wp-content/uploads/sites/10/2020/01/RS40742_IMG_8320-qut-160x120.jpg 160w, https://cdn.kqed.org/wp-content/uploads/sites/10/2020/01/RS40742_IMG_8320-qut-1020x765.jpg 1020w, https://cdn.kqed.org/wp-content/uploads/sites/10/2020/01/RS40742_IMG_8320-qut-1200x900.jpg 1200w, https://cdn.kqed.org/wp-content/uploads/sites/10/2020/01/RS40742_IMG_8320-qut.jpg 1920w, https://cdn.kqed.org/wp-content/uploads/sites/10/2020/01/RS40742_IMG_8320-qut-1832x1374.jpg 1832w, https://cdn.kqed.org/wp-content/uploads/sites/10/2020/01/RS40742_IMG_8320-qut-1376x1032.jpg 1376w, https://cdn.kqed.org/wp-content/uploads/sites/10/2020/01/RS40742_IMG_8320-qut-1044x783.jpg 1044w, https://cdn.kqed.org/wp-content/uploads/sites/10/2020/01/RS40742_IMG_8320-qut-632x474.jpg 632w, https://cdn.kqed.org/wp-content/uploads/sites/10/2020/01/RS40742_IMG_8320-qut-536x402.jpg 536w\" sizes=\"(max-width: 800px) 100vw, 800px\">\u003cfigcaption class=\"wp-caption-text\">Huy Fong workers inspect the barrels of Sriracha before the paste is bottled, packaged and shipped to distributors. \u003ccite>(Avishay Artsy/KQED News)\u003c/cite>\u003c/figcaption>\u003c/figure>\n\u003cp>So does Tran have a vision for the future? He says he has no plans to sell the company or take on investors, and the company doesn’t spend a dime on advertising. Because Tran named his sauce for the Thai city, he can’t trademark the name, which means there are plenty of copycats. There are no new products in the works, aside from Sriracha and two less-popular sauces, Chili Garlic and Sambal Oelek.\u003c/p>\n\u003cp>All he wants to do, he says, is make what his customers want, and that’s Sriracha.\u003c/p>\n\u003cp>[ad fullwidth]\u003c/p>\n\u003cp>[ad floatright]\u003c/p>\n",
"stats": {
"hasVideo": false,
"hasChartOrMap": false,
"hasAudio": false,
"hasPolis": false,
"wordCount": 1529,
"hasGoogleForm": false,
"hasGallery": false,
"hasHearkenModule": false,
"iframeSrcs": [],
"paragraphCount": 38
},
"modified": 1711753823,
"excerpt": "Sriracha is used to spice up everything from chips and chocolate bars to burgers. But the story of Sriracha’s rise to mainstream condiment began with a Vietnamese refugee who found a home and just the right peppers, in Southern California. ",
"headData": {
"twImgId": "",
"twTitle": "",
"ogTitle": "",
"ogImgId": "",
"twDescription": "",
"description": "Sriracha is used to spice up everything from chips and chocolate bars to burgers. But the story of Sriracha’s rise to mainstream condiment began with a Vietnamese refugee who found a home and just the right peppers, in Southern California. ",
"title": "Golden State Plate: Sriracha’s Journey From Southeast Asia to Southern California | KQED",
"ogDescription": "",
"schema": {
"@context": "https://schema.org",
"@type": "NewsArticle",
"headline": "Golden State Plate: Sriracha’s Journey From Southeast Asia to Southern California",
"datePublished": "2020-01-18T10:05:45-08:00",
"dateModified": "2024-03-29T16:10:23-07:00",
"image": "https://cdn.kqed.org/wp-content/uploads/2020/02/KQED-OG-Image@1x.png",
"isAccessibleForFree": "True",
"publisher": {
"@type": "NewsMediaOrganization",
"@id": "https://www.kqed.org/#organization",
"name": "KQED",
"logo": "https://cdn.kqed.org/wp-content/uploads/2020/02/KQED-OG-Image@1x.png",
"url": "https://www.kqed.org",
"sameAs": [
"https://www.facebook.com/KQED",
"https://twitter.com/KQED",
"https://www.instagram.com/kqed/",
"https://www.tiktok.com/@kqedofficial",
"https://www.linkedin.com/company/kqed",
"https://www.youtube.com/channel/UCeC0IOo7i1P_61zVUWbJ4nw"
]
}
}
},
"guestAuthors": [],
"slug": "golden-state-plate-srirachas-journey-from-southeast-asia-to-southern-california",
"status": "publish",
"sourceUrl": "https://www.kqed.org/food",
"templateType": "standard",
"audioUrl": "https://www.kqed.org/.stream/anon/radio/tcrmag/2020/01/ArtsySriracha.mp3",
"nprByline": "Avishay Artsy",
"excludeFromSiteSearch": "Include",
"featuredImageType": "standard",
"sticky": false,
"audioTrackLength": 346,
"source": "Food",
"showOnAuthorArchivePages": "No",
"articleAge": "0",
"path": "/news/11796231/golden-state-plate-srirachas-journey-from-southeast-asia-to-southern-california",
"audioDuration": 345000,
"parsedContent": [
{
"type": "contentString",
"content": "\u003cdiv class=\"post-body\">\u003cp>\u003cp>\u003cem>\u003ca href=\"http://itunes.apple.com/us/podcast/the-california-report-magazine/id1314750545?mt=2\" rel=\"noopener noreferrer\" target=\"_blank\">Listen to this and more in-depth storytelling by subscribing to The California Report Magazine podcast.\u003c/a>\u003c/em>\u003c/p>\n\u003cp>Sriracha is everywhere. It’s used to spice up anything from chips and chocolate bars to burgers. Just about every fast food chain has a Sriracha-infused menu option.\u003c/p>\n\u003cp>So how did this sauce go from niche condiment to a beloved mainstream staple?\u003c/p>\n\u003cp>The story begins with a Vietnamese refugee who found a home — and just the right peppers — in Southern California.\u003c/p>\n\u003cp>David Tran is the founder and CEO of Huy Fong Foods, the multi-million dollar company that makes Sriracha. The clear bottle filled with fiery red paste has itself become iconic, with a bright green top and a white rooster on the label. The rooster is there because Tran was born in 1945, and his Zodiac sign is the rooster. It’s also why Sriracha is sometimes referred to as “cock sauce” — and yes, they sell t-shirts with that name on it.\u003c/p>\n\u003cp>Tran got his start in Vietnam, when his brother gave him a chili field. He started making and selling a hot sauce called Pepper Sa-te in 1975. It’s based on a Thai chili sauce named for the coastal town of Si Racha. Tran sold the sauce in glass baby food jars.\u003c/p>\n\u003cfigure id=\"attachment_11796236\" class=\"wp-caption aligncenter\" style=\"max-width: 800px\">\u003cimg loading=\"lazy\" decoding=\"async\" class=\"size-medium wp-image-11796236\" src=\"https://ww2.kqed.org/app/uploads/sites/10/2020/01/RS40735_IMG_8233-qut-800x600.jpg\" alt=\"\" width=\"800\" height=\"600\" srcset=\"https://cdn.kqed.org/wp-content/uploads/sites/10/2020/01/RS40735_IMG_8233-qut-800x600.jpg 800w, https://cdn.kqed.org/wp-content/uploads/sites/10/2020/01/RS40735_IMG_8233-qut-160x120.jpg 160w, https://cdn.kqed.org/wp-content/uploads/sites/10/2020/01/RS40735_IMG_8233-qut-1020x765.jpg 1020w, https://cdn.kqed.org/wp-content/uploads/sites/10/2020/01/RS40735_IMG_8233-qut-1200x900.jpg 1200w, https://cdn.kqed.org/wp-content/uploads/sites/10/2020/01/RS40735_IMG_8233-qut.jpg 1920w, https://cdn.kqed.org/wp-content/uploads/sites/10/2020/01/RS40735_IMG_8233-qut-1832x1374.jpg 1832w, https://cdn.kqed.org/wp-content/uploads/sites/10/2020/01/RS40735_IMG_8233-qut-1376x1032.jpg 1376w, https://cdn.kqed.org/wp-content/uploads/sites/10/2020/01/RS40735_IMG_8233-qut-1044x783.jpg 1044w, https://cdn.kqed.org/wp-content/uploads/sites/10/2020/01/RS40735_IMG_8233-qut-632x474.jpg 632w, https://cdn.kqed.org/wp-content/uploads/sites/10/2020/01/RS40735_IMG_8233-qut-536x402.jpg 536w\" sizes=\"(max-width: 800px) 100vw, 800px\">\u003cfigcaption class=\"wp-caption-text\">The entrance to Huy Fong Foods in Irwindale, about 20 miles northeast of downtown Los Angeles. The factory has allowed guided tours since the company was accused of sickening nearby residents with its spicy odors. \u003ccite>(Avishay Artsy/KQED News)\u003c/cite>\u003c/figcaption>\u003c/figure>\n\u003cp>“They used to sell them actually on bikes. And actually my husband was one of the guys, the boys that helped him sell it to the markets over there. Because in Vietnam everybody makes their own hot sauce,” explained Donna Lam. She’s David Tran’s sister-in-law and the company’s executive operations officer. Many of the company’s officials are related to Tran.\u003c/p>\n\u003cp>\u003c/p>\u003c/div>",
"attributes": {
"named": {},
"numeric": []
}
},
{
"type": "component",
"content": "‘He sourced these really fresh peppers. He processed them and they were on your table. That has become the definition of California cuisine. And I really think that he has helped develop this idea of what it means to cook and eat locally and seasonally.’",
"name": "pullquote",
"attributes": {
"named": {
"size": "medium",
"align": "right",
"citation": "Tien Nguyen, food writer",
"label": ""
},
"numeric": []
}
},
{
"type": "contentString",
"content": "\u003cdiv class=\"post-body\">\u003cp>\u003c/p>\n\u003cp>Tran is ethnically Chinese and was a major in the South Vietnamese army, which made him a target of the Communist regime in Vietnam following the Vietnam War. He fled the country on a Taiwanese freighter called the Huey Fong, which means “gathering prosperity” and inspired the name of his company.\u003c/p>\n\u003cp>Tran sailed to the U.S., arriving first in Boston, but the cold winters and lack of fresh peppers drove him west. He moved to Los Angeles in 1979 and established his business in Chinatown, delivering the product himself in a blue Chevy van.\u003c/p>\n\u003cp>“California is the farmer state. They have a lot of produce. So I start a business in California. Seems like the right choice,” Tran explained matter-of-factly.\u003c/p>\n\u003cp>To make Sriracha, Tran uses red jalapeños. They’re no different from green jalapeños, except they’re left on the vine to mature, so they become spicier and sweeter. That’s how Tran made chili sauce back in Vietnam.\u003c/p>\n\u003cp>“In Asia, in China, chili must be red, not green. From beginning we using red, we’re not using green pepper,” Tran explained.\u003c/p>\n\u003cfigure id=\"attachment_11796307\" class=\"wp-caption alignnone\" style=\"max-width: 800px\">\u003cimg loading=\"lazy\" decoding=\"async\" class=\"wp-image-11796307 size-medium\" src=\"https://ww2.kqed.org/app/uploads/sites/10/2020/01/RS40738_IMG_8241-qut-800x600.jpg\" alt=\"\" width=\"800\" height=\"600\" srcset=\"https://cdn.kqed.org/wp-content/uploads/sites/10/2020/01/RS40738_IMG_8241-qut-800x600.jpg 800w, https://cdn.kqed.org/wp-content/uploads/sites/10/2020/01/RS40738_IMG_8241-qut-160x120.jpg 160w, https://cdn.kqed.org/wp-content/uploads/sites/10/2020/01/RS40738_IMG_8241-qut-1020x765.jpg 1020w, https://cdn.kqed.org/wp-content/uploads/sites/10/2020/01/RS40738_IMG_8241-qut-1200x900.jpg 1200w, https://cdn.kqed.org/wp-content/uploads/sites/10/2020/01/RS40738_IMG_8241-qut.jpg 1920w, https://cdn.kqed.org/wp-content/uploads/sites/10/2020/01/RS40738_IMG_8241-qut-1832x1374.jpg 1832w, https://cdn.kqed.org/wp-content/uploads/sites/10/2020/01/RS40738_IMG_8241-qut-1376x1032.jpg 1376w, https://cdn.kqed.org/wp-content/uploads/sites/10/2020/01/RS40738_IMG_8241-qut-1044x783.jpg 1044w, https://cdn.kqed.org/wp-content/uploads/sites/10/2020/01/RS40738_IMG_8241-qut-632x474.jpg 632w, https://cdn.kqed.org/wp-content/uploads/sites/10/2020/01/RS40738_IMG_8241-qut-536x402.jpg 536w\" sizes=\"(max-width: 800px) 100vw, 800px\">\u003cfigcaption class=\"wp-caption-text\">The waiting room at Huy Fong Foods includes giant inflatable Sriracha bottles and cardboard cutouts of company founder David Tran. \u003ccite>(Avishay Artsy/KQED News)\u003c/cite>\u003c/figcaption>\u003c/figure>\n\u003cp>Because he insisted on using freshly-picked peppers, food writer Tien Nguyen says Tran is quintessentially Californian.\u003c/p>\n\u003cp>“All of this California Food Revolution stuff that was happening in the 1970s, where chefs were sourcing locally and seasonally, or trying to source locally and seasonally, he was doing it,” Nguyen said.\u003c/p>\n\u003cp>“He sourced these really fresh peppers. He processed them and they were on your table. That has become the definition of California cuisine. And I really think that he has helped develop this idea of what it means to cook and eat locally and seasonally,” she added.\u003c/p>\n\u003cfigure id=\"attachment_11796315\" class=\"wp-caption alignright\" style=\"max-width: 800px\">\u003cimg loading=\"lazy\" decoding=\"async\" class=\"wp-image-11796315 size-medium\" src=\"https://ww2.kqed.org/app/uploads/sites/10/2020/01/RS40739_IMG_8346-qut-800x600.jpg\" alt=\"\" width=\"800\" height=\"600\" srcset=\"https://cdn.kqed.org/wp-content/uploads/sites/10/2020/01/RS40739_IMG_8346-qut-800x600.jpg 800w, https://cdn.kqed.org/wp-content/uploads/sites/10/2020/01/RS40739_IMG_8346-qut-160x120.jpg 160w, https://cdn.kqed.org/wp-content/uploads/sites/10/2020/01/RS40739_IMG_8346-qut-1020x765.jpg 1020w, https://cdn.kqed.org/wp-content/uploads/sites/10/2020/01/RS40739_IMG_8346-qut-1200x900.jpg 1200w, https://cdn.kqed.org/wp-content/uploads/sites/10/2020/01/RS40739_IMG_8346-qut.jpg 1920w, https://cdn.kqed.org/wp-content/uploads/sites/10/2020/01/RS40739_IMG_8346-qut-1832x1374.jpg 1832w, https://cdn.kqed.org/wp-content/uploads/sites/10/2020/01/RS40739_IMG_8346-qut-1376x1032.jpg 1376w, https://cdn.kqed.org/wp-content/uploads/sites/10/2020/01/RS40739_IMG_8346-qut-1044x783.jpg 1044w, https://cdn.kqed.org/wp-content/uploads/sites/10/2020/01/RS40739_IMG_8346-qut-632x474.jpg 632w, https://cdn.kqed.org/wp-content/uploads/sites/10/2020/01/RS40739_IMG_8346-qut-536x402.jpg 536w\" sizes=\"(max-width: 800px) 100vw, 800px\">\u003cfigcaption class=\"wp-caption-text\">A variety of t-shirts are for sale at the Huy Fong gift shop. \u003ccite>(Avishay Artsy/KQED News)\u003c/cite>\u003c/figcaption>\u003c/figure>\n\u003cp>So why has the sauce become such a hit? Maybe the sweetness and spiciness played well with the American palate. Maybe it was the exotic look of the rooster logo. Or maybe, according to Huy Fong COO Donna Lam, because it’s cheap.\u003c/p>\n\u003cp>“David’s philosophy is to make a rich man’s sauce at a poor man’s price and everybody can get it,” she said.\u003c/p>\n\u003cp>Lam has another theory though. It’s the feel-good origin story of Sriracha. Tran came to America with nothing and launched a business that makes an estimated $80 million a year — and he happily poses for photos with tour groups.\u003c/p>\n\u003cp>“It’s not just like a guy in a glass office somewhere that’s unapproachable, he’s a very approachable guy,” she said.\u003c/p>\n\u003cp>Nguyen has a different theory: as Vietnamese and Thai food became more popular, chefs and foodies sought out Sriracha as well, and eventually, supermarkets started stocking it.\u003c/p>\n\u003cp>For 28 years, Huy Fong got peppers exclusively from Underwood Ranches in Ventura County. But the partnership fell apart in 2016 over allegations of an overpayment and breach of contract. Dueling lawsuits ended this summer when a jury in Ventura County awarded the grower $23.3 million. Huy Fong plans to fight the decision.\u003c/p>\n\u003cp>After the lawsuit with Underwood Ranches, Huy Fong has had to look elsewhere for fresh jalapeños. It now gets its peppers from farms in California, New Mexico and Mexico. The phrase “made in California” was taken off the label.\u003c/p>\n\u003cp>\u003c/p>\u003c/div>",
"attributes": {
"named": {},
"numeric": []
}
},
{
"type": "component",
"content": "",
"name": "aside",
"attributes": {
"named": {
"tag": "golden-state-plate",
"label": "related coverage "
},
"numeric": []
}
},
{
"type": "contentString",
"content": "\u003cdiv class=\"post-body\">\u003cp>\u003c/p>\n\u003cp>But that wasn’t Huy Fong’s first legal battle. Its factory is in Irwindale, about 20 miles northeast of downtown Los Angeles. In 2013, the city filed suit because some neighbors complained about headaches and itchy eyes caused by odors from the plant.\u003c/p>\n\u003cp>“The local resident, they complain that we make the hot sauce and the spicy, toxic gas make them sick,” Tran said.\u003c/p>\n\u003cp>The company countersued, and Tran considered moving the company to Texas. Eventually the suit was dropped, the company installed new filters to reduce the smell and the feared “srirachapocalypse” was averted.\u003c/p>\n\u003cp>Around that time, Tran’s sauce became a full-blown pop culture phenomenon, with Sriracha flavored everything popping up. Suddenly, there were Sriracha cookbooks, a documentary, \u003ca href=\"https://www.youtube.com/watch?v=abf7TueHs1k\" target=\"_blank\" rel=\"noopener noreferrer\">hip hop shoutouts\u003c/a> and a Sriracha-themed food festival in Los Angeles. Merriam-Webster even added “Sriracha” to its dictionary in 2017.\u003c/p>\n\u003cp>After the lawsuits over the odors were dropped, Tran — like a modern-day Willy Wonka — opened his factory for public tours.\u003c/p>\n\u003cp>“And now we keep open because a lot of people interesting to see how we make it. After they take a tour, they trust my product,” Tran said.\u003c/p>\n\u003cfigure id=\"attachment_11796323\" class=\"wp-caption alignnone\" style=\"max-width: 800px\">\u003cimg loading=\"lazy\" decoding=\"async\" class=\"size-medium wp-image-11796323\" src=\"https://ww2.kqed.org/app/uploads/sites/10/2020/01/RS40741_IMG_8284-qut-800x600.jpg\" alt=\"\" width=\"800\" height=\"600\" srcset=\"https://cdn.kqed.org/wp-content/uploads/sites/10/2020/01/RS40741_IMG_8284-qut-800x600.jpg 800w, https://cdn.kqed.org/wp-content/uploads/sites/10/2020/01/RS40741_IMG_8284-qut-160x120.jpg 160w, https://cdn.kqed.org/wp-content/uploads/sites/10/2020/01/RS40741_IMG_8284-qut-1020x765.jpg 1020w, https://cdn.kqed.org/wp-content/uploads/sites/10/2020/01/RS40741_IMG_8284-qut-1200x900.jpg 1200w, https://cdn.kqed.org/wp-content/uploads/sites/10/2020/01/RS40741_IMG_8284-qut.jpg 1920w, https://cdn.kqed.org/wp-content/uploads/sites/10/2020/01/RS40741_IMG_8284-qut-1832x1374.jpg 1832w, https://cdn.kqed.org/wp-content/uploads/sites/10/2020/01/RS40741_IMG_8284-qut-1376x1032.jpg 1376w, https://cdn.kqed.org/wp-content/uploads/sites/10/2020/01/RS40741_IMG_8284-qut-1044x783.jpg 1044w, https://cdn.kqed.org/wp-content/uploads/sites/10/2020/01/RS40741_IMG_8284-qut-632x474.jpg 632w, https://cdn.kqed.org/wp-content/uploads/sites/10/2020/01/RS40741_IMG_8284-qut-536x402.jpg 536w\" sizes=\"(max-width: 800px) 100vw, 800px\">\u003cfigcaption class=\"wp-caption-text\">A Huy Fong employee inspects bottles on the assembly line. \u003ccite>(Avishay Artsy/KQED News)\u003c/cite>\u003c/figcaption>\u003c/figure>\n\u003cp>A recent tour began in a waiting room with walls covered in pictures of Sriracha fans from around the world. There are cardboard cutouts of Tran and the Sriracha bottle. There’s even a picture of astronauts in a space shuttle posing with a bottle.\u003c/p>\n\u003cp>Huy Fong employee Andrea Castillo led the tour group by trolley to the manufacturing facility. The group climbed up a flight of stairs to look down on a conveyor belt. Bright blue fifty-five gallon barrels slid past while workers in white uniforms looked on. The barrels were filled with a mixture of ground chilis, garlic, salt and vinegar.\u003c/p>\n\u003cp>On the tour of the factory I noticed a few of the employees wearing Huy Fong t-shirts. On the back of the shirts it read “No Tear Gas Made Here,” a tongue-in-cheek reference to the 2013 lawsuit.\u003c/p>\n\u003cp>Castillo showed the group how the clear plastic bottles were molded, then filled with the bright red paste, labeled, boxed and placed on pallets to be shipped around the world.\u003c/p>\n\u003cfigure id=\"attachment_11796325\" class=\"wp-caption alignnone\" style=\"max-width: 800px\">\u003cimg loading=\"lazy\" decoding=\"async\" class=\"size-medium wp-image-11796325\" src=\"https://ww2.kqed.org/app/uploads/sites/10/2020/01/RS40742_IMG_8320-qut-800x600.jpg\" alt=\"\" width=\"800\" height=\"600\" srcset=\"https://cdn.kqed.org/wp-content/uploads/sites/10/2020/01/RS40742_IMG_8320-qut-800x600.jpg 800w, https://cdn.kqed.org/wp-content/uploads/sites/10/2020/01/RS40742_IMG_8320-qut-160x120.jpg 160w, https://cdn.kqed.org/wp-content/uploads/sites/10/2020/01/RS40742_IMG_8320-qut-1020x765.jpg 1020w, https://cdn.kqed.org/wp-content/uploads/sites/10/2020/01/RS40742_IMG_8320-qut-1200x900.jpg 1200w, https://cdn.kqed.org/wp-content/uploads/sites/10/2020/01/RS40742_IMG_8320-qut.jpg 1920w, https://cdn.kqed.org/wp-content/uploads/sites/10/2020/01/RS40742_IMG_8320-qut-1832x1374.jpg 1832w, https://cdn.kqed.org/wp-content/uploads/sites/10/2020/01/RS40742_IMG_8320-qut-1376x1032.jpg 1376w, https://cdn.kqed.org/wp-content/uploads/sites/10/2020/01/RS40742_IMG_8320-qut-1044x783.jpg 1044w, https://cdn.kqed.org/wp-content/uploads/sites/10/2020/01/RS40742_IMG_8320-qut-632x474.jpg 632w, https://cdn.kqed.org/wp-content/uploads/sites/10/2020/01/RS40742_IMG_8320-qut-536x402.jpg 536w\" sizes=\"(max-width: 800px) 100vw, 800px\">\u003cfigcaption class=\"wp-caption-text\">Huy Fong workers inspect the barrels of Sriracha before the paste is bottled, packaged and shipped to distributors. \u003ccite>(Avishay Artsy/KQED News)\u003c/cite>\u003c/figcaption>\u003c/figure>\n\u003cp>So does Tran have a vision for the future? He says he has no plans to sell the company or take on investors, and the company doesn’t spend a dime on advertising. Because Tran named his sauce for the Thai city, he can’t trademark the name, which means there are plenty of copycats. There are no new products in the works, aside from Sriracha and two less-popular sauces, Chili Garlic and Sambal Oelek.\u003c/p>\n\u003cp>All he wants to do, he says, is make what his customers want, and that’s Sriracha.\u003c/p>\n\u003cp>\u003c/p>\u003c/div>",
"attributes": {
"named": {},
"numeric": []
}
},
{
"type": "component",
"content": "",
"name": "ad",
"attributes": {
"named": {
"label": "fullwidth"
},
"numeric": [
"fullwidth"
]
}
},
{
"type": "contentString",
"content": "\u003cdiv class=\"post-body\">\u003cp>\u003c/p>\n\u003cp>\u003c/p>\u003c/div>",
"attributes": {
"named": {},
"numeric": []
}
},
{
"type": "component",
"content": "",
"name": "ad",
"attributes": {
"named": {
"label": "floatright"
},
"numeric": [
"floatright"
]
}
},
{
"type": "contentString",
"content": "\u003cdiv class=\"post-body\">\u003cp>\u003c/p>\n\u003c/div>\u003c/p>",
"attributes": {
"named": {},
"numeric": []
}
}
],
"link": "/news/11796231/golden-state-plate-srirachas-journey-from-southeast-asia-to-southern-california",
"authors": [
"byline_news_11796231"
],
"programs": [
"news_72",
"news_26731"
],
"series": [
"news_24115"
],
"categories": [
"news_24114",
"news_8"
],
"tags": [
"news_393",
"news_24116",
"news_4",
"news_235"
],
"featImg": "news_11796240",
"label": "source_news_11796231"
},
"news_11774993": {
"type": "posts",
"id": "news_11774993",
"meta": {
"index": "posts_1716263798",
"site": "news",
"id": "11774993",
"score": null,
"sort": [
1569105863000
]
},
"guestAuthors": [],
"slug": "golden-state-plate-rocky-road-ice-creams-bumpy-history",
"title": "Golden State Plate: Rocky Road Ice Cream's Bumpy History",
"publishDate": 1569105863,
"format": "audio",
"headTitle": "Golden State Plate: Rocky Road Ice Cream’s Bumpy History | KQED",
"labelTerm": {},
"content": "\u003cp>It’s hard to imagine in this era of salted caramel and matcha tea, but there was a time when the American ice cream palate was limited to chocolate, vanilla and strawberry. The invention of Rocky Road in the 1920s changed the ice cream game with “mix-ins”: adding the bumpy texture of nuts, and the soft, pillowy chew of marshmallows.\u003c/p>\n\u003cp>Even though nearly a century has passed since Rocky Road was invented, it is still beloved and immortalized by the likes of “Weird Al” Yankovic:\u003c/p>\n\u003cp>https://www.youtube.com/watch?v=beTsDOBRs8I\u003c/p>\n\u003cp>But there’s still a dispute over just who thought up the recipe for Rocky Road ice cream: \u003ca href=\"https://www.fentonscreamery.com/\" target=\"_blank\" rel=\"noopener\">Fenton’s Creamery \u003c/a>or \u003ca href=\"https://www.dreyers.com/\" target=\"_blank\" rel=\"noopener\">Dreyer’s Grand Ice Cream\u003c/a>. The one certain thing is that the flavor was invented in Oakland, California.\u003c/p>\n\u003ch3>\u003cstrong>An Antidote to the Great Depression\u003c/strong>\u003c/h3>\n\u003cfigure id=\"attachment_11775012\" class=\"wp-caption alignright\" style=\"max-width: 800px\">\u003cimg loading=\"lazy\" decoding=\"async\" src=\"https://ww2.kqed.org/news/wp-content/uploads/sites/10/2019/09/RS39102_LocalFoodAdventures_TL2018-30-qut-e1569096415336-800x1067.jpg\" alt=\"Tour guide Lauren Herpich, of Local Food Adventures, holds up historical photos as she gives an ice cream tour of Oakland's Rockridge neighborhood. \" width=\"800\" height=\"1067\" class=\"size-medium wp-image-11775012\" srcset=\"https://cdn.kqed.org/wp-content/uploads/sites/10/2019/09/RS39102_LocalFoodAdventures_TL2018-30-qut-e1569096415336-800x1067.jpg 800w, https://cdn.kqed.org/wp-content/uploads/sites/10/2019/09/RS39102_LocalFoodAdventures_TL2018-30-qut-e1569096415336-160x213.jpg 160w, https://cdn.kqed.org/wp-content/uploads/sites/10/2019/09/RS39102_LocalFoodAdventures_TL2018-30-qut-e1569096415336-1020x1360.jpg 1020w, https://cdn.kqed.org/wp-content/uploads/sites/10/2019/09/RS39102_LocalFoodAdventures_TL2018-30-qut-e1569096415336-900x1200.jpg 900w, https://cdn.kqed.org/wp-content/uploads/sites/10/2019/09/RS39102_LocalFoodAdventures_TL2018-30-qut-e1569096415336-1122x1496.jpg 1122w, https://cdn.kqed.org/wp-content/uploads/sites/10/2019/09/RS39102_LocalFoodAdventures_TL2018-30-qut-e1569096415336-840x1120.jpg 840w, https://cdn.kqed.org/wp-content/uploads/sites/10/2019/09/RS39102_LocalFoodAdventures_TL2018-30-qut-e1569096415336-687x916.jpg 687w, https://cdn.kqed.org/wp-content/uploads/sites/10/2019/09/RS39102_LocalFoodAdventures_TL2018-30-qut-e1569096415336-414x552.jpg 414w, https://cdn.kqed.org/wp-content/uploads/sites/10/2019/09/RS39102_LocalFoodAdventures_TL2018-30-qut-e1569096415336-354x472.jpg 354w, https://cdn.kqed.org/wp-content/uploads/sites/10/2019/09/RS39102_LocalFoodAdventures_TL2018-30-qut-e1569096415336.jpg 1260w\" sizes=\"(max-width: 800px) 100vw, 800px\">\u003cfigcaption class=\"wp-caption-text\">Tour guide Lauren Herpich, of Local Food Adventures, holds up historical photos as she gives an ice cream tour of Oakland’s Rockridge neighborhood. \u003ccite>(Courtesy Local Food Adventures)\u003c/cite>\u003c/figcaption>\u003c/figure>\n\u003cp>“So the real story goes: there was a man named William Dreyer. He was a German immigrant. He loved making ice cream and so he made it out of a candy shop,” said \u003ca href=\"https://www.localfoodadventures.com/\" target=\"_blank\" rel=\"noopener\">Local Tour Adventures\u003c/a> guide Lauren Herpich, whom I joined for an \u003ca href=\"https://www.localfoodadventures.com/\" target=\"_blank\" rel=\"noopener\">ice cream tour\u003c/a> of College Avenue — a tiny shopping district running through North Oakland.\u003c/p>\n\u003cp>The street is home to the original headquarters of Dreyer’s Grand Ice Cream, which was founded in 1928.\u003c/p>\n\u003cp>A year after its opening, the American stock market crashed. Shantytowns consequently developed along Oakland’s waterfront.\u003c/p>\n\u003cp>“So William Dreyer decides ‘what I want to do is make a new ice cream flavor that puts a smile on people’s faces during this rocky road of life. Aha!’” Herpich exclaimed to the tour group as she handed out little cups of Rocky Road for us to sample.\u003c/p>\n\u003cp>“Rocky Road becomes America’s first blockbuster ice cream flavor after chocolate, vanilla, and strawberry. So really, we can say thanks to Mr. Dreyer for starting the whole idea of new ice cream flavors.”\u003c/p>\n\u003cp>That is the official \u003ca href=\"https://www.nestle.com/aboutus/history/nestle-company-history/dreyers\" target=\"_blank\" rel=\"noopener\">story\u003c/a> from Dreyer’s, too, and William Dreyer — working with candy maker Joseph Edy — came up with the slogan “Share a scoop, share a smile.”\u003c/p>\n\u003cfigure id=\"attachment_11775330\" class=\"wp-caption aligncenter\" style=\"max-width: 572px\">\u003cimg loading=\"lazy\" decoding=\"async\" class=\"size-full wp-image-11775330\" src=\"https://ww2.kqed.org/news/wp-content/uploads/sites/10/2019/09/RS39241_dreyers-vintage-qut.jpg\" alt=\"\" width=\"572\" height=\"276\" srcset=\"https://cdn.kqed.org/wp-content/uploads/sites/10/2019/09/RS39241_dreyers-vintage-qut.jpg 572w, https://cdn.kqed.org/wp-content/uploads/sites/10/2019/09/RS39241_dreyers-vintage-qut-160x77.jpg 160w\" sizes=\"(max-width: 572px) 100vw, 572px\">\u003cfigcaption class=\"wp-caption-text\">Rocky Road is still one of the most popular ice cream flavors in the U.S. \u003ccite>(Used with permission by Nestle. NESTLÉ® and Dreyer's are registered trademarks of Société des Produits Nestlé S.A., Vevey, Switzerland.)\u003c/cite>\u003c/figcaption>\u003c/figure>\n\u003cp>Dreyer apparently figured out how to cut up the marshmallows with his wife’s sewing shears and folded them into chocolate ice cream. The story is repeated by John Harrison, the guy who invented Cookies ‘N Cream ice cream and some 75 other new flavors for Dreyer’s starting in the 1980s. Harrison used to sample flavors with a gold spoon, and his taste buds were famously insured for a million dollars.\u003c/p>\n\u003cp>https://www.youtube.com/watch?v=_RWcqJ4LHM8\u003c/p>\n\u003cp>“[It was] the first time marshmallow was ever used in ice cream,” Harrison told an interviewer in 2011. He was also part of an\u003ca href=\"http://bancroft.berkeley.edu/ROHO/projects/dreyers/index.html\"> oral history project\u003c/a> with UC Berkeley’s Bancroft Library, documenting the long history of Dreyer’s Grand Ice Cream in Oakland.\u003c/p>\n\u003cp>“But the only marshmallow that was available in 1929 was the large fireside marshmallow that their wives used to cut up, bite-size. You can’t put a whole. Wouldn’t work,” Harrison explained, making gummy chewing sounds.\u003c/p>\n\u003cp>Harrison said William Dreyer adapted a popular candy of the period, made with marshmallows and walnuts — using almonds instead.\u003c/p>\n\u003cfigure id=\"attachment_11775368\" class=\"wp-caption aligncenter\" style=\"max-width: 572px\">\u003cimg loading=\"lazy\" decoding=\"async\" class=\"size-full wp-image-11775368\" src=\"https://ww2.kqed.org/news/wp-content/uploads/sites/10/2019/09/RS39242_dreyers-truck-vintage-qut.jpg\" alt=\"\" width=\"572\" height=\"276\" srcset=\"https://cdn.kqed.org/wp-content/uploads/sites/10/2019/09/RS39242_dreyers-truck-vintage-qut.jpg 572w, https://cdn.kqed.org/wp-content/uploads/sites/10/2019/09/RS39242_dreyers-truck-vintage-qut-160x77.jpg 160w\" sizes=\"(max-width: 572px) 100vw, 572px\">\u003cfigcaption class=\"wp-caption-text\">Early Dreyer’s ice cream trucks operated with huge blocks of ice to keep the Rocky Road cool. \u003ccite>(Courtesy of Nestle. (NESTLÉ® and Dreyer's are registered trademarks of Société des Produits Nestlé S.A., Vevey, Switzerland.))\u003c/cite>\u003c/figcaption>\u003c/figure>\n\u003cp>“The candy and ice cream industry has been interwoven since day one,” Harrison said. “Originally, it was walnuts, but it didn’t have that bite, that crispness, that freshness, lasting. It’s too porous. It absorbs and gets soggy. “\u003c/p>\n\u003cp>Dreyer’s has expanded well beyond Oakland since. It was bought by Nestle in 2002 and its ice cream is stocked in nearly every supermarket freezer (either as Dreyer’s or Edy’s on the East Coast.) Nestlé continues to market the brand and the \u003ca href=\"https://www.nestle.com/aboutus/history/nestle-company-history/dreyers\" target=\"_blank\" rel=\"noopener\">claim\u003c/a> that Dreyer invented Rocky Road.\u003c/p>\n\u003ch3>\u003cstrong>Walnuts vs. Almonds\u003c/strong>\u003c/h3>\n\u003cfigure id=\"attachment_11775091\" class=\"wp-caption alignnone\" style=\"max-width: 800px\">\u003cimg loading=\"lazy\" decoding=\"async\" class=\"size-medium wp-image-11775091\" src=\"https://ww2.kqed.org/news/wp-content/uploads/sites/10/2019/09/rocky-road-w-menu-2-800x600.jpg\" alt=\"\" width=\"800\" height=\"600\" srcset=\"https://cdn.kqed.org/wp-content/uploads/sites/10/2019/09/rocky-road-w-menu-2-800x600.jpg 800w, https://cdn.kqed.org/wp-content/uploads/sites/10/2019/09/rocky-road-w-menu-2-160x120.jpg 160w, https://cdn.kqed.org/wp-content/uploads/sites/10/2019/09/rocky-road-w-menu-2-1020x765.jpg 1020w, https://cdn.kqed.org/wp-content/uploads/sites/10/2019/09/rocky-road-w-menu-2-1200x900.jpg 1200w, https://cdn.kqed.org/wp-content/uploads/sites/10/2019/09/rocky-road-w-menu-2-1920x1440.jpg 1920w, https://cdn.kqed.org/wp-content/uploads/sites/10/2019/09/rocky-road-w-menu-2-1832x1374.jpg 1832w, https://cdn.kqed.org/wp-content/uploads/sites/10/2019/09/rocky-road-w-menu-2-1376x1032.jpg 1376w, https://cdn.kqed.org/wp-content/uploads/sites/10/2019/09/rocky-road-w-menu-2-1044x783.jpg 1044w, https://cdn.kqed.org/wp-content/uploads/sites/10/2019/09/rocky-road-w-menu-2-632x474.jpg 632w, https://cdn.kqed.org/wp-content/uploads/sites/10/2019/09/rocky-road-w-menu-2-536x402.jpg 536w, https://cdn.kqed.org/wp-content/uploads/sites/10/2019/09/rocky-road-w-menu-2.jpg 2048w\" sizes=\"(max-width: 800px) 100vw, 800px\">\u003cfigcaption class=\"wp-caption-text\">A Fenton’s Rocky Road sundae. Fenton’s Creamery has not done much to advertise its claim to Rocky Road, although it does mention it on the menu. \u003ccite>(Suzie Racho/KQED)\u003c/cite>\u003c/figcaption>\u003c/figure>\n\u003cp>Just down the road from where Dreyer’s got its start in Oakland, there’s another much smaller ice cream company that also claims to have invented Rocky Road.\u003c/p>\n\u003cfigure id=\"attachment_11775053\" class=\"wp-caption alignright\" style=\"max-width: 300px\">\u003cimg loading=\"lazy\" decoding=\"async\" class=\" wp-image-11775053\" src=\"https://ww2.kqed.org/news/wp-content/uploads/sites/10/2019/09/RS39118_best-of-whidden-and-RR-qut-1-e1569096311914-800x1060.jpg\" alt=\"\" width=\"300\" height=\"397\" srcset=\"https://cdn.kqed.org/wp-content/uploads/sites/10/2019/09/RS39118_best-of-whidden-and-RR-qut-1-e1569096311914-800x1060.jpg 800w, https://cdn.kqed.org/wp-content/uploads/sites/10/2019/09/RS39118_best-of-whidden-and-RR-qut-1-e1569096311914-160x212.jpg 160w, https://cdn.kqed.org/wp-content/uploads/sites/10/2019/09/RS39118_best-of-whidden-and-RR-qut-1-e1569096311914-1020x1351.jpg 1020w, https://cdn.kqed.org/wp-content/uploads/sites/10/2019/09/RS39118_best-of-whidden-and-RR-qut-1-e1569096311914-906x1200.jpg 906w, https://cdn.kqed.org/wp-content/uploads/sites/10/2019/09/RS39118_best-of-whidden-and-RR-qut-1-e1569096311914.jpg 1214w\" sizes=\"(max-width: 300px) 100vw, 300px\">\u003cfigcaption class=\"wp-caption-text\">Fenton’s owner and Master Blender Scott Whidden showing off a new batch of Rocky Road with longtime Fenton’s ice cream maker Alfredo Macias. \u003ccite>(Sasha Khokha/KQED)\u003c/cite>\u003c/figcaption>\u003c/figure>\n\u003cp>At Fenton’s Creamery, owner and master blender Scott Whidden holds a tub under a spigot churning out fresh chocolate ice cream. He puts in fistfuls of nuts and marshmallows that he scoops from plastic tubs. He, however, adds walnuts instead of almonds — just like the original candy bar.\u003c/p>\n\u003cp>“I’m looking for equal parts [in each bite],” explained Whidden over the whirring ice cream machine. “If you have a marshmallow, I want you to have maybe one or two of the walnuts,” he said.\u003c/p>\n\u003cp>Whidden said small-batch and handmade is the way Fenton’s has made its ice cream since the 1920s.\u003c/p>\n\u003cp>That, he said, is when Melvin Fenton — grandson of the original owner — came up with the idea for Rocky Road. There’s a picture of him in the parlor, where dozens of families are sitting in red vinyl booths enjoying giant sundaes in old-fashioned glass dishes. In the photo, Melvin Fenton is loading fresh cream off of a tiny airplane that he flew as an amateur pilot.\u003c/p>\n\u003cp>“Melvin was like the black sheep of the family,” said Whidden. More like a wildcat and an inventor who could see beyond the trifecta of vanilla, chocolate and strawberry.\u003c/p>\n\u003cfigure id=\"attachment_11775078\" class=\"wp-caption alignnone\" style=\"max-width: 800px\">\u003cimg loading=\"lazy\" decoding=\"async\" class=\"size-medium wp-image-11775078\" src=\"https://ww2.kqed.org/news/wp-content/uploads/sites/10/2019/09/RS39105_MELVIN_AIRPLANE_DIVCO-qut-800x529.jpg\" alt=\"\" width=\"800\" height=\"529\" srcset=\"https://cdn.kqed.org/wp-content/uploads/sites/10/2019/09/RS39105_MELVIN_AIRPLANE_DIVCO-qut-800x529.jpg 800w, https://cdn.kqed.org/wp-content/uploads/sites/10/2019/09/RS39105_MELVIN_AIRPLANE_DIVCO-qut-160x106.jpg 160w, https://cdn.kqed.org/wp-content/uploads/sites/10/2019/09/RS39105_MELVIN_AIRPLANE_DIVCO-qut-1020x674.jpg 1020w, https://cdn.kqed.org/wp-content/uploads/sites/10/2019/09/RS39105_MELVIN_AIRPLANE_DIVCO-qut-1200x793.jpg 1200w, https://cdn.kqed.org/wp-content/uploads/sites/10/2019/09/RS39105_MELVIN_AIRPLANE_DIVCO-qut.jpg 1298w\" sizes=\"(max-width: 800px) 100vw, 800px\">\u003cfigcaption class=\"wp-caption-text\">Melvin Fenton loading fresh cream off an airplane into a delivery truck. Fenton’s claims that Melvin invented Rocky Road. Photo Courtesy Fenton’s Creamery. \u003ccite>(Courtesy Fenton's Ice Cream)\u003c/cite>\u003c/figcaption>\u003c/figure>\n\u003cp>“He’s a visionary,” said Whidden. “Forward-thinking guy. And he goes, ‘Whoa. Mix-ins!’ So the thought process on it was, we’re into the depression, it’s bad times. Smooth ice cream, and then there’s these bumps, it gets rocky.”\u003c/p>\n\u003cp>That sounds familiar: Rocky Road, the bumpy road of life during the Depression. Chocolate, marshmallows, nuts.\u003c/p>\n\u003ch3>\u003cstrong>An Ice Cream Expert Weighs In \u003c/strong>\u003c/h3>\n\u003cfigure id=\"attachment_11775079\" class=\"wp-caption alignright\" style=\"max-width: 303px\">\u003cimg loading=\"lazy\" decoding=\"async\" class=\"wp-image-11775079 \" src=\"https://ww2.kqed.org/news/wp-content/uploads/sites/10/2019/09/RS39095_Amy-Ettinger-qut-e1568841953603-800x1067.jpg\" alt=\"\" width=\"303\" height=\"404\" srcset=\"https://cdn.kqed.org/wp-content/uploads/sites/10/2019/09/RS39095_Amy-Ettinger-qut-e1568841953603-800x1067.jpg 800w, https://cdn.kqed.org/wp-content/uploads/sites/10/2019/09/RS39095_Amy-Ettinger-qut-e1568841953603-160x213.jpg 160w, https://cdn.kqed.org/wp-content/uploads/sites/10/2019/09/RS39095_Amy-Ettinger-qut-e1568841953603-1020x1360.jpg 1020w, https://cdn.kqed.org/wp-content/uploads/sites/10/2019/09/RS39095_Amy-Ettinger-qut-e1568841953603-900x1200.jpg 900w, https://cdn.kqed.org/wp-content/uploads/sites/10/2019/09/RS39095_Amy-Ettinger-qut-e1568841953603-1122x1496.jpg 1122w, https://cdn.kqed.org/wp-content/uploads/sites/10/2019/09/RS39095_Amy-Ettinger-qut-e1568841953603-840x1120.jpg 840w, https://cdn.kqed.org/wp-content/uploads/sites/10/2019/09/RS39095_Amy-Ettinger-qut-e1568841953603-687x916.jpg 687w, https://cdn.kqed.org/wp-content/uploads/sites/10/2019/09/RS39095_Amy-Ettinger-qut-e1568841953603-414x552.jpg 414w, https://cdn.kqed.org/wp-content/uploads/sites/10/2019/09/RS39095_Amy-Ettinger-qut-e1568841953603-354x472.jpg 354w, https://cdn.kqed.org/wp-content/uploads/sites/10/2019/09/RS39095_Amy-Ettinger-qut-e1568841953603.jpg 1440w\" sizes=\"(max-width: 303px) 100vw, 303px\">\u003cfigcaption class=\"wp-caption-text\">Amy Ettinger says Rocky Road was the flavor of her childhood. Here she is at Fenton’s Creamery enjoying a sundae. \u003ccite>(Suzie Racho/KQED)\u003c/cite>\u003c/figcaption>\u003c/figure>\n\u003cp>These days, Rocky Road is still one of Fenton’s top-selling flavors. They serve it up in giant scoops and decadent sundaes. When I visited Fenton’s, \u003ca href=\"http://amyettinger.com\" target=\"_blank\" rel=\"noopener\">Amy Ettinger \u003c/a>and I ordered sundaes with whipped cream and cherries —gleefully fishing for the walnuts and marshmallows. Ettinger is an ice cream historian, the author of “\u003ca href=\"https://www.kqed.org/news/11593783/vanilla-chocolate-strawberry-and-oyster-a-year-of-ice-cream\" target=\"_blank\" rel=\"noopener\">Sweet Spot, An Ice Cream Binge Across America\u003c/a>.”\u003c/p>\n\u003cp>“It’s very common in ice cream history to have these kinds of disputes,” said Ettinger. “The 1904 World’s Fair was when the ice cream cone was invented and six different vendors claimed that they were the ones who invented it. Unless you have a time machine, or you know you were actually the inventor, there’s no way really to tell.”\u003c/p>\n\u003cp>Ettinger said Rocky Road is the flavor of her childhood. But not this Rocky Road: the Dreyer’s with the almonds you can buy at the grocery store. She said she feels a little sheepish saying that, because it’s kind of a David and Goliath story: the mom and pop parlor versus what is today a multinational giant.\u003c/p>\n\u003cp>“What’s very interesting is Fenton’s is a very beloved Bay Area institution,” said Ettinger. “But it is not well known outside of the Bay Area. So regardless of who actually invented it, Dreyer’s is hands down the marketer of Rocky Road. They built their brand on the invention and the marketing of Rocky Road. Just because the other company is the one that got the word out about it, doesn’t mean that Fenton’s didn’t invent it. There’s no way for us to know.”\u003c/p>\n\u003cfigure id=\"attachment_11775082\" class=\"wp-caption alignnone\" style=\"max-width: 800px\">\u003cimg loading=\"lazy\" decoding=\"async\" class=\"size-medium wp-image-11775082\" src=\"https://ww2.kqed.org/news/wp-content/uploads/sites/10/2019/09/RS39090_sundae-beauty-pageant-qut-800x600.jpg\" alt=\"\" width=\"800\" height=\"600\" srcset=\"https://cdn.kqed.org/wp-content/uploads/sites/10/2019/09/RS39090_sundae-beauty-pageant-qut-800x600.jpg 800w, https://cdn.kqed.org/wp-content/uploads/sites/10/2019/09/RS39090_sundae-beauty-pageant-qut-160x120.jpg 160w, https://cdn.kqed.org/wp-content/uploads/sites/10/2019/09/RS39090_sundae-beauty-pageant-qut-1020x765.jpg 1020w, https://cdn.kqed.org/wp-content/uploads/sites/10/2019/09/RS39090_sundae-beauty-pageant-qut-1200x900.jpg 1200w, https://cdn.kqed.org/wp-content/uploads/sites/10/2019/09/RS39090_sundae-beauty-pageant-qut.jpg 1920w, https://cdn.kqed.org/wp-content/uploads/sites/10/2019/09/RS39090_sundae-beauty-pageant-qut-1832x1374.jpg 1832w, https://cdn.kqed.org/wp-content/uploads/sites/10/2019/09/RS39090_sundae-beauty-pageant-qut-1376x1032.jpg 1376w, https://cdn.kqed.org/wp-content/uploads/sites/10/2019/09/RS39090_sundae-beauty-pageant-qut-1044x783.jpg 1044w, https://cdn.kqed.org/wp-content/uploads/sites/10/2019/09/RS39090_sundae-beauty-pageant-qut-632x474.jpg 632w, https://cdn.kqed.org/wp-content/uploads/sites/10/2019/09/RS39090_sundae-beauty-pageant-qut-536x402.jpg 536w\" sizes=\"(max-width: 800px) 100vw, 800px\">\u003cfigcaption class=\"wp-caption-text\">Fenton’s is known for its decadent sundaes, including those made with Rocky Road. \u003ccite>(Suzie Racho/KQED)\u003c/cite>\u003c/figcaption>\u003c/figure>\n\u003cp>There are other theories too:\u003c/p>\n\u003cp>[aside tag='golden-state-plate' label='Our Golden State Plate series']\u003c/p>\n\u003cul>\n\u003cli>Fenton’s original candy maker, George Farren, was friends with Dreyer and so perhaps he shared his idea for a Rocky Road ice cream based on the candy with both ice cream companies. It’s unclear whether the original candy bar popular in the 1920s was called Rocky Road. There’s still a Rocky Road candy bar today, invented in San Francisco in the 1950s, that uses cashews. It’s all a bit nutty!\u003c/li>\n\u003cli>Fenton’s owner Scott Whidden claimed Dreyer’s just stole the credit, even though they knew Fenton’s had invented it. Whidden said Dreyer’s former president Ken Cook, who ran Dreyer’s from 1963-1977, was his mentor. The one who actually encouraged him to buy Fenton’s and admitted to him that Fenton’s actually invented Rocky Road. Cook passed away in 1991, so there’s no way to verify that claim, although the online publication Quartzy tried to \u003ca href=\"https://qz.com/quartzy/1376713/who-invented-rocky-road-ice-cream-its-complicated/\" target=\"_blank\" rel=\"noopener\">track it down\u003c/a>.\u003c/li>\n\u003cli>Then there’s the even more radical theory that, in fact, Rocky Road was born in Topeka, Kansas. There is a recipe in a candy cookbook printed there that predates either Fenton’s or Dreyer’s. It calls for honey whip instead of marshmallows.\u003c/li>\n\u003c/ul>\n\u003cfigure id=\"attachment_11775080\" class=\"wp-caption alignnone\" style=\"max-width: 800px\">\u003cimg loading=\"lazy\" decoding=\"async\" class=\"size-medium wp-image-11775080\" src=\"https://ww2.kqed.org/news/wp-content/uploads/sites/10/2019/09/Screen-Shot-2019-09-17-at-1.21.14-PM-800x624.png\" alt=\"\" width=\"800\" height=\"624\" srcset=\"https://cdn.kqed.org/wp-content/uploads/sites/10/2019/09/Screen-Shot-2019-09-17-at-1.21.14-PM-800x624.png 800w, https://cdn.kqed.org/wp-content/uploads/sites/10/2019/09/Screen-Shot-2019-09-17-at-1.21.14-PM-160x125.png 160w, https://cdn.kqed.org/wp-content/uploads/sites/10/2019/09/Screen-Shot-2019-09-17-at-1.21.14-PM.png 982w\" sizes=\"(max-width: 800px) 100vw, 800px\">\u003cfigcaption class=\"wp-caption-text\">Rigby’s Reliable Candy Teacher (this edition published 1920 in Topeka, Kansas) includes a recipe for Rocky Road that predates either Fenton’s or Dreyer’s.\u003c/figcaption>\u003c/figure>\n\u003cp>Ice cream expert Amy Ettinger said this theory doesn’t count. Rocky Road definitely came from Oakland. And who cares who invented it?\u003c/p>\n\u003cp>“At the end of the day I don’t know that it matters,” said Ettinger. I mean, if both places are creating really good scoops of Rocky Road ice cream now, and they both have their little twist on it. How important is it who the original inventor was?”\u003c/p>\n\u003cp>[ad fullwidth]\u003c/p>\n\u003cp>[ad floatright]\u003c/p>\n",
"blocks": [],
"excerpt": "The historical dispute between two California ice cream makers over who invented one of America's most popular flavors. ",
"status": "publish",
"parent": 0,
"modified": 1721123229,
"stats": {
"hasAudio": false,
"hasVideo": true,
"hasChartOrMap": false,
"iframeSrcs": [],
"hasGoogleForm": false,
"hasGallery": false,
"hasHearkenModule": false,
"hasPolis": false,
"paragraphCount": 33,
"wordCount": 1896
},
"headData": {
"title": "Golden State Plate: Rocky Road Ice Cream's Bumpy History | KQED",
"description": "The historical dispute between two California ice cream makers over who invented one of America's most popular flavors. ",
"ogTitle": "",
"ogDescription": "",
"ogImgId": "",
"twTitle": "",
"twDescription": "",
"twImgId": "",
"schema": {
"@context": "https://schema.org",
"@type": "NewsArticle",
"headline": "Golden State Plate: Rocky Road Ice Cream's Bumpy History",
"datePublished": "2019-09-21T15:44:23-07:00",
"dateModified": "2024-07-16T02:47:09-07:00",
"image": "https://cdn.kqed.org/wp-content/uploads/2020/02/KQED-OG-Image@1x.png",
"isAccessibleForFree": "True",
"publisher": {
"@type": "NewsMediaOrganization",
"@id": "https://www.kqed.org/#organization",
"name": "KQED",
"logo": "https://cdn.kqed.org/wp-content/uploads/2020/02/KQED-OG-Image@1x.png",
"url": "https://www.kqed.org",
"sameAs": [
"https://www.facebook.com/KQED",
"https://twitter.com/KQED",
"https://www.instagram.com/kqed/",
"https://www.tiktok.com/@kqedofficial",
"https://www.linkedin.com/company/kqed",
"https://www.youtube.com/channel/UCeC0IOo7i1P_61zVUWbJ4nw"
]
}
}
},
"source": "Food",
"sourceUrl": "https://www.kqed.org/food",
"audioUrl": "https://www.kqed.org/.stream/anon/radio/tcrmag/2019/09/GoldenStatePlateRockyRoad.mp3",
"sticky": false,
"audioTrackLength": 462,
"templateType": "standard",
"featuredImageType": "standard",
"excludeFromSiteSearch": "Include",
"articleAge": "0",
"path": "/news/11774993/golden-state-plate-rocky-road-ice-creams-bumpy-history",
"parsedContent": [
{
"type": "contentString",
"content": "\u003cdiv class=\"post-body\">\u003cp>\u003cp>It’s hard to imagine in this era of salted caramel and matcha tea, but there was a time when the American ice cream palate was limited to chocolate, vanilla and strawberry. The invention of Rocky Road in the 1920s changed the ice cream game with “mix-ins”: adding the bumpy texture of nuts, and the soft, pillowy chew of marshmallows.\u003c/p>\n\u003cp>Even though nearly a century has passed since Rocky Road was invented, it is still beloved and immortalized by the likes of “Weird Al” Yankovic:\u003c/p>\u003c/p>\u003cp>\u003cspan class='utils-parseShortcode-shortcodes-__youtubeShortcode__embedYoutube'>\n \u003cspan class='utils-parseShortcode-shortcodes-__youtubeShortcode__embedYoutubeInside'>\n \u003ciframe\n loading='lazy'\n class='utils-parseShortcode-shortcodes-__youtubeShortcode__youtubePlayer'\n type='text/html'\n src='//www.youtube.com/embed/beTsDOBRs8I'\n title='//www.youtube.com/embed/beTsDOBRs8I'\n allowfullscreen='true'\n style='border:0;'>\u003c/iframe>\n \u003c/span>\n \u003c/span>\u003c/p>\u003cp>\u003cp>But there’s still a dispute over just who thought up the recipe for Rocky Road ice cream: \u003ca href=\"https://www.fentonscreamery.com/\" target=\"_blank\" rel=\"noopener\">Fenton’s Creamery \u003c/a>or \u003ca href=\"https://www.dreyers.com/\" target=\"_blank\" rel=\"noopener\">Dreyer’s Grand Ice Cream\u003c/a>. The one certain thing is that the flavor was invented in Oakland, California.\u003c/p>\n\u003ch3>\u003cstrong>An Antidote to the Great Depression\u003c/strong>\u003c/h3>\n\u003cfigure id=\"attachment_11775012\" class=\"wp-caption alignright\" style=\"max-width: 800px\">\u003cimg loading=\"lazy\" decoding=\"async\" src=\"https://ww2.kqed.org/news/wp-content/uploads/sites/10/2019/09/RS39102_LocalFoodAdventures_TL2018-30-qut-e1569096415336-800x1067.jpg\" alt=\"Tour guide Lauren Herpich, of Local Food Adventures, holds up historical photos as she gives an ice cream tour of Oakland's Rockridge neighborhood. \" width=\"800\" height=\"1067\" class=\"size-medium wp-image-11775012\" srcset=\"https://cdn.kqed.org/wp-content/uploads/sites/10/2019/09/RS39102_LocalFoodAdventures_TL2018-30-qut-e1569096415336-800x1067.jpg 800w, https://cdn.kqed.org/wp-content/uploads/sites/10/2019/09/RS39102_LocalFoodAdventures_TL2018-30-qut-e1569096415336-160x213.jpg 160w, https://cdn.kqed.org/wp-content/uploads/sites/10/2019/09/RS39102_LocalFoodAdventures_TL2018-30-qut-e1569096415336-1020x1360.jpg 1020w, https://cdn.kqed.org/wp-content/uploads/sites/10/2019/09/RS39102_LocalFoodAdventures_TL2018-30-qut-e1569096415336-900x1200.jpg 900w, https://cdn.kqed.org/wp-content/uploads/sites/10/2019/09/RS39102_LocalFoodAdventures_TL2018-30-qut-e1569096415336-1122x1496.jpg 1122w, https://cdn.kqed.org/wp-content/uploads/sites/10/2019/09/RS39102_LocalFoodAdventures_TL2018-30-qut-e1569096415336-840x1120.jpg 840w, https://cdn.kqed.org/wp-content/uploads/sites/10/2019/09/RS39102_LocalFoodAdventures_TL2018-30-qut-e1569096415336-687x916.jpg 687w, https://cdn.kqed.org/wp-content/uploads/sites/10/2019/09/RS39102_LocalFoodAdventures_TL2018-30-qut-e1569096415336-414x552.jpg 414w, https://cdn.kqed.org/wp-content/uploads/sites/10/2019/09/RS39102_LocalFoodAdventures_TL2018-30-qut-e1569096415336-354x472.jpg 354w, https://cdn.kqed.org/wp-content/uploads/sites/10/2019/09/RS39102_LocalFoodAdventures_TL2018-30-qut-e1569096415336.jpg 1260w\" sizes=\"(max-width: 800px) 100vw, 800px\">\u003cfigcaption class=\"wp-caption-text\">Tour guide Lauren Herpich, of Local Food Adventures, holds up historical photos as she gives an ice cream tour of Oakland’s Rockridge neighborhood. \u003ccite>(Courtesy Local Food Adventures)\u003c/cite>\u003c/figcaption>\u003c/figure>\n\u003cp>“So the real story goes: there was a man named William Dreyer. He was a German immigrant. He loved making ice cream and so he made it out of a candy shop,” said \u003ca href=\"https://www.localfoodadventures.com/\" target=\"_blank\" rel=\"noopener\">Local Tour Adventures\u003c/a> guide Lauren Herpich, whom I joined for an \u003ca href=\"https://www.localfoodadventures.com/\" target=\"_blank\" rel=\"noopener\">ice cream tour\u003c/a> of College Avenue — a tiny shopping district running through North Oakland.\u003c/p>\n\u003cp>The street is home to the original headquarters of Dreyer’s Grand Ice Cream, which was founded in 1928.\u003c/p>\n\u003cp>A year after its opening, the American stock market crashed. Shantytowns consequently developed along Oakland’s waterfront.\u003c/p>\n\u003cp>“So William Dreyer decides ‘what I want to do is make a new ice cream flavor that puts a smile on people’s faces during this rocky road of life. Aha!’” Herpich exclaimed to the tour group as she handed out little cups of Rocky Road for us to sample.\u003c/p>\n\u003cp>“Rocky Road becomes America’s first blockbuster ice cream flavor after chocolate, vanilla, and strawberry. So really, we can say thanks to Mr. Dreyer for starting the whole idea of new ice cream flavors.”\u003c/p>\n\u003cp>That is the official \u003ca href=\"https://www.nestle.com/aboutus/history/nestle-company-history/dreyers\" target=\"_blank\" rel=\"noopener\">story\u003c/a> from Dreyer’s, too, and William Dreyer — working with candy maker Joseph Edy — came up with the slogan “Share a scoop, share a smile.”\u003c/p>\n\u003cfigure id=\"attachment_11775330\" class=\"wp-caption aligncenter\" style=\"max-width: 572px\">\u003cimg loading=\"lazy\" decoding=\"async\" class=\"size-full wp-image-11775330\" src=\"https://ww2.kqed.org/news/wp-content/uploads/sites/10/2019/09/RS39241_dreyers-vintage-qut.jpg\" alt=\"\" width=\"572\" height=\"276\" srcset=\"https://cdn.kqed.org/wp-content/uploads/sites/10/2019/09/RS39241_dreyers-vintage-qut.jpg 572w, https://cdn.kqed.org/wp-content/uploads/sites/10/2019/09/RS39241_dreyers-vintage-qut-160x77.jpg 160w\" sizes=\"(max-width: 572px) 100vw, 572px\">\u003cfigcaption class=\"wp-caption-text\">Rocky Road is still one of the most popular ice cream flavors in the U.S. \u003ccite>(Used with permission by Nestle. NESTLÉ® and Dreyer's are registered trademarks of Société des Produits Nestlé S.A., Vevey, Switzerland.)\u003c/cite>\u003c/figcaption>\u003c/figure>\n\u003cp>Dreyer apparently figured out how to cut up the marshmallows with his wife’s sewing shears and folded them into chocolate ice cream. The story is repeated by John Harrison, the guy who invented Cookies ‘N Cream ice cream and some 75 other new flavors for Dreyer’s starting in the 1980s. Harrison used to sample flavors with a gold spoon, and his taste buds were famously insured for a million dollars.\u003c/p>\u003c/p>\u003cp>\u003cspan class='utils-parseShortcode-shortcodes-__youtubeShortcode__embedYoutube'>\n \u003cspan class='utils-parseShortcode-shortcodes-__youtubeShortcode__embedYoutubeInside'>\n \u003ciframe\n loading='lazy'\n class='utils-parseShortcode-shortcodes-__youtubeShortcode__youtubePlayer'\n type='text/html'\n src='//www.youtube.com/embed/_RWcqJ4LHM8'\n title='//www.youtube.com/embed/_RWcqJ4LHM8'\n allowfullscreen='true'\n style='border:0;'>\u003c/iframe>\n \u003c/span>\n \u003c/span>\u003c/p>\u003cp>\u003cp>“[It was] the first time marshmallow was ever used in ice cream,” Harrison told an interviewer in 2011. He was also part of an\u003ca href=\"http://bancroft.berkeley.edu/ROHO/projects/dreyers/index.html\"> oral history project\u003c/a> with UC Berkeley’s Bancroft Library, documenting the long history of Dreyer’s Grand Ice Cream in Oakland.\u003c/p>\n\u003cp>“But the only marshmallow that was available in 1929 was the large fireside marshmallow that their wives used to cut up, bite-size. You can’t put a whole. Wouldn’t work,” Harrison explained, making gummy chewing sounds.\u003c/p>\n\u003cp>Harrison said William Dreyer adapted a popular candy of the period, made with marshmallows and walnuts — using almonds instead.\u003c/p>\n\u003cfigure id=\"attachment_11775368\" class=\"wp-caption aligncenter\" style=\"max-width: 572px\">\u003cimg loading=\"lazy\" decoding=\"async\" class=\"size-full wp-image-11775368\" src=\"https://ww2.kqed.org/news/wp-content/uploads/sites/10/2019/09/RS39242_dreyers-truck-vintage-qut.jpg\" alt=\"\" width=\"572\" height=\"276\" srcset=\"https://cdn.kqed.org/wp-content/uploads/sites/10/2019/09/RS39242_dreyers-truck-vintage-qut.jpg 572w, https://cdn.kqed.org/wp-content/uploads/sites/10/2019/09/RS39242_dreyers-truck-vintage-qut-160x77.jpg 160w\" sizes=\"(max-width: 572px) 100vw, 572px\">\u003cfigcaption class=\"wp-caption-text\">Early Dreyer’s ice cream trucks operated with huge blocks of ice to keep the Rocky Road cool. \u003ccite>(Courtesy of Nestle. (NESTLÉ® and Dreyer's are registered trademarks of Société des Produits Nestlé S.A., Vevey, Switzerland.))\u003c/cite>\u003c/figcaption>\u003c/figure>\n\u003cp>“The candy and ice cream industry has been interwoven since day one,” Harrison said. “Originally, it was walnuts, but it didn’t have that bite, that crispness, that freshness, lasting. It’s too porous. It absorbs and gets soggy. “\u003c/p>\n\u003cp>Dreyer’s has expanded well beyond Oakland since. It was bought by Nestle in 2002 and its ice cream is stocked in nearly every supermarket freezer (either as Dreyer’s or Edy’s on the East Coast.) Nestlé continues to market the brand and the \u003ca href=\"https://www.nestle.com/aboutus/history/nestle-company-history/dreyers\" target=\"_blank\" rel=\"noopener\">claim\u003c/a> that Dreyer invented Rocky Road.\u003c/p>\n\u003ch3>\u003cstrong>Walnuts vs. Almonds\u003c/strong>\u003c/h3>\n\u003cfigure id=\"attachment_11775091\" class=\"wp-caption alignnone\" style=\"max-width: 800px\">\u003cimg loading=\"lazy\" decoding=\"async\" class=\"size-medium wp-image-11775091\" src=\"https://ww2.kqed.org/news/wp-content/uploads/sites/10/2019/09/rocky-road-w-menu-2-800x600.jpg\" alt=\"\" width=\"800\" height=\"600\" srcset=\"https://cdn.kqed.org/wp-content/uploads/sites/10/2019/09/rocky-road-w-menu-2-800x600.jpg 800w, https://cdn.kqed.org/wp-content/uploads/sites/10/2019/09/rocky-road-w-menu-2-160x120.jpg 160w, https://cdn.kqed.org/wp-content/uploads/sites/10/2019/09/rocky-road-w-menu-2-1020x765.jpg 1020w, https://cdn.kqed.org/wp-content/uploads/sites/10/2019/09/rocky-road-w-menu-2-1200x900.jpg 1200w, https://cdn.kqed.org/wp-content/uploads/sites/10/2019/09/rocky-road-w-menu-2-1920x1440.jpg 1920w, https://cdn.kqed.org/wp-content/uploads/sites/10/2019/09/rocky-road-w-menu-2-1832x1374.jpg 1832w, https://cdn.kqed.org/wp-content/uploads/sites/10/2019/09/rocky-road-w-menu-2-1376x1032.jpg 1376w, https://cdn.kqed.org/wp-content/uploads/sites/10/2019/09/rocky-road-w-menu-2-1044x783.jpg 1044w, https://cdn.kqed.org/wp-content/uploads/sites/10/2019/09/rocky-road-w-menu-2-632x474.jpg 632w, https://cdn.kqed.org/wp-content/uploads/sites/10/2019/09/rocky-road-w-menu-2-536x402.jpg 536w, https://cdn.kqed.org/wp-content/uploads/sites/10/2019/09/rocky-road-w-menu-2.jpg 2048w\" sizes=\"(max-width: 800px) 100vw, 800px\">\u003cfigcaption class=\"wp-caption-text\">A Fenton’s Rocky Road sundae. Fenton’s Creamery has not done much to advertise its claim to Rocky Road, although it does mention it on the menu. \u003ccite>(Suzie Racho/KQED)\u003c/cite>\u003c/figcaption>\u003c/figure>\n\u003cp>Just down the road from where Dreyer’s got its start in Oakland, there’s another much smaller ice cream company that also claims to have invented Rocky Road.\u003c/p>\n\u003cfigure id=\"attachment_11775053\" class=\"wp-caption alignright\" style=\"max-width: 300px\">\u003cimg loading=\"lazy\" decoding=\"async\" class=\" wp-image-11775053\" src=\"https://ww2.kqed.org/news/wp-content/uploads/sites/10/2019/09/RS39118_best-of-whidden-and-RR-qut-1-e1569096311914-800x1060.jpg\" alt=\"\" width=\"300\" height=\"397\" srcset=\"https://cdn.kqed.org/wp-content/uploads/sites/10/2019/09/RS39118_best-of-whidden-and-RR-qut-1-e1569096311914-800x1060.jpg 800w, https://cdn.kqed.org/wp-content/uploads/sites/10/2019/09/RS39118_best-of-whidden-and-RR-qut-1-e1569096311914-160x212.jpg 160w, https://cdn.kqed.org/wp-content/uploads/sites/10/2019/09/RS39118_best-of-whidden-and-RR-qut-1-e1569096311914-1020x1351.jpg 1020w, https://cdn.kqed.org/wp-content/uploads/sites/10/2019/09/RS39118_best-of-whidden-and-RR-qut-1-e1569096311914-906x1200.jpg 906w, https://cdn.kqed.org/wp-content/uploads/sites/10/2019/09/RS39118_best-of-whidden-and-RR-qut-1-e1569096311914.jpg 1214w\" sizes=\"(max-width: 300px) 100vw, 300px\">\u003cfigcaption class=\"wp-caption-text\">Fenton’s owner and Master Blender Scott Whidden showing off a new batch of Rocky Road with longtime Fenton’s ice cream maker Alfredo Macias. \u003ccite>(Sasha Khokha/KQED)\u003c/cite>\u003c/figcaption>\u003c/figure>\n\u003cp>At Fenton’s Creamery, owner and master blender Scott Whidden holds a tub under a spigot churning out fresh chocolate ice cream. He puts in fistfuls of nuts and marshmallows that he scoops from plastic tubs. He, however, adds walnuts instead of almonds — just like the original candy bar.\u003c/p>\n\u003cp>“I’m looking for equal parts [in each bite],” explained Whidden over the whirring ice cream machine. “If you have a marshmallow, I want you to have maybe one or two of the walnuts,” he said.\u003c/p>\n\u003cp>Whidden said small-batch and handmade is the way Fenton’s has made its ice cream since the 1920s.\u003c/p>\n\u003cp>That, he said, is when Melvin Fenton — grandson of the original owner — came up with the idea for Rocky Road. There’s a picture of him in the parlor, where dozens of families are sitting in red vinyl booths enjoying giant sundaes in old-fashioned glass dishes. In the photo, Melvin Fenton is loading fresh cream off of a tiny airplane that he flew as an amateur pilot.\u003c/p>\n\u003cp>“Melvin was like the black sheep of the family,” said Whidden. More like a wildcat and an inventor who could see beyond the trifecta of vanilla, chocolate and strawberry.\u003c/p>\n\u003cfigure id=\"attachment_11775078\" class=\"wp-caption alignnone\" style=\"max-width: 800px\">\u003cimg loading=\"lazy\" decoding=\"async\" class=\"size-medium wp-image-11775078\" src=\"https://ww2.kqed.org/news/wp-content/uploads/sites/10/2019/09/RS39105_MELVIN_AIRPLANE_DIVCO-qut-800x529.jpg\" alt=\"\" width=\"800\" height=\"529\" srcset=\"https://cdn.kqed.org/wp-content/uploads/sites/10/2019/09/RS39105_MELVIN_AIRPLANE_DIVCO-qut-800x529.jpg 800w, https://cdn.kqed.org/wp-content/uploads/sites/10/2019/09/RS39105_MELVIN_AIRPLANE_DIVCO-qut-160x106.jpg 160w, https://cdn.kqed.org/wp-content/uploads/sites/10/2019/09/RS39105_MELVIN_AIRPLANE_DIVCO-qut-1020x674.jpg 1020w, https://cdn.kqed.org/wp-content/uploads/sites/10/2019/09/RS39105_MELVIN_AIRPLANE_DIVCO-qut-1200x793.jpg 1200w, https://cdn.kqed.org/wp-content/uploads/sites/10/2019/09/RS39105_MELVIN_AIRPLANE_DIVCO-qut.jpg 1298w\" sizes=\"(max-width: 800px) 100vw, 800px\">\u003cfigcaption class=\"wp-caption-text\">Melvin Fenton loading fresh cream off an airplane into a delivery truck. Fenton’s claims that Melvin invented Rocky Road. Photo Courtesy Fenton’s Creamery. \u003ccite>(Courtesy Fenton's Ice Cream)\u003c/cite>\u003c/figcaption>\u003c/figure>\n\u003cp>“He’s a visionary,” said Whidden. “Forward-thinking guy. And he goes, ‘Whoa. Mix-ins!’ So the thought process on it was, we’re into the depression, it’s bad times. Smooth ice cream, and then there’s these bumps, it gets rocky.”\u003c/p>\n\u003cp>That sounds familiar: Rocky Road, the bumpy road of life during the Depression. Chocolate, marshmallows, nuts.\u003c/p>\n\u003ch3>\u003cstrong>An Ice Cream Expert Weighs In \u003c/strong>\u003c/h3>\n\u003cfigure id=\"attachment_11775079\" class=\"wp-caption alignright\" style=\"max-width: 303px\">\u003cimg loading=\"lazy\" decoding=\"async\" class=\"wp-image-11775079 \" src=\"https://ww2.kqed.org/news/wp-content/uploads/sites/10/2019/09/RS39095_Amy-Ettinger-qut-e1568841953603-800x1067.jpg\" alt=\"\" width=\"303\" height=\"404\" srcset=\"https://cdn.kqed.org/wp-content/uploads/sites/10/2019/09/RS39095_Amy-Ettinger-qut-e1568841953603-800x1067.jpg 800w, https://cdn.kqed.org/wp-content/uploads/sites/10/2019/09/RS39095_Amy-Ettinger-qut-e1568841953603-160x213.jpg 160w, https://cdn.kqed.org/wp-content/uploads/sites/10/2019/09/RS39095_Amy-Ettinger-qut-e1568841953603-1020x1360.jpg 1020w, https://cdn.kqed.org/wp-content/uploads/sites/10/2019/09/RS39095_Amy-Ettinger-qut-e1568841953603-900x1200.jpg 900w, https://cdn.kqed.org/wp-content/uploads/sites/10/2019/09/RS39095_Amy-Ettinger-qut-e1568841953603-1122x1496.jpg 1122w, https://cdn.kqed.org/wp-content/uploads/sites/10/2019/09/RS39095_Amy-Ettinger-qut-e1568841953603-840x1120.jpg 840w, https://cdn.kqed.org/wp-content/uploads/sites/10/2019/09/RS39095_Amy-Ettinger-qut-e1568841953603-687x916.jpg 687w, https://cdn.kqed.org/wp-content/uploads/sites/10/2019/09/RS39095_Amy-Ettinger-qut-e1568841953603-414x552.jpg 414w, https://cdn.kqed.org/wp-content/uploads/sites/10/2019/09/RS39095_Amy-Ettinger-qut-e1568841953603-354x472.jpg 354w, https://cdn.kqed.org/wp-content/uploads/sites/10/2019/09/RS39095_Amy-Ettinger-qut-e1568841953603.jpg 1440w\" sizes=\"(max-width: 303px) 100vw, 303px\">\u003cfigcaption class=\"wp-caption-text\">Amy Ettinger says Rocky Road was the flavor of her childhood. Here she is at Fenton’s Creamery enjoying a sundae. \u003ccite>(Suzie Racho/KQED)\u003c/cite>\u003c/figcaption>\u003c/figure>\n\u003cp>These days, Rocky Road is still one of Fenton’s top-selling flavors. They serve it up in giant scoops and decadent sundaes. When I visited Fenton’s, \u003ca href=\"http://amyettinger.com\" target=\"_blank\" rel=\"noopener\">Amy Ettinger \u003c/a>and I ordered sundaes with whipped cream and cherries —gleefully fishing for the walnuts and marshmallows. Ettinger is an ice cream historian, the author of “\u003ca href=\"https://www.kqed.org/news/11593783/vanilla-chocolate-strawberry-and-oyster-a-year-of-ice-cream\" target=\"_blank\" rel=\"noopener\">Sweet Spot, An Ice Cream Binge Across America\u003c/a>.”\u003c/p>\n\u003cp>“It’s very common in ice cream history to have these kinds of disputes,” said Ettinger. “The 1904 World’s Fair was when the ice cream cone was invented and six different vendors claimed that they were the ones who invented it. Unless you have a time machine, or you know you were actually the inventor, there’s no way really to tell.”\u003c/p>\n\u003cp>Ettinger said Rocky Road is the flavor of her childhood. But not this Rocky Road: the Dreyer’s with the almonds you can buy at the grocery store. She said she feels a little sheepish saying that, because it’s kind of a David and Goliath story: the mom and pop parlor versus what is today a multinational giant.\u003c/p>\n\u003cp>“What’s very interesting is Fenton’s is a very beloved Bay Area institution,” said Ettinger. “But it is not well known outside of the Bay Area. So regardless of who actually invented it, Dreyer’s is hands down the marketer of Rocky Road. They built their brand on the invention and the marketing of Rocky Road. Just because the other company is the one that got the word out about it, doesn’t mean that Fenton’s didn’t invent it. There’s no way for us to know.”\u003c/p>\n\u003cfigure id=\"attachment_11775082\" class=\"wp-caption alignnone\" style=\"max-width: 800px\">\u003cimg loading=\"lazy\" decoding=\"async\" class=\"size-medium wp-image-11775082\" src=\"https://ww2.kqed.org/news/wp-content/uploads/sites/10/2019/09/RS39090_sundae-beauty-pageant-qut-800x600.jpg\" alt=\"\" width=\"800\" height=\"600\" srcset=\"https://cdn.kqed.org/wp-content/uploads/sites/10/2019/09/RS39090_sundae-beauty-pageant-qut-800x600.jpg 800w, https://cdn.kqed.org/wp-content/uploads/sites/10/2019/09/RS39090_sundae-beauty-pageant-qut-160x120.jpg 160w, https://cdn.kqed.org/wp-content/uploads/sites/10/2019/09/RS39090_sundae-beauty-pageant-qut-1020x765.jpg 1020w, https://cdn.kqed.org/wp-content/uploads/sites/10/2019/09/RS39090_sundae-beauty-pageant-qut-1200x900.jpg 1200w, https://cdn.kqed.org/wp-content/uploads/sites/10/2019/09/RS39090_sundae-beauty-pageant-qut.jpg 1920w, https://cdn.kqed.org/wp-content/uploads/sites/10/2019/09/RS39090_sundae-beauty-pageant-qut-1832x1374.jpg 1832w, https://cdn.kqed.org/wp-content/uploads/sites/10/2019/09/RS39090_sundae-beauty-pageant-qut-1376x1032.jpg 1376w, https://cdn.kqed.org/wp-content/uploads/sites/10/2019/09/RS39090_sundae-beauty-pageant-qut-1044x783.jpg 1044w, https://cdn.kqed.org/wp-content/uploads/sites/10/2019/09/RS39090_sundae-beauty-pageant-qut-632x474.jpg 632w, https://cdn.kqed.org/wp-content/uploads/sites/10/2019/09/RS39090_sundae-beauty-pageant-qut-536x402.jpg 536w\" sizes=\"(max-width: 800px) 100vw, 800px\">\u003cfigcaption class=\"wp-caption-text\">Fenton’s is known for its decadent sundaes, including those made with Rocky Road. \u003ccite>(Suzie Racho/KQED)\u003c/cite>\u003c/figcaption>\u003c/figure>\n\u003cp>There are other theories too:\u003c/p>\n\u003cp>\u003c/p>\u003c/div>",
"attributes": {
"named": {},
"numeric": []
}
},
{
"type": "component",
"content": "",
"name": "aside",
"attributes": {
"named": {
"tag": "golden-state-plate",
"label": "Our Golden State Plate series "
},
"numeric": []
}
},
{
"type": "contentString",
"content": "\u003cdiv class=\"post-body\">\u003cp>\u003c/p>\n\u003cul>\n\u003cli>Fenton’s original candy maker, George Farren, was friends with Dreyer and so perhaps he shared his idea for a Rocky Road ice cream based on the candy with both ice cream companies. It’s unclear whether the original candy bar popular in the 1920s was called Rocky Road. There’s still a Rocky Road candy bar today, invented in San Francisco in the 1950s, that uses cashews. It’s all a bit nutty!\u003c/li>\n\u003cli>Fenton’s owner Scott Whidden claimed Dreyer’s just stole the credit, even though they knew Fenton’s had invented it. Whidden said Dreyer’s former president Ken Cook, who ran Dreyer’s from 1963-1977, was his mentor. The one who actually encouraged him to buy Fenton’s and admitted to him that Fenton’s actually invented Rocky Road. Cook passed away in 1991, so there’s no way to verify that claim, although the online publication Quartzy tried to \u003ca href=\"https://qz.com/quartzy/1376713/who-invented-rocky-road-ice-cream-its-complicated/\" target=\"_blank\" rel=\"noopener\">track it down\u003c/a>.\u003c/li>\n\u003cli>Then there’s the even more radical theory that, in fact, Rocky Road was born in Topeka, Kansas. There is a recipe in a candy cookbook printed there that predates either Fenton’s or Dreyer’s. It calls for honey whip instead of marshmallows.\u003c/li>\n\u003c/ul>\n\u003cfigure id=\"attachment_11775080\" class=\"wp-caption alignnone\" style=\"max-width: 800px\">\u003cimg loading=\"lazy\" decoding=\"async\" class=\"size-medium wp-image-11775080\" src=\"https://ww2.kqed.org/news/wp-content/uploads/sites/10/2019/09/Screen-Shot-2019-09-17-at-1.21.14-PM-800x624.png\" alt=\"\" width=\"800\" height=\"624\" srcset=\"https://cdn.kqed.org/wp-content/uploads/sites/10/2019/09/Screen-Shot-2019-09-17-at-1.21.14-PM-800x624.png 800w, https://cdn.kqed.org/wp-content/uploads/sites/10/2019/09/Screen-Shot-2019-09-17-at-1.21.14-PM-160x125.png 160w, https://cdn.kqed.org/wp-content/uploads/sites/10/2019/09/Screen-Shot-2019-09-17-at-1.21.14-PM.png 982w\" sizes=\"(max-width: 800px) 100vw, 800px\">\u003cfigcaption class=\"wp-caption-text\">Rigby’s Reliable Candy Teacher (this edition published 1920 in Topeka, Kansas) includes a recipe for Rocky Road that predates either Fenton’s or Dreyer’s.\u003c/figcaption>\u003c/figure>\n\u003cp>Ice cream expert Amy Ettinger said this theory doesn’t count. Rocky Road definitely came from Oakland. And who cares who invented it?\u003c/p>\n\u003cp>“At the end of the day I don’t know that it matters,” said Ettinger. I mean, if both places are creating really good scoops of Rocky Road ice cream now, and they both have their little twist on it. How important is it who the original inventor was?”\u003c/p>\n\u003cp>\u003c/p>\u003c/div>",
"attributes": {
"named": {},
"numeric": []
}
},
{
"type": "component",
"content": "",
"name": "ad",
"attributes": {
"named": {
"label": "fullwidth"
},
"numeric": [
"fullwidth"
]
}
},
{
"type": "contentString",
"content": "\u003cdiv class=\"post-body\">\u003cp>\u003c/p>\n\u003cp>\u003c/p>\u003c/div>",
"attributes": {
"named": {},
"numeric": []
}
},
{
"type": "component",
"content": "",
"name": "ad",
"attributes": {
"named": {
"label": "floatright"
},
"numeric": [
"floatright"
]
}
},
{
"type": "contentString",
"content": "\u003cdiv class=\"post-body\">\u003cp>\u003c/p>\n\u003c/div>\u003c/p>",
"attributes": {
"named": {},
"numeric": []
}
}
],
"link": "/news/11774993/golden-state-plate-rocky-road-ice-creams-bumpy-history",
"authors": [
"254"
],
"programs": [
"news_72"
],
"series": [
"news_24115"
],
"categories": [
"news_24114",
"news_8"
],
"tags": [
"news_26693",
"news_20013",
"news_19542",
"news_26689",
"news_333",
"news_24116",
"news_160"
],
"featImg": "news_11775051",
"label": "source_news_11774993"
},
"news_11760849": {
"type": "posts",
"id": "news_11760849",
"meta": {
"index": "posts_1716263798",
"site": "news",
"id": "11760849",
"score": null,
"sort": [
1562974222000
]
},
"parent": 0,
"labelTerm": {},
"blocks": [],
"publishDate": 1562974222,
"format": "audio",
"disqusTitle": "Golden State Plate – The Backstory Behind California-Born Food and Drinks",
"title": "Golden State Plate – The Backstory Behind California-Born Food and Drinks",
"headTitle": "Golden State Plate | KQED News",
"content": "\u003cp>\u003cem>This week we’re dishing up some of our favorite stories from our \u003ca href=\"https://www.kqed.org/news/series/golden-state-plate/\" rel=\"noopener noreferrer\" target=\"_blank\">Golden State Plate series\u003c/a>, which explores the backstory behind some iconic California-born food and drinks.\u003c/em>\u003c/p>\n\u003cp>\u003cem>\u003ca href=\"http://itunes.apple.com/us/podcast/the-california-report-magazine/id1314750545?mt=2\" rel=\"noopener noreferrer\" target=\"_blank\">Listen to these and more in-depth storytelling by subscribing to The California Report Magazine podcast.\u003c/a>\u003c/em>\u003c/p>\n\u003ch2>\u003ca href=\"https://www.kqed.org/news/11720617/pisco-punch-the-pricey-san-francisco-cocktail-that-was-a-gold-rush-knock-out\" rel=\"noopener noreferrer\" target=\"_blank\">Pisco Punch: The Pricey San Francisco Cocktail That Was a Gold Rush Knockout\u003c/a>\u003c/h2>\n\u003cp>If you’re a cocktail drinker, you’ve probably tasted a few Pisco Sours in your time. The pale foamy drink is made with Pisco - a highly potent Peruvian brandy. The first recipe for the Pisco Sour came from Peru, back in the 1940s. But many years before that, 19th century San Francisco was gripped by a craze for another Pisco concoction that maybe should have come with a health warning. KQED's Carly Severn takes us back to the time of the Gold Rush.\u003c/p>\n\u003ch2>\u003ca href=\"https://www.kqed.org/news/11732648/flamin-hot-cheetos-the-humble-beginnings-of-a-junk-food\" rel=\"noopener noreferrer\" target=\"_blank\">Flamin’ Hot Cheetos: The Humble Beginnings of a Junk Food\u003c/a>\u003c/h2>\n\u003cp>These days, some folks can’t seem to get enough of Flamin’ Hot Cheetos. This spicy, California-born snack has a devoted following. Bianca Taylor tells us more about the person who invented them. Richard Montañez worked as a janitor at a Frito-Lay factory for nearly two decades before he came up with his concoction. He had grown up picking grapes, living on a farm for migrant workers near Rancho Cucamonga with his 10 siblings.\u003c/p>\n\u003ch2>\u003ca href=\"https://www.kqed.org/news/11742748/unwrapping-the-california-origins-of-the-fortune-cookie\" rel=\"noopener noreferrer\" target=\"_blank\">Unwrapping the California Origins of the Fortune Cookie\u003c/a>\u003c/h2>\n\u003cp>What comes with the check at almost every Chinese restaurant? Fortune cookies. Like orange slices after a blood draw or apples at San Francisco’s Fillmore, they're a given. But how did they come to be? Are they really Chinese? And if so, why do they serve them at the Japanese Tea Garden in San Francisco's Golden Gate Park? The California Report’s Suzie Racho unravels a mystery.\u003c/p>\n\u003ch2>\u003ca href=\"https://www.kqed.org/news/11720665/what-makes-your-salad-taste-like-california-hidden-valley-ranch\" rel=\"noopener noreferrer\" target=\"_blank\">What Makes Your Salad Taste Like California? Hidden Valley Ranch\u003c/a>\u003c/h2>\n\u003cp>This “Golden State Plate” story is about something as ubiquitous as ketchup and mustard: ranch dressing. It’s everywhere, and it’s a California concoction. As Peter Gilstrap tells us, the place that gave the creamy buttermilk dressing its name was a real ranch on the Central Coast.\u003c/p>\n\u003cp>[ad fullwidth]\u003c/p>\u003cp>\u003c/p>\n",
"disqusIdentifier": "11760849 https://ww2.kqed.org/news/?p=11760849",
"disqusUrl": "https://ww2.kqed.org/news/2019/07/12/golden-state-plate-the-backstory-behind-california-born-food-and-drinks/",
"stats": {
"hasVideo": false,
"hasChartOrMap": false,
"hasAudio": false,
"hasPolis": false,
"wordCount": 381,
"hasGoogleForm": false,
"hasGallery": false,
"hasHearkenModule": false,
"iframeSrcs": [],
"paragraphCount": 8
},
"modified": 1594421086,
"excerpt": "Pricey and Potent Pisco Punch, The Birth of Flamin’ Hot Cheetos, The Complex Origin of Fortune Cookies, The Ranch Behind Hidden Valley Ranch",
"headData": {
"twImgId": "",
"twTitle": "",
"ogTitle": "",
"ogImgId": "",
"twDescription": "",
"description": "Pricey and Potent Pisco Punch, The Birth of Flamin’ Hot Cheetos, The Complex Origin of Fortune Cookies, The Ranch Behind Hidden Valley Ranch",
"title": "Golden State Plate – The Backstory Behind California-Born Food and Drinks | KQED",
"ogDescription": "",
"schema": {
"@context": "https://schema.org",
"@type": "NewsArticle",
"headline": "Golden State Plate – The Backstory Behind California-Born Food and Drinks",
"datePublished": "2019-07-12T16:30:22-07:00",
"dateModified": "2020-07-10T15:44:46-07:00",
"image": "https://cdn.kqed.org/wp-content/uploads/2020/02/KQED-OG-Image@1x.png",
"isAccessibleForFree": "True",
"publisher": {
"@type": "NewsMediaOrganization",
"@id": "https://www.kqed.org/#organization",
"name": "KQED",
"logo": "https://cdn.kqed.org/wp-content/uploads/2020/02/KQED-OG-Image@1x.png",
"url": "https://www.kqed.org",
"sameAs": [
"https://www.facebook.com/KQED",
"https://twitter.com/KQED",
"https://www.instagram.com/kqed/",
"https://www.tiktok.com/@kqedofficial",
"https://www.linkedin.com/company/kqed",
"https://www.youtube.com/channel/UCeC0IOo7i1P_61zVUWbJ4nw"
]
}
}
},
"guestAuthors": [],
"slug": "golden-state-plate-the-backstory-behind-california-born-food-and-drinks",
"status": "publish",
"sourceUrl": "https://www.kqed.org/news/tag/tcrarchive/",
"audioUrl": "https://www.kqed.org/.stream/anon/radio/tcrmag/2019/07/TCRMAG20190712.mp3",
"audioTrackLength": 1713,
"source": "The California Report Magazine",
"path": "/news/11760849/golden-state-plate-the-backstory-behind-california-born-food-and-drinks",
"audioDuration": 1711000,
"parsedContent": [
{
"type": "contentString",
"content": "\u003cdiv class=\"post-body\">\u003cp>\u003cp>\u003cem>This week we’re dishing up some of our favorite stories from our \u003ca href=\"https://www.kqed.org/news/series/golden-state-plate/\" rel=\"noopener noreferrer\" target=\"_blank\">Golden State Plate series\u003c/a>, which explores the backstory behind some iconic California-born food and drinks.\u003c/em>\u003c/p>\n\u003cp>\u003cem>\u003ca href=\"http://itunes.apple.com/us/podcast/the-california-report-magazine/id1314750545?mt=2\" rel=\"noopener noreferrer\" target=\"_blank\">Listen to these and more in-depth storytelling by subscribing to The California Report Magazine podcast.\u003c/a>\u003c/em>\u003c/p>\n\u003ch2>\u003ca href=\"https://www.kqed.org/news/11720617/pisco-punch-the-pricey-san-francisco-cocktail-that-was-a-gold-rush-knock-out\" rel=\"noopener noreferrer\" target=\"_blank\">Pisco Punch: The Pricey San Francisco Cocktail That Was a Gold Rush Knockout\u003c/a>\u003c/h2>\n\u003cp>If you’re a cocktail drinker, you’ve probably tasted a few Pisco Sours in your time. The pale foamy drink is made with Pisco - a highly potent Peruvian brandy. The first recipe for the Pisco Sour came from Peru, back in the 1940s. But many years before that, 19th century San Francisco was gripped by a craze for another Pisco concoction that maybe should have come with a health warning. KQED's Carly Severn takes us back to the time of the Gold Rush.\u003c/p>\n\u003ch2>\u003ca href=\"https://www.kqed.org/news/11732648/flamin-hot-cheetos-the-humble-beginnings-of-a-junk-food\" rel=\"noopener noreferrer\" target=\"_blank\">Flamin’ Hot Cheetos: The Humble Beginnings of a Junk Food\u003c/a>\u003c/h2>\n\u003cp>These days, some folks can’t seem to get enough of Flamin’ Hot Cheetos. This spicy, California-born snack has a devoted following. Bianca Taylor tells us more about the person who invented them. Richard Montañez worked as a janitor at a Frito-Lay factory for nearly two decades before he came up with his concoction. He had grown up picking grapes, living on a farm for migrant workers near Rancho Cucamonga with his 10 siblings.\u003c/p>\n\u003ch2>\u003ca href=\"https://www.kqed.org/news/11742748/unwrapping-the-california-origins-of-the-fortune-cookie\" rel=\"noopener noreferrer\" target=\"_blank\">Unwrapping the California Origins of the Fortune Cookie\u003c/a>\u003c/h2>\n\u003cp>What comes with the check at almost every Chinese restaurant? Fortune cookies. Like orange slices after a blood draw or apples at San Francisco’s Fillmore, they're a given. But how did they come to be? Are they really Chinese? And if so, why do they serve them at the Japanese Tea Garden in San Francisco's Golden Gate Park? The California Report’s Suzie Racho unravels a mystery.\u003c/p>\n\u003ch2>\u003ca href=\"https://www.kqed.org/news/11720665/what-makes-your-salad-taste-like-california-hidden-valley-ranch\" rel=\"noopener noreferrer\" target=\"_blank\">What Makes Your Salad Taste Like California? Hidden Valley Ranch\u003c/a>\u003c/h2>\n\u003cp>This “Golden State Plate” story is about something as ubiquitous as ketchup and mustard: ranch dressing. It’s everywhere, and it’s a California concoction. As Peter Gilstrap tells us, the place that gave the creamy buttermilk dressing its name was a real ranch on the Central Coast.\u003c/p>\n\u003cp>\u003c/p>\u003c/div>",
"attributes": {
"named": {},
"numeric": []
}
},
{
"type": "component",
"content": "",
"name": "ad",
"attributes": {
"named": {
"label": "fullwidth"
},
"numeric": [
"fullwidth"
]
}
},
{
"type": "contentString",
"content": "\u003cdiv class=\"post-body\">\u003cp>\u003c/p>\u003cp>\u003c/p>\n\u003c/div>\u003c/p>",
"attributes": {
"named": {},
"numeric": []
}
}
],
"link": "/news/11760849/golden-state-plate-the-backstory-behind-california-born-food-and-drinks",
"authors": [
"236"
],
"series": [
"news_24115"
],
"categories": [
"news_24114"
],
"tags": [
"news_24116",
"news_21268",
"news_22018",
"news_28233"
],
"featImg": "news_11729451",
"label": "source_news_11760849"
},
"news_11758996": {
"type": "posts",
"id": "news_11758996",
"meta": {
"index": "posts_1716263798",
"site": "news",
"id": "11758996",
"score": null,
"sort": [
1562234456000
]
},
"guestAuthors": [],
"slug": "yes-your-tropical-mai-tai-was-invented-right-here-in-the-bay-area",
"title": "Yes, Your 'Tropical' Mai Tai Was Invented Here in Oakland",
"publishDate": 1562234456,
"format": "standard",
"headTitle": "Yes, Your ‘Tropical’ Mai Tai Was Invented Here in Oakland | KQED",
"labelTerm": {},
"content": "\u003cp>You’re sitting on the beach, sand between your toes, sunglasses on. What else could make this picture complete? How about a Mai Tai?\u003c/p>\n\u003cp>This rum cocktail makes many of us think of the tropics.\u003c/p>\n\u003cp>“I always thought the Mai Tai came from Hawaii,” says Bay Curious listener Terese O’Malley from Oakland. “But then I noticed a few tiki bars in the Oakland area claiming the invention of the Mai Tai. I thought, ‘could this be real? Or is this a myth?”\u003c/p>\n\u003cp>She asked Bay Curious to get to the bottom of it. And so … we did!\u003c/p>\n\u003cp>Read the full web version of this episode: \u003ca href=\"https://www.kqed.org/news/11755932/an-island-drink-with-california-roots-the-mai-tai-turns-75\" rel=\"noopener\" target=\"_blank\">An Island Drink With California Roots: The Mai Tai Turns 75\u003c/a>\u003c/p>\n\u003cp>[ad fullwidth]\u003c/p>\n\u003cp>This story is part of our series \u003ca href=\"https://www.kqed.org/news/series/golden-state-plate/\">Golden State Plate\u003c/a>, produced in collaboration with The California Report Magazine.\u003c/p>\n\u003cp>Be sure to catch our other episodes about the Bay Area’s cocktail creations:\u003c/p>\n\u003cul>\n\u003cli>\u003ca href=\"https://www.kqed.org/news/11621844/the-true-history-of-irish-coffee-and-its-san-francisco-origins\">The True History of Irish Coffee and Its San Francisco Origins\u003c/a>\u003c/li>\n\u003cli>\u003ca href=\"https://www.kqed.org/news/11715542/who-invented-the-martini-a-bay-area-story-with-a-twist\">Who Invented the Martini? A Bay Area Story, With a Twist\u003c/a>\u003c/li>\n\u003cli>\u003ca href=\"https://www.kqed.org/news/11729394/this-pricey-san-francisco-cocktail-was-a-gold-rush-knockout\">This Pricey San Francisco Cocktail Was a Gold Rush Knockout\u003c/a>\u003c/li>\n\u003c/ul>\n\u003cp>Reported by \u003ca href=\"https://twitter.com/sracho?lang=en\">Suzie Racho. \u003c/a>\u003c/p>\n\u003cp>Bay Curious is made by Olivia Allen-Price, Jessica Placzek, Robert Speight, Paul Lancour and Ryan Levi. Additional support from Julie Caine, Suzie Racho, Victoria Mauleon, Ceil Mueller, Sasha Khokha, Ethan Lindsey, Pat Yollin and David Weir.\u003c/p>\n\u003cp>Theme music by Pat Mesiti-Miller.\u003c/p>\n\u003cp>\u003ca href=\"https://www.kqed.org/podcasts/baycurious/\">Ask us a question\u003c/a> or \u003ca href=\"https://www.kqed.org/newsletters/bay-curious\">sign up for our Bay Curious newsletter\u003c/a>.\u003c/p>\n\u003cp>\u003c/p>\n\u003cp>Follow Olivia Allen-Price on Twitter \u003ca href=\"%E2%80%9Chttps://twitter.com/oallenprice%E2%80%9D\">@oallenprice.\u003c/a>\u003c/p>\n\n",
"blocks": [],
"excerpt": "You might think the iconic rum cocktail was born in Hawaii. We set off to discover its true roots.",
"status": "publish",
"parent": 0,
"modified": 1719788672,
"stats": {
"hasAudio": false,
"hasVideo": false,
"hasChartOrMap": false,
"iframeSrcs": [],
"hasGoogleForm": false,
"hasGallery": false,
"hasHearkenModule": false,
"hasPolis": false,
"paragraphCount": 14,
"wordCount": 259
},
"headData": {
"title": "Yes, Your 'Tropical' Mai Tai Was Invented Here in Oakland | KQED",
"description": "You might think the iconic rum cocktail was born in Hawaii. We set off to discover its true roots.",
"ogTitle": "",
"ogDescription": "",
"ogImgId": "",
"twTitle": "",
"twDescription": "",
"twImgId": "",
"schema": {
"@context": "https://schema.org",
"@type": "NewsArticle",
"headline": "Yes, Your 'Tropical' Mai Tai Was Invented Here in Oakland",
"datePublished": "2019-07-04T03:00:56-07:00",
"dateModified": "2024-06-30T16:04:32-07:00",
"image": "https://cdn.kqed.org/wp-content/uploads/2020/02/KQED-OG-Image@1x.png",
"isAccessibleForFree": "True",
"publisher": {
"@type": "NewsMediaOrganization",
"@id": "https://www.kqed.org/#organization",
"name": "KQED",
"logo": "https://cdn.kqed.org/wp-content/uploads/2020/02/KQED-OG-Image@1x.png",
"url": "https://www.kqed.org",
"sameAs": [
"https://www.facebook.com/KQED",
"https://twitter.com/KQED",
"https://www.instagram.com/kqed/",
"https://www.tiktok.com/@kqedofficial",
"https://www.linkedin.com/company/kqed",
"https://www.youtube.com/channel/UCeC0IOo7i1P_61zVUWbJ4nw"
]
}
}
},
"source": "Food",
"sourceUrl": "https://www.kqed.org/food",
"sticky": false,
"audioTrackLength": 567,
"templateType": "standard",
"featuredImageType": "standard",
"excludeFromSiteSearch": "Include",
"articleAge": "0",
"path": "/news/11758996/yes-your-tropical-mai-tai-was-invented-right-here-in-the-bay-area",
"parsedContent": [
{
"type": "contentString",
"content": "\u003cdiv class=\"post-body\">\u003cp>\u003cp>You’re sitting on the beach, sand between your toes, sunglasses on. What else could make this picture complete? How about a Mai Tai?\u003c/p>\n\u003cp>This rum cocktail makes many of us think of the tropics.\u003c/p>\n\u003cp>“I always thought the Mai Tai came from Hawaii,” says Bay Curious listener Terese O’Malley from Oakland. “But then I noticed a few tiki bars in the Oakland area claiming the invention of the Mai Tai. I thought, ‘could this be real? Or is this a myth?”\u003c/p>\n\u003cp>She asked Bay Curious to get to the bottom of it. And so … we did!\u003c/p>\n\u003cp>Read the full web version of this episode: \u003ca href=\"https://www.kqed.org/news/11755932/an-island-drink-with-california-roots-the-mai-tai-turns-75\" rel=\"noopener\" target=\"_blank\">An Island Drink With California Roots: The Mai Tai Turns 75\u003c/a>\u003c/p>\n\u003cp>\u003c/p>\u003c/div>",
"attributes": {
"named": {},
"numeric": []
}
},
{
"type": "component",
"content": "",
"name": "ad",
"attributes": {
"named": {
"label": "fullwidth"
},
"numeric": [
"fullwidth"
]
}
},
{
"type": "contentString",
"content": "\u003cdiv class=\"post-body\">\u003cp>\u003c/p>\n\u003cp>This story is part of our series \u003ca href=\"https://www.kqed.org/news/series/golden-state-plate/\">Golden State Plate\u003c/a>, produced in collaboration with The California Report Magazine.\u003c/p>\n\u003cp>Be sure to catch our other episodes about the Bay Area’s cocktail creations:\u003c/p>\n\u003cul>\n\u003cli>\u003ca href=\"https://www.kqed.org/news/11621844/the-true-history-of-irish-coffee-and-its-san-francisco-origins\">The True History of Irish Coffee and Its San Francisco Origins\u003c/a>\u003c/li>\n\u003cli>\u003ca href=\"https://www.kqed.org/news/11715542/who-invented-the-martini-a-bay-area-story-with-a-twist\">Who Invented the Martini? A Bay Area Story, With a Twist\u003c/a>\u003c/li>\n\u003cli>\u003ca href=\"https://www.kqed.org/news/11729394/this-pricey-san-francisco-cocktail-was-a-gold-rush-knockout\">This Pricey San Francisco Cocktail Was a Gold Rush Knockout\u003c/a>\u003c/li>\n\u003c/ul>\n\u003cp>Reported by \u003ca href=\"https://twitter.com/sracho?lang=en\">Suzie Racho. \u003c/a>\u003c/p>\n\u003cp>Bay Curious is made by Olivia Allen-Price, Jessica Placzek, Robert Speight, Paul Lancour and Ryan Levi. Additional support from Julie Caine, Suzie Racho, Victoria Mauleon, Ceil Mueller, Sasha Khokha, Ethan Lindsey, Pat Yollin and David Weir.\u003c/p>\n\u003cp>Theme music by Pat Mesiti-Miller.\u003c/p>\n\u003cp>\u003ca href=\"https://www.kqed.org/podcasts/baycurious/\">Ask us a question\u003c/a> or \u003ca href=\"https://www.kqed.org/newsletters/bay-curious\">sign up for our Bay Curious newsletter\u003c/a>.\u003c/p>\n\u003cp>\u003c/p>\n\u003cp>Follow Olivia Allen-Price on Twitter \u003ca href=\"%E2%80%9Chttps://twitter.com/oallenprice%E2%80%9D\">@oallenprice.\u003c/a>\u003c/p>\n\n\u003c/div>\u003c/p>",
"attributes": {
"named": {},
"numeric": []
}
}
],
"link": "/news/11758996/yes-your-tropical-mai-tai-was-invented-right-here-in-the-bay-area",
"authors": [
"107"
],
"programs": [
"news_33523"
],
"series": [
"news_17986"
],
"categories": [
"news_8",
"news_33520"
],
"tags": [
"news_20353",
"news_19133",
"news_18426",
"news_24374",
"news_333",
"news_24116"
],
"featImg": "news_11759000",
"label": "source_news_11758996"
},
"news_11755932": {
"type": "posts",
"id": "news_11755932",
"meta": {
"index": "posts_1716263798",
"site": "news",
"id": "11755932",
"score": null,
"sort": [
1561159643000
]
},
"guestAuthors": [],
"slug": "an-island-drink-with-california-roots-the-mai-tai-turns-75",
"title": "An Island Drink With California Roots: The Mai Tai Turns 75",
"publishDate": 1561159643,
"format": "standard",
"headTitle": "An Island Drink With California Roots: The Mai Tai Turns 75 | KQED",
"labelTerm": {},
"content": "\u003cp>\u003cspan style=\"font-weight: 400;\">You’re sitting on the beach, sand between your toes, sunglasses on. What else could make this picture complete? How about a Mai Tai? \u003c/span>\u003c/p>\n\u003cp>\u003cspan style=\"font-weight: 400;\">This rum cocktail probably makes you think Hawaii, though a lot of people and places have claimed the drink as their own. But where did it really come from? I set off on a mission to find out. \u003c/span>\u003c/p>\n\u003cp>\u003cspan style=\"font-weight: 400;\">First, I headed to a place that bills itself as the “Home of the Original Mai Tai.” \u003c/span>\u003cspan style=\"font-weight: 400;\">\u003ca href=\"https://tradervics.com/\">Trader Vic’s\u003c/a> is tucked away on the shores of San Francisco Bay, in Emeryville. On one side of the restaurant chain’s flagship is the marina, on the other, the Bay Bridge. \u003c/span>\u003c/p>\n\u003cp>\u003cspan style=\"font-weight: 400;\">According to Daniel Veliz, Trader Vic’s corporate beverage director\u003c/span>\u003cspan style=\"font-weight: 400;\">, they served 40,000 Mai Tais last year in this location alone. \u003c/span>\u003c/p>\n\u003cp>\u003cspan style=\"font-weight: 400;\">But what’s in an Original Trader Vic’s Mai Tai? As Veliz began mixing one for me, he said that it has just five ingredients. “Fresh lime, orgeat (almond) syrup, a touch of rock candy syrup, orange curacao, and 2 ounces of amber rum,” he said.\u003c/span>\u003c/p>\n\u003cfigure id=\"attachment_11756296\" class=\"wp-caption aligncenter\" style=\"max-width: 355px\">\u003cimg loading=\"lazy\" decoding=\"async\" class=\" wp-image-11756296\" src=\"https://ww2.kqed.org/news/wp-content/uploads/sites/10/2019/06/RS37825_IMG_0271-qut-800x1067.jpg\" alt=\"The Original Trader Vic's Mai Tai.\" width=\"355\" height=\"473\" srcset=\"https://cdn.kqed.org/wp-content/uploads/sites/10/2019/06/RS37825_IMG_0271-qut-800x1067.jpg 800w, https://cdn.kqed.org/wp-content/uploads/sites/10/2019/06/RS37825_IMG_0271-qut-160x213.jpg 160w, https://cdn.kqed.org/wp-content/uploads/sites/10/2019/06/RS37825_IMG_0271-qut-1020x1360.jpg 1020w, https://cdn.kqed.org/wp-content/uploads/sites/10/2019/06/RS37825_IMG_0271-qut-900x1200.jpg 900w, https://cdn.kqed.org/wp-content/uploads/sites/10/2019/06/RS37825_IMG_0271-qut-1920x2560.jpg 1920w, https://cdn.kqed.org/wp-content/uploads/sites/10/2019/06/RS37825_IMG_0271-qut-1122x1496.jpg 1122w, https://cdn.kqed.org/wp-content/uploads/sites/10/2019/06/RS37825_IMG_0271-qut-840x1120.jpg 840w, https://cdn.kqed.org/wp-content/uploads/sites/10/2019/06/RS37825_IMG_0271-qut-687x916.jpg 687w, https://cdn.kqed.org/wp-content/uploads/sites/10/2019/06/RS37825_IMG_0271-qut-414x552.jpg 414w, https://cdn.kqed.org/wp-content/uploads/sites/10/2019/06/RS37825_IMG_0271-qut-354x472.jpg 354w, https://cdn.kqed.org/wp-content/uploads/sites/10/2019/06/RS37825_IMG_0271-qut.jpg 1536w\" sizes=\"(max-width: 355px) 100vw, 355px\">\u003cfigcaption class=\"wp-caption-text\">The Original Trader Vic’s Mai Tai. \u003ccite>(Suzie Racho/KQED)\u003c/cite>\u003c/figcaption>\u003c/figure>\n\u003cp>\u003cspan style=\"font-weight: 400;\">He gave it all a shake and poured it into a glass, then added a spent lime wedge and a touch of mint for garnish. And unlike some of the Mai Tais I’ve seen, there was no rum float, no pineapple or orange juice. And it wasn’t red. He presented a drink that was a lovely golden brown. \u003c/span>\u003c/p>\n\u003cp>[ad fullwidth]\u003c/p>\n\u003cp>\u003cspan style=\"font-weight: 400;\">The Vic behind Trader Vic’s was Victor Bergeron, who claimed he invented the drink in 1944. His granddaughter, Eve Bergeron, told me he created the cocktail and asked some visiting friends from Tahiti — Ham and Carrie Guild — to try it. After Carrie tasted it, she exclaimed “Mai Tai roa ae!” which means ” ‘awesome’ in Tahiti,” Veliz explained. And thus the drink was named.\u003c/span>\u003c/p>\n\u003cp>\u003cspan style=\"font-weight: 400;\">Tiki historian and author \u003ca href=\"http://beachbumberry.com/about.html\">Jeff “Beachbum” Berry\u003c/a> said the story of the Mai Tai started at 65th Street and San Pablo Avenue in Oakland. That’s where Bergeron opened a little saloon in 1934 called Hinky Dinks, named after a \u003ca href=\"https://www.youtube.com/watch?v=QlTKKNRkYKs\">risque ditty that was popular\u003c/a> at the time.\u003c/span>\u003c/p>\n\u003cfigure id=\"attachment_11756258\" class=\"wp-caption aligncenter\" style=\"max-width: 800px\">\u003cimg loading=\"lazy\" decoding=\"async\" class=\"size-medium wp-image-11756258\" src=\"https://ww2.kqed.org/news/wp-content/uploads/sites/10/2019/06/RS37843_Hinky-Dinks-qut-800x604.jpg\" alt=\"Victor Bergeron opened Hinky Dinks at 65th and San Pablo in Oakland in 1934. \" width=\"800\" height=\"604\" srcset=\"https://cdn.kqed.org/wp-content/uploads/sites/10/2019/06/RS37843_Hinky-Dinks-qut-800x604.jpg 800w, https://cdn.kqed.org/wp-content/uploads/sites/10/2019/06/RS37843_Hinky-Dinks-qut-160x121.jpg 160w, https://cdn.kqed.org/wp-content/uploads/sites/10/2019/06/RS37843_Hinky-Dinks-qut-1020x770.jpg 1020w, https://cdn.kqed.org/wp-content/uploads/sites/10/2019/06/RS37843_Hinky-Dinks-qut-1200x906.jpg 1200w, https://cdn.kqed.org/wp-content/uploads/sites/10/2019/06/RS37843_Hinky-Dinks-qut.jpg 1920w\" sizes=\"(max-width: 800px) 100vw, 800px\">\u003cfigcaption class=\"wp-caption-text\">Victor Bergeron opened Hinky Dinks at 65th and San Pablo in Oakland in 1934. \u003ccite>(Courtesy of Eve Bergeron)\u003c/cite>\u003c/figcaption>\u003c/figure>\n\u003cp>\u003cspan style=\"font-weight: 400;\">The business was successful, but Vic was interested in the tropical-themed drinks he started to see in a few spots in his native San Francisco. He set off to learn from the masters, stopping in New Orleans and the Caribbean. \u003c/span>\u003c/p>\n\u003cp>\u003cspan style=\"font-weight: 400;\">In 1938, he spent a week at the legendary Havana bar, La Floridita, trying to learn all he could from the man known as the “\u003ca href=\"https://www.npr.org/sections/thesalt/2017/04/25/525063025/the-cocktail-king-of-cuba-the-man-who-invented-hemingways-favorite-daiquiri\">Cocktail King,”\u003c/a> \u003c/span>\u003cspan style=\"font-weight: 400;\">Constantino\u003c/span>\u003cspan style=\"font-weight: 400;\"> Ribalaigua Vert\u003c/span>\u003cspan style=\"font-weight: 400;\">. \u003c/span>\u003c/p>\n\u003cp>\u003cspan style=\"font-weight: 400;\">“One of Constantino’s famous drinks was called the Golden Gloves and (it) calls for gold Jamaican rum, orange juice, orange curacao, lime juice and sugar,” explained Berry. “Now if you add orgeat syrup to that you have a Mai Tai more or less. And that could also have been Vic’s inspiration.”\u003c/span>\u003c/p>\n\u003cfigure id=\"attachment_11756294\" class=\"wp-caption aligncenter\" style=\"max-width: 546px\">\u003cimg loading=\"lazy\" decoding=\"async\" class=\" wp-image-11756294\" src=\"https://ww2.kqed.org/news/wp-content/uploads/sites/10/2019/06/RS37857_Menu-800x379.jpg\" alt=\"One of Trader Vic's early menus features nods to his influences, including Don the Beachcomber in Los Angeles and La Floridita in Havana. \" width=\"546\" height=\"259\" srcset=\"https://cdn.kqed.org/wp-content/uploads/sites/10/2019/06/RS37857_Menu-800x379.jpg 800w, https://cdn.kqed.org/wp-content/uploads/sites/10/2019/06/RS37857_Menu-160x76.jpg 160w, https://cdn.kqed.org/wp-content/uploads/sites/10/2019/06/RS37857_Menu-1020x484.jpg 1020w, https://cdn.kqed.org/wp-content/uploads/sites/10/2019/06/RS37857_Menu-1200x569.jpg 1200w, https://cdn.kqed.org/wp-content/uploads/sites/10/2019/06/RS37857_Menu-1920x911.jpg 1920w, https://cdn.kqed.org/wp-content/uploads/sites/10/2019/06/RS37857_Menu.jpg 2048w\" sizes=\"(max-width: 546px) 100vw, 546px\">\u003cfigcaption class=\"wp-caption-text\">One of Trader Vic’s early menus features a nod to his influences, including Don the Beachcomber in Los Angeles and La Floridita in Havana. \u003ccite>(Suzie Racho/KQED)\u003c/cite>\u003c/figcaption>\u003c/figure>\n\u003cp>\u003cspan style=\"font-weight: 400;\">When Bergeron returned to Oakland, he added the drinks he learned to make during his travels to the Hinky Dinks’ menu. “We went to work and made up a lot of new ones, ones that would sell in America,” he wrote in his 1973 autobiography, “\u003c/span>\u003cspan style=\"font-weight: 400;\">Frankly Speaking\u003c/span>\u003cspan style=\"font-weight: 400;\">.”\u003c/span>\u003c/p>\n\u003cp>\u003cspan style=\"font-weight: 400;\">But Bergeron also found inspiration closer to home at a Los Angeles bar called Don the Beachcomber, according to \u003ca href=\"http://www.martincate.com/\">Martin Cate, \u003c/a>owner of San Francisco’s \u003ca href=\"http://www.smugglerscovesf.com/\">Smuggler’s Cove\u003c/a> and a former Trader Vic’s bartender. \u003c/span>\u003c/p>\n\u003cfigure id=\"attachment_11756252\" class=\"wp-caption alignleft\" style=\"max-width: 800px\">\u003cimg loading=\"lazy\" decoding=\"async\" class=\"size-medium wp-image-11756252\" src=\"https://ww2.kqed.org/news/wp-content/uploads/sites/10/2019/06/RS37815_IMG_0260-qut-800x600.jpg\" alt=\"Martin Cate at his bar, Smuggler's Cove, in San Francisco. \" width=\"800\" height=\"600\" srcset=\"https://cdn.kqed.org/wp-content/uploads/sites/10/2019/06/RS37815_IMG_0260-qut-800x600.jpg 800w, https://cdn.kqed.org/wp-content/uploads/sites/10/2019/06/RS37815_IMG_0260-qut-160x120.jpg 160w, https://cdn.kqed.org/wp-content/uploads/sites/10/2019/06/RS37815_IMG_0260-qut-1020x765.jpg 1020w, https://cdn.kqed.org/wp-content/uploads/sites/10/2019/06/RS37815_IMG_0260-qut-632x474.jpg 632w, https://cdn.kqed.org/wp-content/uploads/sites/10/2019/06/RS37815_IMG_0260-qut-536x402.jpg 536w, https://cdn.kqed.org/wp-content/uploads/sites/10/2019/06/RS37815_IMG_0260-qut.jpg 1024w\" sizes=\"(max-width: 800px) 100vw, 800px\">\u003cfigcaption class=\"wp-caption-text\">Martin Cate at his bar, Smuggler’s Cove, in San Francisco. \u003ccite>(Suzie Racho/KQED)\u003c/cite>\u003c/figcaption>\u003c/figure>\n\u003cp>\u003cspan style=\"font-weight: 400;\">“[It was] \u003c/span>\u003cspan style=\"font-weight: 400;\">a\u003c/span>\u003cspan style=\"font-weight: 400;\">bsolutely all the rage from almost day one when it opened in Hollywood,” said Cate. “[Vic] traveled down and he not only fell in love with the place, he would try to grill bartenders all day long about what was there.” \u003c/span>\u003c/p>\n\u003cp>\u003cspan style=\"font-weight: 400;\">Opened in 1933,\u003ca href=\"https://www.lamag.com/digestblog/don-the-beachcomber-closing/\"> Don the Beachcomber\u003c/a> was essentially the first tiki bar, according to cocktail historians. And it served a couple of drinks that may have been of interest to Vic Bergeron, including the Q.B. Cooler, which Berry said tasted like a Mai Tai. \u003c/span>\u003cspan style=\"font-weight: 400;\">There was even a drink called the Mai Tai Swizzle in the early ’30s, but it was off the menu by the time Bergeron visited. \u003c/span>\u003c/p>\n\u003cp>\u003cspan style=\"font-weight: 400;\">But owner Donn Beach was notoriously protective and had his bartenders mix drinks from bottles labeled with numbers. Even though Bergeron didn’t walk away with any of Donn Beach’s secret recipes, he bought some decor from him, according to Cate. The visit was a catalyst.\u003c/span>\u003c/p>\n\u003cp>\u003cspan style=\"font-weight: 400;\">“When I got back to Oakland and told my wife what I had seen, we agreed to change the name of our restaurant and change the decor,” Bergeron wrote in his autobiography\u003c/span>\u003cspan style=\"font-weight: 400;\">. “We decided Hinky Dinks was a junky name and that the place should be named after someone we could tell a story about. My wife suggested ‘Trader Vic’s’ because I was always making a trade with someone. Fine, I became Trader Vic.”\u003c/span>\u003c/p>\n\u003cfigure id=\"attachment_11756306\" class=\"wp-caption aligncenter\" style=\"max-width: 369px\">\u003cimg loading=\"lazy\" decoding=\"async\" class=\" wp-image-11756306\" src=\"https://ww2.kqed.org/news/wp-content/uploads/sites/10/2019/06/IMG_0268-1-e1561081363941-800x1067.jpg\" alt=\"An early Trader Vic menu. \" width=\"369\" height=\"492\" srcset=\"https://cdn.kqed.org/wp-content/uploads/sites/10/2019/06/IMG_0268-1-e1561081363941-800x1067.jpg 800w, https://cdn.kqed.org/wp-content/uploads/sites/10/2019/06/IMG_0268-1-e1561081363941-160x213.jpg 160w, https://cdn.kqed.org/wp-content/uploads/sites/10/2019/06/IMG_0268-1-e1561081363941-1020x1360.jpg 1020w, https://cdn.kqed.org/wp-content/uploads/sites/10/2019/06/IMG_0268-1-e1561081363941-900x1200.jpg 900w, https://cdn.kqed.org/wp-content/uploads/sites/10/2019/06/IMG_0268-1-e1561081363941-1122x1496.jpg 1122w, https://cdn.kqed.org/wp-content/uploads/sites/10/2019/06/IMG_0268-1-e1561081363941-840x1120.jpg 840w, https://cdn.kqed.org/wp-content/uploads/sites/10/2019/06/IMG_0268-1-e1561081363941-687x916.jpg 687w, https://cdn.kqed.org/wp-content/uploads/sites/10/2019/06/IMG_0268-1-e1561081363941-414x552.jpg 414w, https://cdn.kqed.org/wp-content/uploads/sites/10/2019/06/IMG_0268-1-e1561081363941-354x472.jpg 354w, https://cdn.kqed.org/wp-content/uploads/sites/10/2019/06/IMG_0268-1-e1561081363941.jpg 1536w\" sizes=\"(max-width: 369px) 100vw, 369px\">\u003cfigcaption class=\"wp-caption-text\">An early Trader Vic menu. \u003ccite>(Suzie Racho/KQED)\u003c/cite>\u003c/figcaption>\u003c/figure>\n\u003cp>\u003cspan style=\"font-weight: 400;\">So Hinky Dinks became Trader Vic’s, and business boomed. Bergeron’s pal, San Francisco Chronicle columnist Herb Caen, helped drive its popularity, exclaiming “the best restaurant in San Francisco is in Oakland.” But the Mai Tai itself wasn’t the draw — it was just one of many drinks on Vic’s expansive menu. \u003c/span>\u003c/p>\n\u003cp>\u003cspan style=\"font-weight: 400;\">Martin Cate said that it wasn’t until 1953, nearly 10 years after it was first introduced, that the cocktail took a cruise to Hawaii, where the Mai Tai \u003c/span>\u003ci>\u003cspan style=\"font-weight: 400;\">really\u003c/span>\u003c/i>\u003cspan style=\"font-weight: 400;\"> became the Mai Tai.\u003c/span>\u003c/p>\n\u003cp>\u003cspan style=\"font-weight: 400;\">“He sent the recipe on board the Matson steamship lines, which were sailing out of San Francisco to Hawaii starting in the early 1950s,” Cate said. “The Mai Tai was on the menu because they asked Vic to not only do the menu for the ships, but also for their hotel, the Royal Hawaiian in Waikiki. And when the Mai Tai got to Hawaii, it mutated basically into something Hawaiian, meaning, namely, pineapple juice.”\u003c/span>\u003c/p>\n\u003cfigure id=\"attachment_11756257\" class=\"wp-caption alignleft\" style=\"max-width: 276px\">\u003cimg loading=\"lazy\" decoding=\"async\" class=\" wp-image-11756257\" src=\"https://ww2.kqed.org/news/wp-content/uploads/sites/10/2019/06/RS37842_Vic-mixing-a-drink-at-his-bar-qut-800x992.jpg\" alt=\"Victor Bergeron aka Trader Vic.\" width=\"276\" height=\"342\" srcset=\"https://cdn.kqed.org/wp-content/uploads/sites/10/2019/06/RS37842_Vic-mixing-a-drink-at-his-bar-qut-800x992.jpg 800w, https://cdn.kqed.org/wp-content/uploads/sites/10/2019/06/RS37842_Vic-mixing-a-drink-at-his-bar-qut-160x198.jpg 160w, https://cdn.kqed.org/wp-content/uploads/sites/10/2019/06/RS37842_Vic-mixing-a-drink-at-his-bar-qut-1020x1265.jpg 1020w, https://cdn.kqed.org/wp-content/uploads/sites/10/2019/06/RS37842_Vic-mixing-a-drink-at-his-bar-qut-968x1200.jpg 968w, https://cdn.kqed.org/wp-content/uploads/sites/10/2019/06/RS37842_Vic-mixing-a-drink-at-his-bar-qut-1920x2381.jpg 1920w, https://cdn.kqed.org/wp-content/uploads/sites/10/2019/06/RS37842_Vic-mixing-a-drink-at-his-bar-qut.jpg 1651w\" sizes=\"(max-width: 276px) 100vw, 276px\">\u003cfigcaption class=\"wp-caption-text\">Victor Bergeron aka Trader Vic. \u003ccite>(Courtesy of Eve Bergeron)\u003c/cite>\u003c/figcaption>\u003c/figure>\n\u003cp>\u003cspan style=\"font-weight: 400;\">Jeff Berry said travel writers picked up on it and the Mai Tai basically went viral. And because the recipe wouldn’t be published until two decades later, restaurants and bars put their own spin on the drink. \u003c/span>\u003c/p>\n\u003cp>\u003cspan style=\"font-weight: 400;\">“A Mai Tai became sort of like the symbol of your Hawaiian vacation,” said Berry. “It was like paradise in a glass. I think that name more than anything else is the reason why that happened.”\u003c/span>\u003c/p>\n\u003cp>\u003cspan style=\"font-weight: 400;\">So who’s the true originator of the Mai Tai? Was it \u003c/span>\u003cspan style=\"font-weight: 400;\">Constantino\u003c/span>\u003cspan style=\"font-weight: 400;\"> Ribalaigua Vert in\u003c/span>\u003cspan style=\"font-weight: 400;\"> Cuba? Donn Beach in L.A.? Or Victor Bergeron in Oakland? \u003c/span>\u003c/p>\n\u003cp>\u003cspan style=\"font-weight: 400;\">Well, for most cocktail historians, including Martin Cate and Jeff Berry, the original Mai Tai has just five ingredients and was created in Oakland by Victor Bergeron. \u003c/span>\u003c/p>\n\u003cp>\u003cspan style=\"font-weight: 400;\">As for Vic? As he wrote in his autobiography: \u003c/span>\u003cspan style=\"font-weight: 400;\">“Anybody who says I didn’t create this drink is a dirty stinker.”\u003c/span>\u003c/p>\n\u003cp>[ad floatright]\u003c/p>\n\u003cp>So raise a glass to the Mai Tai, which turns \u003ca href=\"http://tradervics.com/news/lets-get-the-record-straightthe-real-mai-tai-day-is-august-30th/\">75 in August\u003c/a>.\u003c/p>\n\n",
"blocks": [],
"excerpt": "You might think the iconic rum cocktail was born in Hawaii. We set off to discover its true roots.",
"status": "publish",
"parent": 0,
"modified": 1721121890,
"stats": {
"hasAudio": false,
"hasVideo": false,
"hasChartOrMap": false,
"iframeSrcs": [],
"hasGoogleForm": false,
"hasGallery": false,
"hasHearkenModule": false,
"hasPolis": false,
"paragraphCount": 28,
"wordCount": 1308
},
"headData": {
"title": "An Island Drink With California Roots: The Mai Tai Turns 75 | KQED",
"description": "You might think the iconic rum cocktail was born in Hawaii. We set off to discover its true roots.",
"ogTitle": "",
"ogDescription": "",
"ogImgId": "",
"twTitle": "",
"twDescription": "",
"twImgId": "",
"schema": {
"@context": "https://schema.org",
"@type": "NewsArticle",
"headline": "An Island Drink With California Roots: The Mai Tai Turns 75",
"datePublished": "2019-06-21T16:27:23-07:00",
"dateModified": "2024-07-16T02:24:50-07:00",
"image": "https://cdn.kqed.org/wp-content/uploads/2020/02/KQED-OG-Image@1x.png",
"isAccessibleForFree": "True",
"publisher": {
"@type": "NewsMediaOrganization",
"@id": "https://www.kqed.org/#organization",
"name": "KQED",
"logo": "https://cdn.kqed.org/wp-content/uploads/2020/02/KQED-OG-Image@1x.png",
"url": "https://www.kqed.org",
"sameAs": [
"https://www.facebook.com/KQED",
"https://twitter.com/KQED",
"https://www.instagram.com/kqed/",
"https://www.tiktok.com/@kqedofficial",
"https://www.linkedin.com/company/kqed",
"https://www.youtube.com/channel/UCeC0IOo7i1P_61zVUWbJ4nw"
]
}
}
},
"source": "Food",
"sourceUrl": "https://www.kqed.org/food",
"audioUrl": "https://www.kqed.org/.stream/anon/radio/tcrmag/2019/06/20190621atcrmag.mp3",
"sticky": false,
"audioTrackLength": 437,
"templateType": "standard",
"featuredImageType": "standard",
"excludeFromSiteSearch": "Include",
"articleAge": "0",
"path": "/news/11755932/an-island-drink-with-california-roots-the-mai-tai-turns-75",
"parsedContent": [
{
"type": "contentString",
"content": "\u003cdiv class=\"post-body\">\u003cp>\u003cp>\u003cspan style=\"font-weight: 400;\">You’re sitting on the beach, sand between your toes, sunglasses on. What else could make this picture complete? How about a Mai Tai? \u003c/span>\u003c/p>\n\u003cp>\u003cspan style=\"font-weight: 400;\">This rum cocktail probably makes you think Hawaii, though a lot of people and places have claimed the drink as their own. But where did it really come from? I set off on a mission to find out. \u003c/span>\u003c/p>\n\u003cp>\u003cspan style=\"font-weight: 400;\">First, I headed to a place that bills itself as the “Home of the Original Mai Tai.” \u003c/span>\u003cspan style=\"font-weight: 400;\">\u003ca href=\"https://tradervics.com/\">Trader Vic’s\u003c/a> is tucked away on the shores of San Francisco Bay, in Emeryville. On one side of the restaurant chain’s flagship is the marina, on the other, the Bay Bridge. \u003c/span>\u003c/p>\n\u003cp>\u003cspan style=\"font-weight: 400;\">According to Daniel Veliz, Trader Vic’s corporate beverage director\u003c/span>\u003cspan style=\"font-weight: 400;\">, they served 40,000 Mai Tais last year in this location alone. \u003c/span>\u003c/p>\n\u003cp>\u003cspan style=\"font-weight: 400;\">But what’s in an Original Trader Vic’s Mai Tai? As Veliz began mixing one for me, he said that it has just five ingredients. “Fresh lime, orgeat (almond) syrup, a touch of rock candy syrup, orange curacao, and 2 ounces of amber rum,” he said.\u003c/span>\u003c/p>\n\u003cfigure id=\"attachment_11756296\" class=\"wp-caption aligncenter\" style=\"max-width: 355px\">\u003cimg loading=\"lazy\" decoding=\"async\" class=\" wp-image-11756296\" src=\"https://ww2.kqed.org/news/wp-content/uploads/sites/10/2019/06/RS37825_IMG_0271-qut-800x1067.jpg\" alt=\"The Original Trader Vic's Mai Tai.\" width=\"355\" height=\"473\" srcset=\"https://cdn.kqed.org/wp-content/uploads/sites/10/2019/06/RS37825_IMG_0271-qut-800x1067.jpg 800w, https://cdn.kqed.org/wp-content/uploads/sites/10/2019/06/RS37825_IMG_0271-qut-160x213.jpg 160w, https://cdn.kqed.org/wp-content/uploads/sites/10/2019/06/RS37825_IMG_0271-qut-1020x1360.jpg 1020w, https://cdn.kqed.org/wp-content/uploads/sites/10/2019/06/RS37825_IMG_0271-qut-900x1200.jpg 900w, https://cdn.kqed.org/wp-content/uploads/sites/10/2019/06/RS37825_IMG_0271-qut-1920x2560.jpg 1920w, https://cdn.kqed.org/wp-content/uploads/sites/10/2019/06/RS37825_IMG_0271-qut-1122x1496.jpg 1122w, https://cdn.kqed.org/wp-content/uploads/sites/10/2019/06/RS37825_IMG_0271-qut-840x1120.jpg 840w, https://cdn.kqed.org/wp-content/uploads/sites/10/2019/06/RS37825_IMG_0271-qut-687x916.jpg 687w, https://cdn.kqed.org/wp-content/uploads/sites/10/2019/06/RS37825_IMG_0271-qut-414x552.jpg 414w, https://cdn.kqed.org/wp-content/uploads/sites/10/2019/06/RS37825_IMG_0271-qut-354x472.jpg 354w, https://cdn.kqed.org/wp-content/uploads/sites/10/2019/06/RS37825_IMG_0271-qut.jpg 1536w\" sizes=\"(max-width: 355px) 100vw, 355px\">\u003cfigcaption class=\"wp-caption-text\">The Original Trader Vic’s Mai Tai. \u003ccite>(Suzie Racho/KQED)\u003c/cite>\u003c/figcaption>\u003c/figure>\n\u003cp>\u003cspan style=\"font-weight: 400;\">He gave it all a shake and poured it into a glass, then added a spent lime wedge and a touch of mint for garnish. And unlike some of the Mai Tais I’ve seen, there was no rum float, no pineapple or orange juice. And it wasn’t red. He presented a drink that was a lovely golden brown. \u003c/span>\u003c/p>\n\u003cp>\u003c/p>\u003c/div>",
"attributes": {
"named": {},
"numeric": []
}
},
{
"type": "component",
"content": "",
"name": "ad",
"attributes": {
"named": {
"label": "fullwidth"
},
"numeric": [
"fullwidth"
]
}
},
{
"type": "contentString",
"content": "\u003cdiv class=\"post-body\">\u003cp>\u003c/p>\n\u003cp>\u003cspan style=\"font-weight: 400;\">The Vic behind Trader Vic’s was Victor Bergeron, who claimed he invented the drink in 1944. His granddaughter, Eve Bergeron, told me he created the cocktail and asked some visiting friends from Tahiti — Ham and Carrie Guild — to try it. After Carrie tasted it, she exclaimed “Mai Tai roa ae!” which means ” ‘awesome’ in Tahiti,” Veliz explained. And thus the drink was named.\u003c/span>\u003c/p>\n\u003cp>\u003cspan style=\"font-weight: 400;\">Tiki historian and author \u003ca href=\"http://beachbumberry.com/about.html\">Jeff “Beachbum” Berry\u003c/a> said the story of the Mai Tai started at 65th Street and San Pablo Avenue in Oakland. That’s where Bergeron opened a little saloon in 1934 called Hinky Dinks, named after a \u003ca href=\"https://www.youtube.com/watch?v=QlTKKNRkYKs\">risque ditty that was popular\u003c/a> at the time.\u003c/span>\u003c/p>\n\u003cfigure id=\"attachment_11756258\" class=\"wp-caption aligncenter\" style=\"max-width: 800px\">\u003cimg loading=\"lazy\" decoding=\"async\" class=\"size-medium wp-image-11756258\" src=\"https://ww2.kqed.org/news/wp-content/uploads/sites/10/2019/06/RS37843_Hinky-Dinks-qut-800x604.jpg\" alt=\"Victor Bergeron opened Hinky Dinks at 65th and San Pablo in Oakland in 1934. \" width=\"800\" height=\"604\" srcset=\"https://cdn.kqed.org/wp-content/uploads/sites/10/2019/06/RS37843_Hinky-Dinks-qut-800x604.jpg 800w, https://cdn.kqed.org/wp-content/uploads/sites/10/2019/06/RS37843_Hinky-Dinks-qut-160x121.jpg 160w, https://cdn.kqed.org/wp-content/uploads/sites/10/2019/06/RS37843_Hinky-Dinks-qut-1020x770.jpg 1020w, https://cdn.kqed.org/wp-content/uploads/sites/10/2019/06/RS37843_Hinky-Dinks-qut-1200x906.jpg 1200w, https://cdn.kqed.org/wp-content/uploads/sites/10/2019/06/RS37843_Hinky-Dinks-qut.jpg 1920w\" sizes=\"(max-width: 800px) 100vw, 800px\">\u003cfigcaption class=\"wp-caption-text\">Victor Bergeron opened Hinky Dinks at 65th and San Pablo in Oakland in 1934. \u003ccite>(Courtesy of Eve Bergeron)\u003c/cite>\u003c/figcaption>\u003c/figure>\n\u003cp>\u003cspan style=\"font-weight: 400;\">The business was successful, but Vic was interested in the tropical-themed drinks he started to see in a few spots in his native San Francisco. He set off to learn from the masters, stopping in New Orleans and the Caribbean. \u003c/span>\u003c/p>\n\u003cp>\u003cspan style=\"font-weight: 400;\">In 1938, he spent a week at the legendary Havana bar, La Floridita, trying to learn all he could from the man known as the “\u003ca href=\"https://www.npr.org/sections/thesalt/2017/04/25/525063025/the-cocktail-king-of-cuba-the-man-who-invented-hemingways-favorite-daiquiri\">Cocktail King,”\u003c/a> \u003c/span>\u003cspan style=\"font-weight: 400;\">Constantino\u003c/span>\u003cspan style=\"font-weight: 400;\"> Ribalaigua Vert\u003c/span>\u003cspan style=\"font-weight: 400;\">. \u003c/span>\u003c/p>\n\u003cp>\u003cspan style=\"font-weight: 400;\">“One of Constantino’s famous drinks was called the Golden Gloves and (it) calls for gold Jamaican rum, orange juice, orange curacao, lime juice and sugar,” explained Berry. “Now if you add orgeat syrup to that you have a Mai Tai more or less. And that could also have been Vic’s inspiration.”\u003c/span>\u003c/p>\n\u003cfigure id=\"attachment_11756294\" class=\"wp-caption aligncenter\" style=\"max-width: 546px\">\u003cimg loading=\"lazy\" decoding=\"async\" class=\" wp-image-11756294\" src=\"https://ww2.kqed.org/news/wp-content/uploads/sites/10/2019/06/RS37857_Menu-800x379.jpg\" alt=\"One of Trader Vic's early menus features nods to his influences, including Don the Beachcomber in Los Angeles and La Floridita in Havana. \" width=\"546\" height=\"259\" srcset=\"https://cdn.kqed.org/wp-content/uploads/sites/10/2019/06/RS37857_Menu-800x379.jpg 800w, https://cdn.kqed.org/wp-content/uploads/sites/10/2019/06/RS37857_Menu-160x76.jpg 160w, https://cdn.kqed.org/wp-content/uploads/sites/10/2019/06/RS37857_Menu-1020x484.jpg 1020w, https://cdn.kqed.org/wp-content/uploads/sites/10/2019/06/RS37857_Menu-1200x569.jpg 1200w, https://cdn.kqed.org/wp-content/uploads/sites/10/2019/06/RS37857_Menu-1920x911.jpg 1920w, https://cdn.kqed.org/wp-content/uploads/sites/10/2019/06/RS37857_Menu.jpg 2048w\" sizes=\"(max-width: 546px) 100vw, 546px\">\u003cfigcaption class=\"wp-caption-text\">One of Trader Vic’s early menus features a nod to his influences, including Don the Beachcomber in Los Angeles and La Floridita in Havana. \u003ccite>(Suzie Racho/KQED)\u003c/cite>\u003c/figcaption>\u003c/figure>\n\u003cp>\u003cspan style=\"font-weight: 400;\">When Bergeron returned to Oakland, he added the drinks he learned to make during his travels to the Hinky Dinks’ menu. “We went to work and made up a lot of new ones, ones that would sell in America,” he wrote in his 1973 autobiography, “\u003c/span>\u003cspan style=\"font-weight: 400;\">Frankly Speaking\u003c/span>\u003cspan style=\"font-weight: 400;\">.”\u003c/span>\u003c/p>\n\u003cp>\u003cspan style=\"font-weight: 400;\">But Bergeron also found inspiration closer to home at a Los Angeles bar called Don the Beachcomber, according to \u003ca href=\"http://www.martincate.com/\">Martin Cate, \u003c/a>owner of San Francisco’s \u003ca href=\"http://www.smugglerscovesf.com/\">Smuggler’s Cove\u003c/a> and a former Trader Vic’s bartender. \u003c/span>\u003c/p>\n\u003cfigure id=\"attachment_11756252\" class=\"wp-caption alignleft\" style=\"max-width: 800px\">\u003cimg loading=\"lazy\" decoding=\"async\" class=\"size-medium wp-image-11756252\" src=\"https://ww2.kqed.org/news/wp-content/uploads/sites/10/2019/06/RS37815_IMG_0260-qut-800x600.jpg\" alt=\"Martin Cate at his bar, Smuggler's Cove, in San Francisco. \" width=\"800\" height=\"600\" srcset=\"https://cdn.kqed.org/wp-content/uploads/sites/10/2019/06/RS37815_IMG_0260-qut-800x600.jpg 800w, https://cdn.kqed.org/wp-content/uploads/sites/10/2019/06/RS37815_IMG_0260-qut-160x120.jpg 160w, https://cdn.kqed.org/wp-content/uploads/sites/10/2019/06/RS37815_IMG_0260-qut-1020x765.jpg 1020w, https://cdn.kqed.org/wp-content/uploads/sites/10/2019/06/RS37815_IMG_0260-qut-632x474.jpg 632w, https://cdn.kqed.org/wp-content/uploads/sites/10/2019/06/RS37815_IMG_0260-qut-536x402.jpg 536w, https://cdn.kqed.org/wp-content/uploads/sites/10/2019/06/RS37815_IMG_0260-qut.jpg 1024w\" sizes=\"(max-width: 800px) 100vw, 800px\">\u003cfigcaption class=\"wp-caption-text\">Martin Cate at his bar, Smuggler’s Cove, in San Francisco. \u003ccite>(Suzie Racho/KQED)\u003c/cite>\u003c/figcaption>\u003c/figure>\n\u003cp>\u003cspan style=\"font-weight: 400;\">“[It was] \u003c/span>\u003cspan style=\"font-weight: 400;\">a\u003c/span>\u003cspan style=\"font-weight: 400;\">bsolutely all the rage from almost day one when it opened in Hollywood,” said Cate. “[Vic] traveled down and he not only fell in love with the place, he would try to grill bartenders all day long about what was there.” \u003c/span>\u003c/p>\n\u003cp>\u003cspan style=\"font-weight: 400;\">Opened in 1933,\u003ca href=\"https://www.lamag.com/digestblog/don-the-beachcomber-closing/\"> Don the Beachcomber\u003c/a> was essentially the first tiki bar, according to cocktail historians. And it served a couple of drinks that may have been of interest to Vic Bergeron, including the Q.B. Cooler, which Berry said tasted like a Mai Tai. \u003c/span>\u003cspan style=\"font-weight: 400;\">There was even a drink called the Mai Tai Swizzle in the early ’30s, but it was off the menu by the time Bergeron visited. \u003c/span>\u003c/p>\n\u003cp>\u003cspan style=\"font-weight: 400;\">But owner Donn Beach was notoriously protective and had his bartenders mix drinks from bottles labeled with numbers. Even though Bergeron didn’t walk away with any of Donn Beach’s secret recipes, he bought some decor from him, according to Cate. The visit was a catalyst.\u003c/span>\u003c/p>\n\u003cp>\u003cspan style=\"font-weight: 400;\">“When I got back to Oakland and told my wife what I had seen, we agreed to change the name of our restaurant and change the decor,” Bergeron wrote in his autobiography\u003c/span>\u003cspan style=\"font-weight: 400;\">. “We decided Hinky Dinks was a junky name and that the place should be named after someone we could tell a story about. My wife suggested ‘Trader Vic’s’ because I was always making a trade with someone. Fine, I became Trader Vic.”\u003c/span>\u003c/p>\n\u003cfigure id=\"attachment_11756306\" class=\"wp-caption aligncenter\" style=\"max-width: 369px\">\u003cimg loading=\"lazy\" decoding=\"async\" class=\" wp-image-11756306\" src=\"https://ww2.kqed.org/news/wp-content/uploads/sites/10/2019/06/IMG_0268-1-e1561081363941-800x1067.jpg\" alt=\"An early Trader Vic menu. \" width=\"369\" height=\"492\" srcset=\"https://cdn.kqed.org/wp-content/uploads/sites/10/2019/06/IMG_0268-1-e1561081363941-800x1067.jpg 800w, https://cdn.kqed.org/wp-content/uploads/sites/10/2019/06/IMG_0268-1-e1561081363941-160x213.jpg 160w, https://cdn.kqed.org/wp-content/uploads/sites/10/2019/06/IMG_0268-1-e1561081363941-1020x1360.jpg 1020w, https://cdn.kqed.org/wp-content/uploads/sites/10/2019/06/IMG_0268-1-e1561081363941-900x1200.jpg 900w, https://cdn.kqed.org/wp-content/uploads/sites/10/2019/06/IMG_0268-1-e1561081363941-1122x1496.jpg 1122w, https://cdn.kqed.org/wp-content/uploads/sites/10/2019/06/IMG_0268-1-e1561081363941-840x1120.jpg 840w, https://cdn.kqed.org/wp-content/uploads/sites/10/2019/06/IMG_0268-1-e1561081363941-687x916.jpg 687w, https://cdn.kqed.org/wp-content/uploads/sites/10/2019/06/IMG_0268-1-e1561081363941-414x552.jpg 414w, https://cdn.kqed.org/wp-content/uploads/sites/10/2019/06/IMG_0268-1-e1561081363941-354x472.jpg 354w, https://cdn.kqed.org/wp-content/uploads/sites/10/2019/06/IMG_0268-1-e1561081363941.jpg 1536w\" sizes=\"(max-width: 369px) 100vw, 369px\">\u003cfigcaption class=\"wp-caption-text\">An early Trader Vic menu. \u003ccite>(Suzie Racho/KQED)\u003c/cite>\u003c/figcaption>\u003c/figure>\n\u003cp>\u003cspan style=\"font-weight: 400;\">So Hinky Dinks became Trader Vic’s, and business boomed. Bergeron’s pal, San Francisco Chronicle columnist Herb Caen, helped drive its popularity, exclaiming “the best restaurant in San Francisco is in Oakland.” But the Mai Tai itself wasn’t the draw — it was just one of many drinks on Vic’s expansive menu. \u003c/span>\u003c/p>\n\u003cp>\u003cspan style=\"font-weight: 400;\">Martin Cate said that it wasn’t until 1953, nearly 10 years after it was first introduced, that the cocktail took a cruise to Hawaii, where the Mai Tai \u003c/span>\u003ci>\u003cspan style=\"font-weight: 400;\">really\u003c/span>\u003c/i>\u003cspan style=\"font-weight: 400;\"> became the Mai Tai.\u003c/span>\u003c/p>\n\u003cp>\u003cspan style=\"font-weight: 400;\">“He sent the recipe on board the Matson steamship lines, which were sailing out of San Francisco to Hawaii starting in the early 1950s,” Cate said. “The Mai Tai was on the menu because they asked Vic to not only do the menu for the ships, but also for their hotel, the Royal Hawaiian in Waikiki. And when the Mai Tai got to Hawaii, it mutated basically into something Hawaiian, meaning, namely, pineapple juice.”\u003c/span>\u003c/p>\n\u003cfigure id=\"attachment_11756257\" class=\"wp-caption alignleft\" style=\"max-width: 276px\">\u003cimg loading=\"lazy\" decoding=\"async\" class=\" wp-image-11756257\" src=\"https://ww2.kqed.org/news/wp-content/uploads/sites/10/2019/06/RS37842_Vic-mixing-a-drink-at-his-bar-qut-800x992.jpg\" alt=\"Victor Bergeron aka Trader Vic.\" width=\"276\" height=\"342\" srcset=\"https://cdn.kqed.org/wp-content/uploads/sites/10/2019/06/RS37842_Vic-mixing-a-drink-at-his-bar-qut-800x992.jpg 800w, https://cdn.kqed.org/wp-content/uploads/sites/10/2019/06/RS37842_Vic-mixing-a-drink-at-his-bar-qut-160x198.jpg 160w, https://cdn.kqed.org/wp-content/uploads/sites/10/2019/06/RS37842_Vic-mixing-a-drink-at-his-bar-qut-1020x1265.jpg 1020w, https://cdn.kqed.org/wp-content/uploads/sites/10/2019/06/RS37842_Vic-mixing-a-drink-at-his-bar-qut-968x1200.jpg 968w, https://cdn.kqed.org/wp-content/uploads/sites/10/2019/06/RS37842_Vic-mixing-a-drink-at-his-bar-qut-1920x2381.jpg 1920w, https://cdn.kqed.org/wp-content/uploads/sites/10/2019/06/RS37842_Vic-mixing-a-drink-at-his-bar-qut.jpg 1651w\" sizes=\"(max-width: 276px) 100vw, 276px\">\u003cfigcaption class=\"wp-caption-text\">Victor Bergeron aka Trader Vic. \u003ccite>(Courtesy of Eve Bergeron)\u003c/cite>\u003c/figcaption>\u003c/figure>\n\u003cp>\u003cspan style=\"font-weight: 400;\">Jeff Berry said travel writers picked up on it and the Mai Tai basically went viral. And because the recipe wouldn’t be published until two decades later, restaurants and bars put their own spin on the drink. \u003c/span>\u003c/p>\n\u003cp>\u003cspan style=\"font-weight: 400;\">“A Mai Tai became sort of like the symbol of your Hawaiian vacation,” said Berry. “It was like paradise in a glass. I think that name more than anything else is the reason why that happened.”\u003c/span>\u003c/p>\n\u003cp>\u003cspan style=\"font-weight: 400;\">So who’s the true originator of the Mai Tai? Was it \u003c/span>\u003cspan style=\"font-weight: 400;\">Constantino\u003c/span>\u003cspan style=\"font-weight: 400;\"> Ribalaigua Vert in\u003c/span>\u003cspan style=\"font-weight: 400;\"> Cuba? Donn Beach in L.A.? Or Victor Bergeron in Oakland? \u003c/span>\u003c/p>\n\u003cp>\u003cspan style=\"font-weight: 400;\">Well, for most cocktail historians, including Martin Cate and Jeff Berry, the original Mai Tai has just five ingredients and was created in Oakland by Victor Bergeron. \u003c/span>\u003c/p>\n\u003cp>\u003cspan style=\"font-weight: 400;\">As for Vic? As he wrote in his autobiography: \u003c/span>\u003cspan style=\"font-weight: 400;\">“Anybody who says I didn’t create this drink is a dirty stinker.”\u003c/span>\u003c/p>\n\u003cp>\u003c/p>\u003c/div>",
"attributes": {
"named": {},
"numeric": []
}
},
{
"type": "component",
"content": "",
"name": "ad",
"attributes": {
"named": {
"label": "floatright"
},
"numeric": [
"floatright"
]
}
},
{
"type": "contentString",
"content": "\u003cdiv class=\"post-body\">\u003cp>\u003c/p>\n\u003cp>So raise a glass to the Mai Tai, which turns \u003ca href=\"http://tradervics.com/news/lets-get-the-record-straightthe-real-mai-tai-day-is-august-30th/\">75 in August\u003c/a>.\u003c/p>\n\n\u003c/div>\u003c/p>",
"attributes": {
"named": {},
"numeric": []
}
}
],
"link": "/news/11755932/an-island-drink-with-california-roots-the-mai-tai-turns-75",
"authors": [
"107"
],
"programs": [
"news_72"
],
"series": [
"news_24115"
],
"categories": [
"news_24114",
"news_8"
],
"tags": [
"news_19133",
"news_20013",
"news_333",
"news_24116"
],
"featImg": "news_11756259",
"label": "source_news_11755932"
},
"news_11742748": {
"type": "posts",
"id": "news_11742748",
"meta": {
"index": "posts_1716263798",
"site": "news",
"id": "11742748",
"score": null,
"sort": [
1556320465000
]
},
"guestAuthors": [],
"slug": "unwrapping-the-california-origins-of-the-fortune-cookie",
"title": "Unwrapping the California Origins of the Fortune Cookie",
"publishDate": 1556320465,
"format": "audio",
"headTitle": "Unwrapping the California Origins of the Fortune Cookie | KQED",
"labelTerm": {},
"content": "\u003cp>What comes with the check at almost every Chinese restaurant? Fortune cookies. Like orange slices after a blood draw or \u003ca href=\"https://www.kqed.org/news/11731290/how-bill-grahams-nazi-escape-might-explain-his-fillmore-apples\">apples at San Francisco’s Fillmore\u003c/a>, they’re a given. But how did they come to be? Are they really Chinese? And if so, why do they serve them at the \u003ca href=\"https://www.japaneseteagardensf.com/\">Japanese Tea Garden\u003c/a> in San Francisco’s Golden Gate Park?\u003c/p>\n\u003cfigure id=\"attachment_11742906\" class=\"wp-caption aligncenter\" style=\"max-width: 800px\">\u003cimg loading=\"lazy\" decoding=\"async\" class=\"size-medium wp-image-11742906\" src=\"https://ww2.kqed.org/news/wp-content/uploads/sites/10/2019/04/RS36697_IMG_0183-qut-1-800x600.jpg\" alt=\"\" width=\"800\" height=\"600\" srcset=\"https://cdn.kqed.org/wp-content/uploads/sites/10/2019/04/RS36697_IMG_0183-qut-1-800x600.jpg 800w, https://cdn.kqed.org/wp-content/uploads/sites/10/2019/04/RS36697_IMG_0183-qut-1-160x120.jpg 160w, https://cdn.kqed.org/wp-content/uploads/sites/10/2019/04/RS36697_IMG_0183-qut-1-1020x765.jpg 1020w, https://cdn.kqed.org/wp-content/uploads/sites/10/2019/04/RS36697_IMG_0183-qut-1-1200x900.jpg 1200w, https://cdn.kqed.org/wp-content/uploads/sites/10/2019/04/RS36697_IMG_0183-qut-1.jpg 1920w\" sizes=\"(max-width: 800px) 100vw, 800px\">\u003cfigcaption class=\"wp-caption-text\">Tea cookies and green tea served at the Japanese Tea Garden in Golden Gate Park. \u003ccite>(Suzie Racho/KQED)\u003c/cite>\u003c/figcaption>\u003c/figure>\n\u003cp>On a chilly morning, I meet Steven Pitsenbarger at the front gate of the Tea Garden. He’s a gardener here and a bit of a historian.\u003c/p>\n\u003cp>“I think a lot of people put the Japanese Tea Garden in the same box as Alcatraz or Fisherman’s Wharf,” Pitsenbarger says. “But we are really a gem that’s for San Francisco — just as much as it’s for the tourists.”\u003cbr>\n[baycuriousbug]\u003cbr>\nHe tells me the garden was originally an exhibit in the\u003ca href=\"http://www.outsidelands.org/1894_midwinter_fair.php\"> California Midwinter International Exposition of 1894, \u003c/a>then tended by a landscape architect named Makoto Hagiwara.\u003c/p>\n\u003cp>“He was an early immigrant from Japan,” says Pitsenbarger. “He came a decade before most Japanese immigrants came. A lot of folks came in the late 1880s and 1890s. But he came in 1878.”\u003c/p>\n\u003cp>Hagiwara started serving visitors fortune cookies along with green tea in the garden’s tea house.\u003c/p>\n\u003cfigure id=\"attachment_11743019\" class=\"wp-caption aligncenter\" style=\"max-width: 324px\">\u003cimg loading=\"lazy\" decoding=\"async\" class=\" wp-image-11743019\" src=\"https://ww2.kqed.org/news/wp-content/uploads/sites/10/2019/04/RS36763_aad-2922JPG-qut-800x1049.jpg\" alt=\"Makoto Hagiwara and his daughter in 1924.\" width=\"324\" height=\"425\" srcset=\"https://cdn.kqed.org/wp-content/uploads/sites/10/2019/04/RS36763_aad-2922JPG-qut-800x1049.jpg 800w, https://cdn.kqed.org/wp-content/uploads/sites/10/2019/04/RS36763_aad-2922JPG-qut-160x210.jpg 160w, https://cdn.kqed.org/wp-content/uploads/sites/10/2019/04/RS36763_aad-2922JPG-qut-1020x1337.jpg 1020w, https://cdn.kqed.org/wp-content/uploads/sites/10/2019/04/RS36763_aad-2922JPG-qut-915x1200.jpg 915w, https://cdn.kqed.org/wp-content/uploads/sites/10/2019/04/RS36763_aad-2922JPG-qut-1920x2517.jpg 1920w, https://cdn.kqed.org/wp-content/uploads/sites/10/2019/04/RS36763_aad-2922JPG-qut.jpg 1562w\" sizes=\"(max-width: 324px) 100vw, 324px\">\u003cfigcaption class=\"wp-caption-text\">Makoto Hagiwara and his daughter in 1924. \u003ccite>(San Francisco History Center, San Francisco Public Library)\u003c/cite>\u003c/figcaption>\u003c/figure>\n\u003cp>“The story that I understand is he took a Japanese cookie, senbei, and he got the idea to put a little note in it, and originally started making the cookies by hand here with just a little flat press,” says Pitsenbarger. “They would fold the cookies while they were still fresh.”\u003c/p>\n\u003cp>[ad fullwidth]\u003c/p>\n\u003cp>Wow. So this could be the birthplace of the fortune cookie?\u003c/p>\n\u003cp>[pullquote size='medium' align='right' citation='Author Jennifer 8. Lee says of the fortune cookie']‘I like to say that the Japanese invented them, the Chinese popularized them, but the Americans ultimately consume them.’[/pullquote]\u003c/p>\n\u003cp>I didn’t see anything that marked this historical culinary invention until we went to the gift shop. Mounted to the top of a display case are two small black iron presses with long, thin handles.\u003c/p>\n\u003cp>They’re called kata, and are used to make senbei or Japanese crackers. Inside they’re engraved with an H and an M — inverted they would appear on the cookies as MH for \u003ca href=\"https://hanascape.com/japanese-tea-garden\">Makoto Hagiwara.\u003c/a>\u003c/p>\n\u003cp>“If you came to the garden while he was managing it, everything had his name on it. Napkins would say M. Hagiwara. There would be pots in the garden with M. Hagiwara … tea pots, tea cups. His name was everywhere, and the fortune cookie is one of those things that helped to spread his popularity,” Pitsenbarger says.\u003c/p>\n\u003cp>And make the cookies popular, too. But since each fortune cookie was being made by hand, demand became too much for the Hagiwara family. Makoto asked a local confectionary shop, Benkyodo, to take over making the cookies.\u003c/p>\n\u003cfigure id=\"attachment_11742883\" class=\"wp-caption alignnone\" style=\"max-width: 352px\">\u003cimg loading=\"lazy\" decoding=\"async\" class=\" wp-image-11742883\" src=\"https://ww2.kqed.org/news/wp-content/uploads/sites/10/2019/04/RS36751_Benkyodo-outsiide-retouch-300-copy-qut-1-800x1115.jpg\" alt=\"\" width=\"352\" height=\"491\" srcset=\"https://cdn.kqed.org/wp-content/uploads/sites/10/2019/04/RS36751_Benkyodo-outsiide-retouch-300-copy-qut-1-800x1115.jpg 800w, https://cdn.kqed.org/wp-content/uploads/sites/10/2019/04/RS36751_Benkyodo-outsiide-retouch-300-copy-qut-1-160x223.jpg 160w, https://cdn.kqed.org/wp-content/uploads/sites/10/2019/04/RS36751_Benkyodo-outsiide-retouch-300-copy-qut-1-1020x1421.jpg 1020w, https://cdn.kqed.org/wp-content/uploads/sites/10/2019/04/RS36751_Benkyodo-outsiide-retouch-300-copy-qut-1-861x1200.jpg 861w, https://cdn.kqed.org/wp-content/uploads/sites/10/2019/04/RS36751_Benkyodo-outsiide-retouch-300-copy-qut-1.jpg 1470w\" sizes=\"(max-width: 352px) 100vw, 352px\">\u003cfigcaption class=\"wp-caption-text\">Benkyodo on San Francisco’s Geary Boulevard in 1906. \u003ccite>(Photo Courtesy: Gary T. Ono)\u003c/cite>\u003c/figcaption>\u003c/figure>\n\u003cp>Suyeichi Okamura opened \u003ca href=\"http://www.benkyodocompany.com/\">Benkyodo\u003c/a> in 1906 and after a few moves, it’s located today at Sutter and Buchanan in San Francisco’s Japantown. His grandson, Gary T. Ono, is the family’s historian and has \u003ca href=\"http://www.discovernikkei.org/en/journal/2007/10/31/fortune-cookie/\">written articles\u003c/a> about his family’s connection to the fortune cookie.\u003c/p>\n\u003cfigure id=\"attachment_11742884\" class=\"wp-caption aligncenter\" style=\"max-width: 210px\">\u003cimg loading=\"lazy\" decoding=\"async\" class=\" wp-image-11742884\" src=\"https://ww2.kqed.org/news/wp-content/uploads/sites/10/2019/04/RS36752_Suyeichi-Portrait-qut-1-800x1227.jpg\" alt=\"\" width=\"210\" height=\"323\" srcset=\"https://cdn.kqed.org/wp-content/uploads/sites/10/2019/04/RS36752_Suyeichi-Portrait-qut-1-800x1227.jpg 800w, https://cdn.kqed.org/wp-content/uploads/sites/10/2019/04/RS36752_Suyeichi-Portrait-qut-1-160x245.jpg 160w, https://cdn.kqed.org/wp-content/uploads/sites/10/2019/04/RS36752_Suyeichi-Portrait-qut-1-1020x1564.jpg 1020w, https://cdn.kqed.org/wp-content/uploads/sites/10/2019/04/RS36752_Suyeichi-Portrait-qut-1-783x1200.jpg 783w, https://cdn.kqed.org/wp-content/uploads/sites/10/2019/04/RS36752_Suyeichi-Portrait-qut-1-1920x2944.jpg 1920w, https://cdn.kqed.org/wp-content/uploads/sites/10/2019/04/RS36752_Suyeichi-Portrait-qut-1.jpg 1336w\" sizes=\"(max-width: 210px) 100vw, 210px\">\u003cfigcaption class=\"wp-caption-text\">Gary T. Ono’s grandfather, Suyeichi Okamura, opened Benkyodo in 1906. \u003ccite>(Photo Courtesy: Gary T. Ono)\u003c/cite>\u003c/figcaption>\u003c/figure>\n\u003cp>I went to visit Ono in Los Angeles, in his apartment in Little Tokyo. A giant foam fortune cookie hangs in the living room, and the fortune poking out of it reads: “Made In Japan.”\u003c/p>\n\u003cp>Ono drags out a heavy suitcase from a closet and pulls out several kata wrapped in newspaper. They sport the familiar initials: MH.\u003c/p>\n\u003cp>“My grandfather was a service person to Makoto Hagiwara,” Ono says. “And advised Hagiwara in converting the taste (of the fortune cookie) to something more palatable to American tastes. So they came up with a vanilla extract flavor that we know today.”\u003c/p>\n\u003cfigure id=\"attachment_11742908\" class=\"wp-caption aligncenter\" style=\"max-width: 203px\">\u003cimg loading=\"lazy\" decoding=\"async\" class=\" wp-image-11742908\" src=\"https://ww2.kqed.org/news/wp-content/uploads/sites/10/2019/04/RS36718_IMG_0808-qut-1-800x1067.jpg\" alt=\"\" width=\"203\" height=\"271\" srcset=\"https://cdn.kqed.org/wp-content/uploads/sites/10/2019/04/RS36718_IMG_0808-qut-1-800x1067.jpg 800w, https://cdn.kqed.org/wp-content/uploads/sites/10/2019/04/RS36718_IMG_0808-qut-1-160x213.jpg 160w, https://cdn.kqed.org/wp-content/uploads/sites/10/2019/04/RS36718_IMG_0808-qut-1-1020x1360.jpg 1020w, https://cdn.kqed.org/wp-content/uploads/sites/10/2019/04/RS36718_IMG_0808-qut-1-900x1200.jpg 900w, https://cdn.kqed.org/wp-content/uploads/sites/10/2019/04/RS36718_IMG_0808-qut-1-1920x2560.jpg 1920w, https://cdn.kqed.org/wp-content/uploads/sites/10/2019/04/RS36718_IMG_0808-qut-1.jpg 1536w\" sizes=\"(max-width: 203px) 100vw, 203px\">\u003cfigcaption class=\"wp-caption-text\">This flat-iron press, called a kata, was originally used to make fortune cookies for the Japanese Tea Garden in Golden Gate Park. The initials MH stand for creator Makoto Hagiwara. \u003ccite>(Suzie Racho/KQED)\u003c/cite>\u003c/figcaption>\u003c/figure>\n\u003cp>He says Benkyodo helped develop a machine to mass produce the cookies for the garden, sometime around 1911.\u003c/p>\n\u003cfigure id=\"attachment_11742881\" class=\"wp-caption aligncenter\" style=\"max-width: 305px\">\u003cimg loading=\"lazy\" decoding=\"async\" class=\" wp-image-11742881\" src=\"https://ww2.kqed.org/news/wp-content/uploads/sites/10/2019/04/RS36723_IMG_0813-qut-1-800x1067.jpg\" alt=\"\" width=\"305\" height=\"407\" srcset=\"https://cdn.kqed.org/wp-content/uploads/sites/10/2019/04/RS36723_IMG_0813-qut-1-800x1067.jpg 800w, https://cdn.kqed.org/wp-content/uploads/sites/10/2019/04/RS36723_IMG_0813-qut-1-160x213.jpg 160w, https://cdn.kqed.org/wp-content/uploads/sites/10/2019/04/RS36723_IMG_0813-qut-1-1020x1360.jpg 1020w, https://cdn.kqed.org/wp-content/uploads/sites/10/2019/04/RS36723_IMG_0813-qut-1-900x1200.jpg 900w, https://cdn.kqed.org/wp-content/uploads/sites/10/2019/04/RS36723_IMG_0813-qut-1-1920x2560.jpg 1920w, https://cdn.kqed.org/wp-content/uploads/sites/10/2019/04/RS36723_IMG_0813-qut-1.jpg 1536w\" sizes=\"(max-width: 305px) 100vw, 305px\">\u003cfigcaption class=\"wp-caption-text\">Gary T. Ono holds two kata from his grandfather’s bakery, Benkyodo. \u003ccite>(Suzie Racho/KQED)\u003c/cite>\u003c/figcaption>\u003c/figure>\n\u003cp>But Ono isn’t the only one to make family claims to the origins of the fortune cookie: A few Chinese companies have also claimed the invention, as has another Japanese sweet-maker in Los Angeles called \u003ca href=\"http://www.fugetsu-do.com/history.htm\">Fugetsu-Do\u003c/a>.\u003c/p>\n\u003cp>Brian Kito owns Fugetsu-Do, just down the street from Gary Ono in Los Angeles. Brian’s grandfather opened Fugetsu-Do in 1903, three years before Benkyodo opened in San Francisco. And Gary says Brian heard similar stories about his grandfather creating the fortune cookie.\u003c/p>\n\u003cp>“We were never confrontational about it or argumentative. We didn’t know precisely that our grandparents did this or did that,” Ono says. “[Brian] even said, ‘Well, if it wasn’t my grandfather, I hope it’s your grandfather.'”\u003c/p>\n\u003cp>https://youtu.be/Jhmz2Al_pjA\u003c/p>\n\u003cp>Author Jennifer 8. Lee says you can probably trace the history of fortune cookies in America back to L.A. and San Francisco. But as a concept, they go back to Japan.\u003c/p>\n\u003cp>“And in Japan they’re called tsujiura senbei or bell crackers,” says Lee, who traced the history of the American fortune cookie in her book, “The Fortune Cookie Chronicles: Adventures In the World of Chinese Food.”\u003c/p>\n\u003cp>Lee writes about Yasuko Nakamachi, a Japanese researcher whom she met through Gary Ono. Nakamachi was investigating the connection between the fortune cookies she saw in New York with a cracker made in Kyoto. She unearthed a copy of a woodblock print from 1878 of a Japanese man grilling fortune cookies.\u003c/p>\n\u003cfigure id=\"attachment_11743033\" class=\"wp-caption aligncenter\" style=\"max-width: 515px\">\u003cimg loading=\"lazy\" decoding=\"async\" class=\"size-full wp-image-11743033\" src=\"https://ww2.kqed.org/news/wp-content/uploads/sites/10/2019/04/RS36753_woodblock-senbei-cooking-copy_jpg_515x515_detail_q85-qut.jpg\" alt=\"\" width=\"515\" height=\"377\" srcset=\"https://cdn.kqed.org/wp-content/uploads/sites/10/2019/04/RS36753_woodblock-senbei-cooking-copy_jpg_515x515_detail_q85-qut.jpg 515w, https://cdn.kqed.org/wp-content/uploads/sites/10/2019/04/RS36753_woodblock-senbei-cooking-copy_jpg_515x515_detail_q85-qut-160x117.jpg 160w\" sizes=\"(max-width: 515px) 100vw, 515px\">\u003cfigcaption class=\"wp-caption-text\">This Japanese woodblock print showing fortune cookies being grilled dates back to 1878. \u003ccite>(Photo Courtesy; Gary Ono)\u003c/cite>\u003c/figcaption>\u003c/figure>\n\u003cp>“Around the shrine in downtown Kyoto, there are actually a bunch of families that still make ‘fortune cookies’ in the Japanese tradition,” says Lee.\u003c/p>\n\u003cp>“But they’re actually bigger and browner. They’re made with miso paste and sesame, so much nuttier than the American versions, which tend to be yellow and buttery, reflecting the American palate,” she adds.\u003c/p>\n\u003cp>Those cookies also have fortunes, but not inside. Instead they’re pinched in the fold. They look almost exactly the same.\u003c/p>\n\u003cp>But how did this American adaptation of a Japanese cracker become so associated with Chinese restaurants?\u003c/p>\n\u003cp>“When the Japanese first came to the U.S., a lot of them actually ran Chinese restaurants, because back in the 1910s and 1920s Americans were not eating sushi,” says Lee. “You had Japanese opening Chinese restaurants because that was familiar, with chop suey and chow mein and egg fu yung.”\u003c/p>\n\u003cp>[aside tag='golden-state-plate' label='More stories from the Golden State Plate series']\u003c/p>\n\u003cp>In this mix of Japanese families opening Chinese restaurants, they began serving fortune cookies as a form of dessert.\u003c/p>\n\u003cp>“Back then, they were not called fortune cookies, they were called fortune tea cakes, which is actually a better reflection of their name in Japanese,” she says.\u003c/p>\n\u003cp>Bakeries like Benkyodo and Fugetso-Do manufactured fortune cookies for decades until 1942, when President Franklin D. Roosevelt signed Executive Order 9066, ordering people of Japanese descent into internment camps.\u003c/p>\n\u003cp>Fortune cookie makers were among those interned. During World War II, Chinese restaurants surged in popularity and began manufacturing cookies “en masse,” Lee says.\u003c/p>\n\u003cp>“I like to say that the Japanese invented them, the Chinese popularized them, but the Americans ultimately consume them,” she says.\u003c/p>\n\u003cp>Gary Ono’s family was lucky. After being released from the camps, they resumed their business in San Francisco and reclaimed their property. But others weren’t: Many Japanese confectionaries stopped making the cookies after the war.\u003c/p>\n\u003cp>Gary Ono’s family connection to the fortune cookie lives on at the \u003ca href=\"https://americanhistory.si.edu/blog/2010/07/origins-of-a-fortune-cookie.html\">Smithsonian\u003c/a>‘s National Museum of American History, where three of Benkyodo’s katas now reside.\u003cimg loading=\"lazy\" decoding=\"async\" class=\"wp-image-11742907 aligncenter\" src=\"https://ww2.kqed.org/news/wp-content/uploads/sites/10/2019/04/RS36705_IMG_0191-qut-800x800.jpg\" alt=\"\" width=\"285\" height=\"285\" srcset=\"https://cdn.kqed.org/wp-content/uploads/sites/10/2019/04/RS36705_IMG_0191-qut-800x800.jpg 800w, https://cdn.kqed.org/wp-content/uploads/sites/10/2019/04/RS36705_IMG_0191-qut-160x160.jpg 160w, https://cdn.kqed.org/wp-content/uploads/sites/10/2019/04/RS36705_IMG_0191-qut-1020x1020.jpg 1020w, https://cdn.kqed.org/wp-content/uploads/sites/10/2019/04/RS36705_IMG_0191-qut-1200x1200.jpg 1200w, https://cdn.kqed.org/wp-content/uploads/sites/10/2019/04/RS36705_IMG_0191-qut.jpg 1920w\" sizes=\"(max-width: 285px) 100vw, 285px\">\u003c/p>\n\u003cp>[ad floatright]\u003c/p>\n\u003cp>As for the fortune cookies served at the Japanese Tea Garden? They now come from \u003ca href=\"http://www.meemeebakery.com/\">Mee Mee Bakery\u003c/a> in San Francisco’s Chinatown.\u003c/p>\n\n",
"blocks": [],
"excerpt": "There are California and Japanese connections to the fortune cookie, going back more than a century. ",
"status": "publish",
"parent": 0,
"modified": 1721114295,
"stats": {
"hasAudio": false,
"hasVideo": false,
"hasChartOrMap": false,
"iframeSrcs": [],
"hasGoogleForm": false,
"hasGallery": false,
"hasHearkenModule": false,
"hasPolis": false,
"paragraphCount": 39,
"wordCount": 1486
},
"headData": {
"title": "Unwrapping the California Origins of the Fortune Cookie | KQED",
"description": "There are California and Japanese connections to the fortune cookie, going back more than a century. ",
"ogTitle": "",
"ogDescription": "",
"ogImgId": "",
"twTitle": "",
"twDescription": "",
"twImgId": "",
"schema": {
"@context": "https://schema.org",
"@type": "NewsArticle",
"headline": "Unwrapping the California Origins of the Fortune Cookie",
"datePublished": "2019-04-26T16:14:25-07:00",
"dateModified": "2024-07-16T00:18:15-07:00",
"image": "https://cdn.kqed.org/wp-content/uploads/2020/02/KQED-OG-Image@1x.png",
"isAccessibleForFree": "True",
"publisher": {
"@type": "NewsMediaOrganization",
"@id": "https://www.kqed.org/#organization",
"name": "KQED",
"logo": "https://cdn.kqed.org/wp-content/uploads/2020/02/KQED-OG-Image@1x.png",
"url": "https://www.kqed.org",
"sameAs": [
"https://www.facebook.com/KQED",
"https://twitter.com/KQED",
"https://www.instagram.com/kqed/",
"https://www.tiktok.com/@kqedofficial",
"https://www.linkedin.com/company/kqed",
"https://www.youtube.com/channel/UCeC0IOo7i1P_61zVUWbJ4nw"
]
}
}
},
"source": "Food",
"sourceUrl": "https://www.kqed.org/food",
"audioUrl": "https://www.kqed.org/.stream/anon/radio/tcrmag/2019/04/FortuneCookiesRacho.mp3",
"sticky": false,
"audioTrackLength": 392,
"templateType": "standard",
"featuredImageType": "standard",
"excludeFromSiteSearch": "Include",
"articleAge": "0",
"path": "/news/11742748/unwrapping-the-california-origins-of-the-fortune-cookie",
"parsedContent": [
{
"type": "contentString",
"content": "\u003cdiv class=\"post-body\">\u003cp>\u003cp>What comes with the check at almost every Chinese restaurant? Fortune cookies. Like orange slices after a blood draw or \u003ca href=\"https://www.kqed.org/news/11731290/how-bill-grahams-nazi-escape-might-explain-his-fillmore-apples\">apples at San Francisco’s Fillmore\u003c/a>, they’re a given. But how did they come to be? Are they really Chinese? And if so, why do they serve them at the \u003ca href=\"https://www.japaneseteagardensf.com/\">Japanese Tea Garden\u003c/a> in San Francisco’s Golden Gate Park?\u003c/p>\n\u003cfigure id=\"attachment_11742906\" class=\"wp-caption aligncenter\" style=\"max-width: 800px\">\u003cimg loading=\"lazy\" decoding=\"async\" class=\"size-medium wp-image-11742906\" src=\"https://ww2.kqed.org/news/wp-content/uploads/sites/10/2019/04/RS36697_IMG_0183-qut-1-800x600.jpg\" alt=\"\" width=\"800\" height=\"600\" srcset=\"https://cdn.kqed.org/wp-content/uploads/sites/10/2019/04/RS36697_IMG_0183-qut-1-800x600.jpg 800w, https://cdn.kqed.org/wp-content/uploads/sites/10/2019/04/RS36697_IMG_0183-qut-1-160x120.jpg 160w, https://cdn.kqed.org/wp-content/uploads/sites/10/2019/04/RS36697_IMG_0183-qut-1-1020x765.jpg 1020w, https://cdn.kqed.org/wp-content/uploads/sites/10/2019/04/RS36697_IMG_0183-qut-1-1200x900.jpg 1200w, https://cdn.kqed.org/wp-content/uploads/sites/10/2019/04/RS36697_IMG_0183-qut-1.jpg 1920w\" sizes=\"(max-width: 800px) 100vw, 800px\">\u003cfigcaption class=\"wp-caption-text\">Tea cookies and green tea served at the Japanese Tea Garden in Golden Gate Park. \u003ccite>(Suzie Racho/KQED)\u003c/cite>\u003c/figcaption>\u003c/figure>\n\u003cp>On a chilly morning, I meet Steven Pitsenbarger at the front gate of the Tea Garden. He’s a gardener here and a bit of a historian.\u003c/p>\n\u003cp>“I think a lot of people put the Japanese Tea Garden in the same box as Alcatraz or Fisherman’s Wharf,” Pitsenbarger says. “But we are really a gem that’s for San Francisco — just as much as it’s for the tourists.”\u003cbr>\n\u003c/p>\u003cp>\u003caside class=\"alignleft utils-parseShortcode-shortcodes-__bayCuriousPodcastShortcode__bayCurious\">\u003cimg src=https://cdn.kqed.org/wp-content/uploads/2023/02/bayCuriousLogo.png alt=\"Bay Curious Podcast\" loading=\"lazy\" />\n What do you wonder about the Bay Area, its culture or people that you want KQED to investigate?\n \u003ca href=\"/news/series/baycurious\">Ask Bay Curious.\u003c/a>\u003c/aside>\u003c/p>\u003cp>\u003cbr>\nHe tells me the garden was originally an exhibit in the\u003ca href=\"http://www.outsidelands.org/1894_midwinter_fair.php\"> California Midwinter International Exposition of 1894, \u003c/a>then tended by a landscape architect named Makoto Hagiwara.\u003c/p>\n\u003cp>“He was an early immigrant from Japan,” says Pitsenbarger. “He came a decade before most Japanese immigrants came. A lot of folks came in the late 1880s and 1890s. But he came in 1878.”\u003c/p>\n\u003cp>Hagiwara started serving visitors fortune cookies along with green tea in the garden’s tea house.\u003c/p>\n\u003cfigure id=\"attachment_11743019\" class=\"wp-caption aligncenter\" style=\"max-width: 324px\">\u003cimg loading=\"lazy\" decoding=\"async\" class=\" wp-image-11743019\" src=\"https://ww2.kqed.org/news/wp-content/uploads/sites/10/2019/04/RS36763_aad-2922JPG-qut-800x1049.jpg\" alt=\"Makoto Hagiwara and his daughter in 1924.\" width=\"324\" height=\"425\" srcset=\"https://cdn.kqed.org/wp-content/uploads/sites/10/2019/04/RS36763_aad-2922JPG-qut-800x1049.jpg 800w, https://cdn.kqed.org/wp-content/uploads/sites/10/2019/04/RS36763_aad-2922JPG-qut-160x210.jpg 160w, https://cdn.kqed.org/wp-content/uploads/sites/10/2019/04/RS36763_aad-2922JPG-qut-1020x1337.jpg 1020w, https://cdn.kqed.org/wp-content/uploads/sites/10/2019/04/RS36763_aad-2922JPG-qut-915x1200.jpg 915w, https://cdn.kqed.org/wp-content/uploads/sites/10/2019/04/RS36763_aad-2922JPG-qut-1920x2517.jpg 1920w, https://cdn.kqed.org/wp-content/uploads/sites/10/2019/04/RS36763_aad-2922JPG-qut.jpg 1562w\" sizes=\"(max-width: 324px) 100vw, 324px\">\u003cfigcaption class=\"wp-caption-text\">Makoto Hagiwara and his daughter in 1924. \u003ccite>(San Francisco History Center, San Francisco Public Library)\u003c/cite>\u003c/figcaption>\u003c/figure>\n\u003cp>“The story that I understand is he took a Japanese cookie, senbei, and he got the idea to put a little note in it, and originally started making the cookies by hand here with just a little flat press,” says Pitsenbarger. “They would fold the cookies while they were still fresh.”\u003c/p>\n\u003cp>\u003c/p>\u003c/div>",
"attributes": {
"named": {},
"numeric": []
}
},
{
"type": "component",
"content": "",
"name": "ad",
"attributes": {
"named": {
"label": "fullwidth"
},
"numeric": [
"fullwidth"
]
}
},
{
"type": "contentString",
"content": "\u003cdiv class=\"post-body\">\u003cp>\u003c/p>\n\u003cp>Wow. So this could be the birthplace of the fortune cookie?\u003c/p>\n\u003cp>\u003c/p>\u003c/div>",
"attributes": {
"named": {},
"numeric": []
}
},
{
"type": "component",
"content": "‘I like to say that the Japanese invented them, the Chinese popularized them, but the Americans ultimately consume them.’",
"name": "pullquote",
"attributes": {
"named": {
"size": "medium",
"align": "right",
"citation": "Author Jennifer 8. Lee says of the fortune cookie",
"label": ""
},
"numeric": []
}
},
{
"type": "contentString",
"content": "\u003cdiv class=\"post-body\">\u003cp>\u003c/p>\n\u003cp>I didn’t see anything that marked this historical culinary invention until we went to the gift shop. Mounted to the top of a display case are two small black iron presses with long, thin handles.\u003c/p>\n\u003cp>They’re called kata, and are used to make senbei or Japanese crackers. Inside they’re engraved with an H and an M — inverted they would appear on the cookies as MH for \u003ca href=\"https://hanascape.com/japanese-tea-garden\">Makoto Hagiwara.\u003c/a>\u003c/p>\n\u003cp>“If you came to the garden while he was managing it, everything had his name on it. Napkins would say M. Hagiwara. There would be pots in the garden with M. Hagiwara … tea pots, tea cups. His name was everywhere, and the fortune cookie is one of those things that helped to spread his popularity,” Pitsenbarger says.\u003c/p>\n\u003cp>And make the cookies popular, too. But since each fortune cookie was being made by hand, demand became too much for the Hagiwara family. Makoto asked a local confectionary shop, Benkyodo, to take over making the cookies.\u003c/p>\n\u003cfigure id=\"attachment_11742883\" class=\"wp-caption alignnone\" style=\"max-width: 352px\">\u003cimg loading=\"lazy\" decoding=\"async\" class=\" wp-image-11742883\" src=\"https://ww2.kqed.org/news/wp-content/uploads/sites/10/2019/04/RS36751_Benkyodo-outsiide-retouch-300-copy-qut-1-800x1115.jpg\" alt=\"\" width=\"352\" height=\"491\" srcset=\"https://cdn.kqed.org/wp-content/uploads/sites/10/2019/04/RS36751_Benkyodo-outsiide-retouch-300-copy-qut-1-800x1115.jpg 800w, https://cdn.kqed.org/wp-content/uploads/sites/10/2019/04/RS36751_Benkyodo-outsiide-retouch-300-copy-qut-1-160x223.jpg 160w, https://cdn.kqed.org/wp-content/uploads/sites/10/2019/04/RS36751_Benkyodo-outsiide-retouch-300-copy-qut-1-1020x1421.jpg 1020w, https://cdn.kqed.org/wp-content/uploads/sites/10/2019/04/RS36751_Benkyodo-outsiide-retouch-300-copy-qut-1-861x1200.jpg 861w, https://cdn.kqed.org/wp-content/uploads/sites/10/2019/04/RS36751_Benkyodo-outsiide-retouch-300-copy-qut-1.jpg 1470w\" sizes=\"(max-width: 352px) 100vw, 352px\">\u003cfigcaption class=\"wp-caption-text\">Benkyodo on San Francisco’s Geary Boulevard in 1906. \u003ccite>(Photo Courtesy: Gary T. Ono)\u003c/cite>\u003c/figcaption>\u003c/figure>\n\u003cp>Suyeichi Okamura opened \u003ca href=\"http://www.benkyodocompany.com/\">Benkyodo\u003c/a> in 1906 and after a few moves, it’s located today at Sutter and Buchanan in San Francisco’s Japantown. His grandson, Gary T. Ono, is the family’s historian and has \u003ca href=\"http://www.discovernikkei.org/en/journal/2007/10/31/fortune-cookie/\">written articles\u003c/a> about his family’s connection to the fortune cookie.\u003c/p>\n\u003cfigure id=\"attachment_11742884\" class=\"wp-caption aligncenter\" style=\"max-width: 210px\">\u003cimg loading=\"lazy\" decoding=\"async\" class=\" wp-image-11742884\" src=\"https://ww2.kqed.org/news/wp-content/uploads/sites/10/2019/04/RS36752_Suyeichi-Portrait-qut-1-800x1227.jpg\" alt=\"\" width=\"210\" height=\"323\" srcset=\"https://cdn.kqed.org/wp-content/uploads/sites/10/2019/04/RS36752_Suyeichi-Portrait-qut-1-800x1227.jpg 800w, https://cdn.kqed.org/wp-content/uploads/sites/10/2019/04/RS36752_Suyeichi-Portrait-qut-1-160x245.jpg 160w, https://cdn.kqed.org/wp-content/uploads/sites/10/2019/04/RS36752_Suyeichi-Portrait-qut-1-1020x1564.jpg 1020w, https://cdn.kqed.org/wp-content/uploads/sites/10/2019/04/RS36752_Suyeichi-Portrait-qut-1-783x1200.jpg 783w, https://cdn.kqed.org/wp-content/uploads/sites/10/2019/04/RS36752_Suyeichi-Portrait-qut-1-1920x2944.jpg 1920w, https://cdn.kqed.org/wp-content/uploads/sites/10/2019/04/RS36752_Suyeichi-Portrait-qut-1.jpg 1336w\" sizes=\"(max-width: 210px) 100vw, 210px\">\u003cfigcaption class=\"wp-caption-text\">Gary T. Ono’s grandfather, Suyeichi Okamura, opened Benkyodo in 1906. \u003ccite>(Photo Courtesy: Gary T. Ono)\u003c/cite>\u003c/figcaption>\u003c/figure>\n\u003cp>I went to visit Ono in Los Angeles, in his apartment in Little Tokyo. A giant foam fortune cookie hangs in the living room, and the fortune poking out of it reads: “Made In Japan.”\u003c/p>\n\u003cp>Ono drags out a heavy suitcase from a closet and pulls out several kata wrapped in newspaper. They sport the familiar initials: MH.\u003c/p>\n\u003cp>“My grandfather was a service person to Makoto Hagiwara,” Ono says. “And advised Hagiwara in converting the taste (of the fortune cookie) to something more palatable to American tastes. So they came up with a vanilla extract flavor that we know today.”\u003c/p>\n\u003cfigure id=\"attachment_11742908\" class=\"wp-caption aligncenter\" style=\"max-width: 203px\">\u003cimg loading=\"lazy\" decoding=\"async\" class=\" wp-image-11742908\" src=\"https://ww2.kqed.org/news/wp-content/uploads/sites/10/2019/04/RS36718_IMG_0808-qut-1-800x1067.jpg\" alt=\"\" width=\"203\" height=\"271\" srcset=\"https://cdn.kqed.org/wp-content/uploads/sites/10/2019/04/RS36718_IMG_0808-qut-1-800x1067.jpg 800w, https://cdn.kqed.org/wp-content/uploads/sites/10/2019/04/RS36718_IMG_0808-qut-1-160x213.jpg 160w, https://cdn.kqed.org/wp-content/uploads/sites/10/2019/04/RS36718_IMG_0808-qut-1-1020x1360.jpg 1020w, https://cdn.kqed.org/wp-content/uploads/sites/10/2019/04/RS36718_IMG_0808-qut-1-900x1200.jpg 900w, https://cdn.kqed.org/wp-content/uploads/sites/10/2019/04/RS36718_IMG_0808-qut-1-1920x2560.jpg 1920w, https://cdn.kqed.org/wp-content/uploads/sites/10/2019/04/RS36718_IMG_0808-qut-1.jpg 1536w\" sizes=\"(max-width: 203px) 100vw, 203px\">\u003cfigcaption class=\"wp-caption-text\">This flat-iron press, called a kata, was originally used to make fortune cookies for the Japanese Tea Garden in Golden Gate Park. The initials MH stand for creator Makoto Hagiwara. \u003ccite>(Suzie Racho/KQED)\u003c/cite>\u003c/figcaption>\u003c/figure>\n\u003cp>He says Benkyodo helped develop a machine to mass produce the cookies for the garden, sometime around 1911.\u003c/p>\n\u003cfigure id=\"attachment_11742881\" class=\"wp-caption aligncenter\" style=\"max-width: 305px\">\u003cimg loading=\"lazy\" decoding=\"async\" class=\" wp-image-11742881\" src=\"https://ww2.kqed.org/news/wp-content/uploads/sites/10/2019/04/RS36723_IMG_0813-qut-1-800x1067.jpg\" alt=\"\" width=\"305\" height=\"407\" srcset=\"https://cdn.kqed.org/wp-content/uploads/sites/10/2019/04/RS36723_IMG_0813-qut-1-800x1067.jpg 800w, https://cdn.kqed.org/wp-content/uploads/sites/10/2019/04/RS36723_IMG_0813-qut-1-160x213.jpg 160w, https://cdn.kqed.org/wp-content/uploads/sites/10/2019/04/RS36723_IMG_0813-qut-1-1020x1360.jpg 1020w, https://cdn.kqed.org/wp-content/uploads/sites/10/2019/04/RS36723_IMG_0813-qut-1-900x1200.jpg 900w, https://cdn.kqed.org/wp-content/uploads/sites/10/2019/04/RS36723_IMG_0813-qut-1-1920x2560.jpg 1920w, https://cdn.kqed.org/wp-content/uploads/sites/10/2019/04/RS36723_IMG_0813-qut-1.jpg 1536w\" sizes=\"(max-width: 305px) 100vw, 305px\">\u003cfigcaption class=\"wp-caption-text\">Gary T. Ono holds two kata from his grandfather’s bakery, Benkyodo. \u003ccite>(Suzie Racho/KQED)\u003c/cite>\u003c/figcaption>\u003c/figure>\n\u003cp>But Ono isn’t the only one to make family claims to the origins of the fortune cookie: A few Chinese companies have also claimed the invention, as has another Japanese sweet-maker in Los Angeles called \u003ca href=\"http://www.fugetsu-do.com/history.htm\">Fugetsu-Do\u003c/a>.\u003c/p>\n\u003cp>Brian Kito owns Fugetsu-Do, just down the street from Gary Ono in Los Angeles. Brian’s grandfather opened Fugetsu-Do in 1903, three years before Benkyodo opened in San Francisco. And Gary says Brian heard similar stories about his grandfather creating the fortune cookie.\u003c/p>\n\u003cp>“We were never confrontational about it or argumentative. We didn’t know precisely that our grandparents did this or did that,” Ono says. “[Brian] even said, ‘Well, if it wasn’t my grandfather, I hope it’s your grandfather.'”\u003c/p>\u003c/p>\u003cp>\u003cspan class='utils-parseShortcode-shortcodes-__youtubeShortcode__embedYoutube'>\n \u003cspan class='utils-parseShortcode-shortcodes-__youtubeShortcode__embedYoutubeInside'>\n \u003ciframe\n loading='lazy'\n class='utils-parseShortcode-shortcodes-__youtubeShortcode__youtubePlayer'\n type='text/html'\n src='//www.youtube.com/embed/Jhmz2Al_pjA'\n title='//www.youtube.com/embed/Jhmz2Al_pjA'\n allowfullscreen='true'\n style='border:0;'>\u003c/iframe>\n \u003c/span>\n \u003c/span>\u003c/p>\u003cp>\u003cp>Author Jennifer 8. Lee says you can probably trace the history of fortune cookies in America back to L.A. and San Francisco. But as a concept, they go back to Japan.\u003c/p>\n\u003cp>“And in Japan they’re called tsujiura senbei or bell crackers,” says Lee, who traced the history of the American fortune cookie in her book, “The Fortune Cookie Chronicles: Adventures In the World of Chinese Food.”\u003c/p>\n\u003cp>Lee writes about Yasuko Nakamachi, a Japanese researcher whom she met through Gary Ono. Nakamachi was investigating the connection between the fortune cookies she saw in New York with a cracker made in Kyoto. She unearthed a copy of a woodblock print from 1878 of a Japanese man grilling fortune cookies.\u003c/p>\n\u003cfigure id=\"attachment_11743033\" class=\"wp-caption aligncenter\" style=\"max-width: 515px\">\u003cimg loading=\"lazy\" decoding=\"async\" class=\"size-full wp-image-11743033\" src=\"https://ww2.kqed.org/news/wp-content/uploads/sites/10/2019/04/RS36753_woodblock-senbei-cooking-copy_jpg_515x515_detail_q85-qut.jpg\" alt=\"\" width=\"515\" height=\"377\" srcset=\"https://cdn.kqed.org/wp-content/uploads/sites/10/2019/04/RS36753_woodblock-senbei-cooking-copy_jpg_515x515_detail_q85-qut.jpg 515w, https://cdn.kqed.org/wp-content/uploads/sites/10/2019/04/RS36753_woodblock-senbei-cooking-copy_jpg_515x515_detail_q85-qut-160x117.jpg 160w\" sizes=\"(max-width: 515px) 100vw, 515px\">\u003cfigcaption class=\"wp-caption-text\">This Japanese woodblock print showing fortune cookies being grilled dates back to 1878. \u003ccite>(Photo Courtesy; Gary Ono)\u003c/cite>\u003c/figcaption>\u003c/figure>\n\u003cp>“Around the shrine in downtown Kyoto, there are actually a bunch of families that still make ‘fortune cookies’ in the Japanese tradition,” says Lee.\u003c/p>\n\u003cp>“But they’re actually bigger and browner. They’re made with miso paste and sesame, so much nuttier than the American versions, which tend to be yellow and buttery, reflecting the American palate,” she adds.\u003c/p>\n\u003cp>Those cookies also have fortunes, but not inside. Instead they’re pinched in the fold. They look almost exactly the same.\u003c/p>\n\u003cp>But how did this American adaptation of a Japanese cracker become so associated with Chinese restaurants?\u003c/p>\n\u003cp>“When the Japanese first came to the U.S., a lot of them actually ran Chinese restaurants, because back in the 1910s and 1920s Americans were not eating sushi,” says Lee. “You had Japanese opening Chinese restaurants because that was familiar, with chop suey and chow mein and egg fu yung.”\u003c/p>\n\u003cp>\u003c/p>\u003c/div>",
"attributes": {
"named": {},
"numeric": []
}
},
{
"type": "component",
"content": "",
"name": "aside",
"attributes": {
"named": {
"tag": "golden-state-plate",
"label": "More stories from the Golden State Plate series "
},
"numeric": []
}
},
{
"type": "contentString",
"content": "\u003cdiv class=\"post-body\">\u003cp>\u003c/p>\n\u003cp>In this mix of Japanese families opening Chinese restaurants, they began serving fortune cookies as a form of dessert.\u003c/p>\n\u003cp>“Back then, they were not called fortune cookies, they were called fortune tea cakes, which is actually a better reflection of their name in Japanese,” she says.\u003c/p>\n\u003cp>Bakeries like Benkyodo and Fugetso-Do manufactured fortune cookies for decades until 1942, when President Franklin D. Roosevelt signed Executive Order 9066, ordering people of Japanese descent into internment camps.\u003c/p>\n\u003cp>Fortune cookie makers were among those interned. During World War II, Chinese restaurants surged in popularity and began manufacturing cookies “en masse,” Lee says.\u003c/p>\n\u003cp>“I like to say that the Japanese invented them, the Chinese popularized them, but the Americans ultimately consume them,” she says.\u003c/p>\n\u003cp>Gary Ono’s family was lucky. After being released from the camps, they resumed their business in San Francisco and reclaimed their property. But others weren’t: Many Japanese confectionaries stopped making the cookies after the war.\u003c/p>\n\u003cp>Gary Ono’s family connection to the fortune cookie lives on at the \u003ca href=\"https://americanhistory.si.edu/blog/2010/07/origins-of-a-fortune-cookie.html\">Smithsonian\u003c/a>‘s National Museum of American History, where three of Benkyodo’s katas now reside.\u003cimg loading=\"lazy\" decoding=\"async\" class=\"wp-image-11742907 aligncenter\" src=\"https://ww2.kqed.org/news/wp-content/uploads/sites/10/2019/04/RS36705_IMG_0191-qut-800x800.jpg\" alt=\"\" width=\"285\" height=\"285\" srcset=\"https://cdn.kqed.org/wp-content/uploads/sites/10/2019/04/RS36705_IMG_0191-qut-800x800.jpg 800w, https://cdn.kqed.org/wp-content/uploads/sites/10/2019/04/RS36705_IMG_0191-qut-160x160.jpg 160w, https://cdn.kqed.org/wp-content/uploads/sites/10/2019/04/RS36705_IMG_0191-qut-1020x1020.jpg 1020w, https://cdn.kqed.org/wp-content/uploads/sites/10/2019/04/RS36705_IMG_0191-qut-1200x1200.jpg 1200w, https://cdn.kqed.org/wp-content/uploads/sites/10/2019/04/RS36705_IMG_0191-qut.jpg 1920w\" sizes=\"(max-width: 285px) 100vw, 285px\">\u003c/p>\n\u003cp>\u003c/p>\u003c/div>",
"attributes": {
"named": {},
"numeric": []
}
},
{
"type": "component",
"content": "",
"name": "ad",
"attributes": {
"named": {
"label": "floatright"
},
"numeric": [
"floatright"
]
}
},
{
"type": "contentString",
"content": "\u003cdiv class=\"post-body\">\u003cp>\u003c/p>\n\u003cp>As for the fortune cookies served at the Japanese Tea Garden? They now come from \u003ca href=\"http://www.meemeebakery.com/\">Mee Mee Bakery\u003c/a> in San Francisco’s Chinatown.\u003c/p>\n\n\u003c/div>\u003c/p>",
"attributes": {
"named": {},
"numeric": []
}
}
],
"link": "/news/11742748/unwrapping-the-california-origins-of-the-fortune-cookie",
"authors": [
"107"
],
"programs": [
"news_72"
],
"series": [
"news_24115"
],
"categories": [
"news_223",
"news_24114",
"news_8"
],
"tags": [
"news_20397",
"news_393",
"news_823",
"news_24116",
"news_23056",
"news_38",
"news_150"
],
"featImg": "news_11743018",
"label": "source_news_11742748"
},
"news_11734682": {
"type": "posts",
"id": "news_11734682",
"meta": {
"index": "posts_1716263798",
"site": "news",
"id": "11734682",
"score": null,
"sort": [
1553365362000
]
},
"parent": 0,
"labelTerm": {},
"blocks": [],
"publishDate": 1553365362,
"format": "audio",
"title": "Golden State Plate: Santa Maria Barbecue, It's Not Just Tri-Tip",
"headTitle": "Golden State Plate: Santa Maria Barbecue, It’s Not Just Tri-Tip | KQED",
"content": "\u003cp>Every weekend, an all-ages crowd gathers at the Cold Spring Tavern, a stagecoach stop tucked into a scenic canyon just north of Santa Barbara.\u003c/p>\n\u003cp>Fragrant wood smoke rises from open pit barbecues, and Chef Tom Perez is behind one the grills. “We do a sandwich here,” he says. ‘It’s a tri-tip cut. We’ve been doing it since about 1972.”\u003c/p>\n\u003cfigure id=\"attachment_11734733\" class=\"wp-caption aligncenter\" style=\"max-width: 800px\">\u003cimg loading=\"lazy\" decoding=\"async\" class=\"size-medium wp-image-11734733\" src=\"https://ww2.kqed.org/news/wp-content/uploads/sites/10/2019/03/RS36084_IMG_7635-qut-800x600.jpg\" alt=\"Barbecue chef Tom Perez proudly displays his tri-tip sandwich.\" width=\"800\" height=\"600\" srcset=\"https://cdn.kqed.org/wp-content/uploads/sites/10/2019/03/RS36084_IMG_7635-qut-800x600.jpg 800w, https://cdn.kqed.org/wp-content/uploads/sites/10/2019/03/RS36084_IMG_7635-qut-160x120.jpg 160w, https://cdn.kqed.org/wp-content/uploads/sites/10/2019/03/RS36084_IMG_7635-qut-1020x765.jpg 1020w, https://cdn.kqed.org/wp-content/uploads/sites/10/2019/03/RS36084_IMG_7635-qut-1200x900.jpg 1200w, https://cdn.kqed.org/wp-content/uploads/sites/10/2019/03/RS36084_IMG_7635-qut.jpg 1920w, https://cdn.kqed.org/wp-content/uploads/sites/10/2019/03/RS36084_IMG_7635-qut-1832x1374.jpg 1832w, https://cdn.kqed.org/wp-content/uploads/sites/10/2019/03/RS36084_IMG_7635-qut-1376x1032.jpg 1376w, https://cdn.kqed.org/wp-content/uploads/sites/10/2019/03/RS36084_IMG_7635-qut-1044x783.jpg 1044w, https://cdn.kqed.org/wp-content/uploads/sites/10/2019/03/RS36084_IMG_7635-qut-632x474.jpg 632w, https://cdn.kqed.org/wp-content/uploads/sites/10/2019/03/RS36084_IMG_7635-qut-536x402.jpg 536w\" sizes=\"(max-width: 800px) 100vw, 800px\">\u003cfigcaption class=\"wp-caption-text\">Barbecue chef Tom Perez proudly displays his tri-tip sandwich. \u003ccite>(Diane Bock)\u003c/cite>\u003c/figcaption>\u003c/figure>\n\u003cp>Perez’s sandwich is a carnivore’s dream. Succulent tri-tip, grilled to a perfect medium-rare, piled high on a toasted French roll.\u003c/p>\n\u003cp>“The tri-tip aficionados do not like barbecue sauce anywhere near their tri-tip,” he says. “Chicken, ribs, yes. Tri-tip, you’re going to get some dirty looks.”\u003c/p>\n\u003cp>Perez says when it comes to tri-tip, there are rules. First, the seasonings. Keep ‘em simple: Salt, black pepper and garlic salt. Second, cook the meat over fire. But not just any fire — it should be fueled by local red oak. And finally, serve it with these sides: Salsa, grilled french bread, tossed green salad and locally grown pinquito beans, similar to pintos.\u003c/p>\n\u003cp>Tri-tip has been around since the 1950s. Before that, it was considered scrap, and usually ground into hamburger.\u003c/p>\n\u003cp>“Everyone tends to claim that it was their idea. I’ve heard that it started in a grocery store in Santa Maria,” Perez says.\u003c/p>\n\u003cp>[pullquote size='small' align='right' citation='Barbecue chef Tom Perez']‘The tri-tip aficionados do not like barbecue sauce anywhere near their tri-tip. Chicken, ribs, yes. Tri-tip? You’re going to get some dirty looks.’[/pullquote]\u003c/p>\n\u003cp>According to local lore, it all began with a one-armed butcher named Bob Schutz, who worked at Safeway. Story goes, he was the first to throw this triangular cut on the grill, and christen it tri-tip.\u003c/p>\n\u003cp>But it’s called Santa Maria barbecue, so I head there for some answers. The town has a rich ranching history and the Chamber of Commerce has trademarked their namesake barbecue menu.\u003c/p>\n\u003cfigure id=\"attachment_11734730\" class=\"wp-caption aligncenter\" style=\"max-width: 800px\">\u003cimg loading=\"lazy\" decoding=\"async\" class=\"size-medium wp-image-11734730\" src=\"https://ww2.kqed.org/news/wp-content/uploads/sites/10/2019/03/RS36087_R0025832-qut-800x530.jpg\" alt=\"The Santa Maria Historical Society’s Barbecue Exhibit.\" width=\"800\" height=\"530\" srcset=\"https://cdn.kqed.org/wp-content/uploads/sites/10/2019/03/RS36087_R0025832-qut-800x530.jpg 800w, https://cdn.kqed.org/wp-content/uploads/sites/10/2019/03/RS36087_R0025832-qut-160x106.jpg 160w, https://cdn.kqed.org/wp-content/uploads/sites/10/2019/03/RS36087_R0025832-qut-1020x676.jpg 1020w, https://cdn.kqed.org/wp-content/uploads/sites/10/2019/03/RS36087_R0025832-qut-1200x795.jpg 1200w, https://cdn.kqed.org/wp-content/uploads/sites/10/2019/03/RS36087_R0025832-qut.jpg 1920w\" sizes=\"(max-width: 800px) 100vw, 800px\">\u003cfigcaption class=\"wp-caption-text\">The Santa Maria Historical Society’s Barbecue Exhibit. \u003ccite>(Diane Bock)\u003c/cite>\u003c/figcaption>\u003c/figure>\n\u003cp>“If you’re talking about Santa Maria style barbecue, we’re not talking about tri-tip, specifically, we’re really talking about top block,” says Santa Maria Historical Society curator Cindy Ransick.\u003c/p>\n\u003cp>[pullquote size='small' align='right' citation='John Moretti, Santa Maria Elks Lodge manager']‘Every other neighbor here in this town will have a barbecue pit in their backyard, that’s just the way it is.’[/pullquote]\u003c/p>\n\u003cp>But hold up. I’ve lived around here for 30 years. I’ve never heard of top block. She walks me over to the museum’s barbecue exhibit, and points to a diagram of beef cuts.\u003c/p>\n\u003cp>“This part right here you can see is labeled top block, it’s on the top shoulder of the cow,” she says. “It’s a more expensive cut of meat.”\u003c/p>\n\u003cp>It’s also an enormous cut of meat. It turns out top block is another name for top sirloin.\u003c/p>\n\u003cp>[ad fullwidth]\u003c/p>\n\u003cp>The oldest photos at the historical society date back more than a century. But docent Phil Lawyer says the true legacy goes back even further.\u003c/p>\n\u003cfigure id=\"attachment_11734757\" class=\"wp-caption aligncenter\" style=\"max-width: 800px\">\u003cimg loading=\"lazy\" decoding=\"async\" class=\"size-medium wp-image-11734757\" src=\"https://ww2.kqed.org/news/wp-content/uploads/sites/10/2019/03/RS36088_R0025835-qut-800x530.jpg\" alt=\"Volunteers barbecue at Santa Maria’s Fourth of July celebration in 1904. Photo courtesy Santa Maria Historical Society\" width=\"800\" height=\"530\" srcset=\"https://cdn.kqed.org/wp-content/uploads/sites/10/2019/03/RS36088_R0025835-qut-800x530.jpg 800w, https://cdn.kqed.org/wp-content/uploads/sites/10/2019/03/RS36088_R0025835-qut-160x106.jpg 160w, https://cdn.kqed.org/wp-content/uploads/sites/10/2019/03/RS36088_R0025835-qut-1020x676.jpg 1020w, https://cdn.kqed.org/wp-content/uploads/sites/10/2019/03/RS36088_R0025835-qut-1200x795.jpg 1200w, https://cdn.kqed.org/wp-content/uploads/sites/10/2019/03/RS36088_R0025835-qut.jpg 1920w\" sizes=\"(max-width: 800px) 100vw, 800px\">\u003cfigcaption class=\"wp-caption-text\">Volunteers barbecue at Santa Maria’s Fourth of July celebration in 1904. \u003ccite>(Photo courtesy: Santa Maria Historical Society)\u003c/cite>\u003c/figcaption>\u003c/figure>\n\u003cp>“This type of cooking began in the Spanish tradition when we had the Spanish rancheros, and they had the huge cattle drives,” he says. “The rancheros were great hosts. They’d have everybody in the valley come, have a party all night, dancing and eating.”\u003c/p>\n\u003cp>[aside tag='golden-state-plate' label='More from our Golden State Plate series']\u003c/p>\n\u003cp>Today, barbecue continues to bind this community together. Every Friday, hundreds gather at the Santa Maria Elks Lodge for “Cook Your Own” night.\u003c/p>\n\u003cp>“From fundraisers to just having people come over to your house and barbecuing for dinner. Every other neighbor here in this town will have a barbecue pit in their backyard, that’s just the way it is,” says manager John Moretti.\u003c/p>\n\u003cp>“We grew up with it, I should say, so that’s what we’re used to,” he adds. “And you get a good beef, aged beef, good mix and good coals, comes out good every time. Pretty simple.”\u003c/p>\n\u003cp>So, whether you prefer tri-tip or top sirloin, it’s all Santa Maria barbecue. Just remember to hold the sauce.\u003c/p>\n\u003cp>\u003c/p>\n",
"stats": {
"hasVideo": false,
"hasChartOrMap": false,
"hasAudio": false,
"hasPolis": false,
"wordCount": 795,
"hasGoogleForm": false,
"hasGallery": false,
"hasHearkenModule": false,
"iframeSrcs": [],
"paragraphCount": 24
},
"modified": 1711753989,
"excerpt": "Whether you prefer tri-tip or top sirloin, it’s all Santa Maria barbecue. Just remember to hold the sauce.",
"headData": {
"twImgId": "",
"twTitle": "",
"ogTitle": "",
"ogImgId": "",
"twDescription": "",
"description": "Whether you prefer tri-tip or top sirloin, it’s all Santa Maria barbecue. Just remember to hold the sauce.",
"title": "Golden State Plate: Santa Maria Barbecue, It's Not Just Tri-Tip | KQED",
"ogDescription": "",
"schema": {
"@context": "https://schema.org",
"@type": "NewsArticle",
"headline": "Golden State Plate: Santa Maria Barbecue, It's Not Just Tri-Tip",
"datePublished": "2019-03-23T11:22:42-07:00",
"dateModified": "2024-03-29T16:13:09-07:00",
"image": "https://cdn.kqed.org/wp-content/uploads/2020/02/KQED-OG-Image@1x.png",
"isAccessibleForFree": "True",
"publisher": {
"@type": "NewsMediaOrganization",
"@id": "https://www.kqed.org/#organization",
"name": "KQED",
"logo": "https://cdn.kqed.org/wp-content/uploads/2020/02/KQED-OG-Image@1x.png",
"url": "https://www.kqed.org",
"sameAs": [
"https://www.facebook.com/KQED",
"https://twitter.com/KQED",
"https://www.instagram.com/kqed/",
"https://www.tiktok.com/@kqedofficial",
"https://www.linkedin.com/company/kqed",
"https://www.youtube.com/channel/UCeC0IOo7i1P_61zVUWbJ4nw"
]
}
}
},
"guestAuthors": [],
"slug": "golden-state-plate-santa-maria-barbecue-its-not-just-tri-tip",
"status": "publish",
"sourceUrl": "https://www.kqed.org/food",
"templateType": "standard",
"audioUrl": "https://www.kqed.org/.stream/anon/radio/tcrmag/2019/03/SantaMariaBBQ.mp3",
"nprByline": "Diane Bock",
"excludeFromSiteSearch": "Include",
"featuredImageType": "standard",
"sticky": false,
"audioTrackLength": 321,
"source": "Food",
"showOnAuthorArchivePages": "No",
"articleAge": "0",
"path": "/news/11734682/golden-state-plate-santa-maria-barbecue-its-not-just-tri-tip",
"audioDuration": 321000,
"parsedContent": [
{
"type": "contentString",
"content": "\u003cdiv class=\"post-body\">\u003cp>\u003cp>Every weekend, an all-ages crowd gathers at the Cold Spring Tavern, a stagecoach stop tucked into a scenic canyon just north of Santa Barbara.\u003c/p>\n\u003cp>Fragrant wood smoke rises from open pit barbecues, and Chef Tom Perez is behind one the grills. “We do a sandwich here,” he says. ‘It’s a tri-tip cut. We’ve been doing it since about 1972.”\u003c/p>\n\u003cfigure id=\"attachment_11734733\" class=\"wp-caption aligncenter\" style=\"max-width: 800px\">\u003cimg loading=\"lazy\" decoding=\"async\" class=\"size-medium wp-image-11734733\" src=\"https://ww2.kqed.org/news/wp-content/uploads/sites/10/2019/03/RS36084_IMG_7635-qut-800x600.jpg\" alt=\"Barbecue chef Tom Perez proudly displays his tri-tip sandwich.\" width=\"800\" height=\"600\" srcset=\"https://cdn.kqed.org/wp-content/uploads/sites/10/2019/03/RS36084_IMG_7635-qut-800x600.jpg 800w, https://cdn.kqed.org/wp-content/uploads/sites/10/2019/03/RS36084_IMG_7635-qut-160x120.jpg 160w, https://cdn.kqed.org/wp-content/uploads/sites/10/2019/03/RS36084_IMG_7635-qut-1020x765.jpg 1020w, https://cdn.kqed.org/wp-content/uploads/sites/10/2019/03/RS36084_IMG_7635-qut-1200x900.jpg 1200w, https://cdn.kqed.org/wp-content/uploads/sites/10/2019/03/RS36084_IMG_7635-qut.jpg 1920w, https://cdn.kqed.org/wp-content/uploads/sites/10/2019/03/RS36084_IMG_7635-qut-1832x1374.jpg 1832w, https://cdn.kqed.org/wp-content/uploads/sites/10/2019/03/RS36084_IMG_7635-qut-1376x1032.jpg 1376w, https://cdn.kqed.org/wp-content/uploads/sites/10/2019/03/RS36084_IMG_7635-qut-1044x783.jpg 1044w, https://cdn.kqed.org/wp-content/uploads/sites/10/2019/03/RS36084_IMG_7635-qut-632x474.jpg 632w, https://cdn.kqed.org/wp-content/uploads/sites/10/2019/03/RS36084_IMG_7635-qut-536x402.jpg 536w\" sizes=\"(max-width: 800px) 100vw, 800px\">\u003cfigcaption class=\"wp-caption-text\">Barbecue chef Tom Perez proudly displays his tri-tip sandwich. \u003ccite>(Diane Bock)\u003c/cite>\u003c/figcaption>\u003c/figure>\n\u003cp>Perez’s sandwich is a carnivore’s dream. Succulent tri-tip, grilled to a perfect medium-rare, piled high on a toasted French roll.\u003c/p>\n\u003cp>“The tri-tip aficionados do not like barbecue sauce anywhere near their tri-tip,” he says. “Chicken, ribs, yes. Tri-tip, you’re going to get some dirty looks.”\u003c/p>\n\u003cp>Perez says when it comes to tri-tip, there are rules. First, the seasonings. Keep ‘em simple: Salt, black pepper and garlic salt. Second, cook the meat over fire. But not just any fire — it should be fueled by local red oak. And finally, serve it with these sides: Salsa, grilled french bread, tossed green salad and locally grown pinquito beans, similar to pintos.\u003c/p>\n\u003cp>Tri-tip has been around since the 1950s. Before that, it was considered scrap, and usually ground into hamburger.\u003c/p>\n\u003cp>“Everyone tends to claim that it was their idea. I’ve heard that it started in a grocery store in Santa Maria,” Perez says.\u003c/p>\n\u003cp>\u003c/p>\u003c/div>",
"attributes": {
"named": {},
"numeric": []
}
},
{
"type": "component",
"content": "‘The tri-tip aficionados do not like barbecue sauce anywhere near their tri-tip. Chicken, ribs, yes. Tri-tip? You’re going to get some dirty looks.’",
"name": "pullquote",
"attributes": {
"named": {
"size": "small",
"align": "right",
"citation": "Barbecue chef Tom Perez",
"label": ""
},
"numeric": []
}
},
{
"type": "contentString",
"content": "\u003cdiv class=\"post-body\">\u003cp>\u003c/p>\n\u003cp>According to local lore, it all began with a one-armed butcher named Bob Schutz, who worked at Safeway. Story goes, he was the first to throw this triangular cut on the grill, and christen it tri-tip.\u003c/p>\n\u003cp>But it’s called Santa Maria barbecue, so I head there for some answers. The town has a rich ranching history and the Chamber of Commerce has trademarked their namesake barbecue menu.\u003c/p>\n\u003cfigure id=\"attachment_11734730\" class=\"wp-caption aligncenter\" style=\"max-width: 800px\">\u003cimg loading=\"lazy\" decoding=\"async\" class=\"size-medium wp-image-11734730\" src=\"https://ww2.kqed.org/news/wp-content/uploads/sites/10/2019/03/RS36087_R0025832-qut-800x530.jpg\" alt=\"The Santa Maria Historical Society’s Barbecue Exhibit.\" width=\"800\" height=\"530\" srcset=\"https://cdn.kqed.org/wp-content/uploads/sites/10/2019/03/RS36087_R0025832-qut-800x530.jpg 800w, https://cdn.kqed.org/wp-content/uploads/sites/10/2019/03/RS36087_R0025832-qut-160x106.jpg 160w, https://cdn.kqed.org/wp-content/uploads/sites/10/2019/03/RS36087_R0025832-qut-1020x676.jpg 1020w, https://cdn.kqed.org/wp-content/uploads/sites/10/2019/03/RS36087_R0025832-qut-1200x795.jpg 1200w, https://cdn.kqed.org/wp-content/uploads/sites/10/2019/03/RS36087_R0025832-qut.jpg 1920w\" sizes=\"(max-width: 800px) 100vw, 800px\">\u003cfigcaption class=\"wp-caption-text\">The Santa Maria Historical Society’s Barbecue Exhibit. \u003ccite>(Diane Bock)\u003c/cite>\u003c/figcaption>\u003c/figure>\n\u003cp>“If you’re talking about Santa Maria style barbecue, we’re not talking about tri-tip, specifically, we’re really talking about top block,” says Santa Maria Historical Society curator Cindy Ransick.\u003c/p>\n\u003cp>\u003c/p>\u003c/div>",
"attributes": {
"named": {},
"numeric": []
}
},
{
"type": "component",
"content": "‘Every other neighbor here in this town will have a barbecue pit in their backyard, that’s just the way it is.’",
"name": "pullquote",
"attributes": {
"named": {
"size": "small",
"align": "right",
"citation": "John Moretti, Santa Maria Elks Lodge manager",
"label": ""
},
"numeric": []
}
},
{
"type": "contentString",
"content": "\u003cdiv class=\"post-body\">\u003cp>\u003c/p>\n\u003cp>But hold up. I’ve lived around here for 30 years. I’ve never heard of top block. She walks me over to the museum’s barbecue exhibit, and points to a diagram of beef cuts.\u003c/p>\n\u003cp>“This part right here you can see is labeled top block, it’s on the top shoulder of the cow,” she says. “It’s a more expensive cut of meat.”\u003c/p>\n\u003cp>It’s also an enormous cut of meat. It turns out top block is another name for top sirloin.\u003c/p>\n\u003cp>\u003c/p>\u003c/div>",
"attributes": {
"named": {},
"numeric": []
}
},
{
"type": "component",
"content": "",
"name": "ad",
"attributes": {
"named": {
"label": "fullwidth"
},
"numeric": [
"fullwidth"
]
}
},
{
"type": "contentString",
"content": "\u003cdiv class=\"post-body\">\u003cp>\u003c/p>\n\u003cp>The oldest photos at the historical society date back more than a century. But docent Phil Lawyer says the true legacy goes back even further.\u003c/p>\n\u003cfigure id=\"attachment_11734757\" class=\"wp-caption aligncenter\" style=\"max-width: 800px\">\u003cimg loading=\"lazy\" decoding=\"async\" class=\"size-medium wp-image-11734757\" src=\"https://ww2.kqed.org/news/wp-content/uploads/sites/10/2019/03/RS36088_R0025835-qut-800x530.jpg\" alt=\"Volunteers barbecue at Santa Maria’s Fourth of July celebration in 1904. Photo courtesy Santa Maria Historical Society\" width=\"800\" height=\"530\" srcset=\"https://cdn.kqed.org/wp-content/uploads/sites/10/2019/03/RS36088_R0025835-qut-800x530.jpg 800w, https://cdn.kqed.org/wp-content/uploads/sites/10/2019/03/RS36088_R0025835-qut-160x106.jpg 160w, https://cdn.kqed.org/wp-content/uploads/sites/10/2019/03/RS36088_R0025835-qut-1020x676.jpg 1020w, https://cdn.kqed.org/wp-content/uploads/sites/10/2019/03/RS36088_R0025835-qut-1200x795.jpg 1200w, https://cdn.kqed.org/wp-content/uploads/sites/10/2019/03/RS36088_R0025835-qut.jpg 1920w\" sizes=\"(max-width: 800px) 100vw, 800px\">\u003cfigcaption class=\"wp-caption-text\">Volunteers barbecue at Santa Maria’s Fourth of July celebration in 1904. \u003ccite>(Photo courtesy: Santa Maria Historical Society)\u003c/cite>\u003c/figcaption>\u003c/figure>\n\u003cp>“This type of cooking began in the Spanish tradition when we had the Spanish rancheros, and they had the huge cattle drives,” he says. “The rancheros were great hosts. They’d have everybody in the valley come, have a party all night, dancing and eating.”\u003c/p>\n\u003cp>\u003c/p>\u003c/div>",
"attributes": {
"named": {},
"numeric": []
}
},
{
"type": "component",
"content": "",
"name": "aside",
"attributes": {
"named": {
"tag": "golden-state-plate",
"label": "More from our Golden State Plate series "
},
"numeric": []
}
},
{
"type": "contentString",
"content": "\u003cdiv class=\"post-body\">\u003cp>\u003c/p>\n\u003cp>Today, barbecue continues to bind this community together. Every Friday, hundreds gather at the Santa Maria Elks Lodge for “Cook Your Own” night.\u003c/p>\n\u003cp>“From fundraisers to just having people come over to your house and barbecuing for dinner. Every other neighbor here in this town will have a barbecue pit in their backyard, that’s just the way it is,” says manager John Moretti.\u003c/p>\n\u003cp>“We grew up with it, I should say, so that’s what we’re used to,” he adds. “And you get a good beef, aged beef, good mix and good coals, comes out good every time. Pretty simple.”\u003c/p>\n\u003cp>So, whether you prefer tri-tip or top sirloin, it’s all Santa Maria barbecue. Just remember to hold the sauce.\u003c/p>\n\u003cp>\u003c/p>\n\u003c/div>\u003c/p>",
"attributes": {
"named": {},
"numeric": []
}
}
],
"link": "/news/11734682/golden-state-plate-santa-maria-barbecue-its-not-just-tri-tip",
"authors": [
"byline_news_11734682"
],
"programs": [
"news_72"
],
"series": [
"news_24115"
],
"categories": [
"news_24114",
"news_8"
],
"tags": [
"news_24116"
],
"featImg": "news_11734735",
"label": "source_news_11734682"
}
},
"podcastsReducer": {
"isFetching": false,
"fetchFailed": false,
"hasFetched": false,
"podcasts": {}
},
"radioProgramsReducer": {
"isFetching": false,
"fetchFailed": false,
"hasFetched": false,
"radioPrograms": {}
},
"programsReducer": {
"all-things-considered": {
"id": "all-things-considered",
"title": "All Things Considered",
"info": "Every weekday, \u003cem>All Things Considered\u003c/em> hosts Robert Siegel, Audie Cornish, Ari Shapiro, and Kelly McEvers present the program's trademark mix of news, interviews, commentaries, reviews, and offbeat features. Michel Martin hosts on the weekends.",
"airtime": "MON-FRI 1pm-2pm, 4:30pm-6:30pm\u003cbr />SAT-SUN 5pm-6pm",
"imageSrc": "https://cdn.kqed.org/wp-content/uploads/2024/04/All-Things-Considered-Podcast-Tile-360x360-1.jpg",
"officialWebsiteLink": "https://www.npr.org/programs/all-things-considered/",
"meta": {
"site": "news",
"source": "npr"
},
"link": "/radio/program/all-things-considered"
},
"american-suburb-podcast": {
"id": "american-suburb-podcast",
"title": "American Suburb: The Podcast",
"tagline": "The flip side of gentrification, told through one town",
"info": "Gentrification is changing cities across America, forcing people from neighborhoods they have long called home. Call them the displaced. Now those priced out of the Bay Area are looking for a better life in an unlikely place. American Suburb follows this migration to one California town along the Delta, 45 miles from San Francisco. But is this once sleepy suburb ready for them?",
"imageSrc": "https://cdn.kqed.org/wp-content/uploads/2024/04/American-Suburb-Podcast-Tile-703x703-1.jpg",
"officialWebsiteLink": "/news/series/american-suburb-podcast",
"meta": {
"site": "news",
"source": "kqed",
"order": 19
},
"link": "/news/series/american-suburb-podcast/",
"subscribe": {
"npr": "https://rpb3r.app.goo.gl/RBrW",
"apple": "https://itunes.apple.com/WebObjects/MZStore.woa/wa/viewPodcast?mt=2&id=1287748328",
"tuneIn": "https://tunein.com/radio/American-Suburb-p1086805/",
"rss": "https://ww2.kqed.org/news/series/american-suburb-podcast/feed/podcast",
"google": "https://podcasts.google.com/feed/aHR0cHM6Ly9mZWVkcy5tZWdhcGhvbmUuZm0vS1FJTkMzMDExODgxNjA5"
}
},
"baycurious": {
"id": "baycurious",
"title": "Bay Curious",
"tagline": "Exploring the Bay Area, one question at a time",
"info": "KQED’s new podcast, Bay Curious, gets to the bottom of the mysteries — both profound and peculiar — that give the Bay Area its unique identity. And we’ll do it with your help! You ask the questions. You decide what Bay Curious investigates. And you join us on the journey to find the answers.",
"imageSrc": "https://cdn.kqed.org/wp-content/uploads/2024/04/Bay-Curious-Podcast-Tile-703x703-1.jpg",
"imageAlt": "KQED Bay Curious",
"officialWebsiteLink": "/news/series/baycurious",
"meta": {
"site": "news",
"source": "kqed",
"order": 3
},
"link": "/podcasts/baycurious",
"subscribe": {
"apple": "https://podcasts.apple.com/us/podcast/bay-curious/id1172473406",
"npr": "https://www.npr.org/podcasts/500557090/bay-curious",
"rss": "https://ww2.kqed.org/news/category/bay-curious-podcast/feed/podcast",
"amazon": "https://music.amazon.com/podcasts/9a90d476-aa04-455d-9a4c-0871ed6216d4/bay-curious",
"stitcher": "https://www.stitcher.com/podcast/kqed/bay-curious",
"spotify": "https://open.spotify.com/show/6O76IdmhixfijmhTZLIJ8k"
}
},
"bbc-world-service": {
"id": "bbc-world-service",
"title": "BBC World Service",
"info": "The day's top stories from BBC News compiled twice daily in the week, once at weekends.",
"airtime": "MON-FRI 9pm-10pm, TUE-FRI 1am-2am",
"imageSrc": "https://cdn.kqed.org/wp-content/uploads/2024/04/BBC-World-Service-Podcast-Tile-360x360-1.jpg",
"officialWebsiteLink": "https://www.bbc.co.uk/sounds/play/live:bbc_world_service",
"meta": {
"site": "news",
"source": "BBC World Service"
},
"link": "/radio/program/bbc-world-service",
"subscribe": {
"apple": "https://itunes.apple.com/us/podcast/global-news-podcast/id135067274?mt=2",
"tuneIn": "https://tunein.com/radio/BBC-World-Service-p455581/",
"rss": "https://podcasts.files.bbci.co.uk/p02nq0gn.rss"
}
},
"californiareport": {
"id": "californiareport",
"title": "The California Report",
"tagline": "California, day by day",
"info": "KQED’s statewide radio news program providing daily coverage of issues, trends and public policy decisions.",
"imageSrc": "https://cdn.kqed.org/wp-content/uploads/2024/04/The-California-Report-Podcast-Tile-703x703-1.jpg",
"imageAlt": "KQED The California Report",
"officialWebsiteLink": "/californiareport",
"meta": {
"site": "news",
"source": "kqed",
"order": 8
},
"link": "/californiareport",
"subscribe": {
"apple": "https://podcasts.apple.com/us/podcast/kqeds-the-california-report/id79681292",
"amazon": "https://music.amazon.com/podcasts/26099305-72af-4542-9dde-ac1807fe36d5/kqed-s-the-california-report",
"npr": "https://www.npr.org/podcasts/432285393/the-california-report",
"stitcher": "https://www.stitcher.com/podcast/kqedfm-kqeds-the-california-report-podcast-8838",
"rss": "https://ww2.kqed.org/news/tag/tcram/feed/podcast"
}
},
"californiareportmagazine": {
"id": "californiareportmagazine",
"title": "The California Report Magazine",
"tagline": "Your state, your stories",
"info": "Every week, The California Report Magazine takes you on a road trip for the ears: to visit the places and meet the people who make California unique. The in-depth storytelling podcast from the California Report.",
"airtime": "FRI 4:30pm-5pm, 6:30pm-7pm, 11pm-11:30pm",
"imageSrc": "https://cdn.kqed.org/wp-content/uploads/2024/04/The-California-Report-Magazine-Podcast-Tile-703x703-1.jpg",
"imageAlt": "KQED The California Report Magazine",
"officialWebsiteLink": "/californiareportmagazine",
"meta": {
"site": "news",
"source": "kqed",
"order": 10
},
"link": "/californiareportmagazine",
"subscribe": {
"apple": "https://podcasts.apple.com/us/podcast/the-california-report-magazine/id1314750545",
"google": "https://podcasts.google.com/feed/aHR0cHM6Ly9mZWVkcy5tZWdhcGhvbmUuZm0vS1FJTkM3NjkwNjk1OTAz",
"npr": "https://www.npr.org/podcasts/564733126/the-california-report-magazine",
"stitcher": "https://www.stitcher.com/podcast/kqed/the-california-report-magazine",
"rss": "https://ww2.kqed.org/news/tag/tcrmag/feed/podcast"
}
},
"city-arts": {
"id": "city-arts",
"title": "City Arts & Lectures",
"info": "A one-hour radio program to hear celebrated writers, artists and thinkers address contemporary ideas and values, often discussing the creative process. Please note: tapes or transcripts are not available",
"imageSrc": "https://ww2.kqed.org/radio/wp-content/uploads/sites/50/2018/05/cityartsandlecture-300x300.jpg",
"officialWebsiteLink": "https://www.cityarts.net/",
"airtime": "SUN 1pm-2pm, TUE 10pm, WED 1am",
"meta": {
"site": "news",
"source": "City Arts & Lectures"
},
"link": "https://www.cityarts.net",
"subscribe": {
"tuneIn": "https://tunein.com/radio/City-Arts-and-Lectures-p692/",
"rss": "https://www.cityarts.net/feed/"
}
},
"closealltabs": {
"id": "closealltabs",
"title": "Close All Tabs",
"tagline": "Your irreverent guide to the trends redefining our world",
"info": "Close All Tabs breaks down how digital culture shapes our world through thoughtful insights and irreverent humor.",
"imageSrc": "https://cdn.kqed.org/wp-content/uploads/2025/02/CAT_2_Tile-scaled.jpg",
"imageAlt": "KQED Close All Tabs",
"officialWebsiteLink": "/podcasts/closealltabs",
"meta": {
"site": "news",
"source": "kqed",
"order": 1
},
"link": "/podcasts/closealltabs",
"subscribe": {
"apple": "https://podcasts.apple.com/us/podcast/close-all-tabs/id214663465",
"rss": "https://feeds.megaphone.fm/KQINC6993880386",
"amazon": "https://music.amazon.com/podcasts/92d9d4ac-67a3-4eed-b10a-fb45d45b1ef2/close-all-tabs",
"spotify": "https://open.spotify.com/show/6LAJFHnGK1pYXYzv6SIol6?si=deb0cae19813417c"
}
},
"code-switch-life-kit": {
"id": "code-switch-life-kit",
"title": "Code Switch / Life Kit",
"info": "\u003cem>Code Switch\u003c/em>, which listeners will hear in the first part of the hour, has fearless and much-needed conversations about race. Hosted by journalists of color, the show tackles the subject of race head-on, exploring how it impacts every part of society — from politics and pop culture to history, sports and more.\u003cbr />\u003cbr />\u003cem>Life Kit\u003c/em>, which will be in the second part of the hour, guides you through spaces and feelings no one prepares you for — from finances to mental health, from workplace microaggressions to imposter syndrome, from relationships to parenting. The show features experts with real world experience and shares their knowledge. Because everyone needs a little help being human.\u003cbr />\u003cbr />\u003ca href=\"https://www.npr.org/podcasts/510312/codeswitch\">\u003cem>Code Switch\u003c/em> offical site and podcast\u003c/a>\u003cbr />\u003ca href=\"https://www.npr.org/lifekit\">\u003cem>Life Kit\u003c/em> offical site and podcast\u003c/a>\u003cbr />",
"airtime": "SUN 9pm-10pm",
"imageSrc": "https://cdn.kqed.org/wp-content/uploads/2024/04/Code-Switch-Life-Kit-Podcast-Tile-360x360-1.jpg",
"meta": {
"site": "radio",
"source": "npr"
},
"link": "/radio/program/code-switch-life-kit",
"subscribe": {
"apple": "https://podcasts.apple.com/podcast/1112190608?mt=2&at=11l79Y&ct=nprdirectory",
"google": "https://podcasts.google.com/feed/aHR0cHM6Ly93d3cubnByLm9yZy9yc3MvcG9kY2FzdC5waHA_aWQ9NTEwMzEy",
"spotify": "https://open.spotify.com/show/3bExJ9JQpkwNhoHvaIIuyV",
"rss": "https://feeds.npr.org/510312/podcast.xml"
}
},
"commonwealth-club": {
"id": "commonwealth-club",
"title": "Commonwealth Club of California Podcast",
"info": "The Commonwealth Club of California is the nation's oldest and largest public affairs forum. As a non-partisan forum, The Club brings to the public airwaves diverse viewpoints on important topics. The Club's weekly radio broadcast - the oldest in the U.S., dating back to 1924 - is carried across the nation on public radio stations and is now podcasting. Our website archive features audio of our recent programs, as well as selected speeches from our long and distinguished history. This podcast feed is usually updated twice a week and is always un-edited.",
"airtime": "THU 10pm, FRI 1am",
"imageSrc": "https://cdn.kqed.org/wp-content/uploads/2024/04/Commonwealth-Club-Podcast-Tile-360x360-1.jpg",
"officialWebsiteLink": "https://www.commonwealthclub.org/podcasts",
"meta": {
"site": "news",
"source": "Commonwealth Club of California"
},
"link": "/radio/program/commonwealth-club",
"subscribe": {
"apple": "https://itunes.apple.com/us/podcast/commonwealth-club-of-california-podcast/id976334034?mt=2",
"google": "https://podcasts.google.com/feed/aHR0cDovL3d3dy5jb21tb253ZWFsdGhjbHViLm9yZy9hdWRpby9wb2RjYXN0L3dlZWtseS54bWw",
"tuneIn": "https://tunein.com/radio/Commonwealth-Club-of-California-p1060/"
}
},
"forum": {
"id": "forum",
"title": "Forum",
"tagline": "The conversation starts here",
"info": "KQED’s live call-in program discussing local, state, national and international issues, as well as in-depth interviews.",
"airtime": "MON-FRI 9am-11am, 10pm-11pm",
"imageSrc": "https://cdn.kqed.org/wp-content/uploads/2024/04/Forum-Podcast-Tile-703x703-1.jpg",
"imageAlt": "KQED Forum with Mina Kim and Alexis Madrigal",
"officialWebsiteLink": "/forum",
"meta": {
"site": "news",
"source": "kqed",
"order": 9
},
"link": "/forum",
"subscribe": {
"apple": "https://podcasts.apple.com/us/podcast/kqeds-forum/id73329719",
"google": "https://podcasts.google.com/feed/aHR0cHM6Ly9mZWVkcy5tZWdhcGhvbmUuZm0vS1FJTkM5NTU3MzgxNjMz",
"npr": "https://www.npr.org/podcasts/432307980/forum",
"stitcher": "https://www.stitcher.com/podcast/kqedfm-kqeds-forum-podcast",
"rss": "https://feeds.megaphone.fm/KQINC9557381633"
}
},
"freakonomics-radio": {
"id": "freakonomics-radio",
"title": "Freakonomics Radio",
"info": "Freakonomics Radio is a one-hour award-winning podcast and public-radio project hosted by Stephen Dubner, with co-author Steve Levitt as a regular guest. It is produced in partnership with WNYC.",
"imageSrc": "https://ww2.kqed.org/news/wp-content/uploads/sites/10/2018/05/freakonomicsRadio.png",
"officialWebsiteLink": "http://freakonomics.com/",
"airtime": "SUN 1am-2am, SAT 3pm-4pm",
"meta": {
"site": "radio",
"source": "WNYC"
},
"link": "/radio/program/freakonomics-radio",
"subscribe": {
"npr": "https://rpb3r.app.goo.gl/4s8b",
"apple": "https://itunes.apple.com/us/podcast/freakonomics-radio/id354668519",
"tuneIn": "https://tunein.com/podcasts/WNYC-Podcasts/Freakonomics-Radio-p272293/",
"rss": "https://feeds.feedburner.com/freakonomicsradio"
}
},
"fresh-air": {
"id": "fresh-air",
"title": "Fresh Air",
"info": "Hosted by Terry Gross, \u003cem>Fresh Air from WHYY\u003c/em> is the Peabody Award-winning weekday magazine of contemporary arts and issues. One of public radio's most popular programs, Fresh Air features intimate conversations with today's biggest luminaries.",
"airtime": "MON-FRI 7pm-8pm",
"imageSrc": "https://cdn.kqed.org/wp-content/uploads/2024/04/Fresh-Air-Podcast-Tile-360x360-1.jpg",
"officialWebsiteLink": "https://www.npr.org/programs/fresh-air/",
"meta": {
"site": "radio",
"source": "npr"
},
"link": "/radio/program/fresh-air",
"subscribe": {
"npr": "https://rpb3r.app.goo.gl/4s8b",
"apple": "https://itunes.apple.com/WebObjects/MZStore.woa/wa/viewPodcast?s=143441&mt=2&id=214089682&at=11l79Y&ct=nprdirectory",
"tuneIn": "https://tunein.com/radio/Fresh-Air-p17/",
"rss": "https://feeds.npr.org/381444908/podcast.xml"
}
},
"here-and-now": {
"id": "here-and-now",
"title": "Here & Now",
"info": "A live production of NPR and WBUR Boston, in collaboration with stations across the country, Here & Now reflects the fluid world of news as it's happening in the middle of the day, with timely, in-depth news, interviews and conversation. Hosted by Robin Young, Jeremy Hobson and Tonya Mosley.",
"airtime": "MON-THU 11am-12pm",
"imageSrc": "https://cdn.kqed.org/wp-content/uploads/2024/04/Here-And-Now-Podcast-Tile-360x360-1.jpg",
"officialWebsiteLink": "http://www.wbur.org/hereandnow",
"meta": {
"site": "news",
"source": "npr"
},
"link": "/radio/program/here-and-now",
"subsdcribe": {
"apple": "https://itunes.apple.com/WebObjects/MZStore.woa/wa/viewPodcast?mt=2&id=426698661",
"tuneIn": "https://tunein.com/radio/Here--Now-p211/",
"rss": "https://feeds.npr.org/510051/podcast.xml"
}
},
"hidden-brain": {
"id": "hidden-brain",
"title": "Hidden Brain",
"info": "Shankar Vedantam uses science and storytelling to reveal the unconscious patterns that drive human behavior, shape our choices and direct our relationships.",
"imageSrc": "https://ww2.kqed.org/radio/wp-content/uploads/sites/50/2018/05/hiddenbrain.jpg",
"officialWebsiteLink": "https://www.npr.org/series/423302056/hidden-brain",
"airtime": "SUN 7pm-8pm",
"meta": {
"site": "news",
"source": "NPR"
},
"link": "/radio/program/hidden-brain",
"subscribe": {
"apple": "https://itunes.apple.com/us/podcast/hidden-brain/id1028908750?mt=2",
"tuneIn": "https://tunein.com/podcasts/Science-Podcasts/Hidden-Brain-p787503/",
"rss": "https://feeds.npr.org/510308/podcast.xml"
}
},
"how-i-built-this": {
"id": "how-i-built-this",
"title": "How I Built This with Guy Raz",
"info": "Guy Raz dives into the stories behind some of the world's best known companies. How I Built This weaves a narrative journey about innovators, entrepreneurs and idealists—and the movements they built.",
"imageSrc": "https://ww2.kqed.org/news/wp-content/uploads/sites/10/2018/05/howIBuiltThis.png",
"officialWebsiteLink": "https://www.npr.org/podcasts/510313/how-i-built-this",
"airtime": "SUN 7:30pm-8pm",
"meta": {
"site": "news",
"source": "npr"
},
"link": "/radio/program/how-i-built-this",
"subscribe": {
"npr": "https://rpb3r.app.goo.gl/3zxy",
"apple": "https://itunes.apple.com/us/podcast/how-i-built-this-with-guy-raz/id1150510297?mt=2",
"tuneIn": "https://tunein.com/podcasts/Arts--Culture-Podcasts/How-I-Built-This-p910896/",
"rss": "https://feeds.npr.org/510313/podcast.xml"
}
},
"hyphenacion": {
"id": "hyphenacion",
"title": "Hyphenación",
"tagline": "Where conversation and cultura meet",
"info": "What kind of no sabo word is Hyphenación? For us, it’s about living within a hyphenation. Like being a third-gen Mexican-American from the Texas border now living that Bay Area Chicano life. Like Xorje! Each week we bring together a couple of hyphenated Latinos to talk all about personal life choices: family, careers, relationships, belonging … everything is on the table. ",
"imageSrc": "https://cdn.kqed.org/wp-content/uploads/2025/03/Hyphenacion_FinalAssets_PodcastTile.png",
"imageAlt": "KQED Hyphenación",
"officialWebsiteLink": "/podcasts/hyphenacion",
"meta": {
"site": "news",
"source": "kqed",
"order": 15
},
"link": "/podcasts/hyphenacion",
"subscribe": {
"apple": "https://podcasts.apple.com/us/podcast/hyphenaci%C3%B3n/id1191591838",
"spotify": "https://open.spotify.com/show/2p3Fifq96nw9BPcmFdIq0o?si=39209f7b25774f38",
"youtube": "https://www.youtube.com/c/kqedarts",
"amazon": "https://music.amazon.com/podcasts/6c3dd23c-93fb-4aab-97ba-1725fa6315f1/hyphenaci%C3%B3n",
"rss": "https://feeds.megaphone.fm/KQINC2275451163"
}
},
"jerrybrown": {
"id": "jerrybrown",
"title": "The Political Mind of Jerry Brown",
"tagline": "Lessons from a lifetime in politics",
"info": "The Political Mind of Jerry Brown brings listeners the wisdom of the former Governor, Mayor, and presidential candidate. Scott Shafer interviewed Brown for more than 40 hours, covering the former governor's life and half-century in the political game – and Brown has some lessons he'd like to share. ",
"imageSrc": "https://cdn.kqed.org/wp-content/uploads/2024/04/The-Political-Mind-of-Jerry-Brown-Podcast-Tile-703x703-1.jpg",
"imageAlt": "KQED The Political Mind of Jerry Brown",
"officialWebsiteLink": "/podcasts/jerrybrown",
"meta": {
"site": "news",
"source": "kqed",
"order": 18
},
"link": "/podcasts/jerrybrown",
"subscribe": {
"npr": "https://www.npr.org/podcasts/790253322/the-political-mind-of-jerry-brown",
"apple": "https://itunes.apple.com/us/podcast/id1492194549",
"rss": "https://ww2.kqed.org/news/series/jerrybrown/feed/podcast/",
"tuneIn": "http://tun.in/pjGcK",
"stitcher": "https://www.stitcher.com/podcast/kqed/the-political-mind-of-jerry-brown",
"spotify": "https://open.spotify.com/show/54C1dmuyFyKMFttY6X2j6r?si=K8SgRCoISNK6ZbjpXrX5-w",
"amazon": "https://music.amazon.com/podcasts/44420f75-3b0e-4301-ab3b-16da6b09e543/the-political-mind-of-jerry-brown"
}
},
"latino-usa": {
"id": "latino-usa",
"title": "Latino USA",
"airtime": "MON 1am-2am, SUN 6pm-7pm",
"info": "Latino USA, the radio journal of news and culture, is the only national, English-language radio program produced from a Latino perspective.",
"imageSrc": "https://ww2.kqed.org/radio/wp-content/uploads/sites/50/2018/04/latinoUsa.jpg",
"officialWebsiteLink": "http://latinousa.org/",
"meta": {
"site": "news",
"source": "npr"
},
"link": "/radio/program/latino-usa",
"subscribe": {
"npr": "https://rpb3r.app.goo.gl/xtTd",
"apple": "https://itunes.apple.com/WebObjects/MZStore.woa/wa/viewPodcast?s=143441&mt=2&id=79681317&at=11l79Y&ct=nprdirectory",
"tuneIn": "https://tunein.com/radio/Latino-USA-p621/",
"rss": "https://feeds.npr.org/510016/podcast.xml"
}
},
"marketplace": {
"id": "marketplace",
"title": "Marketplace",
"info": "Our flagship program, helmed by Kai Ryssdal, examines what the day in money delivered, through stories, conversations, newsworthy numbers and more. Updated Monday through Friday at about 3:30 p.m. PT.",
"airtime": "MON-FRI 4pm-4:30pm, MON-WED 6:30pm-7pm",
"imageSrc": "https://cdn.kqed.org/wp-content/uploads/2024/04/Marketplace-Podcast-Tile-360x360-1.jpg",
"officialWebsiteLink": "https://www.marketplace.org/",
"meta": {
"site": "news",
"source": "American Public Media"
},
"link": "/radio/program/marketplace",
"subscribe": {
"apple": "https://itunes.apple.com/WebObjects/MZStore.woa/wa/viewPodcast?s=143441&mt=2&id=201853034&at=11l79Y&ct=nprdirectory",
"tuneIn": "https://tunein.com/radio/APM-Marketplace-p88/",
"rss": "https://feeds.publicradio.org/public_feeds/marketplace-pm/rss/rss"
}
},
"masters-of-scale": {
"id": "masters-of-scale",
"title": "Masters of Scale",
"info": "Masters of Scale is an original podcast in which LinkedIn co-founder and Greylock Partner Reid Hoffman sets out to describe and prove theories that explain how great entrepreneurs take their companies from zero to a gazillion in ingenious fashion.",
"airtime": "Every other Wednesday June 12 through October 16 at 8pm (repeats Thursdays at 2am)",
"imageSrc": "https://cdn.kqed.org/wp-content/uploads/2024/04/Masters-of-Scale-Podcast-Tile-360x360-1.jpg",
"officialWebsiteLink": "https://mastersofscale.com/",
"meta": {
"site": "radio",
"source": "WaitWhat"
},
"link": "/radio/program/masters-of-scale",
"subscribe": {
"apple": "http://mastersofscale.app.link/",
"rss": "https://rss.art19.com/masters-of-scale"
}
},
"mindshift": {
"id": "mindshift",
"title": "MindShift",
"tagline": "A podcast about the future of learning and how we raise our kids",
"info": "The MindShift podcast explores the innovations in education that are shaping how kids learn. Hosts Ki Sung and Katrina Schwartz introduce listeners to educators, researchers, parents and students who are developing effective ways to improve how kids learn. We cover topics like how fed-up administrators are developing surprising tactics to deal with classroom disruptions; how listening to podcasts are helping kids develop reading skills; the consequences of overparenting; and why interdisciplinary learning can engage students on all ends of the traditional achievement spectrum. This podcast is part of the MindShift education site, a division of KQED News. KQED is an NPR/PBS member station based in San Francisco. You can also visit the MindShift website for episodes and supplemental blog posts or tweet us \u003ca href=\"https://twitter.com/MindShiftKQED\">@MindShiftKQED\u003c/a> or visit us at \u003ca href=\"/mindshift\">MindShift.KQED.org\u003c/a>",
"imageSrc": "https://cdn.kqed.org/wp-content/uploads/2024/04/Mindshift-Podcast-Tile-703x703-1.jpg",
"imageAlt": "KQED MindShift: How We Will Learn",
"officialWebsiteLink": "/mindshift/",
"meta": {
"site": "news",
"source": "kqed",
"order": 12
},
"link": "/podcasts/mindshift",
"subscribe": {
"apple": "https://podcasts.apple.com/us/podcast/mindshift-podcast/id1078765985",
"google": "https://podcasts.google.com/feed/aHR0cHM6Ly9mZWVkcy5tZWdhcGhvbmUuZm0vS1FJTkM1NzY0NjAwNDI5",
"npr": "https://www.npr.org/podcasts/464615685/mind-shift-podcast",
"stitcher": "https://www.stitcher.com/podcast/kqed/stories-teachers-share",
"spotify": "https://open.spotify.com/show/0MxSpNYZKNprFLCl7eEtyx"
}
},
"morning-edition": {
"id": "morning-edition",
"title": "Morning Edition",
"info": "\u003cem>Morning Edition\u003c/em> takes listeners around the country and the world with multi-faceted stories and commentaries every weekday. Hosts Steve Inskeep, David Greene and Rachel Martin bring you the latest breaking news and features to prepare you for the day.",
"airtime": "MON-FRI 3am-9am",
"imageSrc": "https://cdn.kqed.org/wp-content/uploads/2024/04/Morning-Edition-Podcast-Tile-360x360-1.jpg",
"officialWebsiteLink": "https://www.npr.org/programs/morning-edition/",
"meta": {
"site": "news",
"source": "npr"
},
"link": "/radio/program/morning-edition"
},
"onourwatch": {
"id": "onourwatch",
"title": "On Our Watch",
"tagline": "Deeply-reported investigative journalism",
"info": "For decades, the process for how police police themselves has been inconsistent – if not opaque. In some states, like California, these proceedings were completely hidden. After a new police transparency law unsealed scores of internal affairs files, our reporters set out to examine these cases and the shadow world of police discipline. On Our Watch brings listeners into the rooms where officers are questioned and witnesses are interrogated to find out who this system is really protecting. Is it the officers, or the public they've sworn to serve?",
"imageSrc": "https://cdn.kqed.org/wp-content/uploads/2024/04/On-Our-Watch-Podcast-Tile-703x703-1.jpg",
"imageAlt": "On Our Watch from NPR and KQED",
"officialWebsiteLink": "/podcasts/onourwatch",
"meta": {
"site": "news",
"source": "kqed",
"order": 11
},
"link": "/podcasts/onourwatch",
"subscribe": {
"apple": "https://podcasts.apple.com/podcast/id1567098962",
"google": "https://podcasts.google.com/feed/aHR0cHM6Ly9mZWVkcy5ucHIub3JnLzUxMDM2MC9wb2RjYXN0LnhtbD9zYz1nb29nbGVwb2RjYXN0cw",
"npr": "https://rpb3r.app.goo.gl/onourwatch",
"spotify": "https://open.spotify.com/show/0OLWoyizopu6tY1XiuX70x",
"tuneIn": "https://tunein.com/radio/On-Our-Watch-p1436229/",
"stitcher": "https://www.stitcher.com/show/on-our-watch",
"rss": "https://feeds.npr.org/510360/podcast.xml"
}
},
"on-the-media": {
"id": "on-the-media",
"title": "On The Media",
"info": "Our weekly podcast explores how the media 'sausage' is made, casts an incisive eye on fluctuations in the marketplace of ideas, and examines threats to the freedom of information and expression in America and abroad. For one hour a week, the show tries to lift the veil from the process of \"making media,\" especially news media, because it's through that lens that we see the world and the world sees us",
"airtime": "SUN 2pm-3pm, MON 12am-1am",
"imageSrc": "https://ww2.kqed.org/radio/wp-content/uploads/sites/50/2018/04/onTheMedia.png",
"officialWebsiteLink": "https://www.wnycstudios.org/shows/otm",
"meta": {
"site": "news",
"source": "wnyc"
},
"link": "/radio/program/on-the-media",
"subscribe": {
"apple": "https://itunes.apple.com/us/podcast/on-the-media/id73330715?mt=2",
"tuneIn": "https://tunein.com/radio/On-the-Media-p69/",
"rss": "http://feeds.wnyc.org/onthemedia"
}
},
"pbs-newshour": {
"id": "pbs-newshour",
"title": "PBS NewsHour",
"info": "Analysis, background reports and updates from the PBS NewsHour putting today's news in context.",
"airtime": "MON-FRI 3pm-4pm",
"imageSrc": "https://cdn.kqed.org/wp-content/uploads/2024/04/PBS-News-Hour-Podcast-Tile-360x360-1.jpg",
"officialWebsiteLink": "https://www.pbs.org/newshour/",
"meta": {
"site": "news",
"source": "pbs"
},
"link": "/radio/program/pbs-newshour",
"subscribe": {
"apple": "https://itunes.apple.com/us/podcast/pbs-newshour-full-show/id394432287?mt=2",
"tuneIn": "https://tunein.com/radio/PBS-NewsHour---Full-Show-p425698/",
"rss": "https://www.pbs.org/newshour/feeds/rss/podcasts/show"
}
},
"perspectives": {
"id": "perspectives",
"title": "Perspectives",
"tagline": "KQED's series of daily listener commentaries since 1991",
"info": "KQED's series of daily listener commentaries since 1991.",
"imageSrc": "https://cdn.kqed.org/wp-content/uploads/2025/01/Perspectives_Tile_Final.jpg",
"imageAlt": "KQED Perspectives",
"officialWebsiteLink": "/perspectives/",
"meta": {
"site": "radio",
"source": "kqed",
"order": 14
},
"link": "/perspectives",
"subscribe": {
"apple": "https://podcasts.apple.com/us/podcast/id73801135",
"npr": "https://www.npr.org/podcasts/432309616/perspectives",
"rss": "https://ww2.kqed.org/perspectives/category/perspectives/feed/",
"google": "https://podcasts.google.com/feed/aHR0cHM6Ly93dzIua3FlZC5vcmcvcGVyc3BlY3RpdmVzL2NhdGVnb3J5L3BlcnNwZWN0aXZlcy9mZWVkLw"
}
},
"planet-money": {
"id": "planet-money",
"title": "Planet Money",
"info": "The economy explained. Imagine you could call up a friend and say, Meet me at the bar and tell me what's going on with the economy. Now imagine that's actually a fun evening.",
"airtime": "SUN 3pm-4pm",
"imageSrc": "https://ww2.kqed.org/radio/wp-content/uploads/sites/50/2018/04/planetmoney.jpg",
"officialWebsiteLink": "https://www.npr.org/sections/money/",
"meta": {
"site": "news",
"source": "npr"
},
"link": "/radio/program/planet-money",
"subscribe": {
"npr": "https://rpb3r.app.goo.gl/M4f5",
"apple": "https://itunes.apple.com/us/podcast/planet-money/id290783428?mt=2",
"tuneIn": "https://tunein.com/podcasts/Business--Economics-Podcasts/Planet-Money-p164680/",
"rss": "https://feeds.npr.org/510289/podcast.xml"
}
},
"politicalbreakdown": {
"id": "politicalbreakdown",
"title": "Political Breakdown",
"tagline": "Politics from a personal perspective",
"info": "Political Breakdown is a new series that explores the political intersection of California and the nation. Each week hosts Scott Shafer and Marisa Lagos are joined with a new special guest to unpack politics -- with personality — and offer an insider’s glimpse at how politics happens.",
"airtime": "THU 6:30pm-7pm",
"imageSrc": "https://cdn.kqed.org/wp-content/uploads/2024/04/Political-Breakdown-2024-Podcast-Tile-703x703-1.jpg",
"imageAlt": "KQED Political Breakdown",
"officialWebsiteLink": "/podcasts/politicalbreakdown",
"meta": {
"site": "radio",
"source": "kqed",
"order": 5
},
"link": "/podcasts/politicalbreakdown",
"subscribe": {
"apple": "https://podcasts.apple.com/us/podcast/political-breakdown/id1327641087",
"amazon": "https://music.amazon.com/podcasts/e0c2d153-ad36-4c8d-901d-f1da6a724824/political-breakdown",
"npr": "https://www.npr.org/podcasts/572155894/political-breakdown",
"stitcher": "https://www.stitcher.com/podcast/kqed/political-breakdown",
"spotify": "https://open.spotify.com/show/07RVyIjIdk2WDuVehvBMoN",
"rss": "https://ww2.kqed.org/news/tag/political-breakdown/feed/podcast"
}
},
"possible": {
"id": "possible",
"title": "Possible",
"info": "Possible is hosted by entrepreneur Reid Hoffman and writer Aria Finger. Together in Possible, Hoffman and Finger lead enlightening discussions about building a brighter collective future. The show features interviews with visionary guests like Trevor Noah, Sam Altman and Janette Sadik-Khan. Possible paints an optimistic portrait of the world we can create through science, policy, business, art and our shared humanity. It asks: What if everything goes right for once? How can we get there? Each episode also includes a short fiction story generated by advanced AI GPT-4, serving as a thought-provoking springboard to speculate how humanity could leverage technology for good.",
"airtime": "SUN 2pm",
"imageSrc": "https://cdn.kqed.org/wp-content/uploads/2024/04/Possible-Podcast-Tile-360x360-1.jpg",
"officialWebsiteLink": "https://www.possible.fm/",
"meta": {
"site": "news",
"source": "Possible"
},
"link": "/radio/program/possible",
"subscribe": {
"apple": "https://podcasts.apple.com/us/podcast/possible/id1677184070",
"spotify": "https://open.spotify.com/show/730YpdUSNlMyPQwNnyjp4k"
}
},
"pri-the-world": {
"id": "pri-the-world",
"title": "PRI's The World: Latest Edition",
"info": "Each weekday, host Marco Werman and his team of producers bring you the world's most interesting stories in an hour of radio that reminds us just how small our planet really is.",
"airtime": "MON-FRI 2pm-3pm",
"imageSrc": "https://cdn.kqed.org/wp-content/uploads/2024/04/The-World-Podcast-Tile-360x360-1.jpg",
"officialWebsiteLink": "https://www.pri.org/programs/the-world",
"meta": {
"site": "news",
"source": "PRI"
},
"link": "/radio/program/pri-the-world",
"subscribe": {
"apple": "https://itunes.apple.com/us/podcast/pris-the-world-latest-edition/id278196007?mt=2",
"tuneIn": "https://tunein.com/podcasts/News--Politics-Podcasts/PRIs-The-World-p24/",
"rss": "http://feeds.feedburner.com/pri/theworld"
}
},
"radiolab": {
"id": "radiolab",
"title": "Radiolab",
"info": "A two-time Peabody Award-winner, Radiolab is an investigation told through sounds and stories, and centered around one big idea. In the Radiolab world, information sounds like music and science and culture collide. Hosted by Jad Abumrad and Robert Krulwich, the show is designed for listeners who demand skepticism, but appreciate wonder. WNYC Studios is the producer of other leading podcasts including Freakonomics Radio, Death, Sex & Money, On the Media and many more.",
"airtime": "SUN 12am-1am, SAT 2pm-3pm",
"imageSrc": "https://ww2.kqed.org/radio/wp-content/uploads/sites/50/2018/04/radiolab1400.png",
"officialWebsiteLink": "https://www.wnycstudios.org/shows/radiolab/",
"meta": {
"site": "science",
"source": "WNYC"
},
"link": "/radio/program/radiolab",
"subscribe": {
"apple": "https://itunes.apple.com/us/podcast/radiolab/id152249110?mt=2",
"tuneIn": "https://tunein.com/radio/RadioLab-p68032/",
"rss": "https://feeds.wnyc.org/radiolab"
}
},
"reveal": {
"id": "reveal",
"title": "Reveal",
"info": "Created by The Center for Investigative Reporting and PRX, Reveal is public radios first one-hour weekly radio show and podcast dedicated to investigative reporting. Credible, fact based and without a partisan agenda, Reveal combines the power and artistry of driveway moment storytelling with data-rich reporting on critically important issues. The result is stories that inform and inspire, arming our listeners with information to right injustices, hold the powerful accountable and improve lives.Reveal is hosted by Al Letson and showcases the award-winning work of CIR and newsrooms large and small across the nation. In a radio and podcast market crowded with choices, Reveal focuses on important and often surprising stories that illuminate the world for our listeners.",
"airtime": "SAT 4pm-5pm",
"imageSrc": "https://ww2.kqed.org/radio/wp-content/uploads/sites/50/2018/04/reveal300px.png",
"officialWebsiteLink": "https://www.revealnews.org/episodes/",
"meta": {
"site": "news",
"source": "npr"
},
"link": "/radio/program/reveal",
"subscribe": {
"apple": "https://itunes.apple.com/us/podcast/reveal/id886009669",
"tuneIn": "https://tunein.com/radio/Reveal-p679597/",
"rss": "http://feeds.revealradio.org/revealpodcast"
}
},
"rightnowish": {
"id": "rightnowish",
"title": "Rightnowish",
"tagline": "Art is where you find it",
"info": "Rightnowish digs into life in the Bay Area right now… ish. Journalist Pendarvis Harshaw takes us to galleries painted on the sides of liquor stores in West Oakland. We'll dance in warehouses in the Bayview, make smoothies with kids in South Berkeley, and listen to classical music in a 1984 Cutlass Supreme in Richmond. Every week, Pen talks to movers and shakers about how the Bay Area shapes what they create, and how they shape the place we call home.",
"imageSrc": "https://cdn.kqed.org/wp-content/uploads/2024/04/Rightnowish-Podcast-Tile-500x500-1.jpg",
"imageAlt": "KQED Rightnowish with Pendarvis Harshaw",
"officialWebsiteLink": "/podcasts/rightnowish",
"meta": {
"site": "arts",
"source": "kqed",
"order": 16
},
"link": "/podcasts/rightnowish",
"subscribe": {
"npr": "https://www.npr.org/podcasts/721590300/rightnowish",
"rss": "https://ww2.kqed.org/arts/programs/rightnowish/feed/podcast",
"apple": "https://podcasts.apple.com/us/podcast/rightnowish/id1482187648",
"stitcher": "https://www.stitcher.com/podcast/kqed/rightnowish",
"google": "https://podcasts.google.com/feed/aHR0cHM6Ly9mZWVkcy5tZWdhcGhvbmUuZm0vS1FJTkMxMjU5MTY3NDc4",
"spotify": "https://open.spotify.com/show/7kEJuafTzTVan7B78ttz1I"
}
},
"science-friday": {
"id": "science-friday",
"title": "Science Friday",
"info": "Science Friday is a weekly science talk show, broadcast live over public radio stations nationwide. Each week, the show focuses on science topics that are in the news and tries to bring an educated, balanced discussion to bear on the scientific issues at hand. Panels of expert guests join host Ira Flatow, a veteran science journalist, to discuss science and to take questions from listeners during the call-in portion of the program.",
"airtime": "FRI 11am-1pm",
"imageSrc": "https://cdn.kqed.org/wp-content/uploads/2024/04/Science-Friday-Podcast-Tile-360x360-1.jpg",
"officialWebsiteLink": "https://www.wnycstudios.org/shows/science-friday",
"meta": {
"site": "news",
"source": "npr"
},
"link": "/radio/program/science-friday",
"subscribe": {
"apple": "https://itunes.apple.com/WebObjects/MZStore.woa/wa/viewPodcast?s=143441&mt=2&id=73329284&at=11l79Y&ct=nprdirectory",
"tuneIn": "https://tunein.com/radio/Science-Friday-p394/",
"rss": "http://feeds.wnyc.org/science-friday"
}
},
"snap-judgment": {
"id": "snap-judgment",
"title": "Snap Judgment",
"tagline": "Real stories with killer beats",
"info": "The Snap Judgment radio show and podcast mixes real stories with killer beats to produce cinematic, dramatic radio. Snap's musical brand of storytelling dares listeners to see the world through the eyes of another. This is storytelling... with a BEAT!! Snap first aired on public radio stations nationwide in July 2010. Today, Snap Judgment airs on over 450 public radio stations and is brought to the airwaves by KQED & PRX.",
"airtime": "SAT 1pm-2pm, 9pm-10pm",
"imageSrc": "https://cdn.kqed.org/wp-content/uploads/2024/05/Snap-Judgment-Podcast-Tile-703x703-1.jpg",
"imageAlt": "KQED Snap Judgment",
"officialWebsiteLink": "https://snapjudgment.org",
"meta": {
"site": "arts",
"source": "kqed",
"order": 4
},
"link": "https://snapjudgment.org",
"subscribe": {
"apple": "https://podcasts.apple.com/us/podcast/snap-judgment/id283657561",
"npr": "https://www.npr.org/podcasts/449018144/snap-judgment",
"stitcher": "https://www.pandora.com/podcast/snap-judgment/PC:241?source=stitcher-sunset",
"spotify": "https://open.spotify.com/show/3Cct7ZWmxHNAtLgBTqjC5v",
"rss": "https://snap.feed.snapjudgment.org/"
}
},
"soldout": {
"id": "soldout",
"title": "SOLD OUT: Rethinking Housing in America",
"tagline": "A new future for housing",
"info": "Sold Out: Rethinking Housing in America",
"imageSrc": "https://cdn.kqed.org/wp-content/uploads/2024/04/Sold-Out-Podcast-Tile-703x703-1.jpg",
"imageAlt": "KQED Sold Out: Rethinking Housing in America",
"officialWebsiteLink": "/podcasts/soldout",
"meta": {
"site": "news",
"source": "kqed",
"order": 13
},
"link": "/podcasts/soldout",
"subscribe": {
"npr": "https://www.npr.org/podcasts/911586047/s-o-l-d-o-u-t-a-new-future-for-housing",
"apple": "https://podcasts.apple.com/us/podcast/introducing-sold-out-rethinking-housing-in-america/id1531354937",
"rss": "https://feeds.megaphone.fm/soldout",
"spotify": "https://open.spotify.com/show/38dTBSk2ISFoPiyYNoKn1X",
"stitcher": "https://www.stitcher.com/podcast/kqed/sold-out-rethinking-housing-in-america",
"tunein": "https://tunein.com/radio/SOLD-OUT-Rethinking-Housing-in-America-p1365871/"
}
},
"spooked": {
"id": "spooked",
"title": "Spooked",
"tagline": "True-life supernatural stories",
"info": "",
"imageSrc": "https://cdn.kqed.org/wp-content/uploads/2024/10/Spooked-Podcast-Tile-703x703-1.jpg",
"imageAlt": "KQED Spooked",
"officialWebsiteLink": "https://spookedpodcast.org/",
"meta": {
"site": "news",
"source": "kqed",
"order": 7
},
"link": "https://spookedpodcast.org/",
"subscribe": {
"apple": "https://podcasts.apple.com/us/podcast/spooked/id1279361017",
"npr": "https://www.npr.org/podcasts/549547848/snap-judgment-presents-spooked",
"spotify": "https://open.spotify.com/show/76571Rfl3m7PLJQZKQIGCT",
"rss": "https://feeds.simplecast.com/TBotaapn"
}
},
"tech-nation": {
"id": "tech-nation",
"title": "Tech Nation Radio Podcast",
"info": "Tech Nation is a weekly public radio program, hosted by Dr. Moira Gunn. Founded in 1993, it has grown from a simple interview show to a multi-faceted production, featuring conversations with noted technology and science leaders, and a weekly science and technology-related commentary.",
"airtime": "FRI 10pm",
"imageSrc": "https://cdn.kqed.org/wp-content/uploads/2024/04/Tech-Nation-Radio-Podcast-Tile-360x360-1.jpg",
"officialWebsiteLink": "http://technation.podomatic.com/",
"meta": {
"site": "science",
"source": "Tech Nation Media"
},
"link": "/radio/program/tech-nation",
"subscribe": {
"rss": "https://technation.podomatic.com/rss2.xml"
}
},
"ted-radio-hour": {
"id": "ted-radio-hour",
"title": "TED Radio Hour",
"info": "The TED Radio Hour is a journey through fascinating ideas, astonishing inventions, fresh approaches to old problems, and new ways to think and create.",
"airtime": "SUN 3pm-4pm, SAT 10pm-11pm",
"imageSrc": "https://ww2.kqed.org/radio/wp-content/uploads/sites/50/2018/04/tedRadioHour.jpg",
"officialWebsiteLink": "https://www.npr.org/programs/ted-radio-hour/?showDate=2018-06-22",
"meta": {
"site": "news",
"source": "npr"
},
"link": "/radio/program/ted-radio-hour",
"subscribe": {
"npr": "https://rpb3r.app.goo.gl/8vsS",
"apple": "https://itunes.apple.com/WebObjects/MZStore.woa/wa/viewPodcast?s=143441&mt=2&id=523121474&at=11l79Y&ct=nprdirectory",
"tuneIn": "https://tunein.com/radio/TED-Radio-Hour-p418021/",
"rss": "https://feeds.npr.org/510298/podcast.xml"
}
},
"thebay": {
"id": "thebay",
"title": "The Bay",
"tagline": "Local news to keep you rooted",
"info": "Host Devin Katayama walks you through the biggest story of the day with reporters and newsmakers.",
"imageSrc": "https://cdn.kqed.org/wp-content/uploads/2024/04/The-Bay-Podcast-Tile-703x703-1.jpg",
"imageAlt": "KQED The Bay",
"officialWebsiteLink": "/podcasts/thebay",
"meta": {
"site": "radio",
"source": "kqed",
"order": 2
},
"link": "/podcasts/thebay",
"subscribe": {
"apple": "https://podcasts.apple.com/us/podcast/the-bay/id1350043452",
"amazon": "https://music.amazon.com/podcasts/d800ea4c-7a2c-42f2-b861-edaf78a5db0b/the-bay",
"npr": "https://www.npr.org/podcasts/586725995/the-bay",
"stitcher": "https://www.stitcher.com/podcast/kqed/the-bay",
"spotify": "https://open.spotify.com/show/4BIKBKIujizLHlIlBNaAqQ",
"rss": "https://feeds.megaphone.fm/KQINC8259786327"
}
},
"thelatest": {
"id": "thelatest",
"title": "The Latest",
"tagline": "Trusted local news in real time",
"info": "",
"imageSrc": "https://cdn.kqed.org/wp-content/uploads/2025/05/The-Latest-2025-Podcast-Tile-703x703-1.jpg",
"imageAlt": "KQED The Latest",
"officialWebsiteLink": "/thelatest",
"meta": {
"site": "news",
"source": "kqed",
"order": 6
},
"link": "/thelatest",
"subscribe": {
"apple": "https://podcasts.apple.com/us/podcast/the-latest-from-kqed/id1197721799",
"npr": "https://www.npr.org/podcasts/1257949365/the-latest-from-k-q-e-d",
"spotify": "https://open.spotify.com/show/5KIIXMgM9GTi5AepwOYvIZ?si=bd3053fec7244dba",
"rss": "https://feeds.megaphone.fm/KQINC9137121918"
}
},
"theleap": {
"id": "theleap",
"title": "The Leap",
"tagline": "What if you closed your eyes, and jumped?",
"info": "Stories about people making dramatic, risky changes, told by award-winning public radio reporter Judy Campbell.",
"imageSrc": "https://cdn.kqed.org/wp-content/uploads/2024/04/The-Leap-Podcast-Tile-703x703-1.jpg",
"imageAlt": "KQED The Leap",
"officialWebsiteLink": "/podcasts/theleap",
"meta": {
"site": "news",
"source": "kqed",
"order": 17
},
"link": "/podcasts/theleap",
"subscribe": {
"apple": "https://podcasts.apple.com/us/podcast/the-leap/id1046668171",
"npr": "https://www.npr.org/podcasts/447248267/the-leap",
"stitcher": "https://www.stitcher.com/podcast/kqed/the-leap",
"spotify": "https://open.spotify.com/show/3sSlVHHzU0ytLwuGs1SD1U",
"rss": "https://ww2.kqed.org/news/programs/the-leap/feed/podcast"
}
},
"the-moth-radio-hour": {
"id": "the-moth-radio-hour",
"title": "The Moth Radio Hour",
"info": "Since its launch in 1997, The Moth has presented thousands of true stories, told live and without notes, to standing-room-only crowds worldwide. Moth storytellers stand alone, under a spotlight, with only a microphone and a roomful of strangers. The storyteller and the audience embark on a high-wire act of shared experience which is both terrifying and exhilarating. Since 2008, The Moth podcast has featured many of our favorite stories told live on Moth stages around the country. For information on all of our programs and live events, visit themoth.org.",
"airtime": "SAT 8pm-9pm and SUN 11am-12pm",
"imageSrc": "https://ww2.kqed.org/radio/wp-content/uploads/sites/50/2018/04/theMoth.jpg",
"officialWebsiteLink": "https://themoth.org/",
"meta": {
"site": "arts",
"source": "prx"
},
"link": "/radio/program/the-moth-radio-hour",
"subscribe": {
"apple": "https://itunes.apple.com/us/podcast/the-moth-podcast/id275699983?mt=2",
"tuneIn": "https://tunein.com/radio/The-Moth-p273888/",
"rss": "http://feeds.themoth.org/themothpodcast"
}
},
"the-new-yorker-radio-hour": {
"id": "the-new-yorker-radio-hour",
"title": "The New Yorker Radio Hour",
"info": "The New Yorker Radio Hour is a weekly program presented by the magazine's editor, David Remnick, and produced by WNYC Studios and The New Yorker. Each episode features a diverse mix of interviews, profiles, storytelling, and an occasional burst of humor inspired by the magazine, and shaped by its writers, artists, and editors. This isn't a radio version of a magazine, but something all its own, reflecting the rich possibilities of audio storytelling and conversation. Theme music for the show was composed and performed by Merrill Garbus of tUnE-YArDs.",
"airtime": "SAT 10am-11am",
"imageSrc": "https://cdn.kqed.org/wp-content/uploads/2024/04/The-New-Yorker-Podcast-Tile-360x360-1.jpg",
"officialWebsiteLink": "https://www.wnycstudios.org/shows/tnyradiohour",
"meta": {
"site": "arts",
"source": "WNYC"
},
"link": "/radio/program/the-new-yorker-radio-hour",
"subscribe": {
"apple": "https://itunes.apple.com/us/podcast/id1050430296",
"tuneIn": "https://tunein.com/podcasts/WNYC-Podcasts/New-Yorker-Radio-Hour-p803804/",
"rss": "https://feeds.feedburner.com/newyorkerradiohour"
}
},
"the-sam-sanders-show": {
"id": "the-sam-sanders-show",
"title": "The Sam Sanders Show",
"info": "One of public radio's most dynamic voices, Sam Sanders helped launch The NPR Politics Podcast and hosted NPR's hit show It's Been A Minute. Now, the award-winning host returns with something brand new, The Sam Sanders Show. Every week, Sam Sanders and friends dig into the culture that shapes our lives: what's driving the biggest trends, how artists really think, and even the memes you can't stop scrolling past. Sam is beloved for his way of unpacking the world and bringing you up close to fresh currents and engaging conversations. The Sam Sanders Show is smart, funny and always a good time.",
"airtime": "FRI 12-1pm AND SAT 11am-12pm",
"imageSrc": "https://cdn.kqed.org/wp-content/uploads/2025/11/The-Sam-Sanders-Show-Podcast-Tile-400x400-1.jpg",
"officialWebsiteLink": "https://www.kcrw.com/shows/the-sam-sanders-show/latest",
"meta": {
"site": "arts",
"source": "KCRW"
},
"link": "https://www.kcrw.com/shows/the-sam-sanders-show/latest",
"subscribe": {
"rss": "https://feed.cdnstream1.com/zjb/feed/download/ac/28/59/ac28594c-e1d0-4231-8728-61865cdc80e8.xml"
}
},
"the-splendid-table": {
"id": "the-splendid-table",
"title": "The Splendid Table",
"info": "\u003cem>The Splendid Table\u003c/em> hosts our nation's conversations about cooking, sustainability and food culture.",
"imageSrc": "https://cdn.kqed.org/wp-content/uploads/2024/04/The-Splendid-Table-Podcast-Tile-360x360-1.jpg",
"officialWebsiteLink": "https://www.splendidtable.org/",
"airtime": "SUN 10-11 pm",
"meta": {
"site": "radio",
"source": "npr"
},
"link": "/radio/program/the-splendid-table"
},
"this-american-life": {
"id": "this-american-life",
"title": "This American Life",
"info": "This American Life is a weekly public radio show, heard by 2.2 million people on more than 500 stations. Another 2.5 million people download the weekly podcast. It is hosted by Ira Glass, produced in collaboration with Chicago Public Media, delivered to stations by PRX The Public Radio Exchange, and has won all of the major broadcasting awards.",
"airtime": "SAT 12pm-1pm, 7pm-8pm",
"imageSrc": "https://ww2.kqed.org/radio/wp-content/uploads/sites/50/2018/04/thisAmericanLife.png",
"officialWebsiteLink": "https://www.thisamericanlife.org/",
"meta": {
"site": "news",
"source": "wbez"
},
"link": "/radio/program/this-american-life",
"subscribe": {
"apple": "https://itunes.apple.com/WebObjects/MZStore.woa/wa/viewPodcast?s=143441&mt=2&id=201671138&at=11l79Y&ct=nprdirectory",
"rss": "https://www.thisamericanlife.org/podcast/rss.xml"
}
},
"tinydeskradio": {
"id": "tinydeskradio",
"title": "Tiny Desk Radio",
"info": "We're bringing the best of Tiny Desk to the airwaves, only on public radio.",
"airtime": "SUN 8pm and SAT 9pm",
"imageSrc": "https://cdn.kqed.org/wp-content/uploads/2025/04/300x300-For-Member-Station-Logo-Tiny-Desk-Radio-@2x.png",
"officialWebsiteLink": "https://www.npr.org/series/g-s1-52030/tiny-desk-radio",
"meta": {
"site": "news",
"source": "npr"
},
"link": "/radio/program/tinydeskradio",
"subscribe": {
"rss": "https://feeds.npr.org/g-s1-52030/rss.xml"
}
},
"wait-wait-dont-tell-me": {
"id": "wait-wait-dont-tell-me",
"title": "Wait Wait... Don't Tell Me!",
"info": "Peter Sagal and Bill Kurtis host the weekly NPR News quiz show alongside some of the best and brightest news and entertainment personalities.",
"airtime": "SUN 10am-11am, SAT 11am-12pm, SAT 6pm-7pm",
"imageSrc": "https://cdn.kqed.org/wp-content/uploads/2024/04/Wait-Wait-Podcast-Tile-300x300-1.jpg",
"officialWebsiteLink": "https://www.npr.org/programs/wait-wait-dont-tell-me/",
"meta": {
"site": "news",
"source": "npr"
},
"link": "/radio/program/wait-wait-dont-tell-me",
"subscribe": {
"npr": "https://rpb3r.app.goo.gl/Xogv",
"apple": "https://itunes.apple.com/WebObjects/MZStore.woa/wa/viewPodcast?s=143441&mt=2&id=121493804&at=11l79Y&ct=nprdirectory",
"tuneIn": "https://tunein.com/radio/Wait-Wait-Dont-Tell-Me-p46/",
"rss": "https://feeds.npr.org/344098539/podcast.xml"
}
},
"weekend-edition-saturday": {
"id": "weekend-edition-saturday",
"title": "Weekend Edition Saturday",
"info": "Weekend Edition Saturday wraps up the week's news and offers a mix of analysis and features on a wide range of topics, including arts, sports, entertainment, and human interest stories. The two-hour program is hosted by NPR's Peabody Award-winning Scott Simon.",
"airtime": "SAT 5am-10am",
"imageSrc": "https://cdn.kqed.org/wp-content/uploads/2024/04/Weekend-Edition-Podcast-Tile-360x360-1.jpg",
"officialWebsiteLink": "https://www.npr.org/programs/weekend-edition-saturday/",
"meta": {
"site": "news",
"source": "npr"
},
"link": "/radio/program/weekend-edition-saturday"
},
"weekend-edition-sunday": {
"id": "weekend-edition-sunday",
"title": "Weekend Edition Sunday",
"info": "Weekend Edition Sunday features interviews with newsmakers, artists, scientists, politicians, musicians, writers, theologians and historians. The program has covered news events from Nelson Mandela's 1990 release from a South African prison to the capture of Saddam Hussein.",
"airtime": "SUN 5am-10am",
"imageSrc": "https://cdn.kqed.org/wp-content/uploads/2024/04/Weekend-Edition-Podcast-Tile-360x360-1.jpg",
"officialWebsiteLink": "https://www.npr.org/programs/weekend-edition-sunday/",
"meta": {
"site": "news",
"source": "npr"
},
"link": "/radio/program/weekend-edition-sunday"
}
},
"racesReducer": {},
"racesGenElectionReducer": {},
"racesGenElection2026Reducer": {},
"radioSchedulesReducer": {},
"listsReducer": {
"posts/bayareabites,arts,news?category=food&queryId=13c78a7bb6e": {
"isFetching": false,
"latestQuery": {
"from": 0,
"size": 9
},
"vitalsOnly": false,
"totalRequested": 9,
"isLoading": false,
"isLoadingMore": true,
"total": {
"value": 1026,
"relation": "eq"
},
"items": [
"arts_13990975",
"arts_13990903",
"news_12087737",
"arts_13990715",
"arts_13990663",
"news_12086417",
"arts_13990274",
"arts_13990218",
"arts_13990167"
],
"complete": true
},
"posts/?tag=beyond-the-menu&queryId=7d419e5806": {
"isFetching": false,
"latestQuery": {
"from": 0,
"size": 9
},
"vitalsOnly": false,
"totalRequested": 9,
"isLoading": false,
"isLoadingMore": true,
"total": {
"value": 9,
"relation": "eq"
},
"items": [
"food_1337824",
"food_1337646",
"food_1337639",
"food_1337630",
"food_1337599",
"food_1337589",
"food_1337576",
"food_1337534",
"food_1337517"
],
"complete": true
},
"posts/checkplease?&queryId=158a28fc4bb": {
"isFetching": false,
"latestQuery": {
"from": 0,
"size": 9
},
"vitalsOnly": false,
"totalRequested": 9,
"isLoading": false,
"isLoadingMore": true,
"total": {
"value": 1218,
"relation": "eq"
},
"items": [
"checkplease_23756",
"checkplease_23755",
"checkplease_23754",
"checkplease_23753",
"checkplease_23771",
"checkplease_23742",
"checkplease_23729",
"checkplease_23721",
"checkplease_23706"
],
"complete": true
},
"posts/food,bayareabites?tag=recipe,recipes&queryId=1279f4cb899": {
"isFetching": false,
"latestQuery": {
"from": 0,
"size": 9
},
"vitalsOnly": false,
"totalRequested": 9,
"isLoading": false,
"isLoadingMore": true,
"total": {
"value": 259,
"relation": "eq"
},
"items": [
"food_1337955",
"food_1337943",
"food_1337762",
"food_1337517",
"food_1337484",
"food_1337457",
"food_1337402",
"food_1337385",
"food_1337370"
],
"complete": true
},
"posts/news?tag=golden-state-plate&queryId=914c85b379": {
"isFetching": false,
"latestQuery": {
"from": 0,
"size": 9
},
"vitalsOnly": false,
"totalRequested": 9,
"isLoading": false,
"isLoadingMore": true,
"total": {
"value": 15,
"relation": "eq"
},
"items": [
"news_11819923",
"news_11816328",
"news_11796231",
"news_11774993",
"news_11760849",
"news_11758996",
"news_11755932",
"news_11742748",
"news_11734682"
],
"complete": true
}
},
"recallGuideReducer": {
"intros": {},
"policy": {},
"candidates": {}
},
"savedArticleReducer": {
"articles": [],
"status": {}
},
"newslettersReducer": {
"isFetching": false,
"fetchFailed": false,
"hasFetched": false,
"newsletters": {},
"isSubscribing": false,
"isUnsubscribing": false,
"subscribedNewsletters": {}
},
"termsReducer": {
"about": {
"name": "About",
"type": "terms",
"id": "about",
"slug": "about",
"link": "/about",
"taxonomy": "site"
},
"arts": {
"name": "Arts & Culture",
"grouping": [
"arts",
"pop",
"trulyca"
],
"description": "KQED Arts provides daily in-depth coverage of the Bay Area's music, art, film, performing arts, literature and arts news, as well as cultural commentary and criticism.",
"type": "terms",
"id": "arts",
"slug": "arts",
"link": "/arts",
"taxonomy": "site"
},
"artschool": {
"name": "Art School",
"parent": "arts",
"type": "terms",
"id": "artschool",
"slug": "artschool",
"link": "/artschool",
"taxonomy": "site"
},
"bayareabites": {
"name": "KQED food",
"grouping": [
"food",
"bayareabites",
"checkplease"
],
"parent": "food",
"type": "terms",
"id": "bayareabites",
"slug": "bayareabites",
"link": "/food",
"taxonomy": "site"
},
"bayareahiphop": {
"name": "Bay Area Hiphop",
"type": "terms",
"id": "bayareahiphop",
"slug": "bayareahiphop",
"link": "/bayareahiphop",
"taxonomy": "site"
},
"campaign21": {
"name": "Campaign 21",
"type": "terms",
"id": "campaign21",
"slug": "campaign21",
"link": "/campaign21",
"taxonomy": "site"
},
"careers": {
"name": "Careers",
"type": "terms",
"id": "careers",
"slug": "careers",
"link": "/careers",
"taxonomy": "site"
},
"checkplease": {
"name": "KQED food",
"grouping": [
"food",
"bayareabites",
"checkplease"
],
"parent": "food",
"type": "terms",
"id": "checkplease",
"slug": "checkplease",
"link": "/food",
"taxonomy": "site"
},
"education": {
"name": "Education",
"grouping": [
"education"
],
"type": "terms",
"id": "education",
"slug": "education",
"link": "/education",
"taxonomy": "site"
},
"elections": {
"name": "Elections",
"type": "terms",
"id": "elections",
"slug": "elections",
"link": "/elections",
"taxonomy": "site"
},
"events": {
"name": "Events",
"type": "terms",
"id": "events",
"slug": "events",
"link": "/events",
"taxonomy": "site"
},
"event": {
"name": "Event",
"alias": "events",
"type": "terms",
"id": "event",
"slug": "event",
"link": "/event",
"taxonomy": "site"
},
"filmschoolshorts": {
"name": "Film School Shorts",
"type": "terms",
"id": "filmschoolshorts",
"slug": "filmschoolshorts",
"link": "/filmschoolshorts",
"taxonomy": "site"
},
"food": {
"name": "KQED food",
"grouping": [
"food",
"bayareabites",
"checkplease"
],
"type": "terms",
"id": "food",
"slug": "food",
"link": "/food",
"taxonomy": "site"
},
"forum": {
"name": "Forum",
"relatedContentQuery": "posts/forum?",
"parent": "news",
"type": "terms",
"id": "forum",
"slug": "forum",
"link": "/forum",
"taxonomy": "site"
},
"futureofyou": {
"name": "Future of You",
"grouping": [
"science",
"futureofyou"
],
"parent": "science",
"type": "terms",
"id": "futureofyou",
"slug": "futureofyou",
"link": "/futureofyou",
"taxonomy": "site"
},
"jpepinheart": {
"name": "KQED food",
"relatedContentQuery": "posts/food,bayareabites,checkplease",
"parent": "food",
"type": "terms",
"id": "jpepinheart",
"slug": "jpepinheart",
"link": "/food",
"taxonomy": "site"
},
"liveblog": {
"name": "Live Blog",
"type": "terms",
"id": "liveblog",
"slug": "liveblog",
"link": "/liveblog",
"taxonomy": "site"
},
"livetv": {
"name": "Live TV",
"parent": "tv",
"type": "terms",
"id": "livetv",
"slug": "livetv",
"link": "/livetv",
"taxonomy": "site"
},
"lowdown": {
"name": "The Lowdown",
"relatedContentQuery": "posts/lowdown?",
"parent": "news",
"type": "terms",
"id": "lowdown",
"slug": "lowdown",
"link": "/lowdown",
"taxonomy": "site"
},
"mindshift": {
"name": "Mindshift",
"parent": "news",
"description": "MindShift explores the future of education by highlighting the innovative – and sometimes counterintuitive – ways educators and parents are helping all children succeed.",
"type": "terms",
"id": "mindshift",
"slug": "mindshift",
"link": "/mindshift",
"taxonomy": "site"
},
"news": {
"name": "News",
"grouping": [
"news",
"forum"
],
"type": "terms",
"id": "news",
"slug": "news",
"link": "/news",
"taxonomy": "site"
},
"newsletters": {
"name": "newsletters",
"type": "terms",
"id": "newsletters",
"slug": "newsletters",
"link": "/newsletters",
"taxonomy": "site"
},
"perspectives": {
"name": "Perspectives",
"parent": "radio",
"type": "terms",
"id": "perspectives",
"slug": "perspectives",
"link": "/perspectives",
"taxonomy": "site"
},
"podcasts": {
"name": "Podcasts",
"type": "terms",
"id": "podcasts",
"slug": "podcasts",
"link": "/podcasts",
"taxonomy": "site"
},
"pop": {
"name": "Pop",
"parent": "arts",
"type": "terms",
"id": "pop",
"slug": "pop",
"link": "/pop",
"taxonomy": "site"
},
"pressroom": {
"name": "Pressroom",
"type": "terms",
"id": "pressroom",
"slug": "pressroom",
"link": "/pressroom",
"taxonomy": "site"
},
"quest": {
"name": "Quest",
"parent": "science",
"type": "terms",
"id": "quest",
"slug": "quest",
"link": "/quest",
"taxonomy": "site"
},
"radio": {
"name": "Radio",
"grouping": [
"forum",
"perspectives"
],
"description": "Listen to KQED Public Radio – home of Forum and The California Report – on 88.5 FM in San Francisco, 89.3 FM in Sacramento, 88.3 FM in Santa Rosa and 88.1 FM in Martinez.",
"type": "terms",
"id": "radio",
"slug": "radio",
"link": "/radio",
"taxonomy": "site"
},
"root": {
"name": "KQED",
"image": "https://ww2.kqed.org/app/uploads/2020/02/KQED-OG-Image@1x.png",
"imageWidth": 1200,
"imageHeight": 630,
"headData": {
"title": "KQED | News, Radio, Podcasts, TV | Public Media for Northern California",
"description": "KQED provides public radio, television, and independent reporting on issues that matter to the Bay Area. We’re the NPR and PBS member station for Northern California."
},
"type": "terms",
"id": "root",
"slug": "root",
"link": "/root",
"taxonomy": "site"
},
"science": {
"name": "Science",
"grouping": [
"science",
"futureofyou"
],
"description": "KQED Science brings you award-winning science and environment coverage from the Bay Area and beyond.",
"type": "terms",
"id": "science",
"slug": "science",
"link": "/science",
"taxonomy": "site"
},
"stateofhealth": {
"name": "State of Health",
"parent": "science",
"type": "terms",
"id": "stateofhealth",
"slug": "stateofhealth",
"link": "/stateofhealth",
"taxonomy": "site"
},
"support": {
"name": "Support",
"type": "terms",
"id": "support",
"slug": "support",
"link": "/support",
"taxonomy": "site"
},
"thedolist": {
"name": "The Do List",
"parent": "arts",
"type": "terms",
"id": "thedolist",
"slug": "thedolist",
"link": "/thedolist",
"taxonomy": "site"
},
"trulyca": {
"name": "Truly CA",
"grouping": [
"arts",
"pop",
"trulyca"
],
"parent": "arts",
"type": "terms",
"id": "trulyca",
"slug": "trulyca",
"link": "/trulyca",
"taxonomy": "site"
},
"tv": {
"name": "TV",
"type": "terms",
"id": "tv",
"slug": "tv",
"link": "/tv",
"taxonomy": "site"
},
"voterguide": {
"name": "Voter Guide",
"parent": "elections",
"alias": "elections",
"type": "terms",
"id": "voterguide",
"slug": "voterguide",
"link": "/voterguide",
"taxonomy": "site"
},
"guiaelectoral": {
"name": "Guia Electoral",
"parent": "elections",
"alias": "elections",
"type": "terms",
"id": "guiaelectoral",
"slug": "guiaelectoral",
"link": "/guiaelectoral",
"taxonomy": "site"
},
"source_arts_13990975": {
"type": "terms",
"id": "source_arts_13990975",
"meta": {
"override": true
},
"name": "Food",
"link": "https://www.kqed.org/food",
"isLoading": false
},
"source_arts_13990903": {
"type": "terms",
"id": "source_arts_13990903",
"meta": {
"override": true
},
"name": "Food",
"link": "https://www.kqed.org/food",
"isLoading": false
},
"source_arts_13990715": {
"type": "terms",
"id": "source_arts_13990715",
"meta": {
"override": true
},
"name": "The Midnight Diners",
"link": "https://www.kqed.org/arts/tag/the-midnight-diners",
"isLoading": false
},
"source_arts_13990663": {
"type": "terms",
"id": "source_arts_13990663",
"meta": {
"override": true
},
"name": "Food",
"link": "https://www.kqed.org/food",
"isLoading": false
},
"source_arts_13990274": {
"type": "terms",
"id": "source_arts_13990274",
"meta": {
"override": true
},
"name": "The Midnight Diners",
"link": "https://www.kqed.org/arts/tag/the-midnight-diners",
"isLoading": false
},
"source_arts_13990218": {
"type": "terms",
"id": "source_arts_13990218",
"meta": {
"override": true
},
"name": "Food",
"link": "https://www.kqed.org/arts/13990218/indian-mango-party-san-francisco-mission",
"isLoading": false
},
"source_arts_13990167": {
"type": "terms",
"id": "source_arts_13990167",
"meta": {
"override": true
},
"name": "Food",
"link": "https://www.kqed.org/food",
"isLoading": false
},
"arts_140": {
"type": "terms",
"id": "arts_140",
"meta": {
"index": "terms_1716263798",
"site": "arts",
"id": "140",
"found": true
},
"relationships": {},
"name": "The Do List",
"slug": "the-do-list",
"taxonomy": "program",
"description": null,
"featImg": "https://cdn.kqed.org/wp-content/uploads/sites/2/2015/11/The-Do-LIst-logo-2014-horizontal-015.png",
"headData": {
"title": "The Do List Archives | KQED Arts",
"description": null,
"ogTitle": null,
"ogDescription": null,
"ogImgId": null,
"twTitle": null,
"twDescription": null,
"twImgId": null
},
"ttid": 141,
"isLoading": false,
"link": "/arts/program/the-do-list"
},
"arts_1": {
"type": "terms",
"id": "arts_1",
"meta": {
"index": "terms_1716263798",
"site": "arts",
"id": "1",
"found": true
},
"relationships": {},
"featImg": null,
"name": "Arts",
"description": null,
"taxonomy": "category",
"headData": {
"twImgId": null,
"twTitle": null,
"ogTitle": null,
"ogImgId": null,
"twDescription": null,
"description": null,
"title": "Arts Archives | KQED Arts",
"ogDescription": null
},
"ttid": 1,
"slug": "arts",
"isLoading": false,
"link": "/arts/category/arts"
},
"arts_12276": {
"type": "terms",
"id": "arts_12276",
"meta": {
"index": "terms_1716263798",
"site": "arts",
"id": "12276",
"found": true
},
"relationships": {},
"featImg": null,
"name": "Food",
"description": null,
"taxonomy": "category",
"headData": {
"twImgId": null,
"twTitle": null,
"ogTitle": null,
"ogImgId": null,
"twDescription": null,
"description": "Explore the Bay Area culinary scene through KQED's food stories, recipes, dining experiences, and stories from the diverse tastemakers that define the Bay's cuisines.",
"title": "Bay Area Food Archives, Articles, News, and Reviews | KQED",
"ogDescription": null
},
"ttid": 12288,
"slug": "food",
"isLoading": false,
"link": "/arts/category/food"
},
"arts_16106": {
"type": "terms",
"id": "arts_16106",
"meta": {
"index": "terms_1716263798",
"site": "arts",
"id": "16106",
"found": true
},
"relationships": {},
"featImg": null,
"name": "cookbook",
"description": null,
"taxonomy": "tag",
"headData": {
"twImgId": null,
"twTitle": null,
"ogTitle": null,
"ogImgId": null,
"twDescription": null,
"description": null,
"title": "cookbook Archives | KQED Arts",
"ogDescription": null
},
"ttid": 16118,
"slug": "cookbook",
"isLoading": false,
"link": "/arts/tag/cookbook"
},
"arts_10278": {
"type": "terms",
"id": "arts_10278",
"meta": {
"index": "terms_1716263798",
"site": "arts",
"id": "10278",
"found": true
},
"relationships": {},
"featImg": null,
"name": "featured-arts",
"description": null,
"taxonomy": "tag",
"headData": {
"twImgId": null,
"twTitle": null,
"ogTitle": null,
"ogImgId": null,
"twDescription": null,
"description": null,
"title": "featured-arts Archives | KQED Arts",
"ogDescription": null
},
"ttid": 10290,
"slug": "featured-arts",
"isLoading": false,
"link": "/arts/tag/featured-arts"
},
"arts_1297": {
"type": "terms",
"id": "arts_1297",
"meta": {
"index": "terms_1716263798",
"site": "arts",
"id": "1297",
"found": true
},
"relationships": {},
"featImg": null,
"name": "food",
"description": null,
"taxonomy": "tag",
"headData": {
"twImgId": null,
"twTitle": null,
"ogTitle": null,
"ogImgId": null,
"twDescription": null,
"description": null,
"title": "food Archives | KQED Arts",
"ogDescription": null
},
"ttid": 1309,
"slug": "food",
"isLoading": false,
"link": "/arts/tag/food"
},
"arts_1855": {
"type": "terms",
"id": "arts_1855",
"meta": {
"index": "terms_1716263798",
"site": "arts",
"id": "1855",
"found": true
},
"relationships": {},
"featImg": null,
"name": "napa",
"description": null,
"taxonomy": "tag",
"headData": {
"twImgId": null,
"twTitle": null,
"ogTitle": null,
"ogImgId": null,
"twDescription": null,
"description": null,
"title": "napa Archives | KQED Arts",
"ogDescription": null
},
"ttid": 1867,
"slug": "napa",
"isLoading": false,
"link": "/arts/tag/napa"
},
"arts_14089": {
"type": "terms",
"id": "arts_14089",
"meta": {
"index": "terms_1716263798",
"site": "arts",
"id": "14089",
"found": true
},
"relationships": {},
"featImg": null,
"name": "pop-up",
"description": null,
"taxonomy": "tag",
"headData": {
"twImgId": null,
"twTitle": null,
"ogTitle": null,
"ogImgId": null,
"twDescription": null,
"description": null,
"title": "pop-up Archives | KQED Arts",
"ogDescription": null
},
"ttid": 14101,
"slug": "pop-up",
"isLoading": false,
"link": "/arts/tag/pop-up"
},
"arts_16761": {
"type": "terms",
"id": "arts_16761",
"meta": {
"index": "terms_1716263798",
"site": "arts",
"id": "16761",
"found": true
},
"relationships": {},
"featImg": null,
"name": "Ukraine",
"description": null,
"taxonomy": "tag",
"headData": {
"twImgId": null,
"twTitle": null,
"ogTitle": null,
"ogImgId": null,
"twDescription": null,
"description": null,
"title": "Ukraine Archives | KQED Arts",
"ogDescription": null
},
"ttid": 16773,
"slug": "ukraine",
"isLoading": false,
"link": "/arts/tag/ukraine"
},
"arts_2845": {
"type": "terms",
"id": "arts_2845",
"meta": {
"index": "terms_1716263798",
"site": "arts",
"id": "2845",
"found": true
},
"relationships": {},
"featImg": null,
"name": "wine country",
"description": null,
"taxonomy": "tag",
"headData": {
"twImgId": null,
"twTitle": null,
"ogTitle": null,
"ogImgId": null,
"twDescription": null,
"description": null,
"title": "wine country Archives | KQED Arts",
"ogDescription": null
},
"ttid": 2857,
"slug": "wine-country",
"isLoading": false,
"link": "/arts/tag/wine-country"
},
"arts_21866": {
"type": "terms",
"id": "arts_21866",
"meta": {
"index": "terms_1716263798",
"site": "arts",
"id": "21866",
"found": true
},
"relationships": {},
"featImg": null,
"name": "Arts and Culture",
"description": null,
"taxonomy": "interest",
"headData": {
"twImgId": null,
"twTitle": null,
"ogTitle": null,
"ogImgId": null,
"twDescription": null,
"description": null,
"title": "Arts and Culture Archives | KQED Arts",
"ogDescription": null
},
"ttid": 21878,
"slug": "arts-and-culture",
"isLoading": false,
"link": "/arts/interest/arts-and-culture"
},
"arts_21865": {
"type": "terms",
"id": "arts_21865",
"meta": {
"index": "terms_1716263798",
"site": "arts",
"id": "21865",
"found": true
},
"relationships": {},
"featImg": null,
"name": "Food and Drink",
"description": null,
"taxonomy": "interest",
"headData": {
"twImgId": null,
"twTitle": null,
"ogTitle": null,
"ogImgId": null,
"twDescription": null,
"description": null,
"title": "Food and Drink Archives | KQED Arts",
"ogDescription": null
},
"ttid": 21877,
"slug": "food-and-drink",
"isLoading": false,
"link": "/arts/interest/food-and-drink"
},
"arts_21873": {
"type": "terms",
"id": "arts_21873",
"meta": {
"index": "terms_1716263798",
"site": "arts",
"id": "21873",
"found": true
},
"relationships": {},
"featImg": null,
"name": "North Bay",
"description": null,
"taxonomy": "interest",
"headData": {
"twImgId": null,
"twTitle": null,
"ogTitle": null,
"ogImgId": null,
"twDescription": null,
"description": null,
"title": "North Bay Archives | KQED Arts",
"ogDescription": null
},
"ttid": 21885,
"slug": "north-bay",
"isLoading": false,
"link": "/arts/interest/north-bay"
},
"arts_20950": {
"type": "terms",
"id": "arts_20950",
"meta": {
"index": "terms_1716263798",
"site": "arts",
"id": "20950",
"found": true
},
"relationships": {},
"featImg": null,
"name": "coffee shops",
"description": null,
"taxonomy": "tag",
"headData": {
"twImgId": null,
"twTitle": null,
"ogTitle": null,
"ogImgId": null,
"twDescription": null,
"description": null,
"title": "coffee shops Archives | KQED Arts",
"ogDescription": null
},
"ttid": 20962,
"slug": "coffee-shops",
"isLoading": false,
"link": "/arts/tag/coffee-shops"
},
"arts_21744": {
"type": "terms",
"id": "arts_21744",
"meta": {
"index": "terms_1716263798",
"site": "arts",
"id": "21744",
"found": true
},
"relationships": {},
"featImg": null,
"name": "Library",
"description": null,
"taxonomy": "tag",
"headData": {
"twImgId": null,
"twTitle": null,
"ogTitle": null,
"ogImgId": null,
"twDescription": null,
"description": null,
"title": "Library Archives | KQED Arts",
"ogDescription": null
},
"ttid": 21756,
"slug": "library",
"isLoading": false,
"link": "/arts/tag/library"
},
"arts_1635": {
"type": "terms",
"id": "arts_1635",
"meta": {
"index": "terms_1716263798",
"site": "arts",
"id": "1635",
"found": true
},
"relationships": {},
"featImg": null,
"name": "San Leandro",
"description": null,
"taxonomy": "tag",
"headData": {
"twImgId": null,
"twTitle": null,
"ogTitle": null,
"ogImgId": null,
"twDescription": null,
"description": null,
"title": "San Leandro Archives | KQED Arts",
"ogDescription": null
},
"ttid": 1647,
"slug": "san-leandro",
"isLoading": false,
"link": "/arts/tag/san-leandro"
},
"arts_21871": {
"type": "terms",
"id": "arts_21871",
"meta": {
"index": "terms_1716263798",
"site": "arts",
"id": "21871",
"found": true
},
"relationships": {},
"featImg": null,
"name": "East Bay",
"description": null,
"taxonomy": "interest",
"headData": {
"twImgId": null,
"twTitle": null,
"ogTitle": null,
"ogImgId": null,
"twDescription": null,
"description": null,
"title": "East Bay Archives | KQED Arts",
"ogDescription": null
},
"ttid": 21883,
"slug": "east-bay",
"isLoading": false,
"link": "/arts/interest/east-bay"
},
"news_1758": {
"type": "terms",
"id": "news_1758",
"meta": {
"index": "terms_1716263798",
"site": "news",
"id": "1758",
"found": true
},
"relationships": {},
"featImg": null,
"name": "Economy",
"description": null,
"taxonomy": "category",
"headData": {
"twImgId": null,
"twTitle": null,
"ogTitle": null,
"ogImgId": null,
"twDescription": null,
"description": "Full coverage of the economy",
"title": "Economy Archives | KQED News",
"ogDescription": null
},
"ttid": 2648,
"slug": "economy",
"isLoading": false,
"link": "/news/category/economy"
},
"news_24114": {
"type": "terms",
"id": "news_24114",
"meta": {
"index": "terms_1716263798",
"site": "news",
"id": "24114",
"found": true
},
"relationships": {},
"featImg": null,
"name": "Food",
"description": null,
"taxonomy": "category",
"headData": {
"twImgId": null,
"twTitle": null,
"ogTitle": null,
"ogImgId": null,
"twDescription": null,
"description": null,
"title": "Food Archives | KQED News",
"ogDescription": null
},
"ttid": 24131,
"slug": "food",
"isLoading": false,
"link": "/news/category/food"
},
"news_8": {
"type": "terms",
"id": "news_8",
"meta": {
"index": "terms_1716263798",
"site": "news",
"id": "8",
"found": true
},
"relationships": {},
"featImg": null,
"name": "News",
"description": null,
"taxonomy": "category",
"headData": {
"twImgId": null,
"twTitle": null,
"ogTitle": null,
"ogImgId": null,
"twDescription": null,
"description": null,
"title": "News Archives | KQED News",
"ogDescription": null
},
"ttid": 8,
"slug": "news",
"isLoading": false,
"link": "/news/category/news"
},
"news_26598": {
"type": "terms",
"id": "news_26598",
"meta": {
"index": "terms_1716263798",
"site": "news",
"id": "26598",
"found": true
},
"relationships": {},
"name": "affordability",
"slug": "affordability",
"taxonomy": "tag",
"description": null,
"featImg": null,
"headData": {
"title": "affordability | KQED News",
"description": null,
"ogTitle": null,
"ogDescription": null,
"ogImgId": null,
"twTitle": null,
"twDescription": null,
"twImgId": null,
"metaRobotsNoIndex": "noindex"
},
"ttid": 26615,
"isLoading": false,
"link": "/news/tag/affordability"
},
"news_35283": {
"type": "terms",
"id": "news_35283",
"meta": {
"index": "terms_1716263798",
"site": "news",
"id": "35283",
"found": true
},
"relationships": {},
"name": "affordable",
"slug": "affordable",
"taxonomy": "tag",
"description": null,
"featImg": null,
"headData": {
"title": "affordable | KQED News",
"description": null,
"ogTitle": null,
"ogDescription": null,
"ogImgId": null,
"twTitle": null,
"twDescription": null,
"twImgId": null
},
"ttid": 35300,
"isLoading": false,
"link": "/news/tag/affordable"
},
"news_35666": {
"type": "terms",
"id": "news_35666",
"meta": {
"index": "terms_1716263798",
"site": "news",
"id": "35666",
"found": true
},
"relationships": {},
"name": "bilal mahmood",
"slug": "bilal-mahmood",
"taxonomy": "tag",
"description": null,
"featImg": null,
"headData": {
"title": "bilal mahmood | KQED News",
"description": null,
"ogTitle": null,
"ogDescription": null,
"ogImgId": null,
"twTitle": null,
"twDescription": null,
"twImgId": null
},
"ttid": 35683,
"isLoading": false,
"link": "/news/tag/bilal-mahmood"
},
"news_333": {
"type": "terms",
"id": "news_333",
"meta": {
"index": "terms_1716263798",
"site": "news",
"id": "333",
"found": true
},
"relationships": {},
"featImg": null,
"name": "Food",
"description": null,
"taxonomy": "tag",
"headData": {
"twImgId": null,
"twTitle": null,
"ogTitle": null,
"ogImgId": null,
"twDescription": null,
"description": null,
"title": "Food Archives | KQED News",
"ogDescription": null
},
"ttid": 341,
"slug": "food",
"isLoading": false,
"link": "/news/tag/food"
},
"news_18543": {
"type": "terms",
"id": "news_18543",
"meta": {
"index": "terms_1716263798",
"site": "news",
"id": "18543",
"found": true
},
"relationships": {},
"featImg": null,
"name": "Health",
"description": null,
"taxonomy": "tag",
"headData": {
"twImgId": null,
"twTitle": null,
"ogTitle": null,
"ogImgId": null,
"twDescription": null,
"description": null,
"title": "Health Archives | KQED News",
"ogDescription": null
},
"ttid": 466,
"slug": "health",
"isLoading": false,
"link": "/news/tag/health"
},
"news_20147": {
"type": "terms",
"id": "news_20147",
"meta": {
"index": "terms_1716263798",
"site": "news",
"id": "20147",
"found": true
},
"relationships": {},
"featImg": null,
"name": "voters",
"description": null,
"taxonomy": "tag",
"headData": {
"twImgId": null,
"twTitle": null,
"ogTitle": null,
"ogImgId": null,
"twDescription": null,
"description": null,
"title": "voters Archives | KQED News",
"ogDescription": null
},
"ttid": 20164,
"slug": "voters",
"isLoading": false,
"link": "/news/tag/voters"
},
"news_33747": {
"type": "terms",
"id": "news_33747",
"meta": {
"index": "terms_1716263798",
"site": "news",
"id": "33747",
"found": true
},
"relationships": {},
"featImg": null,
"name": "Health",
"description": null,
"taxonomy": "interest",
"headData": {
"twImgId": null,
"twTitle": null,
"ogTitle": null,
"ogImgId": null,
"twDescription": null,
"description": null,
"title": "Health Archives | KQED News",
"ogDescription": null
},
"ttid": 33764,
"slug": "health",
"isLoading": false,
"link": "/news/interest/health"
},
"news_33734": {
"type": "terms",
"id": "news_33734",
"meta": {
"index": "terms_1716263798",
"site": "news",
"id": "33734",
"found": true
},
"relationships": {},
"featImg": null,
"name": "Local Politics",
"description": null,
"taxonomy": "interest",
"headData": {
"twImgId": null,
"twTitle": null,
"ogTitle": null,
"ogImgId": null,
"twDescription": null,
"description": null,
"title": "Local Politics Archives | KQED News",
"ogDescription": null
},
"ttid": 33751,
"slug": "local-politics",
"isLoading": false,
"link": "/news/interest/local-politics"
},
"arts_22316": {
"type": "terms",
"id": "arts_22316",
"meta": {
"index": "terms_1716263798",
"site": "arts",
"id": "22316",
"found": true
},
"relationships": {},
"name": "The Midnight Diners",
"slug": "midnight-diners",
"taxonomy": "series",
"description": null,
"featImg": null,
"headData": {
"title": "The Midnight Diners | KQED Arts",
"description": null,
"ogTitle": null,
"ogDescription": null,
"ogImgId": null,
"twTitle": null,
"twDescription": null,
"twImgId": null
},
"ttid": 22328,
"isLoading": false,
"link": "/arts/series/midnight-diners"
},
"arts_22078": {
"type": "terms",
"id": "arts_22078",
"meta": {
"index": "terms_1716263798",
"site": "arts",
"id": "22078",
"found": true
},
"relationships": {},
"featImg": null,
"name": "ice cream",
"description": null,
"taxonomy": "tag",
"headData": {
"twImgId": null,
"twTitle": null,
"ogTitle": null,
"ogImgId": null,
"twDescription": null,
"description": null,
"title": "ice cream Archives | KQED Arts",
"ogDescription": null
},
"ttid": 22090,
"slug": "ice-cream",
"isLoading": false,
"link": "/arts/tag/ice-cream"
},
"arts_8805": {
"type": "terms",
"id": "arts_8805",
"meta": {
"index": "terms_1716263798",
"site": "arts",
"id": "8805",
"found": true
},
"relationships": {},
"featImg": null,
"name": "late night",
"description": null,
"taxonomy": "tag",
"headData": {
"twImgId": null,
"twTitle": null,
"ogTitle": null,
"ogImgId": null,
"twDescription": null,
"description": null,
"title": "late night Archives | KQED Arts",
"ogDescription": null
},
"ttid": 8817,
"slug": "late-night",
"isLoading": false,
"link": "/arts/tag/late-night"
},
"arts_2475": {
"type": "terms",
"id": "arts_2475",
"meta": {
"index": "terms_1716263798",
"site": "arts",
"id": "2475",
"found": true
},
"relationships": {},
"featImg": null,
"name": "South Bay",
"description": null,
"taxonomy": "tag",
"headData": {
"twImgId": null,
"twTitle": null,
"ogTitle": null,
"ogImgId": null,
"twDescription": null,
"description": null,
"title": "South Bay Archives | KQED Arts",
"ogDescription": null
},
"ttid": 2487,
"slug": "south-bay",
"isLoading": false,
"link": "/arts/tag/south-bay"
},
"arts_14954": {
"type": "terms",
"id": "arts_14954",
"meta": {
"index": "terms_1716263798",
"site": "arts",
"id": "14954",
"found": true
},
"relationships": {},
"featImg": null,
"name": "Sunnyvale",
"description": null,
"taxonomy": "tag",
"headData": {
"twImgId": null,
"twTitle": null,
"ogTitle": null,
"ogImgId": null,
"twDescription": null,
"description": null,
"title": "Sunnyvale Archives | KQED Arts",
"ogDescription": null
},
"ttid": 14966,
"slug": "sunnyvale",
"isLoading": false,
"link": "/arts/tag/sunnyvale"
},
"arts_21928": {
"type": "terms",
"id": "arts_21928",
"meta": {
"index": "terms_1716263798",
"site": "arts",
"id": "21928",
"found": true
},
"relationships": {},
"featImg": null,
"name": "The Midnight Diners",
"description": "The Midnight Diners is a regular collaboration between KQED food editor Luke Tsai and artist Thien Pham. Follow them each week as they explore the hot pot restaurants, taco carts and 24-hour casino buffets that make up the Bay Area’s after-hours dining scene.",
"taxonomy": "tag",
"headData": {
"twImgId": null,
"twTitle": null,
"ogTitle": null,
"ogImgId": null,
"twDescription": null,
"description": "The Midnight Diners is a regular collaboration between KQED food editor Luke Tsai and artist Thien Pham. Follow them each week as they explore the hot pot restaurants, taco carts and 24-hour casino buffets that make up the Bay Area’s after-hours dining scene.",
"title": "The Midnight Diners Archives | KQED Arts",
"ogDescription": null
},
"ttid": 21940,
"slug": "the-midnight-diners",
"isLoading": false,
"link": "/arts/tag/the-midnight-diners"
},
"arts_21861": {
"type": "terms",
"id": "arts_21861",
"meta": {
"index": "terms_1716263798",
"site": "arts",
"id": "21861",
"found": true
},
"relationships": {},
"featImg": null,
"name": "South Bay",
"description": null,
"taxonomy": "interest",
"headData": {
"twImgId": null,
"twTitle": null,
"ogTitle": null,
"ogImgId": null,
"twDescription": null,
"description": null,
"title": "South Bay Archives | KQED Arts",
"ogDescription": null
},
"ttid": 21873,
"slug": "south-bay",
"isLoading": false,
"link": "/arts/interest/south-bay"
},
"arts_2438": {
"type": "terms",
"id": "arts_2438",
"meta": {
"index": "terms_1716263798",
"site": "arts",
"id": "2438",
"found": true
},
"relationships": {},
"featImg": null,
"name": "African diaspora",
"description": null,
"taxonomy": "tag",
"headData": {
"twImgId": null,
"twTitle": null,
"ogTitle": null,
"ogImgId": null,
"twDescription": null,
"description": null,
"title": "African diaspora Archives | KQED Arts",
"ogDescription": null
},
"ttid": 2450,
"slug": "african-diaspora",
"isLoading": false,
"link": "/arts/tag/african-diaspora"
},
"arts_1084": {
"type": "terms",
"id": "arts_1084",
"meta": {
"index": "terms_1716263798",
"site": "arts",
"id": "1084",
"found": true
},
"relationships": {},
"featImg": null,
"name": "San Jose",
"description": null,
"taxonomy": "tag",
"headData": {
"twImgId": null,
"twTitle": null,
"ogTitle": null,
"ogImgId": null,
"twDescription": null,
"description": null,
"title": "San Jose Archives | KQED Arts",
"ogDescription": null
},
"ttid": 1101,
"slug": "san-jose",
"isLoading": false,
"link": "/arts/tag/san-jose"
},
"arts_21774": {
"type": "terms",
"id": "arts_21774",
"meta": {
"index": "terms_1716263798",
"site": "arts",
"id": "21774",
"found": true
},
"relationships": {},
"featImg": null,
"name": "west african",
"description": null,
"taxonomy": "tag",
"headData": {
"twImgId": null,
"twTitle": null,
"ogTitle": null,
"ogImgId": null,
"twDescription": null,
"description": null,
"title": "west african Archives | KQED Arts",
"ogDescription": null
},
"ttid": 21786,
"slug": "west-african",
"isLoading": false,
"link": "/arts/tag/west-african"
},
"news_18540": {
"type": "terms",
"id": "news_18540",
"meta": {
"index": "terms_1716263798",
"site": "news",
"id": "18540",
"found": true
},
"relationships": {},
"featImg": null,
"name": "Education",
"description": null,
"taxonomy": "category",
"headData": {
"twImgId": null,
"twTitle": null,
"ogTitle": null,
"ogImgId": null,
"twDescription": null,
"description": null,
"title": "Education Archives | KQED News",
"ogDescription": null
},
"ttid": 2595,
"slug": "education",
"isLoading": false,
"link": "/news/category/education"
},
"news_34168": {
"type": "terms",
"id": "news_34168",
"meta": {
"index": "terms_1716263798",
"site": "news",
"id": "34168",
"found": true
},
"relationships": {},
"name": "Guides and Explainers",
"slug": "guides-and-explainers",
"taxonomy": "category",
"description": null,
"featImg": null,
"headData": {
"title": "Guides and Explainers Archives | KQED News",
"description": null,
"ogTitle": null,
"ogDescription": null,
"ogImgId": null,
"twTitle": null,
"twDescription": null,
"twImgId": null
},
"ttid": 34185,
"isLoading": false,
"link": "/news/category/guides-and-explainers"
},
"news_28250": {
"type": "terms",
"id": "news_28250",
"meta": {
"index": "terms_1716263798",
"site": "news",
"id": "28250",
"found": true
},
"relationships": {},
"featImg": null,
"name": "Local",
"description": null,
"taxonomy": "category",
"headData": {
"twImgId": null,
"twTitle": null,
"ogTitle": null,
"ogImgId": null,
"twDescription": null,
"description": null,
"title": "Local Archives | KQED News",
"ogDescription": null
},
"ttid": 28267,
"slug": "local",
"isLoading": false,
"link": "/news/category/local"
},
"news_32707": {
"type": "terms",
"id": "news_32707",
"meta": {
"index": "terms_1716263798",
"site": "news",
"id": "32707",
"found": true
},
"relationships": {},
"featImg": null,
"name": "audience-news",
"description": null,
"taxonomy": "tag",
"headData": {
"twImgId": null,
"twTitle": null,
"ogTitle": null,
"ogImgId": null,
"twDescription": null,
"description": null,
"title": "audience-news Archives | KQED News",
"ogDescription": null
},
"ttid": 32724,
"slug": "audience-news",
"isLoading": false,
"link": "/news/tag/audience-news"
},
"news_1386": {
"type": "terms",
"id": "news_1386",
"meta": {
"index": "terms_1716263798",
"site": "news",
"id": "1386",
"found": true
},
"relationships": {},
"featImg": null,
"name": "Bay Area",
"description": null,
"taxonomy": "tag",
"headData": {
"twImgId": null,
"twTitle": null,
"ogTitle": null,
"ogImgId": null,
"twDescription": null,
"description": null,
"title": "Bay Area Archives | KQED News",
"ogDescription": null
},
"ttid": 1398,
"slug": "bay-area",
"isLoading": false,
"link": "/news/tag/bay-area"
},
"news_22578": {
"type": "terms",
"id": "news_22578",
"meta": {
"index": "terms_1716263798",
"site": "news",
"id": "22578",
"found": true
},
"relationships": {},
"featImg": null,
"name": "CalFresh",
"description": null,
"taxonomy": "tag",
"headData": {
"twImgId": null,
"twTitle": null,
"ogTitle": null,
"ogImgId": null,
"twDescription": null,
"description": null,
"title": "CalFresh Archives | KQED News",
"ogDescription": null
},
"ttid": 22595,
"slug": "calfresh",
"isLoading": false,
"link": "/news/tag/calfresh"
},
"news_29886": {
"type": "terms",
"id": "news_29886",
"meta": {
"index": "terms_1716263798",
"site": "news",
"id": "29886",
"found": true
},
"relationships": {},
"featImg": null,
"name": "children's health",
"description": null,
"taxonomy": "tag",
"headData": {
"twImgId": null,
"twTitle": null,
"ogTitle": null,
"ogImgId": null,
"twDescription": null,
"description": null,
"title": "children's health Archives | KQED News",
"ogDescription": null
},
"ttid": 29903,
"slug": "childrens-health",
"isLoading": false,
"link": "/news/tag/childrens-health"
},
"news_20013": {
"type": "terms",
"id": "news_20013",
"meta": {
"index": "terms_1716263798",
"site": "news",
"id": "20013",
"found": true
},
"relationships": {},
"featImg": null,
"name": "education",
"description": null,
"taxonomy": "tag",
"headData": {
"twImgId": null,
"twTitle": null,
"ogTitle": null,
"ogImgId": null,
"twDescription": null,
"description": null,
"title": "education Archives | KQED News",
"ogDescription": null
},
"ttid": 20030,
"slug": "education",
"isLoading": false,
"link": "/news/tag/education"
},
"news_35888": {
"type": "terms",
"id": "news_35888",
"meta": {
"index": "terms_1716263798",
"site": "news",
"id": "35888",
"found": true
},
"relationships": {},
"name": "featured-audience-news",
"slug": "featured-audience-news",
"taxonomy": "tag",
"description": null,
"featImg": null,
"headData": {
"title": "featured-audience-news | KQED News",
"description": null,
"ogTitle": null,
"ogDescription": null,
"ogImgId": null,
"twTitle": null,
"twDescription": null,
"twImgId": null
},
"ttid": 35905,
"isLoading": false,
"link": "/news/tag/featured-audience-news"
},
"news_27626": {
"type": "terms",
"id": "news_27626",
"meta": {
"index": "terms_1716263798",
"site": "news",
"id": "27626",
"found": true
},
"relationships": {},
"featImg": null,
"name": "featured-news",
"description": null,
"taxonomy": "tag",
"headData": {
"twImgId": null,
"twTitle": null,
"ogTitle": null,
"ogImgId": null,
"twDescription": null,
"description": null,
"title": "featured-news Archives | KQED News",
"ogDescription": null
},
"ttid": 27643,
"slug": "featured-news",
"isLoading": false,
"link": "/news/tag/featured-news"
},
"news_20337": {
"type": "terms",
"id": "news_20337",
"meta": {
"index": "terms_1716263798",
"site": "news",
"id": "20337",
"found": true
},
"relationships": {},
"featImg": null,
"name": "food banks",
"description": null,
"taxonomy": "tag",
"headData": {
"twImgId": null,
"twTitle": null,
"ogTitle": null,
"ogImgId": null,
"twDescription": null,
"description": null,
"title": "food banks Archives | KQED News",
"ogDescription": null
},
"ttid": 20354,
"slug": "food-banks",
"isLoading": false,
"link": "/news/tag/food-banks"
},
"news_21602": {
"type": "terms",
"id": "news_21602",
"meta": {
"index": "terms_1716263798",
"site": "news",
"id": "21602",
"found": true
},
"relationships": {},
"featImg": null,
"name": "food insecurity",
"description": null,
"taxonomy": "tag",
"headData": {
"twImgId": null,
"twTitle": null,
"ogTitle": null,
"ogImgId": null,
"twDescription": null,
"description": null,
"title": "food insecurity Archives | KQED News",
"ogDescription": null
},
"ttid": 21619,
"slug": "food-insecurity",
"isLoading": false,
"link": "/news/tag/food-insecurity"
},
"news_3365": {
"type": "terms",
"id": "news_3365",
"meta": {
"index": "terms_1716263798",
"site": "news",
"id": "3365",
"found": true
},
"relationships": {},
"featImg": null,
"name": "school lunch",
"description": null,
"taxonomy": "tag",
"headData": {
"twImgId": null,
"twTitle": null,
"ogTitle": null,
"ogImgId": null,
"twDescription": null,
"description": null,
"title": "school lunch Archives | KQED News",
"ogDescription": null
},
"ttid": 3383,
"slug": "school-lunch",
"isLoading": false,
"link": "/news/tag/school-lunch"
},
"news_22992": {
"type": "terms",
"id": "news_22992",
"meta": {
"index": "terms_1716263798",
"site": "news",
"id": "22992",
"found": true
},
"relationships": {},
"featImg": null,
"name": "snap",
"description": null,
"taxonomy": "tag",
"headData": {
"twImgId": null,
"twTitle": null,
"ogTitle": null,
"ogImgId": null,
"twDescription": null,
"description": null,
"title": "snap Archives | KQED News",
"ogDescription": null
},
"ttid": 23009,
"slug": "snap",
"isLoading": false,
"link": "/news/tag/snap"
},
"news_33746": {
"type": "terms",
"id": "news_33746",
"meta": {
"index": "terms_1716263798",
"site": "news",
"id": "33746",
"found": true
},
"relationships": {},
"featImg": null,
"name": "Education",
"description": null,
"taxonomy": "interest",
"headData": {
"twImgId": null,
"twTitle": null,
"ogTitle": null,
"ogImgId": null,
"twDescription": null,
"description": null,
"title": "Education Archives | KQED News",
"ogDescription": null
},
"ttid": 33763,
"slug": "education",
"isLoading": false,
"link": "/news/interest/education"
},
"news_33733": {
"type": "terms",
"id": "news_33733",
"meta": {
"index": "terms_1716263798",
"site": "news",
"id": "33733",
"found": true
},
"relationships": {},
"featImg": null,
"name": "News",
"description": null,
"taxonomy": "interest",
"headData": {
"twImgId": null,
"twTitle": null,
"ogTitle": null,
"ogImgId": null,
"twDescription": null,
"description": null,
"title": "News Archives | KQED News",
"ogDescription": null
},
"ttid": 33750,
"slug": "news",
"isLoading": false,
"link": "/news/interest/news"
},
"arts_235": {
"type": "terms",
"id": "arts_235",
"meta": {
"index": "terms_1716263798",
"site": "arts",
"id": "235",
"found": true
},
"relationships": {},
"featImg": null,
"name": "News",
"description": null,
"taxonomy": "category",
"headData": {
"twImgId": null,
"twTitle": null,
"ogTitle": null,
"ogImgId": null,
"twDescription": null,
"description": null,
"title": "News Archives | KQED Arts",
"ogDescription": null
},
"ttid": 236,
"slug": "news",
"isLoading": false,
"link": "/arts/category/news"
},
"arts_2855": {
"type": "terms",
"id": "arts_2855",
"meta": {
"index": "terms_1716263798",
"site": "arts",
"id": "2855",
"found": true
},
"relationships": {},
"featImg": null,
"name": "Filipino",
"description": null,
"taxonomy": "tag",
"headData": {
"twImgId": null,
"twTitle": null,
"ogTitle": null,
"ogImgId": null,
"twDescription": null,
"description": null,
"title": "Filipino Archives | KQED Arts",
"ogDescription": null
},
"ttid": 2867,
"slug": "filipino",
"isLoading": false,
"link": "/arts/tag/filipino"
},
"arts_14183": {
"type": "terms",
"id": "arts_14183",
"meta": {
"index": "terms_1716263798",
"site": "arts",
"id": "14183",
"found": true
},
"relationships": {},
"featImg": null,
"name": "Filipino food",
"description": null,
"taxonomy": "tag",
"headData": {
"twImgId": null,
"twTitle": null,
"ogTitle": null,
"ogImgId": null,
"twDescription": null,
"description": null,
"title": "Filipino food Archives | KQED Arts",
"ogDescription": null
},
"ttid": 14195,
"slug": "filipino-food",
"isLoading": false,
"link": "/arts/tag/filipino-food"
},
"arts_1143": {
"type": "terms",
"id": "arts_1143",
"meta": {
"index": "terms_1716263798",
"site": "arts",
"id": "1143",
"found": true
},
"relationships": {},
"featImg": null,
"name": "Oakland",
"description": null,
"taxonomy": "tag",
"headData": {
"twImgId": null,
"twTitle": null,
"ogTitle": null,
"ogImgId": null,
"twDescription": null,
"description": null,
"title": "Oakland Archives | KQED Arts",
"ogDescription": null
},
"ttid": 692,
"slug": "oakland",
"isLoading": false,
"link": "/arts/tag/oakland"
},
"arts_21860": {
"type": "terms",
"id": "arts_21860",
"meta": {
"index": "terms_1716263798",
"site": "arts",
"id": "21860",
"found": true
},
"relationships": {},
"featImg": null,
"name": "Oakland",
"description": null,
"taxonomy": "interest",
"headData": {
"twImgId": null,
"twTitle": null,
"ogTitle": null,
"ogImgId": null,
"twDescription": null,
"description": null,
"title": "Oakland Archives | KQED Arts",
"ogDescription": null
},
"ttid": 21872,
"slug": "oakland",
"isLoading": false,
"link": "/arts/interest/oakland"
},
"arts_16154": {
"type": "terms",
"id": "arts_16154",
"meta": {
"index": "terms_1716263798",
"site": "arts",
"id": "16154",
"found": true
},
"relationships": {},
"featImg": null,
"name": "Indian diaspora",
"description": null,
"taxonomy": "tag",
"headData": {
"twImgId": null,
"twTitle": null,
"ogTitle": null,
"ogImgId": null,
"twDescription": null,
"description": null,
"title": "Indian diaspora Archives | KQED Arts",
"ogDescription": null
},
"ttid": 16166,
"slug": "indian-diaspora",
"isLoading": false,
"link": "/arts/tag/indian-diaspora"
},
"arts_1257": {
"type": "terms",
"id": "arts_1257",
"meta": {
"index": "terms_1716263798",
"site": "arts",
"id": "1257",
"found": true
},
"relationships": {},
"featImg": null,
"name": "Mission District",
"description": null,
"taxonomy": "tag",
"headData": {
"twImgId": null,
"twTitle": null,
"ogTitle": null,
"ogImgId": null,
"twDescription": null,
"description": null,
"title": "Mission District Archives | KQED Arts",
"ogDescription": null
},
"ttid": 1269,
"slug": "mission-district",
"isLoading": false,
"link": "/arts/tag/mission-district"
},
"arts_1146": {
"type": "terms",
"id": "arts_1146",
"meta": {
"index": "terms_1716263798",
"site": "arts",
"id": "1146",
"found": true
},
"relationships": {},
"featImg": null,
"name": "San Francisco",
"description": null,
"taxonomy": "tag",
"headData": {
"twImgId": null,
"twTitle": null,
"ogTitle": null,
"ogImgId": null,
"twDescription": null,
"description": null,
"title": "San Francisco Archives | KQED Arts",
"ogDescription": null
},
"ttid": 701,
"slug": "san-francisco",
"isLoading": false,
"link": "/arts/tag/san-francisco"
},
"arts_585": {
"type": "terms",
"id": "arts_585",
"meta": {
"index": "terms_1716263798",
"site": "arts",
"id": "585",
"found": true
},
"relationships": {},
"featImg": null,
"name": "thedolist",
"description": null,
"taxonomy": "tag",
"headData": {
"twImgId": null,
"twTitle": null,
"ogTitle": null,
"ogImgId": null,
"twDescription": null,
"description": null,
"title": "thedolist Archives | KQED Arts",
"ogDescription": null
},
"ttid": 590,
"slug": "thedolist",
"isLoading": false,
"link": "/arts/tag/thedolist"
},
"arts_21870": {
"type": "terms",
"id": "arts_21870",
"meta": {
"index": "terms_1716263798",
"site": "arts",
"id": "21870",
"found": true
},
"relationships": {},
"featImg": null,
"name": "Events",
"description": null,
"taxonomy": "interest",
"headData": {
"twImgId": null,
"twTitle": null,
"ogTitle": null,
"ogImgId": null,
"twDescription": null,
"description": null,
"title": "Events Archives | KQED Arts",
"ogDescription": null
},
"ttid": 21882,
"slug": "events",
"isLoading": false,
"link": "/arts/interest/events"
},
"arts_21859": {
"type": "terms",
"id": "arts_21859",
"meta": {
"index": "terms_1716263798",
"site": "arts",
"id": "21859",
"found": true
},
"relationships": {},
"featImg": null,
"name": "San Francisco",
"description": null,
"taxonomy": "interest",
"headData": {
"twImgId": null,
"twTitle": null,
"ogTitle": null,
"ogImgId": null,
"twDescription": null,
"description": null,
"title": "San Francisco Archives | KQED Arts",
"ogDescription": null
},
"ttid": 21871,
"slug": "san-francisco",
"isLoading": false,
"link": "/arts/interest/san-francisco"
},
"arts_5569": {
"type": "terms",
"id": "arts_5569",
"meta": {
"index": "terms_1716263798",
"site": "arts",
"id": "5569",
"found": true
},
"relationships": {},
"featImg": null,
"name": "east bay",
"description": null,
"taxonomy": "tag",
"headData": {
"twImgId": null,
"twTitle": null,
"ogTitle": null,
"ogImgId": null,
"twDescription": null,
"description": null,
"title": "east bay Archives | KQED Arts",
"ogDescription": null
},
"ttid": 5581,
"slug": "east-bay",
"isLoading": false,
"link": "/arts/tag/east-bay"
},
"arts_3078": {
"type": "terms",
"id": "arts_3078",
"meta": {
"index": "terms_1716263798",
"site": "arts",
"id": "3078",
"found": true
},
"relationships": {},
"featImg": null,
"name": "marijuana",
"description": null,
"taxonomy": "tag",
"headData": {
"twImgId": null,
"twTitle": null,
"ogTitle": null,
"ogImgId": null,
"twDescription": null,
"description": null,
"title": "marijuana Archives | KQED Arts",
"ogDescription": null
},
"ttid": 3090,
"slug": "marijuana",
"isLoading": false,
"link": "/arts/tag/marijuana"
},
"arts_14730": {
"type": "terms",
"id": "arts_14730",
"meta": {
"index": "terms_1716263798",
"site": "arts",
"id": "14730",
"found": true
},
"relationships": {},
"featImg": null,
"name": "pizza",
"description": null,
"taxonomy": "tag",
"headData": {
"twImgId": null,
"twTitle": null,
"ogTitle": null,
"ogImgId": null,
"twDescription": null,
"description": null,
"title": "pizza Archives | KQED Arts",
"ogDescription": null
},
"ttid": 14742,
"slug": "pizza",
"isLoading": false,
"link": "/arts/tag/pizza"
},
"arts_2479": {
"type": "terms",
"id": "arts_2479",
"meta": {
"index": "terms_1716263798",
"site": "arts",
"id": "2479",
"found": true
},
"relationships": {},
"featImg": null,
"name": "Richmond",
"description": null,
"taxonomy": "tag",
"headData": {
"twImgId": null,
"twTitle": null,
"ogTitle": null,
"ogImgId": null,
"twDescription": null,
"description": null,
"title": "Richmond Archives | KQED Arts",
"ogDescription": null
},
"ttid": 2491,
"slug": "richmond",
"isLoading": false,
"link": "/arts/tag/richmond"
},
"source_food_1337824": {
"type": "terms",
"id": "source_food_1337824",
"meta": {
"override": true
},
"name": "Food",
"link": "https://www.kqed.org/food",
"isLoading": false
},
"source_food_1337646": {
"type": "terms",
"id": "source_food_1337646",
"meta": {
"override": true
},
"name": "Food",
"link": "https://www.kqed.org/food",
"isLoading": false
},
"source_food_1337639": {
"type": "terms",
"id": "source_food_1337639",
"meta": {
"override": true
},
"name": "Food",
"link": "https://www.kqed.org/food",
"isLoading": false
},
"source_food_1337630": {
"type": "terms",
"id": "source_food_1337630",
"meta": {
"override": true
},
"name": "Food",
"link": "https://www.kqed.org/food",
"isLoading": false
},
"source_food_1337599": {
"type": "terms",
"id": "source_food_1337599",
"meta": {
"override": true
},
"name": "Food",
"link": "https://www.kqed.org/food",
"isLoading": false
},
"source_food_1337589": {
"type": "terms",
"id": "source_food_1337589",
"meta": {
"override": true
},
"name": "Food",
"link": "https://www.kqed.org/food",
"isLoading": false
},
"source_food_1337576": {
"type": "terms",
"id": "source_food_1337576",
"meta": {
"override": true
},
"name": "Food",
"link": "https://www.kqed.org/food",
"isLoading": false
},
"source_food_1337534": {
"type": "terms",
"id": "source_food_1337534",
"meta": {
"override": true
},
"name": "Food",
"link": "https://www.kqed.org/food",
"isLoading": false
},
"source_food_1337517": {
"type": "terms",
"id": "source_food_1337517",
"meta": {
"override": true
},
"name": "Food",
"link": "https://www.kqed.org/food",
"isLoading": false
},
"food_311": {
"type": "terms",
"id": "food_311",
"meta": {
"index": "terms_1716263798",
"site": "food",
"id": "311",
"found": true
},
"relationships": {},
"featImg": null,
"name": "Beyond The Menu",
"description": null,
"taxonomy": "series",
"headData": {
"twImgId": null,
"twTitle": null,
"ogTitle": null,
"ogImgId": null,
"twDescription": null,
"description": null,
"title": "Beyond The Menu Archives - KQED Food",
"ogDescription": null
},
"ttid": 311,
"slug": "beyond-the-menu",
"isLoading": false,
"link": "/food/series/beyond-the-menu"
},
"food_1": {
"type": "terms",
"id": "food_1",
"meta": {
"index": "terms_1716263798",
"site": "food",
"id": "1",
"found": true
},
"relationships": {},
"featImg": null,
"name": "food",
"description": null,
"taxonomy": "category",
"headData": {
"twImgId": null,
"twTitle": null,
"ogTitle": null,
"ogImgId": null,
"twDescription": null,
"description": null,
"title": "food Archives - KQED Food",
"ogDescription": null
},
"ttid": 1,
"slug": "food",
"isLoading": false,
"link": "/food/category/food"
},
"food_313": {
"type": "terms",
"id": "food_313",
"meta": {
"index": "terms_1716263798",
"site": "food",
"id": "313",
"found": true
},
"relationships": {},
"featImg": null,
"name": "beyond the menu",
"description": null,
"taxonomy": "tag",
"headData": {
"twImgId": null,
"twTitle": null,
"ogTitle": null,
"ogImgId": null,
"twDescription": null,
"description": null,
"title": "beyond the menu Archives - KQED Food",
"ogDescription": null
},
"ttid": 313,
"slug": "beyond-the-menu",
"isLoading": false,
"link": "/food/tag/beyond-the-menu"
},
"food_312": {
"type": "terms",
"id": "food_312",
"meta": {
"index": "terms_1716263798",
"site": "food",
"id": "312",
"found": true
},
"relationships": {},
"featImg": null,
"name": "cecilia phillips",
"description": null,
"taxonomy": "tag",
"headData": {
"twImgId": null,
"twTitle": null,
"ogTitle": null,
"ogImgId": null,
"twDescription": null,
"description": null,
"title": "cecilia phillips Archives - KQED Food",
"ogDescription": null
},
"ttid": 312,
"slug": "cecilia-phillips",
"isLoading": false,
"link": "/food/tag/cecilia-phillips"
},
"food_328": {
"type": "terms",
"id": "food_328",
"meta": {
"index": "terms_1716263798",
"site": "food",
"id": "328",
"found": true
},
"relationships": {},
"featImg": null,
"name": "food history",
"description": null,
"taxonomy": "tag",
"headData": {
"twImgId": null,
"twTitle": null,
"ogTitle": null,
"ogImgId": null,
"twDescription": null,
"description": null,
"title": "food history Archives - KQED Food",
"ogDescription": null
},
"ttid": 328,
"slug": "food-history",
"isLoading": false,
"link": "/food/tag/food-history"
},
"food_319": {
"type": "terms",
"id": "food_319",
"meta": {
"index": "terms_1716263798",
"site": "food",
"id": "319",
"found": true
},
"relationships": {},
"featImg": null,
"name": "food history video",
"description": null,
"taxonomy": "tag",
"headData": {
"twImgId": null,
"twTitle": null,
"ogTitle": null,
"ogImgId": null,
"twDescription": null,
"description": null,
"title": "food history video Archives - KQED Food",
"ogDescription": null
},
"ttid": 319,
"slug": "food-history-video",
"isLoading": false,
"link": "/food/tag/food-history-video"
},
"food_300": {
"type": "terms",
"id": "food_300",
"meta": {
"index": "terms_1716263798",
"site": "food",
"id": "300",
"found": true
},
"relationships": {},
"featImg": null,
"name": "East Bay",
"description": null,
"taxonomy": "interest",
"headData": {
"twImgId": null,
"twTitle": null,
"ogTitle": null,
"ogImgId": null,
"twDescription": null,
"description": null,
"title": "East Bay Archives - KQED Food",
"ogDescription": null
},
"ttid": 300,
"slug": "east-bay",
"isLoading": false,
"link": "/food/interest/east-bay"
},
"food_294": {
"type": "terms",
"id": "food_294",
"meta": {
"index": "terms_1716263798",
"site": "food",
"id": "294",
"found": true
},
"relationships": {},
"featImg": null,
"name": "Food and Drink",
"description": null,
"taxonomy": "interest",
"headData": {
"twImgId": null,
"twTitle": null,
"ogTitle": null,
"ogImgId": null,
"twDescription": null,
"description": null,
"title": "Food and Drink Archives - KQED Food",
"ogDescription": null
},
"ttid": 294,
"slug": "food-and-drink",
"isLoading": false,
"link": "/food/interest/food-and-drink"
},
"food_289": {
"type": "terms",
"id": "food_289",
"meta": {
"index": "terms_1716263798",
"site": "food",
"id": "289",
"found": true
},
"relationships": {},
"featImg": null,
"name": "Oakland",
"description": null,
"taxonomy": "interest",
"headData": {
"twImgId": null,
"twTitle": null,
"ogTitle": null,
"ogImgId": null,
"twDescription": null,
"description": null,
"title": "Oakland Archives - KQED Food",
"ogDescription": null
},
"ttid": 289,
"slug": "oakland",
"isLoading": false,
"link": "/food/interest/oakland"
},
"food_288": {
"type": "terms",
"id": "food_288",
"meta": {
"index": "terms_1716263798",
"site": "food",
"id": "288",
"found": true
},
"relationships": {},
"featImg": null,
"name": "San Francisco",
"description": null,
"taxonomy": "interest",
"headData": {
"twImgId": null,
"twTitle": null,
"ogTitle": null,
"ogImgId": null,
"twDescription": null,
"description": null,
"title": "San Francisco Archives - KQED Food",
"ogDescription": null
},
"ttid": 288,
"slug": "san-francisco",
"isLoading": false,
"link": "/food/interest/san-francisco"
},
"food_354": {
"type": "terms",
"id": "food_354",
"meta": {
"index": "terms_1716263798",
"site": "food",
"id": "354",
"found": true
},
"relationships": {},
"name": "chamoy",
"slug": "chamoy",
"taxonomy": "tag",
"description": null,
"featImg": null,
"headData": {
"title": "chamoy Archives - KQED Food",
"description": null,
"ogTitle": null,
"ogDescription": null,
"ogImgId": null,
"twTitle": null,
"twDescription": null,
"twImgId": null
},
"ttid": 354,
"isLoading": false,
"link": "/food/tag/chamoy"
},
"food_352": {
"type": "terms",
"id": "food_352",
"meta": {
"index": "terms_1716263798",
"site": "food",
"id": "352",
"found": true
},
"relationships": {},
"name": "hot sauce",
"slug": "hot-sauce",
"taxonomy": "tag",
"description": null,
"featImg": null,
"headData": {
"title": "hot sauce Archives - KQED Food",
"description": null,
"ogTitle": null,
"ogDescription": null,
"ogImgId": null,
"twTitle": null,
"twDescription": null,
"twImgId": null
},
"ttid": 352,
"isLoading": false,
"link": "/food/tag/hot-sauce"
},
"food_114": {
"type": "terms",
"id": "food_114",
"meta": {
"index": "terms_1716263798",
"site": "food",
"id": "114",
"found": true
},
"relationships": {},
"featImg": null,
"name": "bay area bites",
"description": null,
"taxonomy": "tag",
"headData": {
"twImgId": null,
"twTitle": null,
"ogTitle": null,
"ogImgId": null,
"twDescription": null,
"description": null,
"title": "bay area bites Archives | KQED Food",
"ogDescription": null
},
"ttid": 114,
"slug": "bay-area-bites",
"isLoading": false,
"link": "/food/tag/bay-area-bites"
},
"food_150": {
"type": "terms",
"id": "food_150",
"meta": {
"index": "terms_1716263798",
"site": "food",
"id": "150",
"found": true
},
"relationships": {},
"featImg": null,
"name": "restaurants",
"description": null,
"taxonomy": "tag",
"headData": {
"twImgId": null,
"twTitle": null,
"ogTitle": null,
"ogImgId": null,
"twDescription": null,
"description": null,
"title": "restaurants Archives | KQED Food",
"ogDescription": null
},
"ttid": 150,
"slug": "restaurants",
"isLoading": false,
"link": "/food/tag/restaurants"
},
"food_176": {
"type": "terms",
"id": "food_176",
"meta": {
"index": "terms_1716263798",
"site": "food",
"id": "176",
"found": true
},
"relationships": {},
"featImg": null,
"name": "homemade ice cream",
"description": null,
"taxonomy": "tag",
"headData": {
"twImgId": null,
"twTitle": null,
"ogTitle": null,
"ogImgId": null,
"twDescription": null,
"description": null,
"title": "homemade ice cream Archives | KQED Food",
"ogDescription": null
},
"ttid": 176,
"slug": "homemade-ice-cream",
"isLoading": false,
"link": "/food/tag/homemade-ice-cream"
},
"food_143": {
"type": "terms",
"id": "food_143",
"meta": {
"index": "terms_1716263798",
"site": "food",
"id": "143",
"found": true
},
"relationships": {},
"featImg": null,
"name": "food",
"description": null,
"taxonomy": "tag",
"headData": {
"twImgId": null,
"twTitle": null,
"ogTitle": null,
"ogImgId": null,
"twDescription": null,
"description": null,
"title": "food Archives | KQED Food",
"ogDescription": null
},
"ttid": 143,
"slug": "food",
"isLoading": false,
"link": "/food/tag/food"
},
"food_138": {
"type": "terms",
"id": "food_138",
"meta": {
"index": "terms_1716263798",
"site": "food",
"id": "138",
"found": true
},
"relationships": {},
"featImg": null,
"name": "recipes",
"description": null,
"taxonomy": "tag",
"headData": {
"twImgId": null,
"twTitle": null,
"ogTitle": null,
"ogImgId": null,
"twDescription": null,
"description": null,
"title": "recipes Archives | KQED Food",
"ogDescription": null
},
"ttid": 138,
"slug": "recipes",
"isLoading": false,
"link": "/food/tag/recipes"
},
"checkplease_9339": {
"type": "terms",
"id": "checkplease_9339",
"meta": {
"index": "terms_1716263798",
"site": "checkplease",
"id": "9339",
"found": true
},
"relationships": {},
"name": "Check Please!",
"slug": "check-please",
"taxonomy": "program",
"description": null,
"featImg": null,
"headData": {
"title": "Check Please! Archives - Check, Please! Bay Area",
"description": null,
"ogTitle": null,
"ogDescription": null,
"ogImgId": null,
"twTitle": null,
"twDescription": null,
"twImgId": null
},
"ttid": 1710,
"isLoading": false,
"link": "/checkplease/program/check-please"
},
"checkplease_7989": {
"type": "terms",
"id": "checkplease_7989",
"meta": {
"index": "terms_1716263798",
"site": "checkplease",
"id": "7989",
"found": true
},
"relationships": {},
"featImg": null,
"name": "alameda",
"description": null,
"taxonomy": "category",
"headData": {
"twImgId": null,
"twTitle": null,
"ogTitle": null,
"ogImgId": null,
"twDescription": null,
"description": null,
"title": "alameda Archives | Check, Please! Bay Area",
"ogDescription": null
},
"ttid": 356,
"slug": "alameda",
"isLoading": false,
"link": "/checkplease/category/alameda"
},
"checkplease_3758": {
"type": "terms",
"id": "checkplease_3758",
"meta": {
"index": "terms_1716263798",
"site": "checkplease",
"id": "3758",
"found": true
},
"relationships": {},
"featImg": null,
"name": "american",
"description": null,
"taxonomy": "category",
"headData": {
"twImgId": null,
"twTitle": null,
"ogTitle": null,
"ogImgId": null,
"twDescription": null,
"description": null,
"title": "american Archives | Check, Please! Bay Area",
"ogDescription": null
},
"ttid": 173,
"slug": "american",
"isLoading": false,
"link": "/checkplease/category/american"
},
"checkplease_3845": {
"type": "terms",
"id": "checkplease_3845",
"meta": {
"index": "terms_1716263798",
"site": "checkplease",
"id": "3845",
"found": true
},
"relationships": {},
"featImg": null,
"name": "asian",
"description": null,
"taxonomy": "category",
"headData": {
"twImgId": null,
"twTitle": null,
"ogTitle": null,
"ogImgId": null,
"twDescription": null,
"description": null,
"title": "asian Archives | Check, Please! Bay Area",
"ogDescription": null
},
"ttid": 232,
"slug": "asian-fusion",
"isLoading": false,
"link": "/checkplease/category/asian-fusion"
},
"checkplease_3392": {
"type": "terms",
"id": "checkplease_3392",
"meta": {
"index": "terms_1716263798",
"site": "checkplease",
"id": "3392",
"found": true
},
"relationships": {},
"featImg": null,
"name": "bay area bites",
"description": null,
"taxonomy": "category",
"headData": {
"twImgId": null,
"twTitle": null,
"ogTitle": null,
"ogImgId": null,
"twDescription": null,
"description": null,
"title": "bay area bites Archives | Check, Please! Bay Area",
"ogDescription": null
},
"ttid": 129,
"slug": "bay-area-bites",
"isLoading": false,
"link": "/checkplease/category/bay-area-bites"
},
"checkplease_3763": {
"type": "terms",
"id": "checkplease_3763",
"meta": {
"index": "terms_1716263798",
"site": "checkplease",
"id": "3763",
"found": true
},
"relationships": {},
"featImg": null,
"name": "berkeley",
"description": null,
"taxonomy": "category",
"headData": {
"twImgId": null,
"twTitle": null,
"ogTitle": null,
"ogImgId": null,
"twDescription": null,
"description": null,
"title": "berkeley Archives | Check, Please! Bay Area",
"ogDescription": null
},
"ttid": 179,
"slug": "berkeley-east-bay-restaurant-info",
"isLoading": false,
"link": "/checkplease/category/berkeley-east-bay-restaurant-info"
},
"checkplease_3873": {
"type": "terms",
"id": "checkplease_3873",
"meta": {
"index": "terms_1716263798",
"site": "checkplease",
"id": "3873",
"found": true
},
"relationships": {},
"featImg": null,
"name": "breakfast / brunch",
"description": null,
"taxonomy": "category",
"headData": {
"twImgId": null,
"twTitle": null,
"ogTitle": null,
"ogImgId": null,
"twDescription": null,
"description": null,
"title": "breakfast / brunch Archives | Check, Please! Bay Area",
"ogDescription": null
},
"ttid": 168,
"slug": "breakfast-brunch",
"isLoading": false,
"link": "/checkplease/category/breakfast-brunch"
},
"checkplease_3750": {
"type": "terms",
"id": "checkplease_3750",
"meta": {
"index": "terms_1716263798",
"site": "checkplease",
"id": "3750",
"found": true
},
"relationships": {},
"featImg": null,
"name": "cuisine",
"description": null,
"taxonomy": "category",
"headData": {
"twImgId": null,
"twTitle": null,
"ogTitle": null,
"ogImgId": null,
"twDescription": null,
"description": null,
"title": "cuisine Archives | Check, Please! Bay Area",
"ogDescription": null
},
"ttid": 161,
"slug": "cuisine",
"isLoading": false,
"link": "/checkplease/category/cuisine"
},
"checkplease_3730": {
"type": "terms",
"id": "checkplease_3730",
"meta": {
"index": "terms_1716263798",
"site": "checkplease",
"id": "3730",
"found": true
},
"relationships": {},
"featImg": null,
"name": "east bay",
"description": null,
"taxonomy": "category",
"headData": {
"twImgId": null,
"twTitle": null,
"ogTitle": null,
"ogImgId": null,
"twDescription": null,
"description": null,
"title": "east bay Archives | Check, Please! Bay Area",
"ogDescription": null
},
"ttid": 146,
"slug": "east-bay-reviews",
"isLoading": false,
"link": "/checkplease/category/east-bay-reviews"
},
"checkplease_3740": {
"type": "terms",
"id": "checkplease_3740",
"meta": {
"index": "terms_1716263798",
"site": "checkplease",
"id": "3740",
"found": true
},
"relationships": {},
"featImg": null,
"name": "east bay",
"description": null,
"taxonomy": "category",
"headData": {
"twImgId": null,
"twTitle": null,
"ogTitle": null,
"ogImgId": null,
"twDescription": null,
"description": null,
"title": "east bay Archives | Check, Please! Bay Area",
"ogDescription": null
},
"ttid": 158,
"slug": "east-bay-restaurant-info",
"isLoading": false,
"link": "/checkplease/category/east-bay-restaurant-info"
},
"checkplease_9210": {
"type": "terms",
"id": "checkplease_9210",
"meta": {
"index": "terms_1716263798",
"site": "checkplease",
"id": "9210",
"found": true
},
"relationships": {},
"featImg": null,
"name": "east bay",
"description": null,
"taxonomy": "category",
"headData": {
"twImgId": null,
"twTitle": null,
"ogTitle": null,
"ogImgId": null,
"twDescription": null,
"description": null,
"title": "east bay Archives - Check, Please! Bay Area",
"ogDescription": null
},
"ttid": 1581,
"slug": "east-bay",
"isLoading": false,
"link": "/checkplease/category/east-bay"
},
"checkplease_3731": {
"type": "terms",
"id": "checkplease_3731",
"meta": {
"index": "terms_1716263798",
"site": "checkplease",
"id": "3731",
"found": true
},
"relationships": {},
"featImg": null,
"name": "episodes",
"description": null,
"taxonomy": "category",
"headData": {
"twImgId": null,
"twTitle": null,
"ogTitle": null,
"ogImgId": null,
"twDescription": null,
"description": null,
"title": "episodes Archives | Check, Please! Bay Area",
"ogDescription": null
},
"ttid": 149,
"slug": "episodes",
"isLoading": false,
"link": "/checkplease/category/episodes"
},
"checkplease_9200": {
"type": "terms",
"id": "checkplease_9200",
"meta": {
"index": "terms_1716263798",
"site": "checkplease",
"id": "9200",
"found": true
},
"relationships": {},
"featImg": null,
"name": "food",
"description": null,
"taxonomy": "category",
"headData": {
"twImgId": null,
"twTitle": null,
"ogTitle": null,
"ogImgId": null,
"twDescription": null,
"description": null,
"title": "food Archives - Check, Please! Bay Area",
"ogDescription": null
},
"ttid": 1571,
"slug": "food",
"isLoading": false,
"link": "/checkplease/category/food"
},
"checkplease_3751": {
"type": "terms",
"id": "checkplease_3751",
"meta": {
"index": "terms_1716263798",
"site": "checkplease",
"id": "3751",
"found": true
},
"relationships": {},
"featImg": null,
"name": "italian",
"description": null,
"taxonomy": "category",
"headData": {
"twImgId": null,
"twTitle": null,
"ogTitle": null,
"ogImgId": null,
"twDescription": null,
"description": null,
"title": "italian Archives | Check, Please! Bay Area",
"ogDescription": null
},
"ttid": 162,
"slug": "italian-cuisine",
"isLoading": false,
"link": "/checkplease/category/italian-cuisine"
},
"checkplease_494": {
"type": "terms",
"id": "checkplease_494",
"meta": {
"index": "terms_1716263798",
"site": "checkplease",
"id": "494",
"found": true
},
"relationships": {},
"featImg": null,
"name": "korean",
"description": null,
"taxonomy": "category",
"headData": {
"twImgId": null,
"twTitle": null,
"ogTitle": null,
"ogImgId": null,
"twDescription": null,
"description": null,
"title": "korean Archives | Check, Please! Bay Area",
"ogDescription": null
},
"ttid": 171,
"slug": "korean",
"isLoading": false,
"link": "/checkplease/category/korean"
},
"checkplease_3871": {
"type": "terms",
"id": "checkplease_3871",
"meta": {
"index": "terms_1716263798",
"site": "checkplease",
"id": "3871",
"found": true
},
"relationships": {},
"featImg": null,
"name": "kqed food",
"description": null,
"taxonomy": "category",
"headData": {
"twImgId": null,
"twTitle": null,
"ogTitle": null,
"ogImgId": null,
"twDescription": null,
"description": null,
"title": "kqed food Archives | Check, Please! Bay Area",
"ogDescription": null
},
"ttid": 272,
"slug": "kqed-food",
"isLoading": false,
"link": "/checkplease/category/kqed-food"
},
"checkplease_9212": {
"type": "terms",
"id": "checkplease_9212",
"meta": {
"index": "terms_1716263798",
"site": "checkplease",
"id": "9212",
"found": true
},
"relationships": {},
"featImg": null,
"name": "oakland",
"description": null,
"taxonomy": "category",
"headData": {
"twImgId": null,
"twTitle": null,
"ogTitle": null,
"ogImgId": null,
"twDescription": null,
"description": null,
"title": "oakland Archives - Check, Please! Bay Area",
"ogDescription": null
},
"ttid": 1583,
"slug": "oakland",
"isLoading": false,
"link": "/checkplease/category/oakland"
},
"checkplease_9211": {
"type": "terms",
"id": "checkplease_9211",
"meta": {
"index": "terms_1716263798",
"site": "checkplease",
"id": "9211",
"found": true
},
"relationships": {},
"featImg": null,
"name": "peninsula",
"description": null,
"taxonomy": "category",
"headData": {
"twImgId": null,
"twTitle": null,
"ogTitle": null,
"ogImgId": null,
"twDescription": null,
"description": null,
"title": "peninsula Archives - Check, Please! Bay Area",
"ogDescription": null
},
"ttid": 1582,
"slug": "peninsula",
"isLoading": false,
"link": "/checkplease/category/peninsula"
},
"checkplease_3741": {
"type": "terms",
"id": "checkplease_3741",
"meta": {
"index": "terms_1716263798",
"site": "checkplease",
"id": "3741",
"found": true
},
"relationships": {},
"featImg": null,
"name": "peninsula / south bay",
"description": null,
"taxonomy": "category",
"headData": {
"twImgId": null,
"twTitle": null,
"ogTitle": null,
"ogImgId": null,
"twDescription": null,
"description": null,
"title": "peninsula / south bay Archives | Check, Please! Bay Area",
"ogDescription": null
},
"ttid": 159,
"slug": "south-bay-restaurant-info",
"isLoading": false,
"link": "/checkplease/category/south-bay-restaurant-info"
},
"checkplease_443": {
"type": "terms",
"id": "checkplease_443",
"meta": {
"index": "terms_1716263798",
"site": "checkplease",
"id": "443",
"found": true
},
"relationships": {},
"featImg": null,
"name": "pizza",
"description": null,
"taxonomy": "category",
"headData": {
"twImgId": null,
"twTitle": null,
"ogTitle": null,
"ogImgId": null,
"twDescription": null,
"description": null,
"title": "pizza Archives | Check, Please! Bay Area",
"ogDescription": null
},
"ttid": 210,
"slug": "pizza",
"isLoading": false,
"link": "/checkplease/category/pizza"
},
"checkplease_3738": {
"type": "terms",
"id": "checkplease_3738",
"meta": {
"index": "terms_1716263798",
"site": "checkplease",
"id": "3738",
"found": true
},
"relationships": {},
"featImg": null,
"name": "restaurant info",
"description": null,
"taxonomy": "category",
"headData": {
"twImgId": null,
"twTitle": null,
"ogTitle": null,
"ogImgId": null,
"twDescription": null,
"description": null,
"title": "restaurant info Archives | Check, Please! Bay Area",
"ogDescription": null
},
"ttid": 156,
"slug": "restaurant-info",
"isLoading": false,
"link": "/checkplease/category/restaurant-info"
},
"checkplease_10": {
"type": "terms",
"id": "checkplease_10",
"meta": {
"index": "terms_1716263798",
"site": "checkplease",
"id": "10",
"found": true
},
"relationships": {},
"featImg": null,
"name": "reviews",
"description": null,
"taxonomy": "category",
"headData": {
"twImgId": null,
"twTitle": null,
"ogTitle": null,
"ogImgId": null,
"twDescription": null,
"description": null,
"title": "reviews Archives | Check, Please! Bay Area",
"ogDescription": null
},
"ttid": 15,
"slug": "reviews",
"isLoading": false,
"link": "/checkplease/category/reviews"
},
"checkplease_7954": {
"type": "terms",
"id": "checkplease_7954",
"meta": {
"index": "terms_1716263798",
"site": "checkplease",
"id": "7954",
"found": true
},
"relationships": {},
"featImg": null,
"name": "san carlos",
"description": null,
"taxonomy": "category",
"headData": {
"twImgId": null,
"twTitle": null,
"ogTitle": null,
"ogImgId": null,
"twDescription": null,
"description": null,
"title": "san carlos Archives | Check, Please! Bay Area",
"ogDescription": null
},
"ttid": 321,
"slug": "san-carlos",
"isLoading": false,
"link": "/checkplease/category/san-carlos"
},
"checkplease_9453": {
"type": "terms",
"id": "checkplease_9453",
"meta": {
"index": "terms_1716263798",
"site": "checkplease",
"id": "9453",
"found": true
},
"relationships": {},
"name": "season 21",
"slug": "season-21",
"taxonomy": "category",
"description": null,
"featImg": null,
"headData": {
"title": "season 21 - Check, Please! Bay Area",
"description": null,
"ogTitle": null,
"ogDescription": null,
"ogImgId": null,
"twTitle": null,
"twDescription": null,
"twImgId": null
},
"ttid": 1824,
"isLoading": false,
"link": "/checkplease/category/season-21"
},
"checkplease_8715": {
"type": "terms",
"id": "checkplease_8715",
"meta": {
"index": "terms_1716263798",
"site": "checkplease",
"id": "8715",
"found": true
},
"relationships": {},
"featImg": null,
"name": "alameda",
"description": null,
"taxonomy": "tag",
"headData": {
"twImgId": null,
"twTitle": null,
"ogTitle": null,
"ogImgId": null,
"twDescription": null,
"description": null,
"title": "alameda Archives | Check, Please! Bay Area",
"ogDescription": null
},
"ttid": 1084,
"slug": "alameda",
"isLoading": false,
"link": "/checkplease/tag/alameda"
},
"checkplease_8957": {
"type": "terms",
"id": "checkplease_8957",
"meta": {
"index": "terms_1716263798",
"site": "checkplease",
"id": "8957",
"found": true
},
"relationships": {},
"featImg": null,
"name": "american cuisine",
"description": null,
"taxonomy": "tag",
"headData": {
"twImgId": null,
"twTitle": null,
"ogTitle": null,
"ogImgId": null,
"twDescription": null,
"description": null,
"title": "american cuisine Archives | Check, Please! Bay Area",
"ogDescription": null
},
"ttid": 1328,
"slug": "american-cuisine",
"isLoading": false,
"link": "/checkplease/tag/american-cuisine"
},
"checkplease_8574": {
"type": "terms",
"id": "checkplease_8574",
"meta": {
"index": "terms_1716263798",
"site": "checkplease",
"id": "8574",
"found": true
},
"relationships": {},
"featImg": null,
"name": "american food",
"description": null,
"taxonomy": "tag",
"headData": {
"twImgId": null,
"twTitle": null,
"ogTitle": null,
"ogImgId": null,
"twDescription": null,
"description": null,
"title": "american food Archives | Check, Please! Bay Area",
"ogDescription": null
},
"ttid": 943,
"slug": "american-food",
"isLoading": false,
"link": "/checkplease/tag/american-food"
},
"checkplease_8508": {
"type": "terms",
"id": "checkplease_8508",
"meta": {
"index": "terms_1716263798",
"site": "checkplease",
"id": "8508",
"found": true
},
"relationships": {},
"featImg": null,
"name": "berkeley",
"description": null,
"taxonomy": "tag",
"headData": {
"twImgId": null,
"twTitle": null,
"ogTitle": null,
"ogImgId": null,
"twDescription": null,
"description": null,
"title": "berkeley Archives | Check, Please! Bay Area",
"ogDescription": null
},
"ttid": 877,
"slug": "berkeley",
"isLoading": false,
"link": "/checkplease/tag/berkeley"
},
"checkplease_8633": {
"type": "terms",
"id": "checkplease_8633",
"meta": {
"index": "terms_1716263798",
"site": "checkplease",
"id": "8633",
"found": true
},
"relationships": {},
"featImg": null,
"name": "breakfast",
"description": null,
"taxonomy": "tag",
"headData": {
"twImgId": null,
"twTitle": null,
"ogTitle": null,
"ogImgId": null,
"twDescription": null,
"description": null,
"title": "breakfast Archives | Check, Please! Bay Area",
"ogDescription": null
},
"ttid": 1002,
"slug": "breakfast",
"isLoading": false,
"link": "/checkplease/tag/breakfast"
},
"checkplease_1368": {
"type": "terms",
"id": "checkplease_1368",
"meta": {
"index": "terms_1716263798",
"site": "checkplease",
"id": "1368",
"found": true
},
"relationships": {},
"featImg": null,
"name": "brunch",
"description": null,
"taxonomy": "tag",
"headData": {
"twImgId": null,
"twTitle": null,
"ogTitle": null,
"ogImgId": null,
"twDescription": null,
"description": null,
"title": "brunch Archives | Check, Please! Bay Area",
"ogDescription": null
},
"ttid": 29,
"slug": "brunch",
"isLoading": false,
"link": "/checkplease/tag/brunch"
},
"checkplease_9162": {
"type": "terms",
"id": "checkplease_9162",
"meta": {
"index": "terms_1716263798",
"site": "checkplease",
"id": "9162",
"found": true
},
"relationships": {},
"featImg": null,
"name": "italian cuisine",
"description": null,
"taxonomy": "tag",
"headData": {
"twImgId": null,
"twTitle": null,
"ogTitle": null,
"ogImgId": null,
"twDescription": null,
"description": null,
"title": "italian cuisine Archives - Check, Please! Bay Area",
"ogDescription": null
},
"ttid": 1533,
"slug": "italian-cuisine",
"isLoading": false,
"link": "/checkplease/tag/italian-cuisine"
},
"checkplease_8566": {
"type": "terms",
"id": "checkplease_8566",
"meta": {
"index": "terms_1716263798",
"site": "checkplease",
"id": "8566",
"found": true
},
"relationships": {},
"featImg": null,
"name": "italian food",
"description": null,
"taxonomy": "tag",
"headData": {
"twImgId": null,
"twTitle": null,
"ogTitle": null,
"ogImgId": null,
"twDescription": null,
"description": null,
"title": "italian food Archives | Check, Please! Bay Area",
"ogDescription": null
},
"ttid": 935,
"slug": "italian-food",
"isLoading": false,
"link": "/checkplease/tag/italian-food"
},
"checkplease_9382": {
"type": "terms",
"id": "checkplease_9382",
"meta": {
"index": "terms_1716263798",
"site": "checkplease",
"id": "9382",
"found": true
},
"relationships": {},
"name": "korean cuisine",
"slug": "korean-cuisine",
"taxonomy": "tag",
"description": null,
"featImg": null,
"headData": {
"title": "korean cuisine - Check, Please! Bay Area",
"description": null,
"ogTitle": null,
"ogDescription": null,
"ogImgId": null,
"twTitle": null,
"twDescription": null,
"twImgId": null
},
"ttid": 1753,
"isLoading": false,
"link": "/checkplease/tag/korean-cuisine"
},
"checkplease_8821": {
"type": "terms",
"id": "checkplease_8821",
"meta": {
"index": "terms_1716263798",
"site": "checkplease",
"id": "8821",
"found": true
},
"relationships": {},
"featImg": null,
"name": "korean food",
"description": null,
"taxonomy": "tag",
"headData": {
"twImgId": null,
"twTitle": null,
"ogTitle": null,
"ogImgId": null,
"twDescription": null,
"description": null,
"title": "korean food Archives | Check, Please! Bay Area",
"ogDescription": null
},
"ttid": 1190,
"slug": "korean-food",
"isLoading": false,
"link": "/checkplease/tag/korean-food"
},
"checkplease_8587": {
"type": "terms",
"id": "checkplease_8587",
"meta": {
"index": "terms_1716263798",
"site": "checkplease",
"id": "8587",
"found": true
},
"relationships": {},
"featImg": null,
"name": "san carlos",
"description": null,
"taxonomy": "tag",
"headData": {
"twImgId": null,
"twTitle": null,
"ogTitle": null,
"ogImgId": null,
"twDescription": null,
"description": null,
"title": "san carlos Archives | Check, Please! Bay Area",
"ogDescription": null
},
"ttid": 956,
"slug": "san-carlos",
"isLoading": false,
"link": "/checkplease/tag/san-carlos"
},
"checkplease_9289": {
"type": "terms",
"id": "checkplease_9289",
"meta": {
"index": "terms_1716263798",
"site": "checkplease",
"id": "9289",
"found": true
},
"relationships": {},
"featImg": null,
"name": "Berkeley",
"description": null,
"taxonomy": "interest",
"headData": {
"twImgId": null,
"twTitle": null,
"ogTitle": null,
"ogImgId": null,
"twDescription": null,
"description": null,
"title": "Berkeley Archives - Check, Please! Bay Area",
"ogDescription": null
},
"ttid": 1660,
"slug": "berkeley",
"isLoading": false,
"link": "/checkplease/interest/berkeley"
},
"checkplease_9288": {
"type": "terms",
"id": "checkplease_9288",
"meta": {
"index": "terms_1716263798",
"site": "checkplease",
"id": "9288",
"found": true
},
"relationships": {},
"featImg": null,
"name": "East Bay",
"description": null,
"taxonomy": "interest",
"headData": {
"twImgId": null,
"twTitle": null,
"ogTitle": null,
"ogImgId": null,
"twDescription": null,
"description": null,
"title": "East Bay Archives - Check, Please! Bay Area",
"ogDescription": null
},
"ttid": 1659,
"slug": "east-bay",
"isLoading": false,
"link": "/checkplease/interest/east-bay"
},
"checkplease_9296": {
"type": "terms",
"id": "checkplease_9296",
"meta": {
"index": "terms_1716263798",
"site": "checkplease",
"id": "9296",
"found": true
},
"relationships": {},
"featImg": null,
"name": "Entertainment",
"description": null,
"taxonomy": "interest",
"headData": {
"twImgId": null,
"twTitle": null,
"ogTitle": null,
"ogImgId": null,
"twDescription": null,
"description": null,
"title": "Entertainment Archives - Check, Please! Bay Area",
"ogDescription": null
},
"ttid": 1667,
"slug": "entertainment",
"isLoading": false,
"link": "/checkplease/interest/entertainment"
},
"checkplease_9282": {
"type": "terms",
"id": "checkplease_9282",
"meta": {
"index": "terms_1716263798",
"site": "checkplease",
"id": "9282",
"found": true
},
"relationships": {},
"featImg": null,
"name": "Food and Drink",
"description": null,
"taxonomy": "interest",
"headData": {
"twImgId": null,
"twTitle": null,
"ogTitle": null,
"ogImgId": null,
"twDescription": null,
"description": null,
"title": "Food and Drink Archives - Check, Please! Bay Area",
"ogDescription": null
},
"ttid": 1653,
"slug": "food-and-drink",
"isLoading": false,
"link": "/checkplease/interest/food-and-drink"
},
"checkplease_9277": {
"type": "terms",
"id": "checkplease_9277",
"meta": {
"index": "terms_1716263798",
"site": "checkplease",
"id": "9277",
"found": true
},
"relationships": {},
"featImg": null,
"name": "Oakland",
"description": null,
"taxonomy": "interest",
"headData": {
"twImgId": null,
"twTitle": null,
"ogTitle": null,
"ogImgId": null,
"twDescription": null,
"description": null,
"title": "Oakland Archives - Check, Please! Bay Area",
"ogDescription": null
},
"ttid": 1648,
"slug": "oakland",
"isLoading": false,
"link": "/checkplease/interest/oakland"
},
"checkplease_9291": {
"type": "terms",
"id": "checkplease_9291",
"meta": {
"index": "terms_1716263798",
"site": "checkplease",
"id": "9291",
"found": true
},
"relationships": {},
"featImg": null,
"name": "Peninsula",
"description": null,
"taxonomy": "interest",
"headData": {
"twImgId": null,
"twTitle": null,
"ogTitle": null,
"ogImgId": null,
"twDescription": null,
"description": null,
"title": "Peninsula Archives - Check, Please! Bay Area",
"ogDescription": null
},
"ttid": 1662,
"slug": "peninsula",
"isLoading": false,
"link": "/checkplease/interest/peninsula"
},
"checkplease_3784": {
"type": "terms",
"id": "checkplease_3784",
"meta": {
"index": "terms_1716263798",
"site": "checkplease",
"id": "3784",
"found": true
},
"relationships": {},
"featImg": null,
"name": "caribbean",
"description": null,
"taxonomy": "category",
"headData": {
"twImgId": null,
"twTitle": null,
"ogTitle": null,
"ogImgId": null,
"twDescription": null,
"description": null,
"title": "caribbean Archives | Check, Please! Bay Area",
"ogDescription": null
},
"ttid": 194,
"slug": "caribbean",
"isLoading": false,
"link": "/checkplease/category/caribbean"
},
"checkplease_9451": {
"type": "terms",
"id": "checkplease_9451",
"meta": {
"index": "terms_1716263798",
"site": "checkplease",
"id": "9451",
"found": true
},
"relationships": {},
"name": "Haitian",
"slug": "haitian",
"taxonomy": "category",
"description": null,
"featImg": null,
"headData": {
"title": "Haitian - Check, Please! Bay Area",
"description": null,
"ogTitle": null,
"ogDescription": null,
"ogImgId": null,
"twTitle": null,
"twDescription": null,
"twImgId": null
},
"ttid": 1822,
"isLoading": false,
"link": "/checkplease/category/haitian"
},
"checkplease_3472": {
"type": "terms",
"id": "checkplease_3472",
"meta": {
"index": "terms_1716263798",
"site": "checkplease",
"id": "3472",
"found": true
},
"relationships": {},
"featImg": null,
"name": "north bay",
"description": null,
"taxonomy": "category",
"headData": {
"twImgId": null,
"twTitle": null,
"ogTitle": null,
"ogImgId": null,
"twDescription": null,
"description": null,
"title": "north bay Archives - Check, Please! Bay Area",
"ogDescription": null
},
"ttid": 148,
"slug": "north-bay",
"isLoading": false,
"link": "/checkplease/category/north-bay"
},
"checkplease_3742": {
"type": "terms",
"id": "checkplease_3742",
"meta": {
"index": "terms_1716263798",
"site": "checkplease",
"id": "3742",
"found": true
},
"relationships": {},
"featImg": null,
"name": "north bay",
"description": null,
"taxonomy": "category",
"headData": {
"twImgId": null,
"twTitle": null,
"ogTitle": null,
"ogImgId": null,
"twDescription": null,
"description": null,
"title": "north bay Archives | Check, Please! Bay Area",
"ogDescription": null
},
"ttid": 160,
"slug": "north-bay-restaurant-info",
"isLoading": false,
"link": "/checkplease/category/north-bay-restaurant-info"
},
"checkplease_9452": {
"type": "terms",
"id": "checkplease_9452",
"meta": {
"index": "terms_1716263798",
"site": "checkplease",
"id": "9452",
"found": true
},
"relationships": {},
"name": "novato",
"slug": "novato",
"taxonomy": "category",
"description": null,
"featImg": null,
"headData": {
"title": "novato - Check, Please! Bay Area",
"description": null,
"ogTitle": null,
"ogDescription": null,
"ogImgId": null,
"twTitle": null,
"twDescription": null,
"twImgId": null
},
"ttid": 1823,
"isLoading": false,
"link": "/checkplease/category/novato"
},
"checkplease_3764": {
"type": "terms",
"id": "checkplease_3764",
"meta": {
"index": "terms_1716263798",
"site": "checkplease",
"id": "3764",
"found": true
},
"relationships": {},
"featImg": null,
"name": "oakland east bay restaurant info",
"description": null,
"taxonomy": "category",
"headData": {
"twImgId": null,
"twTitle": null,
"ogTitle": null,
"ogImgId": null,
"twDescription": null,
"description": null,
"title": "oakland east bay restaurant info Archives - Check, Please! Bay Area",
"ogDescription": null
},
"ttid": 180,
"slug": "oakland-east-bay-restaurant-info",
"isLoading": false,
"link": "/checkplease/category/oakland-east-bay-restaurant-info"
},
"checkplease_3729": {
"type": "terms",
"id": "checkplease_3729",
"meta": {
"index": "terms_1716263798",
"site": "checkplease",
"id": "3729",
"found": true
},
"relationships": {},
"featImg": null,
"name": "san francisco",
"description": null,
"taxonomy": "category",
"headData": {
"twImgId": null,
"twTitle": null,
"ogTitle": null,
"ogImgId": null,
"twDescription": null,
"description": null,
"title": "san francisco Archives | Check, Please! Bay Area",
"ogDescription": null
},
"ttid": 145,
"slug": "reviews-san-francisco",
"isLoading": false,
"link": "/checkplease/category/reviews-san-francisco"
},
"checkplease_3739": {
"type": "terms",
"id": "checkplease_3739",
"meta": {
"index": "terms_1716263798",
"site": "checkplease",
"id": "3739",
"found": true
},
"relationships": {},
"featImg": null,
"name": "san francisco",
"description": null,
"taxonomy": "category",
"headData": {
"twImgId": null,
"twTitle": null,
"ogTitle": null,
"ogImgId": null,
"twDescription": null,
"description": null,
"title": "san francisco Archives | Check, Please! Bay Area",
"ogDescription": null
},
"ttid": 157,
"slug": "san-francisco-restaurant-info",
"isLoading": false,
"link": "/checkplease/category/san-francisco-restaurant-info"
},
"checkplease_9209": {
"type": "terms",
"id": "checkplease_9209",
"meta": {
"index": "terms_1716263798",
"site": "checkplease",
"id": "9209",
"found": true
},
"relationships": {},
"featImg": null,
"name": "san francisco",
"description": null,
"taxonomy": "category",
"headData": {
"twImgId": null,
"twTitle": null,
"ogTitle": null,
"ogImgId": null,
"twDescription": null,
"description": null,
"title": "san francisco Archives - Check, Please! Bay Area",
"ogDescription": null
},
"ttid": 1580,
"slug": "san-francisco",
"isLoading": false,
"link": "/checkplease/category/san-francisco"
},
"checkplease_9455": {
"type": "terms",
"id": "checkplease_9455",
"meta": {
"index": "terms_1716263798",
"site": "checkplease",
"id": "9455",
"found": true
},
"relationships": {},
"name": "haitian cuisine",
"slug": "haitian-cuisine",
"taxonomy": "tag",
"description": null,
"featImg": null,
"headData": {
"title": "haitian cuisine - Check, Please! Bay Area",
"description": null,
"ogTitle": null,
"ogDescription": null,
"ogImgId": null,
"twTitle": null,
"twDescription": null,
"twImgId": null
},
"ttid": 1826,
"isLoading": false,
"link": "/checkplease/tag/haitian-cuisine"
},
"checkplease_9454": {
"type": "terms",
"id": "checkplease_9454",
"meta": {
"index": "terms_1716263798",
"site": "checkplease",
"id": "9454",
"found": true
},
"relationships": {},
"name": "haitian food",
"slug": "haitian-food",
"taxonomy": "tag",
"description": null,
"featImg": null,
"headData": {
"title": "haitian food - Check, Please! Bay Area",
"description": null,
"ogTitle": null,
"ogDescription": null,
"ogImgId": null,
"twTitle": null,
"twDescription": null,
"twImgId": null
},
"ttid": 1825,
"isLoading": false,
"link": "/checkplease/tag/haitian-food"
},
"checkplease_8811": {
"type": "terms",
"id": "checkplease_8811",
"meta": {
"index": "terms_1716263798",
"site": "checkplease",
"id": "8811",
"found": true
},
"relationships": {},
"featImg": null,
"name": "novato",
"description": null,
"taxonomy": "tag",
"headData": {
"twImgId": null,
"twTitle": null,
"ogTitle": null,
"ogImgId": null,
"twDescription": null,
"description": null,
"title": "novato Archives | Check, Please! Bay Area",
"ogDescription": null
},
"ttid": 1180,
"slug": "novato",
"isLoading": false,
"link": "/checkplease/tag/novato"
},
"checkplease_8509": {
"type": "terms",
"id": "checkplease_8509",
"meta": {
"index": "terms_1716263798",
"site": "checkplease",
"id": "8509",
"found": true
},
"relationships": {},
"featImg": null,
"name": "oakland",
"description": null,
"taxonomy": "tag",
"headData": {
"twImgId": null,
"twTitle": null,
"ogTitle": null,
"ogImgId": null,
"twDescription": null,
"description": null,
"title": "oakland Archives | Check, Please! Bay Area",
"ogDescription": null
},
"ttid": 878,
"slug": "oakland",
"isLoading": false,
"link": "/checkplease/tag/oakland"
},
"checkplease_8518": {
"type": "terms",
"id": "checkplease_8518",
"meta": {
"index": "terms_1716263798",
"site": "checkplease",
"id": "8518",
"found": true
},
"relationships": {},
"featImg": null,
"name": "san francisco",
"description": null,
"taxonomy": "tag",
"headData": {
"twImgId": null,
"twTitle": null,
"ogTitle": null,
"ogImgId": null,
"twDescription": null,
"description": null,
"title": "san francisco Archives | Check, Please! Bay Area",
"ogDescription": null
},
"ttid": 887,
"slug": "san-francisco",
"isLoading": false,
"link": "/checkplease/tag/san-francisco"
},
"checkplease_9290": {
"type": "terms",
"id": "checkplease_9290",
"meta": {
"index": "terms_1716263798",
"site": "checkplease",
"id": "9290",
"found": true
},
"relationships": {},
"featImg": null,
"name": "North Bay",
"description": null,
"taxonomy": "interest",
"headData": {
"twImgId": null,
"twTitle": null,
"ogTitle": null,
"ogImgId": null,
"twDescription": null,
"description": null,
"title": "North Bay Archives - Check, Please! Bay Area",
"ogDescription": null
},
"ttid": 1661,
"slug": "north-bay",
"isLoading": false,
"link": "/checkplease/interest/north-bay"
},
"checkplease_9276": {
"type": "terms",
"id": "checkplease_9276",
"meta": {
"index": "terms_1716263798",
"site": "checkplease",
"id": "9276",
"found": true
},
"relationships": {},
"featImg": null,
"name": "San Francisco",
"description": null,
"taxonomy": "interest",
"headData": {
"twImgId": null,
"twTitle": null,
"ogTitle": null,
"ogImgId": null,
"twDescription": null,
"description": null,
"title": "San Francisco Archives - Check, Please! Bay Area",
"ogDescription": null
},
"ttid": 1647,
"slug": "san-francisco",
"isLoading": false,
"link": "/checkplease/interest/san-francisco"
},
"checkplease_9105": {
"type": "terms",
"id": "checkplease_9105",
"meta": {
"index": "terms_1716263798",
"site": "checkplease",
"id": "9105",
"found": true
},
"relationships": {},
"featImg": null,
"name": "cecilia tries it",
"description": null,
"taxonomy": "category",
"headData": {
"twImgId": null,
"twTitle": null,
"ogTitle": null,
"ogImgId": null,
"twDescription": null,
"description": null,
"title": "cecilia tries it Archives - Check, Please! Bay Area",
"ogDescription": null
},
"ttid": 1476,
"slug": "cecilia-tries-it",
"isLoading": false,
"link": "/checkplease/category/cecilia-tries-it"
},
"checkplease_3753": {
"type": "terms",
"id": "checkplease_3753",
"meta": {
"index": "terms_1716263798",
"site": "checkplease",
"id": "3753",
"found": true
},
"relationships": {},
"featImg": null,
"name": "mexican",
"description": null,
"taxonomy": "category",
"headData": {
"twImgId": null,
"twTitle": null,
"ogTitle": null,
"ogImgId": null,
"twDescription": null,
"description": null,
"title": "mexican Archives | Check, Please! Bay Area",
"ogDescription": null
},
"ttid": 164,
"slug": "mexican-cuisine",
"isLoading": false,
"link": "/checkplease/category/mexican-cuisine"
},
"checkplease_8175": {
"type": "terms",
"id": "checkplease_8175",
"meta": {
"index": "terms_1716263798",
"site": "checkplease",
"id": "8175",
"found": true
},
"relationships": {},
"featImg": null,
"name": "southern",
"description": null,
"taxonomy": "category",
"headData": {
"twImgId": null,
"twTitle": null,
"ogTitle": null,
"ogImgId": null,
"twDescription": null,
"description": null,
"title": "southern Archives | Check, Please! Bay Area",
"ogDescription": null
},
"ttid": 542,
"slug": "southern",
"isLoading": false,
"link": "/checkplease/category/southern"
},
"checkplease_7938": {
"type": "terms",
"id": "checkplease_7938",
"meta": {
"index": "terms_1716263798",
"site": "checkplease",
"id": "7938",
"found": true
},
"relationships": {},
"featImg": null,
"name": "thai",
"description": null,
"taxonomy": "category",
"headData": {
"twImgId": null,
"twTitle": null,
"ogTitle": null,
"ogImgId": null,
"twDescription": null,
"description": null,
"title": "thai Archives | Check, Please! Bay Area",
"ogDescription": null
},
"ttid": 305,
"slug": "thai",
"isLoading": false,
"link": "/checkplease/category/thai"
},
"checkplease_8707": {
"type": "terms",
"id": "checkplease_8707",
"meta": {
"index": "terms_1716263798",
"site": "checkplease",
"id": "8707",
"found": true
},
"relationships": {},
"featImg": null,
"name": "soul food",
"description": null,
"taxonomy": "tag",
"headData": {
"twImgId": null,
"twTitle": null,
"ogTitle": null,
"ogImgId": null,
"twDescription": null,
"description": null,
"title": "soul food Archives | Check, Please! Bay Area",
"ogDescription": null
},
"ttid": 1076,
"slug": "soul-food",
"isLoading": false,
"link": "/checkplease/tag/soul-food"
},
"checkplease_9007": {
"type": "terms",
"id": "checkplease_9007",
"meta": {
"index": "terms_1716263798",
"site": "checkplease",
"id": "9007",
"found": true
},
"relationships": {},
"featImg": null,
"name": "southern cuisine",
"description": null,
"taxonomy": "tag",
"headData": {
"twImgId": null,
"twTitle": null,
"ogTitle": null,
"ogImgId": null,
"twDescription": null,
"description": null,
"title": "southern cuisine Archives | Check, Please! Bay Area",
"ogDescription": null
},
"ttid": 1378,
"slug": "southern-cuisine",
"isLoading": false,
"link": "/checkplease/tag/southern-cuisine"
},
"checkplease_9005": {
"type": "terms",
"id": "checkplease_9005",
"meta": {
"index": "terms_1716263798",
"site": "checkplease",
"id": "9005",
"found": true
},
"relationships": {},
"featImg": null,
"name": "southern food",
"description": null,
"taxonomy": "tag",
"headData": {
"twImgId": null,
"twTitle": null,
"ogTitle": null,
"ogImgId": null,
"twDescription": null,
"description": null,
"title": "southern food Archives | Check, Please! Bay Area",
"ogDescription": null
},
"ttid": 1376,
"slug": "southern-food",
"isLoading": false,
"link": "/checkplease/tag/southern-food"
},
"checkplease_9404": {
"type": "terms",
"id": "checkplease_9404",
"meta": {
"index": "terms_1716263798",
"site": "checkplease",
"id": "9404",
"found": true
},
"relationships": {},
"name": "thai cuisine",
"slug": "thai-cuisine",
"taxonomy": "tag",
"description": null,
"featImg": null,
"headData": {
"title": "thai cuisine - Check, Please! Bay Area",
"description": null,
"ogTitle": null,
"ogDescription": null,
"ogImgId": null,
"twTitle": null,
"twDescription": null,
"twImgId": null
},
"ttid": 1775,
"isLoading": false,
"link": "/checkplease/tag/thai-cuisine"
},
"checkplease_8703": {
"type": "terms",
"id": "checkplease_8703",
"meta": {
"index": "terms_1716263798",
"site": "checkplease",
"id": "8703",
"found": true
},
"relationships": {},
"featImg": null,
"name": "thai food",
"description": null,
"taxonomy": "tag",
"headData": {
"twImgId": null,
"twTitle": null,
"ogTitle": null,
"ogImgId": null,
"twDescription": null,
"description": null,
"title": "thai food Archives | Check, Please! Bay Area",
"ogDescription": null
},
"ttid": 1072,
"slug": "thai-food",
"isLoading": false,
"link": "/checkplease/tag/thai-food"
},
"checkplease_8600": {
"type": "terms",
"id": "checkplease_8600",
"meta": {
"index": "terms_1716263798",
"site": "checkplease",
"id": "8600",
"found": true
},
"relationships": {},
"featImg": null,
"name": "los gatos",
"description": null,
"taxonomy": "category",
"headData": {
"twImgId": null,
"twTitle": null,
"ogTitle": null,
"ogImgId": null,
"twDescription": null,
"description": null,
"title": "los gatos Archives | Check, Please! Bay Area",
"ogDescription": null
},
"ttid": 969,
"slug": "los-gatos",
"isLoading": false,
"link": "/checkplease/category/los-gatos"
},
"checkplease_8964": {
"type": "terms",
"id": "checkplease_8964",
"meta": {
"index": "terms_1716263798",
"site": "checkplease",
"id": "8964",
"found": true
},
"relationships": {},
"featImg": null,
"name": "san jose",
"description": null,
"taxonomy": "category",
"headData": {
"twImgId": null,
"twTitle": null,
"ogTitle": null,
"ogImgId": null,
"twDescription": null,
"description": null,
"title": "san jose Archives | Check, Please! Bay Area",
"ogDescription": null
},
"ttid": 1335,
"slug": "san-jose",
"isLoading": false,
"link": "/checkplease/category/san-jose"
},
"checkplease_3934": {
"type": "terms",
"id": "checkplease_3934",
"meta": {
"index": "terms_1716263798",
"site": "checkplease",
"id": "3934",
"found": true
},
"relationships": {},
"featImg": null,
"name": "soul food, cajun, creole",
"description": null,
"taxonomy": "category",
"headData": {
"twImgId": null,
"twTitle": null,
"ogTitle": null,
"ogImgId": null,
"twDescription": null,
"description": null,
"title": "soul food, cajun, creole Archives | Check, Please! Bay Area",
"ogDescription": null
},
"ttid": 201,
"slug": "soul-food-cajun-creole",
"isLoading": false,
"link": "/checkplease/category/soul-food-cajun-creole"
},
"checkplease_91": {
"type": "terms",
"id": "checkplease_91",
"meta": {
"index": "terms_1716263798",
"site": "checkplease",
"id": "91",
"found": true
},
"relationships": {},
"featImg": null,
"name": "south bay",
"description": null,
"taxonomy": "category",
"headData": {
"twImgId": null,
"twTitle": null,
"ogTitle": null,
"ogImgId": null,
"twDescription": null,
"description": null,
"title": "south bay Archives - Check, Please! Bay Area",
"ogDescription": null
},
"ttid": 147,
"slug": "south-bay",
"isLoading": false,
"link": "/checkplease/category/south-bay"
},
"checkplease_108": {
"type": "terms",
"id": "checkplease_108",
"meta": {
"index": "terms_1716263798",
"site": "checkplease",
"id": "108",
"found": true
},
"relationships": {},
"featImg": null,
"name": "vegetarian, vegan",
"description": null,
"taxonomy": "category",
"headData": {
"twImgId": null,
"twTitle": null,
"ogTitle": null,
"ogImgId": null,
"twDescription": null,
"description": null,
"title": "vegetarian, vegan Archives | Check, Please! Bay Area",
"ogDescription": null
},
"ttid": 165,
"slug": "vegetarian",
"isLoading": false,
"link": "/checkplease/category/vegetarian"
},
"checkplease_8601": {
"type": "terms",
"id": "checkplease_8601",
"meta": {
"index": "terms_1716263798",
"site": "checkplease",
"id": "8601",
"found": true
},
"relationships": {},
"featImg": null,
"name": "los gatos",
"description": null,
"taxonomy": "tag",
"headData": {
"twImgId": null,
"twTitle": null,
"ogTitle": null,
"ogImgId": null,
"twDescription": null,
"description": null,
"title": "los gatos Archives | Check, Please! Bay Area",
"ogDescription": null
},
"ttid": 970,
"slug": "los-gatos",
"isLoading": false,
"link": "/checkplease/tag/los-gatos"
},
"checkplease_8568": {
"type": "terms",
"id": "checkplease_8568",
"meta": {
"index": "terms_1716263798",
"site": "checkplease",
"id": "8568",
"found": true
},
"relationships": {},
"featImg": null,
"name": "san jose",
"description": null,
"taxonomy": "tag",
"headData": {
"twImgId": null,
"twTitle": null,
"ogTitle": null,
"ogImgId": null,
"twDescription": null,
"description": null,
"title": "san jose Archives | Check, Please! Bay Area",
"ogDescription": null
},
"ttid": 937,
"slug": "san-jose",
"isLoading": false,
"link": "/checkplease/tag/san-jose"
},
"checkplease_9254": {
"type": "terms",
"id": "checkplease_9254",
"meta": {
"index": "terms_1716263798",
"site": "checkplease",
"id": "9254",
"found": true
},
"relationships": {},
"featImg": null,
"name": "vegan cuisine",
"description": null,
"taxonomy": "tag",
"headData": {
"twImgId": null,
"twTitle": null,
"ogTitle": null,
"ogImgId": null,
"twDescription": null,
"description": null,
"title": "vegan cuisine Archives - Check, Please! Bay Area",
"ogDescription": null
},
"ttid": 1625,
"slug": "vegan-cuisine",
"isLoading": false,
"link": "/checkplease/tag/vegan-cuisine"
},
"checkplease_9033": {
"type": "terms",
"id": "checkplease_9033",
"meta": {
"index": "terms_1716263798",
"site": "checkplease",
"id": "9033",
"found": true
},
"relationships": {},
"featImg": null,
"name": "vegan food",
"description": null,
"taxonomy": "tag",
"headData": {
"twImgId": null,
"twTitle": null,
"ogTitle": null,
"ogImgId": null,
"twDescription": null,
"description": null,
"title": "vegan food Archives | Check, Please! Bay Area",
"ogDescription": null
},
"ttid": 1404,
"slug": "vegan-food",
"isLoading": false,
"link": "/checkplease/tag/vegan-food"
},
"checkplease_9429": {
"type": "terms",
"id": "checkplease_9429",
"meta": {
"index": "terms_1716263798",
"site": "checkplease",
"id": "9429",
"found": true
},
"relationships": {},
"name": "vegetarian cuisine",
"slug": "vegetarian-cuisine",
"taxonomy": "tag",
"description": null,
"featImg": null,
"headData": {
"title": "vegetarian cuisine - Check, Please! Bay Area",
"description": null,
"ogTitle": null,
"ogDescription": null,
"ogImgId": null,
"twTitle": null,
"twDescription": null,
"twImgId": null
},
"ttid": 1800,
"isLoading": false,
"link": "/checkplease/tag/vegetarian-cuisine"
},
"checkplease_9428": {
"type": "terms",
"id": "checkplease_9428",
"meta": {
"index": "terms_1716263798",
"site": "checkplease",
"id": "9428",
"found": true
},
"relationships": {},
"name": "vegetarian food",
"slug": "vegetarian-food",
"taxonomy": "tag",
"description": null,
"featImg": null,
"headData": {
"title": "vegetarian food - Check, Please! Bay Area",
"description": null,
"ogTitle": null,
"ogDescription": null,
"ogImgId": null,
"twTitle": null,
"twDescription": null,
"twImgId": null
},
"ttid": 1799,
"isLoading": false,
"link": "/checkplease/tag/vegetarian-food"
},
"checkplease_9285": {
"type": "terms",
"id": "checkplease_9285",
"meta": {
"index": "terms_1716263798",
"site": "checkplease",
"id": "9285",
"found": true
},
"relationships": {},
"featImg": null,
"name": "California",
"description": null,
"taxonomy": "interest",
"headData": {
"twImgId": null,
"twTitle": null,
"ogTitle": null,
"ogImgId": null,
"twDescription": null,
"description": null,
"title": "California Archives - Check, Please! Bay Area",
"ogDescription": null
},
"ttid": 1656,
"slug": "california",
"isLoading": false,
"link": "/checkplease/interest/california"
},
"checkplease_9278": {
"type": "terms",
"id": "checkplease_9278",
"meta": {
"index": "terms_1716263798",
"site": "checkplease",
"id": "9278",
"found": true
},
"relationships": {},
"featImg": null,
"name": "South Bay",
"description": null,
"taxonomy": "interest",
"headData": {
"twImgId": null,
"twTitle": null,
"ogTitle": null,
"ogImgId": null,
"twDescription": null,
"description": null,
"title": "South Bay Archives - Check, Please! Bay Area",
"ogDescription": null
},
"ttid": 1649,
"slug": "south-bay",
"isLoading": false,
"link": "/checkplease/interest/south-bay"
},
"checkplease_1477": {
"type": "terms",
"id": "checkplease_1477",
"meta": {
"index": "terms_1716263798",
"site": "checkplease",
"id": "1477",
"found": true
},
"relationships": {},
"featImg": null,
"name": "spanish, latin",
"description": null,
"taxonomy": "category",
"headData": {
"twImgId": null,
"twTitle": null,
"ogTitle": null,
"ogImgId": null,
"twDescription": null,
"description": null,
"title": "spanish, latin Archives | Check, Please! Bay Area",
"ogDescription": null
},
"ttid": 182,
"slug": "spanish",
"isLoading": false,
"link": "/checkplease/category/spanish"
},
"checkplease_8776": {
"type": "terms",
"id": "checkplease_8776",
"meta": {
"index": "terms_1716263798",
"site": "checkplease",
"id": "8776",
"found": true
},
"relationships": {},
"featImg": null,
"name": "bakery",
"description": null,
"taxonomy": "tag",
"headData": {
"twImgId": null,
"twTitle": null,
"ogTitle": null,
"ogImgId": null,
"twDescription": null,
"description": null,
"title": "bakery Archives | Check, Please! Bay Area",
"ogDescription": null
},
"ttid": 1145,
"slug": "bakery",
"isLoading": false,
"link": "/checkplease/tag/bakery"
},
"checkplease_9398": {
"type": "terms",
"id": "checkplease_9398",
"meta": {
"index": "terms_1716263798",
"site": "checkplease",
"id": "9398",
"found": true
},
"relationships": {},
"name": "check please",
"slug": "check-please",
"taxonomy": "tag",
"description": null,
"featImg": null,
"headData": {
"title": "check please - Check, Please! Bay Area",
"description": null,
"ogTitle": null,
"ogDescription": null,
"ogImgId": null,
"twTitle": null,
"twDescription": null,
"twImgId": null
},
"ttid": 1769,
"isLoading": false,
"link": "/checkplease/tag/check-please"
},
"checkplease_763": {
"type": "terms",
"id": "checkplease_763",
"meta": {
"index": "terms_1716263798",
"site": "checkplease",
"id": "763",
"found": true
},
"relationships": {},
"featImg": null,
"name": "check please bay area",
"description": null,
"taxonomy": "tag",
"headData": {
"twImgId": null,
"twTitle": null,
"ogTitle": null,
"ogImgId": null,
"twDescription": null,
"description": null,
"title": "check please bay area Archives | Check, Please! Bay Area",
"ogDescription": null
},
"ttid": 37,
"slug": "check-please-bay-area",
"isLoading": false,
"link": "/checkplease/tag/check-please-bay-area"
},
"checkplease_3760": {
"type": "terms",
"id": "checkplease_3760",
"meta": {
"index": "terms_1716263798",
"site": "checkplease",
"id": "3760",
"found": true
},
"relationships": {},
"featImg": null,
"name": "barbeque",
"description": null,
"taxonomy": "category",
"headData": {
"twImgId": null,
"twTitle": null,
"ogTitle": null,
"ogImgId": null,
"twDescription": null,
"description": null,
"title": "barbeque Archives | Check, Please! Bay Area",
"ogDescription": null
},
"ttid": 176,
"slug": "barbeque",
"isLoading": false,
"link": "/checkplease/category/barbeque"
},
"checkplease_3847": {
"type": "terms",
"id": "checkplease_3847",
"meta": {
"index": "terms_1716263798",
"site": "checkplease",
"id": "3847",
"found": true
},
"relationships": {},
"featImg": null,
"name": "japanese",
"description": null,
"taxonomy": "category",
"headData": {
"twImgId": null,
"twTitle": null,
"ogTitle": null,
"ogImgId": null,
"twDescription": null,
"description": null,
"title": "japanese Archives | Check, Please! Bay Area",
"ogDescription": null
},
"ttid": 170,
"slug": "japanese-asian-cuisine",
"isLoading": false,
"link": "/checkplease/category/japanese-asian-cuisine"
},
"checkplease_9450": {
"type": "terms",
"id": "checkplease_9450",
"meta": {
"index": "terms_1716263798",
"site": "checkplease",
"id": "9450",
"found": true
},
"relationships": {},
"name": "Pacifica",
"slug": "pacifica",
"taxonomy": "category",
"description": null,
"featImg": null,
"headData": {
"title": "Pacifica - Check, Please! Bay Area",
"description": null,
"ogTitle": null,
"ogDescription": null,
"ogImgId": null,
"twTitle": null,
"twDescription": null,
"twImgId": null
},
"ttid": 1821,
"isLoading": false,
"link": "/checkplease/category/pacifica"
},
"checkplease_8061": {
"type": "terms",
"id": "checkplease_8061",
"meta": {
"index": "terms_1716263798",
"site": "checkplease",
"id": "8061",
"found": true
},
"relationships": {},
"featImg": null,
"name": "san mateo",
"description": null,
"taxonomy": "category",
"headData": {
"twImgId": null,
"twTitle": null,
"ogTitle": null,
"ogImgId": null,
"twDescription": null,
"description": null,
"title": "san mateo Archives | Check, Please! Bay Area",
"ogDescription": null
},
"ttid": 428,
"slug": "san-mateo",
"isLoading": false,
"link": "/checkplease/category/san-mateo"
},
"checkplease_9427": {
"type": "terms",
"id": "checkplease_9427",
"meta": {
"index": "terms_1716263798",
"site": "checkplease",
"id": "9427",
"found": true
},
"relationships": {},
"name": "season 20",
"slug": "season-20",
"taxonomy": "category",
"description": null,
"featImg": null,
"headData": {
"title": "season 20 - Check, Please! Bay Area",
"description": null,
"ogTitle": null,
"ogDescription": null,
"ogImgId": null,
"twTitle": null,
"twDescription": null,
"twImgId": null
},
"ttid": 1798,
"isLoading": false,
"link": "/checkplease/category/season-20"
},
"checkplease_8575": {
"type": "terms",
"id": "checkplease_8575",
"meta": {
"index": "terms_1716263798",
"site": "checkplease",
"id": "8575",
"found": true
},
"relationships": {},
"featImg": null,
"name": "barbecue",
"description": null,
"taxonomy": "tag",
"headData": {
"twImgId": null,
"twTitle": null,
"ogTitle": null,
"ogImgId": null,
"twDescription": null,
"description": null,
"title": "barbecue Archives | Check, Please! Bay Area",
"ogDescription": null
},
"ttid": 944,
"slug": "barbecue",
"isLoading": false,
"link": "/checkplease/tag/barbecue"
},
"checkplease_8988": {
"type": "terms",
"id": "checkplease_8988",
"meta": {
"index": "terms_1716263798",
"site": "checkplease",
"id": "8988",
"found": true
},
"relationships": {},
"featImg": null,
"name": "bbq",
"description": null,
"taxonomy": "tag",
"headData": {
"twImgId": null,
"twTitle": null,
"ogTitle": null,
"ogImgId": null,
"twDescription": null,
"description": null,
"title": "bbq Archives | Check, Please! Bay Area",
"ogDescription": null
},
"ttid": 1359,
"slug": "bbq",
"isLoading": false,
"link": "/checkplease/tag/bbq"
},
"checkplease_9245": {
"type": "terms",
"id": "checkplease_9245",
"meta": {
"index": "terms_1716263798",
"site": "checkplease",
"id": "9245",
"found": true
},
"relationships": {},
"featImg": null,
"name": "japanese cuisine",
"description": null,
"taxonomy": "tag",
"headData": {
"twImgId": null,
"twTitle": null,
"ogTitle": null,
"ogImgId": null,
"twDescription": null,
"description": null,
"title": "japanese cuisine Archives - Check, Please! Bay Area",
"ogDescription": null
},
"ttid": 1616,
"slug": "japanese-cuisine",
"isLoading": false,
"link": "/checkplease/tag/japanese-cuisine"
},
"checkplease_8794": {
"type": "terms",
"id": "checkplease_8794",
"meta": {
"index": "terms_1716263798",
"site": "checkplease",
"id": "8794",
"found": true
},
"relationships": {},
"featImg": null,
"name": "japanese food",
"description": null,
"taxonomy": "tag",
"headData": {
"twImgId": null,
"twTitle": null,
"ogTitle": null,
"ogImgId": null,
"twDescription": null,
"description": null,
"title": "japanese food Archives | Check, Please! Bay Area",
"ogDescription": null
},
"ttid": 1163,
"slug": "japanese-food",
"isLoading": false,
"link": "/checkplease/tag/japanese-food"
},
"checkplease_8758": {
"type": "terms",
"id": "checkplease_8758",
"meta": {
"index": "terms_1716263798",
"site": "checkplease",
"id": "8758",
"found": true
},
"relationships": {},
"featImg": null,
"name": "pacifica",
"description": null,
"taxonomy": "tag",
"headData": {
"twImgId": null,
"twTitle": null,
"ogTitle": null,
"ogImgId": null,
"twDescription": null,
"description": null,
"title": "pacifica Archives | Check, Please! Bay Area",
"ogDescription": null
},
"ttid": 1127,
"slug": "pacifica",
"isLoading": false,
"link": "/checkplease/tag/pacifica"
},
"checkplease_8519": {
"type": "terms",
"id": "checkplease_8519",
"meta": {
"index": "terms_1716263798",
"site": "checkplease",
"id": "8519",
"found": true
},
"relationships": {},
"featImg": null,
"name": "san mateo",
"description": null,
"taxonomy": "tag",
"headData": {
"twImgId": null,
"twTitle": null,
"ogTitle": null,
"ogImgId": null,
"twDescription": null,
"description": null,
"title": "san mateo Archives | Check, Please! Bay Area",
"ogDescription": null
},
"ttid": 888,
"slug": "san-mateo",
"isLoading": false,
"link": "/checkplease/tag/san-mateo"
},
"checkplease_3637": {
"type": "terms",
"id": "checkplease_3637",
"meta": {
"index": "terms_1716263798",
"site": "checkplease",
"id": "3637",
"found": true
},
"relationships": {},
"featImg": null,
"name": "african",
"description": null,
"taxonomy": "category",
"headData": {
"twImgId": null,
"twTitle": null,
"ogTitle": null,
"ogImgId": null,
"twDescription": null,
"description": null,
"title": "african Archives | Check, Please! Bay Area",
"ogDescription": null
},
"ttid": 250,
"slug": "african",
"isLoading": false,
"link": "/checkplease/category/african"
},
"checkplease_8009": {
"type": "terms",
"id": "checkplease_8009",
"meta": {
"index": "terms_1716263798",
"site": "checkplease",
"id": "8009",
"found": true
},
"relationships": {},
"featImg": null,
"name": "burgers",
"description": null,
"taxonomy": "category",
"headData": {
"twImgId": null,
"twTitle": null,
"ogTitle": null,
"ogImgId": null,
"twDescription": null,
"description": null,
"title": "burgers Archives | Check, Please! Bay Area",
"ogDescription": null
},
"ttid": 376,
"slug": "burgers",
"isLoading": false,
"link": "/checkplease/category/burgers"
},
"checkplease_250": {
"type": "terms",
"id": "checkplease_250",
"meta": {
"index": "terms_1716263798",
"site": "checkplease",
"id": "250",
"found": true
},
"relationships": {},
"featImg": null,
"name": "california",
"description": null,
"taxonomy": "category",
"headData": {
"twImgId": null,
"twTitle": null,
"ogTitle": null,
"ogImgId": null,
"twDescription": null,
"description": null,
"title": "california Archives - Check, Please! Bay Area",
"ogDescription": null
},
"ttid": 172,
"slug": "california",
"isLoading": false,
"link": "/checkplease/category/california"
},
"checkplease_8017": {
"type": "terms",
"id": "checkplease_8017",
"meta": {
"index": "terms_1716263798",
"site": "checkplease",
"id": "8017",
"found": true
},
"relationships": {},
"featImg": null,
"name": "danville",
"description": null,
"taxonomy": "category",
"headData": {
"twImgId": null,
"twTitle": null,
"ogTitle": null,
"ogImgId": null,
"twDescription": null,
"description": null,
"title": "danville Archives | Check, Please! Bay Area",
"ogDescription": null
},
"ttid": 384,
"slug": "danville",
"isLoading": false,
"link": "/checkplease/category/danville"
},
"checkplease_9448": {
"type": "terms",
"id": "checkplease_9448",
"meta": {
"index": "terms_1716263798",
"site": "checkplease",
"id": "9448",
"found": true
},
"relationships": {},
"name": "eritrean",
"slug": "eritrean",
"taxonomy": "category",
"description": null,
"featImg": null,
"headData": {
"title": "eritrean - Check, Please! Bay Area",
"description": null,
"ogTitle": null,
"ogDescription": null,
"ogImgId": null,
"twTitle": null,
"twDescription": null,
"twImgId": null
},
"ttid": 1819,
"isLoading": false,
"link": "/checkplease/category/eritrean"
},
"checkplease_3936": {
"type": "terms",
"id": "checkplease_3936",
"meta": {
"index": "terms_1716263798",
"site": "checkplease",
"id": "3936",
"found": true
},
"relationships": {},
"featImg": null,
"name": "street cart / truck",
"description": null,
"taxonomy": "category",
"headData": {
"twImgId": null,
"twTitle": null,
"ogTitle": null,
"ogImgId": null,
"twDescription": null,
"description": null,
"title": "street cart / truck Archives | Check, Please! Bay Area",
"ogDescription": null
},
"ttid": 277,
"slug": "street-cart-truck",
"isLoading": false,
"link": "/checkplease/category/street-cart-truck"
},
"checkplease_9442": {
"type": "terms",
"id": "checkplease_9442",
"meta": {
"index": "terms_1716263798",
"site": "checkplease",
"id": "9442",
"found": true
},
"relationships": {},
"name": "danville",
"slug": "danville",
"taxonomy": "tag",
"description": null,
"featImg": null,
"headData": {
"title": "danville - Check, Please! Bay Area",
"description": null,
"ogTitle": null,
"ogDescription": null,
"ogImgId": null,
"twTitle": null,
"twDescription": null,
"twImgId": null
},
"ttid": 1813,
"isLoading": false,
"link": "/checkplease/tag/danville"
},
"checkplease_9445": {
"type": "terms",
"id": "checkplease_9445",
"meta": {
"index": "terms_1716263798",
"site": "checkplease",
"id": "9445",
"found": true
},
"relationships": {},
"name": "eritrean cuisine",
"slug": "eritrean-cuisine",
"taxonomy": "tag",
"description": null,
"featImg": null,
"headData": {
"title": "eritrean cuisine - Check, Please! Bay Area",
"description": null,
"ogTitle": null,
"ogDescription": null,
"ogImgId": null,
"twTitle": null,
"twDescription": null,
"twImgId": null
},
"ttid": 1816,
"isLoading": false,
"link": "/checkplease/tag/eritrean-cuisine"
},
"checkplease_9449": {
"type": "terms",
"id": "checkplease_9449",
"meta": {
"index": "terms_1716263798",
"site": "checkplease",
"id": "9449",
"found": true
},
"relationships": {},
"name": "eritrean food",
"slug": "eritrean-food",
"taxonomy": "tag",
"description": null,
"featImg": null,
"headData": {
"title": "eritrean food - Check, Please! Bay Area",
"description": null,
"ogTitle": null,
"ogDescription": null,
"ogImgId": null,
"twTitle": null,
"twDescription": null,
"twImgId": null
},
"ttid": 1820,
"isLoading": false,
"link": "/checkplease/tag/eritrean-food"
},
"checkplease_9091": {
"type": "terms",
"id": "checkplease_9091",
"meta": {
"index": "terms_1716263798",
"site": "checkplease",
"id": "9091",
"found": true
},
"relationships": {},
"featImg": null,
"name": "mexican cuisine",
"description": null,
"taxonomy": "tag",
"headData": {
"twImgId": null,
"twTitle": null,
"ogTitle": null,
"ogImgId": null,
"twDescription": null,
"description": null,
"title": "mexican cuisine Archives - Check, Please! Bay Area",
"ogDescription": null
},
"ttid": 1462,
"slug": "mexican-cuisine",
"isLoading": false,
"link": "/checkplease/tag/mexican-cuisine"
},
"checkplease_8573": {
"type": "terms",
"id": "checkplease_8573",
"meta": {
"index": "terms_1716263798",
"site": "checkplease",
"id": "8573",
"found": true
},
"relationships": {},
"featImg": null,
"name": "mexican food",
"description": null,
"taxonomy": "tag",
"headData": {
"twImgId": null,
"twTitle": null,
"ogTitle": null,
"ogImgId": null,
"twDescription": null,
"description": null,
"title": "mexican food Archives | Check, Please! Bay Area",
"ogDescription": null
},
"ttid": 942,
"slug": "mexican-food",
"isLoading": false,
"link": "/checkplease/tag/mexican-food"
},
"checkplease_8022": {
"type": "terms",
"id": "checkplease_8022",
"meta": {
"index": "terms_1716263798",
"site": "checkplease",
"id": "8022",
"found": true
},
"relationships": {},
"featImg": null,
"name": "burlingame",
"description": null,
"taxonomy": "category",
"headData": {
"twImgId": null,
"twTitle": null,
"ogTitle": null,
"ogImgId": null,
"twDescription": null,
"description": null,
"title": "burlingame Archives | Check, Please! Bay Area",
"ogDescription": null
},
"ttid": 389,
"slug": "burlingame",
"isLoading": false,
"link": "/checkplease/category/burlingame"
},
"checkplease_93": {
"type": "terms",
"id": "checkplease_93",
"meta": {
"index": "terms_1716263798",
"site": "checkplease",
"id": "93",
"found": true
},
"relationships": {},
"featImg": null,
"name": "filipino",
"description": null,
"taxonomy": "category",
"headData": {
"twImgId": null,
"twTitle": null,
"ogTitle": null,
"ogImgId": null,
"twDescription": null,
"description": null,
"title": "filipino Archives | Check, Please! Bay Area",
"ogDescription": null
},
"ttid": 295,
"slug": "filipino",
"isLoading": false,
"link": "/checkplease/category/filipino"
},
"checkplease_3831": {
"type": "terms",
"id": "checkplease_3831",
"meta": {
"index": "terms_1716263798",
"site": "checkplease",
"id": "3831",
"found": true
},
"relationships": {},
"featImg": null,
"name": "greek",
"description": null,
"taxonomy": "category",
"headData": {
"twImgId": null,
"twTitle": null,
"ogTitle": null,
"ogImgId": null,
"twDescription": null,
"description": null,
"title": "greek Archives | Check, Please! Bay Area",
"ogDescription": null
},
"ttid": 236,
"slug": "greek-cuisine",
"isLoading": false,
"link": "/checkplease/category/greek-cuisine"
},
"checkplease_3754": {
"type": "terms",
"id": "checkplease_3754",
"meta": {
"index": "terms_1716263798",
"site": "checkplease",
"id": "3754",
"found": true
},
"relationships": {},
"featImg": null,
"name": "mediterranean",
"description": null,
"taxonomy": "category",
"headData": {
"twImgId": null,
"twTitle": null,
"ogTitle": null,
"ogImgId": null,
"twDescription": null,
"description": null,
"title": "mediterranean Archives | Check, Please! Bay Area",
"ogDescription": null
},
"ttid": 166,
"slug": "mediterranean-cuisine",
"isLoading": false,
"link": "/checkplease/category/mediterranean-cuisine"
},
"checkplease_7949": {
"type": "terms",
"id": "checkplease_7949",
"meta": {
"index": "terms_1716263798",
"site": "checkplease",
"id": "7949",
"found": true
},
"relationships": {},
"featImg": null,
"name": "walnut creek",
"description": null,
"taxonomy": "category",
"headData": {
"twImgId": null,
"twTitle": null,
"ogTitle": null,
"ogImgId": null,
"twDescription": null,
"description": null,
"title": "walnut creek Archives | Check, Please! Bay Area",
"ogDescription": null
},
"ttid": 316,
"slug": "walnut-creek",
"isLoading": false,
"link": "/checkplease/category/walnut-creek"
},
"checkplease_8584": {
"type": "terms",
"id": "checkplease_8584",
"meta": {
"index": "terms_1716263798",
"site": "checkplease",
"id": "8584",
"found": true
},
"relationships": {},
"featImg": null,
"name": "burlingame",
"description": null,
"taxonomy": "tag",
"headData": {
"twImgId": null,
"twTitle": null,
"ogTitle": null,
"ogImgId": null,
"twDescription": null,
"description": null,
"title": "burlingame Archives | Check, Please! Bay Area",
"ogDescription": null
},
"ttid": 953,
"slug": "burlingame",
"isLoading": false,
"link": "/checkplease/tag/burlingame"
},
"checkplease_8971": {
"type": "terms",
"id": "checkplease_8971",
"meta": {
"index": "terms_1716263798",
"site": "checkplease",
"id": "8971",
"found": true
},
"relationships": {},
"featImg": null,
"name": "filipino cuisine",
"description": null,
"taxonomy": "tag",
"headData": {
"twImgId": null,
"twTitle": null,
"ogTitle": null,
"ogImgId": null,
"twDescription": null,
"description": null,
"title": "filipino cuisine Archives | Check, Please! Bay Area",
"ogDescription": null
},
"ttid": 1342,
"slug": "filipino-cuisine",
"isLoading": false,
"link": "/checkplease/tag/filipino-cuisine"
},
"checkplease_8565": {
"type": "terms",
"id": "checkplease_8565",
"meta": {
"index": "terms_1716263798",
"site": "checkplease",
"id": "8565",
"found": true
},
"relationships": {},
"featImg": null,
"name": "filipino food",
"description": null,
"taxonomy": "tag",
"headData": {
"twImgId": null,
"twTitle": null,
"ogTitle": null,
"ogImgId": null,
"twDescription": null,
"description": null,
"title": "filipino food Archives | Check, Please! Bay Area",
"ogDescription": null
},
"ttid": 934,
"slug": "filipino-food",
"isLoading": false,
"link": "/checkplease/tag/filipino-food"
},
"checkplease_9025": {
"type": "terms",
"id": "checkplease_9025",
"meta": {
"index": "terms_1716263798",
"site": "checkplease",
"id": "9025",
"found": true
},
"relationships": {},
"featImg": null,
"name": "greek cuisine",
"description": null,
"taxonomy": "tag",
"headData": {
"twImgId": null,
"twTitle": null,
"ogTitle": null,
"ogImgId": null,
"twDescription": null,
"description": null,
"title": "greek cuisine Archives | Check, Please! Bay Area",
"ogDescription": null
},
"ttid": 1396,
"slug": "greek-cuisine",
"isLoading": false,
"link": "/checkplease/tag/greek-cuisine"
},
"checkplease_8599": {
"type": "terms",
"id": "checkplease_8599",
"meta": {
"index": "terms_1716263798",
"site": "checkplease",
"id": "8599",
"found": true
},
"relationships": {},
"featImg": null,
"name": "greek food",
"description": null,
"taxonomy": "tag",
"headData": {
"twImgId": null,
"twTitle": null,
"ogTitle": null,
"ogImgId": null,
"twDescription": null,
"description": null,
"title": "greek food Archives | Check, Please! Bay Area",
"ogDescription": null
},
"ttid": 968,
"slug": "greek-food",
"isLoading": false,
"link": "/checkplease/tag/greek-food"
},
"checkplease_8569": {
"type": "terms",
"id": "checkplease_8569",
"meta": {
"index": "terms_1716263798",
"site": "checkplease",
"id": "8569",
"found": true
},
"relationships": {},
"featImg": null,
"name": "walnut creek",
"description": null,
"taxonomy": "tag",
"headData": {
"twImgId": null,
"twTitle": null,
"ogTitle": null,
"ogImgId": null,
"twDescription": null,
"description": null,
"title": "walnut creek Archives | Check, Please! Bay Area",
"ogDescription": null
},
"ttid": 938,
"slug": "walnut-creek",
"isLoading": false,
"link": "/checkplease/tag/walnut-creek"
},
"checkplease_9186": {
"type": "terms",
"id": "checkplease_9186",
"meta": {
"index": "terms_1716263798",
"site": "checkplease",
"id": "9186",
"found": true
},
"relationships": {},
"featImg": null,
"name": "middle eastern",
"description": null,
"taxonomy": "category",
"headData": {
"twImgId": null,
"twTitle": null,
"ogTitle": null,
"ogImgId": null,
"twDescription": null,
"description": null,
"title": "middle eastern Archives - Check, Please! Bay Area",
"ogDescription": null
},
"ttid": 1557,
"slug": "middle-eastern",
"isLoading": false,
"link": "/checkplease/category/middle-eastern"
},
"checkplease_9275": {
"type": "terms",
"id": "checkplease_9275",
"meta": {
"index": "terms_1716263798",
"site": "checkplease",
"id": "9275",
"found": true
},
"relationships": {},
"featImg": null,
"name": "napa",
"description": null,
"taxonomy": "category",
"headData": {
"twImgId": null,
"twTitle": null,
"ogTitle": null,
"ogImgId": null,
"twDescription": null,
"description": null,
"title": "napa Archives - Check, Please! Bay Area",
"ogDescription": null
},
"ttid": 1646,
"slug": "napa-north-bay-restaurant-info",
"isLoading": false,
"link": "/checkplease/category/napa-north-bay-restaurant-info"
},
"checkplease_7994": {
"type": "terms",
"id": "checkplease_7994",
"meta": {
"index": "terms_1716263798",
"site": "checkplease",
"id": "7994",
"found": true
},
"relationships": {},
"featImg": null,
"name": "petaluma",
"description": null,
"taxonomy": "category",
"headData": {
"twImgId": null,
"twTitle": null,
"ogTitle": null,
"ogImgId": null,
"twDescription": null,
"description": null,
"title": "petaluma Archives | Check, Please! Bay Area",
"ogDescription": null
},
"ttid": 361,
"slug": "petaluma",
"isLoading": false,
"link": "/checkplease/category/petaluma"
},
"checkplease_8156": {
"type": "terms",
"id": "checkplease_8156",
"meta": {
"index": "terms_1716263798",
"site": "checkplease",
"id": "8156",
"found": true
},
"relationships": {},
"featImg": null,
"name": "scandinavian",
"description": null,
"taxonomy": "category",
"headData": {
"twImgId": null,
"twTitle": null,
"ogTitle": null,
"ogImgId": null,
"twDescription": null,
"description": null,
"title": "scandinavian Archives | Check, Please! Bay Area",
"ogDescription": null
},
"ttid": 523,
"slug": "scandinavian",
"isLoading": false,
"link": "/checkplease/category/scandinavian"
},
"checkplease_9444": {
"type": "terms",
"id": "checkplease_9444",
"meta": {
"index": "terms_1716263798",
"site": "checkplease",
"id": "9444",
"found": true
},
"relationships": {},
"name": "middle eastern cuisine",
"slug": "middle-eastern-cuisine",
"taxonomy": "tag",
"description": null,
"featImg": null,
"headData": {
"title": "middle eastern cuisine - Check, Please! Bay Area",
"description": null,
"ogTitle": null,
"ogDescription": null,
"ogImgId": null,
"twTitle": null,
"twDescription": null,
"twImgId": null
},
"ttid": 1815,
"isLoading": false,
"link": "/checkplease/tag/middle-eastern-cuisine"
},
"checkplease_9447": {
"type": "terms",
"id": "checkplease_9447",
"meta": {
"index": "terms_1716263798",
"site": "checkplease",
"id": "9447",
"found": true
},
"relationships": {},
"name": "middle eastern food",
"slug": "middle-eastern-food",
"taxonomy": "tag",
"description": null,
"featImg": null,
"headData": {
"title": "middle eastern food - Check, Please! Bay Area",
"description": null,
"ogTitle": null,
"ogDescription": null,
"ogImgId": null,
"twTitle": null,
"twDescription": null,
"twImgId": null
},
"ttid": 1818,
"isLoading": false,
"link": "/checkplease/tag/middle-eastern-food"
},
"checkplease_8579": {
"type": "terms",
"id": "checkplease_8579",
"meta": {
"index": "terms_1716263798",
"site": "checkplease",
"id": "8579",
"found": true
},
"relationships": {},
"featImg": null,
"name": "napa",
"description": null,
"taxonomy": "tag",
"headData": {
"twImgId": null,
"twTitle": null,
"ogTitle": null,
"ogImgId": null,
"twDescription": null,
"description": null,
"title": "napa Archives | Check, Please! Bay Area",
"ogDescription": null
},
"ttid": 948,
"slug": "napa",
"isLoading": false,
"link": "/checkplease/tag/napa"
},
"checkplease_8640": {
"type": "terms",
"id": "checkplease_8640",
"meta": {
"index": "terms_1716263798",
"site": "checkplease",
"id": "8640",
"found": true
},
"relationships": {},
"featImg": null,
"name": "petaluma",
"description": null,
"taxonomy": "tag",
"headData": {
"twImgId": null,
"twTitle": null,
"ogTitle": null,
"ogImgId": null,
"twDescription": null,
"description": null,
"title": "petaluma Archives | Check, Please! Bay Area",
"ogDescription": null
},
"ttid": 1009,
"slug": "petaluma",
"isLoading": false,
"link": "/checkplease/tag/petaluma"
},
"checkplease_9443": {
"type": "terms",
"id": "checkplease_9443",
"meta": {
"index": "terms_1716263798",
"site": "checkplease",
"id": "9443",
"found": true
},
"relationships": {},
"name": "swedish cuisine",
"slug": "swedish-cuisine",
"taxonomy": "tag",
"description": null,
"featImg": null,
"headData": {
"title": "swedish cuisine - Check, Please! Bay Area",
"description": null,
"ogTitle": null,
"ogDescription": null,
"ogImgId": null,
"twTitle": null,
"twDescription": null,
"twImgId": null
},
"ttid": 1814,
"isLoading": false,
"link": "/checkplease/tag/swedish-cuisine"
},
"checkplease_9446": {
"type": "terms",
"id": "checkplease_9446",
"meta": {
"index": "terms_1716263798",
"site": "checkplease",
"id": "9446",
"found": true
},
"relationships": {},
"name": "swedish food",
"slug": "swedish-food",
"taxonomy": "tag",
"description": null,
"featImg": null,
"headData": {
"title": "swedish food - Check, Please! Bay Area",
"description": null,
"ogTitle": null,
"ogDescription": null,
"ogImgId": null,
"twTitle": null,
"twDescription": null,
"twImgId": null
},
"ttid": 1817,
"isLoading": false,
"link": "/checkplease/tag/swedish-food"
},
"source_food_1337955": {
"type": "terms",
"id": "source_food_1337955",
"meta": {
"override": true
},
"name": "Food",
"link": "https://www.kqed.org/food",
"isLoading": false
},
"source_food_1337943": {
"type": "terms",
"id": "source_food_1337943",
"meta": {
"override": true
},
"name": "Food",
"link": "https://www.kqed.org/food",
"isLoading": false
},
"source_food_1337762": {
"type": "terms",
"id": "source_food_1337762",
"meta": {
"override": true
},
"name": "Food",
"link": "https://www.kqed.org/food",
"isLoading": false
},
"source_food_1337484": {
"type": "terms",
"id": "source_food_1337484",
"meta": {
"override": true
},
"name": "Food",
"link": "/food/",
"isLoading": false
},
"source_food_1337457": {
"type": "terms",
"id": "source_food_1337457",
"meta": {
"override": true
},
"name": "Food",
"isLoading": false
},
"source_food_1337385": {
"type": "terms",
"id": "source_food_1337385",
"meta": {
"override": true
},
"name": "Food",
"link": "/food/",
"isLoading": false
},
"source_food_1337370": {
"type": "terms",
"id": "source_food_1337370",
"meta": {
"override": true
},
"name": "Food",
"link": "/food/",
"isLoading": false
},
"food_331": {
"type": "terms",
"id": "food_331",
"meta": {
"index": "terms_1716263798",
"site": "food",
"id": "331",
"found": true
},
"relationships": {},
"featImg": null,
"name": "No Crumbs",
"description": null,
"taxonomy": "series",
"headData": {
"twImgId": null,
"twTitle": null,
"ogTitle": null,
"ogImgId": null,
"twDescription": null,
"description": null,
"title": "No Crumbs Archives - KQED Food",
"ogDescription": null
},
"ttid": 331,
"slug": "no-crumbs",
"isLoading": false,
"link": "/food/series/no-crumbs"
},
"food_136": {
"type": "terms",
"id": "food_136",
"meta": {
"index": "terms_1716263798",
"site": "food",
"id": "136",
"found": true
},
"relationships": {},
"featImg": null,
"name": "beans",
"description": null,
"taxonomy": "tag",
"headData": {
"twImgId": null,
"twTitle": null,
"ogTitle": null,
"ogImgId": null,
"twDescription": null,
"description": null,
"title": "beans Archives | KQED Food",
"ogDescription": null
},
"ttid": 136,
"slug": "beans",
"isLoading": false,
"link": "/food/tag/beans"
},
"food_261": {
"type": "terms",
"id": "food_261",
"meta": {
"index": "terms_1716263798",
"site": "food",
"id": "261",
"found": true
},
"relationships": {},
"featImg": null,
"name": "no crumbs",
"description": null,
"taxonomy": "tag",
"headData": {
"twImgId": null,
"twTitle": null,
"ogTitle": null,
"ogImgId": null,
"twDescription": null,
"description": null,
"title": "no crumbs Archives - KQED Food",
"ogDescription": null
},
"ttid": 261,
"slug": "no-crumbs",
"isLoading": false,
"link": "/food/tag/no-crumbs"
},
"food_397": {
"type": "terms",
"id": "food_397",
"meta": {
"index": "terms_1716263798",
"site": "food",
"id": "397",
"found": true
},
"relationships": {},
"name": "rancho gordo",
"slug": "rancho-gordo",
"taxonomy": "tag",
"description": null,
"featImg": null,
"headData": {
"title": "rancho gordo - KQED Food",
"description": null,
"ogTitle": null,
"ogDescription": null,
"ogImgId": null,
"twTitle": null,
"twDescription": null,
"twImgId": null
},
"ttid": 397,
"isLoading": false,
"link": "/food/tag/rancho-gordo"
},
"food_387": {
"type": "terms",
"id": "food_387",
"meta": {
"index": "terms_1716263798",
"site": "food",
"id": "387",
"found": true
},
"relationships": {},
"name": "black history month",
"slug": "black-history-month",
"taxonomy": "tag",
"description": null,
"featImg": null,
"headData": {
"title": "black history month - KQED Food",
"description": null,
"ogTitle": null,
"ogDescription": null,
"ogImgId": null,
"twTitle": null,
"twDescription": null,
"twImgId": null
},
"ttid": 387,
"isLoading": false,
"link": "/food/tag/black-history-month"
},
"food_393": {
"type": "terms",
"id": "food_393",
"meta": {
"index": "terms_1716263798",
"site": "food",
"id": "393",
"found": true
},
"relationships": {},
"name": "maya angelou",
"slug": "maya-angelou",
"taxonomy": "tag",
"description": null,
"featImg": null,
"headData": {
"title": "maya angelou - KQED Food",
"description": null,
"ogTitle": null,
"ogDescription": null,
"ogImgId": null,
"twTitle": null,
"twDescription": null,
"twImgId": null
},
"ttid": 393,
"isLoading": false,
"link": "/food/tag/maya-angelou"
},
"food_394": {
"type": "terms",
"id": "food_394",
"meta": {
"index": "terms_1716263798",
"site": "food",
"id": "394",
"found": true
},
"relationships": {},
"name": "pie",
"slug": "pie",
"taxonomy": "tag",
"description": null,
"featImg": null,
"headData": {
"title": "pie - KQED Food",
"description": null,
"ogTitle": null,
"ogDescription": null,
"ogImgId": null,
"twTitle": null,
"twDescription": null,
"twImgId": null
},
"ttid": 394,
"isLoading": false,
"link": "/food/tag/pie"
},
"food_102": {
"type": "terms",
"id": "food_102",
"meta": {
"index": "terms_1716263798",
"site": "food",
"id": "102",
"found": true
},
"relationships": {},
"featImg": null,
"name": "halloween",
"description": null,
"taxonomy": "tag",
"headData": {
"twImgId": null,
"twTitle": null,
"ogTitle": null,
"ogImgId": null,
"twDescription": null,
"description": null,
"title": "halloween Archives | KQED Food",
"ogDescription": null
},
"ttid": 102,
"slug": "halloween",
"isLoading": false,
"link": "/food/tag/halloween"
},
"food_212": {
"type": "terms",
"id": "food_212",
"meta": {
"index": "terms_1716263798",
"site": "food",
"id": "212",
"found": true
},
"relationships": {},
"featImg": null,
"name": "holiday recipe",
"description": null,
"taxonomy": "tag",
"headData": {
"twImgId": null,
"twTitle": null,
"ogTitle": null,
"ogImgId": null,
"twDescription": null,
"description": null,
"title": "holiday recipe Archives | KQED Food",
"ogDescription": null
},
"ttid": 212,
"slug": "holiday-recipe",
"isLoading": false,
"link": "/food/tag/holiday-recipe"
},
"food_175": {
"type": "terms",
"id": "food_175",
"meta": {
"index": "terms_1716263798",
"site": "food",
"id": "175",
"found": true
},
"relationships": {},
"featImg": null,
"name": "recipe",
"description": null,
"taxonomy": "tag",
"headData": {
"twImgId": null,
"twTitle": null,
"ogTitle": null,
"ogImgId": null,
"twDescription": null,
"description": null,
"title": "recipe Archives | KQED Food",
"ogDescription": null
},
"ttid": 175,
"slug": "recipe",
"isLoading": false,
"link": "/food/tag/recipe"
},
"food_162": {
"type": "terms",
"id": "food_162",
"meta": {
"index": "terms_1716263798",
"site": "food",
"id": "162",
"found": true
},
"relationships": {},
"featImg": null,
"name": "Jacques Pepin Cooking At Home",
"description": null,
"taxonomy": "series",
"headData": {
"twImgId": null,
"twTitle": null,
"ogTitle": null,
"ogImgId": null,
"twDescription": null,
"description": null,
"title": "Jacques Pepin Cooking At Home Archives | KQED Food",
"ogDescription": null
},
"ttid": 162,
"slug": "jacques-pepin-cooking-at-home",
"isLoading": false,
"link": "/food/series/jacques-pepin-cooking-at-home"
},
"food_165": {
"type": "terms",
"id": "food_165",
"meta": {
"index": "terms_1716263798",
"site": "food",
"id": "165",
"found": true
},
"relationships": {},
"featImg": null,
"name": "Jacques Pepin",
"description": null,
"taxonomy": "category",
"headData": {
"twImgId": null,
"twTitle": null,
"ogTitle": null,
"ogImgId": null,
"twDescription": null,
"description": null,
"title": "Jacques Pepin Archives | KQED Food",
"ogDescription": null
},
"ttid": 165,
"slug": "jacques-pepin",
"isLoading": false,
"link": "/food/category/jacques-pepin"
},
"food_158": {
"type": "terms",
"id": "food_158",
"meta": {
"index": "terms_1716263798",
"site": "food",
"id": "158",
"found": true
},
"relationships": {},
"featImg": null,
"name": "jacques pepin",
"description": null,
"taxonomy": "tag",
"headData": {
"twImgId": null,
"twTitle": null,
"ogTitle": null,
"ogImgId": null,
"twDescription": null,
"description": null,
"title": "jacques pepin Archives | KQED Food",
"ogDescription": null
},
"ttid": 158,
"slug": "jacques-pepin",
"isLoading": false,
"link": "/food/tag/jacques-pepin"
},
"food_166": {
"type": "terms",
"id": "food_166",
"meta": {
"index": "terms_1716263798",
"site": "food",
"id": "166",
"found": true
},
"relationships": {},
"featImg": null,
"name": "jpcookhome",
"description": null,
"taxonomy": "tag",
"headData": {
"twImgId": null,
"twTitle": null,
"ogTitle": null,
"ogImgId": null,
"twDescription": null,
"description": null,
"title": "jpcookhome Archives | KQED Food",
"ogDescription": null
},
"ttid": 166,
"slug": "jpcookhome",
"isLoading": false,
"link": "/food/tag/jpcookhome"
},
"food_268": {
"type": "terms",
"id": "food_268",
"meta": {
"index": "terms_1716263798",
"site": "food",
"id": "268",
"found": true
},
"relationships": {},
"featImg": null,
"name": "soup",
"description": null,
"taxonomy": "tag",
"headData": {
"twImgId": null,
"twTitle": null,
"ogTitle": null,
"ogImgId": null,
"twDescription": null,
"description": null,
"title": "soup Archives - KQED Food",
"ogDescription": null
},
"ttid": 268,
"slug": "soup",
"isLoading": false,
"link": "/food/tag/soup"
},
"food_265": {
"type": "terms",
"id": "food_265",
"meta": {
"index": "terms_1716263798",
"site": "food",
"id": "265",
"found": true
},
"relationships": {},
"featImg": null,
"name": "how to make an it's-it",
"description": null,
"taxonomy": "tag",
"headData": {
"twImgId": null,
"twTitle": null,
"ogTitle": null,
"ogImgId": null,
"twDescription": null,
"description": null,
"title": "how to make an it's-it Archives - KQED Food",
"ogDescription": null
},
"ttid": 265,
"slug": "how-to-make-an-its-it",
"isLoading": false,
"link": "/food/tag/how-to-make-an-its-it"
},
"food_264": {
"type": "terms",
"id": "food_264",
"meta": {
"index": "terms_1716263798",
"site": "food",
"id": "264",
"found": true
},
"relationships": {},
"featImg": null,
"name": "it's-it",
"description": null,
"taxonomy": "tag",
"headData": {
"twImgId": null,
"twTitle": null,
"ogTitle": null,
"ogImgId": null,
"twDescription": null,
"description": null,
"title": "it's-it Archives - KQED Food",
"ogDescription": null
},
"ttid": 264,
"slug": "its-it",
"isLoading": false,
"link": "/food/tag/its-it"
},
"food_230": {
"type": "terms",
"id": "food_230",
"meta": {
"index": "terms_1716263798",
"site": "food",
"id": "230",
"found": true
},
"relationships": {},
"featImg": null,
"name": "san francisco",
"description": null,
"taxonomy": "tag",
"headData": {
"twImgId": null,
"twTitle": null,
"ogTitle": null,
"ogImgId": null,
"twDescription": null,
"description": null,
"title": "san francisco Archives | KQED Food",
"ogDescription": null
},
"ttid": 230,
"slug": "san-francisco",
"isLoading": false,
"link": "/food/tag/san-francisco"
},
"food_234": {
"type": "terms",
"id": "food_234",
"meta": {
"index": "terms_1716263798",
"site": "food",
"id": "234",
"found": true
},
"relationships": {},
"featImg": null,
"name": "Easter",
"description": null,
"taxonomy": "tag",
"headData": {
"twImgId": null,
"twTitle": null,
"ogTitle": null,
"ogImgId": null,
"twDescription": null,
"description": null,
"title": "Easter Archives - KQED Food",
"ogDescription": null
},
"ttid": 234,
"slug": "easter",
"isLoading": false,
"link": "/food/tag/easter"
},
"food_233": {
"type": "terms",
"id": "food_233",
"meta": {
"index": "terms_1716263798",
"site": "food",
"id": "233",
"found": true
},
"relationships": {},
"featImg": null,
"name": "egg recipes",
"description": null,
"taxonomy": "tag",
"headData": {
"twImgId": null,
"twTitle": null,
"ogTitle": null,
"ogImgId": null,
"twDescription": null,
"description": null,
"title": "egg recipes Archives - KQED Food",
"ogDescription": null
},
"ttid": 233,
"slug": "egg-recipes",
"isLoading": false,
"link": "/food/tag/egg-recipes"
},
"food_213": {
"type": "terms",
"id": "food_213",
"meta": {
"index": "terms_1716263798",
"site": "food",
"id": "213",
"found": true
},
"relationships": {},
"featImg": null,
"name": "apple cake",
"description": null,
"taxonomy": "tag",
"headData": {
"twImgId": null,
"twTitle": null,
"ogTitle": null,
"ogImgId": null,
"twDescription": null,
"description": null,
"title": "apple cake Archives | KQED Food",
"ogDescription": null
},
"ttid": 213,
"slug": "apple-cake",
"isLoading": false,
"link": "/food/tag/apple-cake"
},
"food_214": {
"type": "terms",
"id": "food_214",
"meta": {
"index": "terms_1716263798",
"site": "food",
"id": "214",
"found": true
},
"relationships": {},
"featImg": null,
"name": "fall recipe",
"description": null,
"taxonomy": "tag",
"headData": {
"twImgId": null,
"twTitle": null,
"ogTitle": null,
"ogImgId": null,
"twDescription": null,
"description": null,
"title": "fall recipe Archives | KQED Food",
"ogDescription": null
},
"ttid": 214,
"slug": "fall-recipe",
"isLoading": false,
"link": "/food/tag/fall-recipe"
},
"food_215": {
"type": "terms",
"id": "food_215",
"meta": {
"index": "terms_1716263798",
"site": "food",
"id": "215",
"found": true
},
"relationships": {},
"featImg": null,
"name": "spiced apple upside down cake",
"description": null,
"taxonomy": "tag",
"headData": {
"twImgId": null,
"twTitle": null,
"ogTitle": null,
"ogImgId": null,
"twDescription": null,
"description": null,
"title": "spiced apple upside down cake Archives | KQED Food",
"ogDescription": null
},
"ttid": 215,
"slug": "spiced-apple-upside-down-cake",
"isLoading": false,
"link": "/food/tag/spiced-apple-upside-down-cake"
},
"food_202": {
"type": "terms",
"id": "food_202",
"meta": {
"index": "terms_1716263798",
"site": "food",
"id": "202",
"found": true
},
"relationships": {},
"featImg": null,
"name": "stefani renee",
"description": null,
"taxonomy": "tag",
"headData": {
"twImgId": null,
"twTitle": null,
"ogTitle": null,
"ogImgId": null,
"twDescription": null,
"description": null,
"title": "stefani renee Archives | KQED Food",
"ogDescription": null
},
"ttid": 202,
"slug": "stefani-renee",
"isLoading": false,
"link": "/food/tag/stefani-renee"
},
"food_209": {
"type": "terms",
"id": "food_209",
"meta": {
"index": "terms_1716263798",
"site": "food",
"id": "209",
"found": true
},
"relationships": {},
"featImg": null,
"name": "breakfast recipe",
"description": null,
"taxonomy": "tag",
"headData": {
"twImgId": null,
"twTitle": null,
"ogTitle": null,
"ogImgId": null,
"twDescription": null,
"description": null,
"title": "breakfast recipe Archives | KQED Food",
"ogDescription": null
},
"ttid": 209,
"slug": "breakfast-recipe",
"isLoading": false,
"link": "/food/tag/breakfast-recipe"
},
"food_211": {
"type": "terms",
"id": "food_211",
"meta": {
"index": "terms_1716263798",
"site": "food",
"id": "211",
"found": true
},
"relationships": {},
"featImg": null,
"name": "fall galette",
"description": null,
"taxonomy": "tag",
"headData": {
"twImgId": null,
"twTitle": null,
"ogTitle": null,
"ogImgId": null,
"twDescription": null,
"description": null,
"title": "fall galette Archives | KQED Food",
"ogDescription": null
},
"ttid": 211,
"slug": "fall-galette",
"isLoading": false,
"link": "/food/tag/fall-galette"
},
"food_210": {
"type": "terms",
"id": "food_210",
"meta": {
"index": "terms_1716263798",
"site": "food",
"id": "210",
"found": true
},
"relationships": {},
"featImg": null,
"name": "holiday",
"description": null,
"taxonomy": "tag",
"headData": {
"twImgId": null,
"twTitle": null,
"ogTitle": null,
"ogImgId": null,
"twDescription": null,
"description": null,
"title": "holiday Archives | KQED Food",
"ogDescription": null
},
"ttid": 210,
"slug": "holiday",
"isLoading": false,
"link": "/food/tag/holiday"
},
"source_news_11819923": {
"type": "terms",
"id": "source_news_11819923",
"meta": {
"override": true
},
"name": "Food",
"link": "https://www.kqed.org/food",
"isLoading": false
},
"source_news_11816328": {
"type": "terms",
"id": "source_news_11816328",
"meta": {
"override": true
},
"name": "Bay Curious",
"link": "https://www.kqed.org/podcasts/baycurious",
"isLoading": false
},
"source_news_11796231": {
"type": "terms",
"id": "source_news_11796231",
"meta": {
"override": true
},
"name": "Food",
"link": "https://www.kqed.org/food",
"isLoading": false
},
"source_news_11774993": {
"type": "terms",
"id": "source_news_11774993",
"meta": {
"override": true
},
"name": "Food",
"link": "https://www.kqed.org/food",
"isLoading": false
},
"source_news_11760849": {
"type": "terms",
"id": "source_news_11760849",
"meta": {
"override": true
},
"name": "The California Report Magazine",
"link": "https://www.kqed.org/news/tag/tcrarchive/",
"isLoading": false
},
"source_news_11758996": {
"type": "terms",
"id": "source_news_11758996",
"meta": {
"override": true
},
"name": "Food",
"link": "https://www.kqed.org/food",
"isLoading": false
},
"source_news_11755932": {
"type": "terms",
"id": "source_news_11755932",
"meta": {
"override": true
},
"name": "Food",
"link": "https://www.kqed.org/food",
"isLoading": false
},
"source_news_11742748": {
"type": "terms",
"id": "source_news_11742748",
"meta": {
"override": true
},
"name": "Food",
"link": "https://www.kqed.org/food",
"isLoading": false
},
"source_news_11734682": {
"type": "terms",
"id": "source_news_11734682",
"meta": {
"override": true
},
"name": "Food",
"link": "https://www.kqed.org/food",
"isLoading": false
},
"news_17986": {
"type": "terms",
"id": "news_17986",
"meta": {
"index": "terms_1716263798",
"site": "news",
"id": "17986",
"found": true
},
"relationships": {},
"featImg": "https://ww2.kqed.org/app/uploads/sites/10/2016/11/BayCuriousLogoFinal01-e1493662037229.png",
"name": "Bay Curious",
"description": "\u003ch2>A podcast exploring the Bay Area one question at a time\u003c/h2>\r\n\r\n\u003caside>\r\n\u003cdiv style=\"width: 100%; padding-right: 20px;\">\r\n\r\nKQED’s \u003cstrong>Bay Curious\u003c/strong> gets to the bottom of the mysteries — both profound and peculiar — that give the Bay Area its unique identity. And we’ll do it with your help! You ask the questions. You decide what Bay Curious investigates. And you join us on the journey to find the answers.\r\n\u003cbr />\r\n\u003cspan class=\"alignleft\">\u003ca href=\"https://itunes.apple.com/us/podcast/id1172473406\">\u003cimg width=\"75px\" src=\"https://ww2.kqed.org/news/wp-content/uploads/sites/10/2016/11/DownloadOniTunes_100x100.png\">\u003c/a> \u003ca href=\"https://goo.gl/app/playmusic?ibi=com.google.PlayMusic&isi=691797987&ius=googleplaymusic&link=https://play.google.com/music/m/Ipi2mc5aqfen4nr2daayiziiyuy?t%3DBay_Curious\">\u003cimg width=\"75px\" src=\"https://ww2.kqed.org/news/wp-content/uploads/sites/10/2016/11/Google_Play_100x100.png\">\u003c/a>\u003c/span>\u003c/div>\r\n\u003c/aside> \r\n\u003ch2>What's your question?\u003c/h2>\r\n\u003cdiv id=\"huxq6\" class=\"curiosity-module\" data-pym-src=\"//modules.wearehearken.com/kqed/curiosity_modules/133\">\u003c/div>\r\n\u003cscript src=\"//assets.wearehearken.com/production/thirdparty/p.m.js\">\u003c/script>\r\n\u003ch2>Bay Curious monthly newsletter\u003c/h2>\r\nWe're launching it soon! \u003ca href=\"https://docs.google.com/forms/d/e/1FAIpQLSdEtzbyNbSQkRHCCAkKhoGiAl3Bd0zWxhk0ZseJ1KH_o_ZDjQ/viewform\" target=\"_blank\">Sign up\u003c/a> so you don't miss it when it drops.\r\n",
"taxonomy": "series",
"headData": {
"twImgId": null,
"twTitle": null,
"ogTitle": null,
"ogImgId": null,
"twDescription": null,
"description": "A podcast exploring the Bay Area one question at a time KQED’s Bay Curious gets to the bottom of the mysteries — both profound and peculiar — that give the Bay Area its unique identity. And we’ll do it with your help! You ask the questions. You decide what Bay Curious investigates. And you join us on the journey to find the answers. What's your question? Bay Curious monthly newsletter We're launching it soon! Sign up so you don't miss it when it drops.",
"title": "Bay Curious Archives | KQED News",
"ogDescription": null
},
"ttid": 18020,
"slug": "baycurious",
"isLoading": false,
"link": "/news/series/baycurious"
},
"news_24115": {
"type": "terms",
"id": "news_24115",
"meta": {
"index": "terms_1716263798",
"site": "news",
"id": "24115",
"found": true
},
"relationships": {},
"featImg": null,
"name": "Golden State Plate",
"description": null,
"taxonomy": "series",
"headData": {
"twImgId": null,
"twTitle": null,
"ogTitle": null,
"ogImgId": null,
"twDescription": null,
"description": null,
"title": "Golden State Plate Archives | KQED News",
"ogDescription": null
},
"ttid": 24132,
"slug": "golden-state-plate",
"isLoading": false,
"link": "/news/series/golden-state-plate"
},
"news_24312": {
"type": "terms",
"id": "news_24312",
"meta": {
"index": "terms_1716263798",
"site": "news",
"id": "24312",
"found": true
},
"relationships": {},
"featImg": null,
"name": "Bay Area Food",
"description": null,
"taxonomy": "tag",
"headData": {
"twImgId": null,
"twTitle": null,
"ogTitle": null,
"ogImgId": null,
"twDescription": null,
"description": null,
"title": "Bay Area Food Archives | KQED News",
"ogDescription": null
},
"ttid": 24329,
"slug": "bay-area-food",
"isLoading": false,
"link": "/news/tag/bay-area-food"
},
"news_27993": {
"type": "terms",
"id": "news_27993",
"meta": {
"index": "terms_1716263798",
"site": "news",
"id": "27993",
"found": true
},
"relationships": {},
"featImg": null,
"name": "Food history",
"description": null,
"taxonomy": "tag",
"headData": {
"twImgId": null,
"twTitle": null,
"ogTitle": null,
"ogImgId": null,
"twDescription": null,
"description": null,
"title": "Food history Archives | KQED News",
"ogDescription": null
},
"ttid": 28010,
"slug": "food-history",
"isLoading": false,
"link": "/news/tag/food-history"
},
"news_24116": {
"type": "terms",
"id": "news_24116",
"meta": {
"index": "terms_1716263798",
"site": "news",
"id": "24116",
"found": true
},
"relationships": {},
"featImg": null,
"name": "Golden State Plate",
"description": null,
"taxonomy": "tag",
"headData": {
"twImgId": null,
"twTitle": null,
"ogTitle": null,
"ogImgId": null,
"twDescription": null,
"description": null,
"title": "Golden State Plate Archives | KQED News",
"ogDescription": null
},
"ttid": 24133,
"slug": "golden-state-plate",
"isLoading": false,
"link": "/news/tag/golden-state-plate"
},
"news_33523": {
"type": "terms",
"id": "news_33523",
"meta": {
"index": "terms_1716263798",
"site": "news",
"id": "33523",
"found": true
},
"relationships": {},
"featImg": null,
"name": "Bay Curious",
"description": null,
"taxonomy": "program",
"headData": {
"twImgId": null,
"twTitle": null,
"ogTitle": null,
"ogImgId": null,
"twDescription": null,
"description": null,
"title": "Bay Curious Archives | KQED News",
"ogDescription": null
},
"ttid": 33540,
"slug": "bay-curious",
"isLoading": false,
"link": "/news/program/bay-curious"
},
"news_33520": {
"type": "terms",
"id": "news_33520",
"meta": {
"index": "terms_1716263798",
"site": "news",
"id": "33520",
"found": true
},
"relationships": {},
"featImg": null,
"name": "Podcast",
"description": null,
"taxonomy": "category",
"headData": {
"twImgId": null,
"twTitle": null,
"ogTitle": null,
"ogImgId": null,
"twDescription": null,
"description": null,
"title": "Podcast Archives | KQED News",
"ogDescription": null
},
"ttid": 33537,
"slug": "podcast",
"isLoading": false,
"link": "/news/category/podcast"
},
"news_6627": {
"type": "terms",
"id": "news_6627",
"meta": {
"index": "terms_1716263798",
"site": "news",
"id": "6627",
"found": true
},
"relationships": {},
"featImg": null,
"name": "San Francisco history",
"description": null,
"taxonomy": "tag",
"headData": {
"twImgId": null,
"twTitle": null,
"ogTitle": null,
"ogImgId": null,
"twDescription": null,
"description": null,
"title": "San Francisco history Archives | KQED News",
"ogDescription": null
},
"ttid": 6651,
"slug": "san-francisco-history",
"isLoading": false,
"link": "/news/tag/san-francisco-history"
},
"news_72": {
"type": "terms",
"id": "news_72",
"meta": {
"index": "terms_1716263798",
"site": "news",
"id": "72",
"found": true
},
"relationships": {},
"featImg": "https://ww2.kqed.org/app/uploads/sites/10/2014/10/TCR-2-Logo-Web-Banners-03.png",
"name": "The California Report",
"description": null,
"taxonomy": "program",
"headData": {
"twImgId": null,
"twTitle": null,
"ogTitle": null,
"ogImgId": null,
"twDescription": null,
"description": null,
"title": "The California Report Archives | KQED News",
"ogDescription": null
},
"ttid": 6969,
"slug": "the-california-report",
"isLoading": false,
"link": "/news/program/the-california-report"
},
"news_26731": {
"type": "terms",
"id": "news_26731",
"meta": {
"index": "terms_1716263798",
"site": "news",
"id": "26731",
"found": true
},
"relationships": {},
"featImg": null,
"name": "The California Report Magazine",
"description": null,
"taxonomy": "program",
"headData": {
"twImgId": null,
"twTitle": null,
"ogTitle": null,
"ogImgId": null,
"twDescription": null,
"description": null,
"title": "The California Report Magazine Archives | KQED News",
"ogDescription": null
},
"ttid": 26748,
"slug": "the-california-report-magazine",
"isLoading": false,
"link": "/news/program/the-california-report-magazine"
},
"news_393": {
"type": "terms",
"id": "news_393",
"meta": {
"index": "terms_1716263798",
"site": "news",
"id": "393",
"found": true
},
"relationships": {},
"featImg": null,
"name": "Chinatown",
"description": null,
"taxonomy": "tag",
"headData": {
"twImgId": null,
"twTitle": null,
"ogTitle": null,
"ogImgId": null,
"twDescription": null,
"description": null,
"title": "Chinatown Archives | KQED News",
"ogDescription": null
},
"ttid": 401,
"slug": "chinatown",
"isLoading": false,
"link": "/news/tag/chinatown"
},
"news_4": {
"type": "terms",
"id": "news_4",
"meta": {
"index": "terms_1716263798",
"site": "news",
"id": "4",
"found": true
},
"relationships": {},
"featImg": null,
"name": "los angeles",
"description": null,
"taxonomy": "tag",
"headData": {
"twImgId": null,
"twTitle": null,
"ogTitle": null,
"ogImgId": null,
"twDescription": null,
"description": null,
"title": "los angeles Archives | KQED News",
"ogDescription": null
},
"ttid": 4,
"slug": "los-angeles",
"isLoading": false,
"link": "/news/tag/los-angeles"
},
"news_235": {
"type": "terms",
"id": "news_235",
"meta": {
"index": "terms_1716263798",
"site": "news",
"id": "235",
"found": true
},
"relationships": {},
"featImg": null,
"name": "Vietnam",
"description": null,
"taxonomy": "tag",
"headData": {
"twImgId": null,
"twTitle": null,
"ogTitle": null,
"ogImgId": null,
"twDescription": null,
"description": null,
"title": "Vietnam Archives | KQED News",
"ogDescription": null
},
"ttid": 243,
"slug": "vietnam",
"isLoading": false,
"link": "/news/tag/vietnam"
},
"news_26693": {
"type": "terms",
"id": "news_26693",
"meta": {
"index": "terms_1716263798",
"site": "news",
"id": "26693",
"found": true
},
"relationships": {},
"name": "Dreyer's",
"slug": "dreyers",
"taxonomy": "tag",
"description": null,
"featImg": null,
"headData": {
"title": "Dreyer's | KQED News",
"description": null,
"ogTitle": null,
"ogDescription": null,
"ogImgId": null,
"twTitle": null,
"twDescription": null,
"twImgId": null,
"metaRobotsNoIndex": "noindex"
},
"ttid": 26710,
"isLoading": false,
"link": "/news/tag/dreyers"
},
"news_19542": {
"type": "terms",
"id": "news_19542",
"meta": {
"index": "terms_1716263798",
"site": "news",
"id": "19542",
"found": true
},
"relationships": {},
"featImg": null,
"name": "featured",
"description": null,
"taxonomy": "tag",
"headData": {
"twImgId": null,
"twTitle": null,
"ogTitle": null,
"ogImgId": null,
"twDescription": null,
"description": null,
"title": "featured Archives | KQED News",
"ogDescription": null
},
"ttid": 19559,
"slug": "featured",
"isLoading": false,
"link": "/news/tag/featured"
},
"news_26689": {
"type": "terms",
"id": "news_26689",
"meta": {
"index": "terms_1716263798",
"site": "news",
"id": "26689",
"found": true
},
"relationships": {},
"name": "Fenton's Creamery",
"slug": "fentons-creamery",
"taxonomy": "tag",
"description": null,
"featImg": null,
"headData": {
"title": "Fenton's Creamery | KQED News",
"description": null,
"ogTitle": null,
"ogDescription": null,
"ogImgId": null,
"twTitle": null,
"twDescription": null,
"twImgId": null,
"metaRobotsNoIndex": "noindex"
},
"ttid": 26706,
"isLoading": false,
"link": "/news/tag/fentons-creamery"
},
"news_160": {
"type": "terms",
"id": "news_160",
"meta": {
"index": "terms_1716263798",
"site": "news",
"id": "160",
"found": true
},
"relationships": {},
"featImg": null,
"name": "history",
"description": null,
"taxonomy": "tag",
"headData": {
"twImgId": null,
"twTitle": null,
"ogTitle": null,
"ogImgId": null,
"twDescription": null,
"description": null,
"title": "history Archives | KQED News",
"ogDescription": null
},
"ttid": 167,
"slug": "history",
"isLoading": false,
"link": "/news/tag/history"
},
"news_21268": {
"type": "terms",
"id": "news_21268",
"meta": {
"index": "terms_1716263798",
"site": "news",
"id": "21268",
"found": true
},
"relationships": {},
"featImg": null,
"name": "tcrarchive",
"description": null,
"taxonomy": "tag",
"headData": {
"twImgId": null,
"twTitle": null,
"ogTitle": null,
"ogImgId": null,
"twDescription": null,
"description": null,
"title": "tcrarchive Archives | KQED News",
"ogDescription": null
},
"ttid": 21285,
"slug": "tcrarchive",
"isLoading": false,
"link": "/news/tag/tcrarchive"
},
"news_22018": {
"type": "terms",
"id": "news_22018",
"meta": {
"index": "terms_1716263798",
"site": "news",
"id": "22018",
"found": true
},
"relationships": {},
"featImg": null,
"name": "TCRMag",
"description": null,
"taxonomy": "tag",
"headData": {
"twImgId": null,
"twTitle": null,
"ogTitle": null,
"ogImgId": null,
"twDescription": null,
"description": null,
"title": "TCRMag Archives | KQED News",
"ogDescription": null
},
"ttid": 22035,
"slug": "tcrmag",
"isLoading": false,
"link": "/news/tag/tcrmag"
},
"news_28233": {
"type": "terms",
"id": "news_28233",
"meta": {
"index": "terms_1716263798",
"site": "news",
"id": "28233",
"found": true
},
"relationships": {},
"featImg": null,
"name": "tcrmag2",
"description": null,
"taxonomy": "tag",
"headData": {
"twImgId": null,
"twTitle": null,
"ogTitle": null,
"ogImgId": null,
"twDescription": null,
"description": null,
"title": "tcrmag2 Archives | KQED News",
"ogDescription": null
},
"ttid": 28250,
"slug": "tcrmag2",
"isLoading": false,
"link": "/news/tag/tcrmag2"
},
"news_20353": {
"type": "terms",
"id": "news_20353",
"meta": {
"index": "terms_1716263798",
"site": "news",
"id": "20353",
"found": true
},
"relationships": {},
"name": "alcohol",
"slug": "alcohol",
"taxonomy": "tag",
"description": null,
"featImg": null,
"headData": {
"title": "alcohol | KQED News",
"description": null,
"ogTitle": null,
"ogDescription": null,
"ogImgId": null,
"twTitle": null,
"twDescription": null,
"twImgId": null,
"metaRobotsNoIndex": "noindex"
},
"ttid": 20370,
"isLoading": false,
"link": "/news/tag/alcohol"
},
"news_19133": {
"type": "terms",
"id": "news_19133",
"meta": {
"index": "terms_1716263798",
"site": "news",
"id": "19133",
"found": true
},
"relationships": {},
"featImg": null,
"name": "Arts",
"description": null,
"taxonomy": "tag",
"headData": {
"twImgId": null,
"twTitle": null,
"ogTitle": null,
"ogImgId": null,
"twDescription": null,
"description": null,
"title": "Arts Archives | KQED News",
"ogDescription": null
},
"ttid": 19150,
"slug": "arts",
"isLoading": false,
"link": "/news/tag/arts"
},
"news_18426": {
"type": "terms",
"id": "news_18426",
"meta": {
"index": "terms_1716263798",
"site": "news",
"id": "18426",
"found": true
},
"relationships": {},
"featImg": null,
"name": "Bay Curious",
"description": null,
"taxonomy": "tag",
"headData": {
"twImgId": null,
"twTitle": null,
"ogTitle": null,
"ogImgId": null,
"twDescription": null,
"description": null,
"title": "Bay Curious Archives | KQED News",
"ogDescription": null
},
"ttid": 18460,
"slug": "bay-curious",
"isLoading": false,
"link": "/news/tag/bay-curious"
},
"news_24374": {
"type": "terms",
"id": "news_24374",
"meta": {
"index": "terms_1716263798",
"site": "news",
"id": "24374",
"found": true
},
"relationships": {},
"featImg": null,
"name": "Bay Curious featured",
"description": null,
"taxonomy": "tag",
"headData": {
"twImgId": null,
"twTitle": null,
"ogTitle": null,
"ogImgId": null,
"twDescription": null,
"description": null,
"title": "Bay Curious featured Archives | KQED News",
"ogDescription": null
},
"ttid": 24391,
"slug": "bay-curious-featured",
"isLoading": false,
"link": "/news/tag/bay-curious-featured"
},
"news_223": {
"type": "terms",
"id": "news_223",
"meta": {
"index": "terms_1716263798",
"site": "news",
"id": "223",
"found": true
},
"relationships": {},
"featImg": null,
"name": "Arts and Culture",
"description": null,
"taxonomy": "category",
"headData": {
"twImgId": null,
"twTitle": null,
"ogTitle": null,
"ogImgId": null,
"twDescription": null,
"description": null,
"title": "Arts and Culture Archives | KQED News",
"ogDescription": null
},
"ttid": 231,
"slug": "arts-and-culture",
"isLoading": false,
"link": "/news/category/arts-and-culture"
},
"news_20397": {
"type": "terms",
"id": "news_20397",
"meta": {
"index": "terms_1716263798",
"site": "news",
"id": "20397",
"found": true
},
"relationships": {},
"featImg": null,
"name": "California history",
"description": null,
"taxonomy": "tag",
"headData": {
"twImgId": null,
"twTitle": null,
"ogTitle": null,
"ogImgId": null,
"twDescription": null,
"description": null,
"title": "California history Archives | KQED News",
"ogDescription": null
},
"ttid": 20414,
"slug": "california-history",
"isLoading": false,
"link": "/news/tag/california-history"
},
"news_823": {
"type": "terms",
"id": "news_823",
"meta": {
"index": "terms_1716263798",
"site": "news",
"id": "823",
"found": true
},
"relationships": {},
"featImg": null,
"name": "Golden Gate Park",
"description": null,
"taxonomy": "tag",
"headData": {
"twImgId": null,
"twTitle": null,
"ogTitle": null,
"ogImgId": null,
"twDescription": null,
"description": null,
"title": "Golden Gate Park Archives | KQED News",
"ogDescription": null
},
"ttid": 833,
"slug": "golden-gate-park",
"isLoading": false,
"link": "/news/tag/golden-gate-park"
},
"news_23056": {
"type": "terms",
"id": "news_23056",
"meta": {
"index": "terms_1716263798",
"site": "news",
"id": "23056",
"found": true
},
"relationships": {},
"featImg": null,
"name": "japantown",
"description": null,
"taxonomy": "tag",
"headData": {
"twImgId": null,
"twTitle": null,
"ogTitle": null,
"ogImgId": null,
"twDescription": null,
"description": null,
"title": "japantown Archives | KQED News",
"ogDescription": null
},
"ttid": 23073,
"slug": "japantown",
"isLoading": false,
"link": "/news/tag/japantown"
},
"news_38": {
"type": "terms",
"id": "news_38",
"meta": {
"index": "terms_1716263798",
"site": "news",
"id": "38",
"found": true
},
"relationships": {},
"featImg": null,
"name": "San Francisco",
"description": null,
"taxonomy": "tag",
"headData": {
"twImgId": null,
"twTitle": null,
"ogTitle": null,
"ogImgId": null,
"twDescription": null,
"description": null,
"title": "San Francisco Archives | KQED News",
"ogDescription": null
},
"ttid": 58,
"slug": "san-francisco",
"isLoading": false,
"link": "/news/tag/san-francisco"
},
"news_150": {
"type": "terms",
"id": "news_150",
"meta": {
"index": "terms_1716263798",
"site": "news",
"id": "150",
"found": true
},
"relationships": {},
"featImg": null,
"name": "video",
"description": null,
"taxonomy": "tag",
"headData": {
"twImgId": null,
"twTitle": null,
"ogTitle": null,
"ogImgId": null,
"twDescription": null,
"description": null,
"title": "video Archives | KQED News",
"ogDescription": null
},
"ttid": 157,
"slug": "video",
"isLoading": false,
"link": "/news/tag/video"
}
},
"userPermissionsReducer": {
"wpLoggedIn": false
},
"eventsReducer": {},
"fssReducer": {},
"tvDailyScheduleReducer": {},
"tvWeeklyScheduleReducer": {},
"tvPrimetimeScheduleReducer": {},
"tvMonthlyScheduleReducer": {},
"userAccountReducer": {
"user": {
"email": null,
"emailStatus": "EMAIL_UNVALIDATED",
"loggedStatus": "LOGGED_OUT",
"loggingChecked": false,
"articles": [],
"firstName": null,
"lastName": null,
"phoneNumber": null,
"fetchingMembership": false,
"membershipError": false,
"memberships": [
{
"id": null,
"startDate": null,
"firstName": null,
"lastName": null,
"familyNumber": null,
"memberNumber": null,
"memberSince": null,
"expirationDate": null,
"pfsEligible": false,
"isSustaining": false,
"membershipLevel": "Prospect",
"membershipStatus": "Non Member",
"lastGiftDate": null,
"renewalDate": null,
"lastDonationAmount": null
}
]
},
"authModal": {
"isOpen": false,
"view": "LANDING_VIEW"
},
"error": null
},
"youthMediaReducer": {},
"checkPleaseReducer": {
"filterData": {
"region": {
"key": "Restaurant Region",
"filters": [
"Any Region"
]
},
"cuisine": {
"key": "Restaurant Cuisine",
"filters": [
"Any Cuisine"
]
}
},
"restaurantDataById": {},
"restaurantIdsSorted": [],
"error": null
},
"userAgentReducer": {
"userAgent": "Mozilla/5.0 AppleWebKit/537.36 (KHTML, like Gecko; compatible; ClaudeBot/1.0; +claudebot@anthropic.com)",
"isBot": true
}
}